

Air Campaigns
Want to start or join a group build? This is where to start.
Want to start or join a group build? This is where to start.
Hosted by Frederick Boucher, Michael Satin
OFFICIAL: Small is Beautiful Campaign
Removed by original poster on 03/02/12 - 01:28:15 (GMT).
SGTJKJ

#041

Joined: July 20, 2006
KitMaker: 10,069 posts
AeroScale: 3,788 posts

Posted: Friday, March 02, 2012 - 05:13 PM UTC
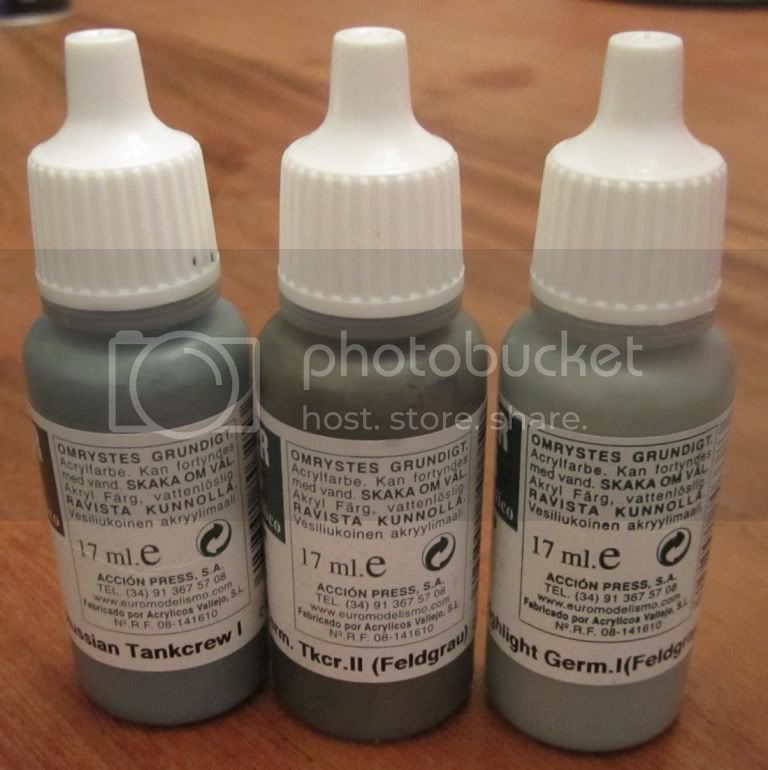
Nice build, Jiang Liu. I have used Vallejo Panzer aces colors. Not exactly the perfect shades, but look right for me. I will post a picture of the paint later.
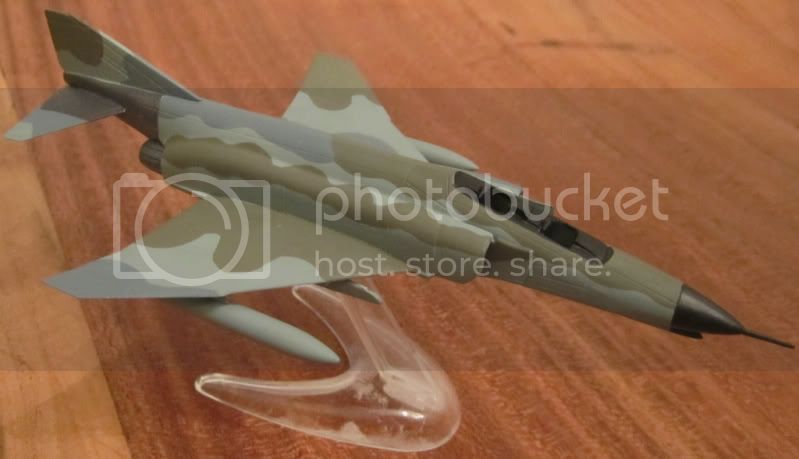
Here is my progress. Next are the decals followed by some light weathering.
More to follow

Here is my progress. Next are the decals followed by some light weathering.
More to follow


ladymodelbuilder

Joined: February 26, 2002
KitMaker: 1,218 posts
AeroScale: 424 posts
Posted: Sunday, March 04, 2012 - 09:06 AM UTC
These little things build up pretty quick!!
https://www.facebook.com/media/set/?set=a.10150705698526221.458581.741651220&type=3&l=79f7b6879
There are a couple of 1/144 scale planes I am working on. One is the Wildcat and the other is a Hurricane.
https://www.facebook.com/media/set/?set=a.10150705698526221.458581.741651220&type=3&l=79f7b6879
There are a couple of 1/144 scale planes I am working on. One is the Wildcat and the other is a Hurricane.

Tomcat31
#042

Joined: November 18, 2006
KitMaker: 2,828 posts
AeroScale: 1,720 posts

Posted: Sunday, March 04, 2012 - 09:38 AM UTC
Quoted Text
all i get is...These little things build up pretty quick!!
https://www.facebook.com/media/set/?set=a.10150705698526221.458581.741651220&type=3&l=79f7b6879
There are a couple of 1/144 scale planes I am working on. One is the Wildcat and the other is a Hurricane.
"This content is currently unavailable
The page you requested cannot be displayed at the moment. It may be temporarily unavailable, the link you clicked on may have expired, or you may not have permission to view this page."

ladymodelbuilder
Joined: February 26, 2002
KitMaker: 1,218 posts
AeroScale: 424 posts
Posted: Sunday, March 04, 2012 - 10:56 AM UTC
Not sure the the deal is, but....
Let's try this AGAIN!!


Let's try this AGAIN!!
SGTJKJ
#041
Joined: July 20, 2006
KitMaker: 10,069 posts
AeroScale: 3,788 posts
Posted: Sunday, March 04, 2012 - 12:44 PM UTC
A little more progress on my Phantom II. The decals are now on.
Jiang Liu, as promised I have posted a picture of the paint as well.
More to follow.

Jiang Liu, as promised I have posted a picture of the paint as well.
More to follow.
ludwig113

Joined: February 05, 2008
KitMaker: 1,381 posts
AeroScale: 1,110 posts

Posted: Monday, March 05, 2012 - 06:07 AM UTC
lookin good everyone 
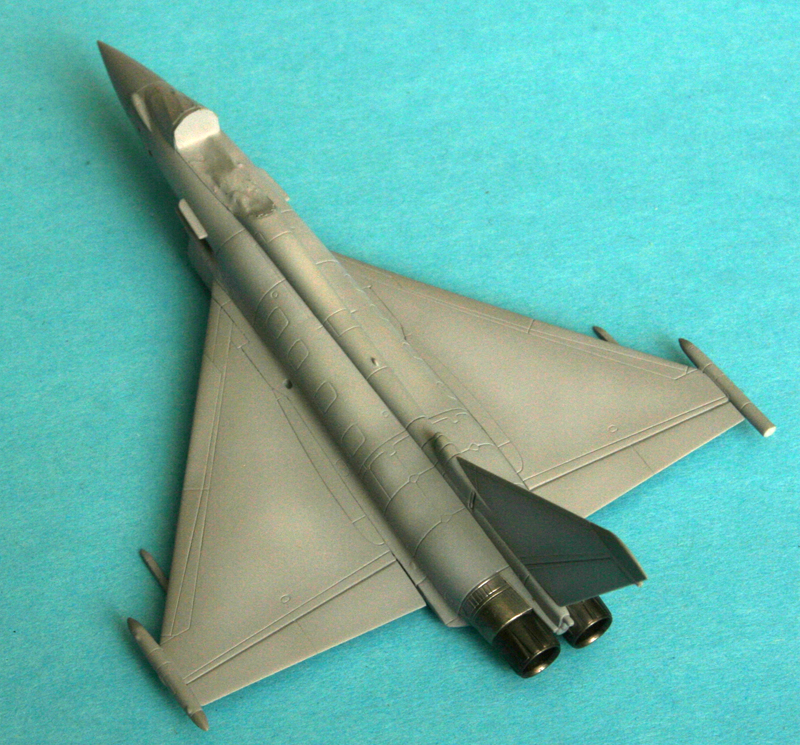
my little update...slow progress, next a gloss coat and decals and paint all the little bits like wheels etc

paul
my little update...slow progress, next a gloss coat and decals and paint all the little bits like wheels etc
paul

Rebilda
#057

Joined: May 11, 2010
KitMaker: 248 posts
AeroScale: 123 posts

Posted: Monday, March 05, 2012 - 06:50 AM UTC
Here's my Tiffy painted and oiled:

Thanks for watching.
Thanks for watching.


JClapp

#259
Joined: October 23, 2011
KitMaker: 2,265 posts
AeroScale: 1,715 posts

Posted: Monday, March 05, 2012 - 06:46 PM UTC
I scratched up a nosewheel compartment and then decided to add a cockpit which I had in the spare parts department.
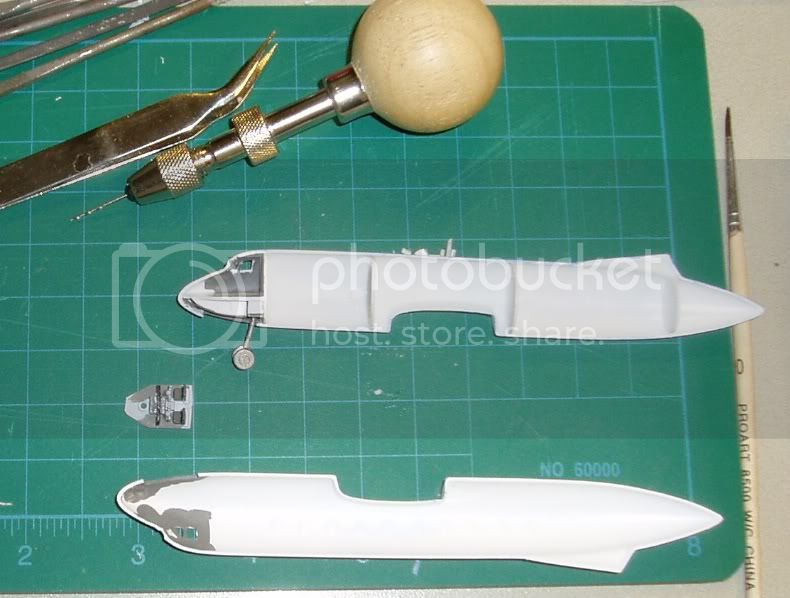
that means cutting out the windows instead of painting them black. Ive done the side windows but will leave the windscreen until after Ive glued the halves together. I am going to fill in the passenger windows and apply decals for those.
The dry fit of a vacuform fuselage is quite good, sanded to perfection! also, the Welsh model master has a high degree of precision.


dbmdyxl
Joined: May 20, 2011
KitMaker: 30 posts
AeroScale: 28 posts

Posted: Monday, March 05, 2012 - 08:46 PM UTC
Thanks Jasper! I think I'll just mix my Tamiya paints to approximate those grays. Why didn't my box come with the stand?
Quoted Text
A little more progress on my Phantom II. The decals are now on.
Jiang Liu, as promised I have posted a picture of the paint as well.
More to follow.

Jessie_C


Joined: September 03, 2009
KitMaker: 6,965 posts
AeroScale: 6,247 posts

Posted: Tuesday, March 06, 2012 - 02:46 AM UTC
Quoted Text
Why didn't my box come with the stand?
It's an Airfix stand. Those of us of a cetain age remember them fondly. They are now available from Airfix without needing to buy a model to get one.
SGTJKJ
#041
Joined: July 20, 2006
KitMaker: 10,069 posts
AeroScale: 3,788 posts
Posted: Tuesday, March 06, 2012 - 10:08 AM UTC
Jessica is correct. It is an old stand I had in my stash. I just added a magnet to the bottom and it works great. See my review of flying stands HERE for an better alternative than the pure plastic displays.
I have finished my build yesterday so pictures will follow soon.
I have finished my build yesterday so pictures will follow soon.
SGTJKJ
#041
Joined: July 20, 2006
KitMaker: 10,069 posts
AeroScale: 3,788 posts
Posted: Wednesday, March 07, 2012 - 08:57 AM UTC
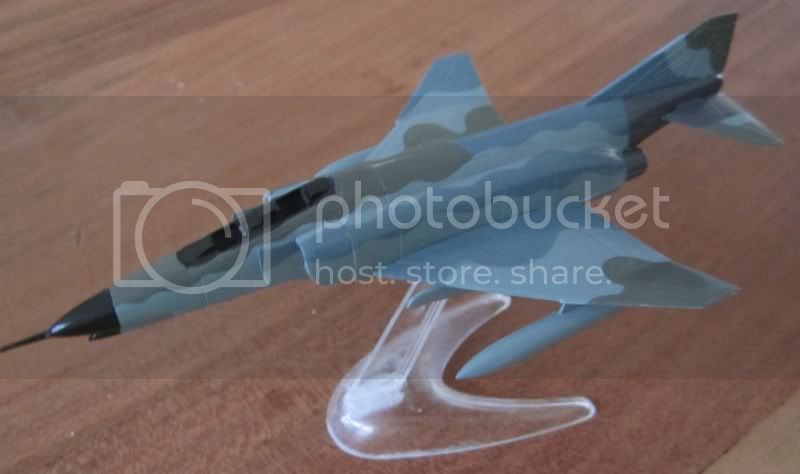
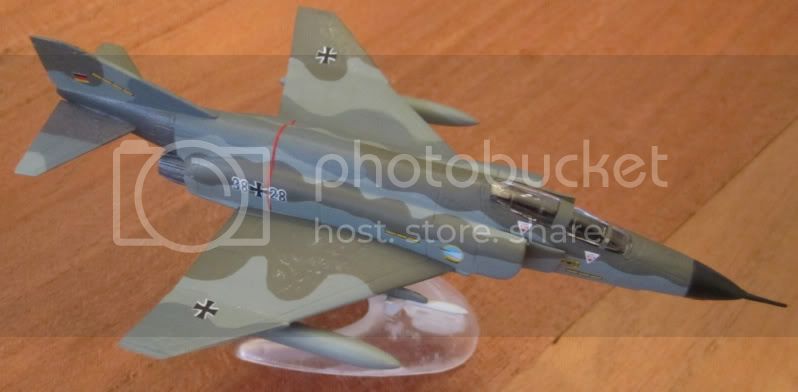
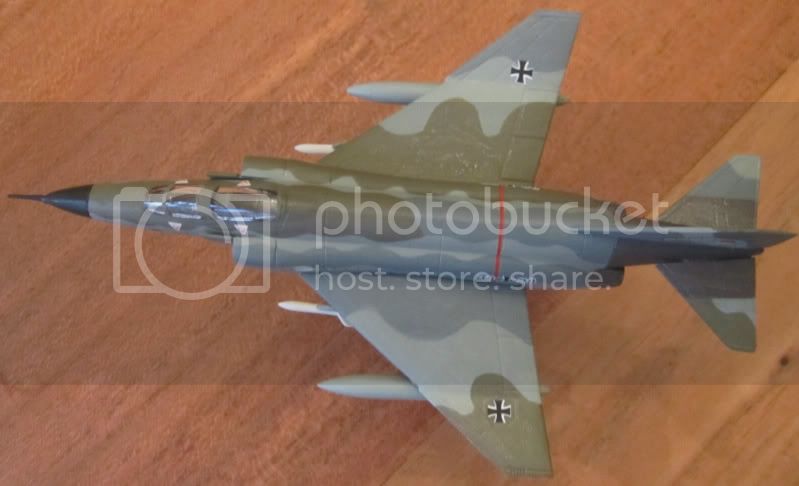
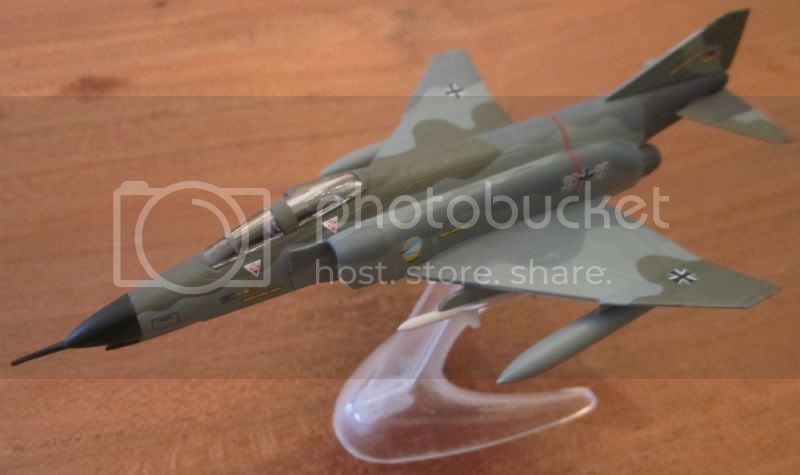
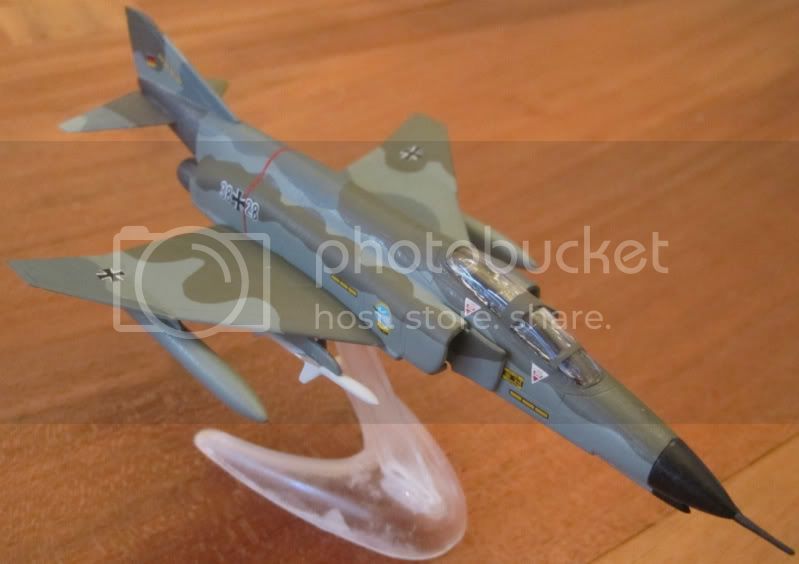
Here are the pictures of my finished Academy 1/144 F-4F Phantom II in German colors. It was an enjoyable little build.
Comments welcome.
Comments welcome.

usethermite
Joined: February 14, 2012
KitMaker: 252 posts
AeroScale: 209 posts
Posted: Thursday, March 08, 2012 - 05:12 PM UTC
Howdy. I'm a newbie to all this, but might as well join the fun! Just palaced an order for some 1/144 kits. I think I might do a Kfir or a "Firebird" Tornado. Very cool paint job.I guess I need to go buy something to shoot photos. Sounds like a good enough reason to me.  Anyway, let's all have some fun!
Happy Gluing, JT
Anyway, let's all have some fun!Happy Gluing, JT
JClapp
#259
Joined: October 23, 2011
KitMaker: 2,265 posts
AeroScale: 1,715 posts
Posted: Sunday, March 11, 2012 - 11:16 AM UTC
Hi JT, good to have another 144 enthusiast on board.
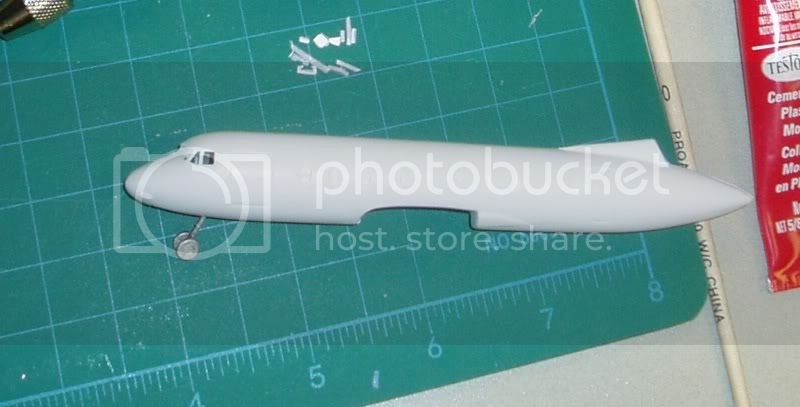
Ive gotten this HS748 together this weekend, and have started on wing root fairing.
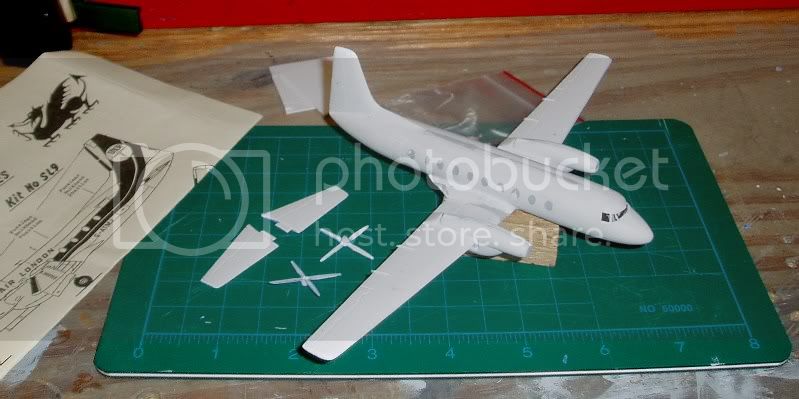
The vertical fin went on fine, but the horizontal ones will be a challenge as there is no indication on the fuselage sides where they should go, so Im going to have to try to make some location marks based on drawings, that kind of precision isnt my strong suit.
Ive gotten this HS748 together this weekend, and have started on wing root fairing.
The vertical fin went on fine, but the horizontal ones will be a challenge as there is no indication on the fuselage sides where they should go, so Im going to have to try to make some location marks based on drawings, that kind of precision isnt my strong suit.
Jessie_C
Joined: September 03, 2009
KitMaker: 6,965 posts
AeroScale: 6,247 posts
Posted: Sunday, March 11, 2012 - 11:36 AM UTC
Quoted Text
Im going to have to try to make some location marks based on drawings, that kind of precision isnt my strong suit.
The drawings in the kit are 1/144 so you can get your placement information by laying the drawing right on the model.

V2Phantom
Joined: December 26, 2008
KitMaker: 288 posts
AeroScale: 195 posts
Posted: Wednesday, March 14, 2012 - 12:48 PM UTC
Since the last time I posted, I managed to get some decent progress done on my F-15J. I cleaned up the seems and poor panel lines (at least the worse ones!) and went through the usual sand, wash, prime, sand, etc. cycle. When I was happy with the way it looked, I gave it the overall light gull gray color seen on the Eagles with the Compass Ghost scheme. I then let it dry for a week as I am using Xtracolor gloss paints for the gray parts of the scheme. I was a bit nervous on getting the darker ghost or cloud part of the scheme. Trying to get the subtle dark patchy look is tough in 1/144 for me! I masked the darker gray ares off using medical tape and 3 M tape.

I then shot the dark gull gray Xtracolor paint and voila! It does not look too bad to my eyes. Whew!
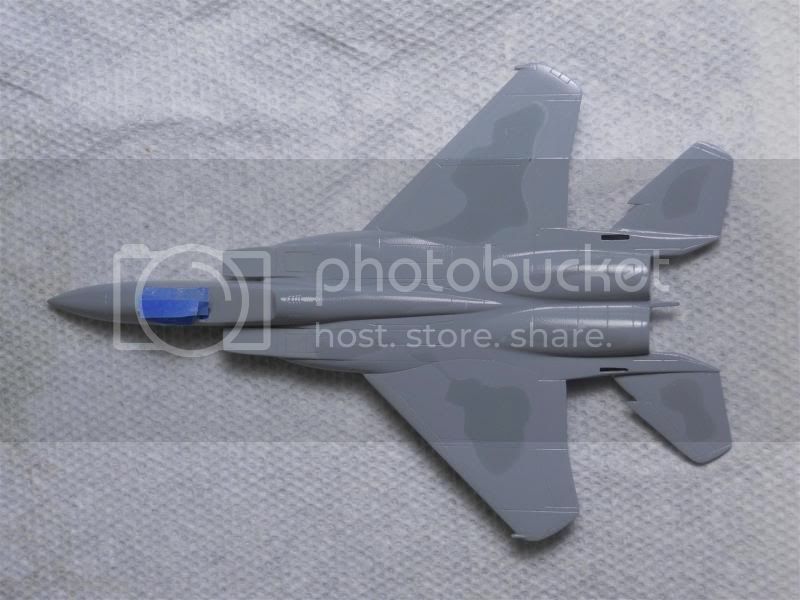

I am now letting the gloss paint fully dry, and then I'll lightly sand the scheme to give it a more patchy or hazy look. While I am waiting, I have masked off the wheel wells and inlets and will give them a coat of flat white followed by gloss white.
Have fun modeling!
Mike

I then shot the dark gull gray Xtracolor paint and voila! It does not look too bad to my eyes. Whew!
I am now letting the gloss paint fully dry, and then I'll lightly sand the scheme to give it a more patchy or hazy look. While I am waiting, I have masked off the wheel wells and inlets and will give them a coat of flat white followed by gloss white.
Have fun modeling!
Mike
JClapp
#259
Joined: October 23, 2011
KitMaker: 2,265 posts
AeroScale: 1,715 posts
Posted: Saturday, March 17, 2012 - 07:46 PM UTC
Assembly of the 748 is complete, as is most of the fairing. I put it on its wheels only to find I had not put nearly enough lead in the nose. No choice but to cut a hole. 
Fortunately the 748 has a large cargo door at the front, so that came out and the lead went in. looks good.
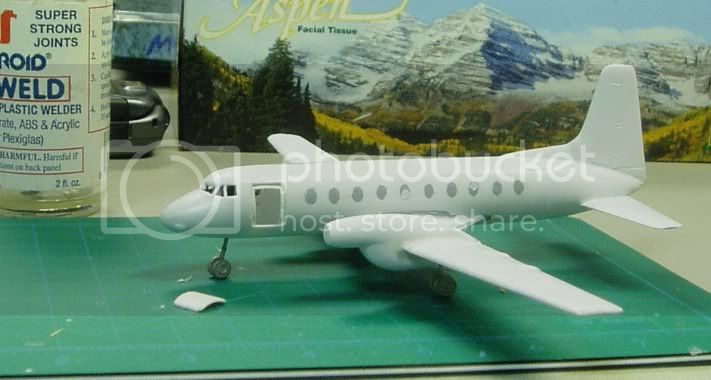
I welded in some .010 backing strips so the door will go back in flush, but it got me thinking, in future I might want to do an open cargo door scene. might make a good campaign theme.
No choice but to cut a hole. Fortunately the 748 has a large cargo door at the front, so that came out and the lead went in. looks good.
I welded in some .010 backing strips so the door will go back in flush, but it got me thinking, in future I might want to do an open cargo door scene. might make a good campaign theme.
Jessie_C
Joined: September 03, 2009
KitMaker: 6,965 posts
AeroScale: 6,247 posts
Posted: Sunday, March 18, 2012 - 05:58 PM UTC
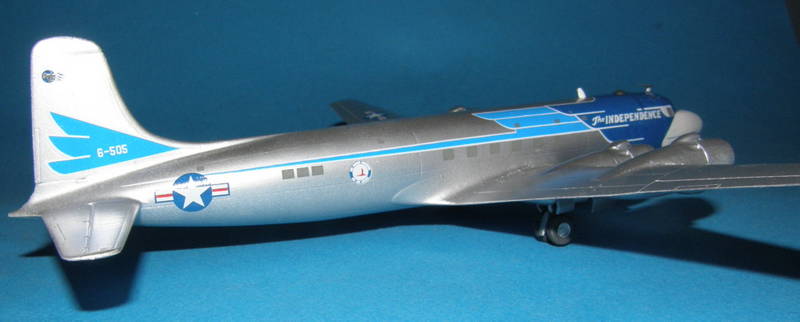
White nose masked.
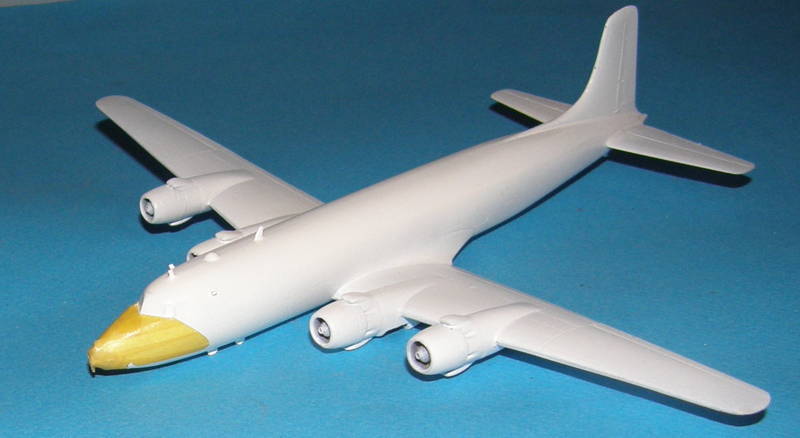
And silver on.

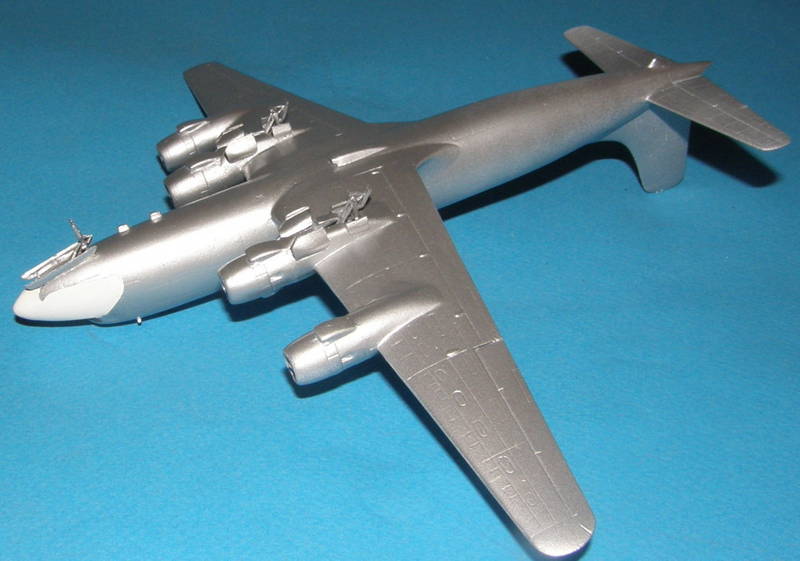

Stay tuned for our next thrilling installment: decals!
And silver on.
Stay tuned for our next thrilling installment: decals!
Jessie_C
Joined: September 03, 2009
KitMaker: 6,965 posts
AeroScale: 6,247 posts
Posted: Monday, March 19, 2012 - 03:53 AM UTC
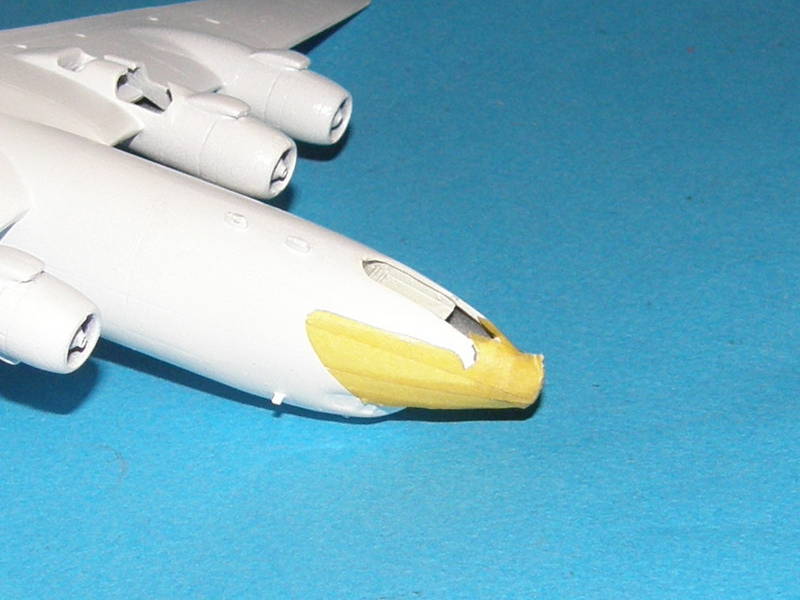
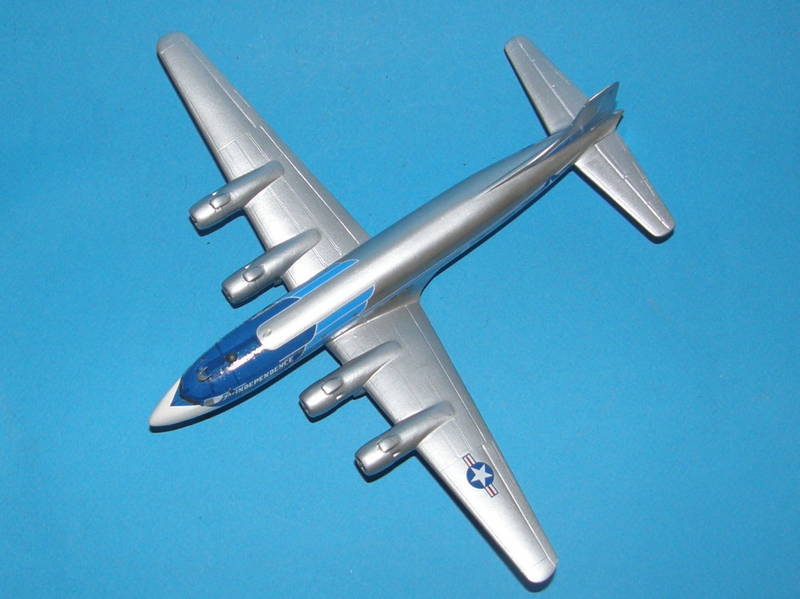
As promised.
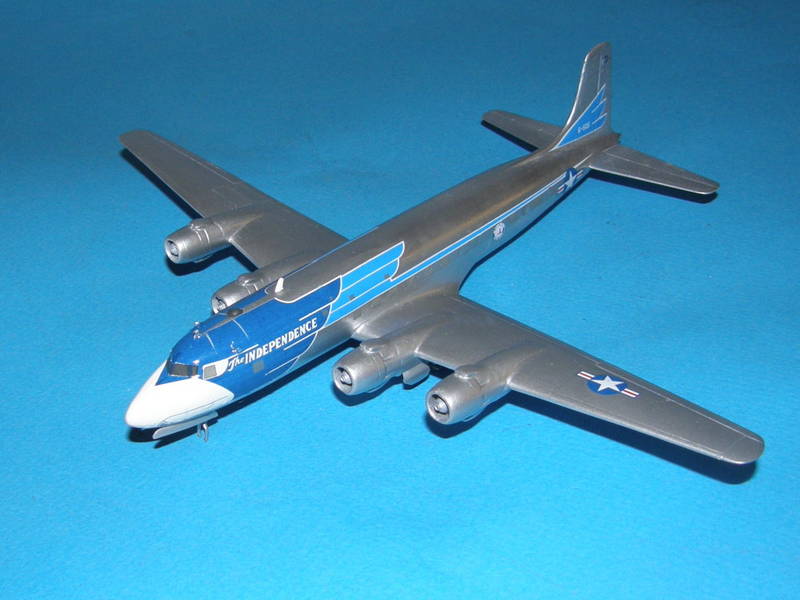

The anti glare panel didn't fit at all. I had to do some radical trimming because the V for the windscreen was much too acute to fit around the base of the actual windscreen.
Roden supplies a swatch of dark blue decal to patch the cabin roof where the cheatline decals do not line up. Much of it will be needed. I'm beginning to suspect that the person who drew the decals didn't have an actual kit to test fit them on.
I'm also not too thrilled about the colour of the windows. They're too light to show up well against the silver background.
Jessie_C
Joined: September 03, 2009
KitMaker: 6,965 posts
AeroScale: 6,247 posts
Posted: Monday, March 19, 2012 - 01:22 PM UTC
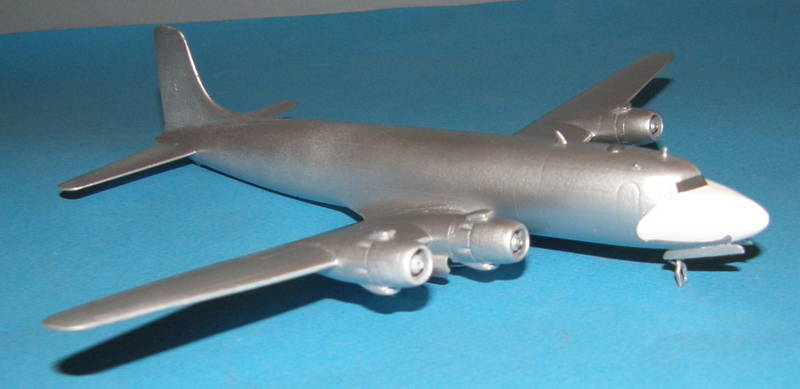
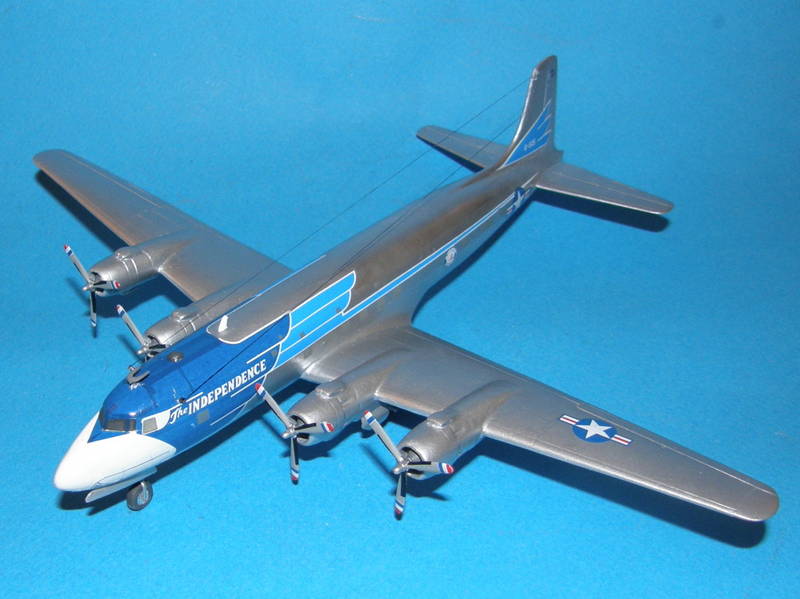
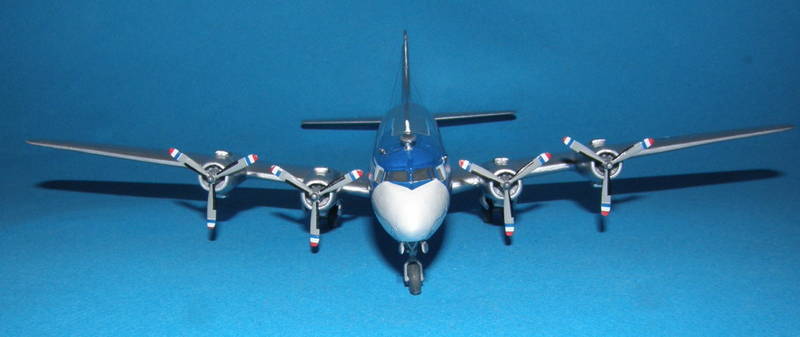
The patching is done and she's up on her wheels at last.
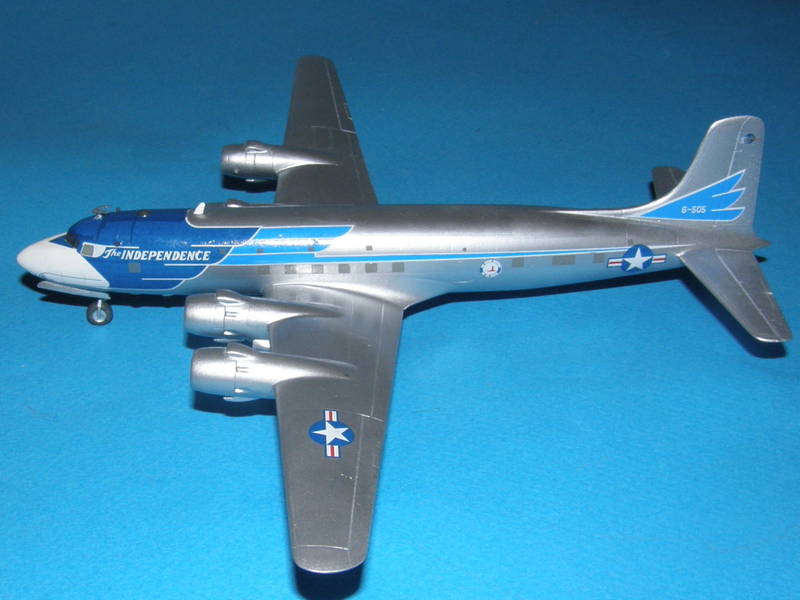


I'm not very happy with the patching. The blue is transparent, which means that whenever the decal is doubled up it's darker. Every patch job can be seen plain as day.
Now I'm having tons of fun persuading 24 propeller tip decals to stay in one place. I put the first side on without trimming down the carrier film, which caused the capillary effect of the setting solution to pull them down the blade until the edge of the film was lined up with the tip of the blade. I had to keep shifting them back up and they kept shifting back down like they were alive. They also didn't react to the Solvaset. They're so armour plated that at one point I lost one right into the bottom of the Solvaset bottle. Instead of instantly becomming a tiny ball of ex decal, it just sat there on the bottom until I fished it out with my tweezers and put it firmly back into place on the propeller. It took the boiling water trick to keep them in their place. Roden didn't include the very prominent propeller de-icing boots, so I'm resorting to decal strips for them. The propellers will end up with more decals than the whole rest of the model.
JClapp
#259
Joined: October 23, 2011
KitMaker: 2,265 posts
AeroScale: 1,715 posts
Posted: Monday, March 19, 2012 - 01:59 PM UTC
that's poor that the decal didnt fit well- right up front in the most eye drawing place too..
Otherwise, glorious model!
Ive made a terrible mistake on the 748. last thing I did last night was pack a bunch of putty into the engine nacelles so I would have something to drill into today for the air intakes and props. Well the solvent in the putty ate the plastic.

that wrinkly area is soft as taffy. I hope itll solidify in a few days, and I can do some more fairing. if not, I'll have to saw the ends off and fabricate some sort of replacement engines. damit, I was going to start painting this tonight.
Otherwise, glorious model!
Ive made a terrible mistake on the 748. last thing I did last night was pack a bunch of putty into the engine nacelles so I would have something to drill into today for the air intakes and props. Well the solvent in the putty ate the plastic.
that wrinkly area is soft as taffy. I hope itll solidify in a few days, and I can do some more fairing. if not, I'll have to saw the ends off and fabricate some sort of replacement engines. damit, I was going to start painting this tonight.

Siderius
Joined: September 20, 2005
KitMaker: 1,747 posts
AeroScale: 1,673 posts
Posted: Monday, March 19, 2012 - 02:25 PM UTC
Hi Jessica; I had similar problems with the Piedmont decals for the Airfix 737. I had to use the extra decals which were for the 727 version to cover up some ill fitting places.
You have done a very good job with a difficult subject. I know all of us modelers want to do the very best we can, with the skill set we have, we are often are own worst critics. You've done the best you can, that's the important thing. Good work. Russell
P.S. Sometimes you can do everything right and things just don't quite work out, some things are just beyond our control. I am sure you know that just wanted to reiterate it.

Jessie_C
Joined: September 03, 2009
KitMaker: 6,965 posts
AeroScale: 6,247 posts
Posted: Monday, March 19, 2012 - 02:57 PM UTC
Quoted Text
Ive made a terrible mistake on the 748. last thing I did last night was pack a bunch of putty into the engine nacelles so I would have something to drill into today for the air intakes and props. Well the solvent in the putty ate the plastic.
Miliput is your friend. It doesn't eat styrene, dries rock hard and can be drilled just like wood. Best yet, it can be sculpted when it's wet using plain water to shape it. I use it to pack out all my vacuforms where they're thin. You can likely make up new engine fronts from miliput very easily.
Jessie_C
Joined: September 03, 2009
KitMaker: 6,965 posts
AeroScale: 6,247 posts
Posted: Monday, March 19, 2012 - 04:18 PM UTC
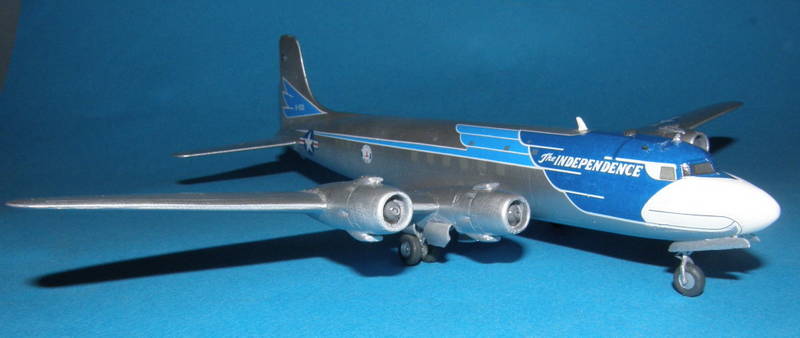
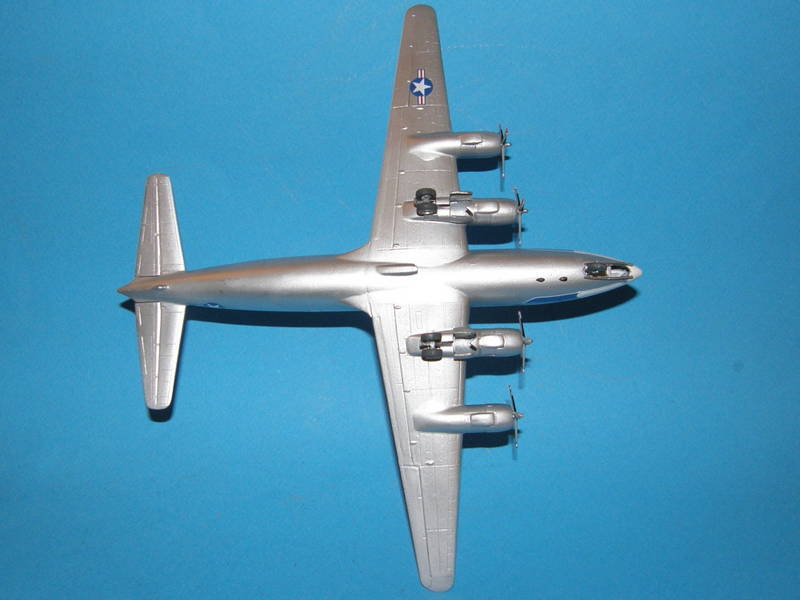
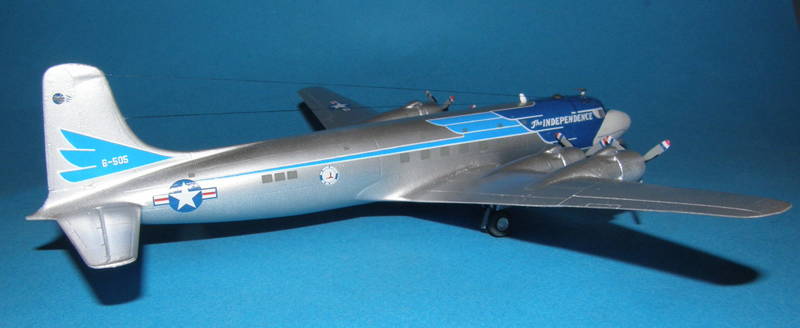
Finished.


 |

WEB HOSTING BY


Copyright ©2021 AeroScale and Kitmaker Network, a subsidiary of Silver Star Enterprises
All Rights Reserved. Please read our Conditions of Use and Privacy Policy.
All Rights Reserved. Please read our Conditions of Use and Privacy Policy.