OFFICIAL: Devils in the Dark: Nightfighters!
Maryland, United States
Joined: September 30, 2010
KitMaker: 430 posts
AeroScale: 75 posts
Posted: Friday, May 10, 2013 - 09:33 PM UTC
Update on my F6F. Cockpit & engine done. Photos.......


Now I can put the rest of the plane together. Update soon.
Thanks for viewing, Bill.
PS: @Van, good luck on the F-82
@Jesper, liking that masking job on the 109.
Tank Destroyer campaign......Bandai 1/48 Hetzer
Shep Paine Tribute campaign......Brit. Paras vs Ostwind

#041
Kobenhavn, Denmark
Joined: July 20, 2006
KitMaker: 10,069 posts
AeroScale: 3,788 posts
Posted: Saturday, May 11, 2013 - 06:48 AM UTC
Nice progress on the F6F, William. Pretty nice details for this scale. looking forward to see more.
A little more progress on my 109. Next are the detail painting and the decals.

Campaign'oholic - 252+ campaigns completed
#226
British Columbia, Canada
Joined: February 20, 2012
KitMaker: 1,909 posts
AeroScale: 508 posts
Posted: Saturday, May 11, 2013 - 08:29 PM UTC
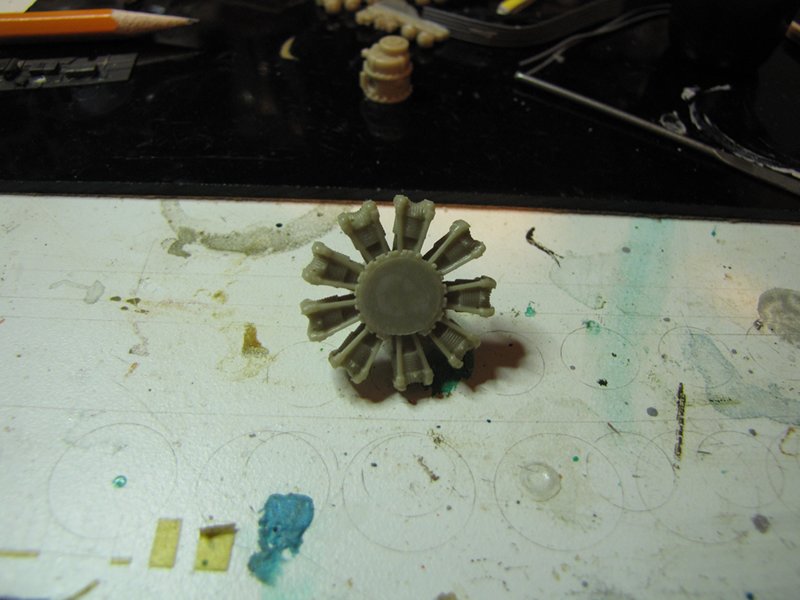
Been working on the Verlinden P&W 18 cylinder.
The directions show that the cylinders are to fit into small round depressions in the crankcase:
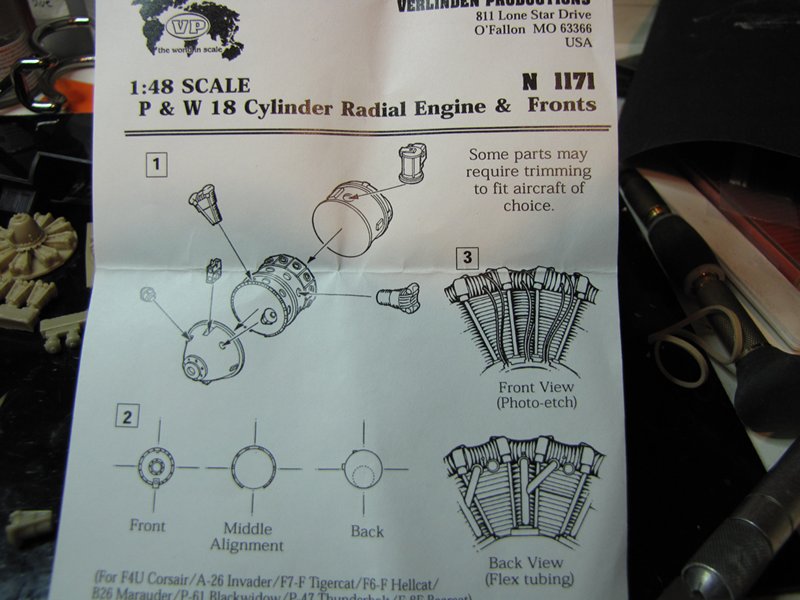
However there are a couple of problems with that

the bottom peg on the cylinders is not round and the depressions are not even or evenly spaced.

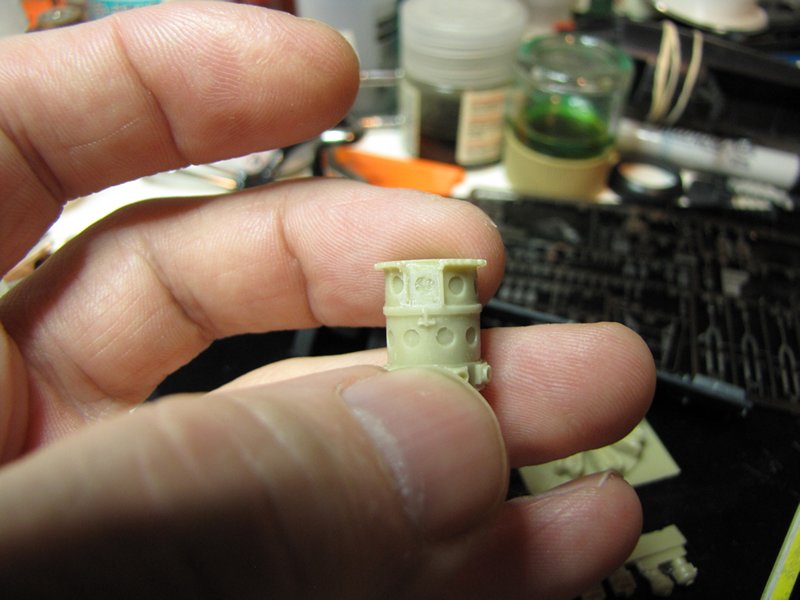
For that reason and because I need the diameter to be smaller I am building them this way:
I first drilled a shallow hole in the bottom of each cylinder,this will make sanding them easier. Then I sand a curve in the bottom to match the crankcase and I can assemble them thus:

Cheers Rob.
Anything without guns is a target!
27 completed campaigns and counting :)
#305
Christchurch, New Zealand
Joined: February 01, 2006
KitMaker: 1,673 posts
AeroScale: 1,517 posts
Posted: Saturday, May 11, 2013 - 08:52 PM UTC
Thanks Rob good to know! I've heard that verlinden can be quite hit and miss in quality and buildability and that fit is often an issue. I've got one of these engines in my stash but it has always intimidated me. I look forward to seeing it built and fitted into the model.
MichaelSatin
 Campaigns Administrator
Colorado, United States
Joined: January 19, 2008
KitMaker: 3,909 posts
AeroScale: 2,904 posts
Posted: Sunday, May 12, 2013 - 03:09 AM UTC
Rob,
As someone said on another board, looks good to me! Be careful you use the correct magnetos, the USN and USAAF used different styles. Hopefully the Verlinden kit has them both.
Michael
On the bench:
Sorta depends on your definition of "on the bench"...
Maryland, United States
Joined: September 30, 2010
KitMaker: 430 posts
AeroScale: 75 posts
Posted: Sunday, May 12, 2013 - 04:31 AM UTC
Construction update. The build is done, now onto painting.
Here's some photos..................


It's going to be a rather dull paint scheme though, all dark sea blue.
@Jesper, totally cool splinter camo on the 109. Good job.
@Rob, that engine looks incredibly detailed...awesome!
Thanks for viewing. Update soon. Bill.
Tank Destroyer campaign......Bandai 1/48 Hetzer
Shep Paine Tribute campaign......Brit. Paras vs Ostwind
#041
Kobenhavn, Denmark
Joined: July 20, 2006
KitMaker: 10,069 posts
AeroScale: 3,788 posts
Posted: Monday, May 13, 2013 - 12:38 PM UTC
Looks cool, William. Looking forward to see it with some color on.
Campaign'oholic - 252+ campaigns completed
#041
Kobenhavn, Denmark
Joined: July 20, 2006
KitMaker: 10,069 posts
AeroScale: 3,788 posts
Posted: Friday, May 17, 2013 - 04:29 AM UTC
A little more progress. The markings are now on. I plan to keep weathering very light as this plane flew out of good airfield facilities in Germany early in the war.
More to follow


Campaign'oholic - 252+ campaigns completed
Maryland, United States
Joined: September 30, 2010
KitMaker: 430 posts
AeroScale: 75 posts
Posted: Friday, May 17, 2013 - 03:56 PM UTC
Jesper, the 109 is looking Fabulous. Something about putting markings on a plane....the character is revealed.
Good work, Bill.
Tank Destroyer campaign......Bandai 1/48 Hetzer
Shep Paine Tribute campaign......Brit. Paras vs Ostwind
#041
Kobenhavn, Denmark
Joined: July 20, 2006
KitMaker: 10,069 posts
AeroScale: 3,788 posts
Posted: Sunday, May 19, 2013 - 02:01 AM UTC
Thanks for the comment, William.
I have now finished my Academy 1/48 Bf 109D. It is a great little kit that goes together. It is one of the first dedicated nightfighthers that still had the dayfighter camouflage scheme.
This aircarft was flown by Oblt. Johannes Steinhoff, staffelkapitan of 11.(N)/JG2, Hage, Germany, April 1940. The aircraft carries the first two markings of Steinhoff's 176 kills in the second world war. The first two kills were gained during the battle of the Heligoland Bight on 18th December 1939.
I used the balken cross decals from the kit and they went on surpricingly well. The old Academy decals are normally almost unusable.
Comments welcome


Here the Bf 109D are with a more lethal wingman.

Campaign'oholic - 252+ campaigns completed
MichaelSatin
Campaigns Administrator Colorado, United States
Joined: January 19, 2008
KitMaker: 3,909 posts
AeroScale: 2,904 posts
Posted: Sunday, May 19, 2013 - 03:00 AM UTC
Nice, clean work Jesper! Excellent progress everyone. A little less than a month and a half to go and we have a great campaign!
Michael

On the bench:
Sorta depends on your definition of "on the bench"...
#439
Washington, United States
Joined: November 05, 2005
KitMaker: 4,950 posts
AeroScale: 3,192 posts
Posted: Monday, May 20, 2013 - 03:39 AM UTC
Painfully slow progress, I've got all the sub assemblies put together and sanded down, Just need to fix up the clear parts and I'm ready to bring it together.
Hanger Queens in Waiting:
Monogram 1/72 F8F-1
Corsair the Sky Pirate - 1/72 Ace A-7D
Century Series - Airfix 1/72 F-105G
Anti Shipping - Academy 1/72 PBJ-1D
Academy 1/72 F-84E
#041
Kobenhavn, Denmark
Joined: July 20, 2006
KitMaker: 10,069 posts
AeroScale: 3,788 posts
Posted: Monday, May 20, 2013 - 05:10 AM UTC
Thanks for the comment, Michael. Appreciate it.
Campaign'oholic - 252+ campaigns completed
Schleswig-Holstein, Germany
Joined: July 03, 2005
KitMaker: 17 posts
AeroScale: 15 posts
Posted: Monday, May 20, 2013 - 06:47 AM UTC
After solving a couple of serious private problems, I finally returned to the bench and continued to build the Heinkel (sorting out different problems
) . So far, I nearly completed the cockpit and started to assemble further components.


For the first time I used seatbelts from HGW, and I really like them.

Step by step I realize that this kit is not exactly a small one...

One of it´s engine nacelles is nearly as long as an 1/48 Ta-154, so I should start to clear some shelf space
Next steps will be the final assembly of the fuselage and the wings (and maybe the correction of the landing gear).
#041
Kobenhavn, Denmark
Joined: July 20, 2006
KitMaker: 10,069 posts
AeroScale: 3,788 posts
Posted: Wednesday, May 22, 2013 - 08:05 AM UTC
Nice progress, Christian. It looks great, but it will be a beast sizevise when done.
Campaign'oholic - 252+ campaigns completed
Maryland, United States
Joined: September 30, 2010
KitMaker: 430 posts
AeroScale: 75 posts
Posted: Wednesday, May 22, 2013 - 02:09 PM UTC
Jesper, the 109 turned out amazingly. The paint scheme and markings together make it a very striking looking early war fighter. Congrats! Bill.
Christian, that level of detailing you've done to the Owl's cockpit is Incredible....it goes beyond hobbying into ultra-realism. Fantastic work! Bill.
Update soon on my F6F 5N.
Bill.
Tank Destroyer campaign......Bandai 1/48 Hetzer
Shep Paine Tribute campaign......Brit. Paras vs Ostwind
Maryland, United States
Joined: September 30, 2010
KitMaker: 430 posts
AeroScale: 75 posts
Posted: Saturday, May 25, 2013 - 11:17 AM UTC
Basic painting is done and the decals have been applied.
I'm going to make my F6F 5N Nightfighter into an inflight diorama. Idea is the Hellcat has just shot down a Japanese Betty bomber. Some wip photos..........


I'll come up with a backdrop and armitures to hold the planes. Comments welcomed(good or bad). Thanks, Bill.
PS: The Betty is the Minicraft 1/144 scale kit. Scratchbuilt interior, even carved the crew out of styrene.
Replaced mg's with copper wire.
Tank Destroyer campaign......Bandai 1/48 Hetzer
Shep Paine Tribute campaign......Brit. Paras vs Ostwind
#226
British Columbia, Canada
Joined: February 20, 2012
KitMaker: 1,909 posts
AeroScale: 508 posts
Posted: Saturday, May 25, 2013 - 07:40 PM UTC
Thanks Chris, Michael,
No the Verlinden kit does not have the right magnetos, but I have that covered as well as the right exhausts.
William, Jesper,
Nicely done!

Christian,
Nice progress!
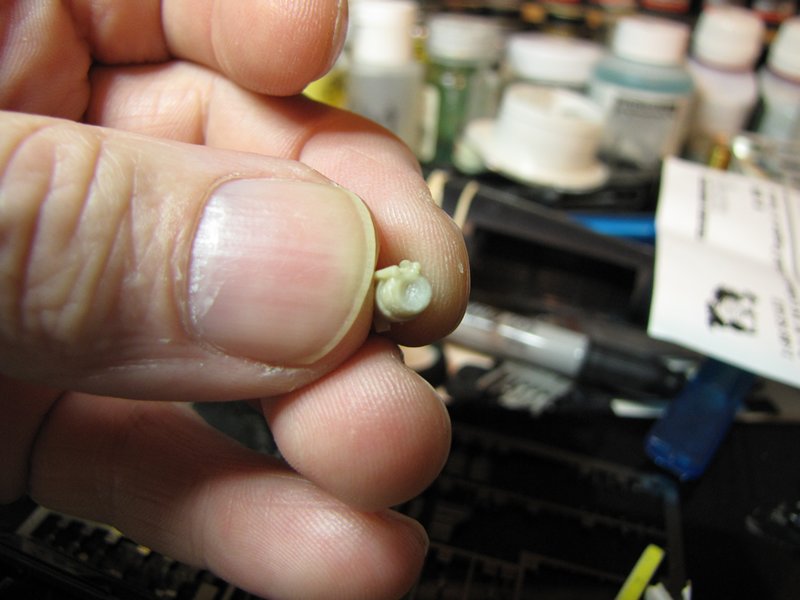
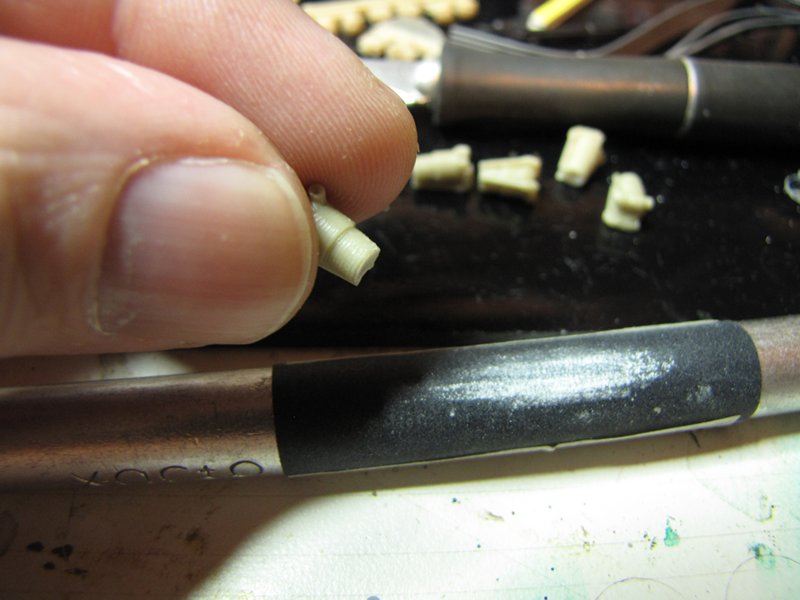
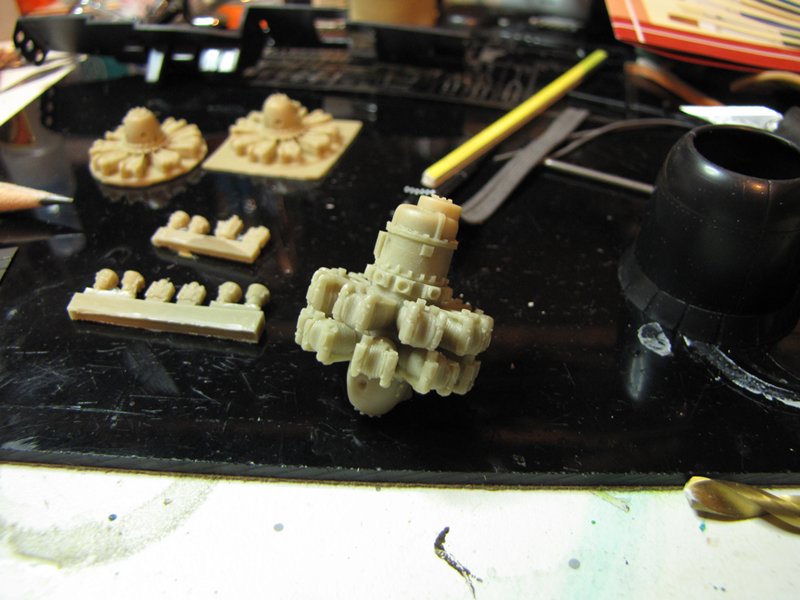
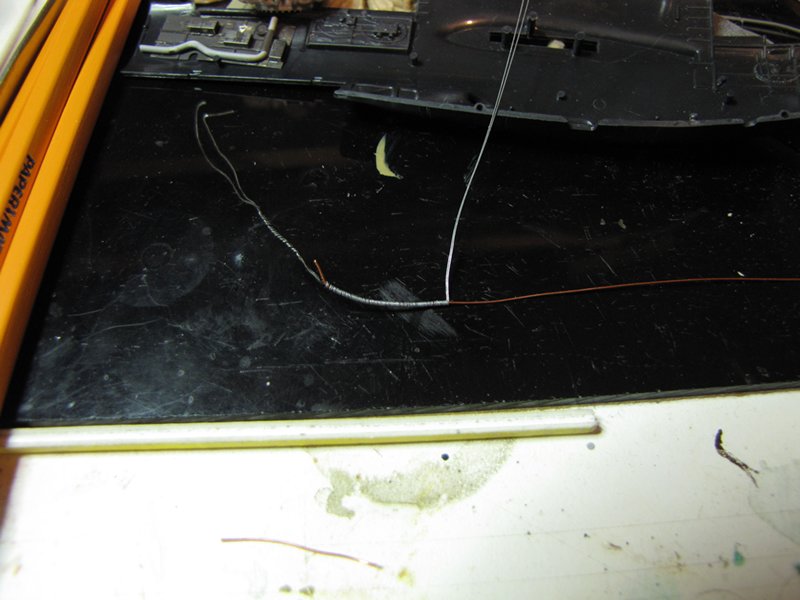
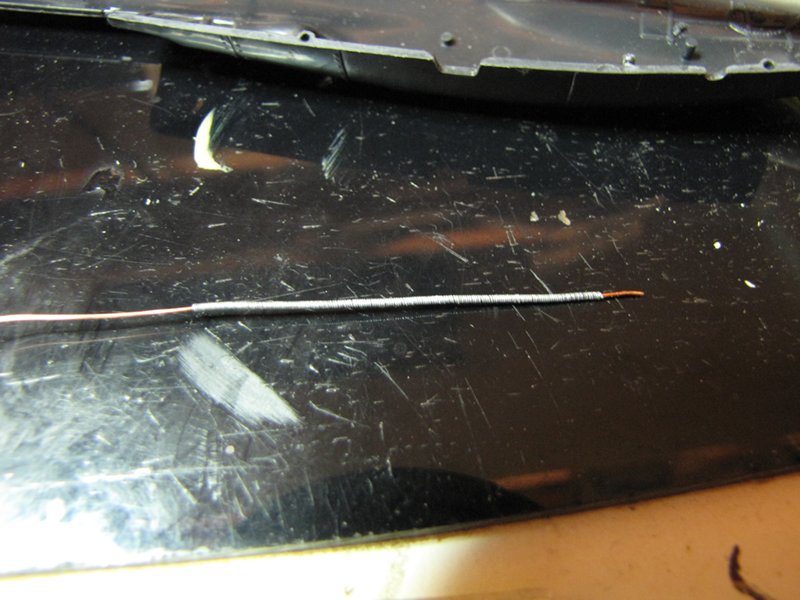
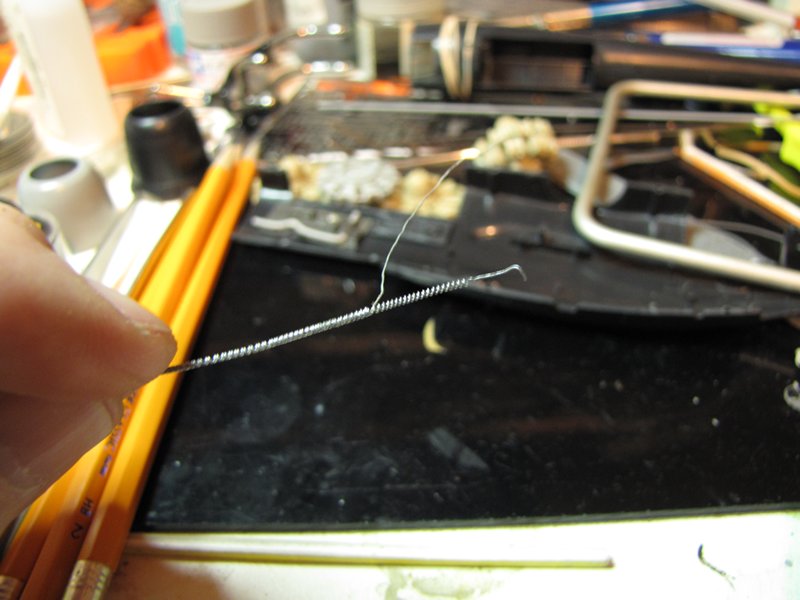
Finished all the cylinders and checked the fit in the cowl. I also made up the oxygen line for the cockpit, I wrapped two pieces of fine beading wire around a piece of copper wire ( I was hoping to slide them off and unscrew one from the other but they would not slide off the wire.
) I then started unwrapping one strand leaving the other nicely spaced. It stayed nicely spaced until I bunged it up installing it, still came out fine though.
Cheers Rob.


Anything without guns is a target!
27 completed campaigns and counting :)
#041
Kobenhavn, Denmark
Joined: July 20, 2006
KitMaker: 10,069 posts
AeroScale: 3,788 posts
Posted: Sunday, May 26, 2013 - 09:23 AM UTC
Thanks for the comments on my Bf 109D, guys. Appreciate it.
Rob, cool details. Really adds depth to the details on the kit.
William, very cool idea. Looking forward to see it finished.
Campaign'oholic - 252+ campaigns completed
MichaelSatin
Campaigns Administrator Colorado, United States
Joined: January 19, 2008
KitMaker: 3,909 posts
AeroScale: 2,904 posts
Posted: Sunday, May 26, 2013 - 10:29 AM UTC
Lovin' this campaign, we're seeing some great work out there!
Michael
On the bench:
Sorta depends on your definition of "on the bench"...
Maryland, United States
Joined: September 30, 2010
KitMaker: 430 posts
AeroScale: 75 posts
Posted: Monday, May 27, 2013 - 04:43 AM UTC
Thank you Jesper and Rob.
Rob, that detailing is uber-realistic...Great job!
Quick update......Some photos.................

Added a gun sight, finished the pilot w/ seatbelt, and painted the canopy.

Canopy in place. Kit also provides an open version.

Betty is done. Added stalled & spinning propeller. Canopy and dorsal turret added.

Will add fire and smoke to the stricken Betty in the final display.
Thanks for viewing. Comments welcomed(Positive or Derisive).
Bill.
Tank Destroyer campaign......Bandai 1/48 Hetzer
Shep Paine Tribute campaign......Brit. Paras vs Ostwind
#226
British Columbia, Canada
Joined: February 20, 2012
KitMaker: 1,909 posts
AeroScale: 508 posts
Posted: Monday, May 27, 2013 - 10:21 AM UTC
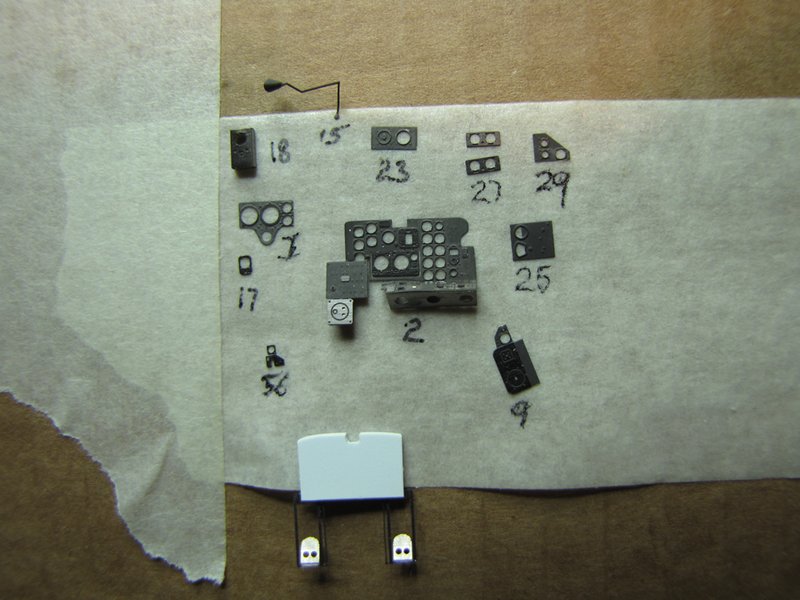
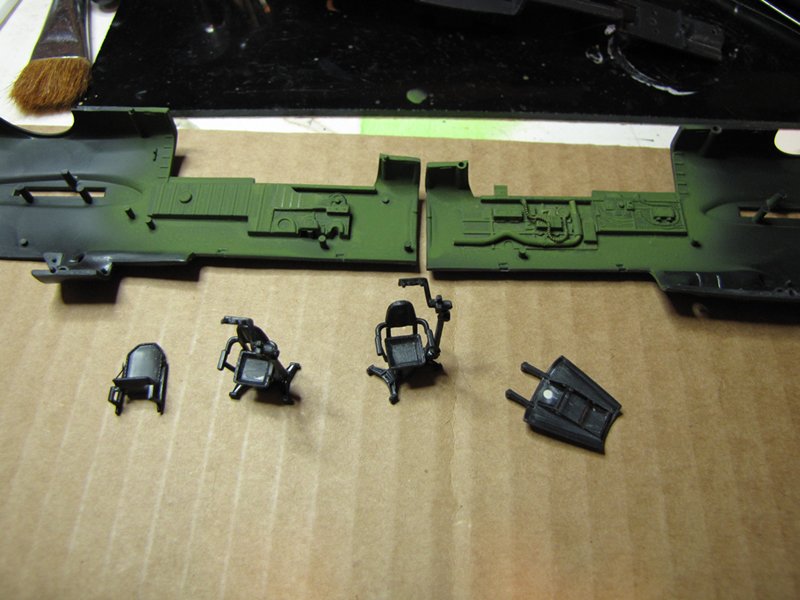
I can finally start putting paint on.
I put all the PE that has gauges behind on masking tape to paint the photo not only shows what I am doing but allows me to figure out what each part is after painting when I can no longer see the numbers.
I got one coat on the interior a mix of MM interior green with MM gr drab. I have modified the the gun controls into a stowed position.
Cheers Rob.
Anything without guns is a target!
27 completed campaigns and counting :)
#298
Hong Kong S.A.R. / 繁體
Joined: August 08, 2002
KitMaker: 1,182 posts
AeroScale: 351 posts
Posted: Tuesday, May 28, 2013 - 09:04 PM UTC
Maryland, United States
Joined: February 25, 2013
KitMaker: 209 posts
AeroScale: 138 posts
Posted: Wednesday, May 29, 2013 - 12:59 AM UTC
One month to go, and I've got something that is starting to look like a Twin Mustang. I'm becoming more enamored of the plane as I build it. Beautiful clean lines and incredibly unique yet functional. The Monogram plastic fits together wonderfully for such an old mould, only a few small seams to clean up and a little bit of flash. The props are test fitted on for the picture but have not been cemented.

I used Testors MM interior green enamel for the cockpit. I will try to get a better picture of the cockpit because the raised sidewall detail looks nice after a little careful drybrushing. You will just have to take my word for it for now.
A shot of the plane I'm modeling to whet the appetite. It took a little searching to find this photo on the web.

#298
Hong Kong S.A.R. / 繁體
Joined: August 08, 2002
KitMaker: 1,182 posts
AeroScale: 351 posts
Posted: Thursday, May 30, 2013 - 08:04 PM UTC