

Air Campaigns
Want to start or join a group build? This is where to start.
Want to start or join a group build? This is where to start.
Hosted by Frederick Boucher, Michael Satin
OFFICIAL: Anything Goes Campaign

RedwingNev

Joined: February 07, 2004
KitMaker: 911 posts
AeroScale: 415 posts

Posted: Friday, March 29, 2013 - 12:56 AM UTC
That's a really nice looking cockpit Dave

Arrrgee

Joined: June 30, 2012
KitMaker: 54 posts
AeroScale: 43 posts

Posted: Friday, March 29, 2013 - 05:52 AM UTC
Everyone,
I've finally freed up the time to start on this campaign,
I wasn't sure which kit to pull out of the stash;

Although that's roughly one third of my kit stash, it has several kits that I'm itching to do. One of which is the Dassault Super Etendard "Libya 2011" by academy. I had bought this with a mind to have it marked up as one of the argentine etendards as I have an ongoing project making various craft from the falklands conflict, however I feel it would be a missed oppurtunity to not make a version of the etendard from it's career swansong. Anyway I will just have to do another etendard in the future as an argy ship killer!
The kit;


I shall get started on it staight away,
Rich.
I've finally freed up the time to start on this campaign,
I wasn't sure which kit to pull out of the stash;
Although that's roughly one third of my kit stash, it has several kits that I'm itching to do. One of which is the Dassault Super Etendard "Libya 2011" by academy. I had bought this with a mind to have it marked up as one of the argentine etendards as I have an ongoing project making various craft from the falklands conflict, however I feel it would be a missed oppurtunity to not make a version of the etendard from it's career swansong. Anyway I will just have to do another etendard in the future as an argy ship killer!
The kit;
I shall get started on it staight away,
Rich.
epshifty

Joined: August 05, 2011
KitMaker: 376 posts
AeroScale: 348 posts

Posted: Friday, March 29, 2013 - 06:15 AM UTC
Thanks for the comments guys  ..
..
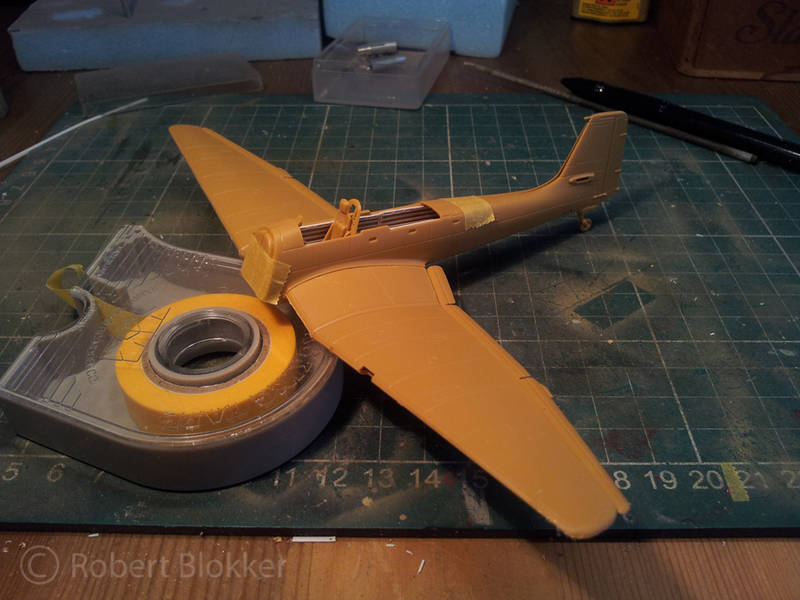
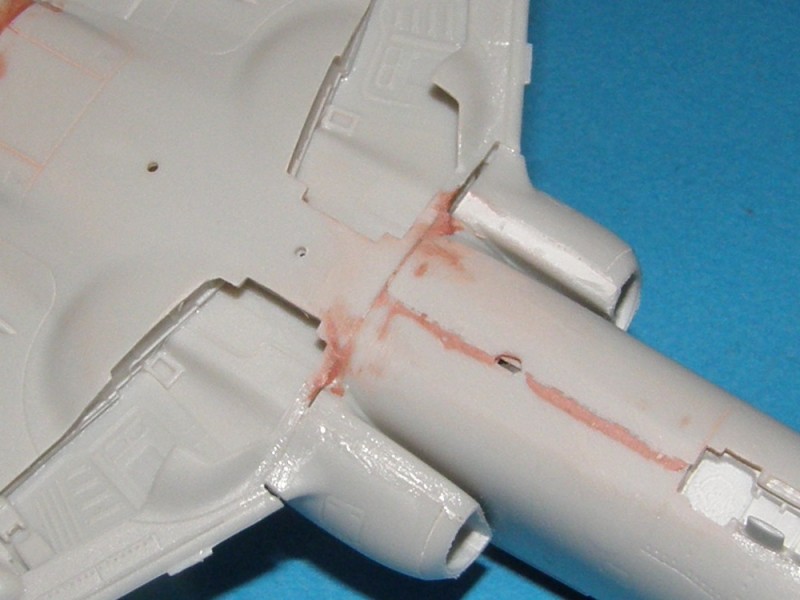
Iv been busy with the A6 again today and made some more progress , the join of the wings to the fuselage isnt great so im going to be doing some filling here i think ..
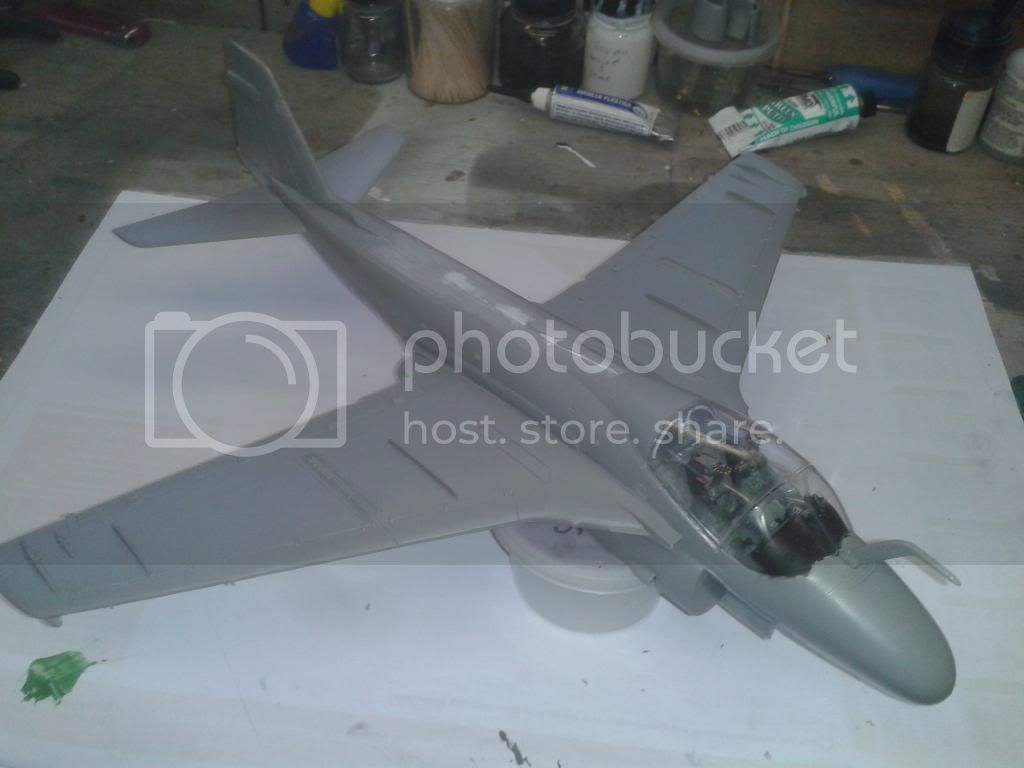

..Iv been busy with the A6 again today and made some more progress , the join of the wings to the fuselage isnt great so im going to be doing some filling here i think ..


mykroft

Joined: November 14, 2009
KitMaker: 270 posts
AeroScale: 264 posts

Posted: Sunday, March 31, 2013 - 07:46 AM UTC
I'm starting to lay paint now on the lovely AZModel Spitfire IXc
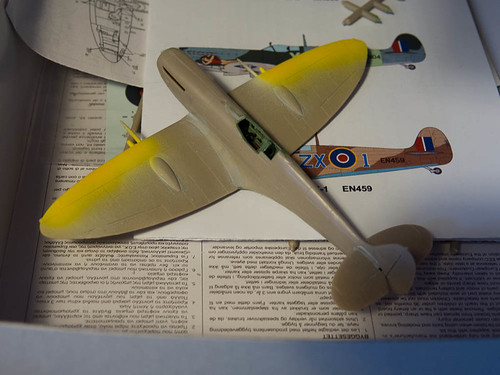
AZModel Spitfire IXc 1/72 by mawz_models, on Flickr
AZModel Spitfire IXc 1/72 by mawz_models, on Flickr

Middle_Franconian

Joined: January 02, 2011
KitMaker: 279 posts
AeroScale: 239 posts

Posted: Sunday, March 31, 2013 - 06:28 PM UTC
Hello all,
finally I found some time for posting!
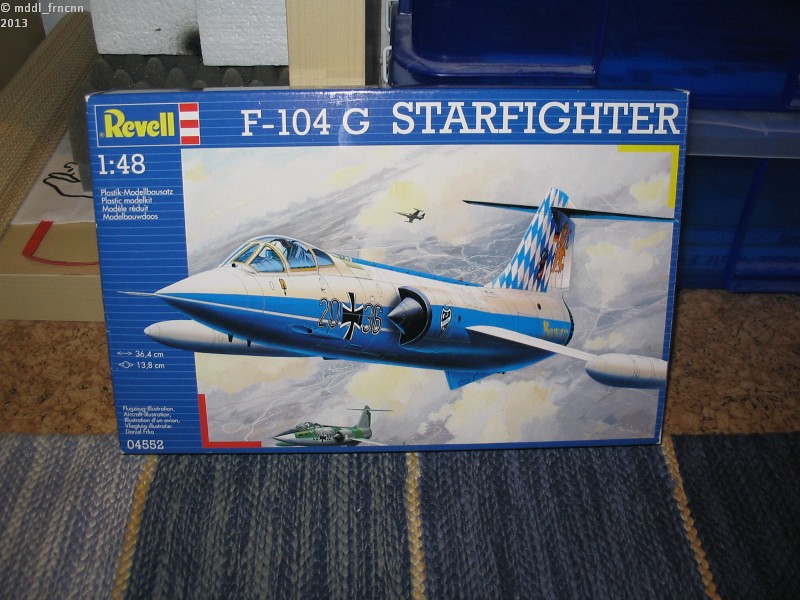
I take part with this kit here: the Revell issue of Hasegawa´s 1:48 F-104 Starfighter.
I have already started it end of February :
:
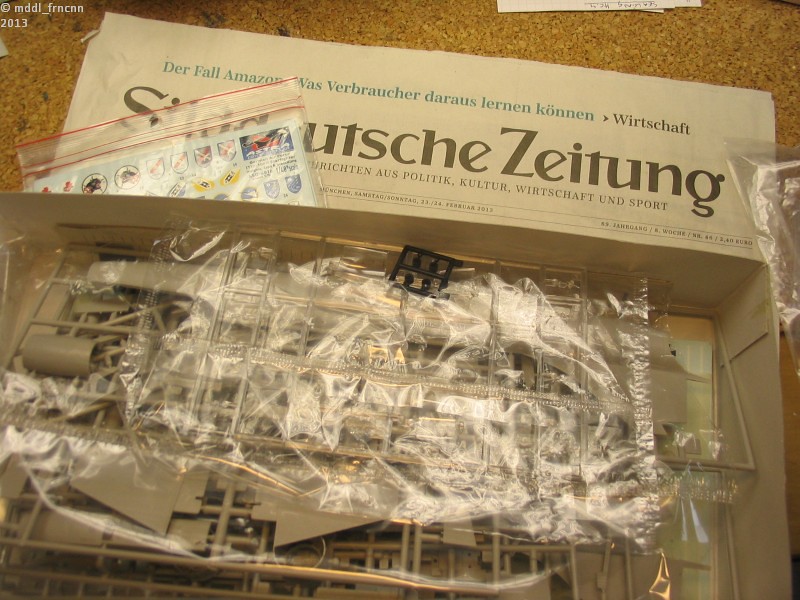
The plan is to make F-104G of the JG74, Neuburg an der Donau.
I want to create the 23+74 which has a nice zapping on the fuselage that was put on during a squadron exchange with RAF Lightnings in Binbrook, UK.
Thanks to DACO (Danny Coreman´s unbelievable research job) this zapping can be found on the fantastic decal sheet of German Starfighters:
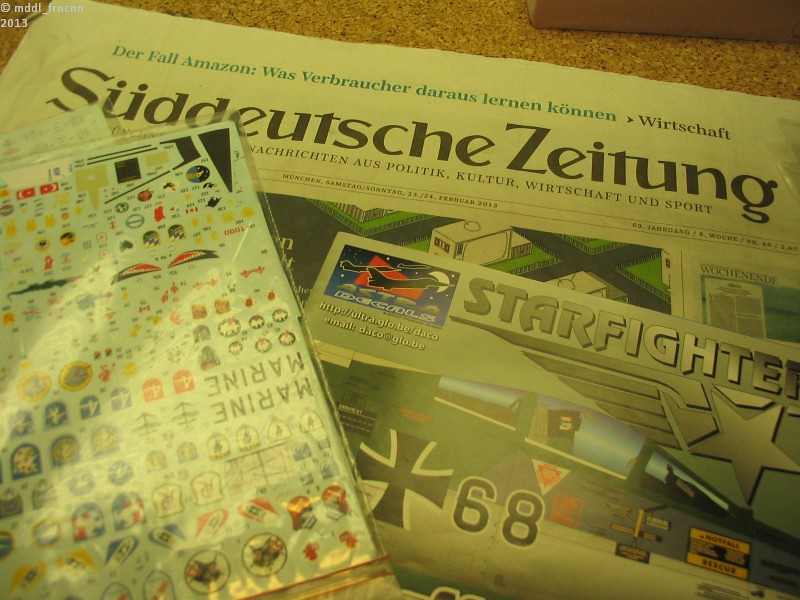
The direct link to DACO:
http://ultra.glo.be/daco/
More pictures will come soon!
Regards,
Sebastian
finally I found some time for posting!
I take part with this kit here: the Revell issue of Hasegawa´s 1:48 F-104 Starfighter.
I have already started it end of February
: The plan is to make F-104G of the JG74, Neuburg an der Donau.
I want to create the 23+74 which has a nice zapping on the fuselage that was put on during a squadron exchange with RAF Lightnings in Binbrook, UK.
Thanks to DACO (Danny Coreman´s unbelievable research job) this zapping can be found on the fantastic decal sheet of German Starfighters:
The direct link to DACO:
http://ultra.glo.be/daco/
More pictures will come soon!
Regards,
Sebastian
emroglan

Joined: December 16, 2004
KitMaker: 1,163 posts
AeroScale: 255 posts

Posted: Monday, April 01, 2013 - 04:09 AM UTC
A little more progress. The fuselage was mated, wings and stabs are attached. With a little care, minimal amount of putty is required. The only problem is the recessed detail. In some areas it is very light and not very clear. If you need to sand these areas the entire detail is lost very easily.
I also made a canvas cover using epoxy putty. Not sure if it's 100% right, but anyways.
I also made a canvas cover using epoxy putty. Not sure if it's 100% right, but anyways.

JClapp

#259

Joined: October 23, 2011
KitMaker: 2,265 posts
AeroScale: 1,715 posts

Posted: Monday, April 01, 2013 - 02:38 PM UTC
Ive made a start on this campaign today.
I have this Revell 1/144 B-25,
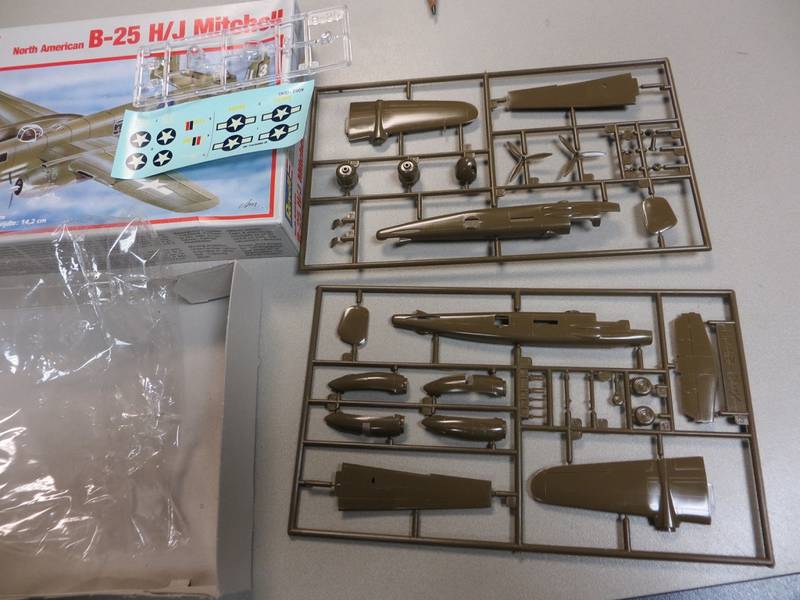
I want this TB-25K of the Mass. ANG 101st FW.

this is a nicely molded kit, the fits are excellent.
the gun pods are ugly, if I wanted gun pods, I'd make better ones. moot point, they have to come off, as does the dorsal turret. The TB-25K's were radar trainers with all armaments removed.
thats as far as I've gotten. next I have to modify that nose glazing and fabricate a radome.
I have this Revell 1/144 B-25,
I want this TB-25K of the Mass. ANG 101st FW.
this is a nicely molded kit, the fits are excellent.
the gun pods are ugly, if I wanted gun pods, I'd make better ones. moot point, they have to come off, as does the dorsal turret. The TB-25K's were radar trainers with all armaments removed.
thats as far as I've gotten. next I have to modify that nose glazing and fabricate a radome.


ljames0874

Joined: August 15, 2012
KitMaker: 408 posts
AeroScale: 365 posts
Posted: Monday, April 01, 2013 - 07:57 PM UTC
At last! A break in the weather means I can get outside and do some airbrushing!
So far, I've primed and pre-shaded, and got the first coat of silver/aluminium on the underside, as well as painted and masked the wheels, undercarriage and bay doors (on the sprue).

Keep up the good work everyone, there's some great builds happening here!
So far, I've primed and pre-shaded, and got the first coat of silver/aluminium on the underside, as well as painted and masked the wheels, undercarriage and bay doors (on the sprue).
Keep up the good work everyone, there's some great builds happening here!

drabslab

Joined: September 28, 2004
KitMaker: 2,186 posts
AeroScale: 1,587 posts

Posted: Tuesday, April 02, 2013 - 01:33 AM UTC
Finally some quality building time 
And here are the first results, a Tamiya 1/48 mustang taking shape:

Still a lot of work but I am happy getting already this far during a "house renovation year". Now to the Ground forces campaign for some progress there.
And here are the first results, a Tamiya 1/48 mustang taking shape:
Still a lot of work but I am happy getting already this far during a "house renovation year". Now to the Ground forces campaign for some progress there.

drabslab
Joined: September 28, 2004
KitMaker: 2,186 posts
AeroScale: 1,587 posts
Posted: Tuesday, April 02, 2013 - 01:57 AM UTC
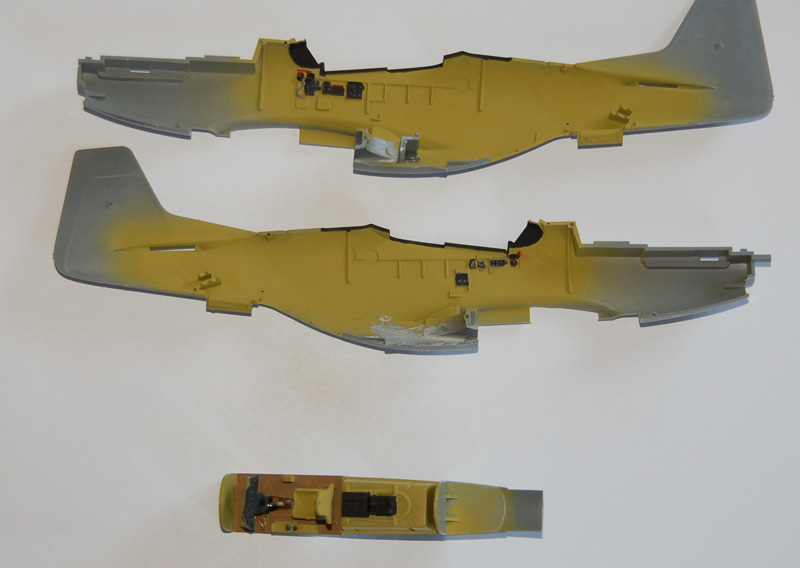
Quoted Text
Started work on the cockpit Fit was as good as I had expected it to be. Cockpit colours aren't 100% accurate, but this is just a fun build to see if I want to get hooked on another branch of scale modelling. My wallet is kind of hoping I don't. Next up if the step that worries me most, dealing with the seam on the top and bottom of the fuselage.

Great work all around,
Jeff
Hai Jeff,
it seems we're of on the same bird
The fit is iondeed excellent. I scanned the internet for good pictures of the cockpit but not much to be found there either, at least not something I could find.
The very good fit takes largely care of the fuselage seams
have fun

Jessie_C

Joined: September 03, 2009
KitMaker: 6,965 posts
AeroScale: 6,247 posts

Posted: Tuesday, April 02, 2013 - 10:45 AM UTC
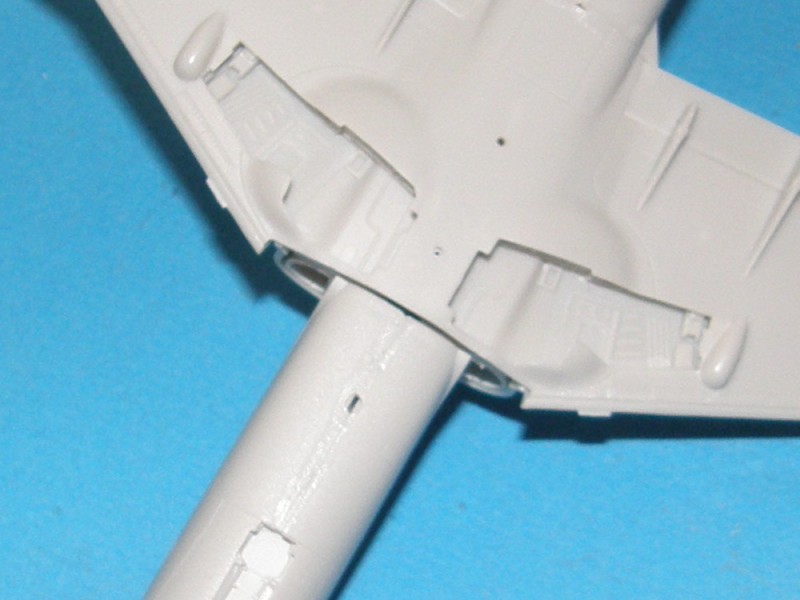
Fuselage glued. The fit is a bit sloppy.
Now the wings. The fit here is even worse. The tape is needed to prevent huge gaps at the wing roots.
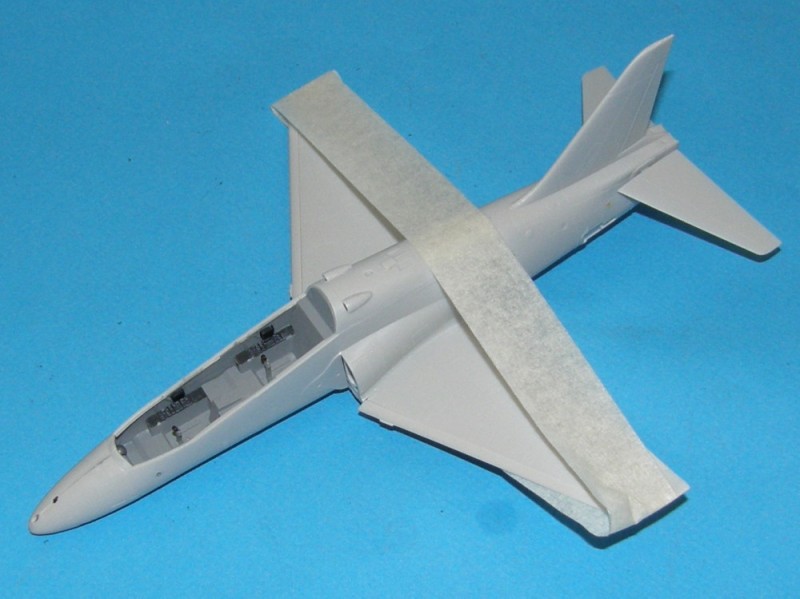
But that just opens up a cavern underneath.
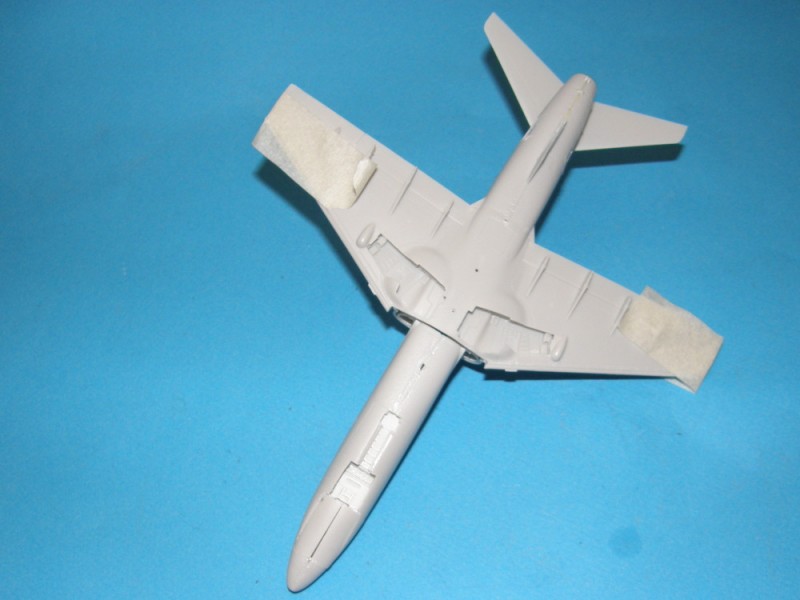
I'm going to need some serious shims in here.
Now the wings. The fit here is even worse. The tape is needed to prevent huge gaps at the wing roots.
But that just opens up a cavern underneath.
I'm going to need some serious shims in here.
JClapp
#259
Joined: October 23, 2011
KitMaker: 2,265 posts
AeroScale: 1,715 posts
Posted: Tuesday, April 02, 2013 - 06:47 PM UTC
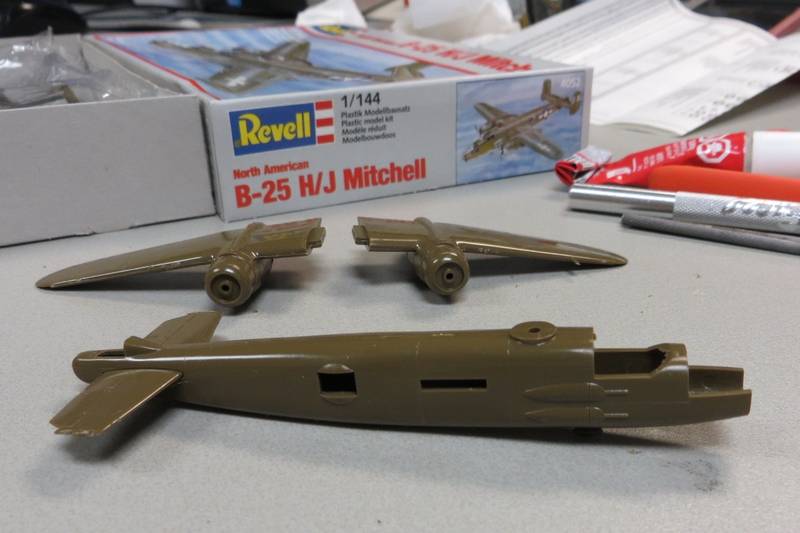
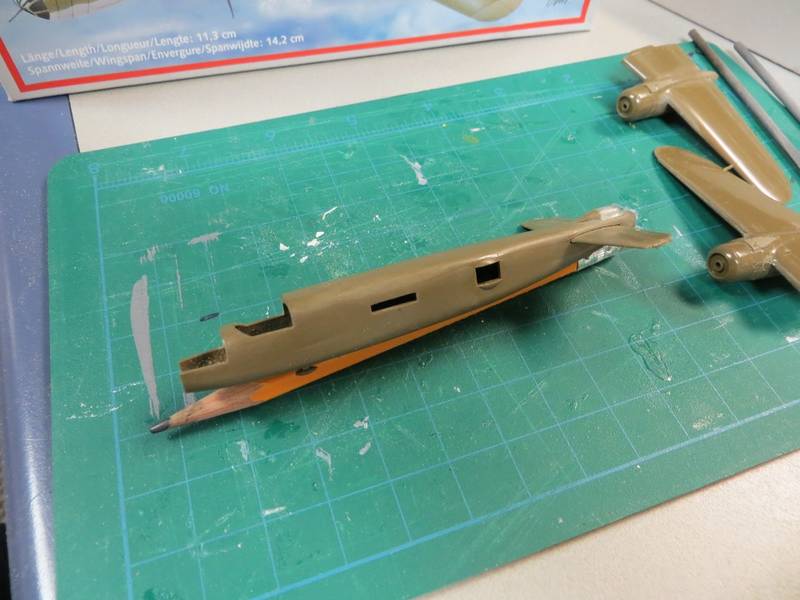
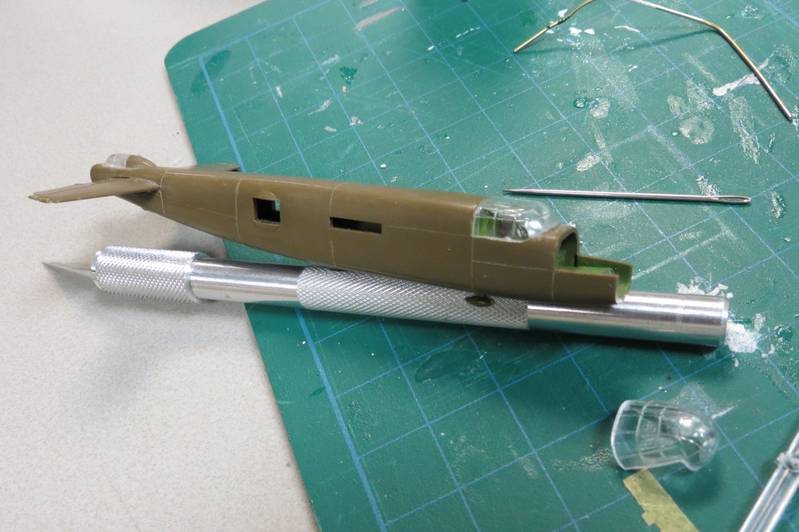
The Revell 1/144 B-25 kit has no interior parts, but quite a bright clear cockpit canopy, so I scratched up a bit of interior.
no mention of the need for a nose weight in the instructions, though it obviously needs one. the floor of the cockpit is a solid block of lead.
I sanded off all the surface panel lines along with the gun pods, so Ive tried to scribe new ones on, something I havent done much of, hoping for the best.
no mention of the need for a nose weight in the instructions, though it obviously needs one. the floor of the cockpit is a solid block of lead.
I sanded off all the surface panel lines along with the gun pods, so Ive tried to scribe new ones on, something I havent done much of, hoping for the best.
drabslab
Joined: September 28, 2004
KitMaker: 2,186 posts
AeroScale: 1,587 posts
Posted: Tuesday, April 02, 2013 - 10:42 PM UTC
Mustang is ready for paint.
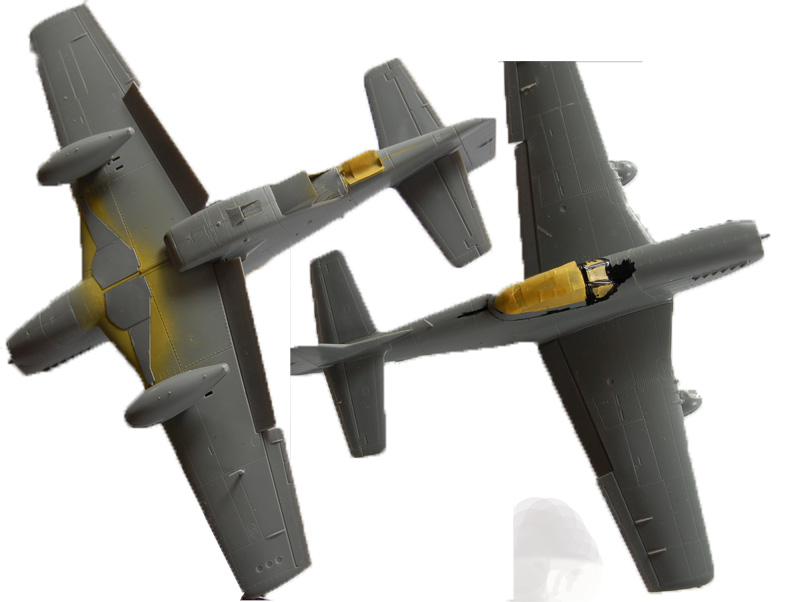
I decided to use Humbrol 89 for the blue nows. according to info found on the net, its a bit unclear what kind of blue was used but soem pictures show a pale bleu, hence ...
I decided to use Humbrol 89 for the blue nows. according to info found on the net, its a bit unclear what kind of blue was used but soem pictures show a pale bleu, hence ...

FAUST
#130

Joined: June 07, 2002
KitMaker: 8,797 posts
AeroScale: 190 posts

Posted: Wednesday, April 03, 2013 - 02:46 AM UTC
Ola guys and gals
Today I have enlisted in this campaign as well. I was planning to buy something from Eduard for my first aircraft but since I have the selfcontainment of a Jack Russel terrier I ran to the LHS today and bought myself a Revell 1:72 Stuka B1-R1.
I hope to post some photo's soon.
Today I have enlisted in this campaign as well. I was planning to buy something from Eduard for my first aircraft but since I have the selfcontainment of a Jack Russel terrier I ran to the LHS today and bought myself a Revell 1:72 Stuka B1-R1.
I hope to post some photo's soon.

Middle_Franconian
Joined: January 02, 2011
KitMaker: 279 posts
AeroScale: 239 posts
Posted: Wednesday, April 03, 2013 - 07:40 AM UTC
Hi!
Lots of nice entries here, I am still catching up all old posts to be up to date !
!
@ Jonathan: the Mitchell is nice! I did not know that Revell once issued a B-25 in that scale! The grey box is cool, some say that they grey boxes indicate the barbarous decade of Revell kits...
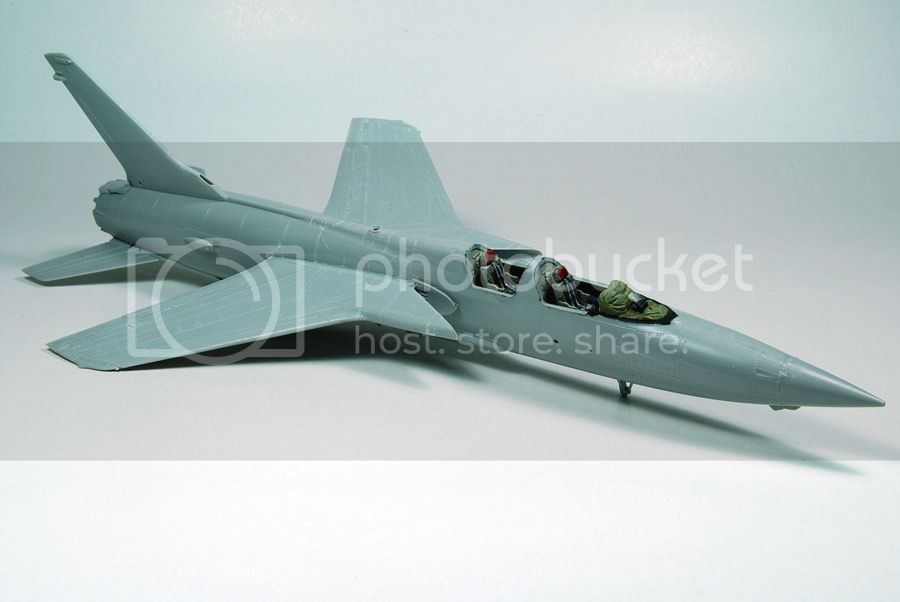
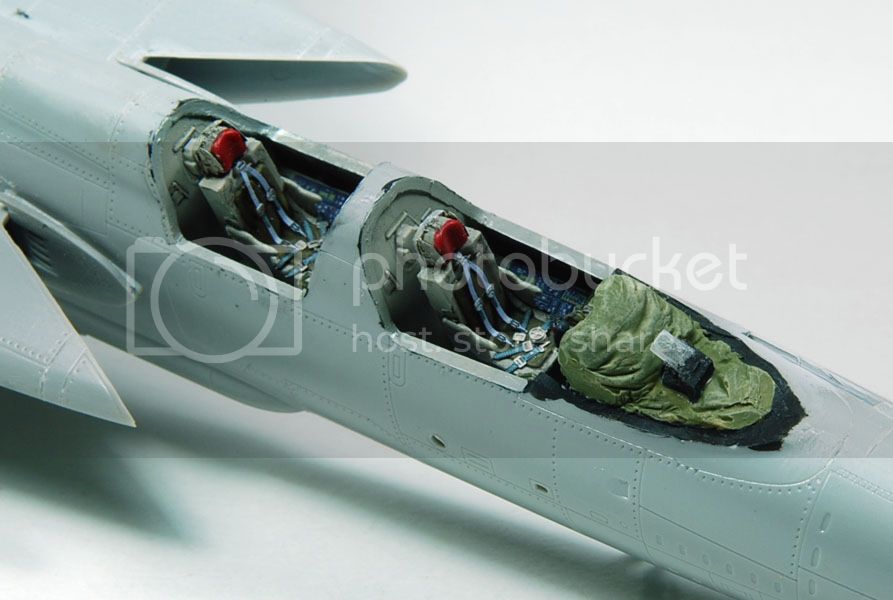
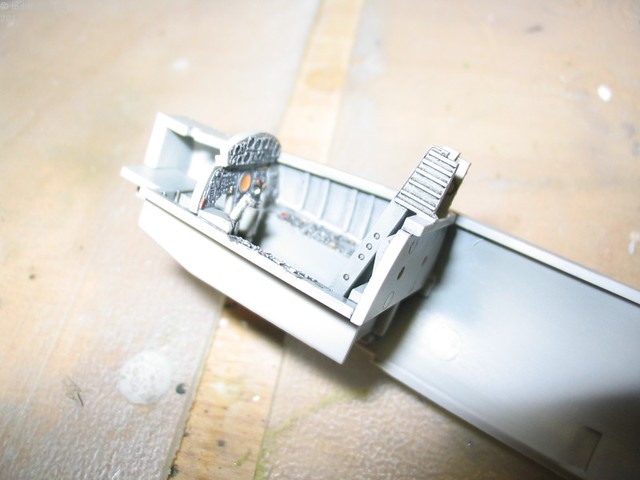
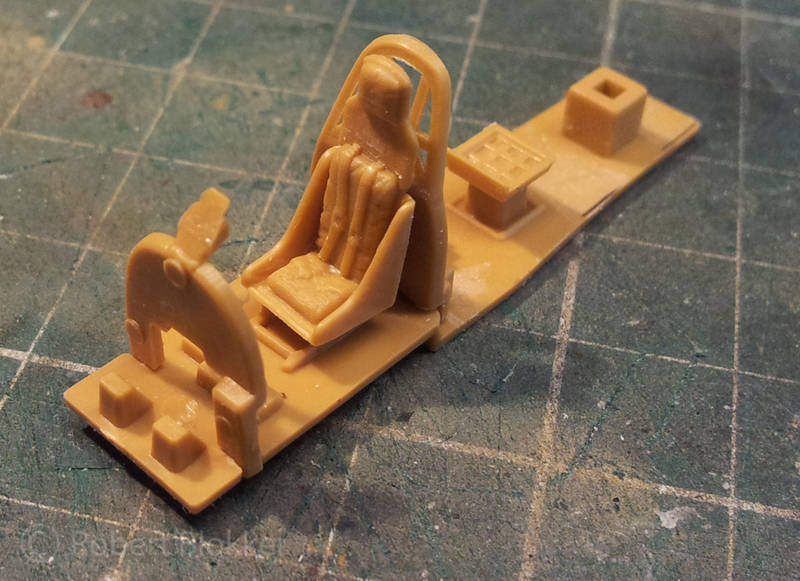
Some progress pics from my F-104G.
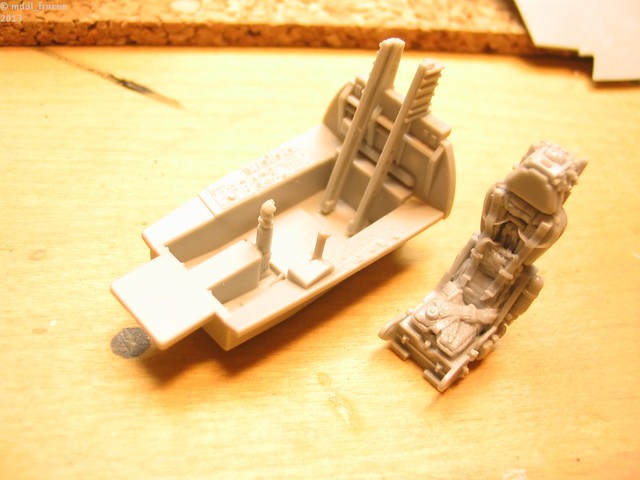
I have a resin seat and cockpitfron panel cover left (I think this was once a Cutting Edge set) which I use for my cockpit.
Painting is straightforward, semigloss grey with a decent oil paint wash.
Regards,
Sebastian
Lots of nice entries here, I am still catching up all old posts to be up to date
!@ Jonathan: the Mitchell is nice! I did not know that Revell once issued a B-25 in that scale! The grey box is cool, some say that they grey boxes indicate the barbarous decade of Revell kits...
Some progress pics from my F-104G.
I have a resin seat and cockpitfron panel cover left (I think this was once a Cutting Edge set) which I use for my cockpit.
Painting is straightforward, semigloss grey with a decent oil paint wash.
Regards,
Sebastian
JClapp
#259
Joined: October 23, 2011
KitMaker: 2,265 posts
AeroScale: 1,715 posts
Posted: Wednesday, April 03, 2013 - 08:11 AM UTC
Quoted Text
selfcontainment of a Jack Russel terrier ...
huehuehue

Jessie_C
Joined: September 03, 2009
KitMaker: 6,965 posts
AeroScale: 6,247 posts
Posted: Wednesday, April 03, 2013 - 08:17 AM UTC
Quoted Text
I did not know that Revell once issued a B-25 in that scale! The grey box is cool, some say that they grey boxes indicate the barbarous decade of Revell kits...
Most of the Revell 1/144 kits from that era originated with Crown, and are now in the hands of Minicraft.


So you have 3 choices of a kit with the same plastic

JClapp
#259
Joined: October 23, 2011
KitMaker: 2,265 posts
AeroScale: 1,715 posts
Posted: Wednesday, April 03, 2013 - 08:54 AM UTC
I havent looked at a recent Minicraft B-25 kit, I hope the tooling has not worn down too much since 1988, which is the (C) date on the Revell box.
The provided Decal sheet is total crap, I wont be needing it fortunately.
The provided Decal sheet is total crap, I wont be needing it fortunately.
epshifty
Joined: August 05, 2011
KitMaker: 376 posts
AeroScale: 348 posts
Posted: Wednesday, April 03, 2013 - 09:49 AM UTC
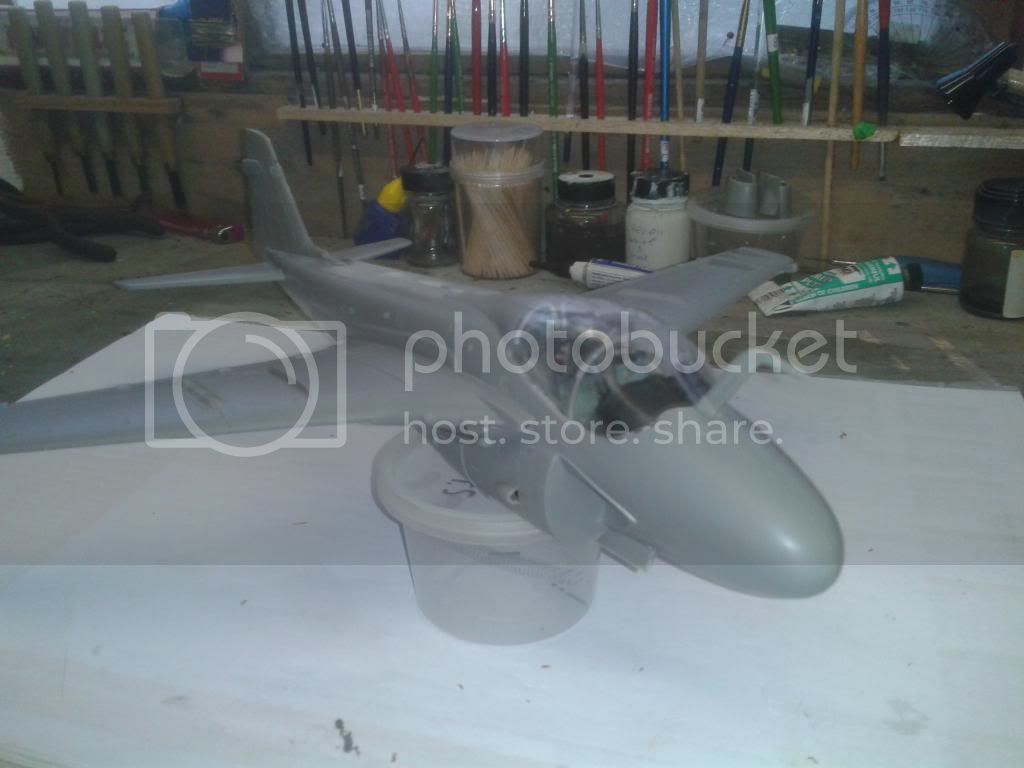
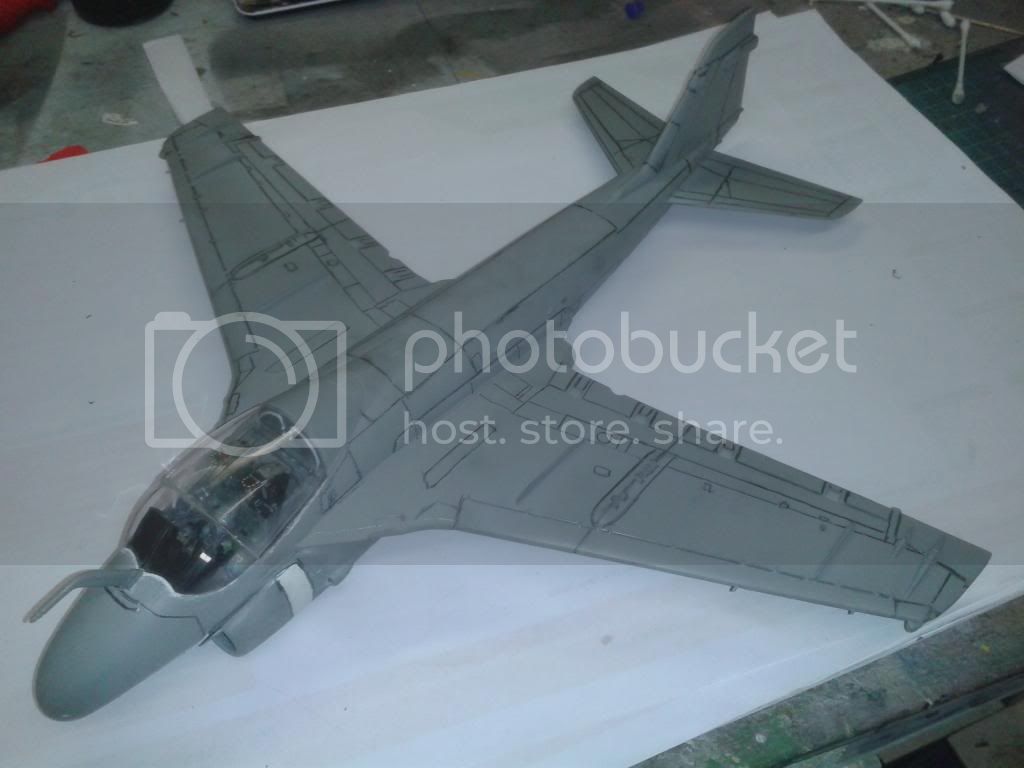
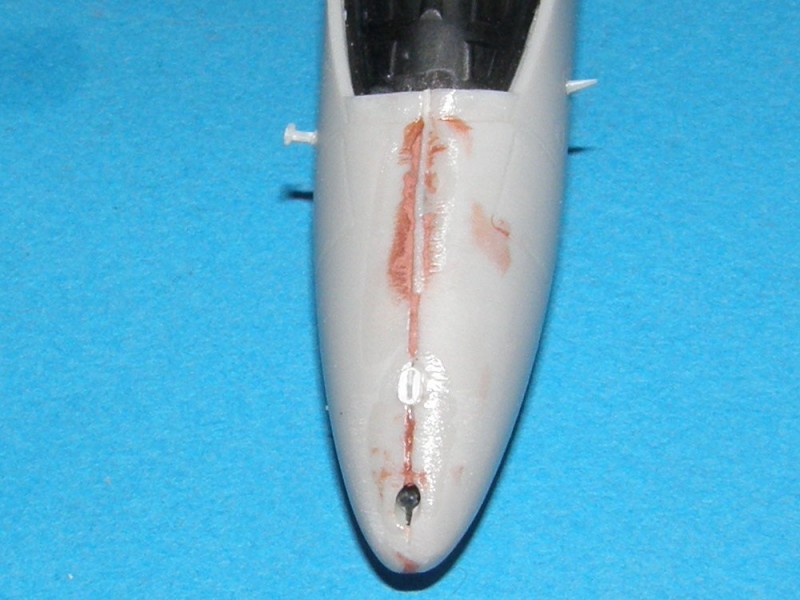
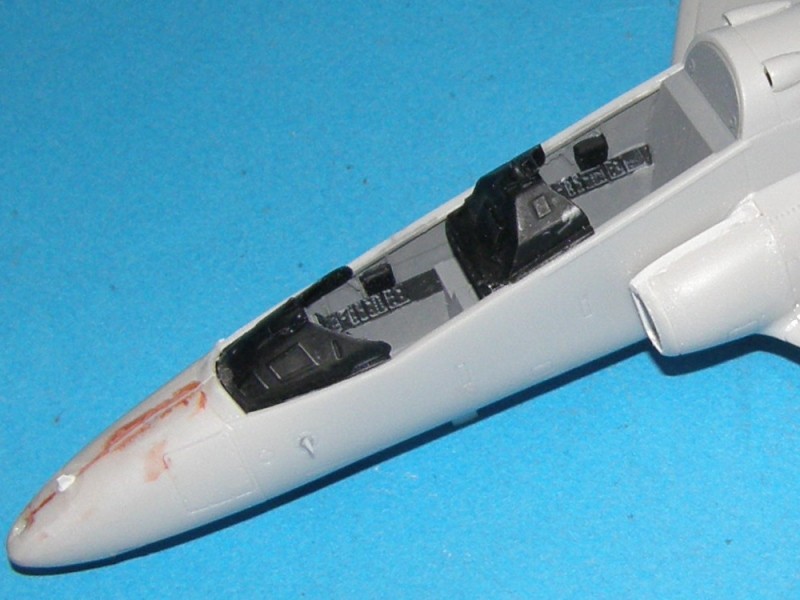
Some more progress with the A6 . Iv done the filling and sanding also got it primed and pre shaded .. The white area is where the boarding ladder should go but it was missing from the kit so i have had to fill it ...

drabslab
Joined: September 28, 2004
KitMaker: 2,186 posts
AeroScale: 1,587 posts
Posted: Wednesday, April 03, 2013 - 08:00 PM UTC
Quoted Text
Some more progress with the A6 . Iv done the filling and sanding also got it primed and pre shaded .. The white area is where the boarding ladder should go but it was missing from the kit so i have had to fill it ...
That A6 is looking very nice!
And the large canopy will allow for the hard work on the cockpit to remain visible too.
FAUST
#130
Joined: June 07, 2002
KitMaker: 8,797 posts
AeroScale: 190 posts
Posted: Friday, April 05, 2013 - 01:26 AM UTC
Ola people
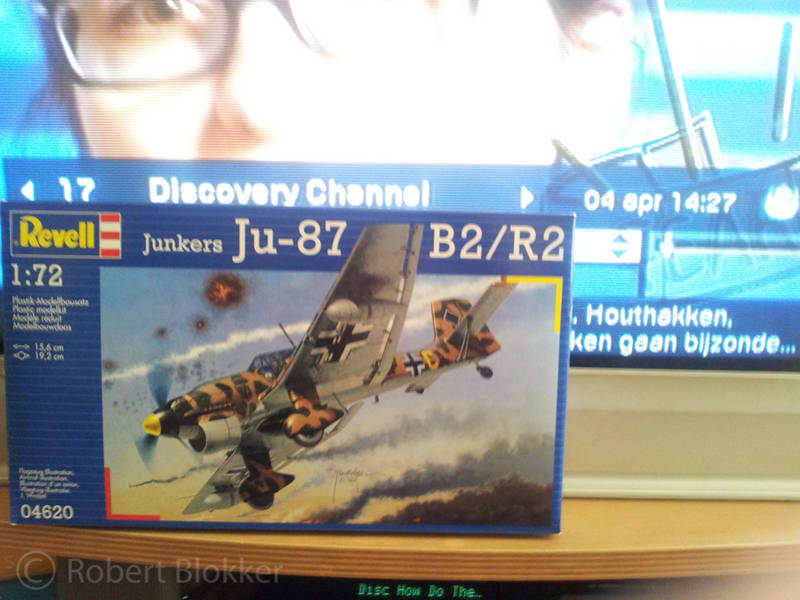
Well yesterday I started on my Stuka. And I have the obligatory starting pic with date
And I started to add some ribs on the interior as I read that this area was serious lacking in detail.
I also borrowed a book from an uncle of me about the Stuka. Where I of course found out that what I scratched did not look like the real thing at all. But Not much will be visible in the end so I'll leave it at that.

More to follow soon.
Any feedback is appreciated.
With friendly greetz
Robert Blokker
Well yesterday I started on my Stuka. And I have the obligatory starting pic with date
And I started to add some ribs on the interior as I read that this area was serious lacking in detail.
I also borrowed a book from an uncle of me about the Stuka. Where I of course found out that what I scratched did not look like the real thing at all. But Not much will be visible in the end so I'll leave it at that.
More to follow soon.
Any feedback is appreciated.
With friendly greetz
Robert Blokker
Jessie_C
Joined: September 03, 2009
KitMaker: 6,965 posts
AeroScale: 6,247 posts
Posted: Friday, April 05, 2013 - 06:31 AM UTC
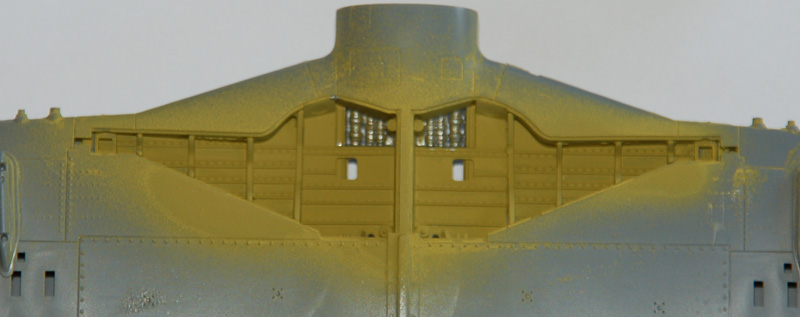
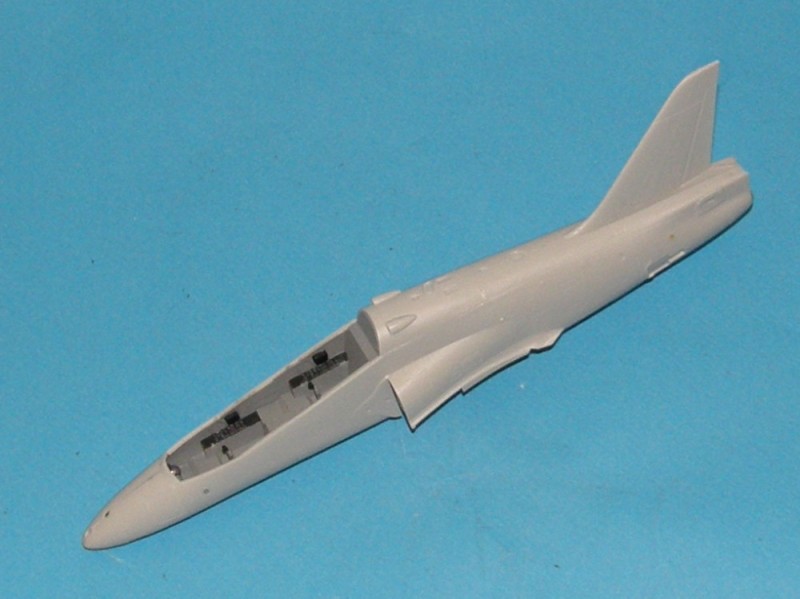
The intakes and many of the fiddly bits are on the Goshawk. The fit is less than spectacular in places.

The instructions called for a hole to be opened up on the top of the nose so part B56 could fit in. This would have been nice if B56 existed. In the end I had to make a replacement out of a couple of pieces of card.
The nose didn't fit together very well. This may have been the result of all the lead shot I crammed in there.
I'll need to do a lot of filling around the intakes and wing roots. This one was very tight while the opposite side was sloppy. I had to trrim off the mounting tabs and sand both the wing and the intake to make it slip into place. This tells me that the wing didn't fit exactly on the centreline the way it should have.

The bottoms of the intakes are also in dire need of shimming, filling and sanding.
On the bottom of the nose is supposed to be a spot for part B16. Except that part B16 had a huge plinth on the bottom, and no corresponding hole to go into. I had to shave most of it off before it looked right.

The nose wheel doors are made to be posed open, even though most pictures I've seen have them closed. I trimmed the mounting pegs off and glued them to their respective fuselage halves. Their fit is terrible, and I had to shim the centreline in order to close the resulting gap. In hindsight, I should have cut the nose doors off the closed door piece instead. Or maybe I should have followed the insttructions and left them open.
This kit, nice as it is, cannot be recommended to beginners.
The instructions called for a hole to be opened up on the top of the nose so part B56 could fit in. This would have been nice if B56 existed. In the end I had to make a replacement out of a couple of pieces of card.
The nose didn't fit together very well. This may have been the result of all the lead shot I crammed in there.
I'll need to do a lot of filling around the intakes and wing roots. This one was very tight while the opposite side was sloppy. I had to trrim off the mounting tabs and sand both the wing and the intake to make it slip into place. This tells me that the wing didn't fit exactly on the centreline the way it should have.
The bottoms of the intakes are also in dire need of shimming, filling and sanding.
On the bottom of the nose is supposed to be a spot for part B16. Except that part B16 had a huge plinth on the bottom, and no corresponding hole to go into. I had to shave most of it off before it looked right.
The nose wheel doors are made to be posed open, even though most pictures I've seen have them closed. I trimmed the mounting pegs off and glued them to their respective fuselage halves. Their fit is terrible, and I had to shim the centreline in order to close the resulting gap. In hindsight, I should have cut the nose doors off the closed door piece instead. Or maybe I should have followed the insttructions and left them open.
This kit, nice as it is, cannot be recommended to beginners.

SuperSandaas

Joined: October 23, 2012
KitMaker: 189 posts
AeroScale: 142 posts
Posted: Friday, April 05, 2013 - 07:53 AM UTC
A lot of great builds, interesting to see all the different eras and scales people choose.

FAUST
#130
Joined: June 07, 2002
KitMaker: 8,797 posts
AeroScale: 190 posts
Posted: Friday, April 05, 2013 - 07:56 AM UTC
@ Jessica.
Starts to shape up nicely. Do you have to rescribe panellines where the two halfs of the body meet up? I see myself also with this problem in the near future on my Stuka. Any tricks on that?
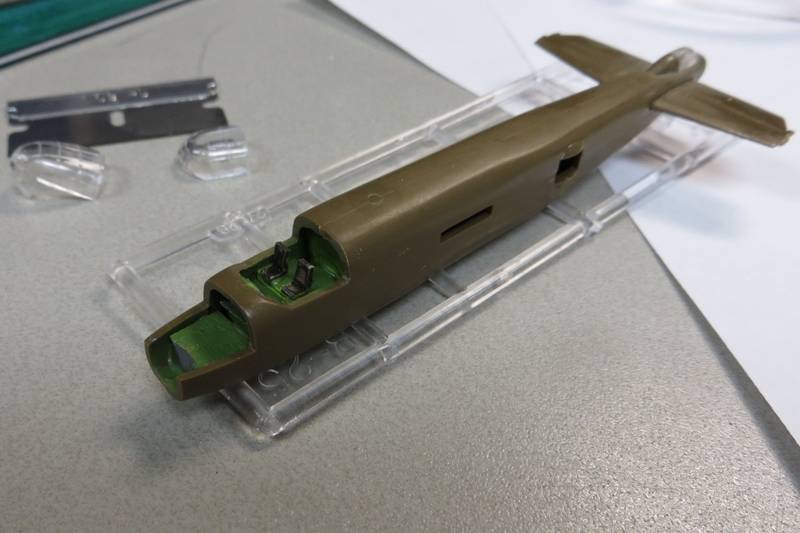
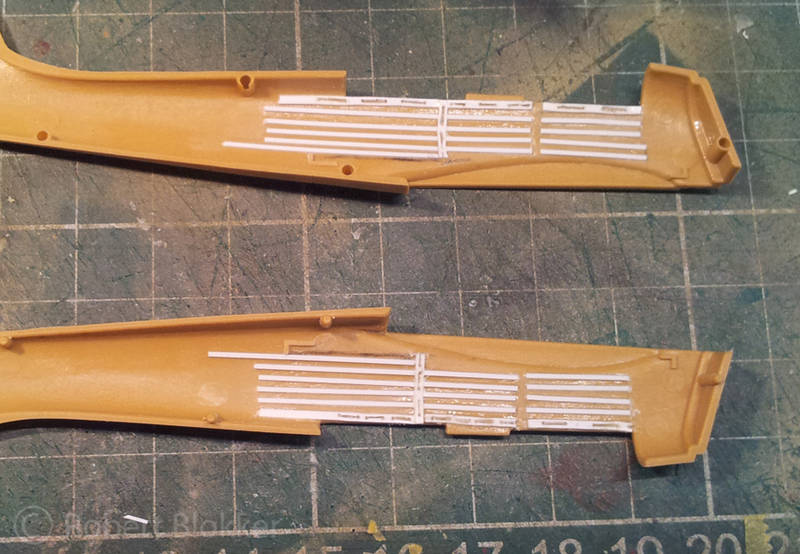
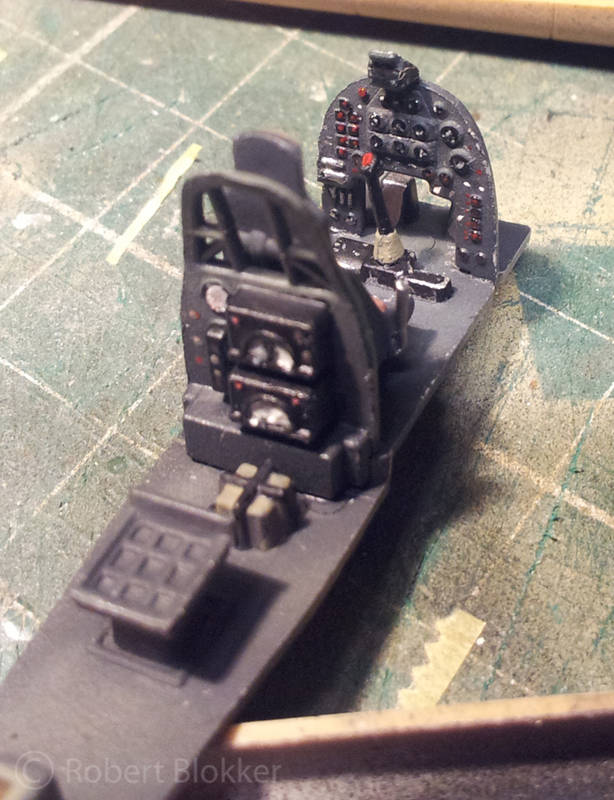
I got a bit of an update as well on my Stuka. I did most of the painting on my cockpit. I plan to do a black wash to bring out the details a bit more and some highlighting after that. The red white lines I saw in the book I borrowed and I saw in another modelers built that he did them red and white as well. Which I blindly copied and I have no clue if this is correct. I painted the cockpit details by hand. Not much is visible of it so it only needs to look "right"
Some bits, bobs and doodads on the interior walls. The Revell instructions told me to paint it Hell Grun. But the book mentioned the overall interior to be painted darkgrey.
I went with the color as described in the book. And all was colored in grey
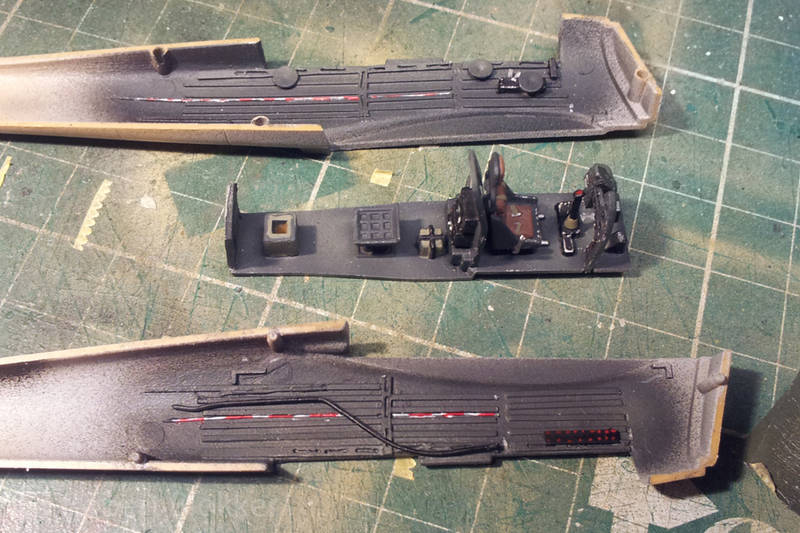
And this is the view when I button it up. You will see even less when the canopy is fitted on top of it. Even with the Pilots window opened.

So far I enjoy my first seriously built Aircraft. It goes together fine so far and the results are pretty satisfying so far as well. This afternoon I also spend a lot of time masking the canopy. And I primed it. In lightgrey. And When I peeled off the tape I put on the inside I saw nothing had leaked and was even more pleased with that. But then I also found out my inexperience in aircraft since the frame on the inside of the canopy now is lightgrey and will stay that way.
Starts to shape up nicely. Do you have to rescribe panellines where the two halfs of the body meet up? I see myself also with this problem in the near future on my Stuka. Any tricks on that?
I got a bit of an update as well on my Stuka. I did most of the painting on my cockpit. I plan to do a black wash to bring out the details a bit more and some highlighting after that. The red white lines I saw in the book I borrowed and I saw in another modelers built that he did them red and white as well. Which I blindly copied and I have no clue if this is correct. I painted the cockpit details by hand. Not much is visible of it so it only needs to look "right"
Some bits, bobs and doodads on the interior walls. The Revell instructions told me to paint it Hell Grun. But the book mentioned the overall interior to be painted darkgrey.
I went with the color as described in the book. And all was colored in grey
And this is the view when I button it up. You will see even less when the canopy is fitted on top of it. Even with the Pilots window opened.
So far I enjoy my first seriously built Aircraft. It goes together fine so far and the results are pretty satisfying so far as well. This afternoon I also spend a lot of time masking the canopy. And I primed it. In lightgrey. And When I peeled off the tape I put on the inside I saw nothing had leaked and was even more pleased with that. But then I also found out my inexperience in aircraft since the frame on the inside of the canopy now is lightgrey and will stay that way.
Jessie_C
Joined: September 03, 2009
KitMaker: 6,965 posts
AeroScale: 6,247 posts
Posted: Friday, April 05, 2013 - 08:03 AM UTC
Quoted Text
@ Jessica.
Starts to shape up nicely. Do you have to rescribe panel lines where the two halves of the body meet up? I see myself also with this problem in the near future on my Stuka. Any tricks on that?
There are actually very few on this model which go right across the top. One trick if they're straight is to gently rock a brand new Exacto blade over the line's location a few times. This creates a guide groove for your scriber. Another is to use a piece of Dymo label tape. You may wish to stick it on your arm to use up a little of the adhesive first. It may be trimmed down if it's too wide to fit where you need it to fit. Circles and ovals will require a flexible scribing template.
 |

WEB HOSTING BY


Copyright ©2021 AeroScale and Kitmaker Network, a subsidiary of Silver Star Enterprises
All Rights Reserved. Please read our Conditions of Use and Privacy Policy.
All Rights Reserved. Please read our Conditions of Use and Privacy Policy.