Air Campaigns
Want to start or join a group build? This is where to start.
Want to start or join a group build? This is where to start.
Hosted by Frederick Boucher, Michael Satin
OFFICIAL: Anything Goes Campaign
usethermite

Joined: February 14, 2012
KitMaker: 252 posts
AeroScale: 209 posts

Posted: Thursday, April 18, 2013 - 09:56 AM UTC
Hi, Robert. I could be wrong, but the black is the Alcad undercoat. JT

Jessie_C


Joined: September 03, 2009
KitMaker: 6,965 posts
AeroScale: 6,247 posts

Posted: Thursday, April 18, 2013 - 04:56 PM UTC
I return to the Goshawk and some serious filling around the intakes. This is the worst fitting part of the kit.
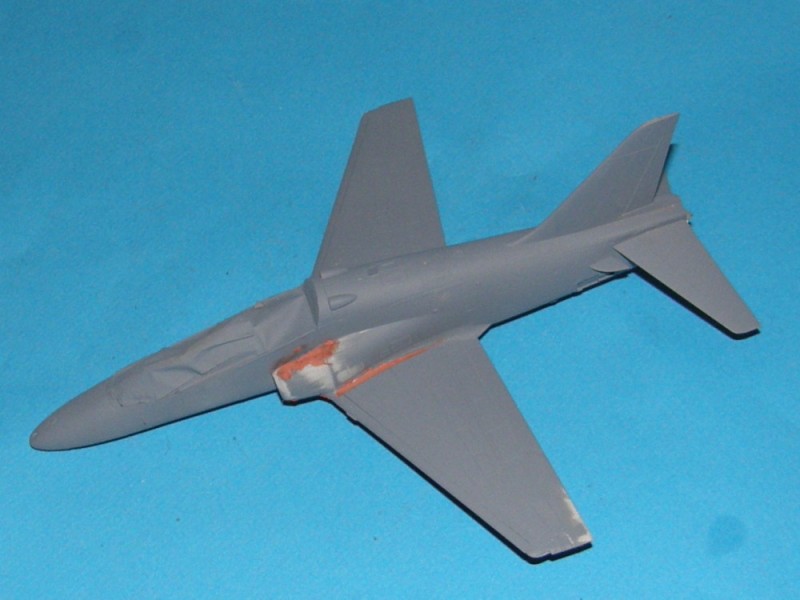
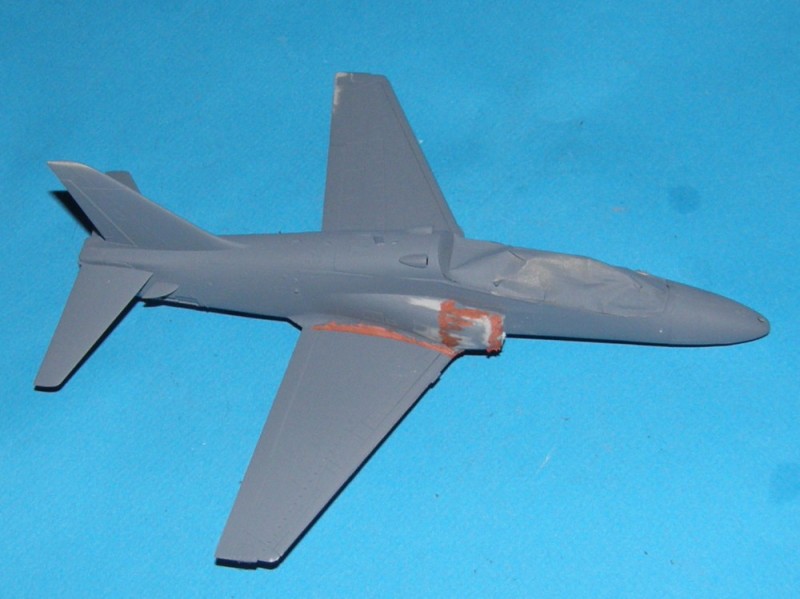
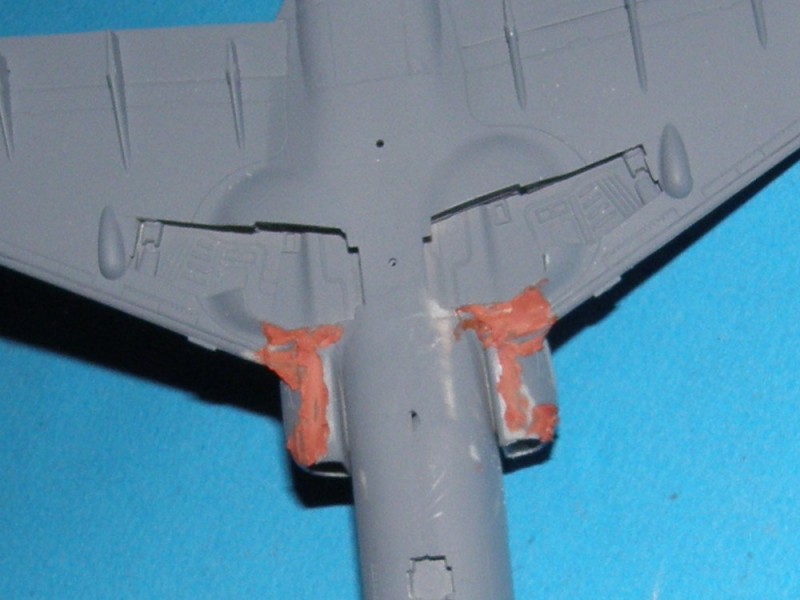
It's also a focal point on the model, so it really needs to be nice and smooth when it's finished.


It's also a focal point on the model, so it really needs to be nice and smooth when it's finished.

Middle_Franconian

Joined: January 02, 2011
KitMaker: 279 posts
AeroScale: 239 posts

Posted: Friday, April 19, 2013 - 05:58 AM UTC
Hi!
@ Robert: Good to see that you found a replacement!
@ Jessie: your Bondo sculpting is amazing! It´s too bad that a brand new kit requires such a treatment...
What bothers me most is the fact that when I do such a kit all the others in forums or magazines say
- nice fit
- no putty required
- built in three days etc.
So what I am doing wrong? At the moment it is the same case with my 1-72 Italeri Harrier Gr Mk. 3. But this is , I know...
Enough whining!
In the meantime I have finished the painting of my Starfighter. I painted the intakes in black, the antenna covers in sand and the nose in white with a dark green anti-glare panel.
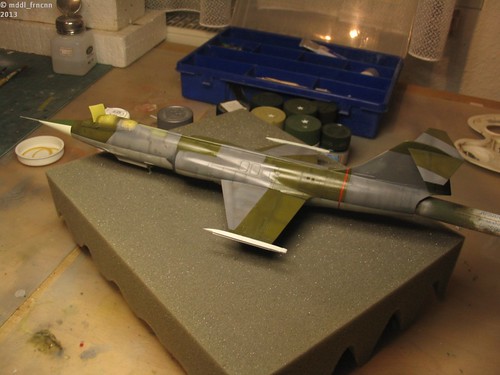
So the stage is prepared for the best part of the built: applying the superb decals from DACO:
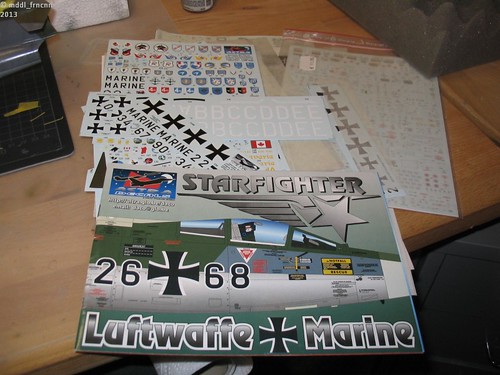
More update soon!
Regards,
Sebastian
@ Robert: Good to see that you found a replacement!
@ Jessie: your Bondo sculpting is amazing! It´s too bad that a brand new kit requires such a treatment...
What bothers me most is the fact that when I do such a kit all the others in forums or magazines say
- nice fit
- no putty required
- built in three days etc.
So what I am doing wrong? At the moment it is the same case with my 1-72 Italeri Harrier Gr Mk. 3. But this is
 , I know...
Enough whining!
In the meantime I have finished the painting of my Starfighter. I painted the intakes in black, the antenna covers in sand and the nose in white with a dark green anti-glare panel.

So the stage is prepared for the best part of the built: applying the superb decals from DACO:

More update soon!
Regards,
Sebastian

SaxonTheShiba

Joined: February 01, 2009
KitMaker: 1,233 posts
AeroScale: 663 posts

Posted: Friday, April 19, 2013 - 12:27 PM UTC
Sebastian------Don't sweat it. Sometimes the kits "act differently" for different modellers. Your F-104 looks great.....good looking camo and nice shading under your clear coat. If it gave you problems we sure would not know it.
Jessica---Nice progress on the Hawk. Looks like the intakes didn't fit too well. Things to look forward to when I build mine at some point.
Regards, Ian
Jessica---Nice progress on the Hawk. Looks like the intakes didn't fit too well. Things to look forward to when I build mine at some point.
Regards, Ian
Posted: Friday, April 19, 2013 - 04:56 PM UTC
Looks great, Sebastian. Looking forward to see more.

Middle_Franconian

Joined: January 02, 2011
KitMaker: 279 posts
AeroScale: 239 posts

Posted: Friday, April 19, 2013 - 08:35 PM UTC
@ Ian: thanks for your comment! The Starfighter was easy to build. This is the 4th Hasegawa one so I already start to gain some experience with this kit.
@ Jesper: Thanks! I will post new pics soon!
@ Jesper: Thanks! I will post new pics soon!
ljames0874

Joined: August 15, 2012
KitMaker: 408 posts
AeroScale: 365 posts

Posted: Friday, April 19, 2013 - 09:10 PM UTC
@Sebastian - the Starfighter is looking amazing, have fun and take your time with the decals. I am at the same stage with the Lightning, and so far I've spent 3 days on decals, and I'm no where near half way yet! I've got the underside and the red top missiles done, each missile had 8 seperate decals 


Middle_Franconian

Joined: January 02, 2011
KitMaker: 279 posts
AeroScale: 239 posts

Posted: Saturday, April 20, 2013 - 09:41 PM UTC
@ Lee: your Lightning is looking great! Blu Tac (or UHU Patafix here in Germany) is my weapon of choice since many years.
But what air force flew their Lightning in that camo? Sorry if I overread it in your previous posts
Looks like Saudi Arabia or Kuwait...
Are the decals part of the kit?
Regards,
Sebastian
But what air force flew their Lightning in that camo? Sorry if I overread it in your previous posts

Looks like Saudi Arabia or Kuwait...
Are the decals part of the kit?
Regards,
Sebastian
ljames0874

Joined: August 15, 2012
KitMaker: 408 posts
AeroScale: 365 posts

Posted: Sunday, April 21, 2013 - 02:35 AM UTC
@Sebastian - The RAF used that camo scheme in the mid to late 1970's - my Lightning is an F6, 11 Squadron RAF Binbrook 1978. The Camo scheme was also used in (west) Germany around that time. And yes, these decals came with the kit but they are by Cartograf, so they are as good as it gets.

Middle_Franconian

Joined: January 02, 2011
KitMaker: 279 posts
AeroScale: 239 posts

Posted: Sunday, April 21, 2013 - 06:53 AM UTC
Hi Lee,
so your Lightning gets the dark grey/green camo? Sorry, it looked brighter on the pictures to me.
BTW, the guys from RAF Binbrook left their marks on the Starfighter :
:
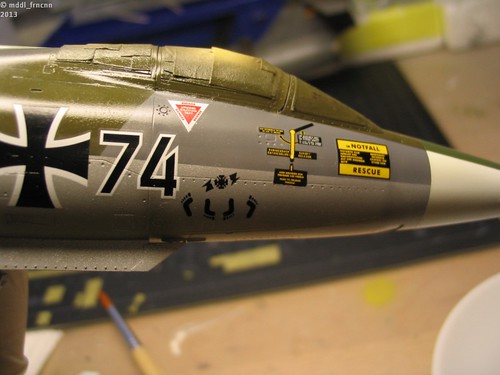
Regards,
Sebastian
so your Lightning gets the dark grey/green camo? Sorry, it looked brighter on the pictures to me.
BTW, the guys from RAF Binbrook left their marks on the Starfighter
 :
:
Regards,
Sebastian
Posted: Sunday, April 21, 2013 - 07:33 AM UTC
@ Jessica
That could almost be called resculpting what you are doing on that kit. But I bet it will all come out as it needs to be.
@ Sebastian
That is an amazing amount of decals you got there. Is it for 1 aircraft or is it several options rolled into 1 set?
You decal work looks really good by the way.
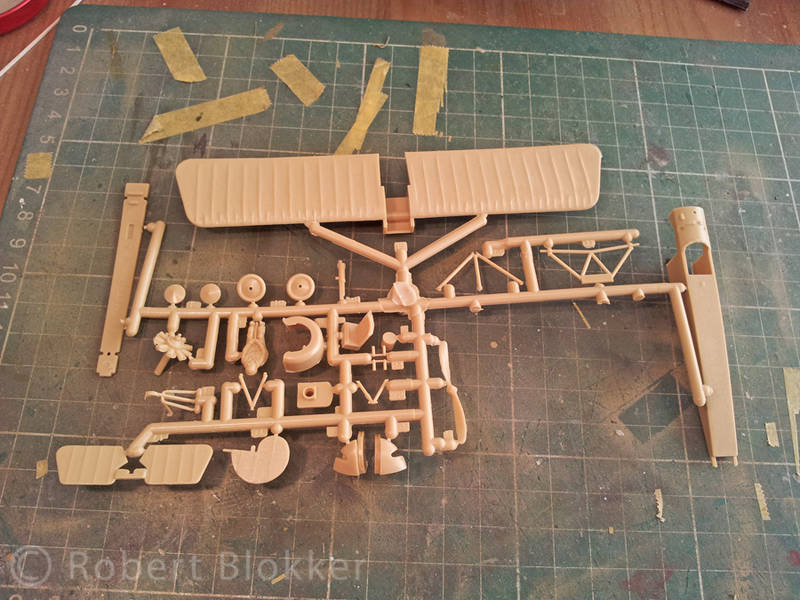
Ok this is what I'm up against.
A "massive" amount of parts.
A 1 page built instruction
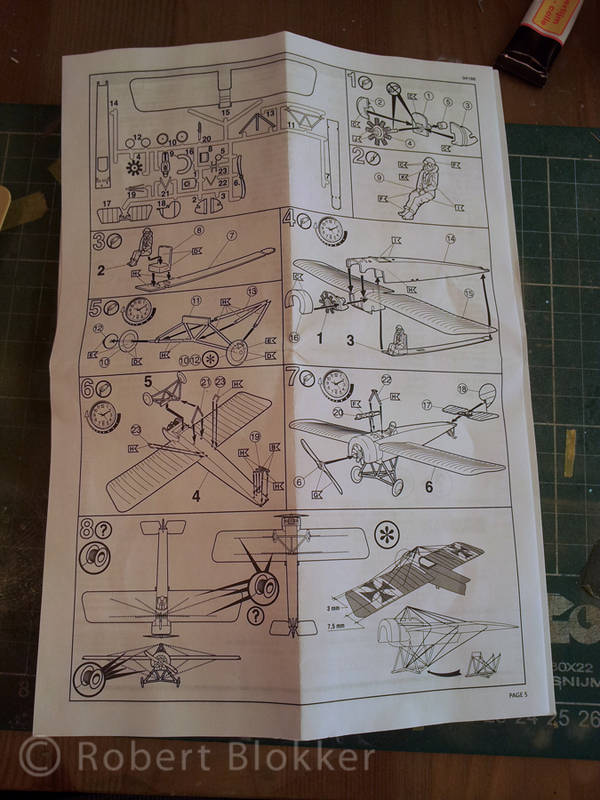
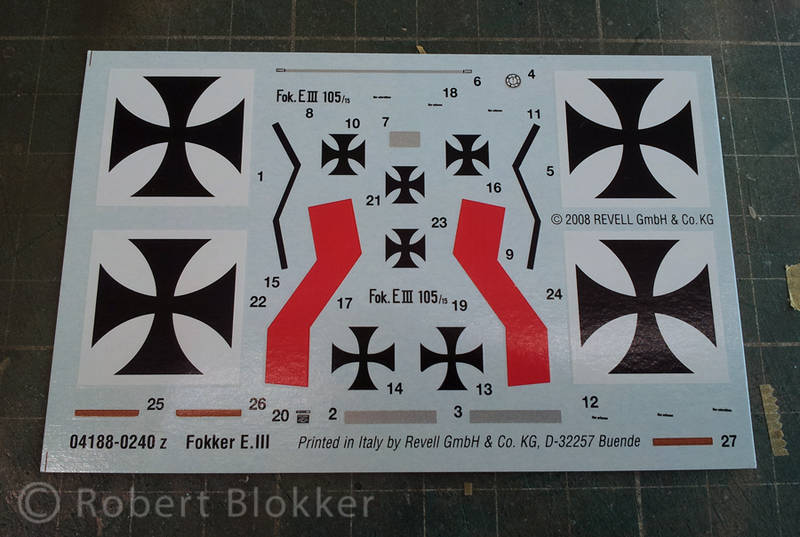
A 1 page paintinstruction of an E.III flown by Ernst Udet. Which I will follow because of a lack of reference materials and imagination.

And the decal sheet
At moment of writing I already cut and cleaned some parts and sprayed the interior bits in primer. More on that later.
That could almost be called resculpting what you are doing on that kit. But I bet it will all come out as it needs to be.
@ Sebastian
That is an amazing amount of decals you got there. Is it for 1 aircraft or is it several options rolled into 1 set?
You decal work looks really good by the way.
Ok this is what I'm up against.
A "massive" amount of parts.

A 1 page built instruction

A 1 page paintinstruction of an E.III flown by Ernst Udet. Which I will follow because of a lack of reference materials and imagination.

And the decal sheet

At moment of writing I already cut and cleaned some parts and sprayed the interior bits in primer. More on that later.
Posted: Sunday, April 21, 2013 - 10:12 AM UTC
usethermite

Joined: February 14, 2012
KitMaker: 252 posts
AeroScale: 209 posts

Posted: Sunday, April 21, 2013 - 10:38 AM UTC
Looking good, Dave. JT
Posted: Sunday, April 21, 2013 - 11:11 AM UTC
Dave, great work so far on the Intruder.
Robert, watching with interest. I've been thinking about buying that kit for while so I'll be keen to see how it turns out.
Robert, watching with interest. I've been thinking about buying that kit for while so I'll be keen to see how it turns out.
raypalmer

Joined: March 29, 2010
KitMaker: 1,151 posts
AeroScale: 985 posts

Posted: Sunday, April 21, 2013 - 01:54 PM UTC
The build that would never end has ended.
Complete. Although when I find a fat cat whisker I'll install the antenna.


Complete. Although when I find a fat cat whisker I'll install the antenna.


ljames0874

Joined: August 15, 2012
KitMaker: 408 posts
AeroScale: 365 posts

Posted: Sunday, April 21, 2013 - 07:43 PM UTC
@Sebastian - yes that pic did come out a bit too light, it is much darker in real life - more pics later today.
Nito74

Joined: March 04, 2008
KitMaker: 5,386 posts
AeroScale: 635 posts

Posted: Monday, April 22, 2013 - 02:39 AM UTC
It's been over a month since I've checked this thread... sorry.
Here's my update on the Amodel Su-15TM
(this kit is awful... I'm seriously considering starting a new kit or getting a Trumpeter Su-15.. )
Cockpit base colours
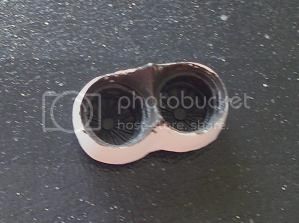
The base of the cockpit will serve as the wheelbay for the front wheel, but it doesn't fit .. another A-model chapter..
Here's my update on the Amodel Su-15TM
(this kit is awful... I'm seriously considering starting a new kit or getting a Trumpeter Su-15.. )
Cockpit base colours


The base of the cockpit will serve as the wheelbay for the front wheel, but it doesn't fit .. another A-model chapter..
ljames0874

Joined: August 15, 2012
KitMaker: 408 posts
AeroScale: 365 posts

Posted: Monday, April 22, 2013 - 03:51 AM UTC
Phew! I've been decalling for 5 days now, hopefully tomorrow will be the last day! 


Posted: Monday, April 22, 2013 - 09:10 AM UTC
@ Dave
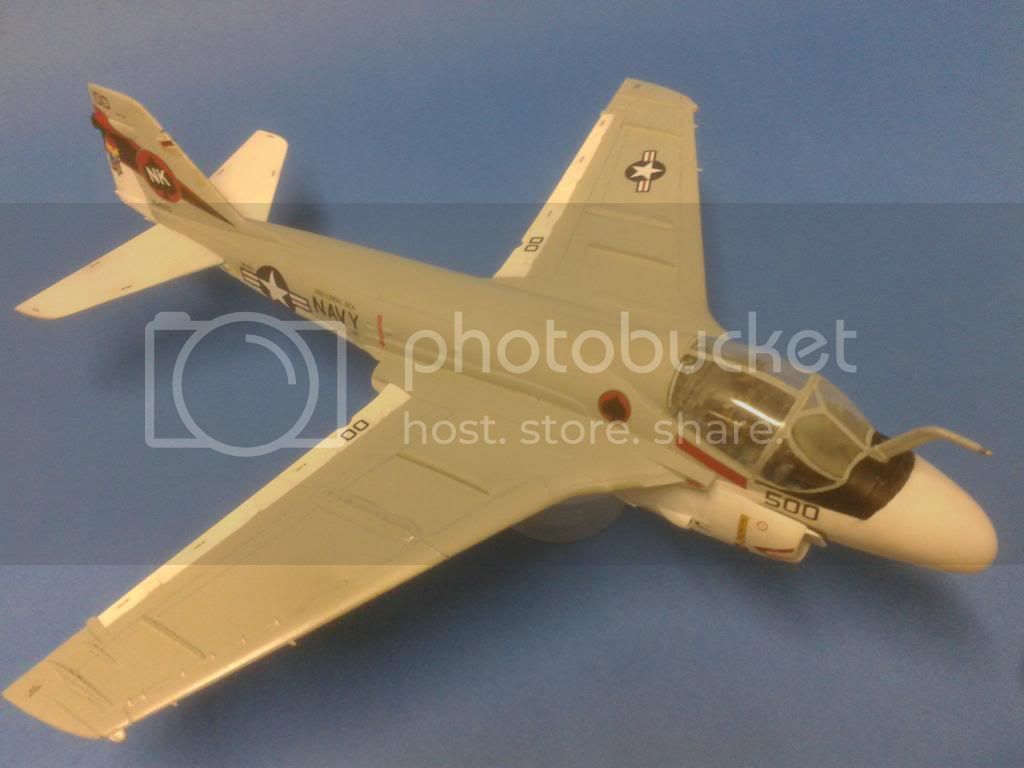
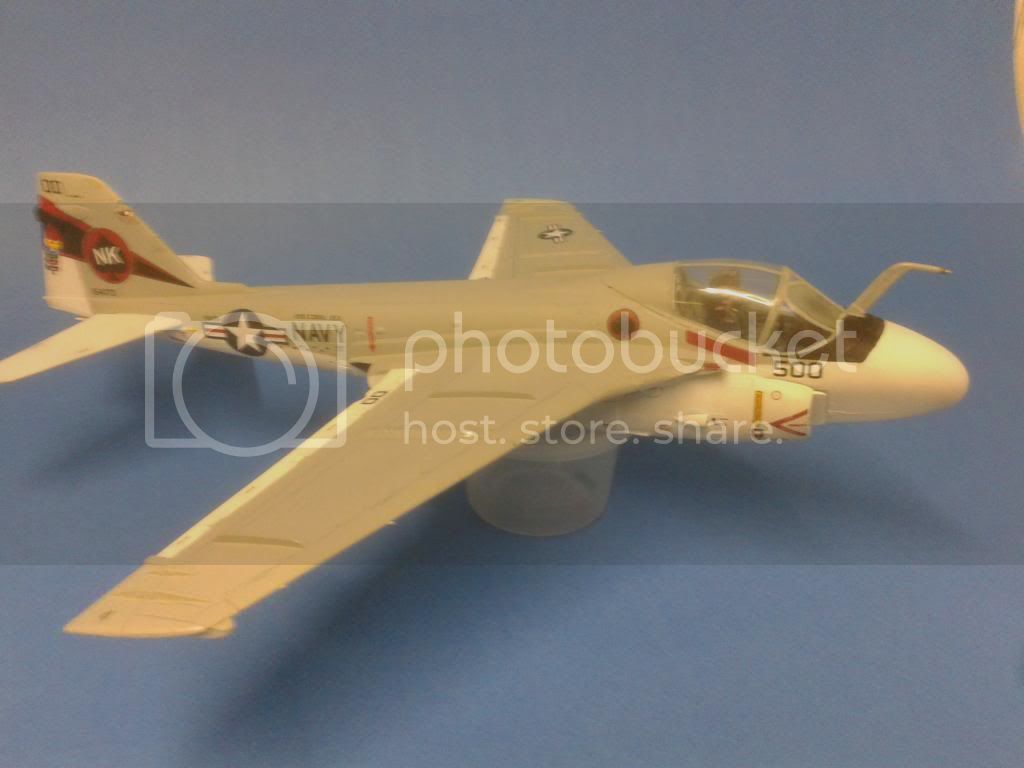
Wow that intruder starts to look good with all the decals on it. Pretty neat aircraft.
@ Richard
Congrats on finishing this kit. odd looking plane but really well painted.
@ John
Pitty to hear that kit is not so good. Never heard of Amodel is it a brand to watch out for?
@ Lee James
5 days of decalling. That must be an epic amount of decals. Looks good though. Great work.
@ Stephen W.
The E.III is a fun little kit. Everything fits together well. Little bit of flash to clean up and 4 pushout marks under the wings and a couple of those on the tailsections and that is about it.
Another Fokker E.III update
I assembled the engine section, primed it and then painted it in 2 shades of light metallic colors. Gave the rotation engine a wash with pure black.
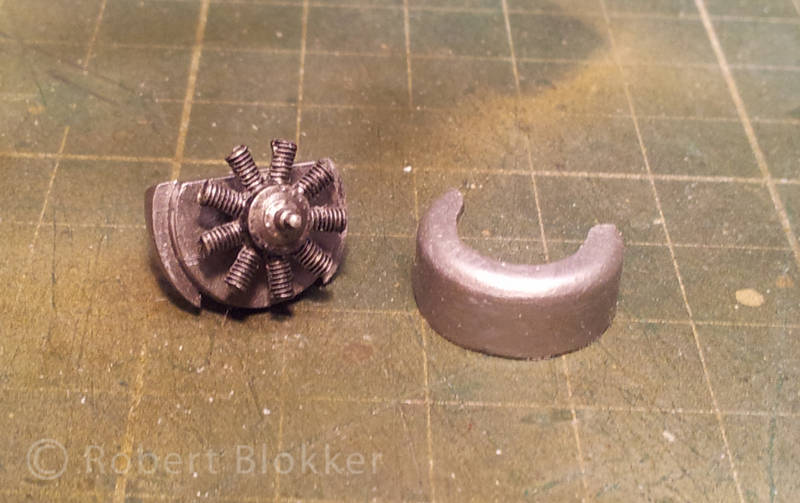
You could also look into the cockpit almost all the way up to the nose. Quite an empty hole. So I decided to at least block part of that view with something that kinda looks like a instrument panel
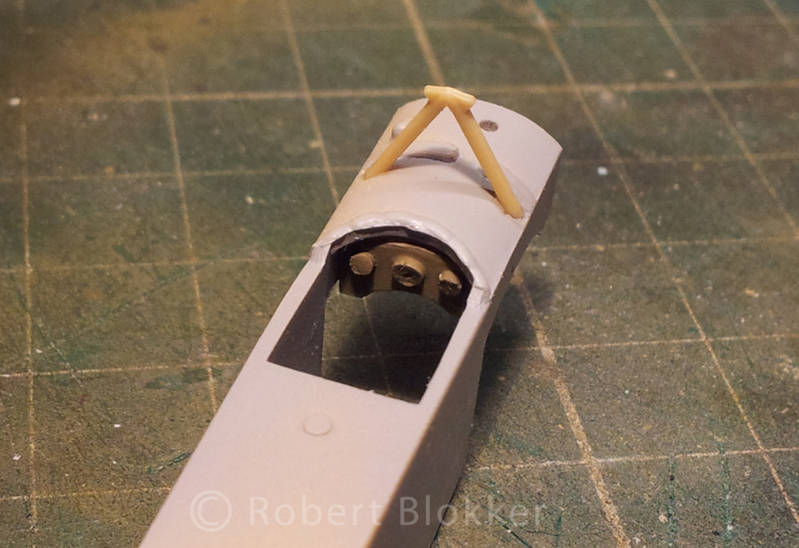
And this is the mainparts being dryfitted. Are the fuselage halfs just in front of the wing. A vertical line in the fuselage just under the hull and the bottom of the fuselage. The wings fit so snug against the fuselage that probably the plastic cement fills that perfectly.

It is that I decided that I want to airbrush the aircraft. If I opted to brushpaint it it would almost be ready for decals by now. This kit can be sneezed together.
More to follow soon. Tomorrow I get my long awaited white Tamiya acrylic so I can do some paintworks on this kit.
Wow that intruder starts to look good with all the decals on it. Pretty neat aircraft.
@ Richard
Congrats on finishing this kit. odd looking plane but really well painted.
@ John
Pitty to hear that kit is not so good. Never heard of Amodel is it a brand to watch out for?
@ Lee James
5 days of decalling. That must be an epic amount of decals. Looks good though. Great work.
@ Stephen W.
The E.III is a fun little kit. Everything fits together well. Little bit of flash to clean up and 4 pushout marks under the wings and a couple of those on the tailsections and that is about it.
Another Fokker E.III update
I assembled the engine section, primed it and then painted it in 2 shades of light metallic colors. Gave the rotation engine a wash with pure black.

You could also look into the cockpit almost all the way up to the nose. Quite an empty hole. So I decided to at least block part of that view with something that kinda looks like a instrument panel

And this is the mainparts being dryfitted. Are the fuselage halfs just in front of the wing. A vertical line in the fuselage just under the hull and the bottom of the fuselage. The wings fit so snug against the fuselage that probably the plastic cement fills that perfectly.

It is that I decided that I want to airbrush the aircraft. If I opted to brushpaint it it would almost be ready for decals by now. This kit can be sneezed together.
More to follow soon. Tomorrow I get my long awaited white Tamiya acrylic so I can do some paintworks on this kit.
Nito74

Joined: March 04, 2008
KitMaker: 5,386 posts
AeroScale: 635 posts

Posted: Monday, April 22, 2013 - 02:03 PM UTC
Quoted Text
@ Dave
Wow that intruder starts to look good with all the decals on it. Pretty neat aircraft.
@ Richard
Congrats on finishing this kit. odd looking plane but really well painted.
@ John
Pitty to hear that kit is not so good. Never heard of Amodel is it a brand to watch out for?
@ Lee James
5 days of decalling. That must be an epic amount of decals. Looks good though. Great work.
@ Stephen W.
The E.III is a fun little kit. Everything fits together well. Little bit of flash to clean up and 4 pushout marks under the wings and a couple of those on the tailsections and that is about it.
Another Fokker E.III update
I assembled the engine section, primed it and then painted it in 2 shades of light metallic colors. Gave the rotation engine a wash with pure black.
You could also look into the cockpit almost all the way up to the nose. Quite an empty hole. So I decided to at least block part of that view with something that kinda looks like a instrument panel
And this is the mainparts being dryfitted. Are the fuselage halfs just in front of the wing. A vertical line in the fuselage just under the hull and the bottom of the fuselage. The wings fit so snug against the fuselage that probably the plastic cement fills that perfectly.
It is that I decided that I want to airbrush the aircraft. If I opted to brushpaint it it would almost be ready for decals by now. This kit can be sneezed together.
More to follow soon. Tomorrow I get my long awaited white Tamiya acrylic so I can do some paintworks on this kit.
Nice metallic colour Robert !
A-Model, well they have quite a catalog with very unique and interesting subjects but the quality... I just built 3 A-model kits all had poor fitting, soft plastic, you might spent more time correcting and fixing than building & painting your kit...
In the last 7/8 years I've built maybe 3 A-Model kits, so I might have been unlucky picking those kits..
@Sebastian
Your Starfighter is looking great !!!

Jessie_C


Joined: September 03, 2009
KitMaker: 6,965 posts
AeroScale: 6,247 posts

Posted: Monday, April 22, 2013 - 03:35 PM UTC
Amodel is a limited run producer and therefore their kits must be expected to be rough and need more than a little TLC to build successfully. I've built several of them:


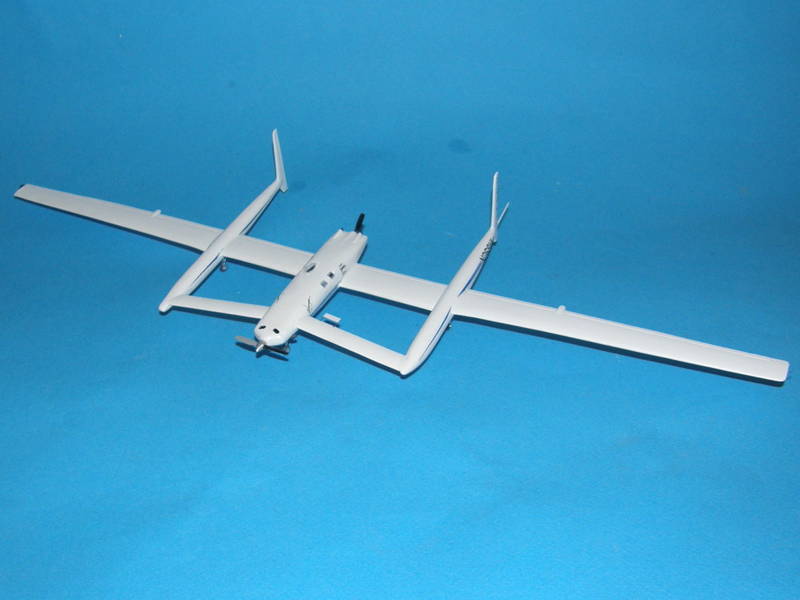
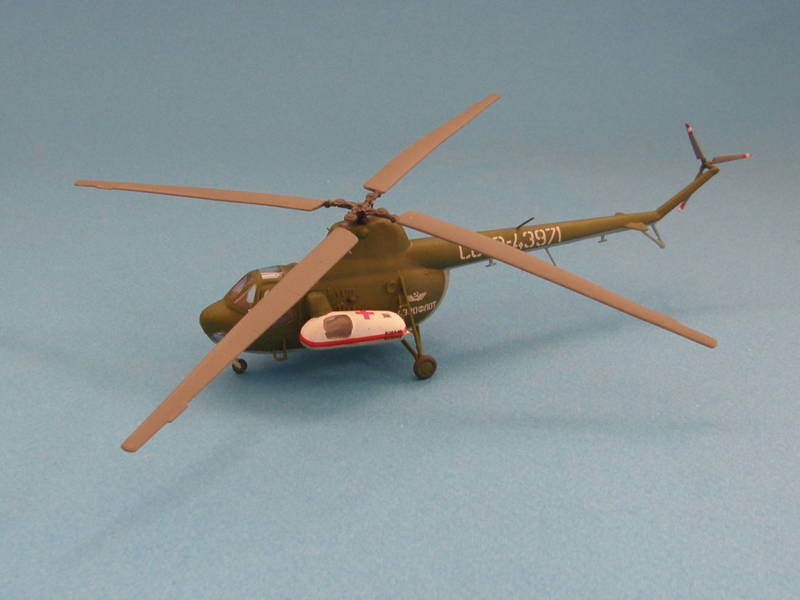
The plastic is soft, there is always flash and quite often the smaller parts need refining or replacing. All of this is par for the course when you're doing an Amodel kit. We put up with this because Amodel does subjects nobody else would ever touch. How many other model companies have a 1/72 Hughes Spruce Goose in their catalogue?


The plastic is soft, there is always flash and quite often the smaller parts need refining or replacing. All of this is par for the course when you're doing an Amodel kit. We put up with this because Amodel does subjects nobody else would ever touch. How many other model companies have a 1/72 Hughes Spruce Goose in their catalogue?
Nito74

Joined: March 04, 2008
KitMaker: 5,386 posts
AeroScale: 635 posts

Posted: Monday, April 22, 2013 - 03:59 PM UTC
Quoted Text
Amodel is a limited run producer and therefore their kits must be expected to be rough and need more than a little TLC to build successfully. I've built several of them:


The plastic is soft, there is always flash and quite often the smaller parts need refining or replacing. All of this is par for the course when you're doing an Amodel kit. We put up with this because Amodel does subjects nobody else would ever touch. How many other model companies have a 1/72 Hughes Spruce Goose in their catalogue?
Jessica, that Aeroflot IL-18 is great !!!
Really like that Mi-3
Posted: Monday, April 22, 2013 - 07:39 PM UTC
@ Jessica
Thanks for the info on A-model. That Aeroflot plane reminds me of a kit of an Aeroflot aircraft I got from my uncle when I was a kid. Lots of parts... horrible built instructions and the things I needed to do were way beyond my skills at that time... It never got finished.
To tell you the truth I actually thought that plenty manufacturers would have a spruce goose in their range. It is only one of the most iconic aircraft in the world. And a Spruce Goose in 1:72 makes a lot of sense since that way you can still store it in your house. But apparently I was wrong there. Nice builts by the way.
@ John
Thanks for the compliments on the metal colors. Pretty pleased with that as well.
I noticed I posted the same photo twice. Was not really paying attention yesterday. Sadly I can't change it anymore
So here is the missing pic
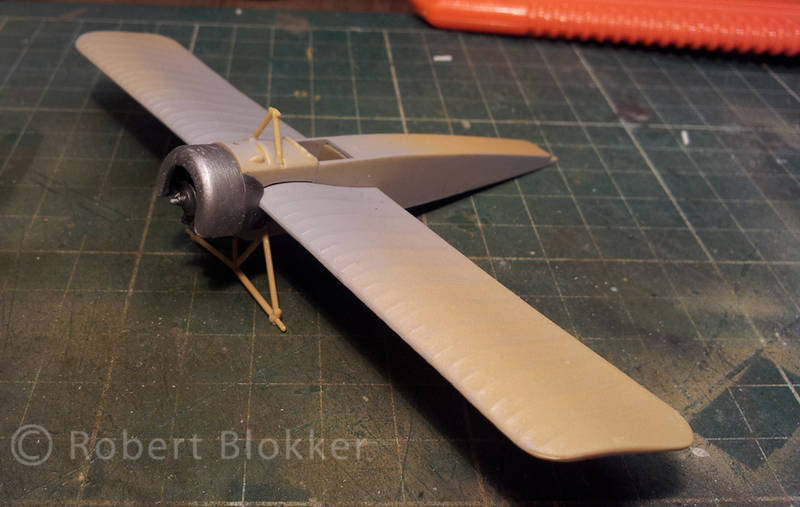


Middle_Franconian

Joined: January 02, 2011
KitMaker: 279 posts
AeroScale: 239 posts

Posted: Tuesday, April 23, 2013 - 06:20 AM UTC
Hi all,
@ Dave: Almost done! Your A-6 is looking great!
@ Richard: Your Vampire looks great! Congratulations!
@ Lee: Ok, now that camo looks familiar! I like the dayglo band!
@ Robert: Good progress on that little Eindecker.
Will post more pics of my project soon.
Regards,
Sebastian
@ Dave: Almost done! Your A-6 is looking great!
@ Richard: Your Vampire looks great! Congratulations!
@ Lee: Ok, now that camo looks familiar! I like the dayglo band!
@ Robert: Good progress on that little Eindecker.
Will post more pics of my project soon.
Regards,
Sebastian
Posted: Tuesday, April 23, 2013 - 09:19 AM UTC
@ Sebastian
Thanks a lot for the compliments.
Got some more pics of the works of today.
I added a bit more generic detail in the nose section like the ribs to the cockpit. It is not based on anything but it looks convincing enough.
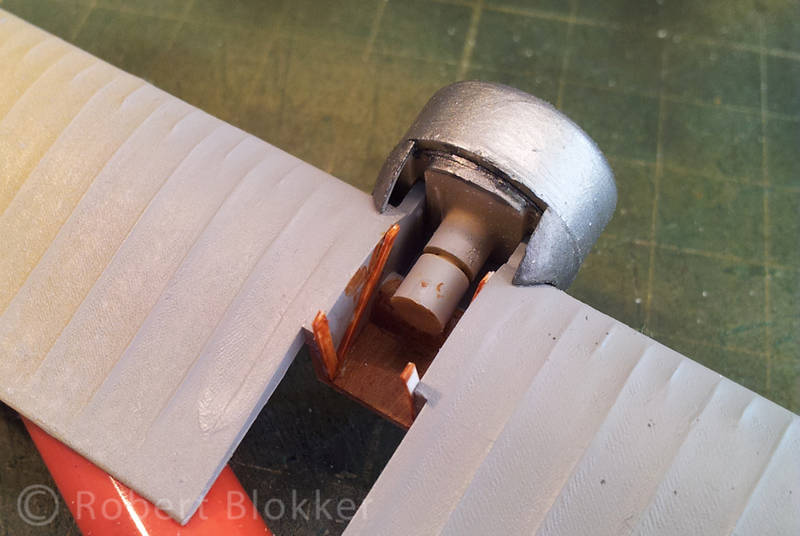
Instrument panel was painted and I added the leather padding around the cockpit-opening with tamiya masking tape
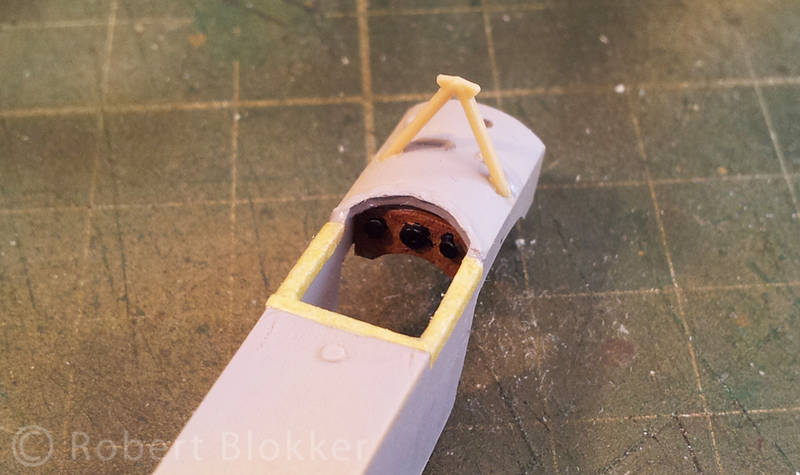
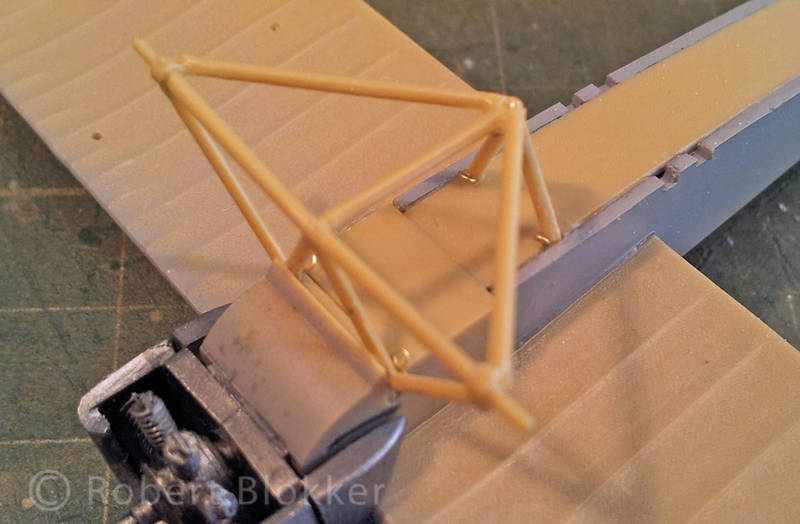
Did all the assembly bar the wheels. And on the landinggear I added 6 small rings from copperwire to which the rigging will be tied.
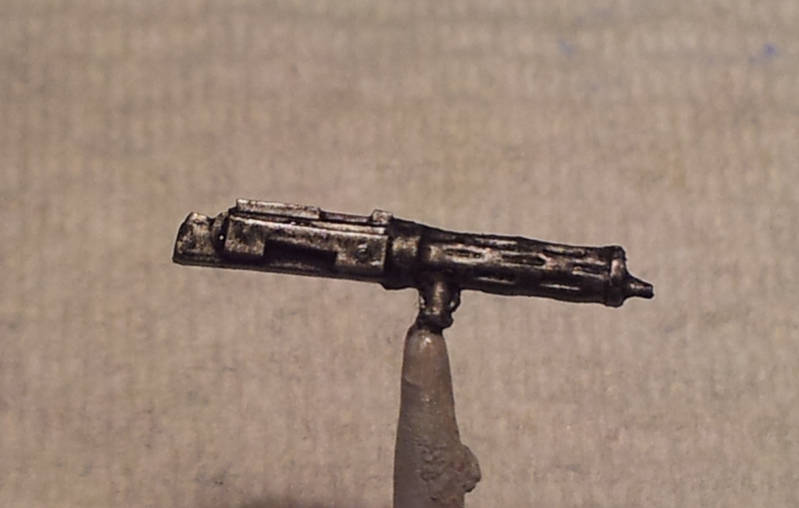
The machinegun had only detail on the cooling mantle and I added some details to the gun itself with evergreen. Painted in silver and a thick wash of black
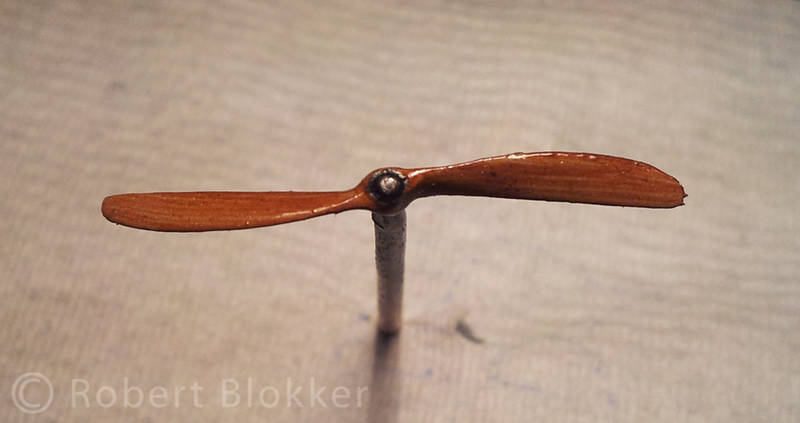
No laminated prop this time. Simply an sandcolored base with diluted burned Sienna oilpaint applied with an older brush to create the grain.
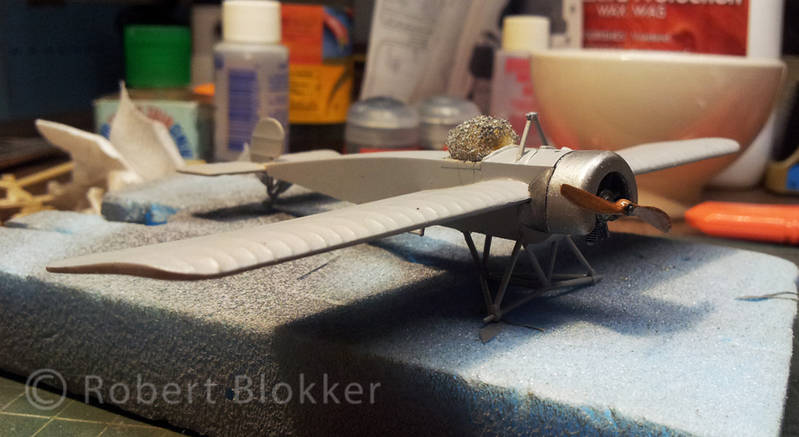
And with 95% of the crate assembled it went straight into the primer to receive it's colors.
Next update will show paint.
Thanks a lot for the compliments.
Got some more pics of the works of today.
I added a bit more generic detail in the nose section like the ribs to the cockpit. It is not based on anything but it looks convincing enough.

Instrument panel was painted and I added the leather padding around the cockpit-opening with tamiya masking tape

Did all the assembly bar the wheels. And on the landinggear I added 6 small rings from copperwire to which the rigging will be tied.

The machinegun had only detail on the cooling mantle and I added some details to the gun itself with evergreen. Painted in silver and a thick wash of black

No laminated prop this time. Simply an sandcolored base with diluted burned Sienna oilpaint applied with an older brush to create the grain.

And with 95% of the crate assembled it went straight into the primer to receive it's colors.

Next update will show paint.
 |


