Hi all:-H !
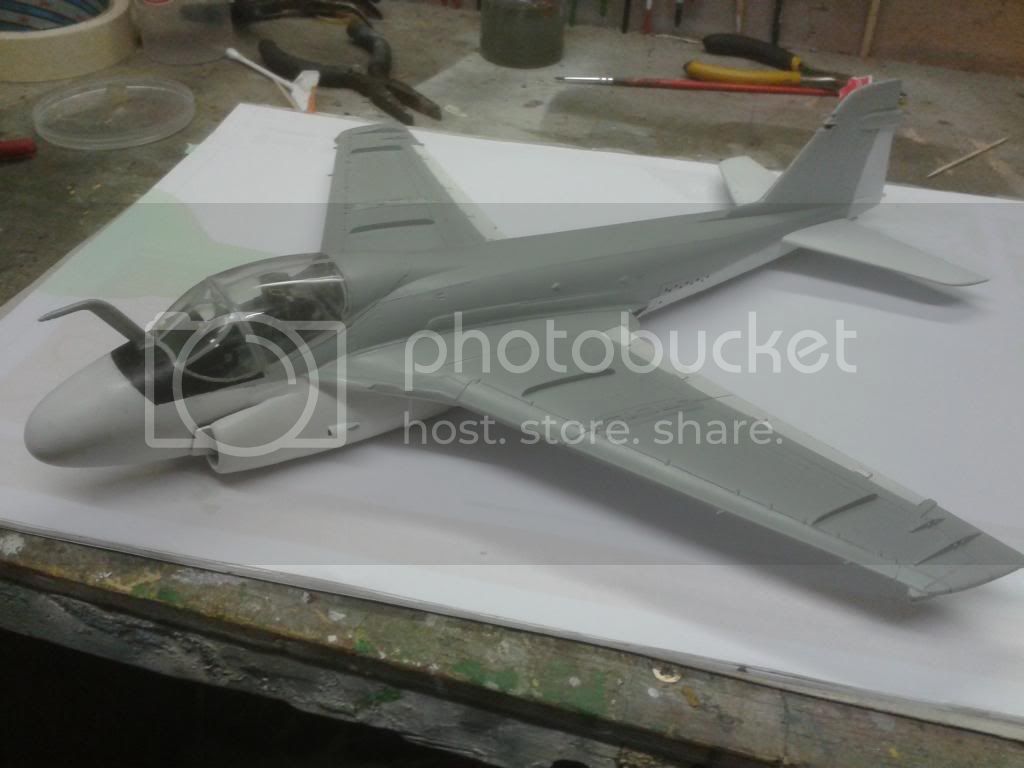
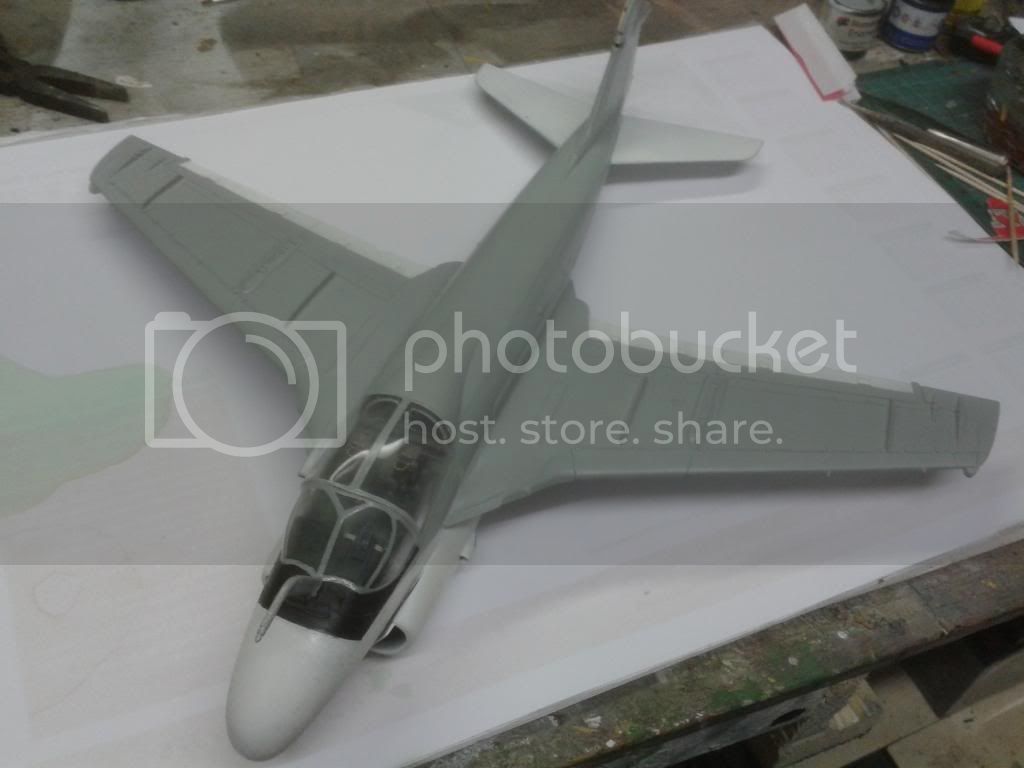
@ Dave: great progress on your A-6!
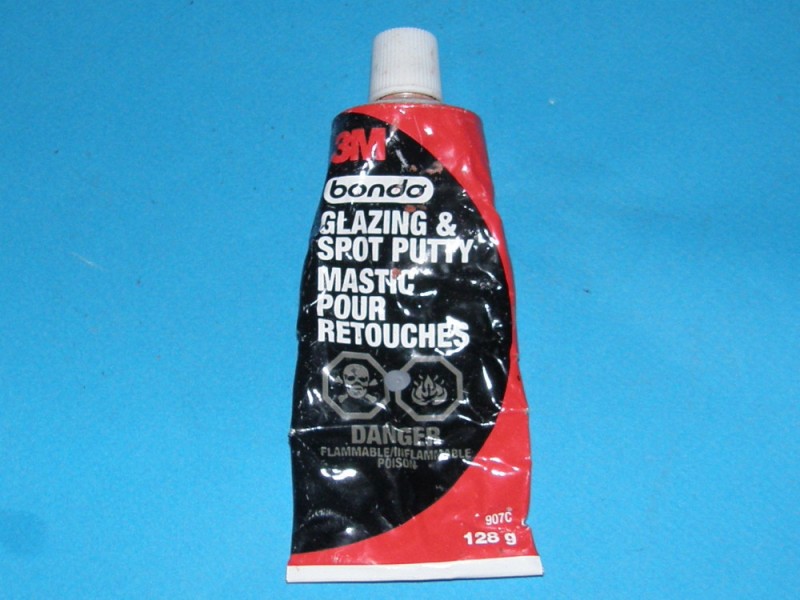
@ Jessie: the reddish substance you use for putty, what is this? Bondo putty?
@ Robert: the interior of your Stuka looks good! Hardto belive that it is 1:72!
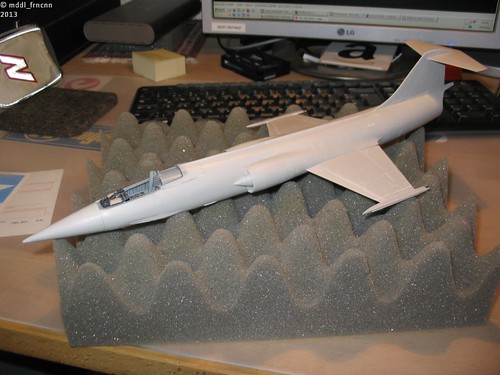
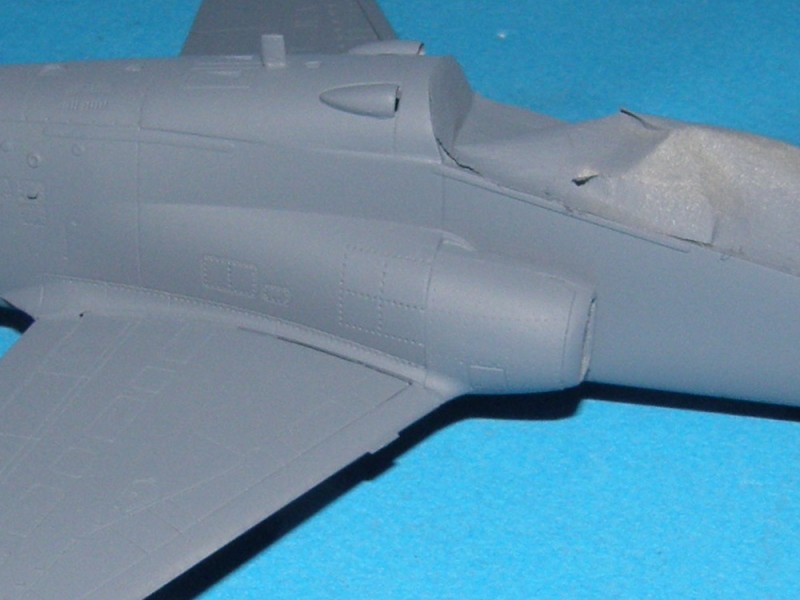
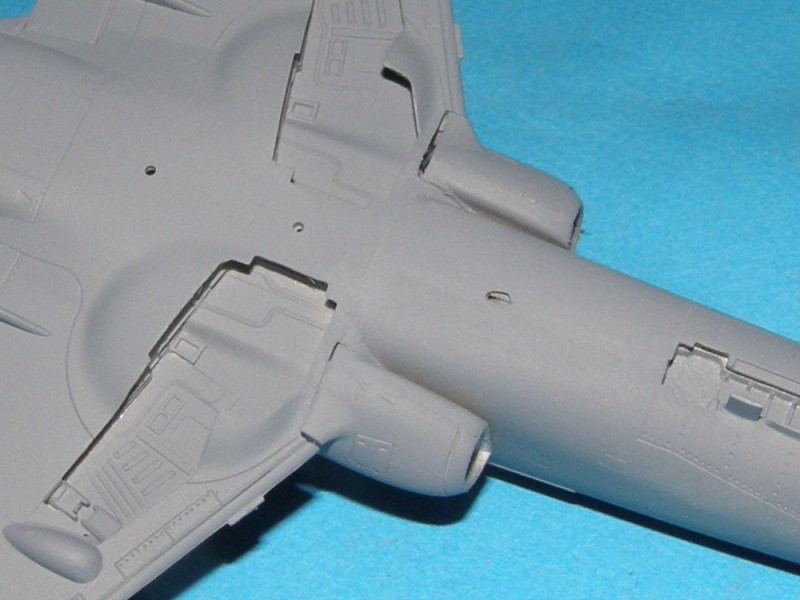
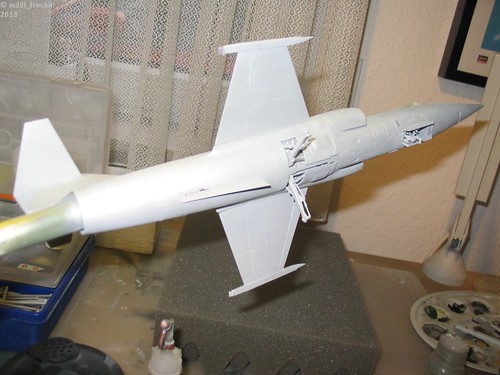
Glueing the fuselage starts.
This time I tried to use Superglue and accelerator (Kicker) whereever possible to speed up building. The advantages of the superglue:
+ dries rock-hard, easy to rescribe
+ thanks to the kicker you can immediately sand the surface
+ no problems with ghost seams
On the other side the disadvantages:
- the seam is not so resistant against pressure, this means it cracks more easily if you press too hard for example during excessive sanding. To avoid this, I try to use thin plastic cement from the inner side of the fuselage or at places where you can not see anything.
By the way, I use Zap-A-Gap products. One very thin and a thicker superglue.
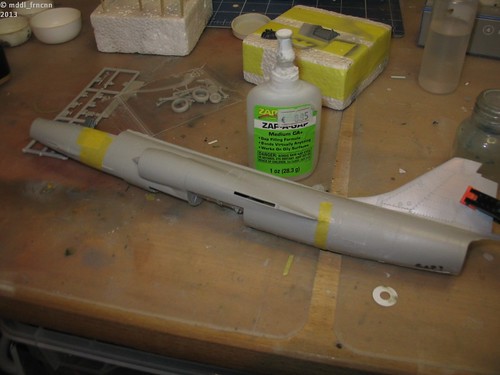
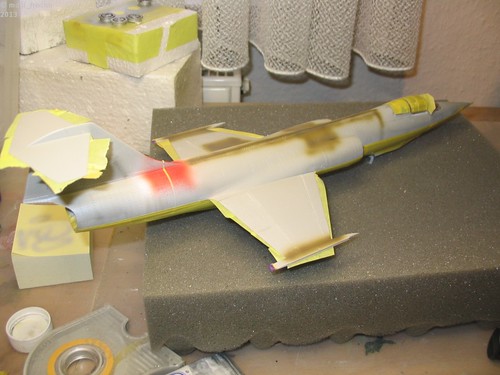
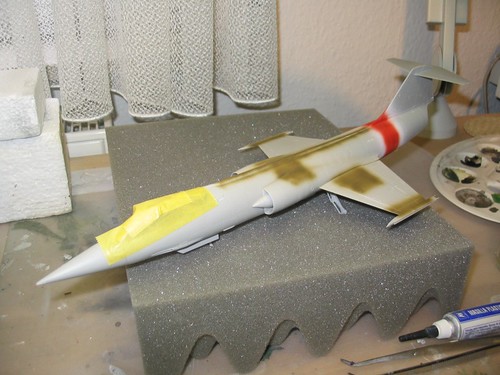
After having the main parts glued together the paint job starts. The Luftwaffe F-104Gs have a red line on the rear fuselage which warns before jet exhaust. As it is easy to paint I just brush the area red and cover it with a thin line cut from masking tape.
Regards,
Sebastian
Air Campaigns
Want to start or join a group build? This is where to start.
Hosted by Frederick Boucher, Michael Satin
OFFICIAL: Anything Goes Campaign
Middle_Franconian
Bayern, Germany
Joined: January 02, 2011
KitMaker: 279 posts
AeroScale: 239 posts
Joined: January 02, 2011
KitMaker: 279 posts
AeroScale: 239 posts
Posted: Saturday, April 06, 2013 - 02:12 AM UTC
Jessie_C
British Columbia, Canada
Joined: September 03, 2009
KitMaker: 6,965 posts
AeroScale: 6,247 posts
Joined: September 03, 2009
KitMaker: 6,965 posts
AeroScale: 6,247 posts
Posted: Saturday, April 06, 2013 - 03:01 AM UTC
Quoted Text
@ Jessie: the reddish substance you use for putty, what is this? Bondo putty?
Yes
This is the same tube I was using for my Cub in the 2011 Hangar Queen campaign. It lasts forever and is much cheaper than Squadron putty.
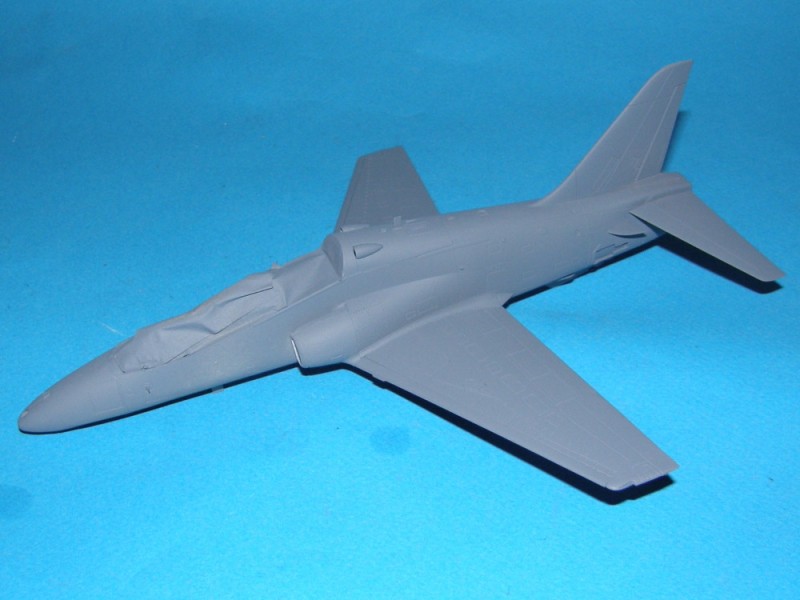
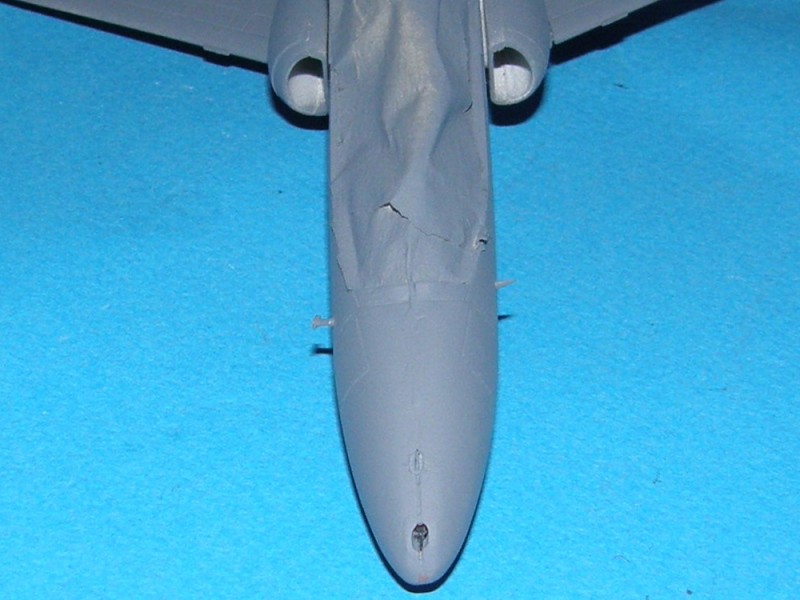
Now on to the Goshawk. The primer coat reveals how much more filling and general cleanup I need to do.
Those poor intakes especially need a lot of blending.
Middle_Franconian
Bayern, Germany
Joined: January 02, 2011
KitMaker: 279 posts
AeroScale: 239 posts
Joined: January 02, 2011
KitMaker: 279 posts
AeroScale: 239 posts
Posted: Saturday, April 06, 2013 - 03:21 AM UTC
Quoted Text
This is the same tube I was using for my Cub in the 2011 Hangar Queen campaign.
Yep, now I remember
Posted: Saturday, April 06, 2013 - 05:44 AM UTC
modified nose glazing mounted
Milliput radome curing
almost ready for primer
Milliput radome curing
almost ready for primer
Middle_Franconian
Bayern, Germany
Joined: January 02, 2011
KitMaker: 279 posts
AeroScale: 239 posts
Joined: January 02, 2011
KitMaker: 279 posts
AeroScale: 239 posts
Posted: Saturday, April 06, 2013 - 07:35 PM UTC
Hi!
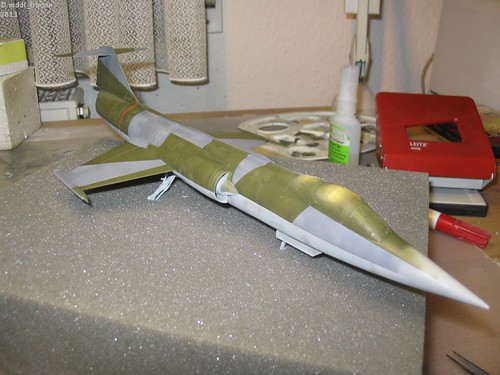
The paintjob starts. The Luftwaffe Starfighter´s were painted in the typical splinter camouflage consisting of dull silver underside and a geometrical pattern of RAL 6014 Gelboliv (Olive drab fits here) and RAL 7012 Basaltgrau (approx. Medium Sea Grey).
You can see a nice in flight picture here:
http://www.916-starfighter.de/Large/2523.htm
The Starfighter in the foreground wears the late style lizard wrap around camo, the ones in the background the splinter scheme.
I prefer the splinter scheme as it emphasizes the elegant lines of the F-104 more...
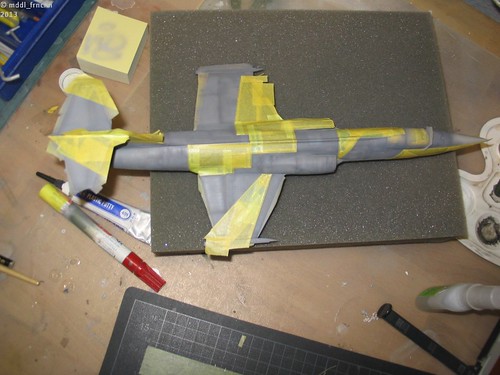
First the underside gets a coat of RAL 7001 Silbergrau. Realized by an approx. mix of 70% Tamiya Chrome Silver X-11 with 30% Tamiya Flat White.
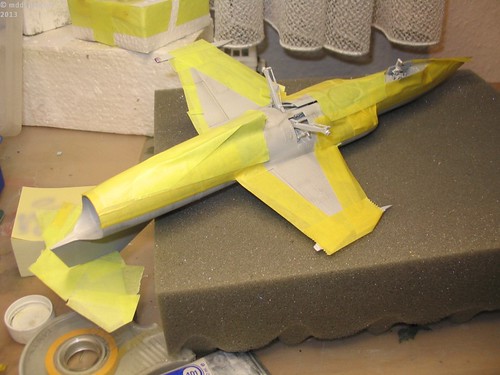
After that the masking starts. Due to the geometric design a lot of tape is required here:
Regards,
Sebastian
Posted: Sunday, April 07, 2013 - 06:33 AM UTC
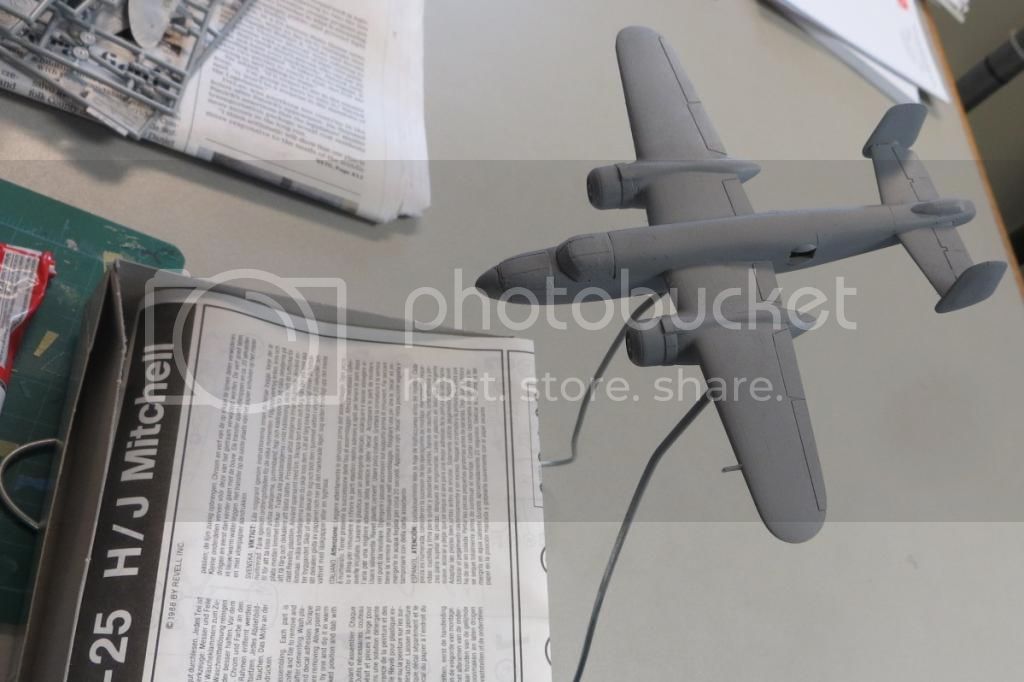
construction complete, in primer.
I have a few projects going that will all need Alclad, so the TB-25K is now on hold until I bring the other ones forward to this state.
Posted: Sunday, April 07, 2013 - 08:04 AM UTC
@ Sebastian
Thanks for the compliments. I'm pretty pleased with it myself. And for what will be visible it is good enough.
Very nice work on that starfighter. Am I right in the assumption that that big red band will eventually end up as being a very thin line of red?
@ Jessica
Starts to look good. I love how vehicles look in a pristine coat of grey. But as you say... It is very unforgiving. Something I found out on my Stuka as well. Looking forward to the rest,
@ Jonathan
That little big bird starts to look good. Will look awesome in a shiny coat.
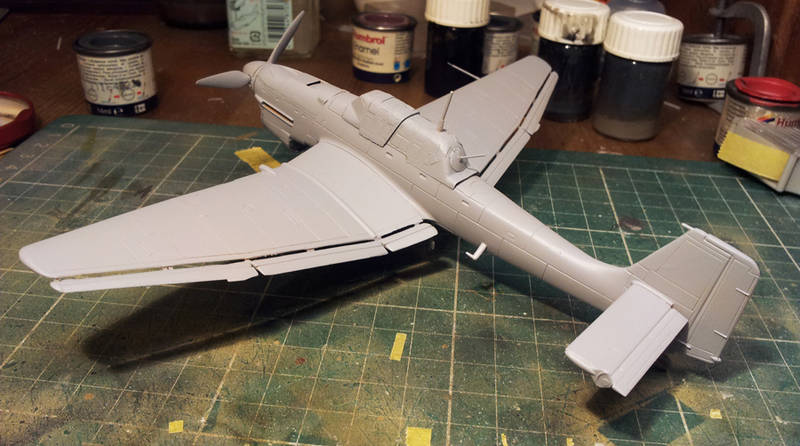
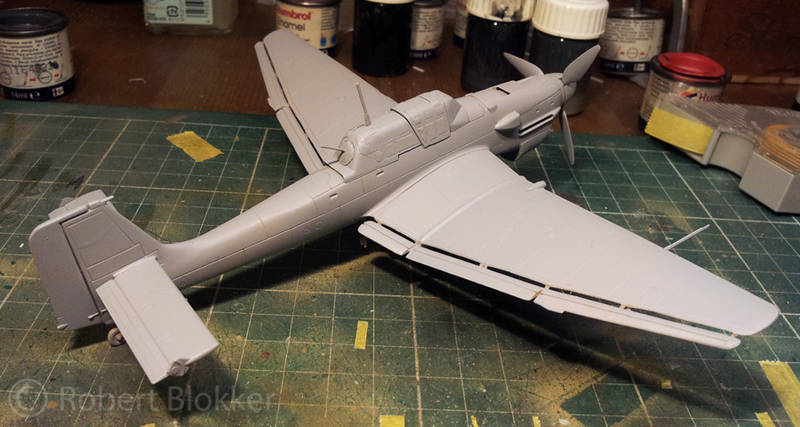
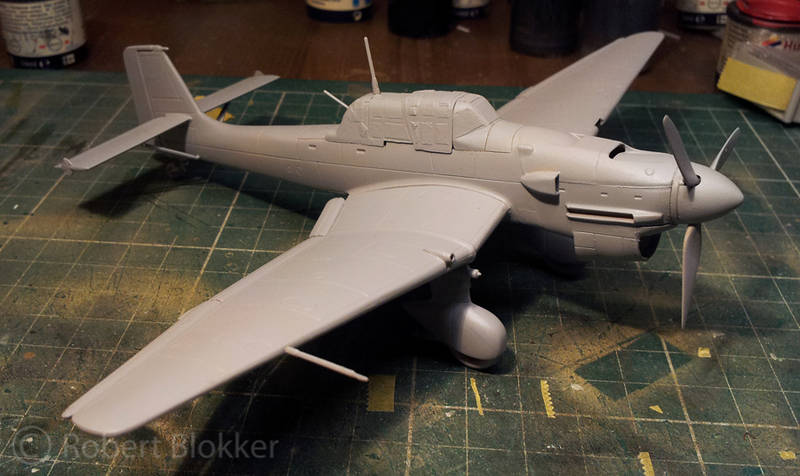
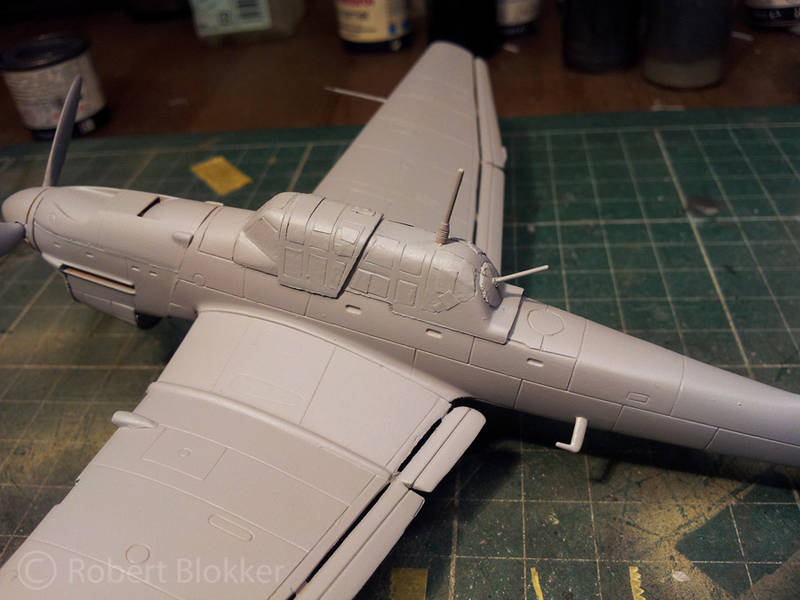
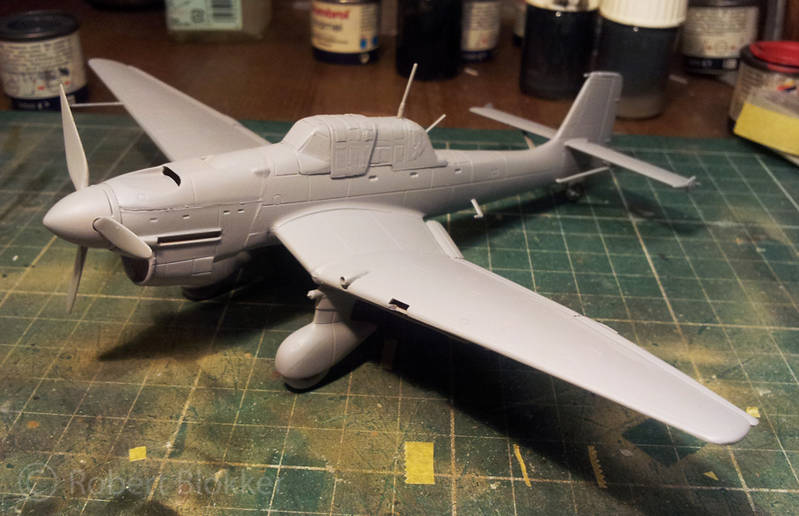
I have a bit of update as well. Man you have to sand a lot with these round shapes. And I lost some panellines on the top and bottom of the aircraft. Which I had to rescribe. I have never done that before. I think I did ok. The round thing behind the canopy was a particularly hard thing to rescribe. Which has probably more to do with not having the right tools. Then it was time for primer and man does that show what you missed. The left part of the engine cowling needs some looking at. But overall I'm really pleased with my result.
Every feedback is welcome.
With friendly greetz
Robert Blokker
Posted: Monday, April 08, 2013 - 07:39 AM UTC
Ola people
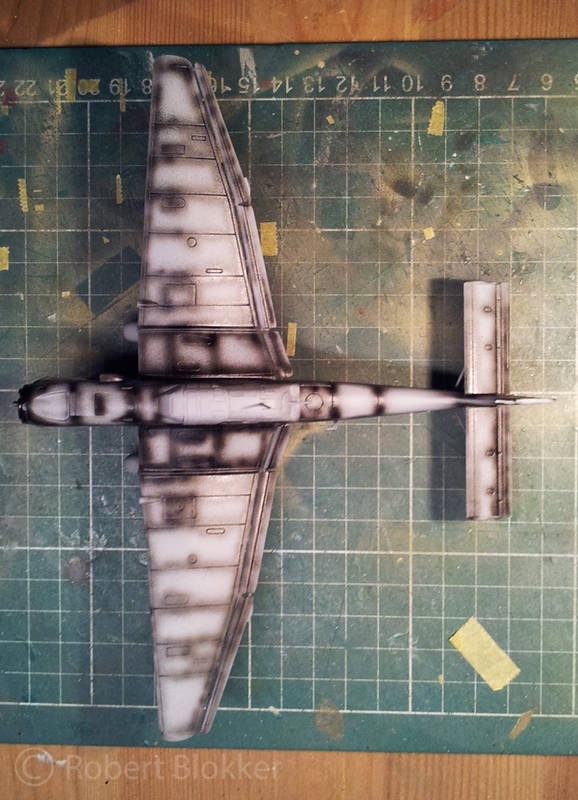
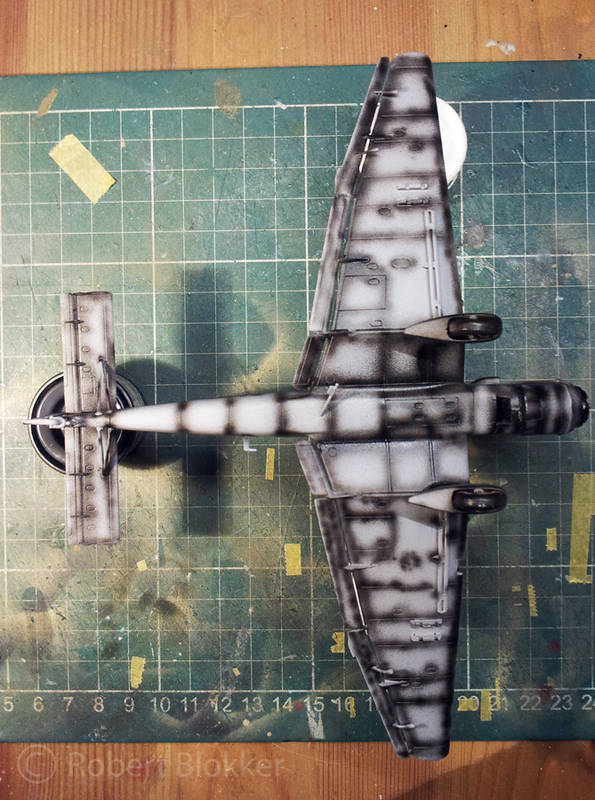
I started with the first paintstep this evening. Preshading the Stuka. It looks a bit odd because of the few drops of gloss I add to my matt paints and because of the light reflecting differently on all surfaces of the aircraft.
Posted: Wednesday, April 10, 2013 - 03:25 AM UTC
Weeeeellllll my first adventure into aircraft turned out to be a very short one. I planned to mix my own light blue for the belly. But I found out I had no more Tamiya white. So I went to the LHS to find out they did not have Tamiya and I had to make due with Vallejo (Of which I'm no fan). Which ended up in a big distaster. I tried to safe it by carefully sanding the offending parts, rescribing every panelline on the plane and when I sprayed it in primer this morning it looked like crap. So I binned it.
I'm still thinking what I'm going to replace it with. Possibly another Stuka but currently I'm extremely annoyed.
I somehow am not very lucky whenever I stray out of my armor area for some reason.
I'm still thinking what I'm going to replace it with. Possibly another Stuka but currently I'm extremely annoyed.
I somehow am not very lucky whenever I stray out of my armor area for some reason.
drabslab
European Union
Joined: September 28, 2004
KitMaker: 2,186 posts
AeroScale: 1,587 posts
Joined: September 28, 2004
KitMaker: 2,186 posts
AeroScale: 1,587 posts
Posted: Wednesday, April 10, 2013 - 03:56 AM UTC
Quoted Text
Weeeeellllll my first adventure into aircraft turned out to be a very short one. I planned to mix my own light blue for the belly. But I found out I had no more Tamiya white. So I went to the LHS to find out they did not have Tamiya and I had to make due with Vallejo (Of which I'm no fan). Which ended up in a big distaster. I tried to safe it by carefully sanding the offending parts, rescribing every panelline on the plane and when I sprayed it in primer this morning it looked like crap. So I binned it.
I'm still thinking what I'm going to replace it with. Possibly another Stuka but currently I'm extremely annoyed.
I somehow am not very lucky whenever I stray out of my armor area for some reason.
mmmmh, been there, done that .... and was frustreated as well.
still it is better to bin a model that is beyond recovery than to continue spending time on it.
Still, I've seen some great diorama's where parts of such disaster plane become suddenly very handy as attributes to the portrayed scene. Maybe an idea for the "ground forces" campaign?
ljames0874
England - South East, United Kingdom
Joined: August 15, 2012
KitMaker: 408 posts
AeroScale: 365 posts
Joined: August 15, 2012
KitMaker: 408 posts
AeroScale: 365 posts
Posted: Wednesday, April 10, 2013 - 04:15 AM UTC
That's bad news Robert, I hate it when that happens!
Onwards with the airbrushing, got the Dark Sea Grey coat on, and then spent the better part of today doing the masking for the camouflage:
Posted: Wednesday, April 10, 2013 - 04:31 AM UTC
Quoted Text
mmmmh, been there, done that .... and was frustreated as well.
still it is better to bin a model that is beyond recovery than to continue spending time on it.
Still, I've seen some great diorama's where parts of such disaster plane become suddenly very handy as attributes to the portrayed scene. Maybe an idea for the "ground forces" campaign?
Nope I leave the Stuka in the capable hands of the garbage disposal people. After spending best part of yesterday, first screwing it up and then trying to save it only to find out this morning when the primer was dry that it was beyond rescue, I found that I have spend enough time on that particular kit.
@ Lee
Thanks for the comment. Will see what I can find in the LHS to replace it.
Jessie_C
British Columbia, Canada
Joined: September 03, 2009
KitMaker: 6,965 posts
AeroScale: 6,247 posts
Joined: September 03, 2009
KitMaker: 6,965 posts
AeroScale: 6,247 posts
Posted: Wednesday, April 10, 2013 - 05:49 AM UTC
Better that it should become a "paint test" hulk for testing new techniques and such. Don't forget to strip it for any usable parts to feed the spares bin : )
Posted: Wednesday, April 10, 2013 - 06:50 AM UTC
Robert , I am surprised, you are a Dutchman, do you think VanGogh would have put that canvas out in the bin because the paint went wrong? paint comes right off.
A bottle of 91% Isopropyl alcohol and an old tooth brush would bring that back to bare plastic condition in about half an hour.
There are more advanced paint strippers as well.
model railroaders are accustomed to buying a built model with the intent of removing the existing paint, to apply something different. I have learned to remove the most tenacious factory applied paint, as well as any mess that fool "previous owner" created.
Shall I send you a bottle of my secret formula?
raypalmer
Ontario, Canada
Joined: March 29, 2010
KitMaker: 1,151 posts
AeroScale: 985 posts
Joined: March 29, 2010
KitMaker: 1,151 posts
AeroScale: 985 posts
Posted: Wednesday, April 10, 2013 - 07:40 AM UTC
Never waste a mule! I have a pink spitfire right now owing to my incoming sas pink panther.
Posted: Wednesday, April 10, 2013 - 11:25 PM UTC
@ Jessica and Richard
Well I can see the benefit of keeping it to use as a test object for paint but I already have a bunch of those. One of my first tiger tanks was used as a testbed for every new technique I came across. So tossing the Stuka was not really a great loss. It is not even the price of the kit either I'm mostly annoyed because of the time invested in it and the little bit of pride that grew every day with seeing it take shape. I'm going to aim myself at the next AC kit... I have frustrated my self long enough now.
@ Jonathan
LOL yeah I'm absolutely Dutch. And I know I could have stripped it the conventional way. But I wanted to save the work I put in the interior. It is probably my inexperience with everything aircraft related. I don't know. With Armored vehicles I usually know exactly what to do and have several chemicals to strip even the colors of a rainbow. But I spend a lot of time trying to save it only to find out in the end I ruined the whole thing instead. So completely undutch-like I tossed it away.
Well fact of the matter is van Gogh didn't need to strip his paintings It is easier to simply cover it up with a fresh layer of white gesso and start anew. And that was quite a common practice among painters of his age and earlier. Few weeks back I saw a cool program on National Geographic where the University of Antwerp had a new technique to X-Ray old paintings and discover what was beneath the layers of paint. And sometimes they uncovered up to 3 or 4 paintings beneath the last one. Got to love science.
ljames0874
England - South East, United Kingdom
Joined: August 15, 2012
KitMaker: 408 posts
AeroScale: 365 posts
Joined: August 15, 2012
KitMaker: 408 posts
AeroScale: 365 posts
Posted: Thursday, April 11, 2013 - 03:20 AM UTC
I've just unmasked the camouflage, and I have to say I'm rather pleased with the way it turned out. Just one or two little touch ups needed, not bad for my first attempt at the blu tack masking technique.
raypalmer
Ontario, Canada
Joined: March 29, 2010
KitMaker: 1,151 posts
AeroScale: 985 posts
Joined: March 29, 2010
KitMaker: 1,151 posts
AeroScale: 985 posts
Posted: Thursday, April 11, 2013 - 10:02 AM UTC
Here's my venom, used silly putty method to great success. Things are progressing.
Posted: Thursday, April 11, 2013 - 11:49 AM UTC
Robert OK OK, you have defeated me ! let the dustman have his due. Anyway, now you have the pleasure of choosing a new box to open.
That is interesting about Van Gogh not stripping his old paintings off his recycled canvases, it makes one wonder what else is hidden right in front of us.
Lee and Richard, this tacky putty method is producing some very cool looking camo shapes, now I am trying to think of a reason to try it.
That is interesting about Van Gogh not stripping his old paintings off his recycled canvases, it makes one wonder what else is hidden right in front of us.
Lee and Richard, this tacky putty method is producing some very cool looking camo shapes, now I am trying to think of a reason to try it.
Posted: Friday, April 12, 2013 - 10:04 AM UTC
Posted: Saturday, April 13, 2013 - 08:39 PM UTC
The TB-25K is ready for Alclad.
The two P-47s will also be getting Alclad, and will also be decorated for Mass. ANG.
raypalmer
Ontario, Canada
Joined: March 29, 2010
KitMaker: 1,151 posts
AeroScale: 985 posts
Joined: March 29, 2010
KitMaker: 1,151 posts
AeroScale: 985 posts
Posted: Wednesday, April 17, 2013 - 01:34 PM UTC
My Venom is in to decaling but stalled. My aztek's gone on strike. I'll do Testors a favour and not post a photo of the pathetic parts one finds inside it.
Middle_Franconian
Bayern, Germany
Joined: January 02, 2011
KitMaker: 279 posts
AeroScale: 239 posts
Joined: January 02, 2011
KitMaker: 279 posts
AeroScale: 239 posts
Posted: Wednesday, April 17, 2013 - 09:43 PM UTC
Hi,
@ Robert: sorry to hear that with your Stuka. I agree to Drabslab that one should not spend too much time anymore on such a model. Have you thought about blowing it up with a firecracker? This means a little bit of fun at least in the end. I did this once to a Panther tank which was beyond repair and it was really relieving...
Err, ja, you are right, the band is painted in this case.
@ Lee, Richard & Dave: looks great guys!
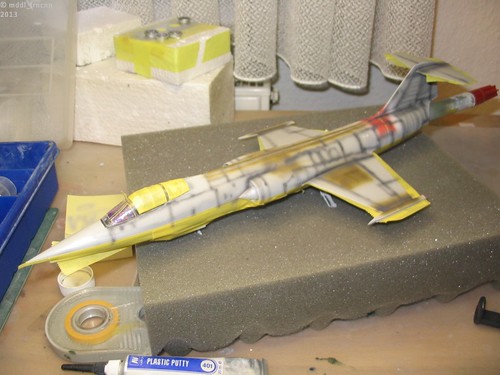
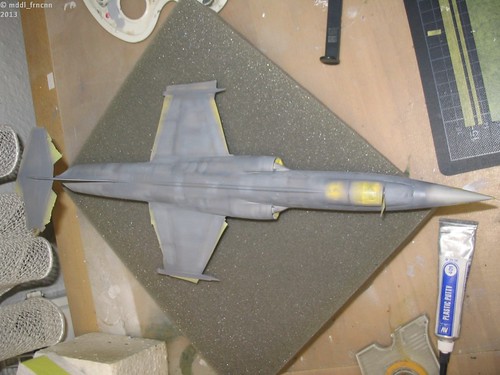
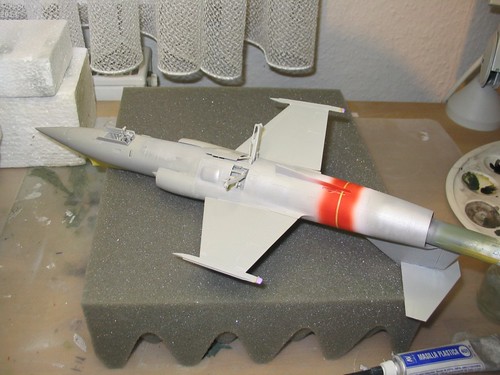
Some progress on my F-104G:
Preshading before applying the grey color:
Preparing for NATO-Oliv:
Done!
Regards,
Sebastian
vdejarnette
Maryland, United States
Joined: February 25, 2013
KitMaker: 209 posts
AeroScale: 138 posts
Joined: February 25, 2013
KitMaker: 209 posts
AeroScale: 138 posts
Posted: Thursday, April 18, 2013 - 02:02 AM UTC
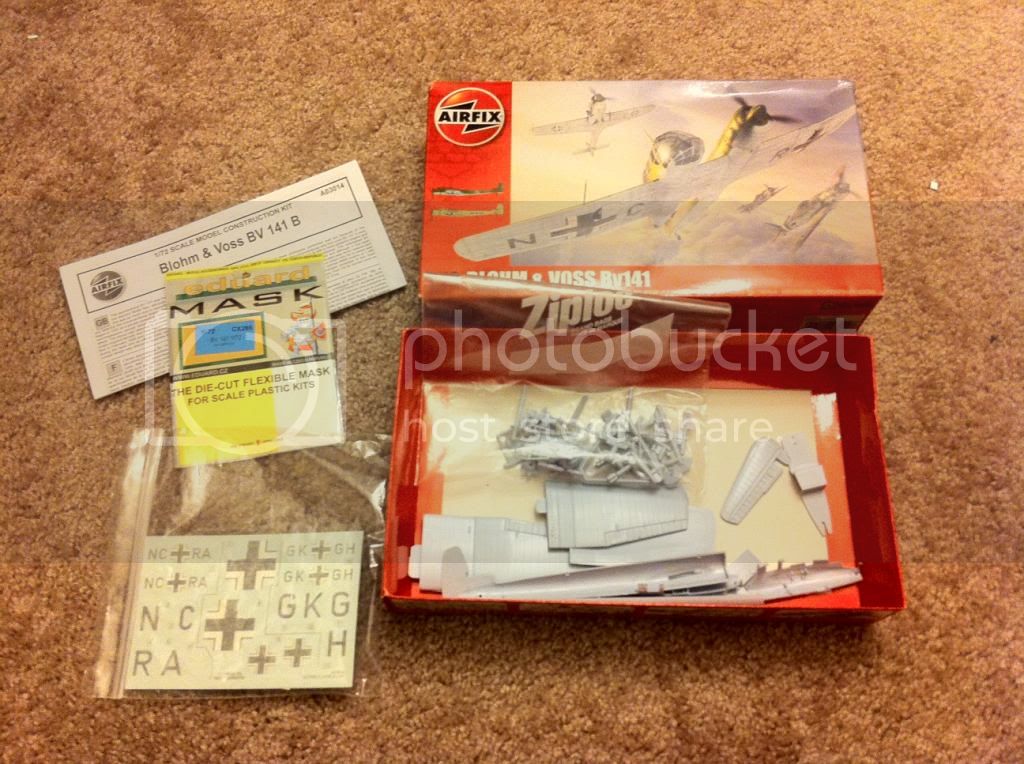
Here is my entry for this campaign. The Airfix BV-141B.
Posted: Thursday, April 18, 2013 - 09:14 AM UTC
Ola Guys
Some works of art in progress here.
@ Lee
I love how the camo on the lightning came out. Really neat job.
@ Richard
your camo came out good as well. Pitty to hear about the airbrush problems though. Hope that will be solved soon.
@ Dave
That is a nice paintjob on that intruder. I especially like that canopy. Well done.
@ Jonathan
Man you have a whole squadron waiting for paint there. Why did you paint them black first?
@ Sebastian
Thanks for your kind words. What can I say about the Stuka.... C'est ca. Nothing more nothing less. That idea with the firecracker was not bad by the way. Wish I thought of that sooner.
Awesome work on that starfighter. It was already looking great in grey but with the green camo patches it looks even tougher. I can only envy that.
@ Van
Cool choice... I have been eyeing that exact kit to replace my Stuka But so far haven't bought it. Looking forward what you are going to do with it.
Well I found a new kit that I will built for this campaign. Not the hardest of kits and I have no AM stuff for it. But it will be a great practice kit for rigging.
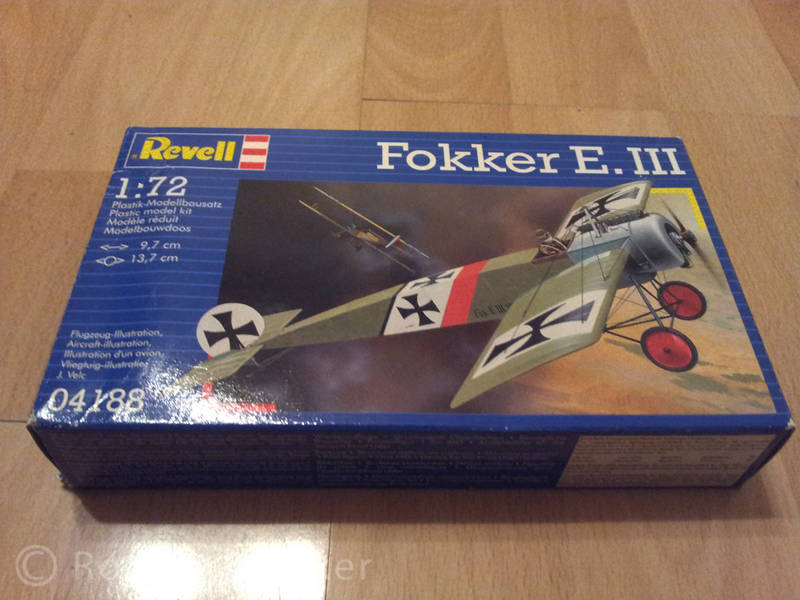
Behold! my Revell 1:72 Fokker E.III
Some works of art in progress here.
@ Lee
I love how the camo on the lightning came out. Really neat job.
@ Richard
your camo came out good as well. Pitty to hear about the airbrush problems though. Hope that will be solved soon.
@ Dave
That is a nice paintjob on that intruder. I especially like that canopy. Well done.
@ Jonathan
Man you have a whole squadron waiting for paint there. Why did you paint them black first?
@ Sebastian
Thanks for your kind words. What can I say about the Stuka.... C'est ca. Nothing more nothing less. That idea with the firecracker was not bad by the way. Wish I thought of that sooner.
Awesome work on that starfighter. It was already looking great in grey but with the green camo patches it looks even tougher. I can only envy that.
@ Van
Cool choice... I have been eyeing that exact kit to replace my Stuka But so far haven't bought it. Looking forward what you are going to do with it.
Well I found a new kit that I will built for this campaign. Not the hardest of kits and I have no AM stuff for it. But it will be a great practice kit for rigging.
Behold! my Revell 1:72 Fokker E.III