Air Campaigns
Want to start or join a group build? This is where to start.
Want to start or join a group build? This is where to start.
Hosted by Frederick Boucher, Michael Satin
OFFICIAL: Anything Goes Campaign
usethermite

Joined: February 14, 2012
KitMaker: 252 posts
AeroScale: 209 posts

Posted: Tuesday, April 23, 2013 - 09:51 AM UTC
To my eye that prop looks darn good. JT

Jessie_C


Joined: September 03, 2009
KitMaker: 6,965 posts
AeroScale: 6,247 posts

Posted: Tuesday, April 23, 2013 - 09:57 AM UTC
Quoted Text
And a Spruce Goose in 1:72 makes a lot of sense since that way you can still store it in your house.
I think you mean that you can store your house in it.
Posted: Tuesday, April 23, 2013 - 10:04 AM UTC
@ JT
Thanks for the compliments. Really appreciated.


 Yeah that is one big bird isn't it.
Thanks for the compliments. Really appreciated.
Quoted Text
Quoted TextAnd a Spruce Goose in 1:72 makes a lot of sense since that way you can still store it in your house.
I think you mean that you can store your house in it.


 Yeah that is one big bird isn't it.
SaxonTheShiba

Joined: February 01, 2009
KitMaker: 1,233 posts
AeroScale: 663 posts

Posted: Tuesday, April 23, 2013 - 11:57 AM UTC
Robert----Great progress on the Eindecker. Very cool subject matter....and a great deal of history to go with it.
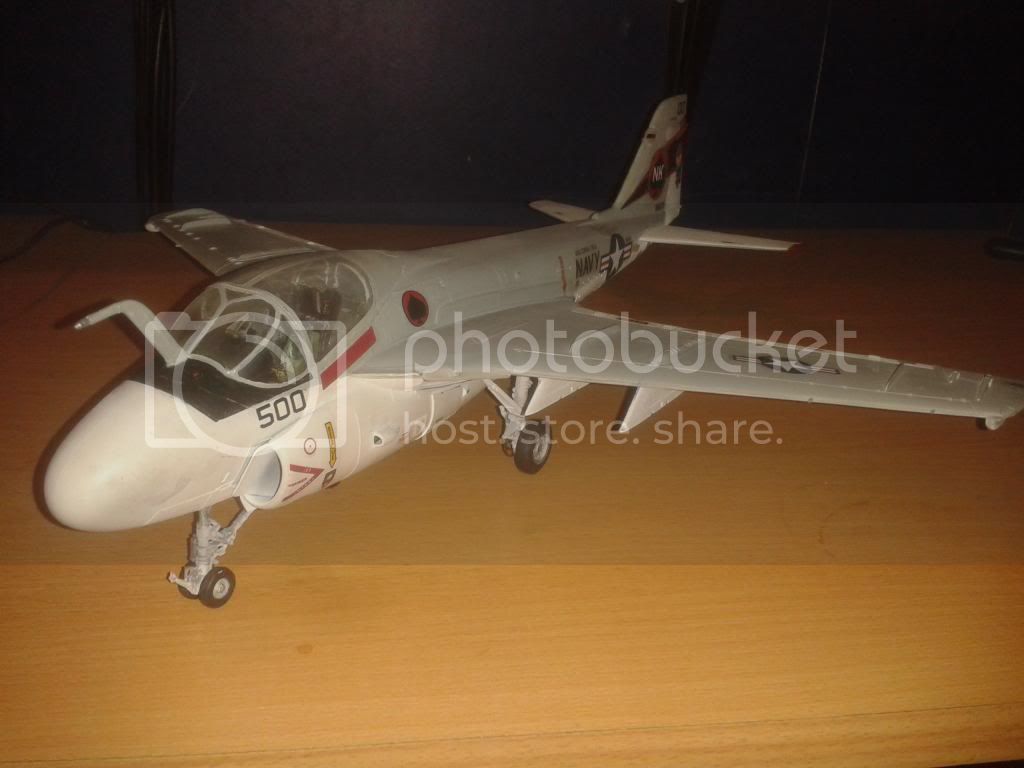
Dave----Like your A-6. Can't go wrong with a Grumman product.
Lee---Love the Lightning. I always thought the camo-ed up ones looked the best.
Richard---Good looking Venom!
I did some work on my A-4. Got the first layer of camo applied, Dk. Ghost Gray, to the top. Light Ghost Gray and Lt. Gray to follow. Also. filled in the slots for the horizontal stabs because I will drill and pin them in the drooped position.
Best wishes, Ian


ljames0874

Joined: August 15, 2012
KitMaker: 408 posts
AeroScale: 365 posts

Posted: Tuesday, April 23, 2013 - 08:12 PM UTC
That's most of the decalling done, just a few to add to the canopy after I unmask it. I did a test fit on the canopy and discovered that the pilot sticks out way above the windshield and it looks ridiculous (even though I was originally intending to leave the canopy open), so the pilot had to go. Also, I had a photo etched ladder I was intending to use, but the assembly didn't go too well. Cue an impressive bout of Model Maker's Tourette's Syndrome (tm)  . It has now been sacrificed to the great god of the trash basket.....grrrr!

Have fun y'all!
 . It has now been sacrificed to the great god of the trash basket.....grrrr!

Have fun y'all!
vdejarnette

Joined: February 25, 2013
KitMaker: 209 posts
AeroScale: 138 posts

Posted: Wednesday, April 24, 2013 - 01:20 AM UTC
Started construction of the Airfix BV-141 last night. It is an incredibly fun build to start because the first step is to build the wings and fuselage. The whole plane almost goes together before you have to touch the cockpit.  Pictures to follow tonight.
 Pictures to follow tonight.
 Posted: Wednesday, April 24, 2013 - 09:05 AM UTC
Cool builds so far. Lee I like the lightning. Curious about that day-glo on the tail? Are they wargames markings?
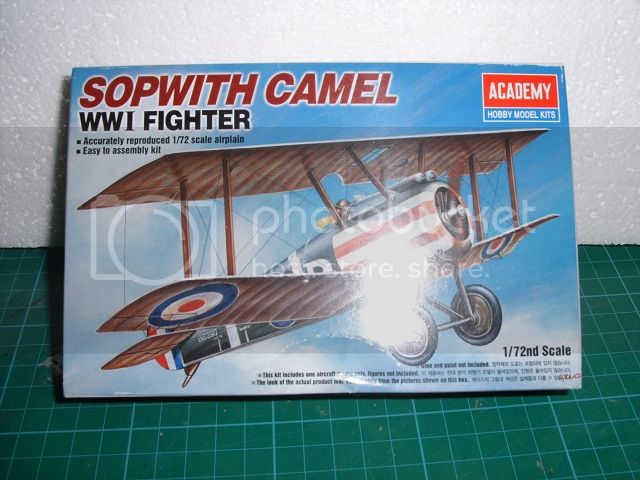
I've decided to change my build, with a lot of other commitments at the minute I feel I can't do that Xtrakit Canberra justice in the time that's left. I've decided instead to build Acdemy's 1/72 Sopwith Camel. Simple and quick it will be strictly OOB. Now I know that there are much better Camel's on the market, but this cost me the princely sum of 99p in evilbay and I need something inexpensive to try out rigging. I'd sooner make a bad job and learn from this than ruin something I invested more time, effort and money into.
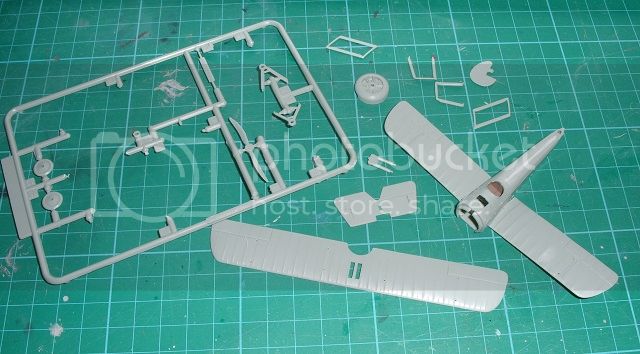
Saying it is quick is an understatement. Especially if you use superglue. This is the result of 5 hrs work since getting in from work. Most of that waiting for glue and filler to harden. The fit of the fuselage and lower wing is surprisingly good. A little filler was needed to get rid of an ejector pin mark on the wing and a little more on the top and bottom of the fuselage. Interior was painted brown and there's nothing but a bench inside. I've also started cleaning up the struts and other bits.
Comments welcome
I've decided to change my build, with a lot of other commitments at the minute I feel I can't do that Xtrakit Canberra justice in the time that's left. I've decided instead to build Acdemy's 1/72 Sopwith Camel. Simple and quick it will be strictly OOB. Now I know that there are much better Camel's on the market, but this cost me the princely sum of 99p in evilbay and I need something inexpensive to try out rigging. I'd sooner make a bad job and learn from this than ruin something I invested more time, effort and money into.

Saying it is quick is an understatement. Especially if you use superglue. This is the result of 5 hrs work since getting in from work. Most of that waiting for glue and filler to harden. The fit of the fuselage and lower wing is surprisingly good. A little filler was needed to get rid of an ejector pin mark on the wing and a little more on the top and bottom of the fuselage. Interior was painted brown and there's nothing but a bench inside. I've also started cleaning up the struts and other bits.

Comments welcome
Posted: Wednesday, April 24, 2013 - 10:19 AM UTC
@ Ian
Thanks a lot for the encouraging words. It is a fun little kit that goes together pretty neat. I heard somebody say that this was the first aircraft type with synchronised MG. I know that was a Fokker invention but didn't know on which type it was introduced.
Very clean work on the A4. Looking forward how you are going to paint it.
@ Lee
That lightning surely comes alive with all those decals. Very neat work.
@ Stephen
Nice change. I like those old warbirds. Interesting pick. It seems it has about the same amount of parts as my Fokker E.III. Looking forward what you are going to make of it. It surely has more wire then my Eindecker.
ljames0874

Joined: August 15, 2012
KitMaker: 408 posts
AeroScale: 365 posts

Posted: Wednesday, April 24, 2013 - 10:34 PM UTC
Quoted Text
Cool builds so far. Lee I like the lightning. Curious about that day-glo on the tail? Are they wargames markings?
That's a good question, and one that I didn't know the answer to. I've just done a quick bit of online research and it sounds like wargames markings are exactly what they are. It seems that this particular Lightning (XS901) was used for DACT training missions (that is Dissimilar Air Combat Training) probably to give RAF Phantom pilots something Mig-like to hunt.

Posted: Thursday, April 25, 2013 - 12:47 AM UTC
After all the damage that's been done to this I think I will be happy if it just looks like a plane. 
I got the wings on and a lot of filler, then sanded it back quite a bit. Will need some primer to check progress but it's coming along.
Cheers Rob.
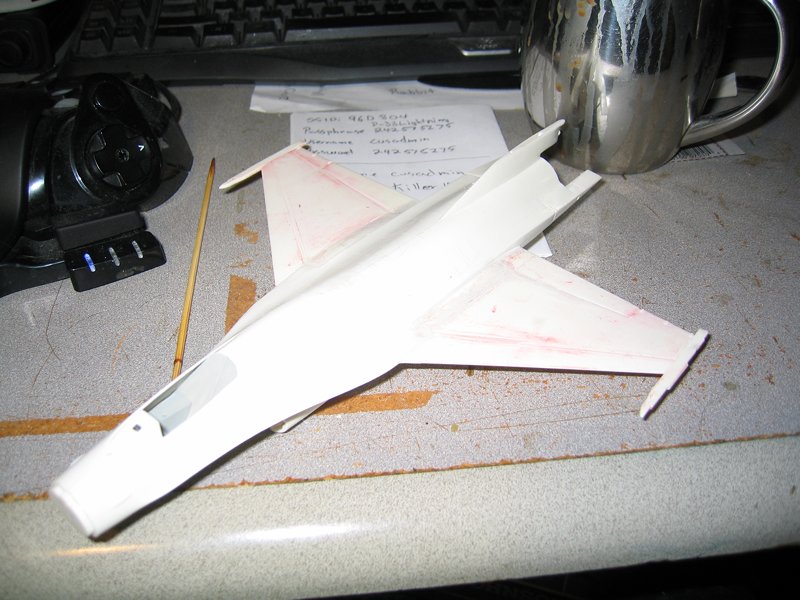

I got the wings on and a lot of filler, then sanded it back quite a bit. Will need some primer to check progress but it's coming along.

Cheers Rob.

ljames0874

Joined: August 15, 2012
KitMaker: 408 posts
AeroScale: 365 posts

Posted: Friday, April 26, 2013 - 05:08 AM UTC
OK chaps (and chapesses of course!) I'm calling the Lightning done. I've had a lot of fun building this kit and I can't wait to get cracking on with the next campaign - which starts on Wednesday, Phantom fans!


Good Luck everybody!


Good Luck everybody!

Posted: Friday, April 26, 2013 - 05:29 AM UTC
That's a lovely Lightning Lee, great job 

usethermite

Joined: February 14, 2012
KitMaker: 252 posts
AeroScale: 209 posts

Posted: Friday, April 26, 2013 - 05:34 AM UTC
That's one fine looking Blowtorch you got there, Lee.  JT
JT
 JT
JTPosted: Friday, April 26, 2013 - 09:32 AM UTC
@ Rob
Nice work. That will paint up nicely.
@ Lee
That lightning surely looks good all decalled up. Great job. And congrats on finishing your built.
Guys and gals I also have an update. Have spend a bit of time with the airbrush. The aircraft has 3 bands halfway along the fuselage. A red band, a white band and a thin black band. Revell expects you to paint the white band and the red and black band as decals. I thought it better to airbrush all three bands. So first I sprayed white, then I masked the whole thing, Then I made the borders for the red and black bands which in turn got airbrushed. Then masked the red and black bands off. And sprayed the green. I built up the green using an olive green for basecoat and shadows. And as a highlight and for flat surfaces I used a yellowish green misted over it.
After peeling all the masking tape off I found out that the red still managed to find a way under it so I have a little touchup to do but nothing that can't be fixed.
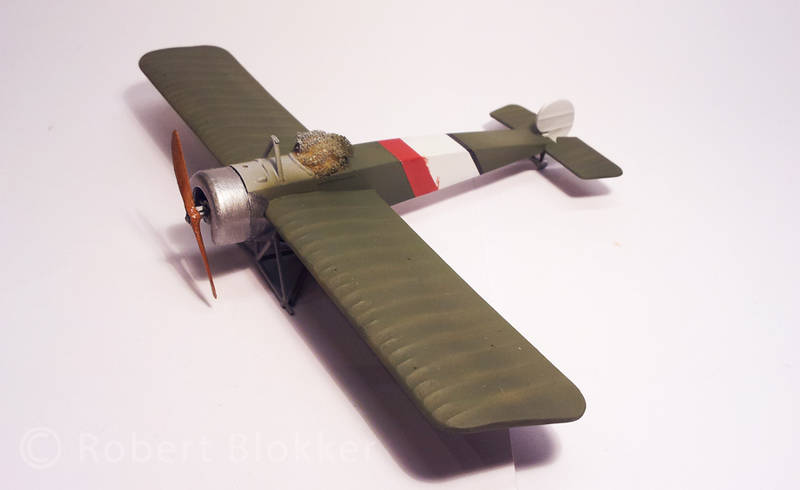
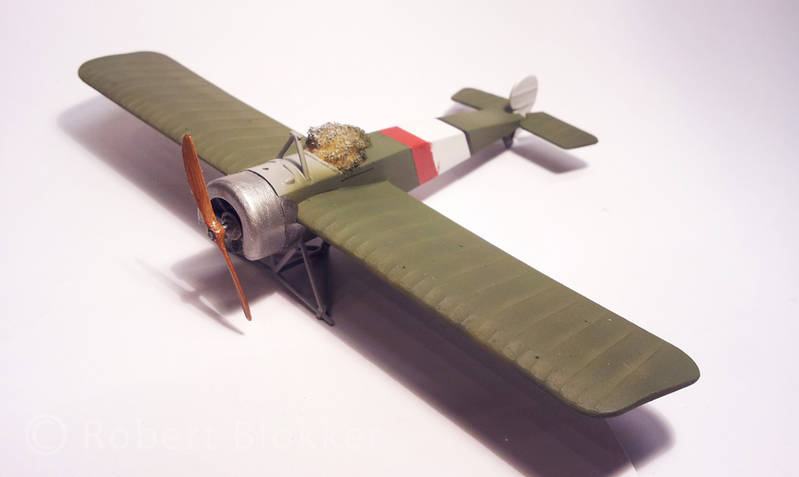
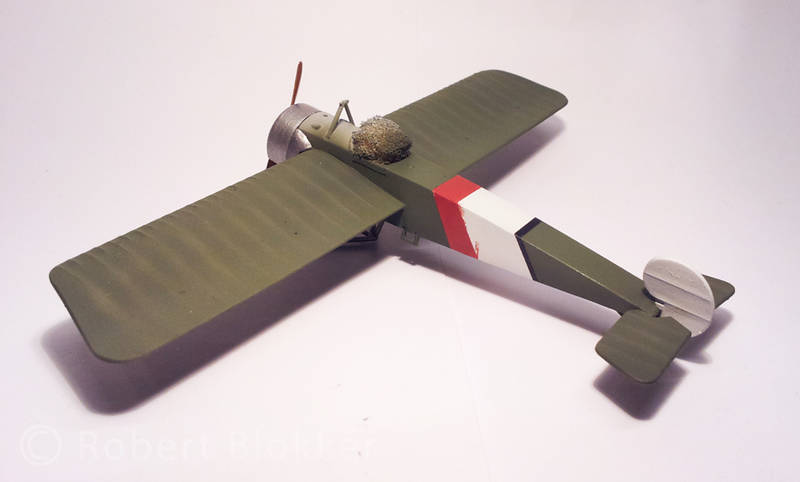
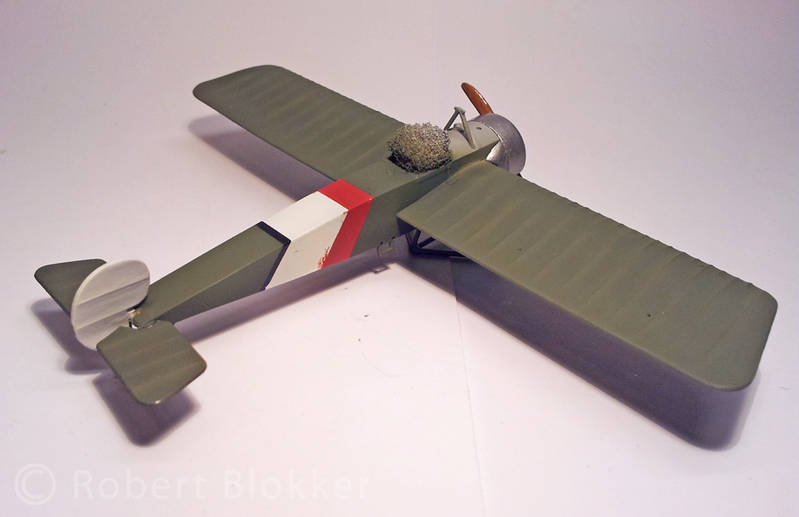
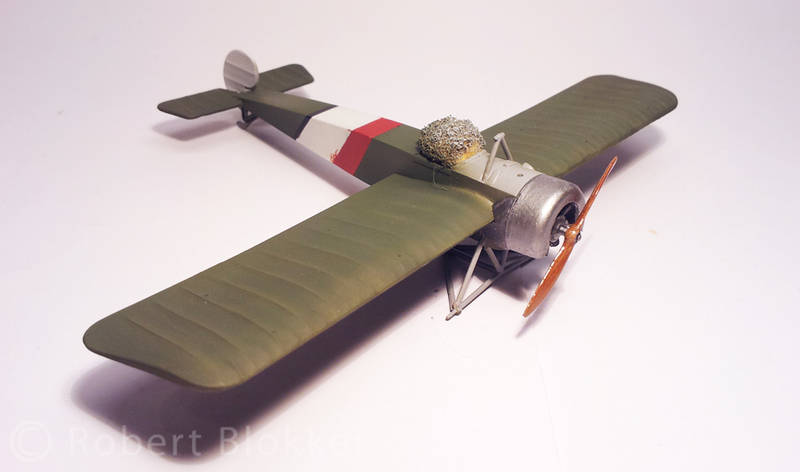
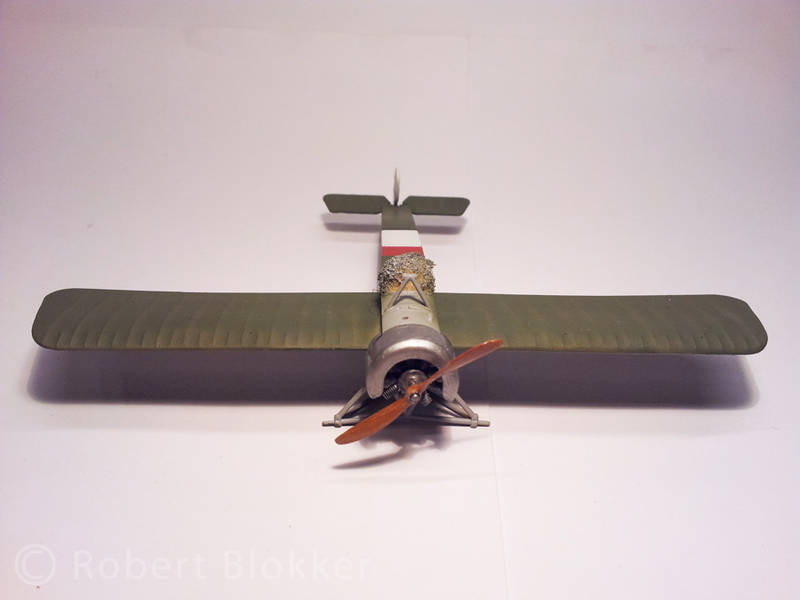
Next up (after touching up the white band) painting the rest of the vehicle. Pledge and decals.
With friendly greetz
Robert Blokker
Nice work. That will paint up nicely.
@ Lee
That lightning surely looks good all decalled up. Great job. And congrats on finishing your built.
Guys and gals I also have an update. Have spend a bit of time with the airbrush. The aircraft has 3 bands halfway along the fuselage. A red band, a white band and a thin black band. Revell expects you to paint the white band and the red and black band as decals. I thought it better to airbrush all three bands. So first I sprayed white, then I masked the whole thing, Then I made the borders for the red and black bands which in turn got airbrushed. Then masked the red and black bands off. And sprayed the green. I built up the green using an olive green for basecoat and shadows. And as a highlight and for flat surfaces I used a yellowish green misted over it.
After peeling all the masking tape off I found out that the red still managed to find a way under it so I have a little touchup to do but nothing that can't be fixed.


Next up (after touching up the white band) painting the rest of the vehicle. Pledge and decals.
With friendly greetz
Robert Blokker
Posted: Friday, April 26, 2013 - 10:44 AM UTC
@ Lee the lightening looks really nice well done 
@ Rob nice work on the fokker
Well iv put off building the UC of the Intruder for as long as i can , the reason is that Revell decided to have a go at moulding the break lines and hoses and well they are really bad , so i have removed them as best i can so that i can replace them with fuse wire for a more realistic look , heres a pic ..
the leg on the right is before and on the left is after ..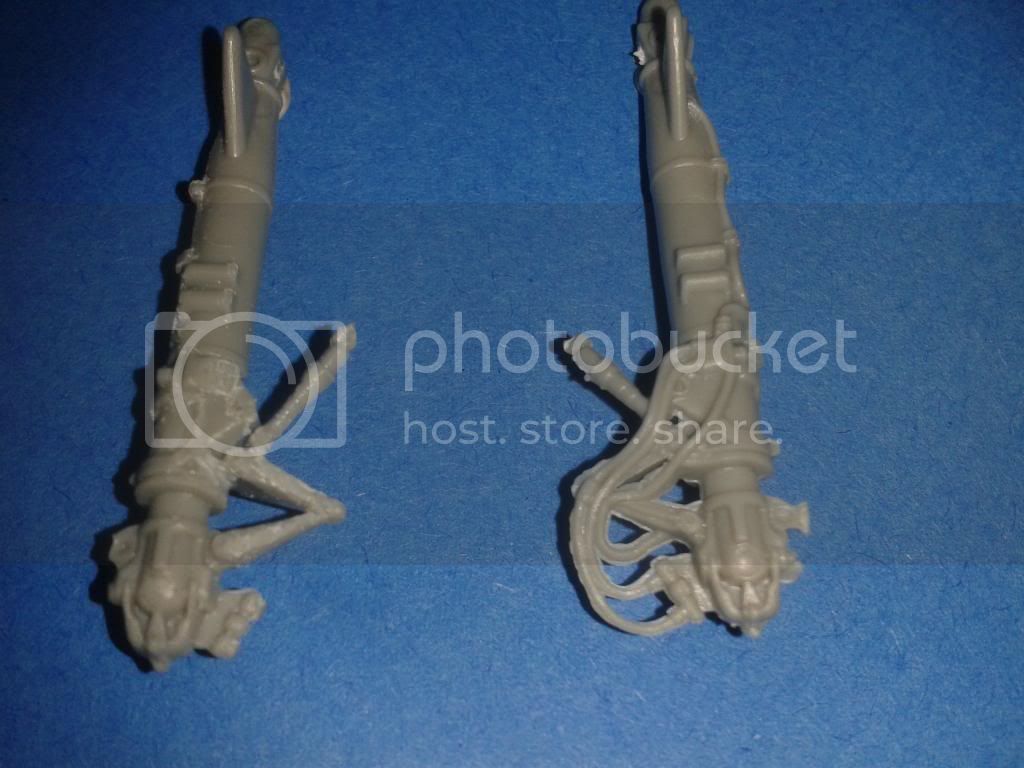


@ Rob nice work on the fokker

Well iv put off building the UC of the Intruder for as long as i can , the reason is that Revell decided to have a go at moulding the break lines and hoses and well they are really bad , so i have removed them as best i can so that i can replace them with fuse wire for a more realistic look , heres a pic ..
the leg on the right is before and on the left is after ..


Posted: Saturday, April 27, 2013 - 01:15 PM UTC
Lee,
Very nice Lightning I especially like the shot from the front.
Robert,
That's the plan.
And here is a tip for masking, before painting the colors shoot clear along the tape edges. That helps seal them.
Cheers Rob.
Very nice Lightning
 I especially like the shot from the front.
Robert,
That's the plan.

And here is a tip for masking, before painting the colors shoot clear along the tape edges. That helps seal them.

Cheers Rob.
Posted: Saturday, April 27, 2013 - 03:40 PM UTC
Have finally found some time to put some paint on my Salamander. Decals next.
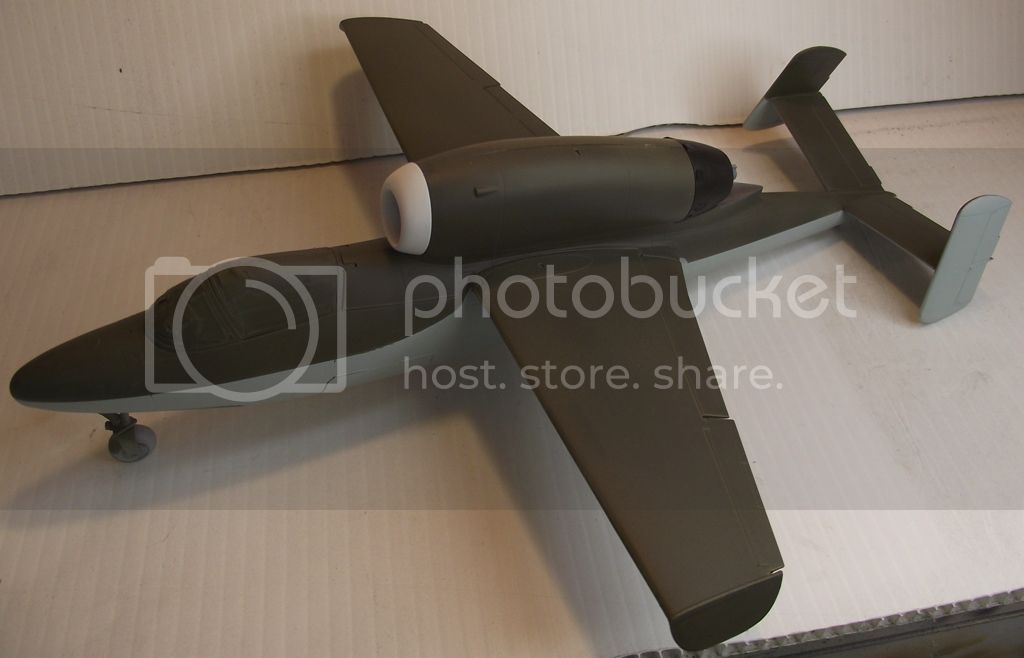

Posted: Sunday, April 28, 2013 - 01:57 AM UTC
@ Dave
Thanks for the compliments.
@ Dave
That is a really good tip about spraying clear on the mask edges. Never would have tought of that.
@ John
That is one odd looking aircraft but very good paintjob. Looking forward how that progresses.
Another E.III Update.
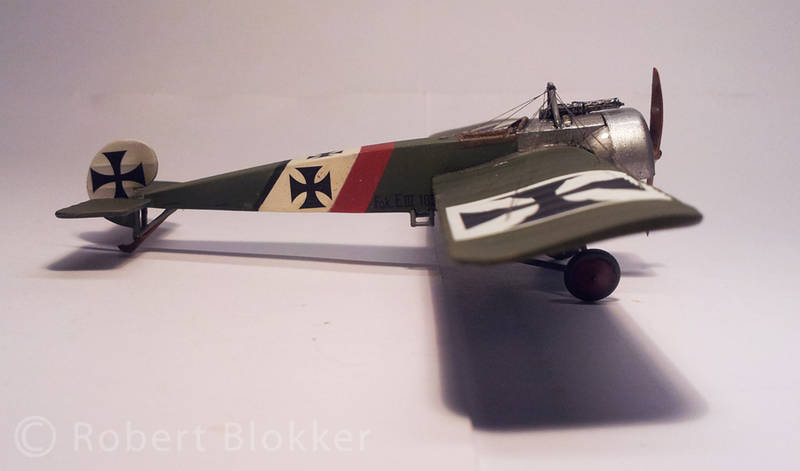
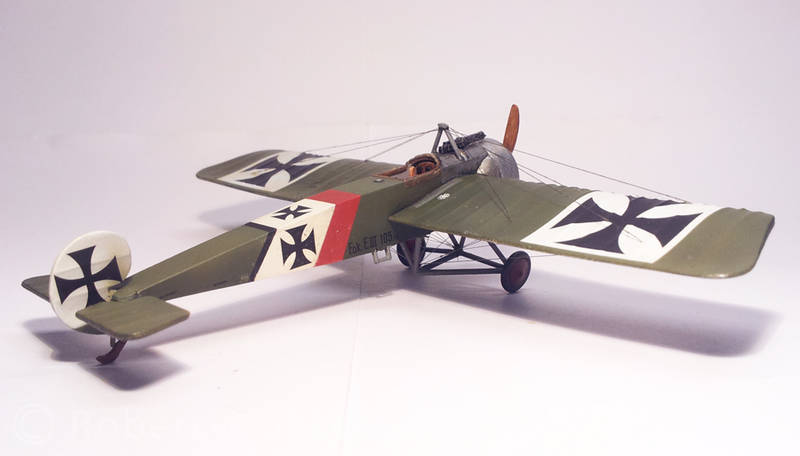
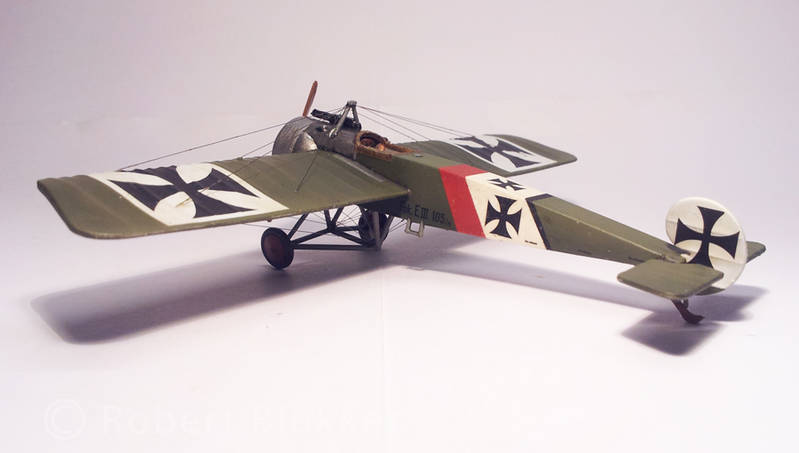
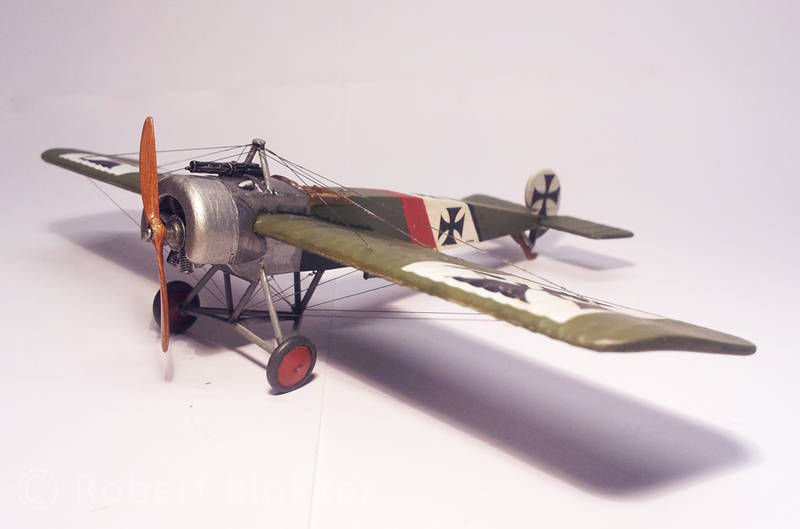
I spend the biggest part of last evening (till deep in the night) doing the decals on the Fokker E.III. As I said earlier they resemble the aircraft that Vizefeldwebel Ernst Udet flew when he was in Kampfeinsitzerkommando Habsheim on the western front 1915/1916. The set and sol really came in handy here. and the decals are stuck to the aircraft really well. Even the canvas texture came nicely through the decals on the wings.
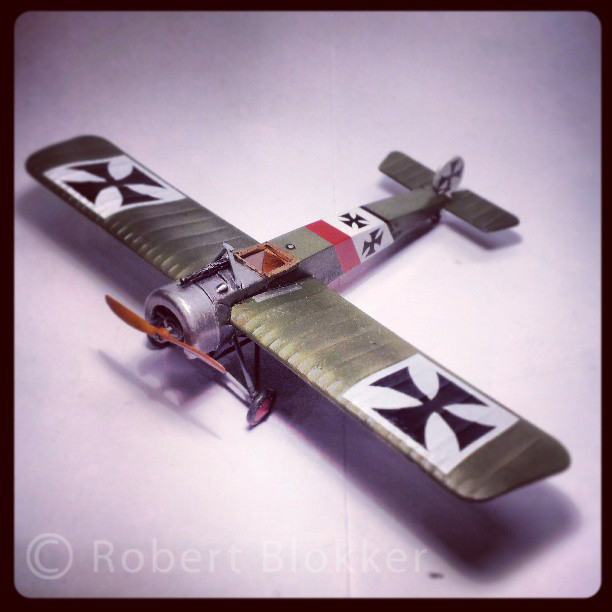
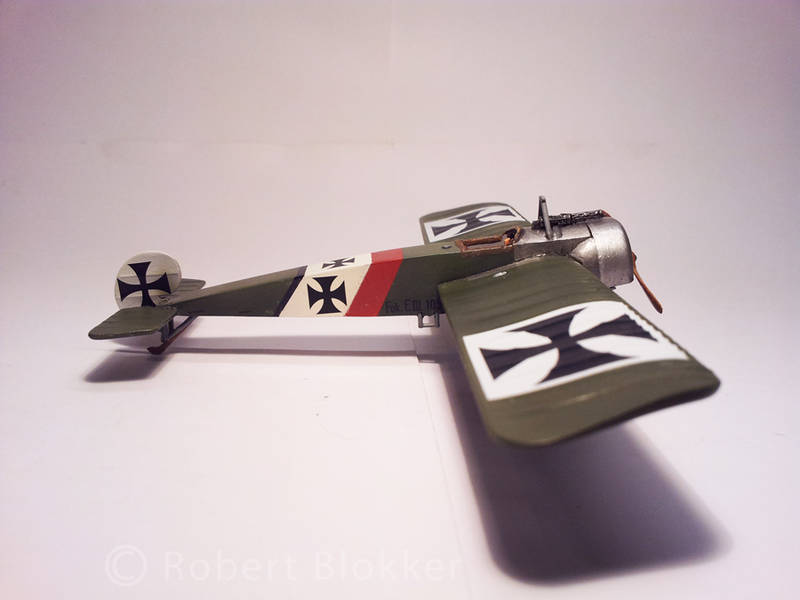
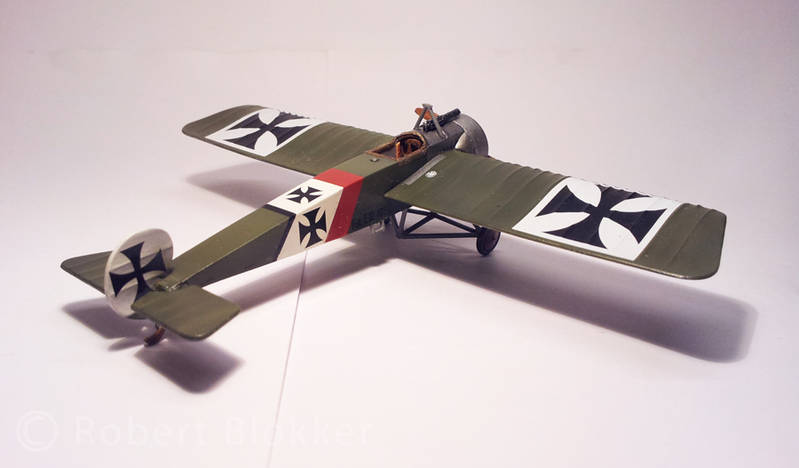
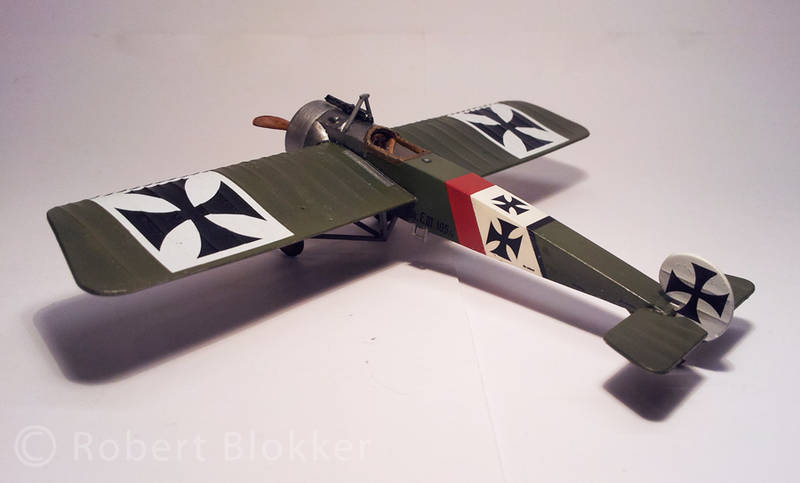
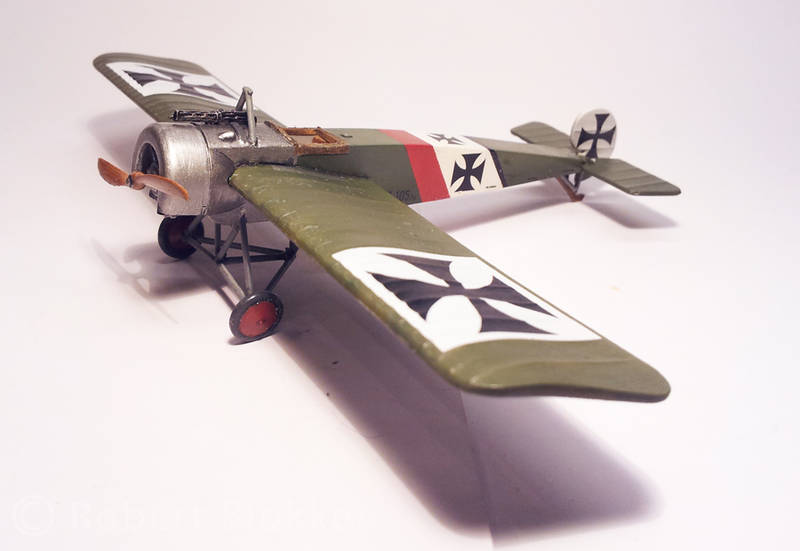
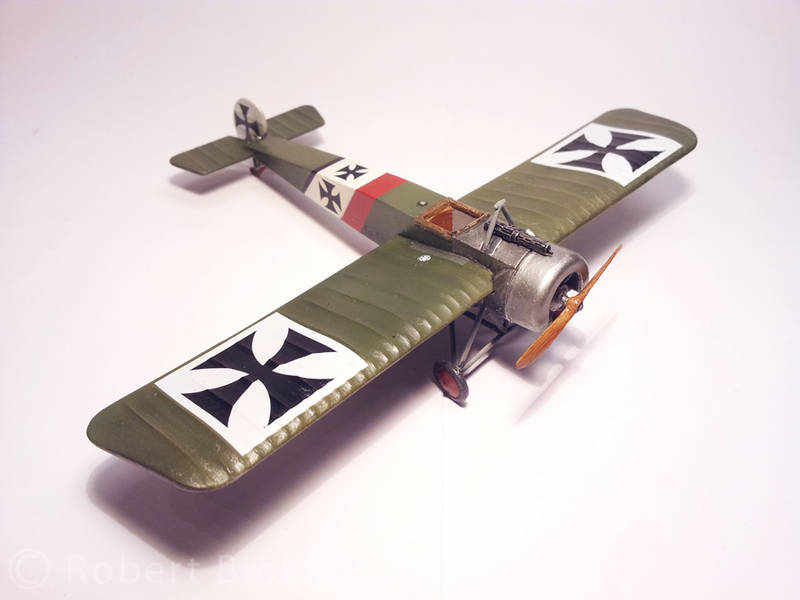
Next up matt, gloss and satin varnishes where they need to go and then the only job that is still left is the rigging.
Thanks for the compliments.
@ Dave
That is a really good tip about spraying clear on the mask edges. Never would have tought of that.
@ John
That is one odd looking aircraft but very good paintjob. Looking forward how that progresses.
Another E.III Update.
I spend the biggest part of last evening (till deep in the night) doing the decals on the Fokker E.III. As I said earlier they resemble the aircraft that Vizefeldwebel Ernst Udet flew when he was in Kampfeinsitzerkommando Habsheim on the western front 1915/1916. The set and sol really came in handy here. and the decals are stuck to the aircraft really well. Even the canvas texture came nicely through the decals on the wings.


Next up matt, gloss and satin varnishes where they need to go and then the only job that is still left is the rigging.

SaxonTheShiba

Joined: February 01, 2009
KitMaker: 1,233 posts
AeroScale: 663 posts

Posted: Sunday, April 28, 2013 - 03:31 AM UTC
Robert-----A fine looking Eindecker indeed!!
I continued work on my A-4F. I got the FS36375 applied to the tail, wings and stabs. Barely discernible, as is mostly the case with the low-viz schemes. Also got my MK20 Rockeye ordnance done. Hopefully I will fet the FS36495 on the underside today.
Regards, Ian


I continued work on my A-4F. I got the FS36375 applied to the tail, wings and stabs. Barely discernible, as is mostly the case with the low-viz schemes. Also got my MK20 Rockeye ordnance done. Hopefully I will fet the FS36495 on the underside today.
Regards, Ian


Posted: Sunday, April 28, 2013 - 07:48 AM UTC
Ola my fellow campaigners and campaignettas
@ Ian
Thanks for the compliments. Your A4 is coming together neatly as well. Very subtle color differences you got going on.
Well my little built has come to an end today. I added lacquer to everything. And when that was dry I did the rigging with fishingwire which was not as hard as I anticipated although I have to say that adding the small copper rings during the built made my life a lot easier. I learned a lot of this kit. And Even though it was a really simple kit I'm pretty proud and pleased with the endresult.
Here are the pictures of the final result.
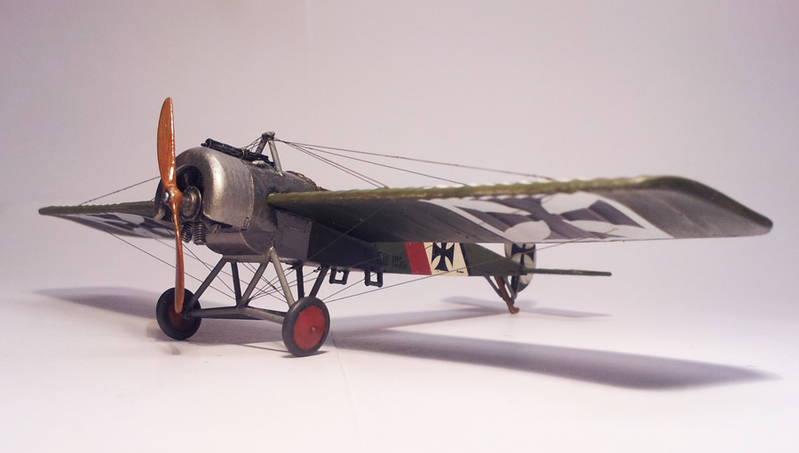
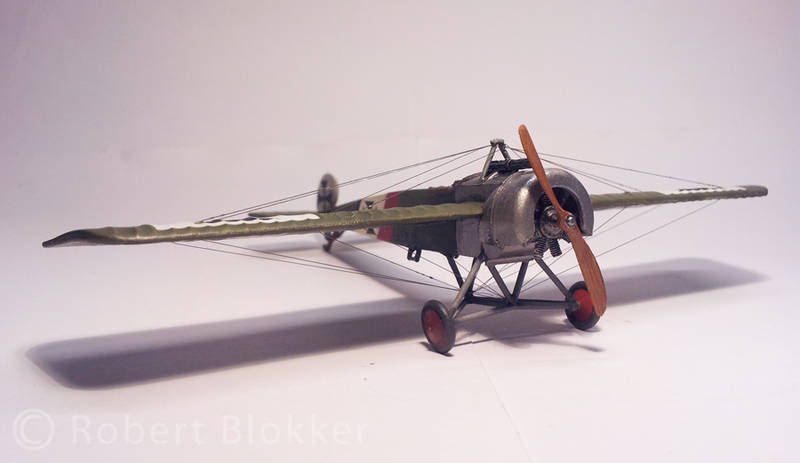
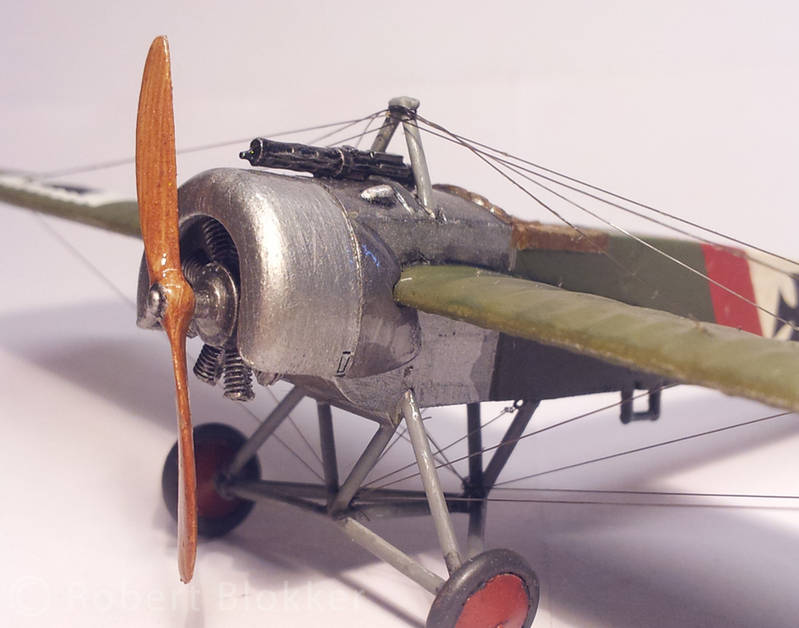
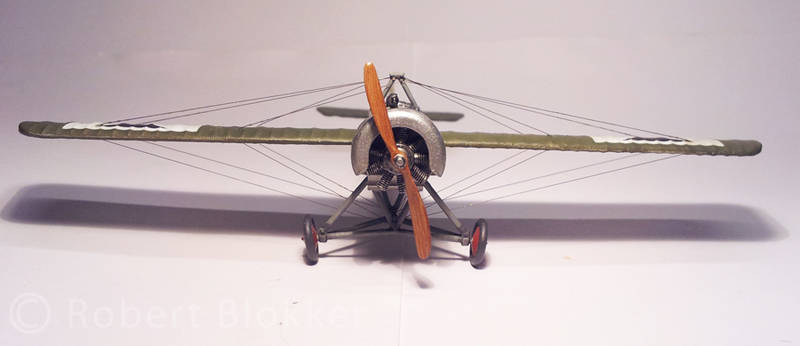
With friendly greetz
Robert Blokker
@ Ian
Thanks for the compliments. Your A4 is coming together neatly as well. Very subtle color differences you got going on.
Well my little built has come to an end today. I added lacquer to everything. And when that was dry I did the rigging with fishingwire which was not as hard as I anticipated although I have to say that adding the small copper rings during the built made my life a lot easier. I learned a lot of this kit. And Even though it was a really simple kit I'm pretty proud and pleased with the endresult.
Here are the pictures of the final result.


With friendly greetz
Robert Blokker
Posted: Sunday, April 28, 2013 - 08:19 AM UTC
Very impressive Robert. I only hope that my rigging goes as well as yours!
Posted: Sunday, April 28, 2013 - 10:15 AM UTC
Posted: Monday, April 29, 2013 - 03:32 AM UTC
@ Stephen
Thanks for the compliments. And if I may give you an advice from my own meagre experiences in rigging... Add rings. they make your life easier and it is also much easier to pull the strings tight.
@ Dave
Thanks to you as well for the kind words.
That Intruder really looks the part. Nice colors and the decals really bring it to life.
usethermite

Joined: February 14, 2012
KitMaker: 252 posts
AeroScale: 209 posts

Posted: Monday, April 29, 2013 - 06:07 AM UTC
Outstanding, Robert! The rigging looks really good. When I think of doing rigging, my reaction is: no way. But seeing yours gives me second thoughts. What are these "rings" and where do you get them? Not saying I'll ever do a rigging job, but you never kniow. 

 All the best, JT


 All the best, JT
Posted: Monday, April 29, 2013 - 06:40 AM UTC
Beautiful Fokker, Robert. The rigging is superb.
Nice progress on the Intruder, Dave. Are you going to give it a load?
Nice progress on the Intruder, Dave. Are you going to give it a load?
 |


