Air Campaigns
Want to start or join a group build? This is where to start.
Want to start or join a group build? This is where to start.
Hosted by Frederick Boucher, Michael Satin
OFFICIAL: The Lottery Campaign
Tailor

Joined: May 26, 2008
KitMaker: 1,168 posts
AeroScale: 199 posts

Posted: Wednesday, September 18, 2013 - 06:03 AM UTC
Nice! How great it looks once the gimmicky colours are gone!

Jessie_C


Joined: September 03, 2009
KitMaker: 6,965 posts
AeroScale: 6,247 posts

Posted: Wednesday, September 18, 2013 - 06:11 AM UTC
That's the great beauty of Matchbox kits. After painting they stop looking like toys and start looking like serious replicas.

SaxonTheShiba

Joined: February 01, 2009
KitMaker: 1,233 posts
AeroScale: 663 posts

Posted: Saturday, September 21, 2013 - 08:49 AM UTC
Lee----Love the Mirage 2000. I have always thought the two-seater 2000 was one of the sexiest fast-burners out there. Well done.
Andy---Oustanding looking helo. It's always nice to see a MEDEVAC subject.
Sean----Cool Cr-42. Nice touch with the white wash
Andrew----Like the Tempest. Good to see one in a NMF.
Chris---The Beech is coming along nicely and a great subject matter to build.
Stefan---The SPAD looks great so far and I have the utmost respect for bi-plane builders because they are challenging subjects to tackle.
Jessica----The Stanraer looks good. Plus the silver dope finish is much more appealing than Matchbox's Taupe/Mauve/Turquoise colored plastics. Well done thus far.
I worked some more on my Grand Phoenix 1/48th scale Seafire 46/47 in the furtherance of my contra-rotating prop assignment.
Got all the resin parts off their carriers and ready for paint.

I began work on the resin cockpit tub and used Floquil Grimy Black for the black interior.

The instrument panel was completed and is a photo-etch face over film instruments.

The lower cowling, engine mounts and wing folds were spray painted with British Interior Green and given a wash of Raw Unmber oils with mineral spirits.

And lastly, the resin depiction of the mighty Rolls Royce Griffon, prior to super-detailing.

Best wishes everybody,
Ian
Andy---Oustanding looking helo. It's always nice to see a MEDEVAC subject.
Sean----Cool Cr-42. Nice touch with the white wash
Andrew----Like the Tempest. Good to see one in a NMF.
Chris---The Beech is coming along nicely and a great subject matter to build.
Stefan---The SPAD looks great so far and I have the utmost respect for bi-plane builders because they are challenging subjects to tackle.
Jessica----The Stanraer looks good. Plus the silver dope finish is much more appealing than Matchbox's Taupe/Mauve/Turquoise colored plastics. Well done thus far.
I worked some more on my Grand Phoenix 1/48th scale Seafire 46/47 in the furtherance of my contra-rotating prop assignment.
Got all the resin parts off their carriers and ready for paint.

I began work on the resin cockpit tub and used Floquil Grimy Black for the black interior.

The instrument panel was completed and is a photo-etch face over film instruments.

The lower cowling, engine mounts and wing folds were spray painted with British Interior Green and given a wash of Raw Unmber oils with mineral spirits.

And lastly, the resin depiction of the mighty Rolls Royce Griffon, prior to super-detailing.

Best wishes everybody,
Ian
Posted: Monday, September 23, 2013 - 11:27 PM UTC
The Tempest is as finished as it is going to get right now, though I need to go back and do something about the leading edges, especially the left wing. The build has been somewhat fraught and I confess I totally underestimated this kit. What looked a simple kit proved to be nothing of the kind, it needed much more skill and planning than I gave it. The finish is silver dope and I planned it completely wrong painting the black after the silver, it would have been easier the other way round. The resin parts ended up distorting the injected parts structure which is why I have that leading edge problem. A picture fell on it, damaging it quite badly and the nose will never be quite right again, and the undercarriage was damaged meaning the part had to be replaced. The kit is probably the most challenging I have built recently, and really I should try it again, but life is too short.
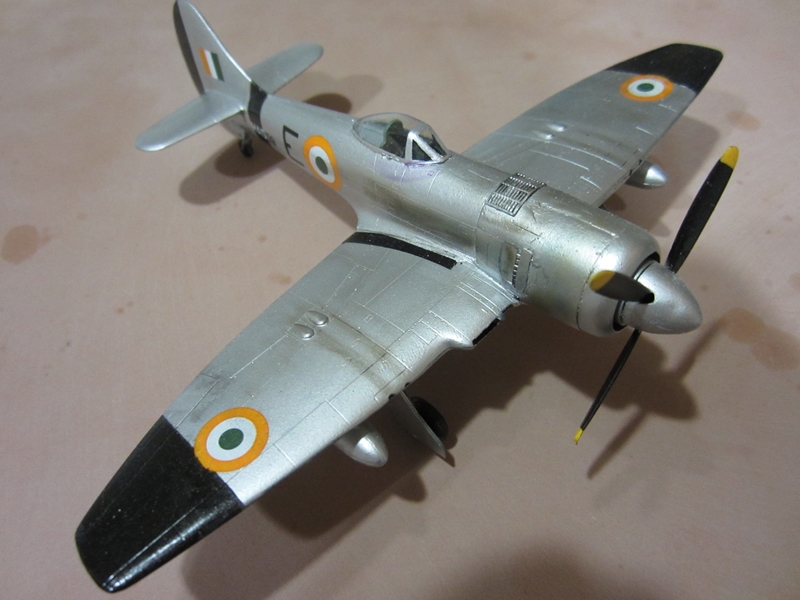
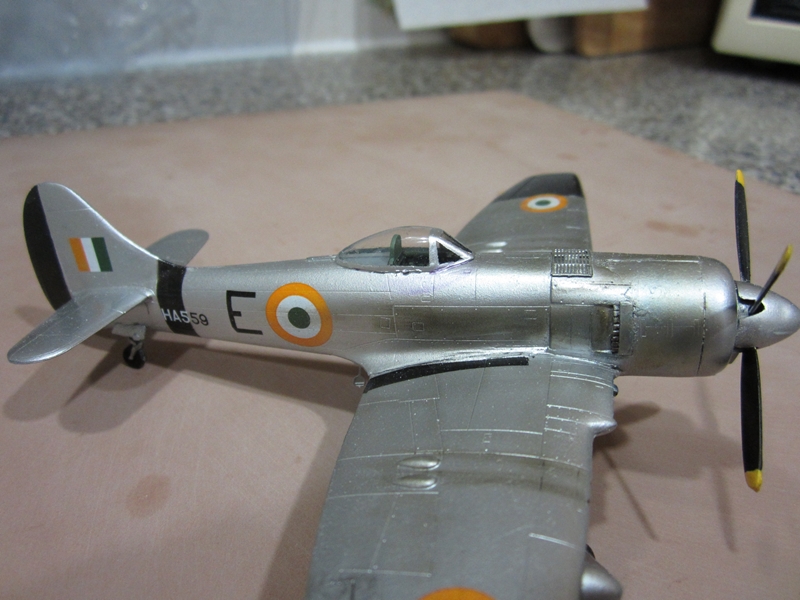
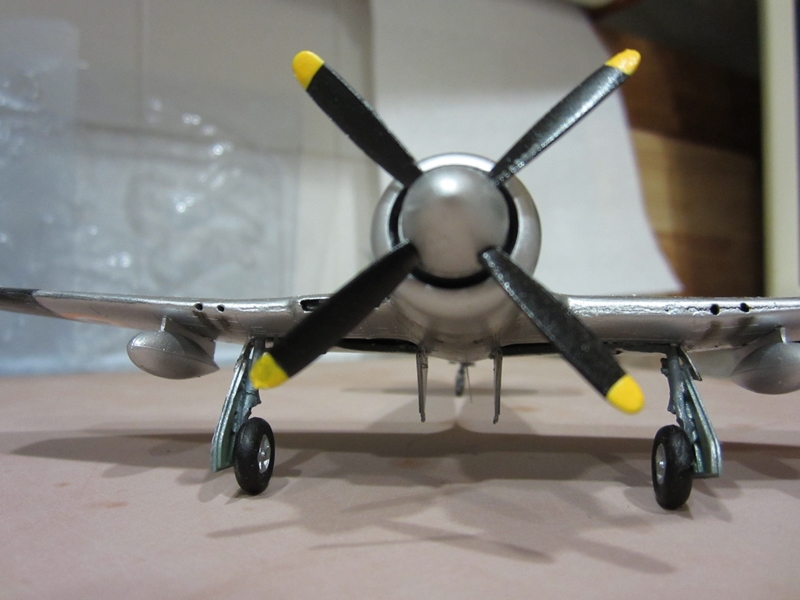
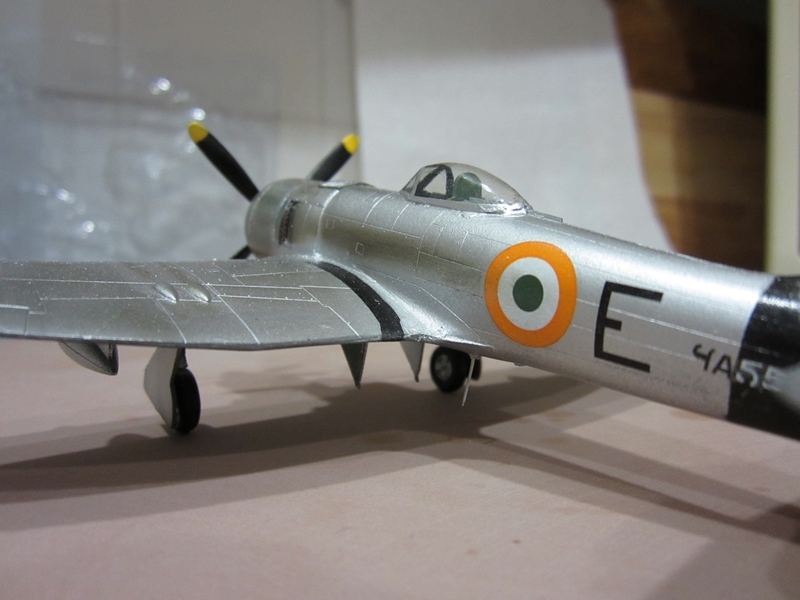
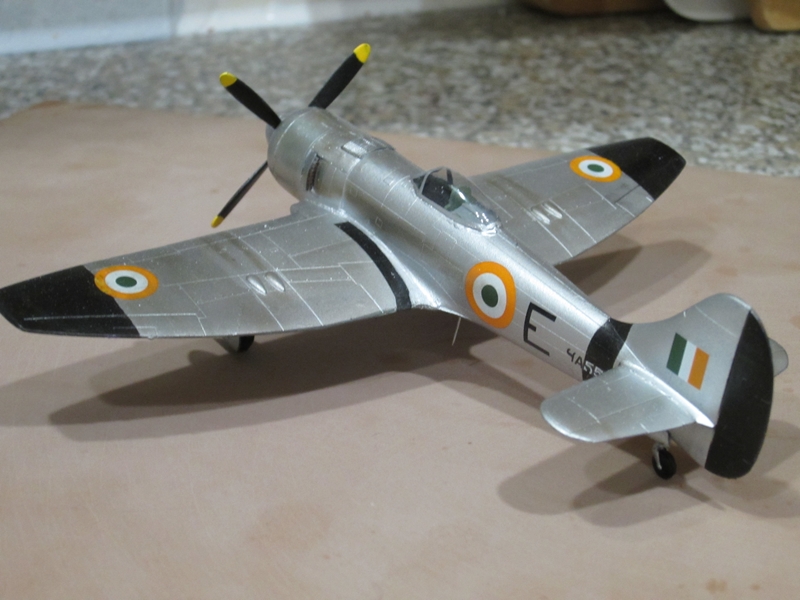
I have enjoyed this campaign and it got me right out of my comfort zone, it is good to see a variety of builds in one campaign. Pics are in the gallery, Dragon Rapide is looking doubtful now as I switch back to KoTS3 and a Hawker Fury, so far a much easier kit


I have enjoyed this campaign and it got me right out of my comfort zone, it is good to see a variety of builds in one campaign. Pics are in the gallery, Dragon Rapide is looking doubtful now as I switch back to KoTS3 and a Hawker Fury, so far a much easier kit

Jessie_C


Joined: September 03, 2009
KitMaker: 6,965 posts
AeroScale: 6,247 posts

Posted: Tuesday, September 24, 2013 - 01:19 PM UTC
Yellow sprayed
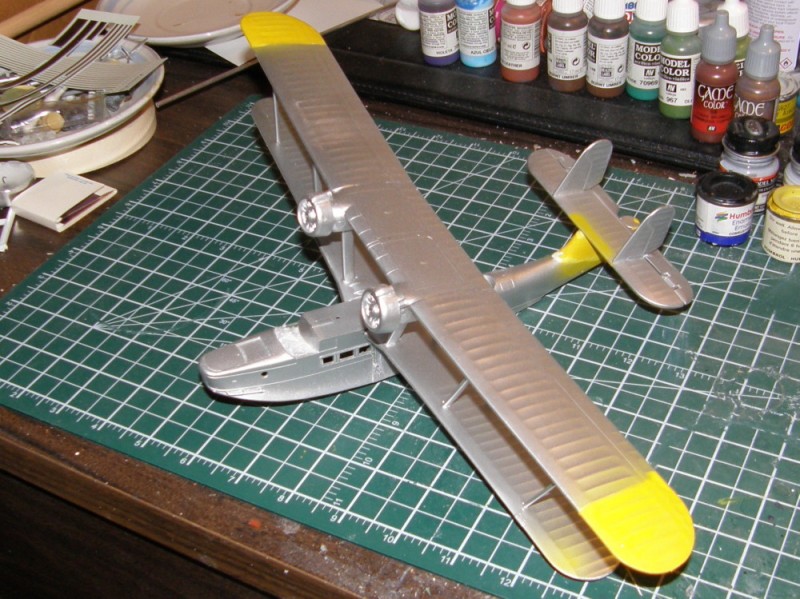
I'll mask it off once it's dry and the finish the silver.

I'll mask it off once it's dry and the finish the silver.
Posted: Wednesday, September 25, 2013 - 01:24 AM UTC
Ah, someone doing it the right way round, unlike me 


SaxonTheShiba

Joined: February 01, 2009
KitMaker: 1,233 posts
AeroScale: 663 posts

Posted: Sunday, September 29, 2013 - 02:33 AM UTC
I did some more work on the Grand Phoenix Seafire. I got the resin cockpit installed which was a real chore. All the resins parts for this kit are grossly oversized so there was alot of trimming and sanding to get everything to fit. I had to take trim alot off the wing roots to get the fuselage to fit because the cockpit had splayed the fueslage out so badly......and that was even after all the resin cockpit parts had been sanded down to the point of almost being able to see through them. Anyway, onwards and upwards-----er something.
Best wishes,
Ian


Best wishes,
Ian


Posted: Monday, September 30, 2013 - 01:12 AM UTC
I sympathised, had the same problem with the Special Hobbies Tempest
vdejarnette

Joined: February 25, 2013
KitMaker: 209 posts
AeroScale: 138 posts

Posted: Tuesday, October 01, 2013 - 01:47 AM UTC
Gah, way behind on my campaigns these days. At this rate not having even started one entry, I doubt that I will get to my second choice "Duck!" (Canard) entry... but I should be starting on a "Hellofacopter" in the next day or two. Originally I was set on doing an Apache, but this ugly thing has been calling me.


windysean

Joined: September 11, 2009
KitMaker: 1,917 posts
AeroScale: 563 posts

Posted: Tuesday, October 01, 2013 - 01:59 AM UTC
Ha! Van, that's a beaut! I hope the Glencoe kit doesn't give you too much trouble-- those are old re-boxings, aren't they? Can't wait to see that join our gallery.
-Sean H.
-Sean H.


Jessie_C


Joined: September 03, 2009
KitMaker: 6,965 posts
AeroScale: 6,247 posts

Posted: Tuesday, October 01, 2013 - 10:21 AM UTC
Masking is off
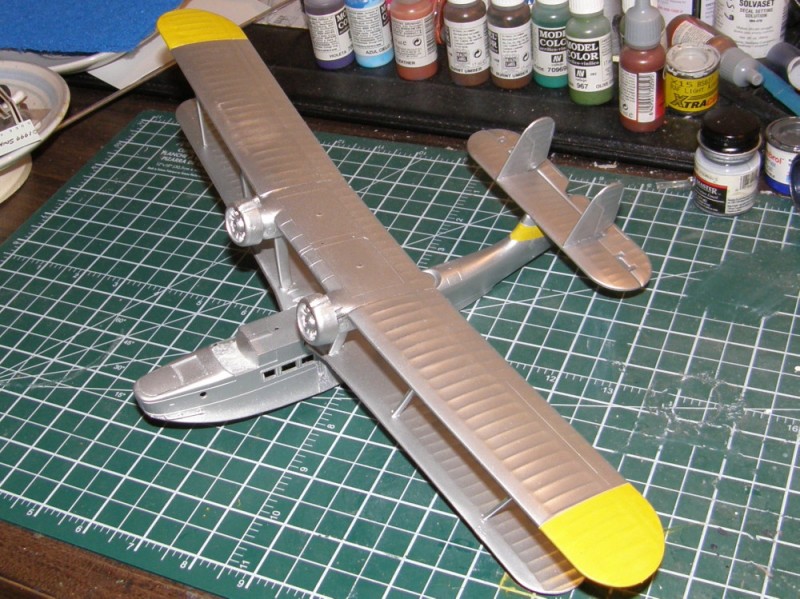
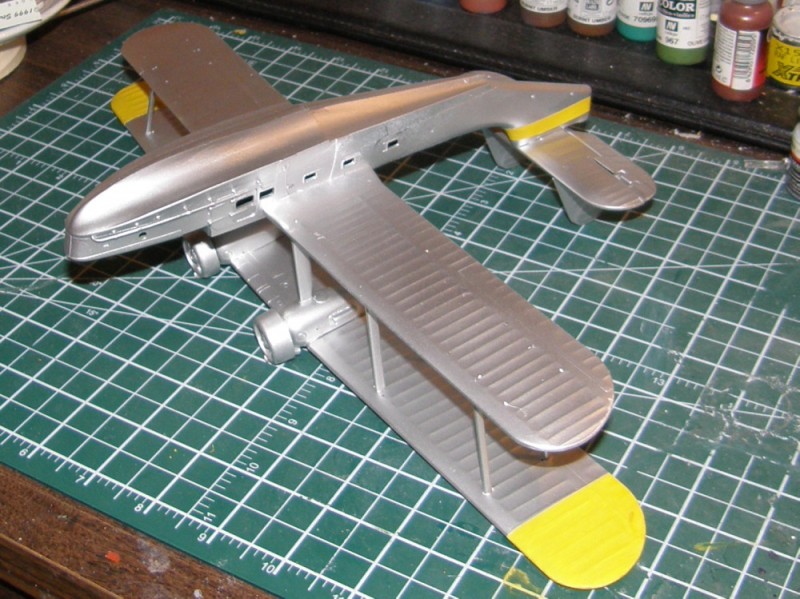
Next up, decals!


Next up, decals!
Tailor

Joined: May 26, 2008
KitMaker: 1,168 posts
AeroScale: 199 posts

Posted: Tuesday, October 01, 2013 - 05:54 PM UTC
Nice projects going on and coming up! This is a very versatile campaign indeed.
Here's my second entry as under "NASA to meet you!"
It'll be a while before I can really get started, but here's the kit anyway:


Home-made NASA decals are courtesy of my good friend Frank Ilse. Thanks, dude!
All this will hopefully assemble into this:

Keep up the great work:
Cheers,
Guido
Here's my second entry as under "NASA to meet you!"
It'll be a while before I can really get started, but here's the kit anyway:


Home-made NASA decals are courtesy of my good friend Frank Ilse. Thanks, dude!
All this will hopefully assemble into this:

Keep up the great work:
Cheers,
Guido

Jessie_C


Joined: September 03, 2009
KitMaker: 6,965 posts
AeroScale: 6,247 posts

Posted: Wednesday, October 02, 2013 - 12:58 PM UTC
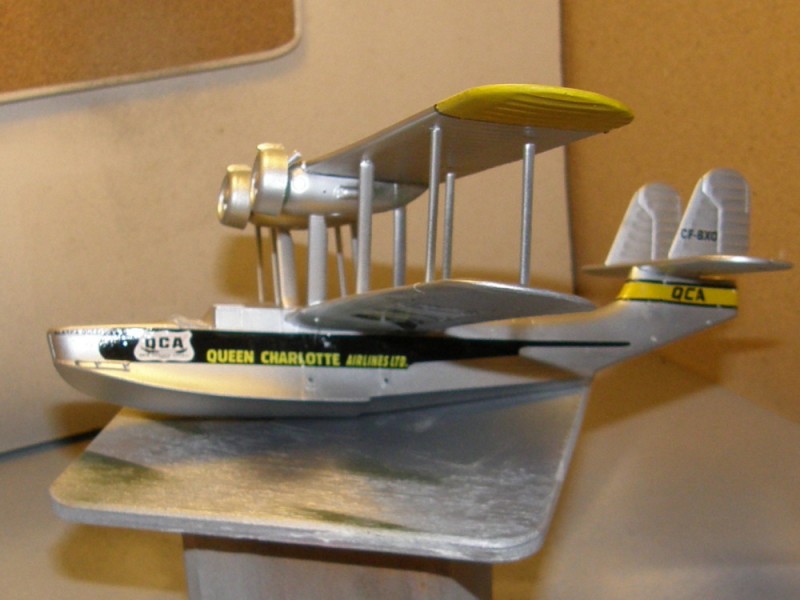
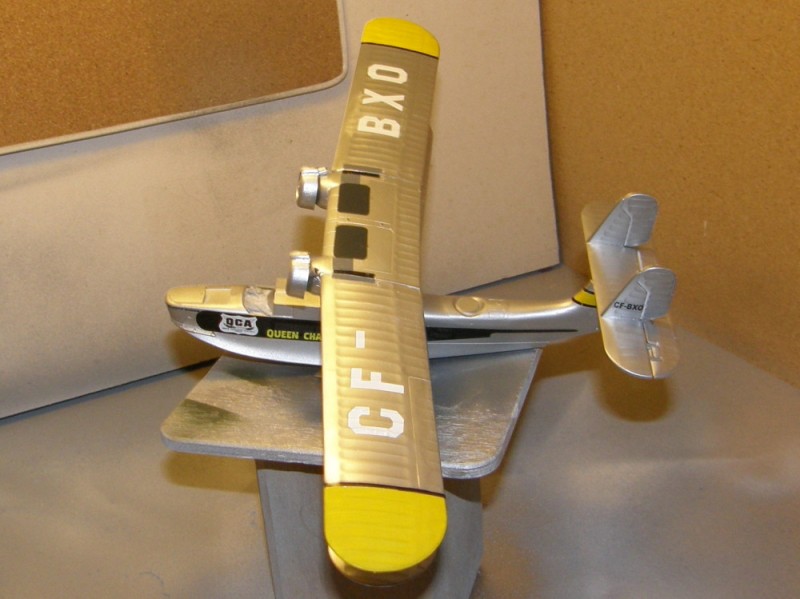
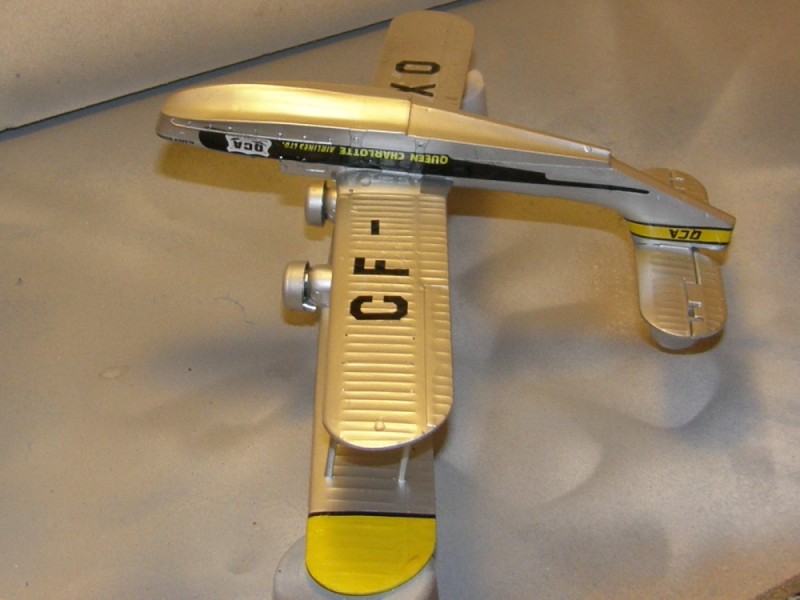
Now it's colourful!


Posted: Wednesday, October 02, 2013 - 06:27 PM UTC
Love the Stranraer Jessie! So this time you just painted it aluminium as it was doped silver? Or were the wings fabric covered and the planing body aluminium? Just curious as I can't quite remember it's construction and I have the same kit to build at some point. (Really seem to have been bitten by the flying boat bug!) Love the civilian decals!
Looking good with the Seafire Ian even if it was a struggle to get the cockpit in that svelte body. Did you grind down the plastic of the fuselage as well as trying to thin the resin to the point of transparency?
Nice recovery on the Sea Fury Andrew, I've had several mishaps in the past months (earthquakes and all) which I've either found new homes for or rebuilt, refurbed and re-fabricated them. Still I feel your frustration as the finished article was looking really good!
I'm just refining the ailerons on the Beech as Jessie pointed out "they don't droop like that" then I'm going to work on the "N" braces, just working out the "how" although I think it'll be thin brass tube and wire anchors as it'll provide a very robust structure. And as I'm sending it to Shane at Northwest Flying once complete, as he's keen to have a model of one of his aircraft, it'll survive the rather long journey much better.
Guido Nasa to meet you too! Looking forward to seeing the T33 take shape!
Tailor

Joined: May 26, 2008
KitMaker: 1,168 posts
AeroScale: 199 posts

Posted: Wednesday, October 02, 2013 - 08:21 PM UTC
Quoted Text
Guido Nasa to meet you too! Looking forward to seeing the T33 take shape!
Me too! First ever metal-finish plane. Some of you make it look a piece of cake, but I know that it can be quite a royal pain.
Lovely bird, Jessica!
Cheers,
Guido

SaxonTheShiba

Joined: February 01, 2009
KitMaker: 1,233 posts
AeroScale: 663 posts

Posted: Wednesday, October 02, 2013 - 10:18 PM UTC
Chris, in answer to your question.....yes...the fuselage sides were also ground down with a Dremel tool, also to the point of almost being transparent. The cockpit tub was just cast way too big. Reminded me of some of the early Black Box sets from the early 2000's. But, nonetheless it's in the plane and a done deal now.
Best wishes,
Ian
Best wishes,
Ian
Quoted Text
Love the Stranraer Jessie! So this time you just painted it aluminium as it was doped silver? Or were the wings fabric covered and the planing body aluminium? Just curious as I can't quite remember it's construction and I have the same kit to build at some point. (Really seem to have been bitten by the flying boat bug!) Love the civilian decals!
Looking good with the Seafire Ian even if it was a struggle to get the cockpit in that svelte body. Did you grind down the plastic of the fuselage as well as trying to thin the resin to the point of transparency?
Nice recovery on the Sea Fury Andrew, I've had several mishaps in the past months (earthquakes and all) which I've either found new homes for or rebuilt, refurbed and re-fabricated them. Still I feel your frustration as the finished article was looking really good!
I'm just refining the ailerons on the Beech as Jessie pointed out "they don't droop like that" then I'm going to work on the "N" braces, just working out the "how" although I think it'll be thin brass tube and wire anchors as it'll provide a very robust structure. And as I'm sending it to Shane at Northwest Flying once complete, as he's keen to have a model of one of his aircraft, it'll survive the rather long journey much better.
Guido Nasa to meet you too! Looking forward to seeing the T33 take shape!

Jessie_C


Joined: September 03, 2009
KitMaker: 6,965 posts
AeroScale: 6,247 posts

Posted: Thursday, October 03, 2013 - 03:44 AM UTC
Quoted Text
Love the Stranraer Jessie! So this time you just painted it aluminium as it was doped silver? Or were the wings fabric covered and the planing body aluminium? Just curious as I can't quite remember it's construction and I have the same kit to build at some point. (Really seem to have been bitten by the flying boat bug!) Love the civilian decals!
It's painted overall in Testors rattle can silver. The fuselage was aluminium while all the flying surfaces were fabric covered in aluminium dope but after RCAF service they were painted overall in silver paint to help protect against corrosion during their heavy scheduled airline use. QCA didn't have much opportunity to haul them out of the water the way the Air Force did.

SaxonTheShiba

Joined: February 01, 2009
KitMaker: 1,233 posts
AeroScale: 663 posts

Posted: Thursday, October 03, 2013 - 12:51 PM UTC
Hey Jessica-----I may have missed it in the thread-----what decals did you use?
Ian
Ian

Jessie_C


Joined: September 03, 2009
KitMaker: 6,965 posts
AeroScale: 6,247 posts

Posted: Thursday, October 03, 2013 - 01:30 PM UTC
I used a very early production Whisky Jack sheet (and which started to fall apart after being soaked, so I coated it all in liquid decal film). I understand that Thunderbird Models in the UK has obtained the license to produce them so they're available again.
Removed by original poster on 10/04/13 - 06:50:28 (GMT).
Posted: Friday, October 04, 2013 - 10:05 PM UTC
Were they in service during WW2 Jessie? Or were they sold off before hostilities commenced? I seem to recall them being in active service prior to WW2. But being part of the far flung empire we made do with the RAF's cast offs as occasion and economy dictated.
vdejarnette

Joined: February 25, 2013
KitMaker: 209 posts
AeroScale: 138 posts

Posted: Saturday, October 05, 2013 - 12:39 AM UTC
Ok... getting started.
My lot was
-"Hellofacopter" Anything rotary wing.
So here's a hell of a project. Flash and messy fits all over the place.


With the obligatory shots out of the way... a little progress with the sub assemblies and filling ejector "pin" holes with mr surfacer.

My lot was
-"Hellofacopter" Anything rotary wing.
So here's a hell of a project. Flash and messy fits all over the place.


With the obligatory shots out of the way... a little progress with the sub assemblies and filling ejector "pin" holes with mr surfacer.


Jessie_C


Joined: September 03, 2009
KitMaker: 6,965 posts
AeroScale: 6,247 posts

Posted: Saturday, October 05, 2013 - 03:53 AM UTC
Quoted Text
Were they in service during WW2 Jessie? Or were they sold off before hostilities commenced? I seem to recall them being in active service prior to WW2. But being part of the far flung empire we made do with the RAF's cast offs as occasion and economy dictated.
The RAF retired theirs in 1941, but the RCAF were forced to make do until 1944 (some sources say 1946).
Posted: Sunday, October 06, 2013 - 07:11 AM UTC
This is a great campaign and great builds gals and guys! Some very obscure themes here, at least to me...
So, my SPAD has moved forward in the painting area. I kinda' like the bright colors, unlike the olive drab I'm used to...
So, after the black pre-shade/priming, I put on some white as the base and masked it for the blue. I printed out some stars at the right size, sprayed them with some Scotch reposable glue and cut them out each one. I did this over the course of several shorter sessions so as not to go completely mad...


This is how it turned out:


Then it was time for red. More masking!

More results!

I also painted the propeller (Valejo dark brown streaks over buff and a spray of white for the middle portion):

And some other detail painting.


Now the decals... They were yellowed, the paint under it shone through and finally, I couldn't get any way to get the wrinkles out... So I decided to mask the roundels and that's where I am right now.


Hopefully I can finish it within the next two weeks.
Cheers!
Stefan
So, my SPAD has moved forward in the painting area. I kinda' like the bright colors, unlike the olive drab I'm used to...

So, after the black pre-shade/priming, I put on some white as the base and masked it for the blue. I printed out some stars at the right size, sprayed them with some Scotch reposable glue and cut them out each one. I did this over the course of several shorter sessions so as not to go completely mad...
This is how it turned out:
Then it was time for red. More masking!
More results!
I also painted the propeller (Valejo dark brown streaks over buff and a spray of white for the middle portion):
And some other detail painting.
Now the decals... They were yellowed, the paint under it shone through and finally, I couldn't get any way to get the wrinkles out... So I decided to mask the roundels and that's where I am right now.
Hopefully I can finish it within the next two weeks.
Cheers!
Stefan
Posted: Sunday, October 06, 2013 - 10:48 AM UTC
How did you get the stars that good, phenomenal paint job
 |


