World War II
Discuss WWII and the era directly before and after the war from 1935-1949.
Hosted by Rowan Baylis
1/48 B-17F Build - 303rd BGs Luscious Lady
Gremlin56
Joined: October 30, 2005
KitMaker: 3,897 posts
AeroScale: 564 posts
Posted: Wednesday, August 06, 2014 - 05:42 AM UTC
Hi Brian, thanks for the update. remember: the more powerful the zoom the bigger the warts Looks rather excellent to me, great progress and immaculate work.
Redhand
#522
_VISITCOMMUNITY
New Jersey, United States
Joined: January 20, 2013
KitMaker: 1,460 posts
AeroScale: 1,443 posts
Posted: Wednesday, August 06, 2014 - 11:26 AM UTC

Quoted Text

Looks rather excellent to me, great progress and immaculate work.


You are too kind. I guarantee that if this wasn't a B-17, I would not be going to these lengths.
Joel_W
Staff MemberAssociate Editor
AUTOMODELER
_VISITCOMMUNITY
New York, United States
Joined: December 04, 2010
KitMaker: 11,666 posts
AeroScale: 7,410 posts
Posted: Thursday, August 07, 2014 - 02:20 AM UTC
Brian
That bulkhead is amazing. I'm just as amazed and intrigued how you can figure out what most of those lines are for.

Joel
Redhand
#522
_VISITCOMMUNITY
New Jersey, United States
Joined: January 20, 2013
KitMaker: 1,460 posts
AeroScale: 1,443 posts
Posted: Thursday, August 07, 2014 - 02:32 AM UTC
BUT WAIT, THERE's MORE!

More work towards the bottom of the bulkhead, where more electrical wiring still needs to be added.


Loading chart on door and kickplate at bottom of door inspired by B-17F Erection and Maintenance Manual photo. (Recently found it free online!!)


Major details to come include vertical control cables, visible above black fuel hose piping; misc. "busy work" bits and pieces and stenciling; and of course the bomb bay door transmissions, drive shafts and ball screws.

I am contemplating a light black wash, especially on the bottom half of bulkhead, and then spraying the whole mess with a dullcoat. This after touch-up painting of spots worn bare, etc.

I think it best to record work incrementally, rather than "show off" finished work, so you can see one modeler's approach.
Redhand
#522
_VISITCOMMUNITY
New Jersey, United States
Joined: January 20, 2013
KitMaker: 1,460 posts
AeroScale: 1,443 posts
Posted: Thursday, August 07, 2014 - 03:43 AM UTC

Quoted Text

Brian
That bulkhead is amazing. I'm just as amazed and intrigued how you can figure out what most of those lines are for.

Joel


The B-17 Pilot's Manual and Erection and Maintenance Manual definitely help. Even as a paper-pushing lawyer I have some relevant "industry experience."

When I was in the US Navy in the early 1970s my last, seven month "tour" was as a shipyard repair officer at the Philadelphia Naval Shipyard. Total immersion in a heavy duty industrial environment where my job was to learn about and monitor progress on a guided missile cruiser modernization and overhaul. So I became generically familiar with and comfortable looking at a wide variety of shipboard mechanical and electrical systems not too different from what's in the B-17.

Same was true when I served on a WWII era reserve training destroyer before that in Philly. As the gunnery officer I had to get familiar with electro-hydraulic drives, electrical systems etc because that's what my people worked on. And that was straight WWII technology.

Finally, when I worked for Curtiss-Wright as an attorney, one of my business unit clients made flap actuators and weapons bay transmissions and actuators for civilian and military aircraft. So again I was fortunate to get some real life exposure to the stuff that fascinates me in my modeling hobby.
Redhand
#522
_VISITCOMMUNITY
New Jersey, United States
Joined: January 20, 2013
KitMaker: 1,460 posts
AeroScale: 1,443 posts
Posted: Sunday, August 10, 2014 - 05:32 AM UTC
CRAWLING RIGHT ALONG

There's little doubt I've gotten "mired in the details" of this [insert pejorative adjective here] bomb bay front bulkhead. I thought before that the bulkhead between the navigator's and pilots' compartment, fore and aft, was the most labor-intensive model part I'd ever worked on. This one runs a close second, and maybe beats it. However, the end is in sight. For now, two progress photos.

The first is a distance shot showing details of the fuel transfer system at the forward end of the catwalk under the step. Those will actually be added when I eventually glue the catwalk in: see photo center. To the right is the complex transmission for the bomb bay actuators, to which the forward actuator drive shafts will attach when they are installed.


At the top of the transmission, see above, there is a drive shaft pointing towards us, more or less. That puppy runs all the way aft under the catwalk to a transmission and drive shafts for the after bomb bay door actuators. It will be a cool detail to add.

Below is a closer shot of the bulkhead "under construction."


More coming soon, I hope.
Joel_W
Staff MemberAssociate Editor
AUTOMODELER
_VISITCOMMUNITY
New York, United States
Joined: December 04, 2010
KitMaker: 11,666 posts
AeroScale: 7,410 posts
Posted: Sunday, August 10, 2014 - 08:53 AM UTC
Brian,
You certainly have the perfect background for detail work. My background certainly has no skills that I can apply to modeling in any manor or fashion.

As I said before, your detailing of that bulkhead is truly amazing. I'm looking forward to seeing how you super detail the entire Bombay compartment.
Joel
Redhand
#522
_VISITCOMMUNITY
New Jersey, United States
Joined: January 20, 2013
KitMaker: 1,460 posts
AeroScale: 1,443 posts
Posted: Monday, August 11, 2014 - 05:28 AM UTC
NEW AFTERMARKET GOODIES

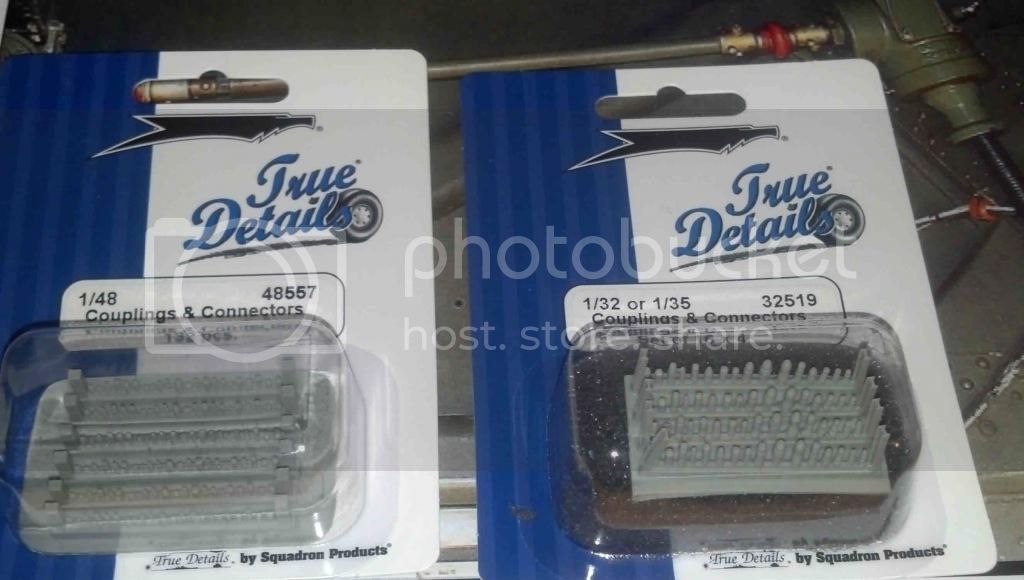
True Details has two new sets that will give me much help in detailing the Bomb Bay. I got one in 1/48 and one in 1/32 and will let you know what I think of them when they come in the mail.


In 1/32 above.


In 1/48.

I would also appreciate it if someone could suggest some "tank accessories" in 1/48 for hooks, lifting brackets and chain falls to go in the bomb bay ceiling. These will represent bomb hoist equipment. I'm building this with the bombs in a cart underneath the open doors, not in the aircraft.
Redhand
#522
_VISITCOMMUNITY
New Jersey, United States
Joined: January 20, 2013
KitMaker: 1,460 posts
AeroScale: 1,443 posts
Posted: Wednesday, August 13, 2014 - 06:48 AM UTC
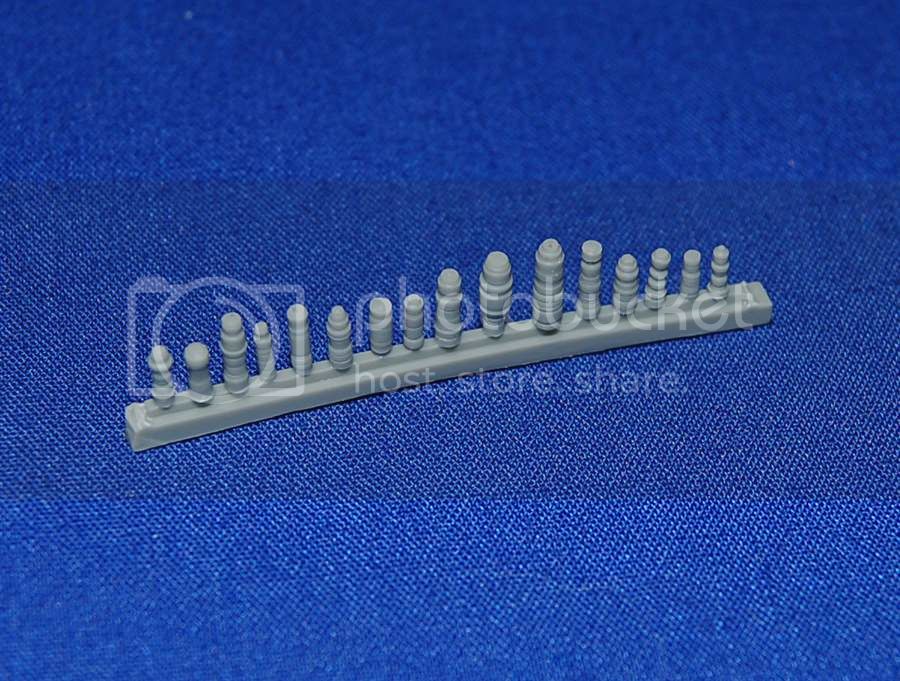
The connectors came in.


There's actually quite a few of them in each set. I think the 1/32 - 1/35 set will be more useful for what I need. You will see what I have in mind when I start work on the actuators, like the one at the top right of the photo.
Redhand
#522
_VISITCOMMUNITY
New Jersey, United States
Joined: January 20, 2013
KitMaker: 1,460 posts
AeroScale: 1,443 posts
Posted: Sunday, August 31, 2014 - 02:12 AM UTC
FORWARD BOMB BAY BULKHEAD DONE! (MORE OR LESS)

As we know, life has a way of intruding * * * and this was my situation in spades the past couple of weeks. However, I got back into the bomb bay,


and finally finished the front bulkhead, after deciding to save the actuators for the doors to a later stage of construction.

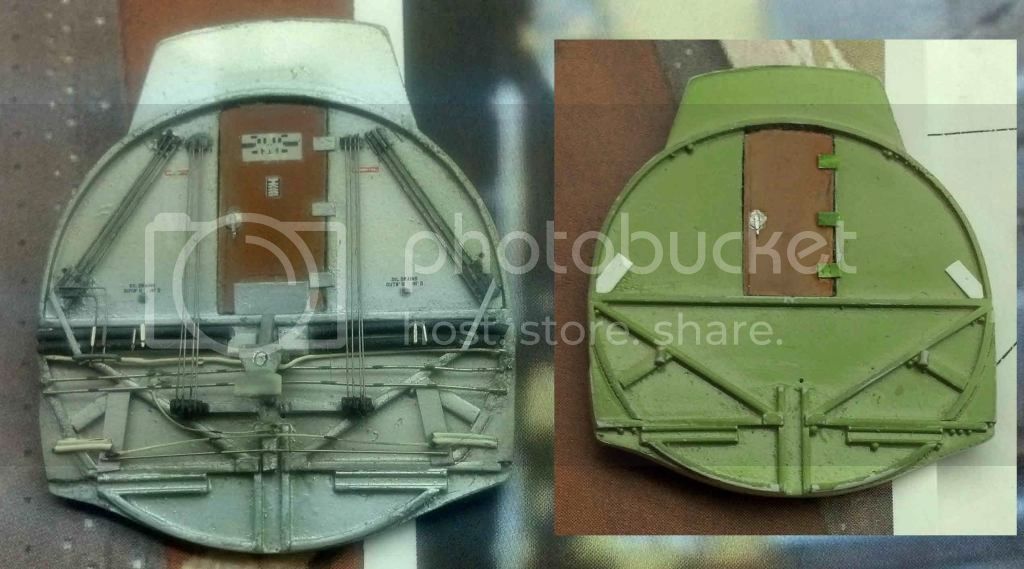
Here it is, with the part at the start to show progress.


And here is a look at things to come in the near future:


Happy Labor Day in the USA.
Joel_W
Staff MemberAssociate Editor
AUTOMODELER
_VISITCOMMUNITY
New York, United States
Joined: December 04, 2010
KitMaker: 11,666 posts
AeroScale: 7,410 posts
Posted: Sunday, August 31, 2014 - 02:27 AM UTC
Brian,
That Bulkhead looks amazing. What a difference from the original bulkhead.
Joel
Gremlin56
Joined: October 30, 2005
KitMaker: 3,897 posts
AeroScale: 564 posts
Posted: Sunday, August 31, 2014 - 02:42 AM UTC
Fantastic work Brian,
dammodeus
_VISITCOMMUNITY
Colorado, United States
Joined: February 01, 2009
KitMaker: 19 posts
AeroScale: 18 posts
Posted: Sunday, August 31, 2014 - 12:54 PM UTC

Quoted Text

NEW AFTERMARKET GOODIES

True Details has two new sets that will give me much help in detailing the Bomb Bay. I got one in 1/48 and one in 1/32 and will let you know what I think of them when they come in the mail.


In 1/32 above.


In 1/48.

What are the name of those sets? Thanks! Ted

I would also appreciate it if someone could suggest some "tank accessories" in 1/48 for hooks, lifting brackets and chain falls to go in the bomb bay ceiling. These will represent bomb hoist equipment. I'm building this with the bombs in a cart underneath the open doors, not in the aircraft.

dammodeus
_VISITCOMMUNITY
Colorado, United States
Joined: February 01, 2009
KitMaker: 19 posts
AeroScale: 18 posts
Posted: Sunday, August 31, 2014 - 03:07 PM UTC
What are the name of those True Details sets?

Thanks!
Ted
Redhand
#522
_VISITCOMMUNITY
New Jersey, United States
Joined: January 20, 2013
KitMaker: 1,460 posts
AeroScale: 1,443 posts
Posted: Sunday, August 31, 2014 - 05:27 PM UTC
They are called "Couplings and Connectors" and the product serial numbers are shown on the box pictures posted above. They are easy to get from Squadron.com
dammodeus
_VISITCOMMUNITY
Colorado, United States
Joined: February 01, 2009
KitMaker: 19 posts
AeroScale: 18 posts
Posted: Monday, September 01, 2014 - 01:36 PM UTC
Thanks! I'm working on the old 1/48 B-29...your work is inspiring!
Redhand
#522
_VISITCOMMUNITY
New Jersey, United States
Joined: January 20, 2013
KitMaker: 1,460 posts
AeroScale: 1,443 posts
Posted: Monday, September 01, 2014 - 10:45 PM UTC
Thank you indeed. I did a 1/48 B-29 a few years ago, in an early OD scheme. Bomb bay doors closed. If you are opening them up, Terry Dean's resin bomb bay doors are a must. See http://modelingmadness.com/scott/detailsets/terrydean/td29bbd.htm He also did some accurate-on-the-inside main wheel doors, not to mention his fabulous nose weights.

I also recommend the Squadron canopy parts, though I had 3rd party help installing it.

That build is a huge undertaking: took me years, and that was before all the recent Eduard brass and goodies. Have to "pick your battles" on that one because of how little one can actually see on the inside. In that sense I think the 17 is a better subject, but hey, I did a 29 first.

Good luck!
dammodeus
_VISITCOMMUNITY
Colorado, United States
Joined: February 01, 2009
KitMaker: 19 posts
AeroScale: 18 posts
Posted: Friday, September 05, 2014 - 11:55 PM UTC
Thanks! Yes I got the Terry Dean stuff, his products are great! Love to see your B-29 sometime!

Ted
Redhand
#522
_VISITCOMMUNITY
New Jersey, United States
Joined: January 20, 2013
KitMaker: 1,460 posts
AeroScale: 1,443 posts
Posted: Saturday, September 06, 2014 - 02:16 AM UTC
Later today I'll post a couple of "taken-from inside the display case" shots. I'm afraid to move the monster after all that went into it.
Redhand
#522
_VISITCOMMUNITY
New Jersey, United States
Joined: January 20, 2013
KitMaker: 1,460 posts
AeroScale: 1,443 posts
Posted: Saturday, September 06, 2014 - 12:25 PM UTC
MEASURE TWICE, CUT ONCE

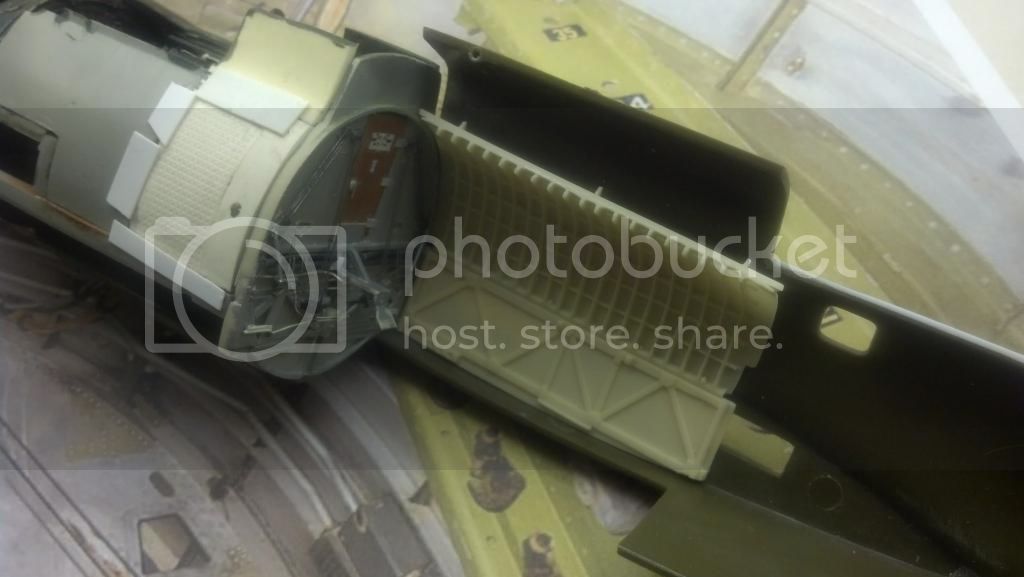
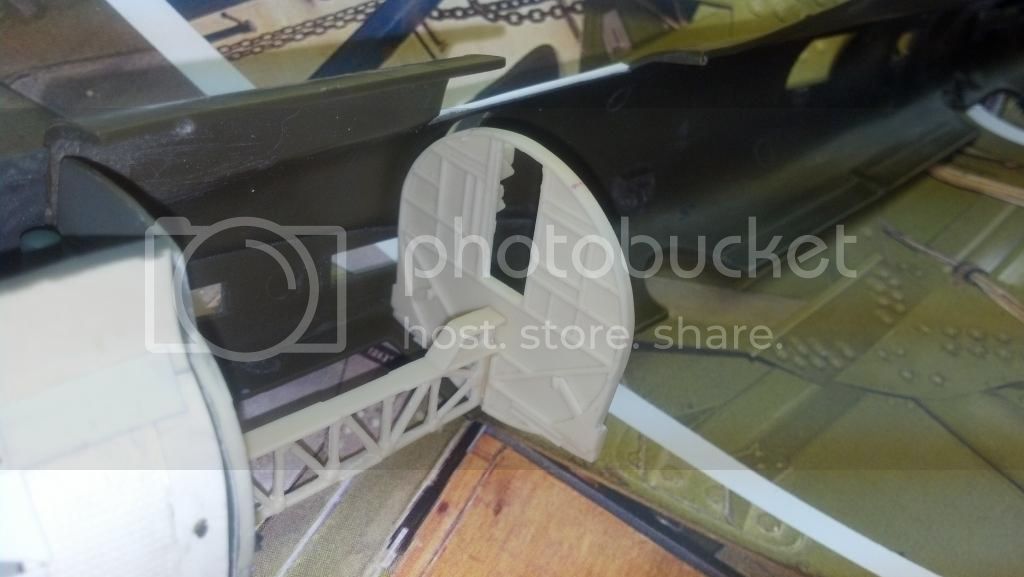
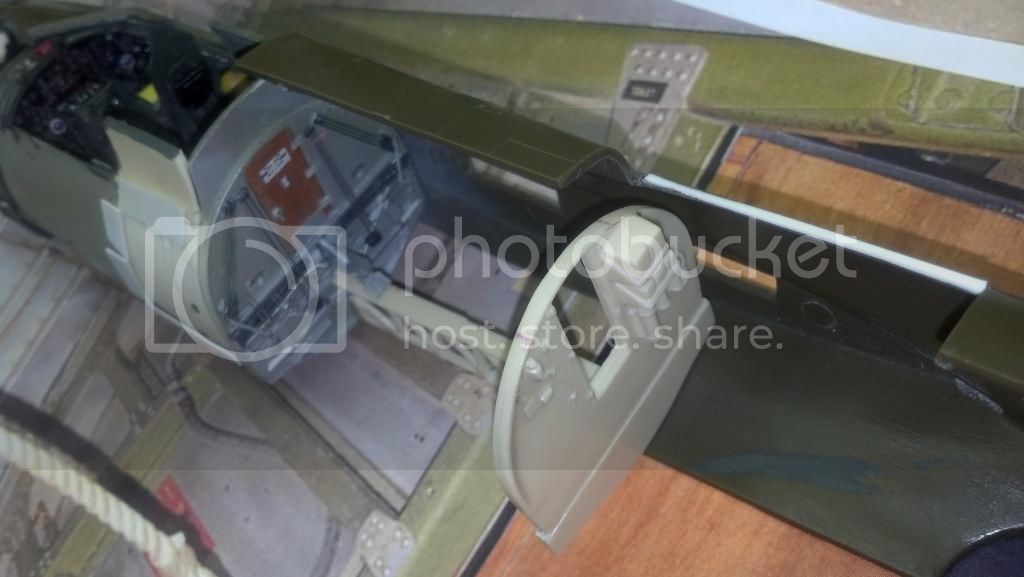
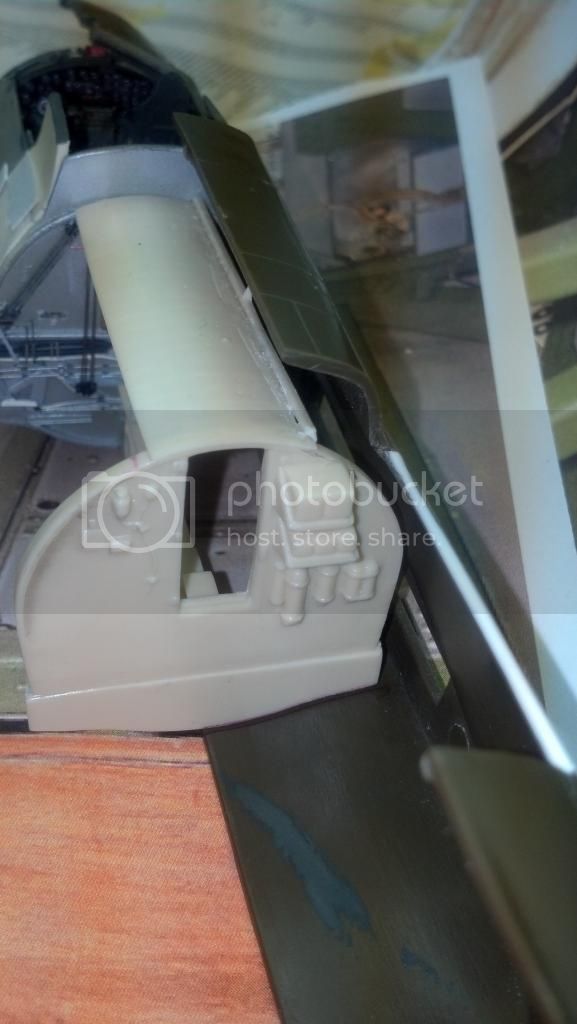
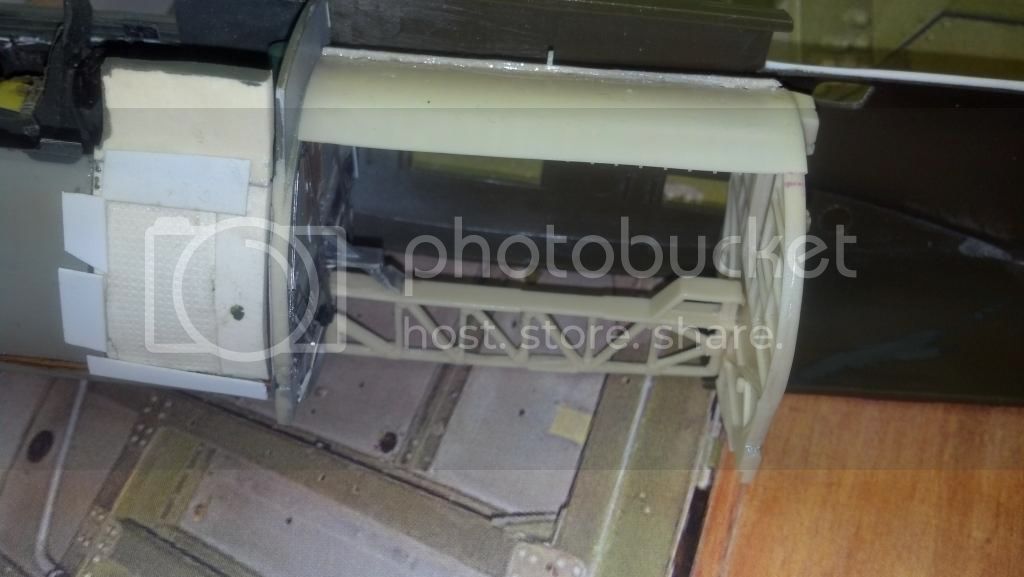
After trying various placements of the bomb-bay side walls it became abundantly clear to me that a simple front-to-back build wasn't going to be possible. The only way to assure that everything will line up correctly is going to be by dead-centering the catwalk so that half of the catwalk will protrude from the bottom edge of the fuselage half at the same time that the rear of the catwalk is fixed to the rear bomb bay bulkhead. I did this with white glue so that I can pull it apart later. See below.


Among other things, when one does that, there is a huge gap between the lower after bulkhead on the radio room side, and the side of the fuselage. See below.


On the bomb-bay side of the bulkhead, this gap will be closed by the bomb-bay side walls. (I'll deal with the gap in the radio room later.) However, the placement of those sidewalls is itself dependent on proper alignment of the bomb-bay ceiling. See below.


In other words, sequence of construction here to allow for proper alignment will require using the catwalk to position everything, then removing the catwalk (probably) to allow access to the other parts.

A bit of a challenge here, folks.

Like I said at the beginning, "Measure Twice, Cut Once."
Joel_W
Staff MemberAssociate Editor
AUTOMODELER
_VISITCOMMUNITY
New York, United States
Joined: December 04, 2010
KitMaker: 11,666 posts
AeroScale: 7,410 posts
Posted: Sunday, September 07, 2014 - 02:03 AM UTC
Brian,
Boy is that bomb-bay going to really be a challenge to your superb modeling skills, but I have no doubt that you will more then just succeed. Your plan sure seems like it should work with removing the catwalk to gain needed access for detailing.

As usual your build thread is one of the threads that the auto notifications doesn't work for me. When following a master build like yours, it's easy to miss an update unless I go looking for your build thread every few days, which isn't always possible.
Joel
Redhand
#522
_VISITCOMMUNITY
New Jersey, United States
Joined: January 20, 2013
KitMaker: 1,460 posts
AeroScale: 1,443 posts
Posted: Sunday, September 07, 2014 - 03:08 AM UTC
Joel:

I think I figured out the way to do it. The key is the ceiling of the bomb bay. I'm going to need to detach the catwalk from the after bulkhead and then finish the after bulkhead front and back.

Then, I need to re-attach the catwalk to the after bulkhead with white glue and glue the after bulkhead in. That will set up the proper positioning for everything that follows.

When the after bulkhead is secure, I will paint and glue the bomb bay ceiling in. I think it will need to be pinned to the top of the after bulkhead in addition to being glued. The top front of the ceiling will have to be braced against the upper "turtleback" part of forward bomb-bay bulkhead so it is secure and not just a "butt join."

Once that is done I will remove the catwalk and then build from the interior shell formed by the bomb bay ceiling down both sides, modular style, one piece at a time, adding all the details before I glue the individual bulkhead parts in.

If it works right the left bomb-bay bulkheads will fit snugly and where they should against the left fuselage half. That I'm going to have to check as I go forward.

I'm not sure when yet in the sequence of construction, but at some point I will glue the catwalk up into the ceiling with vertical bomb shackles attached in that "V" shape.

I think that "sounds like a plan."
Redhand
#522
_VISITCOMMUNITY
New Jersey, United States
Joined: January 20, 2013
KitMaker: 1,460 posts
AeroScale: 1,443 posts
Posted: Friday, September 19, 2014 - 05:12 AM UTC
PLAN OF ATTACK

Posting has been sparse as I suffered an "inspirational lapse" after finishing the forward bulkhead of the bomb bay. Call it a case of the early-mid build blues: Will I EVER get this damn thing done?

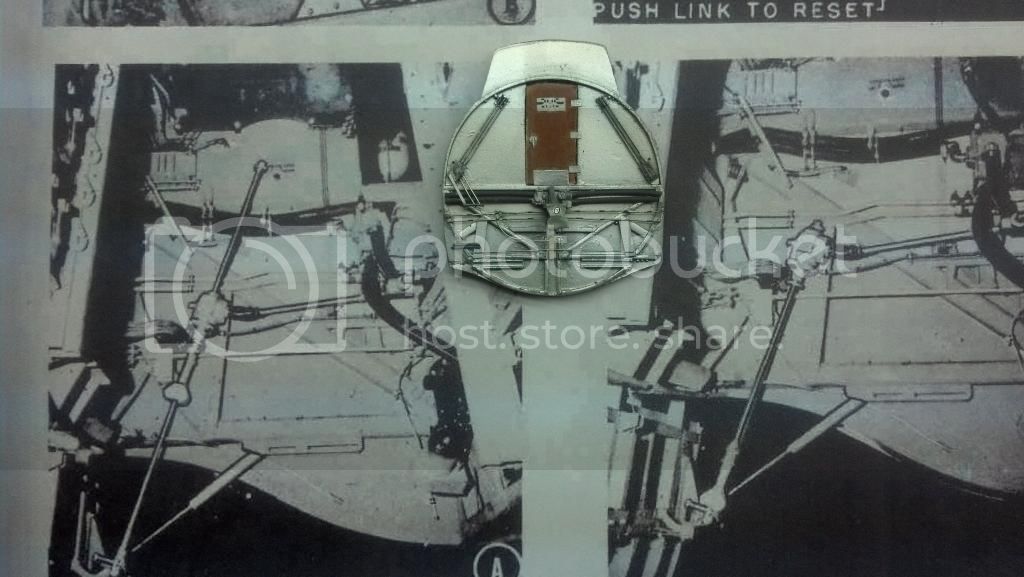
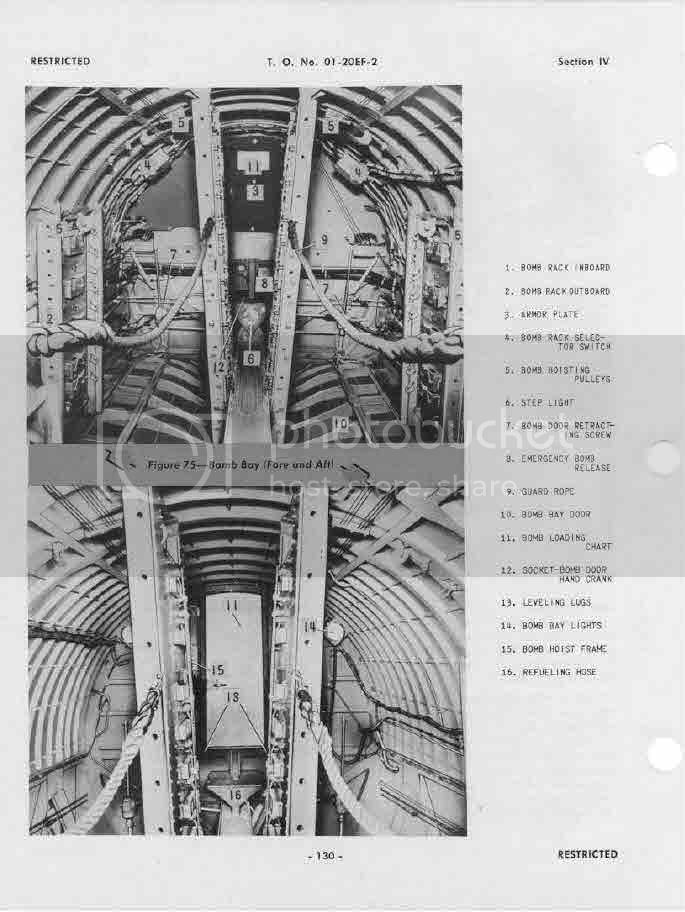
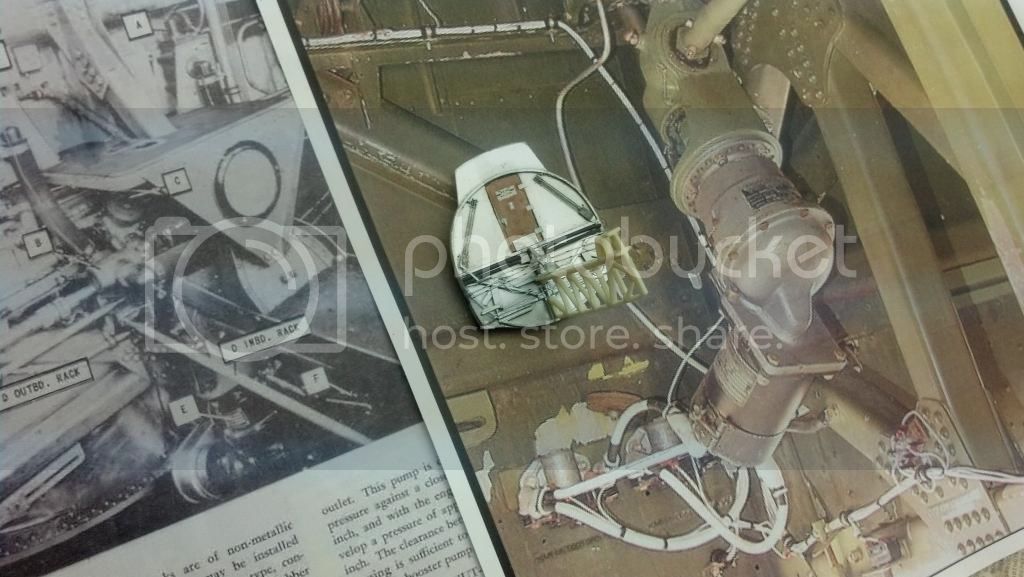
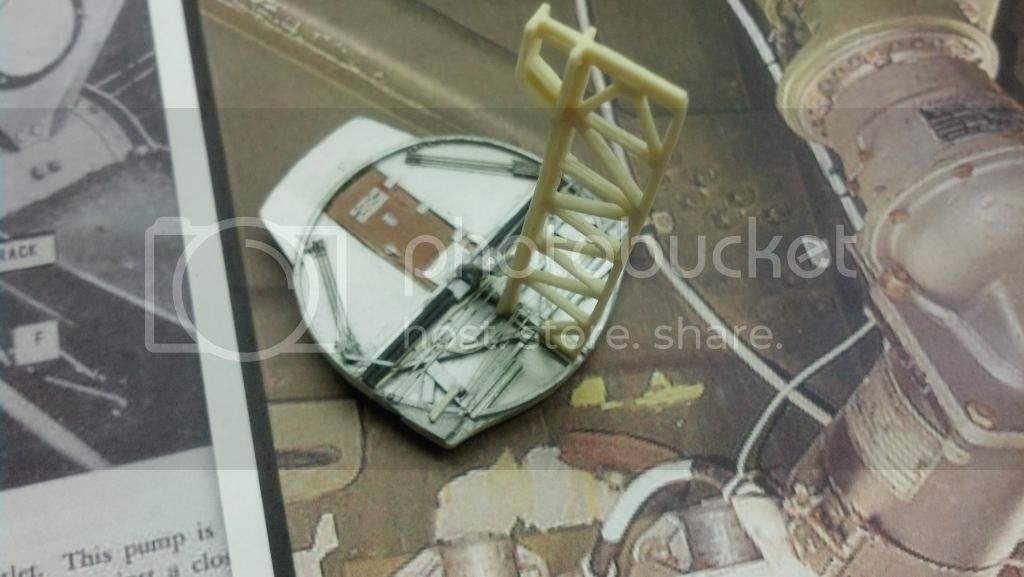
Anyway, I am just about over it. I will be starting with the left after bomb-bay as pictured below: some little seen details from the B-17 pilot's manual, and where they go on the kit part:
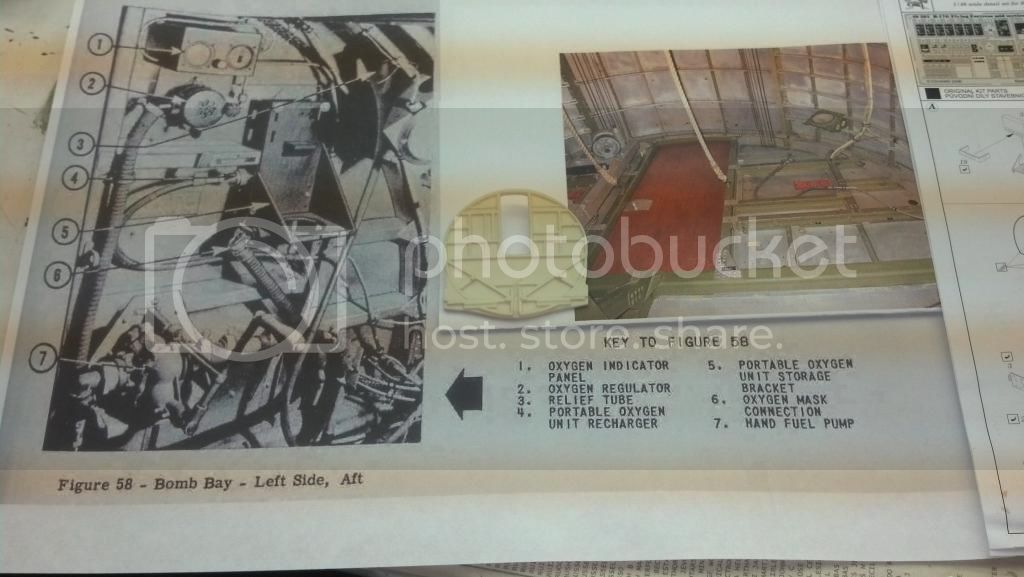

I actually think it will look pretty neat when done. Will add a portable oxygen bottle to the bracket, and I do have the hardware from Eduard brass spares (mostly). Before starting, however, I have to remove the molded in resin radios, etc. on the other side of the bulkhead in order to fix the Eduard details there later. Don't want to do detail work on one side and THEN undertake major surgery on the other.

Someone asked me to post some pics of my 1/48 B-29. Here are a couple of non-professional shots.
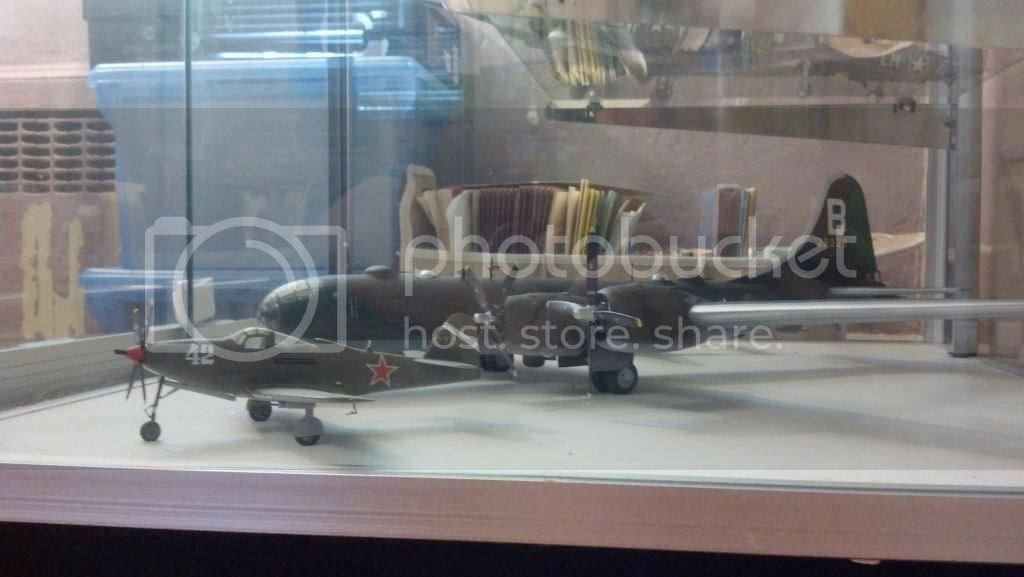


FYI, yes that really is the hideous MPM P-63 1/48 kit in the foreground, but NO I did not do it (except for the cockpit). A friend who is a pro did it. Amazing work on his part. That kit is horrible.

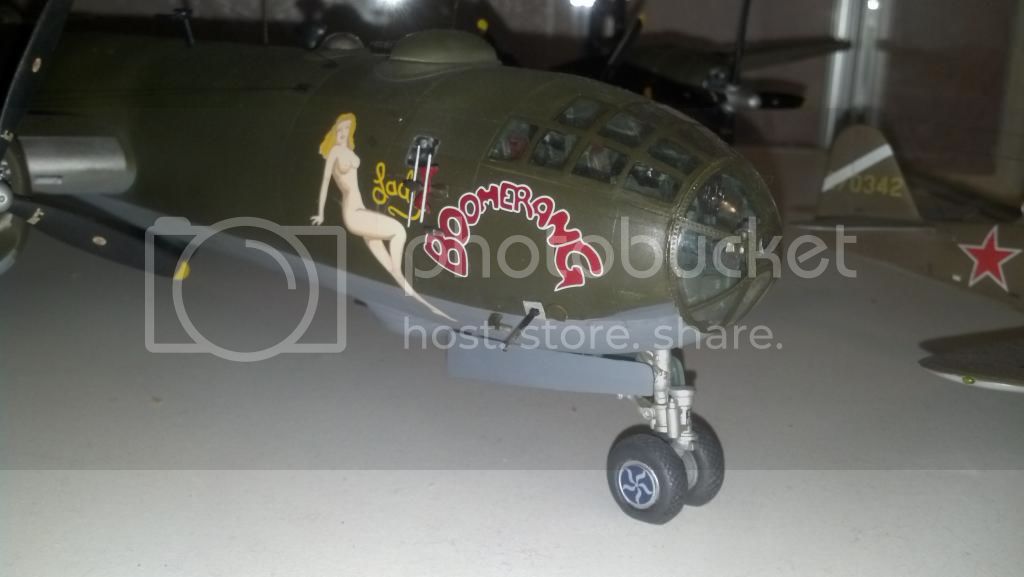
I was very happy with how this early OD/NG B-29 came out. It took about 4 years, on and off, to complete. Do note the engine instruments visible on the flight engineer's panel as seen through the window just above the word "Lady."


I will definitely start physical work (vs. "planning") on the bulkhead this weekend.
Redhand
#522
_VISITCOMMUNITY
New Jersey, United States
Joined: January 20, 2013
KitMaker: 1,460 posts
AeroScale: 1,443 posts
Posted: Tuesday, September 23, 2014 - 03:18 PM UTC
SLOW START

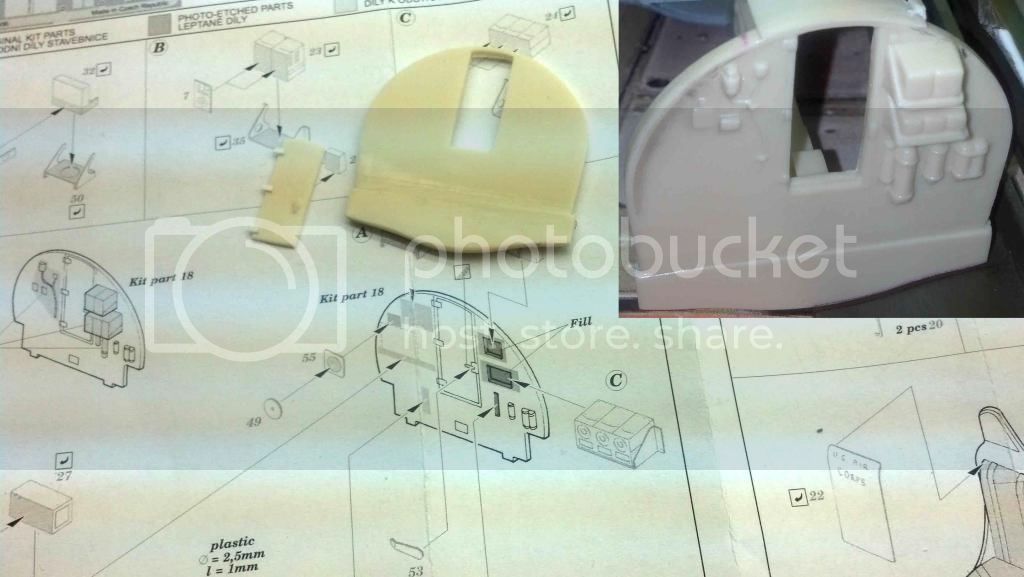
Not to much to see, but at least you have "proof" I have started back up. Below photo shows forward bulkhead of radio room/after bulkhead of bomb-bay with "stuff" removed from the radio room side. Compare inset to right. Of course all this will be replaced with Eduard Brass parts and some Verlinden details.


Also I added door hinges to the door. This one I will definitely glue full open, so that looking in from the open radio room hatch one will be able to see all the way into the finished bomb-bay.

I will prime these parts tomorrow and then start adding detail to the after bomb-bay bulkhead side.
Gremlin56
Joined: October 30, 2005
KitMaker: 3,897 posts
AeroScale: 564 posts
Posted: Tuesday, September 23, 2014 - 05:33 PM UTC
Nice to see you back on the build Brian, the radio room bulkhead will benefit enormously from the Eduard set.
I was the Luchtvaart Hobbyshop near Schiphol a few weeks ago and the 1/32 B-17 caught my eye. It's huge but beautifully detailed. I was able to withstand the temptation, (for the moment anyway )