

Brian,
That housing is going to have to fit into that small opening at the start of the Catwalk? Seems to me that a few basic shapes glued together is all that would be necessary, as it's so small, and tucked away in the back of the bomb bay, that it would be next to unnoticeable.
Joel
World War II
Discuss WWII and the era directly before and after the war from 1935-1949.
Discuss WWII and the era directly before and after the war from 1935-1949.
Hosted by Rowan Baylis
1/48 B-17F Build - 303rd BGs Luscious Lady
Joel_W

Joined: December 04, 2010
KitMaker: 11,666 posts
AeroScale: 7,410 posts
Posted: Saturday, November 01, 2014 - 01:09 AM UTC


Redhand

#522
Joined: January 20, 2013
KitMaker: 1,460 posts
AeroScale: 1,443 posts
Posted: Saturday, November 01, 2014 - 03:17 AM UTC
Quoted Text
Brian,
Seems to me that a few basic shapes glued together is all that would be necessary, as it's so small, and tucked away in the back of the bomb bay, that it would be next to unnoticeable.
Joel
In the front of the bomb bay actually, and you can see the "few basic shapes glued together" at the base of the life-sized transmission, just to the left of the black sprue where the "cap" to the model transmission is.

Joel_W
Joined: December 04, 2010
KitMaker: 11,666 posts
AeroScale: 7,410 posts
Posted: Saturday, November 01, 2014 - 06:19 AM UTC
Brian,
Now I see those shapes. Should be fine as they have the same basic outline.
Joel
Now I see those shapes. Should be fine as they have the same basic outline.
Joel

berndm

Joined: March 26, 2014
KitMaker: 844 posts
AeroScale: 630 posts
Posted: Sunday, November 02, 2014 - 06:06 AM UTC
Hi Brian, i have watched your build for a long time and the amount of details is impressive.
A really superlative build !
Bernd
A really superlative build !
Bernd
Redhand
#522
Joined: January 20, 2013
KitMaker: 1,460 posts
AeroScale: 1,443 posts
Posted: Sunday, November 02, 2014 - 07:03 AM UTC
Thank you Bernd. One day when it's done I hope to add a 109G-6 and a 190A-6 from the Autumn of 1943 to showcase "the opposition." Probably with 20 mm gun pods or rockets underneath.
For now, I can tell you that this is the most challenging build I have ever undertaken. Glad you like the work so far. The subject does deserve a "maximum effort."
For now, I can tell you that this is the most challenging build I have ever undertaken. Glad you like the work so far. The subject does deserve a "maximum effort."
Joel_W
Joined: December 04, 2010
KitMaker: 11,666 posts
AeroScale: 7,410 posts
Posted: Sunday, November 02, 2014 - 07:42 AM UTC
Brian,
Now that's a plan. Of course both aircraft will be super detailed. And how about adding a P-51D, P-47D, and a P-38J? That should cover it for both sides.
Joel
Now that's a plan. Of course both aircraft will be super detailed. And how about adding a P-51D, P-47D, and a P-38J? That should cover it for both sides.
Joel
Redhand
#522
Joined: January 20, 2013
KitMaker: 1,460 posts
AeroScale: 1,443 posts
Posted: Sunday, November 02, 2014 - 01:57 PM UTC
CATWALK COMPLETE - MORE OR LESS
I'm not in much of a "talky" mood tonight. I think I'll just let the pictures do the talking.
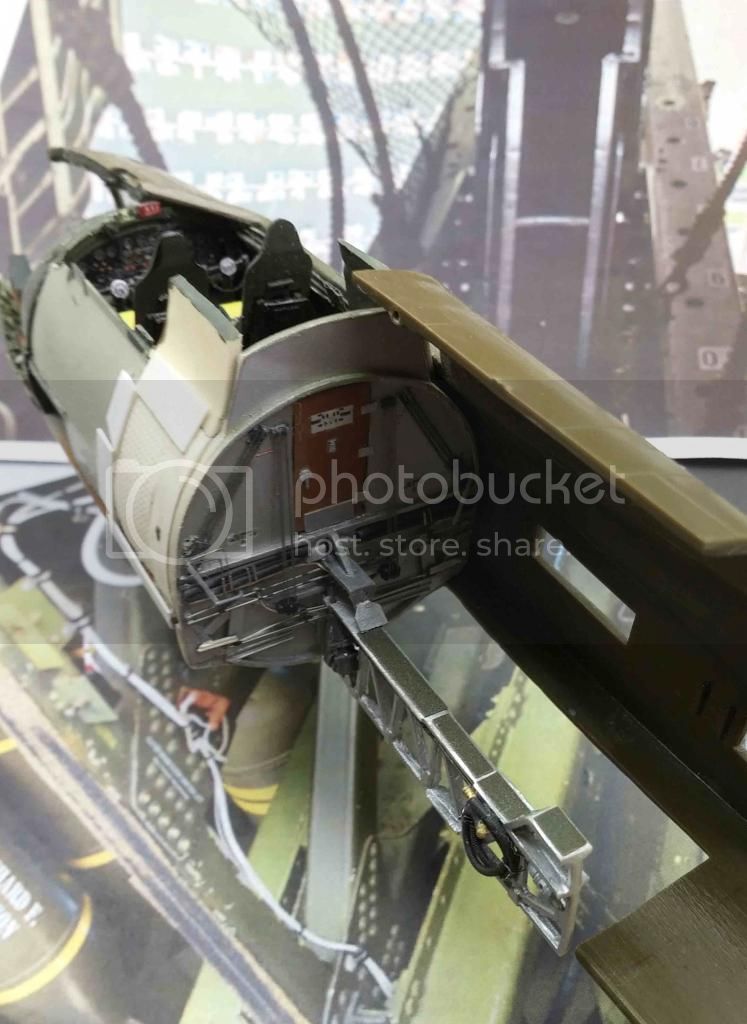
I like the segmented non-skid on the catwalk. Inspiration comes from real thing shot that's the photo backdrop. I do believe this will be visible, more or less, looking through the radio room hatch (where the gun is) through the forward radio room door, which will be positioned full open.

Side view showing the catwalk against the forward bomb bay bulkhead. When I actually get to the point where I glue the catwalk in I will add a hydraulic pump under the first step of the catwalk that will have additional black hoses going to the large hoses midway up the forward bulkhead on either side of the step. I will also squeeze in a transmission for the bomb-bay door actuators, and there will be some additional electrical wiring thrown in too. This will run to the transmission motor and along the bottom of the catwalk to the bomb release mechanisms.
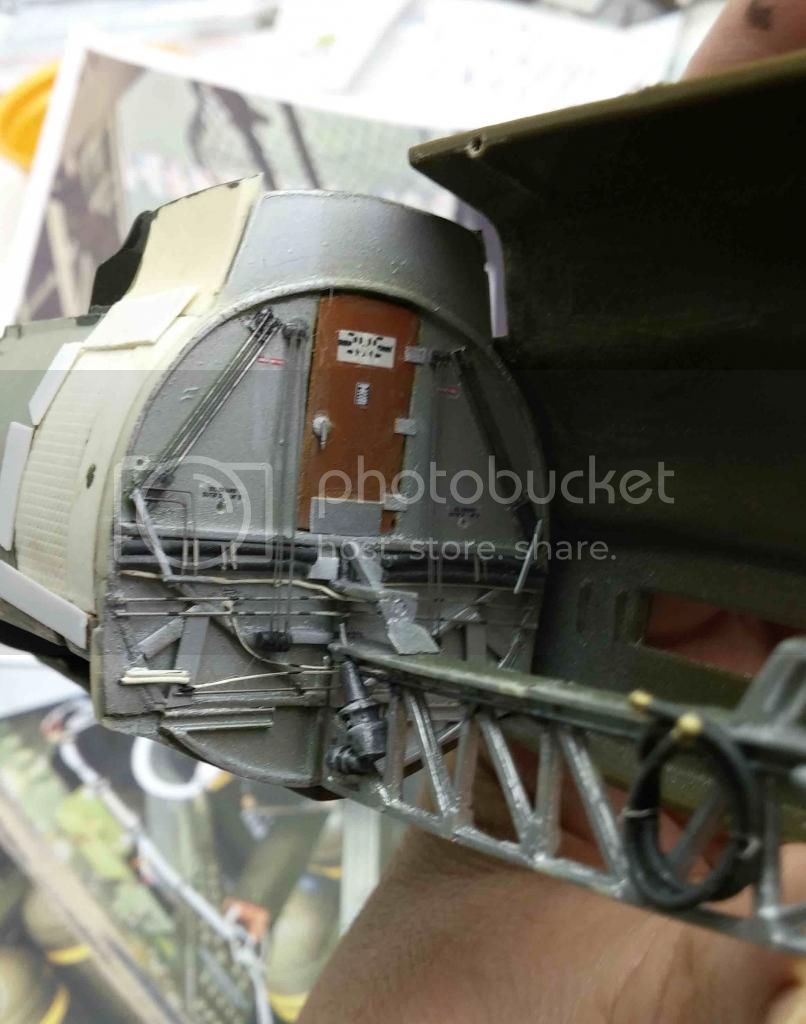
Another shot of the forward bulkhead and catwalk just for fun.
Finally, above is a shot of the after bulkhead with the catwalk positioned. Lotta work here folks. However, it's definitely getting there.
I will leave the bomb bay now and finish the forward radio room bulkhead. After that I will be anxious to start on the the walls and ceiling of the bomb bay. The plan is to build it like modern shipyards build ships, modular style. All details will be added to each piece before it is glued in. That way I'll avoid excessive fiddling with a tweezers, toothpicks, etc. So long as I carefully plan the attachment points between sections, for things like wiring, control cables, etc. it should work out OK, I think.
I'm not in much of a "talky" mood tonight. I think I'll just let the pictures do the talking.
I like the segmented non-skid on the catwalk. Inspiration comes from real thing shot that's the photo backdrop. I do believe this will be visible, more or less, looking through the radio room hatch (where the gun is) through the forward radio room door, which will be positioned full open.
Side view showing the catwalk against the forward bomb bay bulkhead. When I actually get to the point where I glue the catwalk in I will add a hydraulic pump under the first step of the catwalk that will have additional black hoses going to the large hoses midway up the forward bulkhead on either side of the step. I will also squeeze in a transmission for the bomb-bay door actuators, and there will be some additional electrical wiring thrown in too. This will run to the transmission motor and along the bottom of the catwalk to the bomb release mechanisms.
Another shot of the forward bulkhead and catwalk just for fun.
Finally, above is a shot of the after bulkhead with the catwalk positioned. Lotta work here folks. However, it's definitely getting there.
I will leave the bomb bay now and finish the forward radio room bulkhead. After that I will be anxious to start on the the walls and ceiling of the bomb bay. The plan is to build it like modern shipyards build ships, modular style. All details will be added to each piece before it is glued in. That way I'll avoid excessive fiddling with a tweezers, toothpicks, etc. So long as I carefully plan the attachment points between sections, for things like wiring, control cables, etc. it should work out OK, I think.
berndm
Joined: March 26, 2014
KitMaker: 844 posts
AeroScale: 630 posts
Posted: Sunday, November 02, 2014 - 07:19 PM UTC
Brian your superlative modelling goes on. The detailwork is impressive.
If you do the "opposition" Hasegawa does a Fw 190 A-5/U12 with the gunpacks under the wing for example.
Keep up the good work
Bernd
If you do the "opposition" Hasegawa does a Fw 190 A-5/U12 with the gunpacks under the wing for example.
Keep up the good work
Bernd
Redhand
#522
Joined: January 20, 2013
KitMaker: 1,460 posts
AeroScale: 1,443 posts
Posted: Sunday, November 02, 2014 - 11:14 PM UTC
Bernd:
Yes, I have that one. Perfect for the time. The 109G-6 I want to make is W.Nr. 18807, Flown by Ofw. Alfred Surau, 9./JG 3, Bad Wörishofen, September, 1943. That's the one with the two eyes on the gun bulges forward of the cockpit. That HAD to make an impression in the air.
It really was madness for the 8th AF to fly those deep penetration raids without escort in 1943. One statistic about "Luscious Lady" on First Scweinfurt that always blew me away was its bomb load on the mission: 16 250 lb. bombs, because half the bomb bay was taken up with a fuel tank. That works out to 400 lbs. of explosive per crewman. Desperate times.
Joel_W
Joined: December 04, 2010
KitMaker: 11,666 posts
AeroScale: 7,410 posts
Posted: Monday, November 03, 2014 - 02:15 AM UTC
Brian,
The catwalk and bulkhead is some of the most fantastic detailing I've ever seen. It's just mind boggling. Even the hose with the fittings on both ends is a perfect example of not missing any details to the detail itself.
As for the 109G-6 W.Nr. 18807, Flown by Ofw. Alfred Surau, 9./JG 3, Bad Wörishofen in September 1943, Torsten has just posted his very build of that 109 in his continuous running build thread. It's done in his museum finish style, and the markings are quite striking.
Joel
Redhand
#522
Joined: January 20, 2013
KitMaker: 1,460 posts
AeroScale: 1,443 posts
Posted: Monday, November 03, 2014 - 02:43 AM UTC
Thank you Joel. I still consider it "basic" modeling in the sense that, unlike Chuck W. who is a true master with soldering and casting of his own parts, all I do is look at drawings and pics and figure out a sequence of construction using the wealth of aftermarket products available for this A/C. I am not kidding when I say that anybody with reasonable build skills can do this. All it takes is a little imagination and determination.
But yes, I am happy with how it's coming now. This part is my strong suit. External weathering and the like will be another different challenge.
Thanks again. I will check out that G-6 build.
But yes, I am happy with how it's coming now. This part is my strong suit. External weathering and the like will be another different challenge.
Thanks again. I will check out that G-6 build.
berndm
Joined: March 26, 2014
KitMaker: 844 posts
AeroScale: 630 posts
Posted: Monday, November 03, 2014 - 05:58 AM UTC
 a very nice basic modelling !
 Thaks for the mission details on that raid,what is the best literature about the Eight Airforce ? I guess there is a lot of books out.
All the best
Bernd
Joel_W
Joined: December 04, 2010
KitMaker: 11,666 posts
AeroScale: 7,410 posts
Posted: Monday, November 03, 2014 - 06:56 AM UTC
Brian,
Don't sell your skills short. What you did with that gun turret as an example is way above what most modelers can do. Just the thought process requires a mind set where interpretation and adaption is necessary. I honestly don't think that I could even copy what you did successfully. My strengths are in the basic skills of modelling. Nothing more.
Joel
chukw1
Joined: November 28, 2007
KitMaker: 817 posts
AeroScale: 729 posts
Posted: Monday, November 03, 2014 - 10:26 AM UTC
What Joel said! This build is going great guns- I'm very impressed by your skills. I requested of Eduard that they make a bomb bay set for this kit, a la their B-24. They replied that due to the way the wings affix it was not possible. I've been scratching my head over that one ever since. Paragon made a set, and now you've added to the proof that it can be done.
PS- you are way too kind, my friend!
PS- you are way too kind, my friend!

Redhand
#522
Joined: January 20, 2013
KitMaker: 1,460 posts
AeroScale: 1,443 posts
Posted: Monday, November 03, 2014 - 11:02 AM UTC
Quoted Text
They replied that due to the way the wings affix it was not possible. I've been scratching my head over that one ever since.
Thank you Chuck. Fitting the wings will be a challenge. The tabs that join the wings to fuselage will have to be shortened, so that they don't interfere with the bomb bay sides. I may be able to drill holes for a metal spar forward of the bomb bay below the cockpit floor, and run some kind of bar into the wings just below the upper surface of the wings. I have been considering it. Even if I don't, I definitely plan to drill holes in the wing edges and fuselage sides where they mate up, and use some kind of wire or circular bar stock to give the wing join some strength, rather than rely on shortened tabs and butt joins. I do think that will be necessary.
I have that 1/48 I.A.R. kit. You are doing amazing work there, ya know.
Redhand
#522
Joined: January 20, 2013
KitMaker: 1,460 posts
AeroScale: 1,443 posts
Posted: Tuesday, November 04, 2014 - 12:55 PM UTC
Quoted Text
What is the best literature about the Eight Airforce ? I guess there is a lot of books out.
All the best
Bernd
Aw Jeeze Bernd, you have to know I am pretty prejudiced on this subject! If you read the very first post on this build you will see why! But since you asked, I can shamelessly recommend these two:

http://www.amazon.com/Half-Wing-Three-Engines-Prayer/dp/0071341455/ref=sr_1_1?ie=UTF8&qid=1347711671&sr=8-1&keywords=half+a+wing
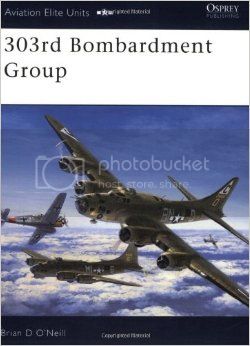
http://www.amazon.com/303rd-Bombardment-Group-Osprey-Aviation/dp/1841765376/ref=sr_1_2?ie=UTF8&qid=1415146428&sr=8-2&keywords=303rd+bomb+group
I won't say more except that Half A Wing covers many missions in Luscious Lady including the two Schweinfurt raids of August and October 1943.
I did like Donald L. Miller's Masters of the Air: America's Bomber Boys Who Fought the Air War Against Nazi Germany.
I also like Fire and Fury: The Allied Bombing of Germany, 1942-1945 by Randall S. Hansen. It is VERY controversial because he clearly paints the 8AF as more "moral" in its bombing strategy than RAF Bomber Command. For my money, the flaw in his analysis is that the Americans engaged in exactly the same kind of city area bombing over Japan as RAF Bomber Command did over Germany, after LeMay discovered that "precision daylight bombing" over Japan was not effective.
As for me, I'm no military moralist. I prefer focusing on the crews of both sides in that conflict, and draw whatever inspiration I can from the fact that so many of them put their lives on the line for what they thought was right, time and time again.
Redhand
#522
Joined: January 20, 2013
KitMaker: 1,460 posts
AeroScale: 1,443 posts
Posted: Tuesday, November 04, 2014 - 01:12 PM UTC
RADIO ROOM RESEARCH
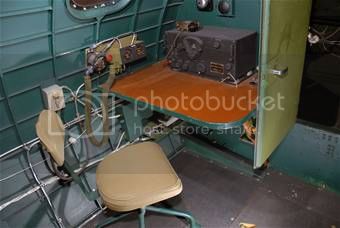
I'm about to start in the radio room front bulkhead. It could look like this:

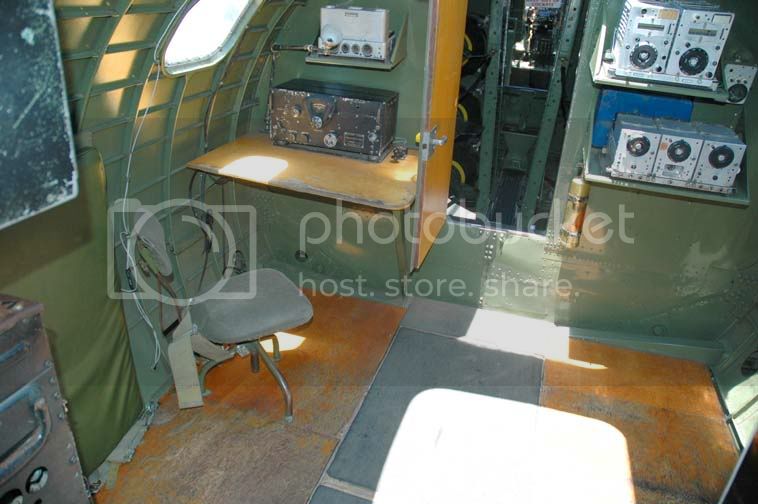
but I prefer to go with what's below in bronze green:
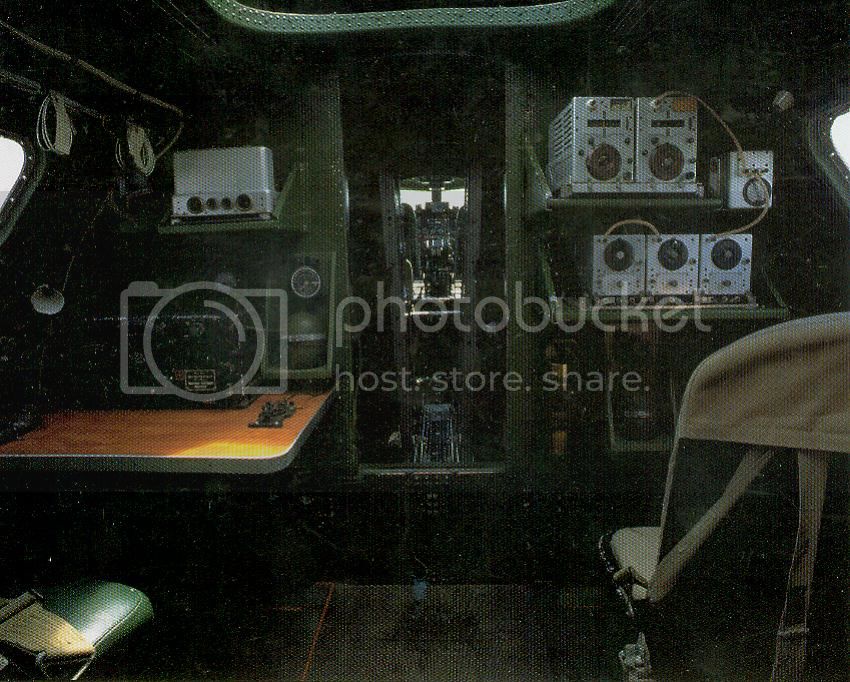
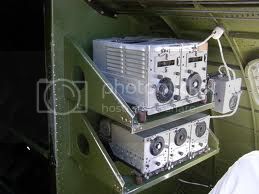
I think I will keep the radio gear in aluminum, even though some sources show it as black:
But, I will paint the portable oxygen bottles yellow, as they appear in the above photo, for the sake of consistency.
Build pictures coming before too long.
I'm about to start in the radio room front bulkhead. It could look like this:
but I prefer to go with what's below in bronze green:
I think I will keep the radio gear in aluminum, even though some sources show it as black:
But, I will paint the portable oxygen bottles yellow, as they appear in the above photo, for the sake of consistency.
Build pictures coming before too long.
berndm
Joined: March 26, 2014
KitMaker: 844 posts
AeroScale: 630 posts
Posted: Tuesday, November 04, 2014 - 07:59 PM UTC
Hi Brian, thanks for the literature tips,i am very interested in these books, i have some very good books from the defense of the reich, viewed from the Luftwaffe side, time to see the other side.
And i agree,moralic views about military campaigns are not my cup of tea too, i depend on the views/experiences of the combatants.
Sadly, after writing the usual long letter to Santa, it seems, he quit his job due to a burnout syndrome
Can t wait to see the next steps of your superlative build
( Should touch plastic too )
Best
Bernd
Joel_W
Joined: December 04, 2010
KitMaker: 11,666 posts
AeroScale: 7,410 posts
Posted: Wednesday, November 05, 2014 - 01:43 AM UTC
Brian,
Your reference material is also consistently setting a really high standard. Just one excellent set of pictures after another.
The 1st picture of the radio room sure looks like it's from a restoration with all the shiny bare Aluminum. Has the same spit and polish of a new car. The 2nd picture with or without the graininess, looks like what I would expect an operational B-17 to have looked like. My only question is the natural metal ratio equipment. I really can't recall seeing pictures of non-painted equipment. The 3rd picture depicts them as I would have expected that they were.
Joel
Redhand
#522
Joined: January 20, 2013
KitMaker: 1,460 posts
AeroScale: 1,443 posts
Posted: Wednesday, November 05, 2014 - 02:02 AM UTC
Quoted Text
Brian,
My only question is the natural metal ratio equipment. I really can't recall seeing pictures of non-painted equipment. The 3rd picture depicts them as I would have expected that they were.
Joel
Thanks Joel. On reflection I think you're right and will go for the black. The first pic is from a B-17E restoration (maybe the bird salvaged from Greenland like the P-38F "Glacier Girl") that some gazillionaire is restoring to factory fresh condition. The mind boggles.
Joel_W
Joined: December 04, 2010
KitMaker: 11,666 posts
AeroScale: 7,410 posts
Posted: Wednesday, November 05, 2014 - 02:19 AM UTC
Brian,
Glad my 2 cents helped.
I find it mind boggling that people have the money to do these type of restorations, while most of us, ok me, are thrilled to just to pay the monthly bills and can afford my few hobbies.
Joel
Glad my 2 cents helped.
I find it mind boggling that people have the money to do these type of restorations, while most of us, ok me, are thrilled to just to pay the monthly bills and can afford my few hobbies.
Joel
Redhand
#522
Joined: January 20, 2013
KitMaker: 1,460 posts
AeroScale: 1,443 posts
Posted: Wednesday, November 12, 2014 - 07:52 AM UTC
FORWARD RADIO ROOM BULKHEAD - PLANNING AND START
Well, I started on this last weekend and made some more progress tonight. See below:

I decide to glue the brackets for radios and fire/oxygen bottles on first, since I will spray the entire bulkhead bronze green, and I want the brackets to appear integral with the bulkhead. I will add the assorted gear you see on the instruction sheet lying around the bulkhead after I separately paint them.
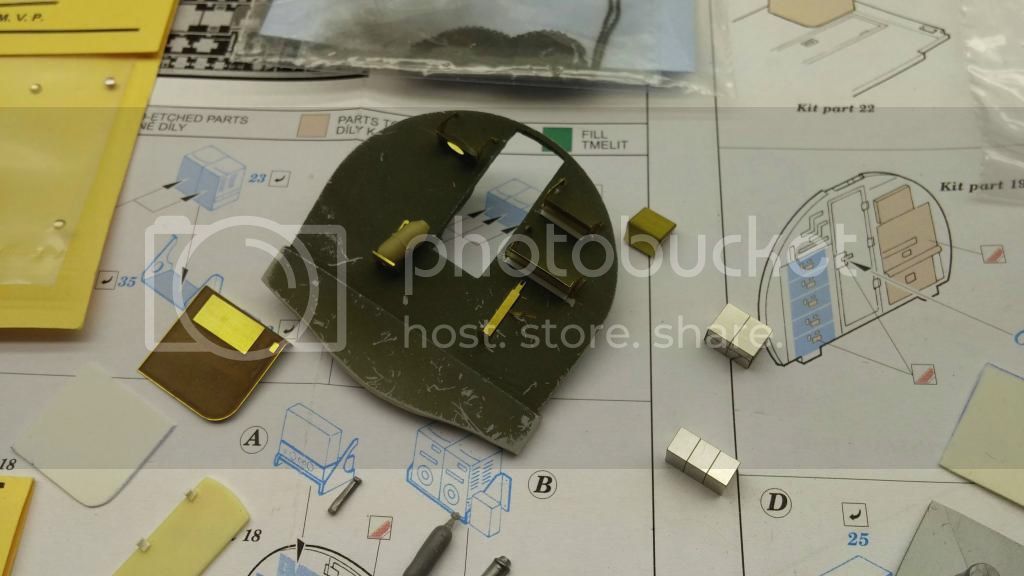
One thing that will look neat (I think) is the table top. I will spray the top my medium-dark plywood colors,
and add a styrene sheet bottom. This I will paint aluminum so you can see a definite table edge to it.
I'll also add a table leg. See below:
If I really like it, I might go Full Butthead in my commentary

but don't feel obliged yourselves.
I did some further online research and one thing that is truly cool is this picture showing the radio cables going to the outside stbd. bulkhead where the outside antenna penetrates the fuselage.
That I will DEFINITELY do after making sure that the internal wiring is placed to line up with the exterior antenna.
Around the top of the first picture in this post you can see some goodies that I purchased for the build. More oxygen hose plus some fine chain from MDC that I will use somewhere. You will also see some neat light lenses that will be used for the bomb-bay interior lights (including the one on the front step of the catwalk leading to the cockpit). Those I was lucky enough to find at my LHS this past weekend.
I should have another post up this coming weekend. With luck I'll have the bulkhead done by then and ready to show, and be ready to return to the bomb bay. That, at least, is the plan.
Well, I started on this last weekend and made some more progress tonight. See below:
I decide to glue the brackets for radios and fire/oxygen bottles on first, since I will spray the entire bulkhead bronze green, and I want the brackets to appear integral with the bulkhead. I will add the assorted gear you see on the instruction sheet lying around the bulkhead after I separately paint them.
One thing that will look neat (I think) is the table top. I will spray the top my medium-dark plywood colors,
and add a styrene sheet bottom. This I will paint aluminum so you can see a definite table edge to it.
I'll also add a table leg. See below:
If I really like it, I might go Full Butthead in my commentary
but don't feel obliged yourselves.
I did some further online research and one thing that is truly cool is this picture showing the radio cables going to the outside stbd. bulkhead where the outside antenna penetrates the fuselage.
That I will DEFINITELY do after making sure that the internal wiring is placed to line up with the exterior antenna.
Around the top of the first picture in this post you can see some goodies that I purchased for the build. More oxygen hose plus some fine chain from MDC that I will use somewhere. You will also see some neat light lenses that will be used for the bomb-bay interior lights (including the one on the front step of the catwalk leading to the cockpit). Those I was lucky enough to find at my LHS this past weekend.
I should have another post up this coming weekend. With luck I'll have the bulkhead done by then and ready to show, and be ready to return to the bomb bay. That, at least, is the plan.
Joel_W
Joined: December 04, 2010
KitMaker: 11,666 posts
AeroScale: 7,410 posts
Posted: Thursday, November 13, 2014 - 12:08 AM UTC
Brian,
Is that picture from the restoration? Just seems rather odd, as well as the wires are white not a O.D. color.
Joel
Is that picture from the restoration? Just seems rather odd, as well as the wires are white not a O.D. color.
Joel
Redhand
#522
Joined: January 20, 2013
KitMaker: 1,460 posts
AeroScale: 1,443 posts
Posted: Thursday, November 13, 2014 - 12:31 AM UTC
Quoted Text
Brian,
Is that picture from the restoration? Just seems rather odd, as well as the wires are white not a O.D. color.
Joel
Yes, I think so. But period photos do show that white wiring predominated in these spaces, so I'm good with that part at least.
Redhand
#522
Joined: January 20, 2013
KitMaker: 1,460 posts
AeroScale: 1,443 posts
Posted: Sunday, November 16, 2014 - 08:47 AM UTC
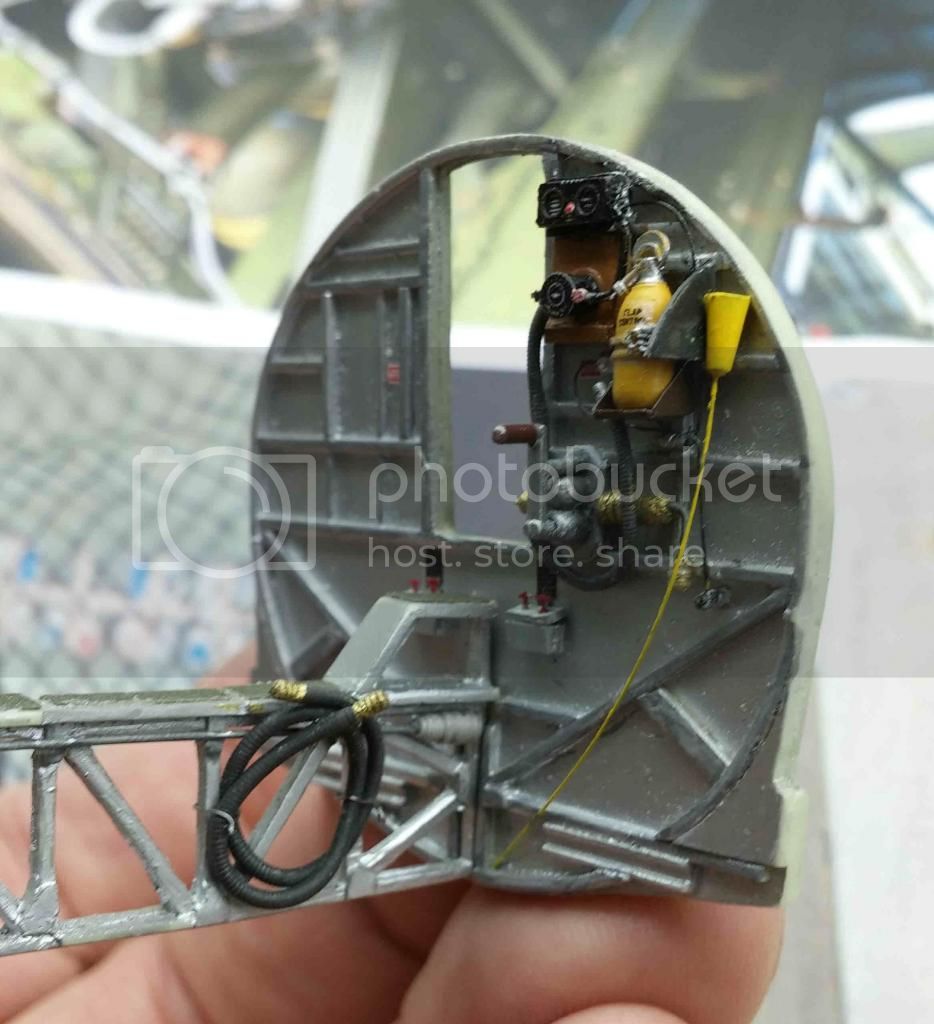
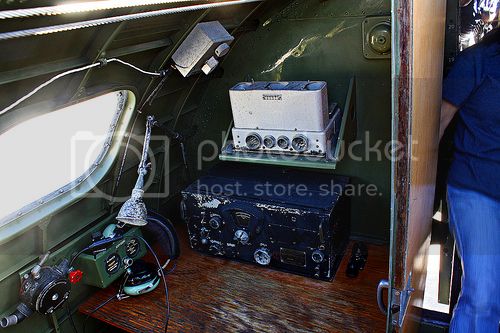
RADIO ROOM FRONT BULKHEAD (CON'T.)
Well, I made some progress over the weekend: not as much as I hoped, but better than none!
Below is the forward radio gear painted and installed in the brackets.
You can see the bits and pieces that will go on below the door opening, and the beginning of my painting of the table top. Need to weather it with dark umber and then glue that beautiful main radio unit on. (The Eduard etched, painted brass front is very attractive, I think). I also have to paint and install the door in the open position off to the left.
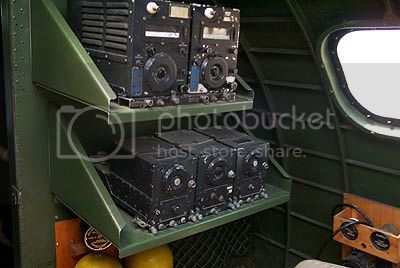
When I get this done I will return to the bomb bay, where further research enlightened me about this piece of gear located on the left side (facing aft) of the rear door leading to the radio room.
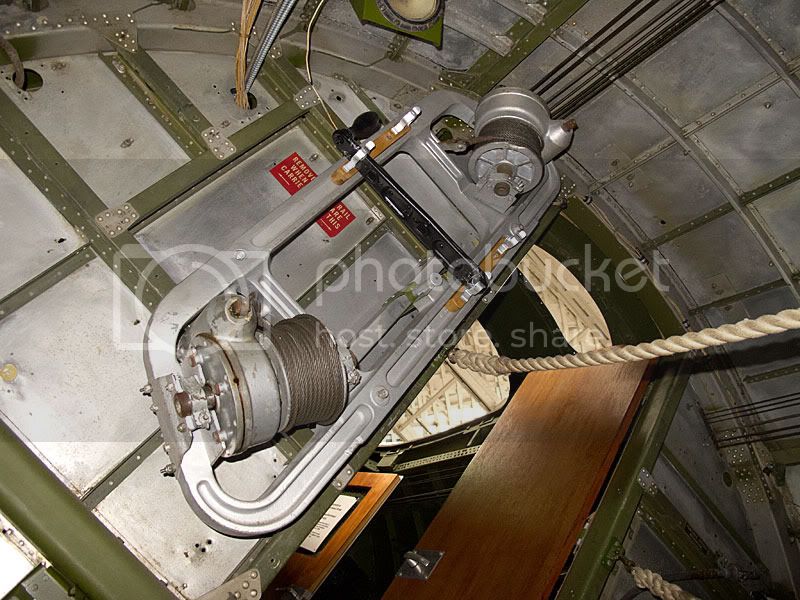
Earlier I couldn't figure out what it was to save my rear end. But it is detachable from the bulkhead, and when I did some thumbing through the B-17 Erection and Maintenance Manual I recognized the shape in a drawing. "Eureka!" It's the bomb loading hoist! See below:

Now that I know what it is, I will scratch build something that looks like it to hang on the after bulkhead. Before I hesitated despite seeing it in the pics because I could not tell if it was WWII equipment, or something else.
Well, I made some progress over the weekend: not as much as I hoped, but better than none!
Below is the forward radio gear painted and installed in the brackets.
You can see the bits and pieces that will go on below the door opening, and the beginning of my painting of the table top. Need to weather it with dark umber and then glue that beautiful main radio unit on. (The Eduard etched, painted brass front is very attractive, I think). I also have to paint and install the door in the open position off to the left.
When I get this done I will return to the bomb bay, where further research enlightened me about this piece of gear located on the left side (facing aft) of the rear door leading to the radio room.
Earlier I couldn't figure out what it was to save my rear end. But it is detachable from the bulkhead, and when I did some thumbing through the B-17 Erection and Maintenance Manual I recognized the shape in a drawing. "Eureka!" It's the bomb loading hoist! See below:
Now that I know what it is, I will scratch build something that looks like it to hang on the after bulkhead. Before I hesitated despite seeing it in the pics because I could not tell if it was WWII equipment, or something else.
 |

WEB HOSTING BY


Copyright ©2021 AeroScale and Kitmaker Network, a subsidiary of Silver Star Enterprises
All Rights Reserved. Please read our Conditions of Use and Privacy Policy.
All Rights Reserved. Please read our Conditions of Use and Privacy Policy.