Simon great looking Do17! Love the kit and this kit now resides on my "I WANT IT" list.
Matthew it would appear that the front wheels of your Grief now stand a few millimeters off the ground? The tracks look fantastic though!
Air Campaigns
Want to start or join a group build? This is where to start.
Want to start or join a group build? This is where to start.
Hosted by Frederick Boucher, Michael Satin
OFFICIAL:- Airfx III campaign
Posted: Saturday, March 28, 2015 - 01:54 PM UTC

firstcircle

Joined: November 19, 2008
KitMaker: 2,249 posts
AeroScale: 34 posts

Posted: Saturday, March 28, 2015 - 02:36 PM UTC
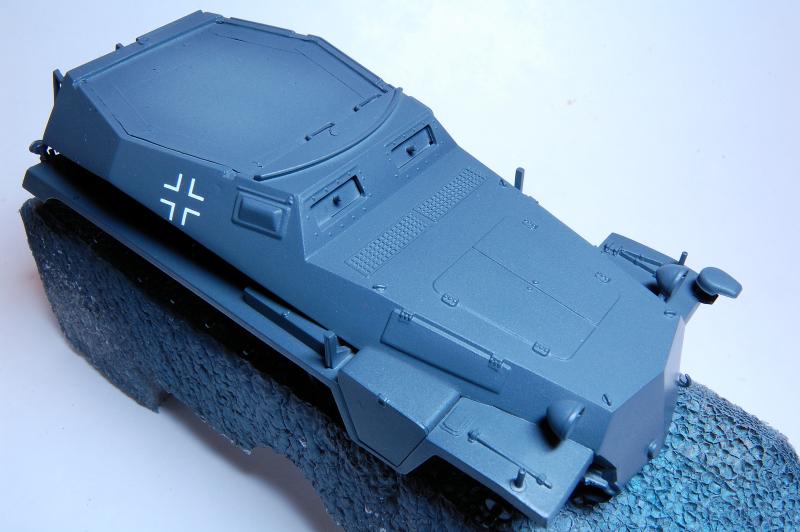
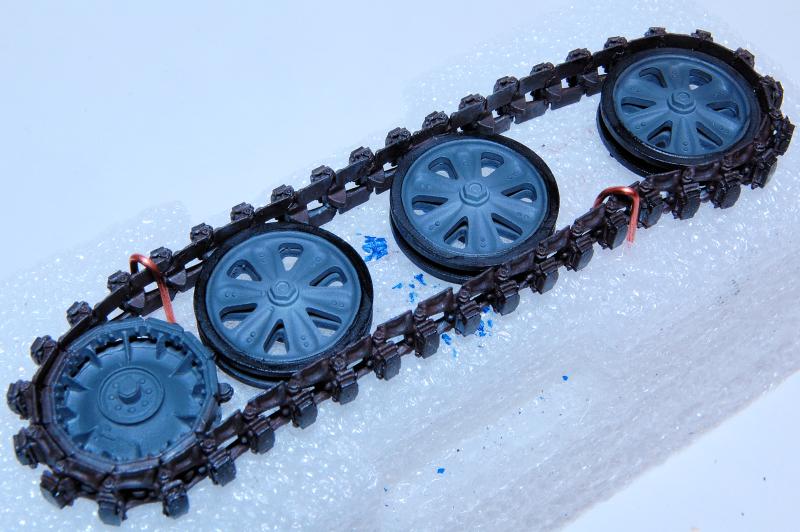
Chris, yes, at the moment the tracks are glued onto the main wheels, the outer layer, the front wheels and the track units are all unattached. This was the the set up to try to ensure the tracks more or less matched on each side. It is possible however that it will need some nose weight as the tracks weigh about as much as the rest of the model....
Dornier has such an interesting camouflage.
Dornier has such an interesting camouflage.
RedDuster

Joined: March 01, 2010
KitMaker: 7,078 posts
AeroScale: 118 posts

Posted: Sunday, March 29, 2015 - 11:54 PM UTC
Thanks Chris,
I have really enjoyed building the Dornier, it really is a very nice kit indeed.
Si
I have really enjoyed building the Dornier, it really is a very nice kit indeed.
Si
Posted: Monday, March 30, 2015 - 02:01 AM UTC
Quoted Text
Thanks Chris,
I have really enjoyed building the Dornier, it really is a very nice kit indeed.
Si
Great work Simon!
I hope to get back to my build this coming weekend.

Posted: Tuesday, March 31, 2015 - 07:39 PM UTC
Simon, great work on the Dornier. I'm going to build one for the Battle of Britain campaign.
First though, I really do need to get cracking on my Airfix build.
The Jet Provost is a very simple kit so I'm just going to do an OOB. I could spend ages trying to improve it but I'd probably never finish it if I did. So I'm going to keep it simple.
First off I painted the cockpit dark grey and the instrument panel black and painted the seats. They look nothing like MB mk.4's but they'll be ok under the thick canopy. I live in hope that one day someone will do a new tool. If Airfix carries on with the trend of producing RAF trainers, we may get one in the near future.

Now, about the final colour scheme. I was looking through some old copies of Warplane magazine and found this photo of a JP of 79sqn in the old RAF cammo scheme. Certainly very different to the red/white or silver they usually wear. I'm very tempted by this.

First though, I really do need to get cracking on my Airfix build.
The Jet Provost is a very simple kit so I'm just going to do an OOB. I could spend ages trying to improve it but I'd probably never finish it if I did. So I'm going to keep it simple.
First off I painted the cockpit dark grey and the instrument panel black and painted the seats. They look nothing like MB mk.4's but they'll be ok under the thick canopy. I live in hope that one day someone will do a new tool. If Airfix carries on with the trend of producing RAF trainers, we may get one in the near future.

Now, about the final colour scheme. I was looking through some old copies of Warplane magazine and found this photo of a JP of 79sqn in the old RAF cammo scheme. Certainly very different to the red/white or silver they usually wear. I'm very tempted by this.

Posted: Thursday, April 02, 2015 - 11:02 PM UTC
Quoted Text
Quoted TextWouldn't a 1970's Continental or Braniff scheme be very pleasing on this model too!
It might be a trifle difficult to paint...

This is actually quite temping.


Jessie_C


Joined: September 03, 2009
KitMaker: 6,965 posts
AeroScale: 6,247 posts

Posted: Friday, April 03, 2015 - 12:32 AM UTC
That's a good price, if you can get it 

Posted: Friday, April 03, 2015 - 12:47 AM UTC
I'll pass this time. I have too much on my plate as it is.

firstcircle

Joined: November 19, 2008
KitMaker: 2,249 posts
AeroScale: 34 posts

Posted: Saturday, April 04, 2015 - 02:14 AM UTC


Berwickboy

Joined: April 27, 2013
KitMaker: 450 posts
AeroScale: 387 posts

Posted: Monday, April 06, 2015 - 02:15 AM UTC
I have gone about as far as I can go with the Defiant. Last thing today was to add a final coat of flat varnish, I masked off the canopy, and promptly broke off one of the guns which flew away to the great spares box in the sky. I will replace it when I feel like it,
Good points, The kit fits lovely with options for in flight, in action, on ground, good detail for non-AMS modellers.
Bad points, sprue attachment gates are chunky and very careful cutting is required, trailing edges need thinning (I didn't), difficult to fit the wheel scrapers. no seatbelts.
My good points, replaced the pitot with Albion Alloys tubing, added etched seatbelts, first time I tried Humbol washes.
My bad points, trying to use Clearfix for landing lights, having to use the rear aerial at the front as the other broke,
Overall I enjoyed the build but the finishing less. It's all education as I find my modelling skills have tended to evaporate due to a long hiatus in my building, ah well, onwards and downwards


These are in the gallery
Good points, The kit fits lovely with options for in flight, in action, on ground, good detail for non-AMS modellers.
Bad points, sprue attachment gates are chunky and very careful cutting is required, trailing edges need thinning (I didn't), difficult to fit the wheel scrapers. no seatbelts.
My good points, replaced the pitot with Albion Alloys tubing, added etched seatbelts, first time I tried Humbol washes.
My bad points, trying to use Clearfix for landing lights, having to use the rear aerial at the front as the other broke,
Overall I enjoyed the build but the finishing less. It's all education as I find my modelling skills have tended to evaporate due to a long hiatus in my building, ah well, onwards and downwards


These are in the gallery
Posted: Monday, April 06, 2015 - 04:20 AM UTC
Nice work Mike!


Mecenas
Joined: December 23, 2007
KitMaker: 1,596 posts
AeroScale: 1,275 posts
KitMaker: 1,596 posts
AeroScale: 1,275 posts

Posted: Monday, April 20, 2015 - 08:19 PM UTC
I'm struggling with the Spit and still getting my butt kicked.


Posted: Tuesday, April 21, 2015 - 05:46 AM UTC
Here is my build with some primer on:-

Some clean up to do!.


Some clean up to do!.


firstcircle

Joined: November 19, 2008
KitMaker: 2,249 posts
AeroScale: 34 posts

Posted: Friday, April 24, 2015 - 01:28 AM UTC
Pigment mud:
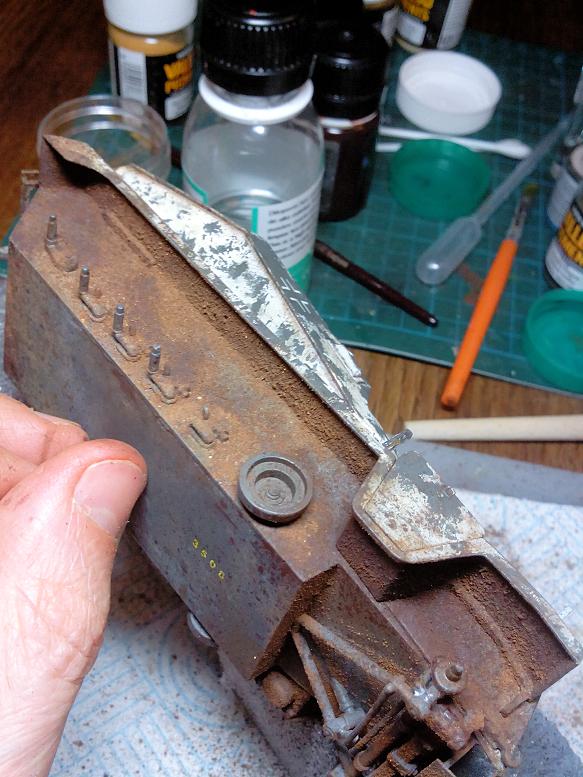
Checking the fitting of the track unit:
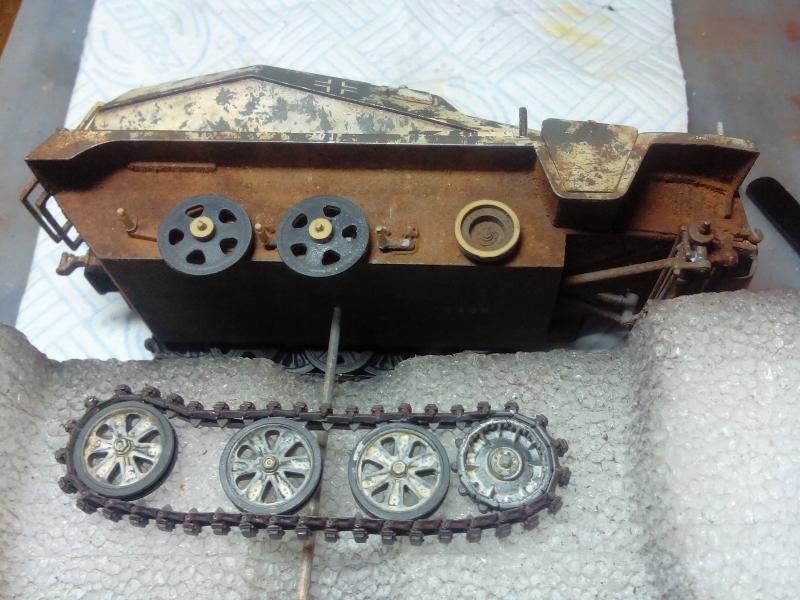
With the tracks units on:
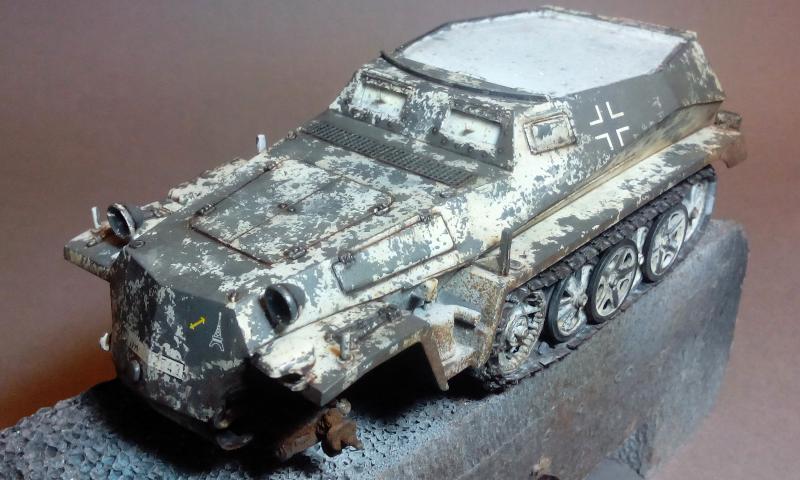
Trying the jerrycans out for size in the cut-down rack:
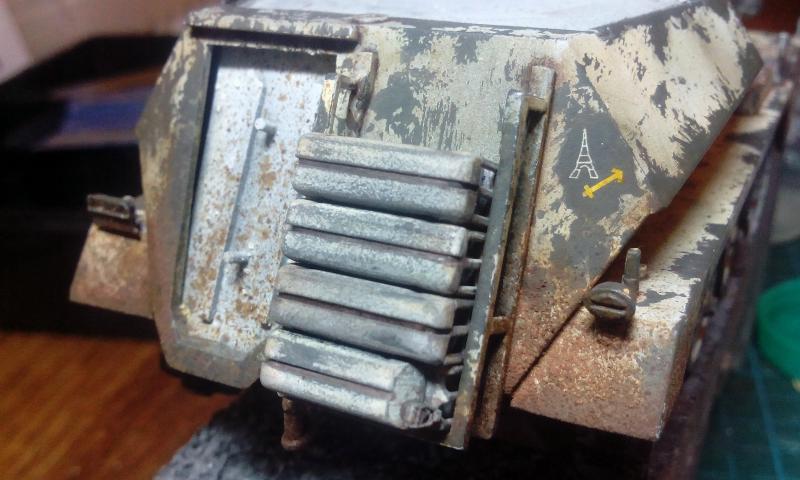
Need to work out some strapping to hold them in place.
Next challenge after that is the tyres, one of which is OK, the other is a bit crummy looking, with a few places where the rubber is kind of pealing off and the central seam is more of a groove than a ridge.

Checking the fitting of the track unit:

With the tracks units on:

Trying the jerrycans out for size in the cut-down rack:

Need to work out some strapping to hold them in place.
Next challenge after that is the tyres, one of which is OK, the other is a bit crummy looking, with a few places where the rubber is kind of pealing off and the central seam is more of a groove than a ridge.
Posted: Monday, April 27, 2015 - 10:02 PM UTC
That Half track is looking better every time I see it. I'm sure you'll be able o sort the tires out.
Afraid to say that I'm going to have to unenlist from this campaign. A look at the campaigns I've signed up for, the growing collection of half built models on my work desk and the fact I have managed so little on my Provost meant I had to do some prioritizing. Sadly this was not of them.
I will keep watching everyone's builds and can't wait to see them all finished.
Stephen
RedDuster

Joined: March 01, 2010
KitMaker: 7,078 posts
AeroScale: 118 posts

Posted: Wednesday, April 29, 2015 - 11:30 PM UTC
Great builds going on,
Just posted a couple of pics of the Dornier in the gallery.
Si
Just posted a couple of pics of the Dornier in the gallery.
Si
Posted: Thursday, April 30, 2015 - 04:37 AM UTC
Matthew nice work!


TimReynaga

Joined: May 03, 2006
KitMaker: 2,500 posts
AeroScale: 318 posts

Posted: Saturday, May 09, 2015 - 01:00 AM UTC
Hello! Off to a late start, but I thought I'd give this campaign a shot.
I don't do a lot of aircraft, but with all the buzz about the new high quality Airfix 1/72 airplane kits coming out, I just had to give one a try. I selected one of my favorite aircraft, the P-39 Airacobra:
Imagine my surprise when I opened up the new red box and saw before me not one of the recent Airfix wunderkits, but what is obviously a repop of their old 1960s molding!

I guess I need to be more careful in future! Not too impressive, but a kit is a kit and I'll go ahead and see what I can do with it.

I don't do a lot of aircraft, but with all the buzz about the new high quality Airfix 1/72 airplane kits coming out, I just had to give one a try. I selected one of my favorite aircraft, the P-39 Airacobra:
Imagine my surprise when I opened up the new red box and saw before me not one of the recent Airfix wunderkits, but what is obviously a repop of their old 1960s molding!
I guess I need to be more careful in future! Not too impressive, but a kit is a kit and I'll go ahead and see what I can do with it.

RedDuster

Joined: March 01, 2010
KitMaker: 7,078 posts
AeroScale: 118 posts

Posted: Saturday, May 09, 2015 - 11:56 PM UTC
Nice choice Tim,
I have just been mugged on memory lane, remember the late 60's issue with Russian markings.
Still keeping an eye on this thread, great stuff going on.
Cheers.
Si
I have just been mugged on memory lane, remember the late 60's issue with Russian markings.
Still keeping an eye on this thread, great stuff going on.
Cheers.
Si
TimReynaga

Joined: May 03, 2006
KitMaker: 2,500 posts
AeroScale: 318 posts

Posted: Sunday, May 10, 2015 - 12:01 AM UTC
Hi Si,
I like the Soviet markings too, think I'll do her up that way. With the fuselage together my future "Bellochka" already shows the sleek lines of the Airacobra!

The cockpit consists of just a blank space and a seat. Since it will be hard to see in there anyway, I simply painted the interior black and the seat green with tan masking tape seatbelts. I think I’ll leave off the side windows (like on a car, on the real aircraft these could be rolled down).
I like the Soviet markings too, think I'll do her up that way. With the fuselage together my future "Bellochka" already shows the sleek lines of the Airacobra!

The cockpit consists of just a blank space and a seat. Since it will be hard to see in there anyway, I simply painted the interior black and the seat green with tan masking tape seatbelts. I think I’ll leave off the side windows (like on a car, on the real aircraft these could be rolled down).
Posted: Sunday, May 10, 2015 - 04:42 AM UTC
Welcome Tim to the campaign!
You should have a quick build with the model and lot of time left in the campaign.

You should have a quick build with the model and lot of time left in the campaign.

Halfyank

Joined: February 01, 2003
KitMaker: 5,221 posts
AeroScale: 36 posts

Posted: Monday, May 11, 2015 - 07:50 AM UTC
I'm getting a late start to this fun but here goes. First off I wanted to say Airfix is my favorite brand. It comes from the days when my English relatives would send Airfix models to my brother and me for Christmas every year. I especially like the newer kits they've been coming out with over the last few years. What great value they are.
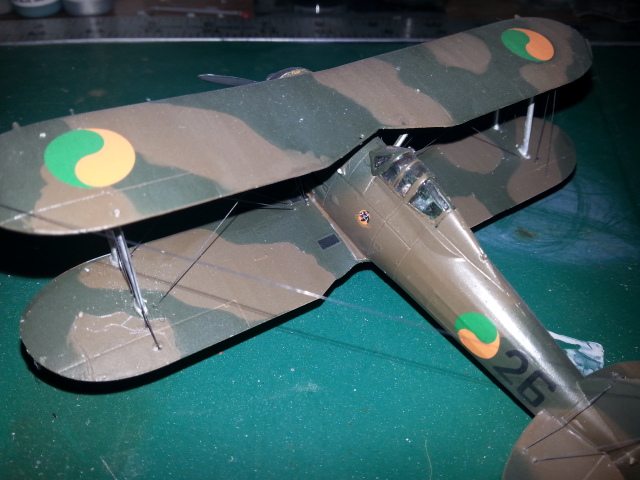
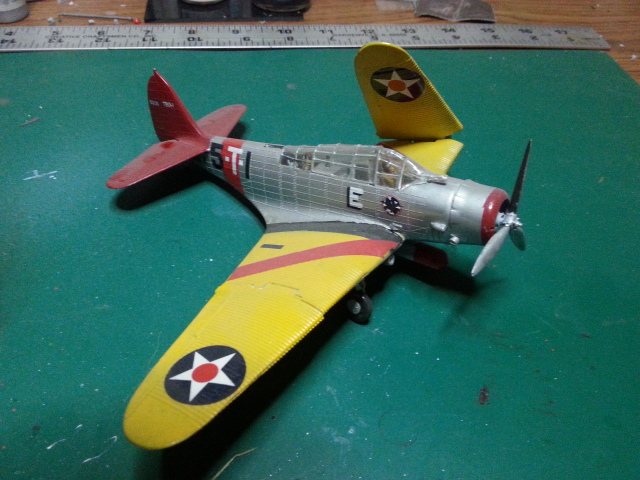
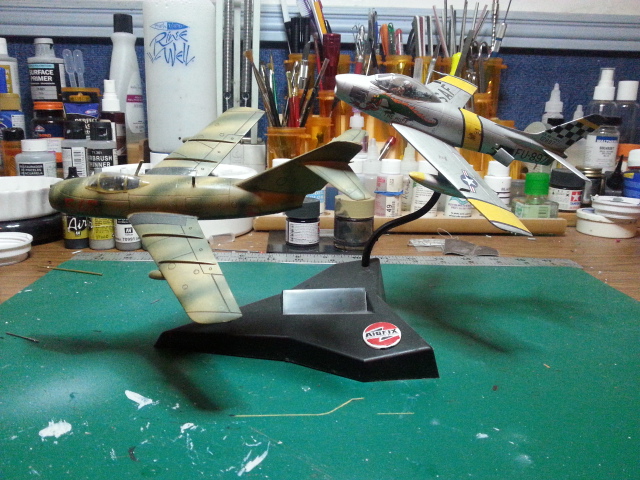
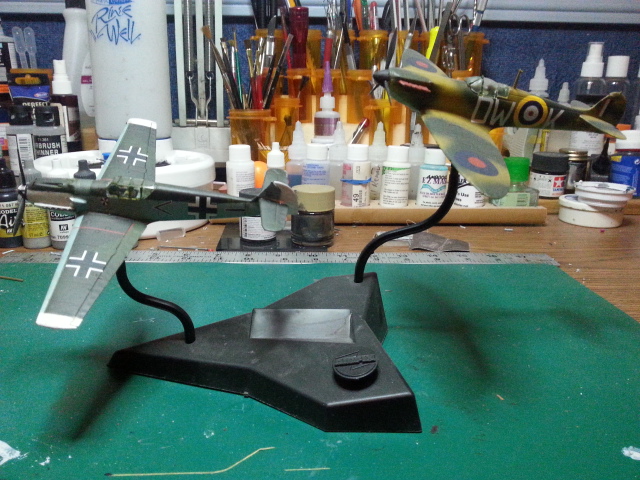
Here are a few pics of kits I've done over the last couple years. These are NOT for the contest, just to show what I've done.
The newer Gladiator
The ancient Devastator
Mig 15 and F86
109 and Spit
Now for the campaign entry. This is the ancient Bristol Beaufighter TFX. Goodness only knows how old this kit is. I'm really looking forward to the new tool kit coming to this side of the pond eventually. Until then here goes...
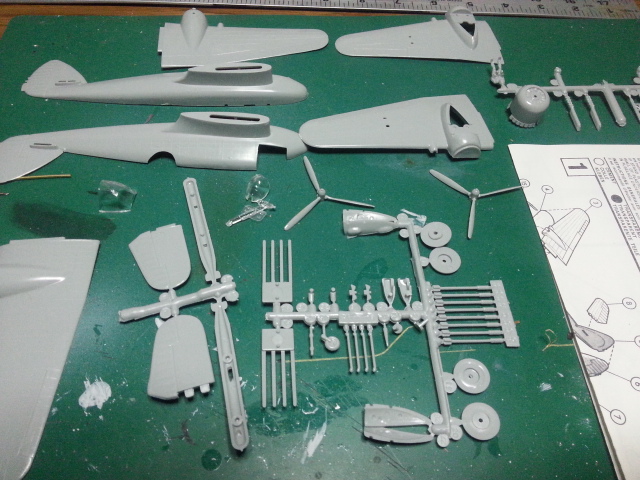
This is after about 45 minutes of work. Now the fun comes, filling and sanding. I'm going to hang this from the ceiling when I'm done so I'm modeling it with gear up. The gear doors fit terribly so I'll be doing a lot of filling.
Here are a few pics of kits I've done over the last couple years. These are NOT for the contest, just to show what I've done.
The newer Gladiator

The ancient Devastator

Mig 15 and F86

109 and Spit

Now for the campaign entry. This is the ancient Bristol Beaufighter TFX. Goodness only knows how old this kit is. I'm really looking forward to the new tool kit coming to this side of the pond eventually. Until then here goes...

This is after about 45 minutes of work. Now the fun comes, filling and sanding. I'm going to hang this from the ceiling when I'm done so I'm modeling it with gear up. The gear doors fit terribly so I'll be doing a lot of filling.
TimReynaga

Joined: May 03, 2006
KitMaker: 2,500 posts
AeroScale: 318 posts

Posted: Monday, May 11, 2015 - 09:27 AM UTC
With initial assembly completed, it’s time to do a little filling.

This will be a bit of a challenge as the top of the aft canopy is too short to reach the frame, and the forward windscreen doesn’t reach back quite far enough. Time to shim!

This will be a bit of a challenge as the top of the aft canopy is too short to reach the frame, and the forward windscreen doesn’t reach back quite far enough. Time to shim!

firstcircle

Joined: November 19, 2008
KitMaker: 2,249 posts
AeroScale: 34 posts

Posted: Tuesday, May 12, 2015 - 02:43 AM UTC
Great to see a couple of late entries. That Devastator certainly brought back memories; my big brother had one, I seem to remember it being very chunky to hold, with those folding wings. The Mig / F-86 set up looks great.
So, little update (more on "Big A")
Door now installed with its new handle, along with number plates (Verlinden), rear reflector (brass strip and section of plastic tube) and some additional painting of the jerry can straps.
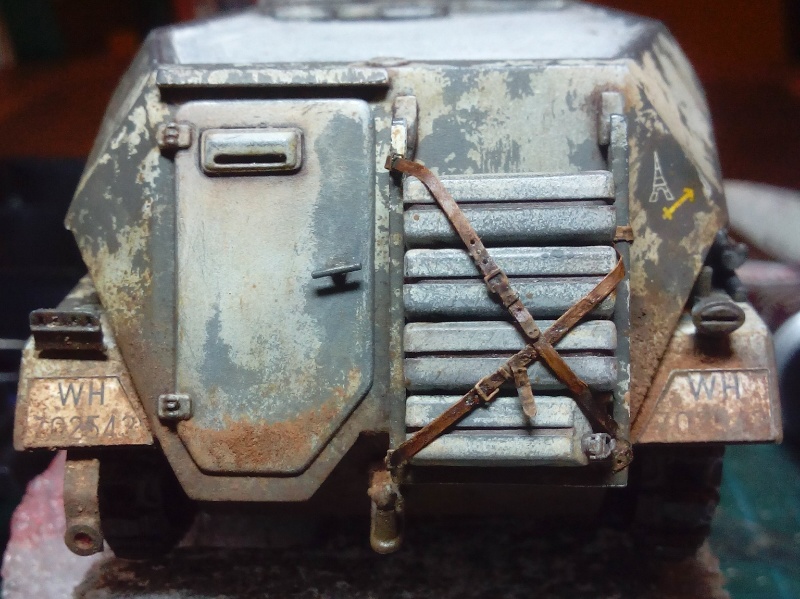
Now the thing I'd been putting off - partly in the hope that Airfix would rush me my replacement tyres, but they didn't - and in the end they literally scrubbed up better than I had imagined.
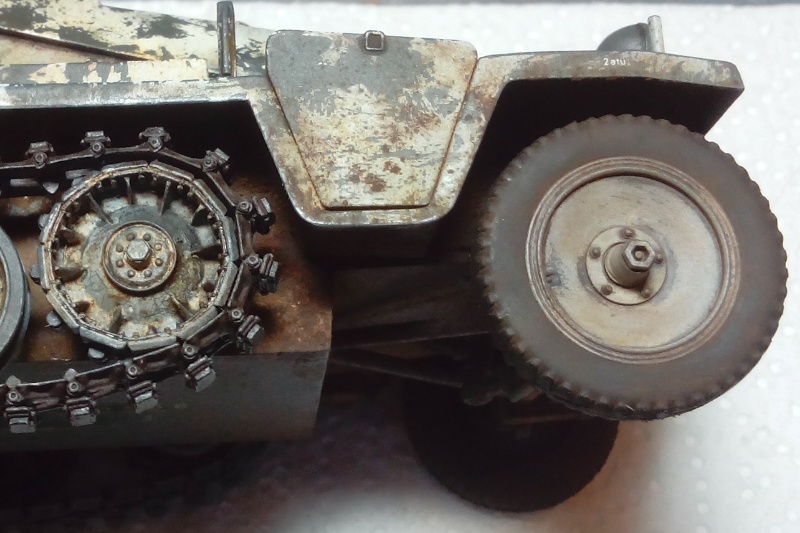
This one is in relatively good condition:
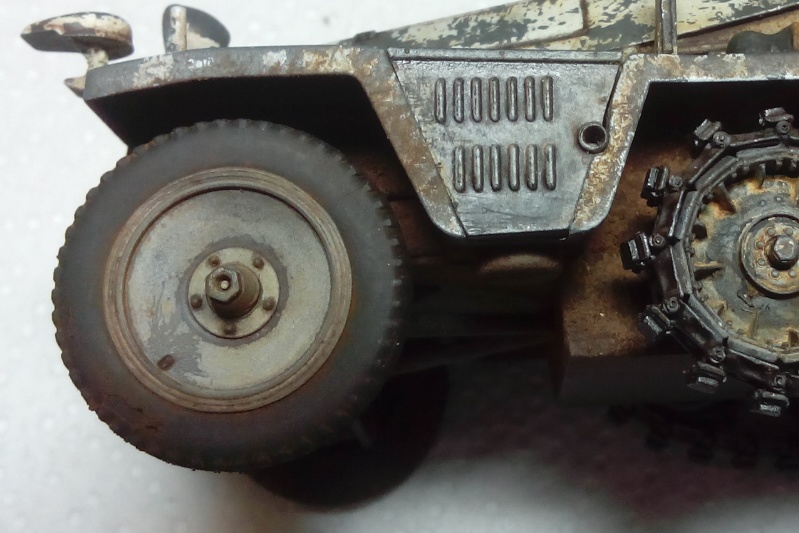
This tyre not so good - on the side just near where the valve is on the wheel rim a bit of peeling is visible. I guess we could put it down to the driver kerbing it really hard...
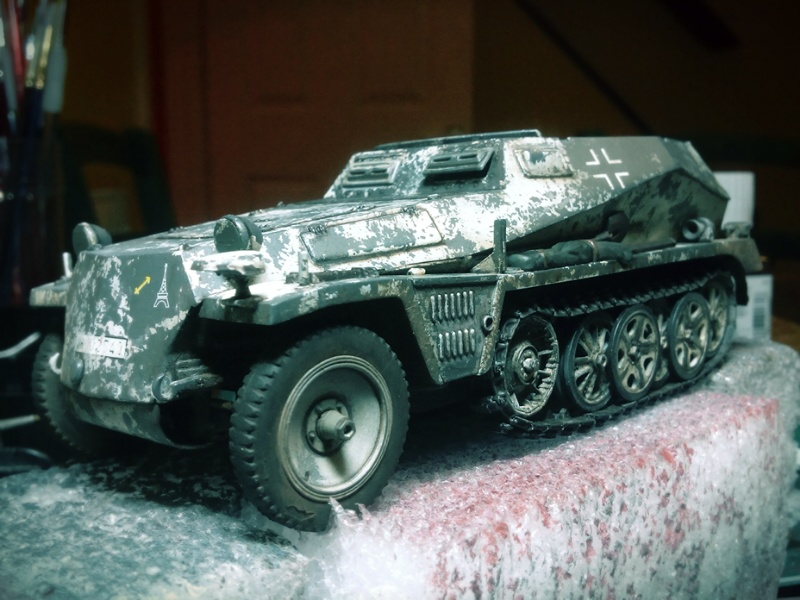
Checking that they sat flat on the ground...seems OK on this block of foam.
So, little update (more on "Big A")
Door now installed with its new handle, along with number plates (Verlinden), rear reflector (brass strip and section of plastic tube) and some additional painting of the jerry can straps.

Now the thing I'd been putting off - partly in the hope that Airfix would rush me my replacement tyres, but they didn't - and in the end they literally scrubbed up better than I had imagined.
This one is in relatively good condition:

This tyre not so good - on the side just near where the valve is on the wheel rim a bit of peeling is visible. I guess we could put it down to the driver kerbing it really hard...

Checking that they sat flat on the ground...seems OK on this block of foam.


Jessie_C


Joined: September 03, 2009
KitMaker: 6,965 posts
AeroScale: 6,247 posts

Posted: Tuesday, May 12, 2015 - 05:35 AM UTC
I don't suppose that you could turn that tire around on its rim so that the 'scuffed' spot is hiding on the inside?
 |


