

Joel:
This does look like a kit that has fought you all the way. I'm really impressed with the progress you have made in a very short time.
Good going!
Brian
World War II
Discuss WWII and the era directly before and after the war from 1935-1949.
Discuss WWII and the era directly before and after the war from 1935-1949.
Hosted by Rowan Baylis
1/32 Czech FA2-3 Buffalo

Redhand

#522

Joined: January 20, 2013
KitMaker: 1,460 posts
AeroScale: 1,443 posts
Posted: Wednesday, June 10, 2015 - 07:24 PM UTC

Joel_W
Joined: December 04, 2010
KitMaker: 11,666 posts
AeroScale: 7,410 posts
Posted: Wednesday, June 10, 2015 - 07:54 PM UTC
Quoted Text
Joel:
This does look like a kit that has fought you all the way. I'm really impressed with the progress you have made in a very short time.
Good going!
Brian
Brian,
Thanks for those most reassuring words. The scary thing is that I'm starting to dream about this build.
The Spitfire turned into the unofficial "Resurrection", and this kit has become my "Dante's Inferno".
Joel

Redhand
#522
Joined: January 20, 2013
KitMaker: 1,460 posts
AeroScale: 1,443 posts
Posted: Thursday, June 11, 2015 - 01:51 AM UTC
Quoted Text
Brian,
Thanks for those most reassuring words. The scary thing is that I'm starting to dream about this build.
The Spitfire turned into the unofficial "Resurrection", and this kit has become my "Dante's Inferno".
Joel
Just for laughs, and perhaps a tad of inspiration, here is my 1/48 F2A-3 build in the livery of VF-2 shortly after Pearl Harbor:
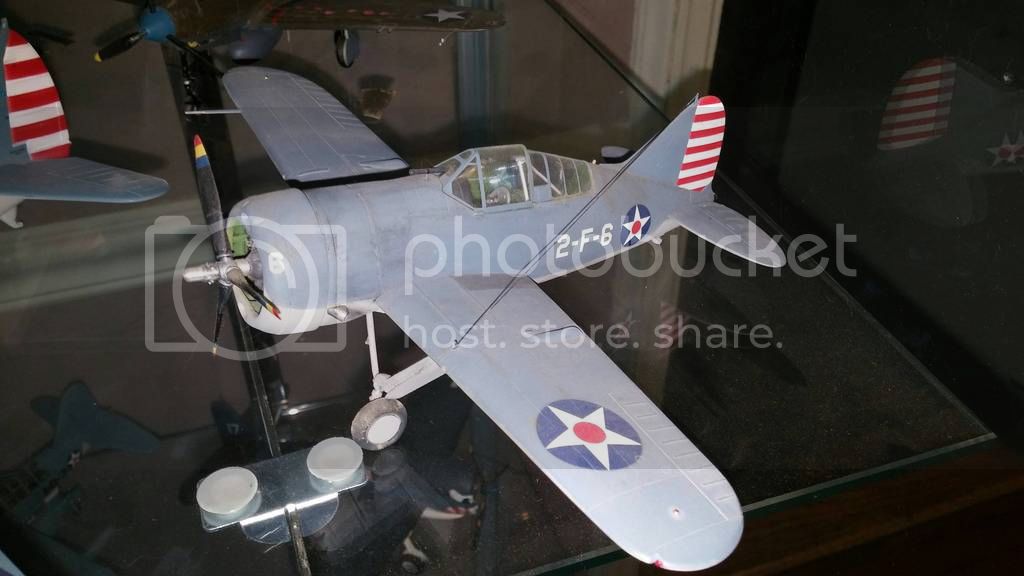
Believe it or not, this is the Tamiya kit, long before the Special Hobby -3s came out. The lengthened nose was achieved by the insertion of a fuselage plug behind the cowling. The plug was made my Aeromaster, but Red Roo Models offers virtually the same thing still, I think.
Believe me, I had plenty of help from a professional model builder with the plug, and the propeller tip (hand made on a lathe!!) but the rivet and panel line detail there is all mine. It was a fun build and is one of the prouder additions to my collection.
I do look forward the doing the Special Hobby 1/48 F2A-3 (or long nose B-339-23) one day.
Joel_W
Joined: December 04, 2010
KitMaker: 11,666 posts
AeroScale: 7,410 posts
Posted: Thursday, June 11, 2015 - 02:35 AM UTC
Brian,
Truly impressive. I really like the paint scheme and weathering. The plug is a scale 10 inches so it's needed for the -3. Your conversion really looks the part.
I took a 2nd look at all those bottom seams and decided to sand down some .040 sheet as Damian and Eetu suggested, and shoe horned them in. What I thought was a nearly perfect alignment to the butt joints is off a little on both wings.
The good news is that the wings seam pretty sturdy.
Joel
Joel_W
Joined: December 04, 2010
KitMaker: 11,666 posts
AeroScale: 7,410 posts
Posted: Tuesday, June 16, 2015 - 08:06 PM UTC
Well, it's time for another update. Lots of work done, but not that much to show for it in terms of pictures. I'm referring to seam and filler work.
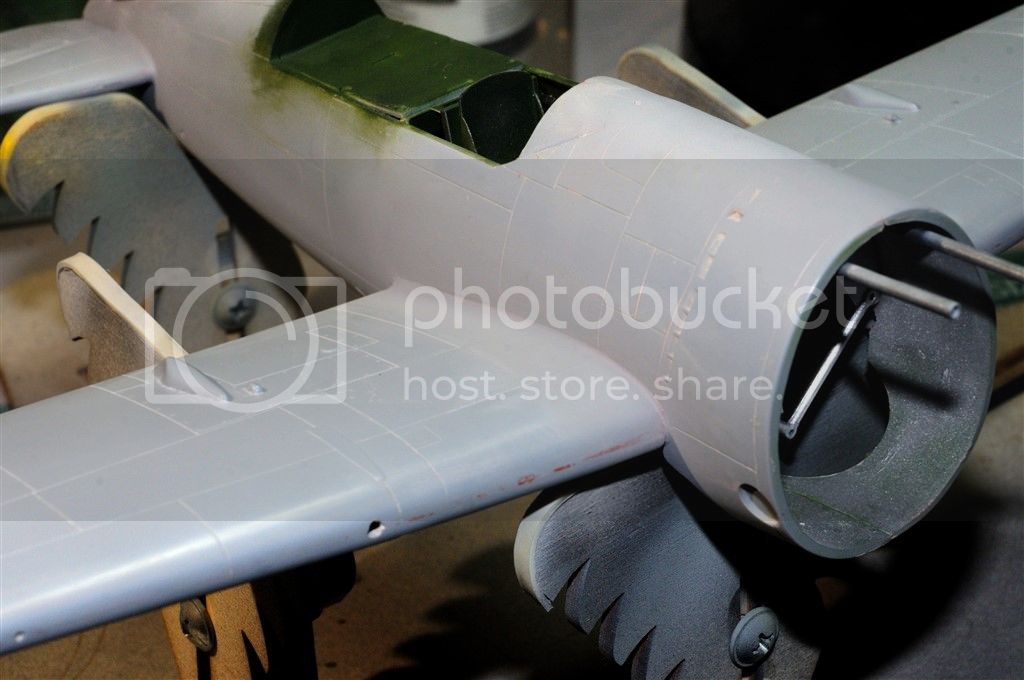
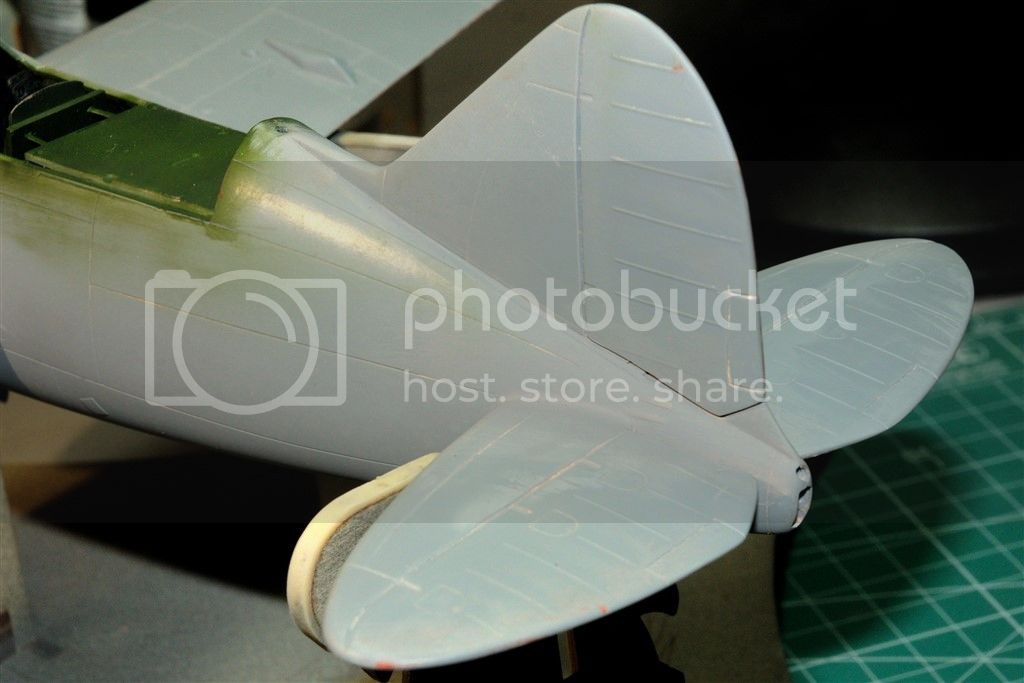
The major wing gaps were plugged with sheet plastic, then both the wing joints, horizontal stabilizer joints, fuselage seams received a healthy dose of Bondo. Then sanded.
Once I was satisfied, I primed all the putty work with AMMO Mig Acrylic Polymer primer in my continuing effort to move away from lacquer based products. This was my 1st time using this product, and after a little experimentation found that it got the best coverage thinning it with 2:1 with Tamiya X20-A. The coverage dries smooth as silk, but takes several light coats to cover the Red/Brown Bondo. So it was a much longer paint session then what I was used to with my old standard; Tamiya Gray Surface Primer, but I always needed to rub it out some.
The 1st go around showed that I had a lot more blending to do with all the wing roots, and fuselage seams, so another application of Bondo was applied, when dry, a more gentile sanding/blending session, then another application of primer. All the seams now look more then acceptable.
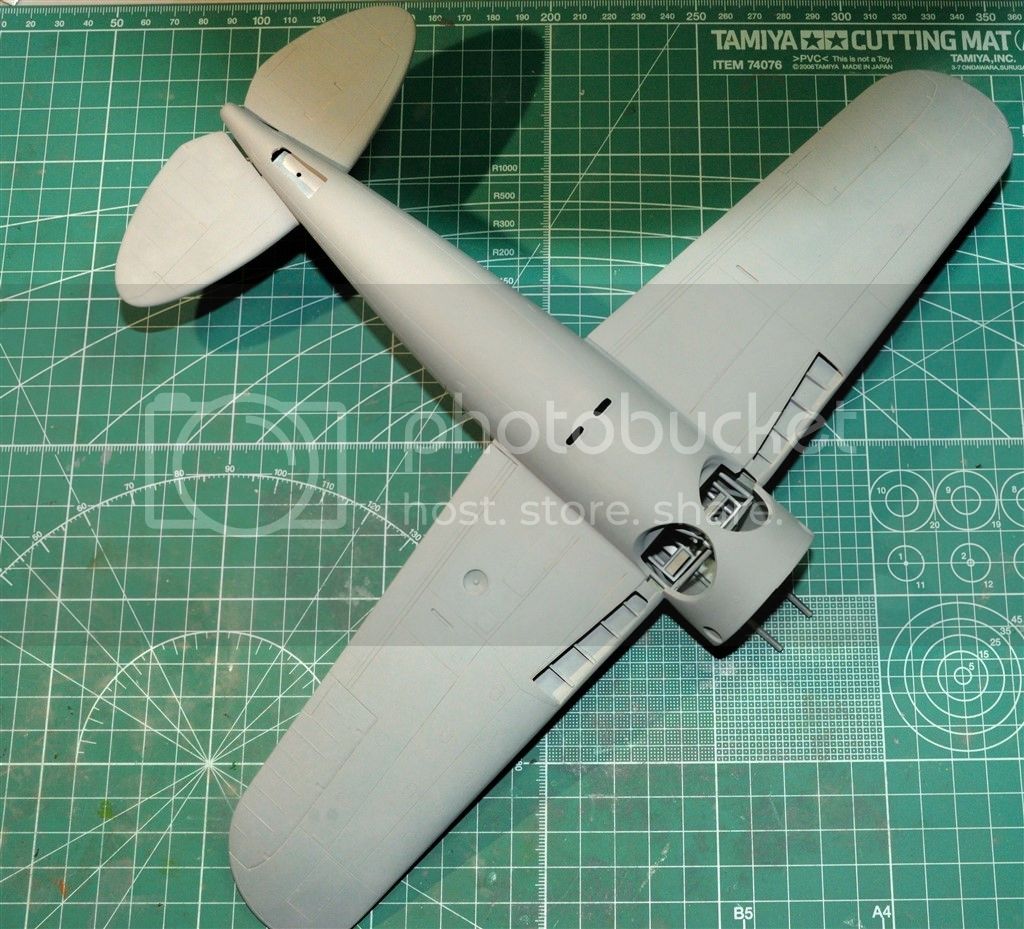
The top with just the seams primed as I still have the greenhouse glass and windshield to mask and install. Also notice that I finished blending in and painting the rear cockpit bulkhead.
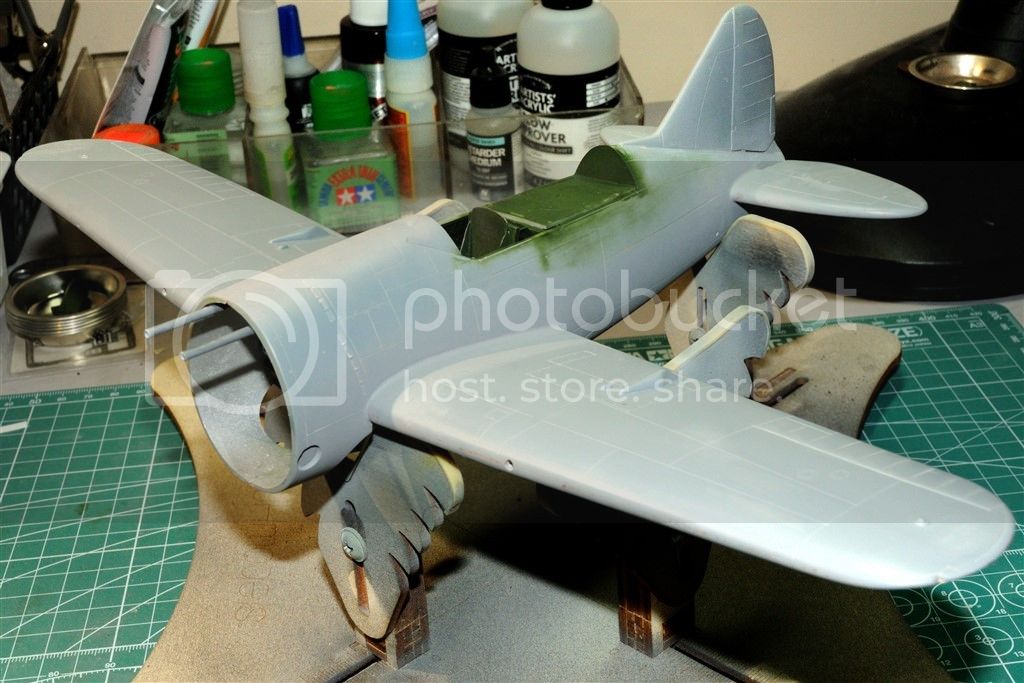
And the horizontal stabilizers.
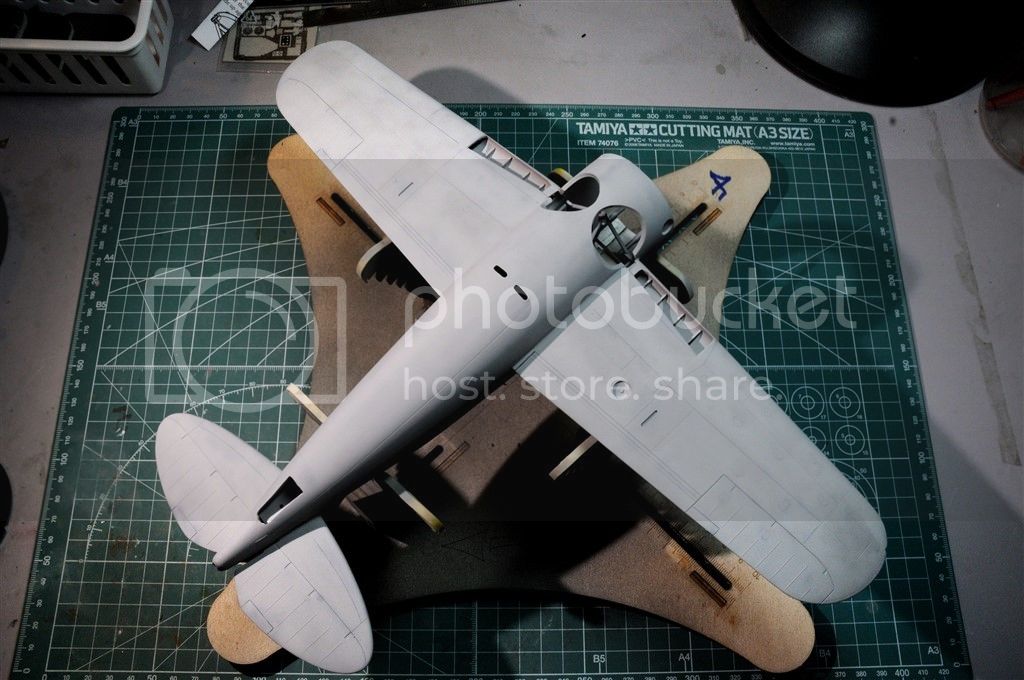
The bottom of the Buffalo was completely primed and is ready for base painting.
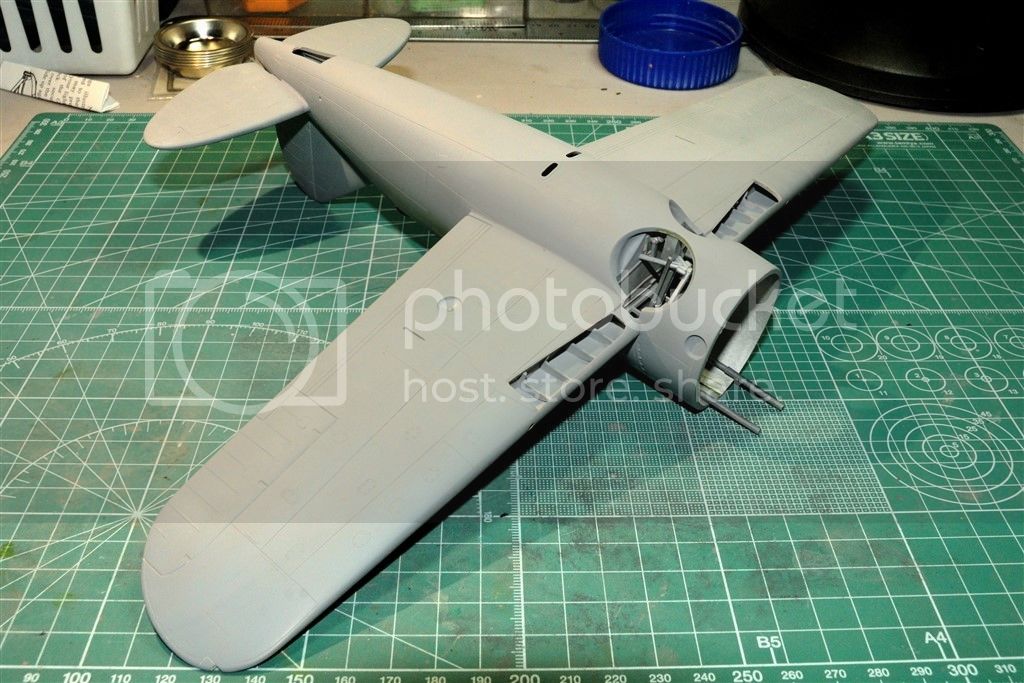
Finally, I feel like I've reached an important milestone in the build, and have re-energized my Mojo levels to continue on. Honestly, this build was starting to get the better of me.
Joel
The major wing gaps were plugged with sheet plastic, then both the wing joints, horizontal stabilizer joints, fuselage seams received a healthy dose of Bondo. Then sanded.
Once I was satisfied, I primed all the putty work with AMMO Mig Acrylic Polymer primer in my continuing effort to move away from lacquer based products. This was my 1st time using this product, and after a little experimentation found that it got the best coverage thinning it with 2:1 with Tamiya X20-A. The coverage dries smooth as silk, but takes several light coats to cover the Red/Brown Bondo. So it was a much longer paint session then what I was used to with my old standard; Tamiya Gray Surface Primer, but I always needed to rub it out some.
The 1st go around showed that I had a lot more blending to do with all the wing roots, and fuselage seams, so another application of Bondo was applied, when dry, a more gentile sanding/blending session, then another application of primer. All the seams now look more then acceptable.
The top with just the seams primed as I still have the greenhouse glass and windshield to mask and install. Also notice that I finished blending in and painting the rear cockpit bulkhead.


And the horizontal stabilizers.

The bottom of the Buffalo was completely primed and is ready for base painting.


Finally, I feel like I've reached an important milestone in the build, and have re-energized my Mojo levels to continue on. Honestly, this build was starting to get the better of me.
Joel
Redhand
#522
Joined: January 20, 2013
KitMaker: 1,460 posts
AeroScale: 1,443 posts
Posted: Wednesday, June 17, 2015 - 07:30 AM UTC
Looking really good, especially the bottom now that it's all primed! I am intrigued by the "jumbo" dimensions of the model in 1/32nd scale. One really gets a sense of that even from the photos.

AussieReg

#007

Joined: June 09, 2009
KitMaker: 8,156 posts
AeroScale: 3,756 posts
Posted: Wednesday, June 17, 2015 - 08:59 AM UTC
Very nice Joel, you are doing a great job overcoming the fit issues.
Looking forward to some broad areas of colour now.
Cheers, D
Looking forward to some broad areas of colour now.
Cheers, D

Holdfast
#056

Joined: September 30, 2002
KitMaker: 8,581 posts
AeroScale: 4,913 posts

Posted: Wednesday, June 17, 2015 - 10:50 AM UTC
Very nicely done Joel, that is looking good 


magnusf

Joined: May 02, 2006
KitMaker: 1,953 posts
AeroScale: 1,902 posts
Posted: Wednesday, June 17, 2015 - 03:47 PM UTC
Joel! I was a bit early with me previous comment... NOW it really does look like a Buffalo except for lacking that big thing in the nose ! Hang in there Joel, now the fun is all about to start (painting...).

Magnus
! Hang in there Joel, now the fun is all about to start (painting...). Magnus
Joel_W
Joined: December 04, 2010
KitMaker: 11,666 posts
AeroScale: 7,410 posts
Posted: Wednesday, June 17, 2015 - 08:18 PM UTC
Quoted Text
Looking really good, especially the bottom now that it's all primed! I am intrigued by the "jumbo" dimensions of the model in 1/32nd scale. One really gets a sense of that even from the photos.
Brian,
Thanks you. I've resisted taking any pictures and posting them with the cowl taped into place. My God, the Buffalo was really aptly named. Damn thing looks like I did before my major weight loss. Which by the way I've now kept off for a year: started at 245 lbs and now weigh a mere 185ish. Ok, sorry for the shameless plug.
Joel
Joel_W
Joined: December 04, 2010
KitMaker: 11,666 posts
AeroScale: 7,410 posts
Posted: Wednesday, June 17, 2015 - 08:24 PM UTC
Quoted Text
Very nice Joel, you are doing a great job overcoming the fit issues.
Looking forward to some broad areas of colour now.
Cheers, D
Damian,
Thanks for those more then kind words. As I've said from just about the start, this is the toughest build I've ever attempted. Not for the complexity nor large scale, but for all those issues one faces with a multi media, limited run kit. I just wasn't fully prepared for what was a head for me. With the primer coats going on, the build is now shifting gears, and following a more familiar time line.
I am going to be pushing my weathering envelope a great deal with some selective pre-shading (never used it before), and a lot more post-shading besides my usual assortment of washes and filters. At least the game plan for now.
In any event, having you guys along for the ride kept me focused and in the ball game.
Joel
Joel_W
Joined: December 04, 2010
KitMaker: 11,666 posts
AeroScale: 7,410 posts
Posted: Wednesday, June 17, 2015 - 08:28 PM UTC
Quoted Text
Very nicely done Joel, that is looking good
Mal,
Thanks for stopping by and liking my efforts to date.
Joel
Joel_W
Joined: December 04, 2010
KitMaker: 11,666 posts
AeroScale: 7,410 posts
Posted: Wednesday, June 17, 2015 - 08:32 PM UTC
Quoted Text
Joel! I was a bit early with me previous comment... NOW it really does look like a Buffalo except for lacking that big thing in the nose
Magnus
Magnus,
Thanks buddy. As I replied to Brian, the Buffalo in 1/32 scale even without the cowl looks like a pregnant Buffalo. I sometimes wonder how it ever got off the ground, and how the Finnish pilots were able to master it to the point of dominance on the Eastern front.
And yeah, now I get to be more creative, or at least attempt to be with the weathering and painting.
Joel

Emeritus

Joined: March 30, 2004
KitMaker: 2,845 posts
AeroScale: 1,564 posts

Posted: Thursday, June 18, 2015 - 03:47 AM UTC
Great work on the seams! Looking forward to seeing some (exterior) paint on it. 

FlorinM

Joined: August 01, 2011
KitMaker: 385 posts
AeroScale: 173 posts
Posted: Thursday, June 18, 2015 - 06:10 PM UTC
RESPECT! Looks really great so far, can't wait to see this bird done.
Joel_W
Joined: December 04, 2010
KitMaker: 11,666 posts
AeroScale: 7,410 posts
Posted: Thursday, June 18, 2015 - 09:50 PM UTC
Quoted Text
RESPECT! Looks really great so far, can't wait to see this bird done.
Florin,
Slowly but surely I'm getting closer and closer to crossing the finish line.
Joel
Joel_W
Joined: December 04, 2010
KitMaker: 11,666 posts
AeroScale: 7,410 posts
Posted: Thursday, June 18, 2015 - 09:51 PM UTC
Quoted Text
Great work on the seams! Looking forward to seeing some (exterior) paint on it.
Eetu,
Thanks so much for appreciating my seam work. As for seeing it with some paint on it, I'm with you on that one.
Joel
Joel_W
Joined: December 04, 2010
KitMaker: 11,666 posts
AeroScale: 7,410 posts
Posted: Sunday, June 21, 2015 - 11:09 PM UTC
Next up on my build agenda is masking and installing all the glass, which there is no shortage of, so I can prime and pre-shade the Buffalo. Working in 1/32 scale I found it an enjoyable and easy task to mask the 3 glass sections: Windshield, rear glass, and sliding canopy section. I really prefer to use Tamiya tape cut into thin strips:

Then filled in with more tape:
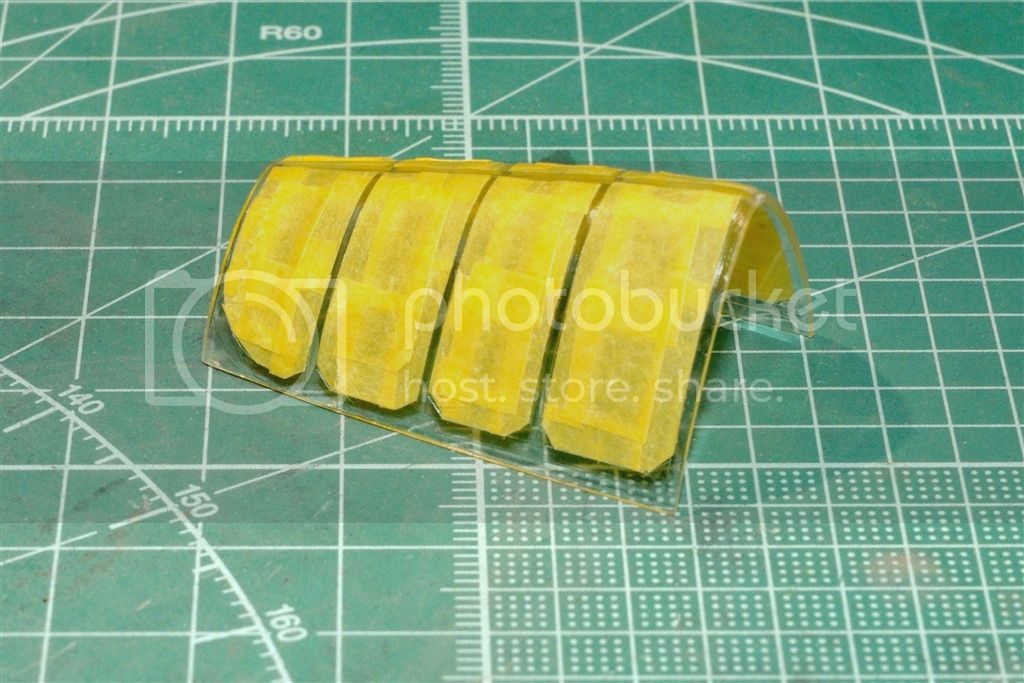
The windshield fit is very good, and only required some blending in with Vallejo white acrylic putty. The rear cockpit glass quickly became a major issue. It's too narrow especial at the rear, and slightly to tall as well at the rear. I sanded the bottom of the glass to get the height about right, but that just made the narrow issue a little worse. I tried to blend it in some with more Vallejo putty, but it's still a glaring issue that isn't really fixable without a new canopy. So I'll just have to learn to live with it.
I primed the upper surfaces with Mig Ammo Gray Surface Primer thinned with Tamiya X20-A and a few drops of flow Enhancer. Dries smooth as silk.
I then pre-shaded all the panel lines and added random blotches with Tamiya XF-1 Black. I really should have thinned it out more then 1:1, perhaps 1:2 and dropped the flow psi down to 12-14 psi, as it just didn't flow on smoothly. I just hate this ugly duckling stage, and couldn't wait to start painting the lower surfaces.

The correct light Gray for the 1940-42 Navy scheme is FS 36440. I mixed XF-19 Med Gray 2:1 with XF-2 White. Then thinned it 1:1 with Tamiya Yellow Cap Lacquer Thinner, and a few drops of Winsor Newton Flow Enhancer, then air brushed it on at 16-18 psi in light coats. A 2nd coat of just XF-10 thinned 1:1 applied in a blotchy random pattern, followed by a 3rd coat of XF-10 thinned 1:2 over sprayed to help blend everything in.
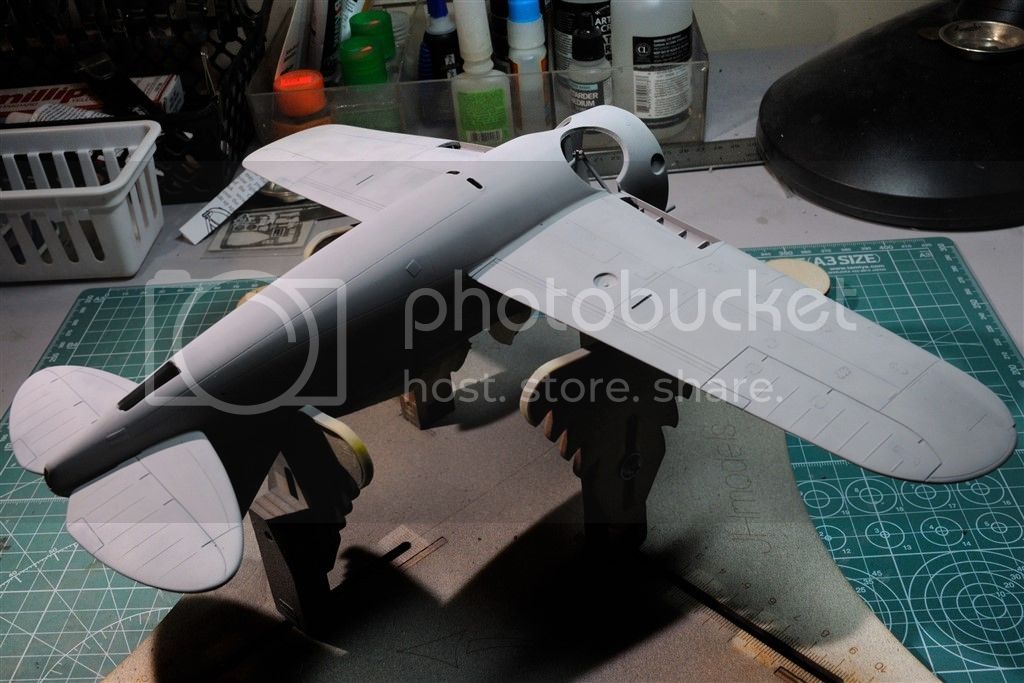
The various shades does show up better up close and personal then they do in these online pictures.
Next up is masking off the Elevators, Flaps, and Ailerons, so I can paint them a few shades lighter as they're cloth not metal. Then it's on to painting the topside colors.
Joel

Then filled in with more tape:

The windshield fit is very good, and only required some blending in with Vallejo white acrylic putty. The rear cockpit glass quickly became a major issue. It's too narrow especial at the rear, and slightly to tall as well at the rear. I sanded the bottom of the glass to get the height about right, but that just made the narrow issue a little worse. I tried to blend it in some with more Vallejo putty, but it's still a glaring issue that isn't really fixable without a new canopy. So I'll just have to learn to live with it.
I primed the upper surfaces with Mig Ammo Gray Surface Primer thinned with Tamiya X20-A and a few drops of flow Enhancer. Dries smooth as silk.
I then pre-shaded all the panel lines and added random blotches with Tamiya XF-1 Black. I really should have thinned it out more then 1:1, perhaps 1:2 and dropped the flow psi down to 12-14 psi, as it just didn't flow on smoothly. I just hate this ugly duckling stage, and couldn't wait to start painting the lower surfaces.

The correct light Gray for the 1940-42 Navy scheme is FS 36440. I mixed XF-19 Med Gray 2:1 with XF-2 White. Then thinned it 1:1 with Tamiya Yellow Cap Lacquer Thinner, and a few drops of Winsor Newton Flow Enhancer, then air brushed it on at 16-18 psi in light coats. A 2nd coat of just XF-10 thinned 1:1 applied in a blotchy random pattern, followed by a 3rd coat of XF-10 thinned 1:2 over sprayed to help blend everything in.


The various shades does show up better up close and personal then they do in these online pictures.
Next up is masking off the Elevators, Flaps, and Ailerons, so I can paint them a few shades lighter as they're cloth not metal. Then it's on to painting the topside colors.
Joel

Merlin
#017


Joined: June 11, 2003
KitMaker: 17,582 posts
AeroScale: 12,795 posts
Posted: Monday, June 22, 2015 - 12:48 AM UTC
Hi Joel
Shaping up really nicely!
All the best
Rowan
Shaping up really nicely!
All the best
Rowan


BlackWidow

Joined: August 09, 2009
KitMaker: 1,732 posts
AeroScale: 1,336 posts
Posted: Monday, June 22, 2015 - 12:48 AM UTC
That looks nice, Joel. Your Buffalo comes along really well!
Btw, at the expo in Strasbourg earlier this month I found a decal sheet for Suomen Ilmavoimat Brewsters in 1/48 for just 5 Euros
Now, what am I gonna do with that, I have no clue ....
Btw, at the expo in Strasbourg earlier this month I found a decal sheet for Suomen Ilmavoimat Brewsters in 1/48 for just 5 Euros
Now, what am I gonna do with that, I have no clue ....

Joel_W
Joined: December 04, 2010
KitMaker: 11,666 posts
AeroScale: 7,410 posts
Posted: Monday, June 22, 2015 - 01:20 AM UTC
Quoted Text
Hi Joel
Shaping up really nicely!
All the best
Rowan
Rowan,
Thanks for stopping by and liking my most modest of efforts.
Joel
Joel_W
Joined: December 04, 2010
KitMaker: 11,666 posts
AeroScale: 7,410 posts
Posted: Monday, June 22, 2015 - 01:24 AM UTC
Quoted Text
That looks nice, Joel. Your Buffalo comes along really well!
Btw, at the expo in Strasbourg earlier this month I found a decal sheet for Suomen Ilmavoimat Brewsters in 1/48 for just 5 Euros
Now, what am I gonna do with that, I have no clue ....
Torsten,
Glad you like my progress to date. As for those decals, gee let me guess. You've just happen to have in your stash the Special Hobbies 1/48 scale Buffalo. I'm certainly looking forward to you adding that to your miniature aircraft museum.
Joel

DougN1
Joined: August 08, 2011
KitMaker: 410 posts
AeroScale: 409 posts

Posted: Monday, June 22, 2015 - 10:05 PM UTC
Looking great Joel! I have a couple of these in my stash and will certianly reference your build for inspiration when the time comes.
FWIW, the early versions of the Buffalo were really quite good, being highly maneuverable (admittedly they don't look it) and packing a good punch. When they started adding more equipment/weight it ruined the aircraft because it got too slow and heavy to use it's main strength, maneuverability.
Doug
BlackWidow
Joined: August 09, 2009
KitMaker: 1,732 posts
AeroScale: 1,336 posts
Posted: Monday, June 22, 2015 - 11:22 PM UTC
Quoted Text
Torsten,
Glad you like my progress to date. As for those decals, gee let me guess. You've just happen to have in your stash the Special Hobbies 1/48 scale Buffalo. I'm certainly looking forward to you adding that to your miniature aircraft museum.
Joel
Joel, actually I have the Tamiya kit of the B-339 in my stash and after a first look over the parts I guess I will have to do some surgery to make a pretty finnish girl out of her. But surely not this year, my head is full of plans which want to be realized ....

Joel_W
Joined: December 04, 2010
KitMaker: 11,666 posts
AeroScale: 7,410 posts
Posted: Tuesday, June 23, 2015 - 05:49 PM UTC
Quoted Text
Looking great Joel! I have a couple of these in my stash and will certianly reference your build for inspiration when the time comes.
FWIW, the early versions of the Buffalo were really quite good, being highly maneuverable (admittedly they don't look it) and packing a good punch. When they started adding more equipment/weight it ruined the aircraft because it got too slow and heavy to use it's main strength, maneuverability.
Doug
Doug,
Thanks for stopping by, it's much appreciated.
Yeah, I read a few quotes from Pappy Boyington about his experiences with the F2As, and that was he colorful take on it.
I'm looking forward to your build, as your skills will really do this kit justice,
Joel
 |

WEB HOSTING BY


Copyright ©2021 AeroScale and Kitmaker Network, a subsidiary of Silver Star Enterprises
All Rights Reserved. Please read our Conditions of Use and Privacy Policy.
All Rights Reserved. Please read our Conditions of Use and Privacy Policy.