

Brian,
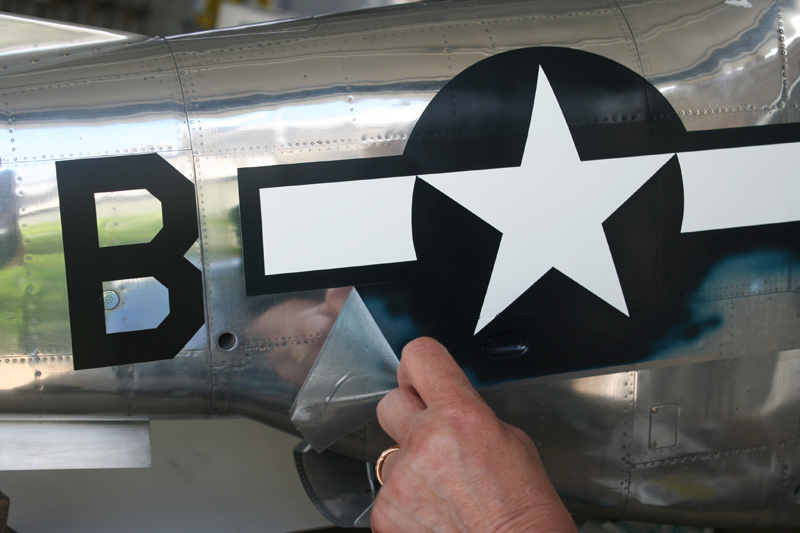
thanks so much for the offer, but as I just posted I got really lucky, very lucky, and have replaced the decal. Looks darn good. The only issue right now is that the two panels lines that are under the decal don't show. I'm hoping that a little Solvaset will do the trick, but if not, I'm still way better off then before.
Joel
World War II
Discuss WWII and the era directly before and after the war from 1935-1949.
Discuss WWII and the era directly before and after the war from 1935-1949.
Hosted by Rowan Baylis
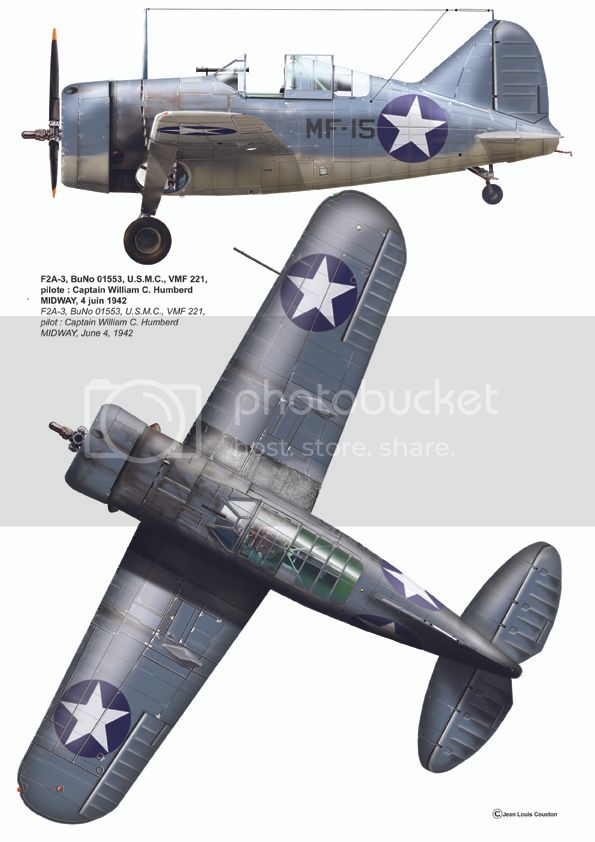
1/32 Czech FA2-3 Buffalo
Joel_W

Joined: December 04, 2010
KitMaker: 11,666 posts
AeroScale: 7,410 posts
Posted: Wednesday, July 01, 2015 - 11:18 PM UTC


Emeritus

Joined: March 30, 2004
KitMaker: 2,845 posts
AeroScale: 1,564 posts

Posted: Thursday, July 02, 2015 - 04:44 AM UTC
Provided the decals' thickness isn't too great, gently cutting along the panel lines with a knife and a couple of applications of decal softener will probably get them to settle down.
Holdfast

#056

Joined: September 30, 2002
KitMaker: 8,581 posts
AeroScale: 4,913 posts

Posted: Thursday, July 02, 2015 - 10:37 AM UTC
Quoted Text
Mal,
Yeah, I know. But you don't have insignias this big.
Where did you get that idea?

Joel_W
Joined: December 04, 2010
KitMaker: 11,666 posts
AeroScale: 7,410 posts
Posted: Thursday, July 02, 2015 - 08:34 PM UTC
Mal,
I just assumed you didn't. That's what happens when you assume and really don' have a clue.
Eetu,
That's certainly an option, and will most likely have a go at that route.
Joel
I just assumed you didn't. That's what happens when you assume and really don' have a clue.
Eetu,
That's certainly an option, and will most likely have a go at that route.
Joel
Joel_W
Joined: December 04, 2010
KitMaker: 11,666 posts
AeroScale: 7,410 posts
Posted: Sunday, July 05, 2015 - 05:07 AM UTC
Well, as I replied to Brian, I was lucky enough to find almost an exact replacement decal for the fuselage side. IN all honesty, I really don't think that I would have been that successful in getting the lighter fuselage decal to look like the other insignia decals even with heavy weathering.

I applied an black oil pin wash in all the flying surfaces recesses. Then I mixed equal parts of Flory Dark and Light washes to create a gray sludge wash, that I applied on the upper and sides of the aircraft. Then I applied just a dark wash on the bottom. When dry, I removed the washes in a more or less a uneven pattern trying to leave a staining effect.

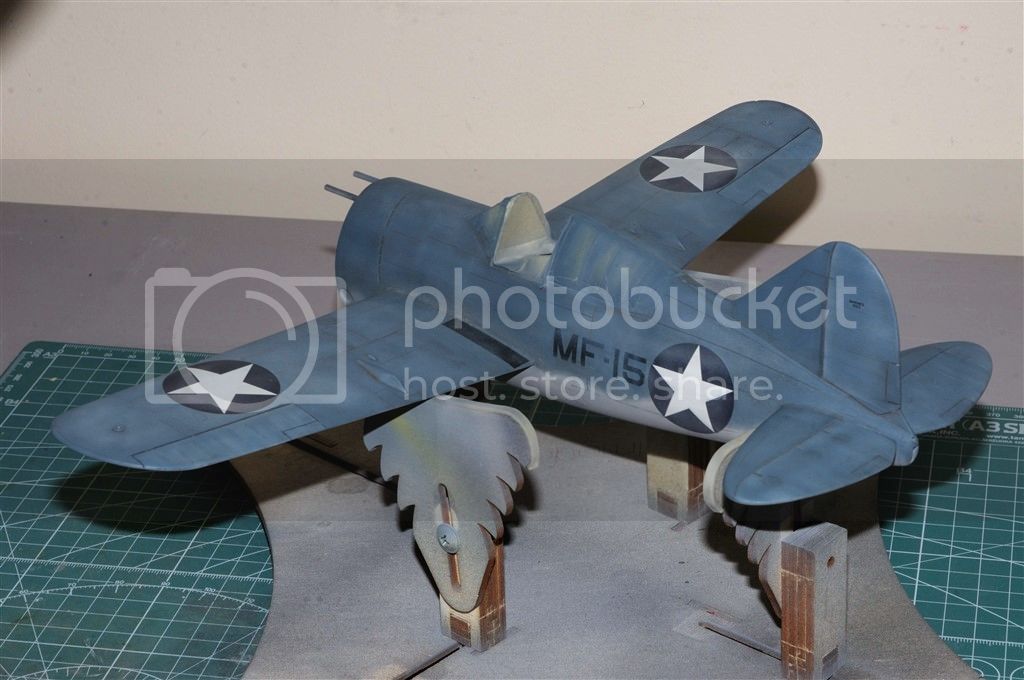

All the flying surfaces except the trim tabs are fabric, and should have faded/bleached more then the painted aluminum skin. So I started to lighten up those surfaces with a light gray wash. I still have to highlight the ribs and add a little more depth with a darker wash between them.
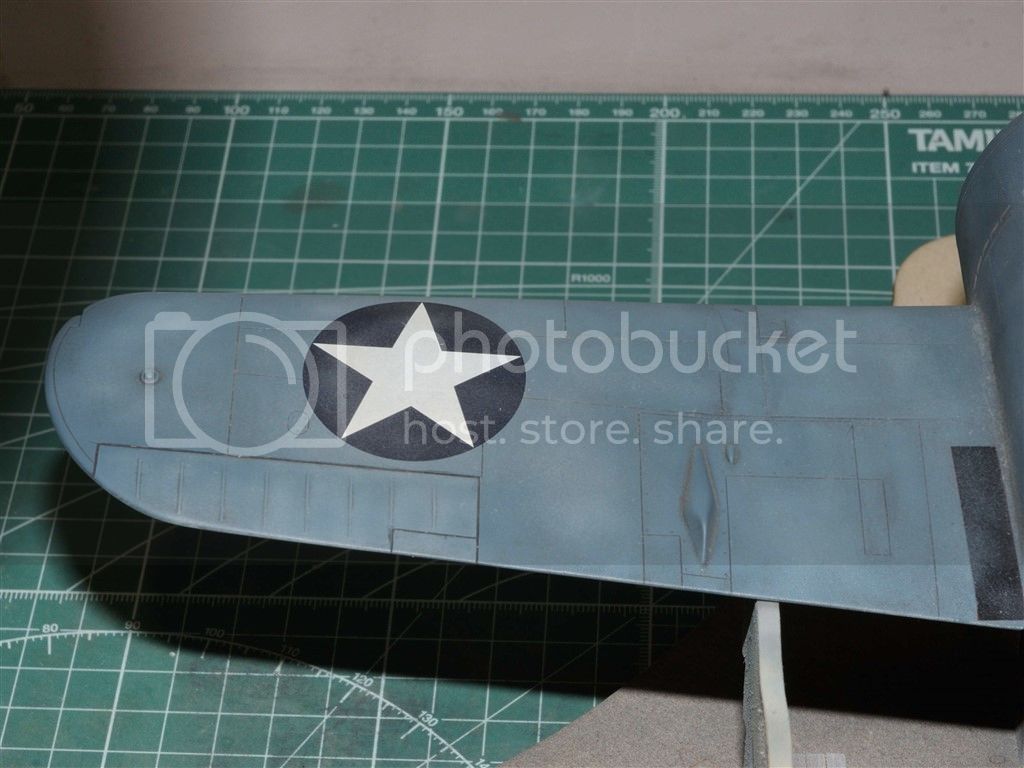
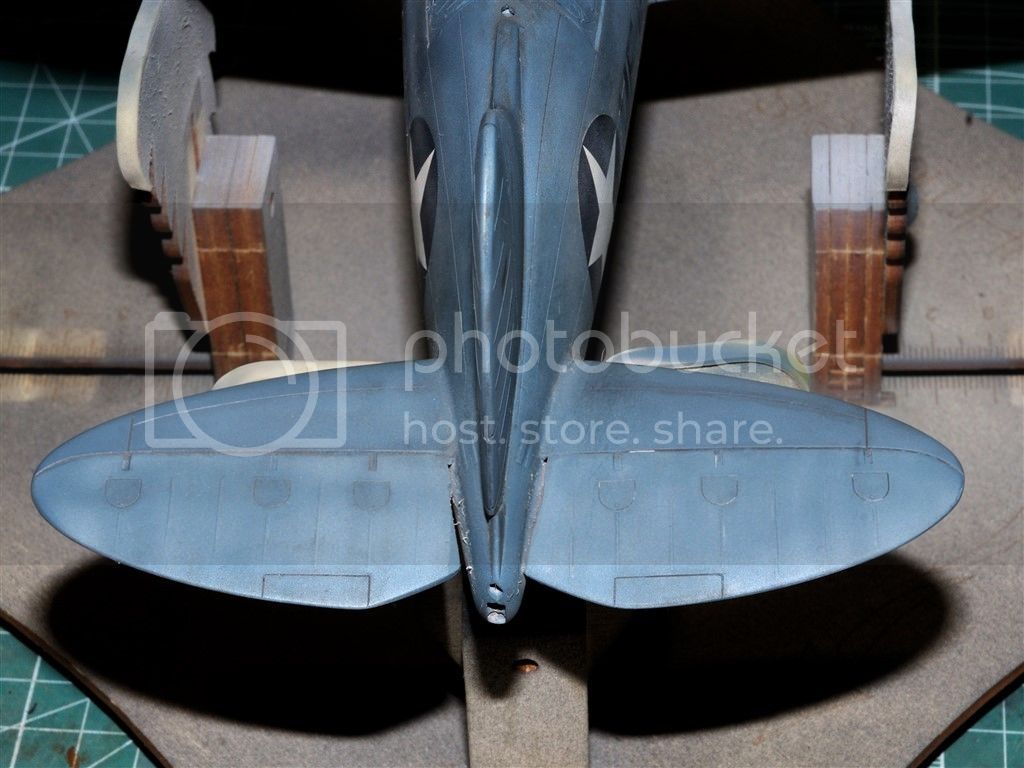
The bottom of the Buffalo now shows a lot of grime and dirt.

And the engine cowl was weathered as well, but kept somewhat cleaner then the rest of the aircraft as most pictures show.

After wiping down the FA2-3 with a tack cloth, I applied a few heavy coats of Testors Dullcoat with my M-1 Air Brush. Unfortunately, the small size of the bowl required me to refill it no less then 8 times, so I'm finding out it does have limitations. I'm looking into purchasing either a M-2 or the Paasche SI internal single action AB. I do like the fact that the SI has a .5mm cone while the M-2 only has a .4mm cone. Not to mention that it's a lot less expensive. as it's only function will be for primer and clear coating.
And once again, you're now up to speed on my build.
Joel

I applied an black oil pin wash in all the flying surfaces recesses. Then I mixed equal parts of Flory Dark and Light washes to create a gray sludge wash, that I applied on the upper and sides of the aircraft. Then I applied just a dark wash on the bottom. When dry, I removed the washes in a more or less a uneven pattern trying to leave a staining effect.


All the flying surfaces except the trim tabs are fabric, and should have faded/bleached more then the painted aluminum skin. So I started to lighten up those surfaces with a light gray wash. I still have to highlight the ribs and add a little more depth with a darker wash between them.


The bottom of the Buffalo now shows a lot of grime and dirt.


And the engine cowl was weathered as well, but kept somewhat cleaner then the rest of the aircraft as most pictures show.

After wiping down the FA2-3 with a tack cloth, I applied a few heavy coats of Testors Dullcoat with my M-1 Air Brush. Unfortunately, the small size of the bowl required me to refill it no less then 8 times, so I'm finding out it does have limitations. I'm looking into purchasing either a M-2 or the Paasche SI internal single action AB. I do like the fact that the SI has a .5mm cone while the M-2 only has a .4mm cone. Not to mention that it's a lot less expensive. as it's only function will be for primer and clear coating.
And once again, you're now up to speed on my build.
Joel

GazzaS

#424

Joined: April 23, 2015
KitMaker: 4,648 posts
AeroScale: 1,938 posts

Posted: Sunday, July 05, 2015 - 03:51 PM UTC
Joel,
You certainly have added a lot of textures to your Buffalo. Looks great!
Gary
You certainly have added a lot of textures to your Buffalo. Looks great!
Gary
Joel_W
Joined: December 04, 2010
KitMaker: 11,666 posts
AeroScale: 7,410 posts
Posted: Sunday, July 05, 2015 - 05:59 PM UTC
Quoted Text
Joel,
You certainly have added a lot of textures to your Buffalo. Looks great!
Gary
Gary,
Thanks for stopping by and appreciating my efforts to date.
Joel

mrockhill
Joined: June 17, 2009
KitMaker: 566 posts
AeroScale: 507 posts

Posted: Monday, July 06, 2015 - 02:18 AM UTC
Joel, I really like how your blue is turning out! Im going to have to go back and read over your paint steps again for future reference as well as the budzik decal link that you posted which I'll be watching in a few minutes. 
Joel_W
Joined: December 04, 2010
KitMaker: 11,666 posts
AeroScale: 7,410 posts
Posted: Monday, July 06, 2015 - 02:58 AM UTC
Quoted Text
Joel, I really like how your blue is turning out! Im going to have to go back and read over your paint steps again for future reference as well as the budzik decal link that you posted which I'll be watching in a few minutes.
Mike,
Thanks for those more then kind words. You'll really like Paul's videos. He's a master modeler, but being a dentist he does spend and own way more tools then most of us could ever dream of.
Joel
GazzaS
#424
Joined: April 23, 2015
KitMaker: 4,648 posts
AeroScale: 1,938 posts
Posted: Monday, July 06, 2015 - 10:42 AM UTC
I'm most impressed that he can sharpen an exacto blade. I use them til they're way to dull then grumble as I chuck em'.
Joel_W
Joined: December 04, 2010
KitMaker: 11,666 posts
AeroScale: 7,410 posts
Posted: Tuesday, July 07, 2015 - 02:24 AM UTC
Quoted Text
I'm most impressed that he can sharpen an exacto blade. I use them til they're way to dull then grumble as I chuck em'.
Me too.
Joel
Joel_W
Joined: December 04, 2010
KitMaker: 11,666 posts
AeroScale: 7,410 posts
Posted: Thursday, July 09, 2015 - 11:39 PM UTC
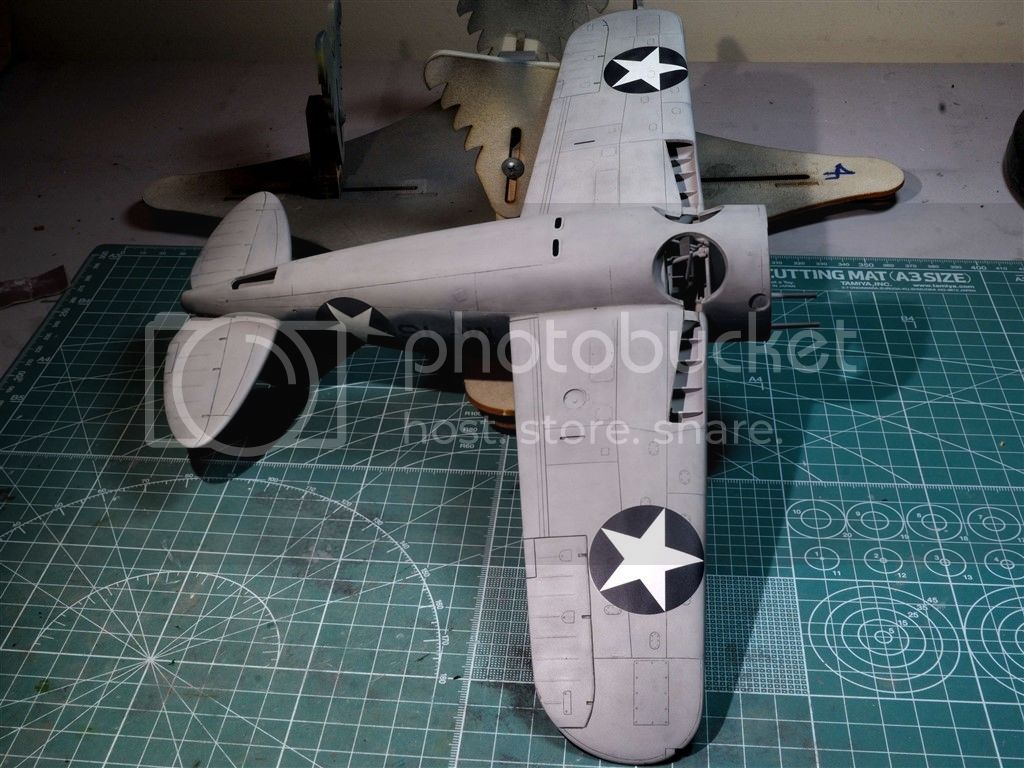
With summer finally making a real appearance, I'm finding myself spending somewhat less time at the workbench, but I'm still making progress at my snail's pace.
I'm finally satisfied with the variation in fading of the fabric surfaces to that of the Aluminum skin. So a coat of Dullcoat to seal those layers, and also apply the foundation for the final weathering effects.


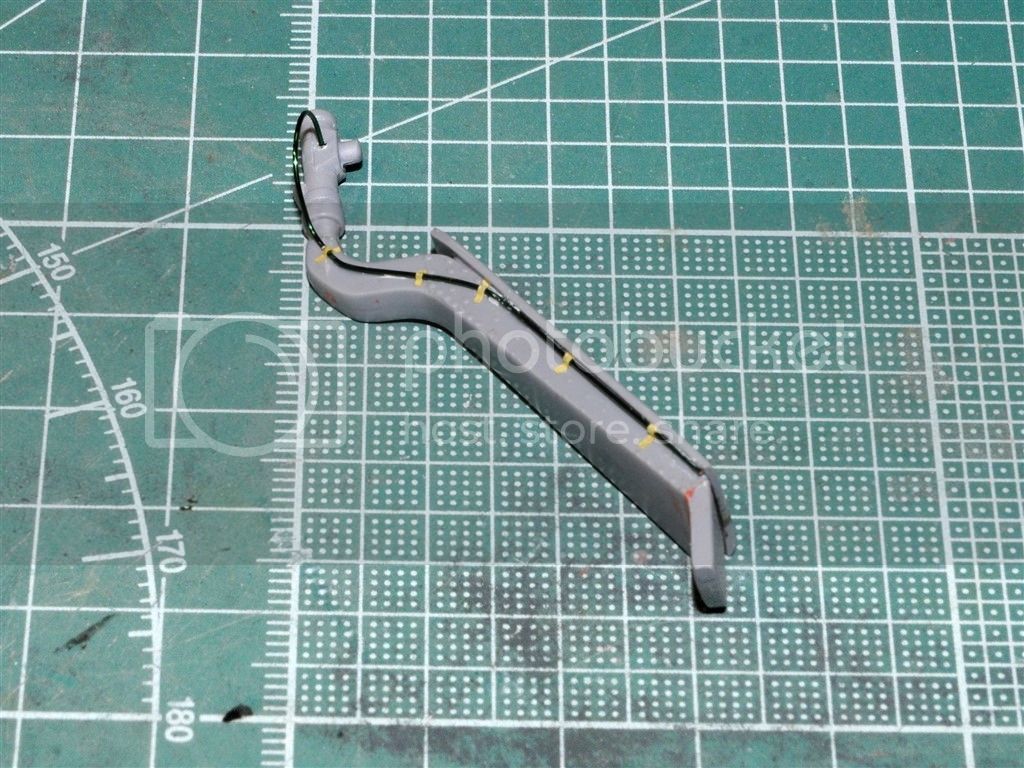
Next up is the construction and modifications to the landing gear. the main strut assembly is comprised on strut, wheel well cover/door, actuating rods that push open and close the struts, and of course the wheels and tires.

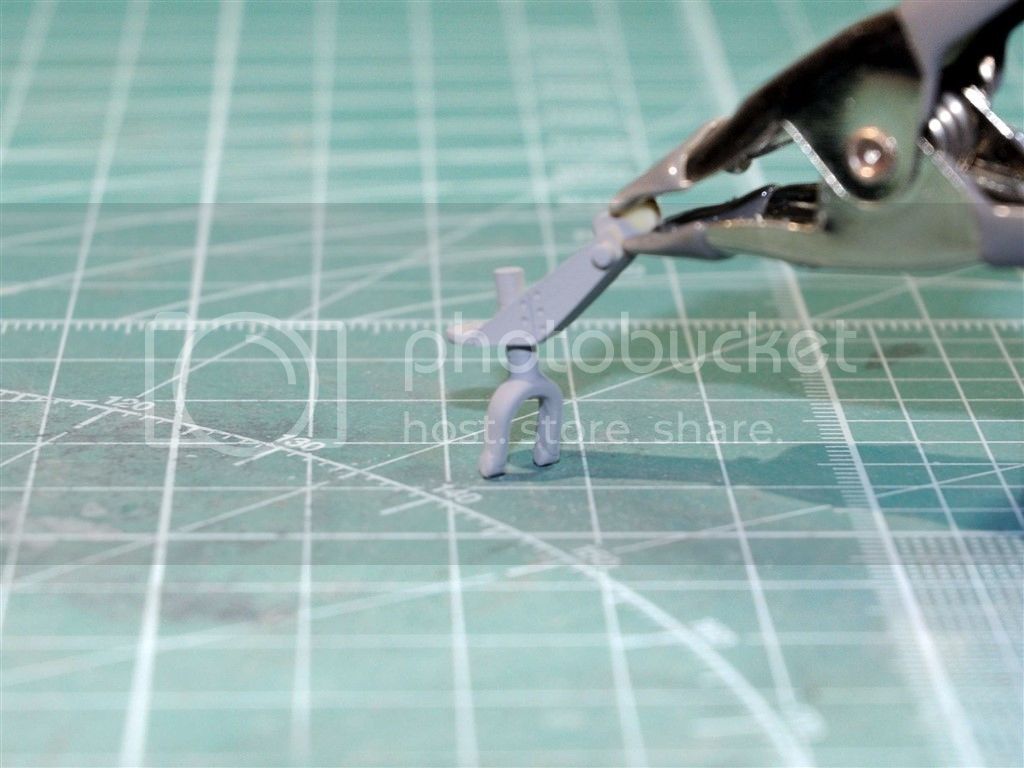
While sanding and doing general cleanup of one strut assembly, I carelessly broke off the axil from the strut, so I needed to repair it with a steel pin and epoxy. I must say that it came out a lot better then I thought it would.
The actuating rods seat into a hole that is at a 45 degree angle, unfortunately, the hole needed to be drilled out to a larger and deeper size. The other side of those rods just lay up against one of the wheel well landing gear tubes. Not a very precise nor secure way to help brace the struts for a life time in my display cabinet. Reading a few other builds, namely Mal's on LSP, I drilled out the far end of each rod, and CA glued in a steel pin. Then test fitting the gear and rod, located the proper mounting spot on a cross member rod, and drilled a hole for each pin. Now the rods are rock solid once mounted and glued to the struts.
Using some electrical wire I made the brake and Hydraulic lines, then created mounting brackets from small pieces of masking tape.
Then I test fitted the wheels to get a feeling for how they will look once completed.
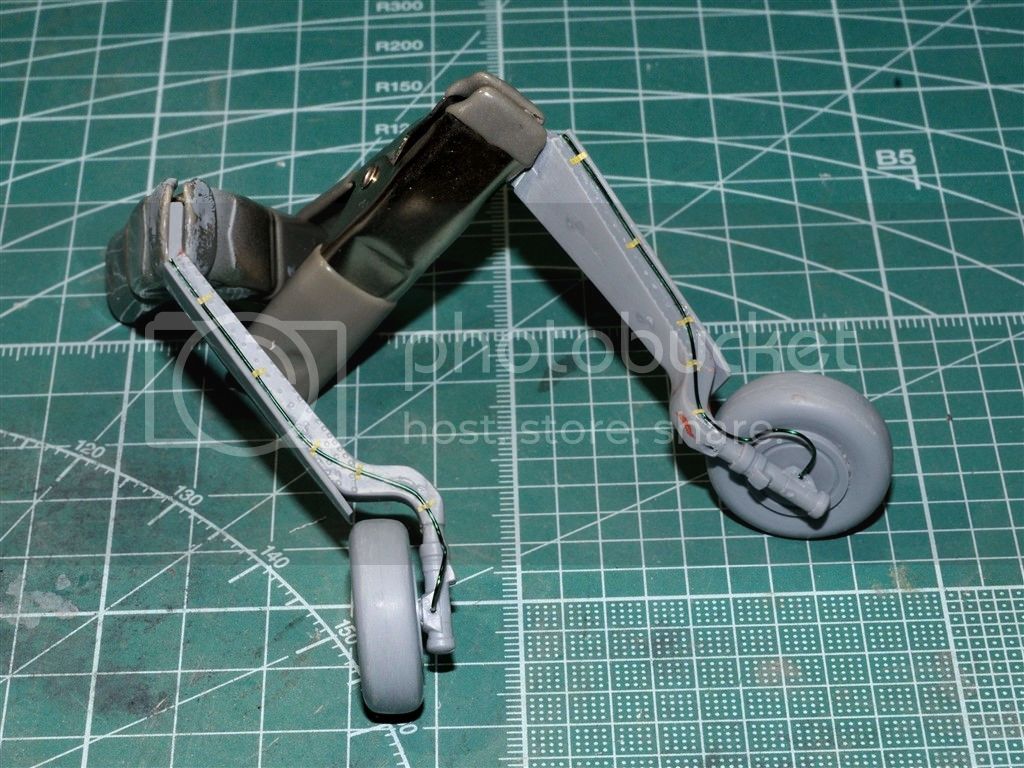
I air brushed each strut assembly and rod with Mig Primer, then the underside gray. I painted the brake line to the 1st bracket Nato Black to simulate the rubber line, but left the rest of the line gray as it was painted the same underside color.

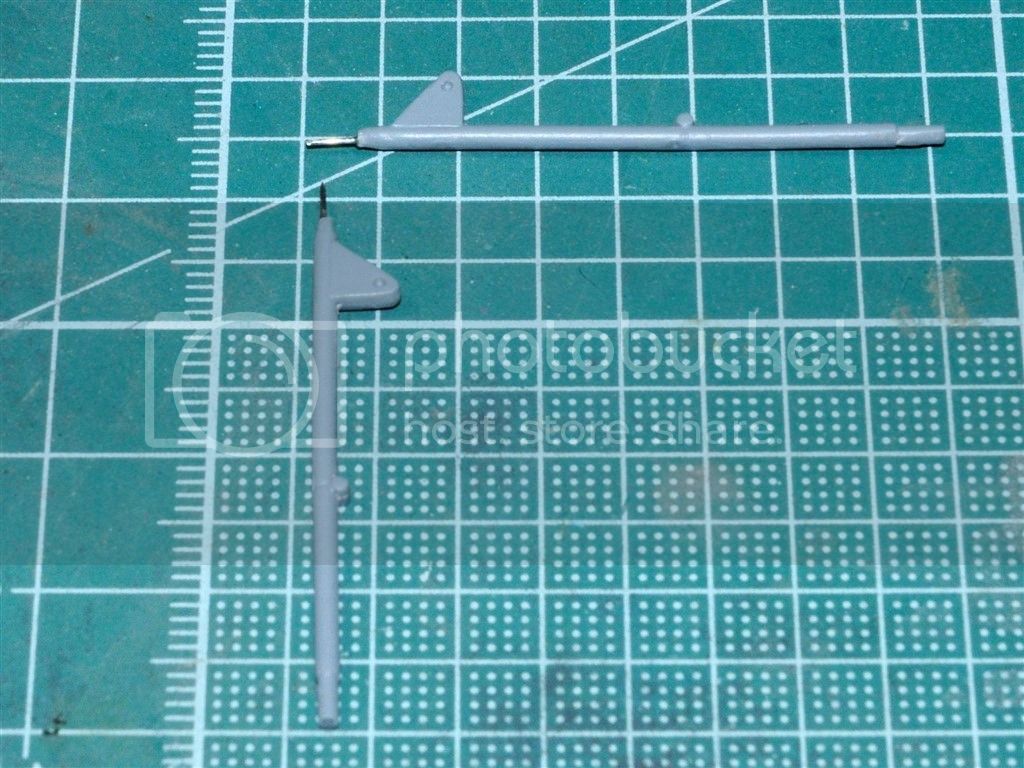
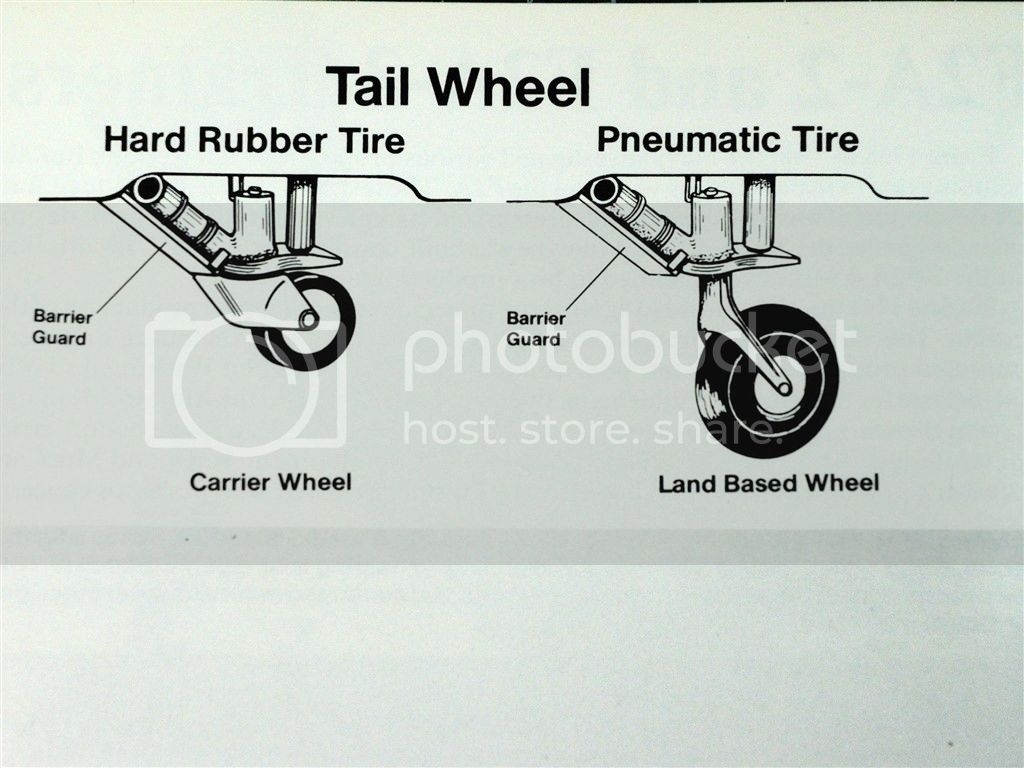
Using Jim Maas's excellent F2A Buffalo in Action book, he points out that the USN version used a tail wheel assembly with a hard solid rubber tire. The land versions where converted to a regular pneumatic tire with a completely different wheel strut. This picture is copied from Jim Maas's book who also has sent me detailed pictures as needed.
To construct the new tail wheel assembly, I used part of the export version tail strut. Drilled holes for a steel mounting pin, and then glued it together.

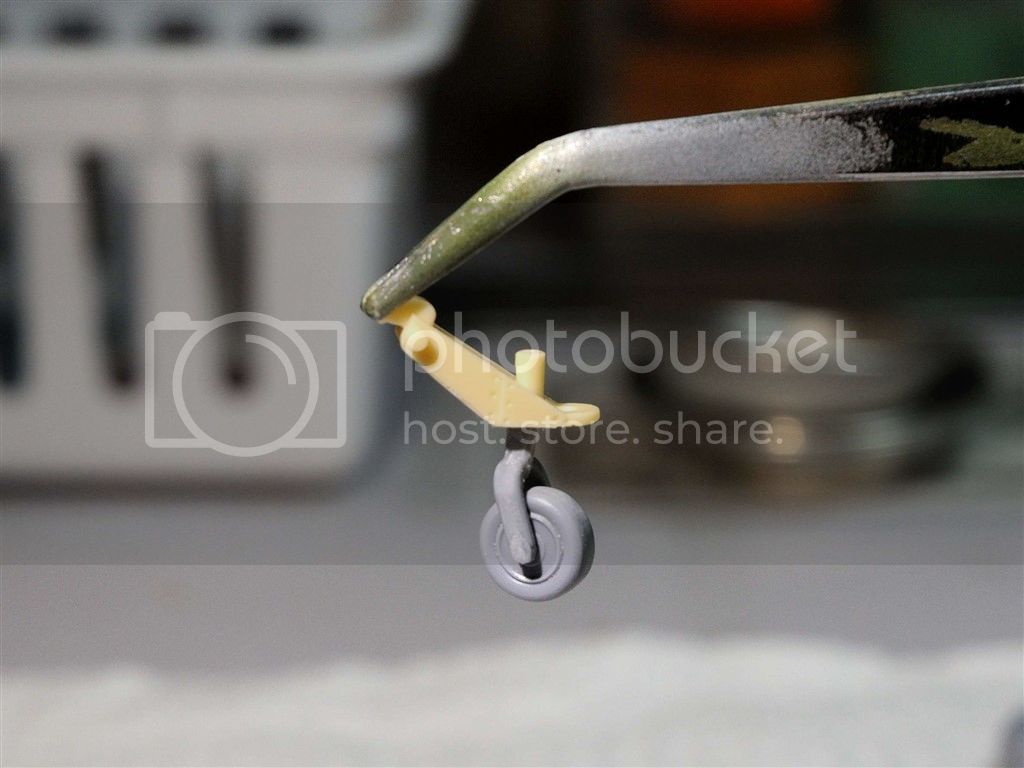
Once painted, it looks exactly like the real thing with the exception of the rear shock that is included in the kit, but will be installed when I glue in the rear wheel strut assembly.
Next up will be weathering the landing gear, painting/ weathering the wheels, and then finally gluing on the landing gear. Once I've that stage where the Buffalo can finally stand on it's own legs, another milestone in the build has been reached.
Joel
I'm finally satisfied with the variation in fading of the fabric surfaces to that of the Aluminum skin. So a coat of Dullcoat to seal those layers, and also apply the foundation for the final weathering effects.


Next up is the construction and modifications to the landing gear. the main strut assembly is comprised on strut, wheel well cover/door, actuating rods that push open and close the struts, and of course the wheels and tires.

While sanding and doing general cleanup of one strut assembly, I carelessly broke off the axil from the strut, so I needed to repair it with a steel pin and epoxy. I must say that it came out a lot better then I thought it would.
The actuating rods seat into a hole that is at a 45 degree angle, unfortunately, the hole needed to be drilled out to a larger and deeper size. The other side of those rods just lay up against one of the wheel well landing gear tubes. Not a very precise nor secure way to help brace the struts for a life time in my display cabinet. Reading a few other builds, namely Mal's on LSP, I drilled out the far end of each rod, and CA glued in a steel pin. Then test fitting the gear and rod, located the proper mounting spot on a cross member rod, and drilled a hole for each pin. Now the rods are rock solid once mounted and glued to the struts.

Using some electrical wire I made the brake and Hydraulic lines, then created mounting brackets from small pieces of masking tape.

Then I test fitted the wheels to get a feeling for how they will look once completed.

I air brushed each strut assembly and rod with Mig Primer, then the underside gray. I painted the brake line to the 1st bracket Nato Black to simulate the rubber line, but left the rest of the line gray as it was painted the same underside color.

Using Jim Maas's excellent F2A Buffalo in Action book, he points out that the USN version used a tail wheel assembly with a hard solid rubber tire. The land versions where converted to a regular pneumatic tire with a completely different wheel strut. This picture is copied from Jim Maas's book who also has sent me detailed pictures as needed.

To construct the new tail wheel assembly, I used part of the export version tail strut. Drilled holes for a steel mounting pin, and then glued it together.


Once painted, it looks exactly like the real thing with the exception of the rear shock that is included in the kit, but will be installed when I glue in the rear wheel strut assembly.

Next up will be weathering the landing gear, painting/ weathering the wheels, and then finally gluing on the landing gear. Once I've that stage where the Buffalo can finally stand on it's own legs, another milestone in the build has been reached.
Joel
GazzaS
#424
Joined: April 23, 2015
KitMaker: 4,648 posts
AeroScale: 1,938 posts
Posted: Friday, July 10, 2015 - 03:37 AM UTC
Hi Joel,
I'm really impressed with your painting results. And like what you are doing with the landing gear. Do you add brake lines at smaller scales?
Gary
I'm really impressed with your painting results. And like what you are doing with the landing gear. Do you add brake lines at smaller scales?
Gary
Joel_W
Joined: December 04, 2010
KitMaker: 11,666 posts
AeroScale: 7,410 posts
Posted: Friday, July 10, 2015 - 04:09 AM UTC
Gary,
Thanks for stopping by, and liking what you've seen.
I've been adding brake and hydraulic lines to aircraft in both 1/48 and now in 1/32 scale.
Joel
Thanks for stopping by, and liking what you've seen.
I've been adding brake and hydraulic lines to aircraft in both 1/48 and now in 1/32 scale.
Joel

Merlin
#017


Joined: June 11, 2003
KitMaker: 17,582 posts
AeroScale: 12,795 posts
Posted: Saturday, July 11, 2015 - 12:46 AM UTC
Hi Joel
Lovely work on the undercarriage!
All the best
Rowan
Lovely work on the undercarriage!
All the best
Rowan


Redhand

#522
Joined: January 20, 2013
KitMaker: 1,460 posts
AeroScale: 1,443 posts
Posted: Saturday, July 11, 2015 - 04:30 AM UTC
Quoted Text
Lovely work on the undercarriage!
It is indeed. And the idea of attaching the brake line with tape is genius. SUCH an elegant, functional solution vs. globs of glue!


Joel_W
Joined: December 04, 2010
KitMaker: 11,666 posts
AeroScale: 7,410 posts
Posted: Saturday, July 11, 2015 - 06:54 PM UTC
Quoted Text
Hi Joel
Lovely work on the undercarriage!
All the best
Rowan
Rowan,
Thank you for your most kind and appreciative words.
Joel
Joel_W
Joined: December 04, 2010
KitMaker: 11,666 posts
AeroScale: 7,410 posts
Posted: Saturday, July 11, 2015 - 07:00 PM UTC
Quoted Text
Quoted Text
Lovely work on the undercarriage!
It is indeed. And the idea of attaching the brake line with tape is genius. SUCH an elegant, functional solution vs. globs of glue!
Brian,
That compliment coming from a master modeler is much appreciated.
The brake line is actually CA glued into the strut hole, and in just two small spots along the strut. If you look closely you'll see a small amount of CA glue right below the top bracket, and right about the bottom bracket. No globs needed.
My reference pictures shows those brackets, and in 1/32 scale masking tape works well to reproduce them. Between the little bit of CA glue and the tape, those lines just aren't going anywhere.
Joel
mrockhill
Joined: June 17, 2009
KitMaker: 566 posts
AeroScale: 507 posts
Posted: Saturday, July 11, 2015 - 11:01 PM UTC
Your paint looks to have turned out great in those pics, your control surfaces are especially convincing. Your landing gear is off to a good start, reminds me that I should be working on mine 
Joel_W
Joined: December 04, 2010
KitMaker: 11,666 posts
AeroScale: 7,410 posts
Posted: Sunday, July 12, 2015 - 02:40 AM UTC
Quoted Text
Your paint looks to have turned out great in those pics, your control surfaces are especially convincing. Your landing gear is off to a good start, reminds me that I should be working on mine
Mike,
Thanks for taking the time out from your P-51B to checkout my F2A-3 build. This has to be the most difficult overall paint scheme I've done, simply because I'm trying to duplicate how that particular Buffalo looked at the Battle of Midway.
I'll be the 1st to confess that I've been really leaning heavenly on the cover painting on Jim Maas's F2A Buffalo in Action book for the best interpretation I can find. BTW, it's also the Wallpaper on my desktop till my next build.
Joel
Joel

thegirl

Joined: January 19, 2008
KitMaker: 6,743 posts
AeroScale: 6,151 posts
Posted: Sunday, July 12, 2015 - 07:40 AM UTC
Nice job on the details Joel , she is shaping up wonderful so far . Really like your paint work , well done 
Looking forward for the next up-date
Terri
Looking forward for the next up-date
Terri
Joel_W
Joined: December 04, 2010
KitMaker: 11,666 posts
AeroScale: 7,410 posts
Posted: Sunday, July 12, 2015 - 07:47 PM UTC
Quoted Text
Nice job on the details Joel , she is shaping up wonderful so far . Really like your paint work , well done
Looking forward for the next up-date
Terri
Terri,
Tanks for stopping by and appreciating my most modest of efforts. This is my 1st ever 1/32 scale kit, which is also my 1st limited run multi media kit. And it's been quite a learning experience. Every stage just has had it's surprises that has kept me on my toes. But finally the end is in sight. I still have the engine to complete with ignition wiring, and a resin prop to build and then paint/weather. So it won't exactly be a walk in the park to the finish line, but I'm pretty certain at this point I'll get there sooner or later.
Joel
Joel_W
Joined: December 04, 2010
KitMaker: 11,666 posts
AeroScale: 7,410 posts
Posted: Monday, July 13, 2015 - 02:23 AM UTC
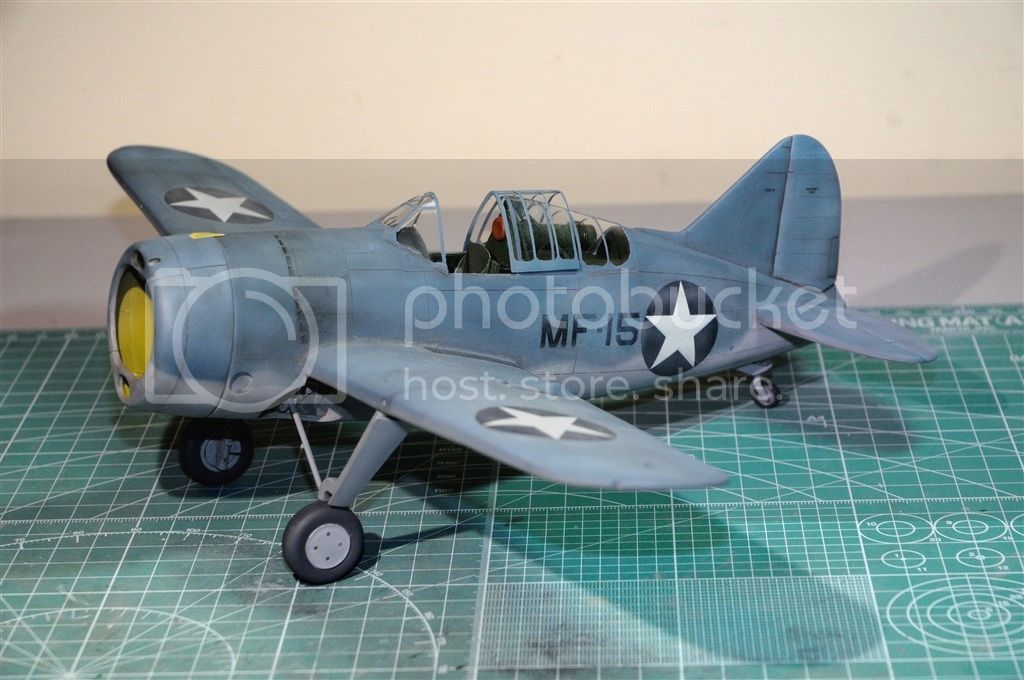
I've reached another Milestone, with a lot of work I've managed to get the Buffalo to stand on it's own two legs. I've taped the cowl on so you can finally see the overall shape of it.
You'll also notice that the cowl is lighter and has a lot less engine exhaust smoke stains and oil on it. That's the way it should be.
Joel


You'll also notice that the cowl is lighter and has a lot less engine exhaust smoke stains and oil on it. That's the way it should be.
Joel


GazzaS
#424
Joined: April 23, 2015
KitMaker: 4,648 posts
AeroScale: 1,938 posts
Posted: Monday, July 13, 2015 - 09:39 AM UTC
Hi Joel,
It looks great! Your canopy framing looks precise and clean. Glassy and not plastic-like at all. Did you dip it in Future, or some other chemical and process?
Keep it up!
Gary
It looks great! Your canopy framing looks precise and clean. Glassy and not plastic-like at all. Did you dip it in Future, or some other chemical and process?
Keep it up!
Gary
Holdfast
#056
Joined: September 30, 2002
KitMaker: 8,581 posts
AeroScale: 4,913 posts
Posted: Monday, July 13, 2015 - 11:46 AM UTC
Now that is looking good Joel
 |

WEB HOSTING BY


Copyright ©2021 AeroScale and Kitmaker Network, a subsidiary of Silver Star Enterprises
All Rights Reserved. Please read our Conditions of Use and Privacy Policy.
All Rights Reserved. Please read our Conditions of Use and Privacy Policy.