OFFICIAL: WWII Twins Campaign

#041
Kobenhavn, Denmark
Joined: July 20, 2006
KitMaker: 10,069 posts
AeroScale: 3,788 posts
Posted: Tuesday, March 22, 2016 - 06:09 PM UTC
Loog great, Jose. Fast and beautiful work.
Looking forward to see more.

Campaign'oholic - 252+ campaigns completed
Nordrhein-Westfalen, Germany
Joined: March 22, 2015
KitMaker: 671 posts
AeroScale: 614 posts
Posted: Tuesday, March 22, 2016 - 06:45 PM UTC
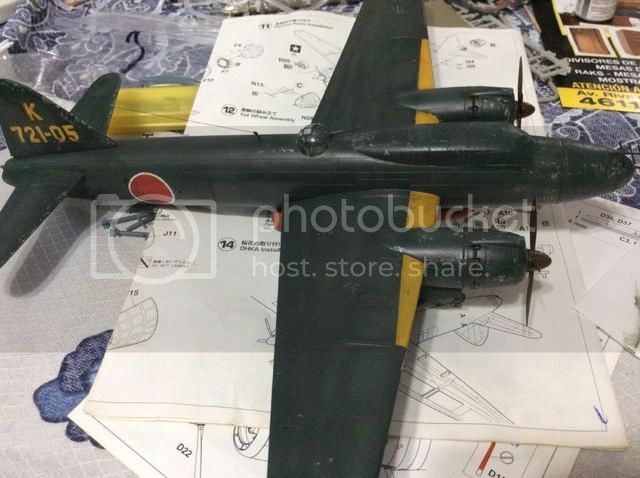
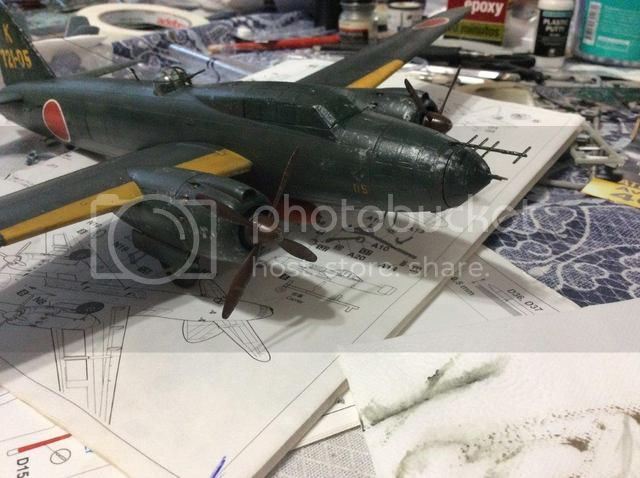
Yes, Jesper I agree. Beautiful Betty, You are building there Jose. I like Your decent shading of the panels very much.
The Revell kit of the Dornier 335 is quite nice. I think, it is the old Dragon kit.
Meanwhile paint is on

and the parts are glued together.

Oliver

On the desk: Probably a Panzer III.
AussieReg
 Associate Editor
#007
Victoria, Australia
Joined: June 09, 2009
KitMaker: 8,156 posts
AeroScale: 3,756 posts
Posted: Wednesday, March 23, 2016 - 01:27 AM UTC
Great detail work Oliver, that cockpit has more parts than most of my entire builds!
Jose, those markings are striking against the dark paintwork, looking really good now.
Roll Call/Build Status updated once again. We currently have 10 builds in progress and 1 completed, a bit over 2 months still to run.
Cheers, D
EDIT: Check out the updates on Joel's B-25 build
HEREON the bench
Revell 1/24 '53 Corvette (building as '54)
Revell 1/24 BMW 507 Coupe and Cabrio
Italeri 1/48 Me262 B-1a/U1 Nightfighter
Monogram 1/24 '57 Chevy Nomad
Dragon 1/350 USS Frank Knox DD-742
Illinois, United States
Joined: January 25, 2010
KitMaker: 110 posts
AeroScale: 88 posts
Posted: Wednesday, March 23, 2016 - 09:18 PM UTC
So there is my update on my Henschel 129 . I am actually close to be done. As of the model it is a typical Hasegawa product. You are not going to have much of problems building it. It falls in to one piece almost perfect. There is few places which have to be done very carefully. Do not spend a lot of time in the cockpit area, since it will be almost invisible after the build.
And some pictures now:
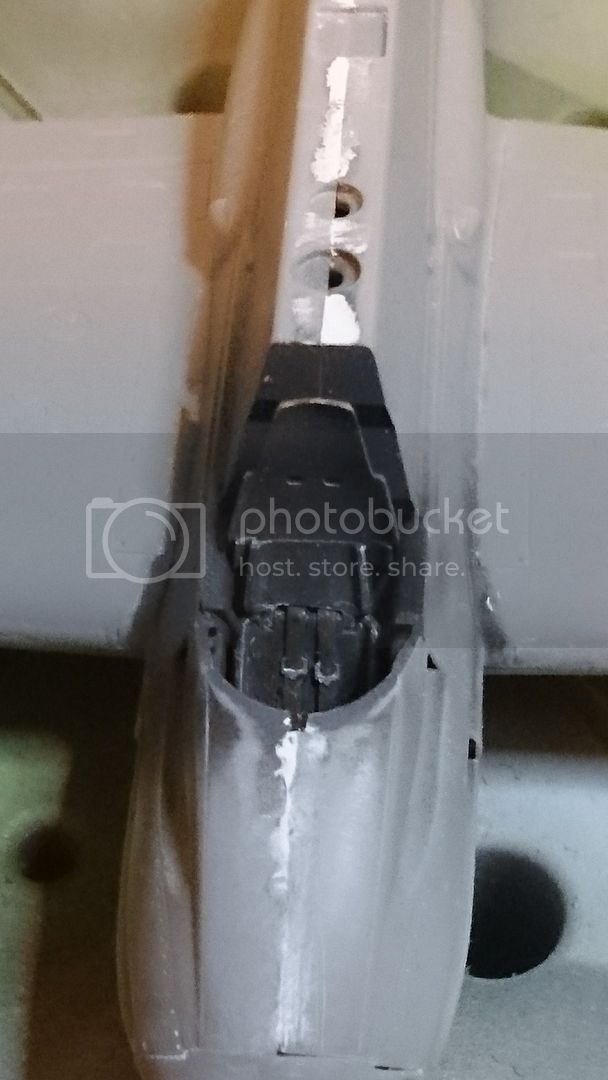
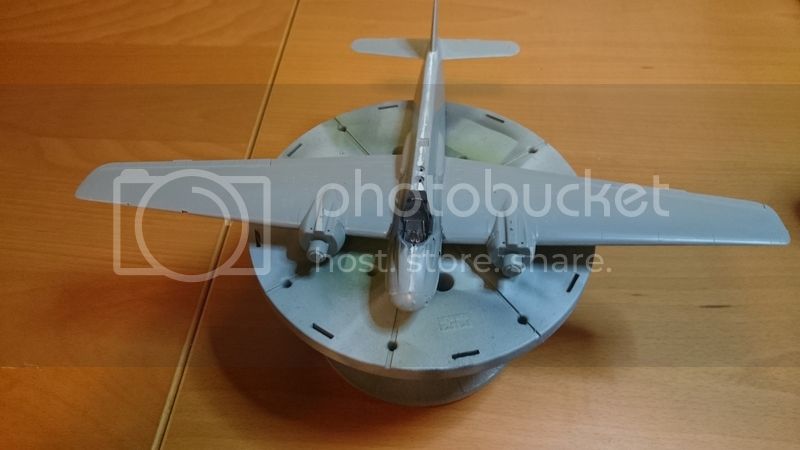
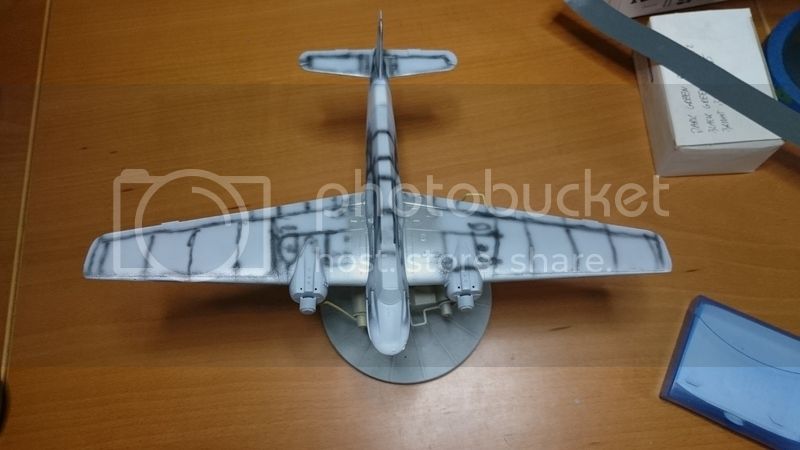
I am pretty happy about the paint job. I am usually not patient enough but slowly I am learning to get it done slowly.
Pictures were taken are not the best, but in a real life it looks even batter.
Now I need your help guys. I have to make dark green patches on the top camo. I did try spray the free hand but I get into trouble with overspraying. I did try to use masking fluids did not give me a result I wanted. So I decided to buy a new airbrush so far I am using a Badger 200, which is a great single stage airbrush double stage Badger Patriot hoping that I will be able to control overspraing. If that will not help does anyone share with me her/his way of spraying patches as a top layer? I know that I can mask the whole model but that is something which I want not to do.
#305
Christchurch, New Zealand
Joined: February 01, 2006
KitMaker: 1,673 posts
AeroScale: 1,517 posts
Posted: Thursday, March 24, 2016 - 03:27 PM UTC
Hi Tom, I know there are photo etched templates available in 1/72 1/48 & 1/32. See this
link for a 1/32 scale mask which might just provide the size of mottle you require. Other than that a double action airbrush does give much greater control over your paint stream. My advice is to thin the paint quite a bit and to spray with as little pressure as is necessary to get it to spray. I pass onto you Joel Willsteins advice to me when I was painting my S.M. 81 Pipistrello and wanted to get a fine a line as possible.
"You need to really thin your paint out, drop the psi to as low as your AB and compressor will let you paint a fine line, and keep the tip only a inch or two from the aircraft surface. The smaller the dia. of the cone opening, the better. .2mm would be ideal. Having a lightly pre-drawn scheme in which to paint over makes it that much easier."

Nordrhein-Westfalen, Germany
Joined: March 22, 2015
KitMaker: 671 posts
AeroScale: 614 posts
Posted: Thursday, March 24, 2016 - 07:11 PM UTC
Hi Tom,
very nice paint job on Your bird. I like the decent visible pre-shading. As Chris pointed out very well, a thin paint and a low pressure for brushing will work. Chris did an exceptional job on a 1/72 plane with a steady hand. 1/48 should hopefully be easier to start with.
Looking forward to see more!
Oliver
On the desk: Probably a Panzer III.
Ontario, Canada
Joined: February 04, 2008
KitMaker: 2,507 posts
AeroScale: 1,814 posts
Posted: Friday, March 25, 2016 - 01:52 AM UTC
" The Die Hards"
43rd MIDDLESEX REGIMENT
MACHINE GUN CORPS
XXX CORP
The most effective way to do it, is to do it.
- Amelia Earhart
#305
Christchurch, New Zealand
Joined: February 01, 2006
KitMaker: 1,673 posts
AeroScale: 1,517 posts
Posted: Friday, March 25, 2016 - 04:13 PM UTC
Nice work Richard! I remember those gaps from when I built this kit way back in the early 80's!
#305
Christchurch, New Zealand
Joined: February 01, 2006
KitMaker: 1,673 posts
AeroScale: 1,517 posts
Posted: Friday, March 25, 2016 - 04:27 PM UTC
Buenos Aires, Argentina
Joined: May 21, 2012
KitMaker: 765 posts
AeroScale: 316 posts
Posted: Saturday, March 26, 2016 - 03:00 AM UTC
Thanks for your comments Oliver and Jester.
Oliver the cockpit of the 335 is beautiful!!!!
Chris I will follow your 328, thats is a kit wich I want...!!
Near to finish
I will go to Chile for a week.... more advances when I return to home
Those Radial Fighters Campaign: 1/72 FW 190 A5
Delta 2 Campaign: 1/48 Hobby Boss Mirage IIIC
Navy Boys on those Postage Stamps 1/72 Airfix Sea Harrier FA2
Working: Trumpeter A-5 Vigilante
Waiting: Phantom 60 Campaign
AussieReg
Associate Editor #007
Victoria, Australia
Joined: June 09, 2009
KitMaker: 8,156 posts
AeroScale: 3,756 posts
Posted: Saturday, March 26, 2016 - 05:13 AM UTC
Excellent progress reports coming in from lots of builds, wonderful to see!
Tom, great job on the pre-shading. Trust the advice of the experienced folks here as I have over the years, they always steer you in the right direction.
Richard, really good to see some work on the big Beau, I'm sure that you will overcome the fit issues.
Chris, sorry to hear about the canopy damage mate, but having a spare kit to raid is always a bonus! Good job on the splinter camo on the Do215, this is going to be a really attractive combination to have on display ate the end.
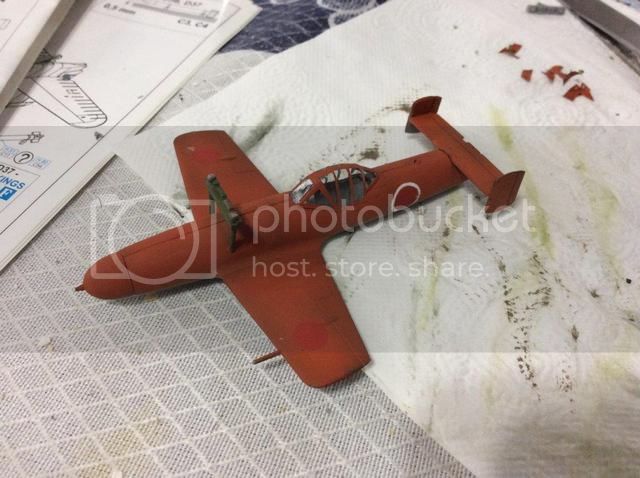
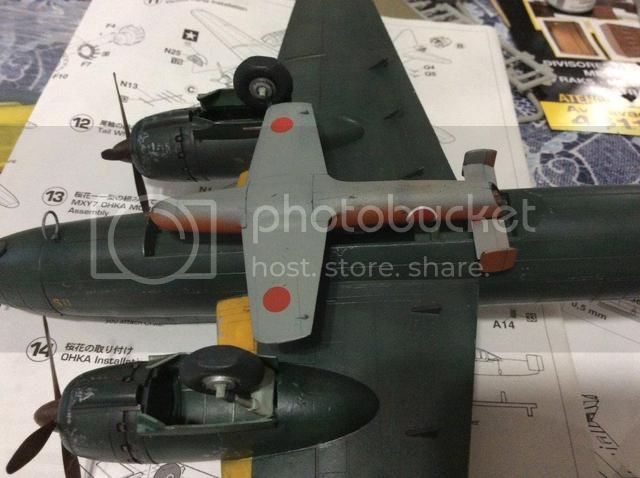
Jose, that little Ohka looks striking, I love the colour. What paint did you use there?
Roll Call/Build Status has just had a very nice revision, keep up the awesome work folks.
Cheers, D
ON the bench
Revell 1/24 '53 Corvette (building as '54)
Revell 1/24 BMW 507 Coupe and Cabrio
Italeri 1/48 Me262 B-1a/U1 Nightfighter
Monogram 1/24 '57 Chevy Nomad
Dragon 1/350 USS Frank Knox DD-742
Sør-Trøndelag, Norway
Joined: October 23, 2012
KitMaker: 189 posts
AeroScale: 142 posts
Posted: Saturday, March 26, 2016 - 05:53 AM UTC
I have a couple of twins I got for christmas. Not sure which one I'll build first, either Italeris Dakota, or Airfix Beaufighter. I'll decide and post some sprue shots hen I get back from the Easter holiday.

Building the world, one piece at the time.
AussieReg
Associate Editor #007
Victoria, Australia
Joined: June 09, 2009
KitMaker: 8,156 posts
AeroScale: 3,756 posts
Posted: Saturday, March 26, 2016 - 06:07 AM UTC
Thanks for joining in Eirik, great to have you on board.
Cheers, D
ON the bench
Revell 1/24 '53 Corvette (building as '54)
Revell 1/24 BMW 507 Coupe and Cabrio
Italeri 1/48 Me262 B-1a/U1 Nightfighter
Monogram 1/24 '57 Chevy Nomad
Dragon 1/350 USS Frank Knox DD-742
Buenos Aires, Argentina
Joined: May 21, 2012
KitMaker: 765 posts
AeroScale: 316 posts
Posted: Saturday, March 26, 2016 - 11:18 PM UTC
@Damian
Thanks for your kindly comments Damian.
For the Okka I used Tamiya XF-6
José
Those Radial Fighters Campaign: 1/72 FW 190 A5
Delta 2 Campaign: 1/48 Hobby Boss Mirage IIIC
Navy Boys on those Postage Stamps 1/72 Airfix Sea Harrier FA2
Working: Trumpeter A-5 Vigilante
Waiting: Phantom 60 Campaign
Nordrhein-Westfalen, Germany
Joined: March 22, 2015
KitMaker: 671 posts
AeroScale: 614 posts
Posted: Sunday, March 27, 2016 - 01:12 AM UTC
Richard, I agree with Chris .Your build reminds me of bigger sanding actions, when I build my kit, too! But Your sanding looks much better than my efforts!
Chris,nice finish on the dornier! What color will you choose for the Me?
Jose , thank You for Your reply. You did a really fine paint job on the Okha! The Betty reminds me, how small this thing was!
Oliver
On the desk: Probably a Panzer III.
Ontario, Canada
Joined: February 04, 2008
KitMaker: 2,507 posts
AeroScale: 1,814 posts
Posted: Sunday, March 27, 2016 - 01:42 AM UTC
Hi Oliver
I try to reduce the filler/sanding area by reducing the area with masking tape and multi layers of filler.

" The Die Hards"
43rd MIDDLESEX REGIMENT
MACHINE GUN CORPS
XXX CORP
The most effective way to do it, is to do it.
- Amelia Earhart
#305
Christchurch, New Zealand
Joined: February 01, 2006
KitMaker: 1,673 posts
AeroScale: 1,517 posts
Posted: Sunday, March 27, 2016 - 07:11 AM UTC
@Damian: Thanks D it was my own fault for underestimating the effects of capillary action. But the second time round I used Airfix's crystal clear canopy/clear part glue so it wouldn't mark the canopy if I was a little to liberal with it. (Love this stuff!)
@Jose: Encores little Me328 kit is a great improvement over the original offering from Pioneer, however I would recommend deepening the panel lines before assembly as the kit is quite small and fragile once the resin undercarriage is attached. I will have to rescribe mine very carefully.
@Oliver: I'll go with the combat colour scheme for yellow 4 I think it'll provide an excellent contrast to the splinter on the Dornier. The scheme is purely a what if as the airframe was only flight tested in a RLM70 green over RLM 76 (RLM65?) and I've found a photo of the Me328 and the motors are attached to the Fuselage not the wing. They gave up on the combination as they had great difficulty isolating the vibration from the pulse jets from the airframe and it quite literally was shaking itself apart.


Western Australia, Australia
Joined: March 21, 2016
KitMaker: 247 posts
AeroScale: 105 posts
Posted: Sunday, March 27, 2016 - 01:06 PM UTC
Hello and Happy Easter
I am joining in on this campaing with Meng's ME410A-1
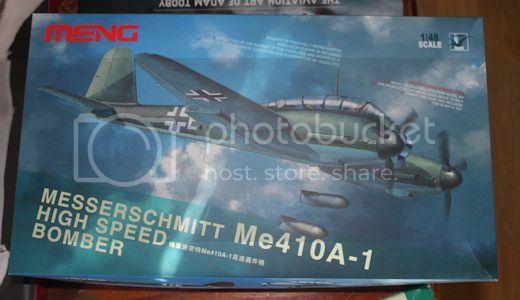
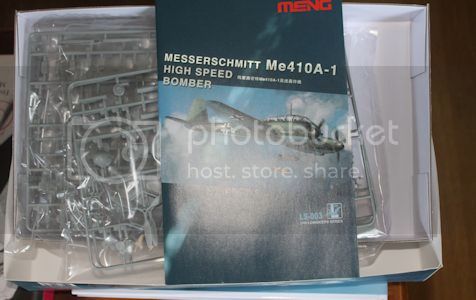
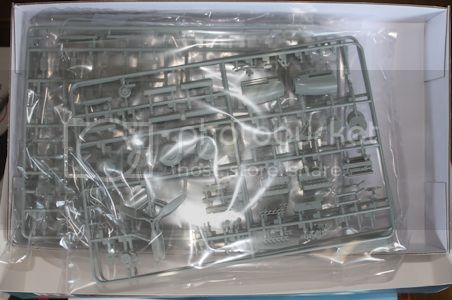
Cheers Linus
#424
Queensland, Australia
Joined: April 23, 2015
KitMaker: 4,648 posts
AeroScale: 1,938 posts
Posted: Sunday, March 27, 2016 - 01:15 PM UTC
Hi Linus,
Always been interested in the 410... Will watch with interest,
Gaz
"Artillery adds dignity, to what would otherwise be an ugly brawl."
Frederick The Great
Nordrhein-Westfalen, Germany
Joined: March 22, 2015
KitMaker: 671 posts
AeroScale: 614 posts
Posted: Monday, March 28, 2016 - 12:03 AM UTC
Richard, thank You for the tip. I will try this on my Do 335. It seems to me, the putty won't stay home this time!
Chris, very nice scheme with the shark mouth. It will sure look great!
Linus, welcome on board. Nice kit You chose for this campaign. Looking forward to Your build.
Oliver
On the desk: Probably a Panzer III.
AussieReg
Associate Editor #007
Victoria, Australia
Joined: June 09, 2009
KitMaker: 8,156 posts
AeroScale: 3,756 posts
Posted: Monday, March 28, 2016 - 01:46 AM UTC
Linus, welcome to the Kitmaker network, great to have another Aussie on the boards. Where are you located?
Excellent choice of build for this Campaign as well, I'm looking forward to watching this one come together.
Cheers, D
ON the bench
Revell 1/24 '53 Corvette (building as '54)
Revell 1/24 BMW 507 Coupe and Cabrio
Italeri 1/48 Me262 B-1a/U1 Nightfighter
Monogram 1/24 '57 Chevy Nomad
Dragon 1/350 USS Frank Knox DD-742
Illinois, United States
Joined: January 25, 2010
KitMaker: 110 posts
AeroScale: 88 posts
Posted: Tuesday, March 29, 2016 - 01:18 AM UTC
So I did received the airbrush
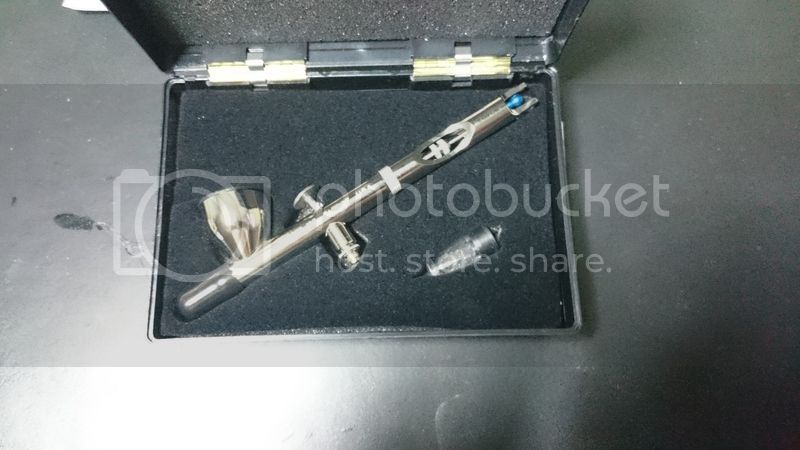
Now I will just have to learn how to use it, and I will take Chris and Oliver advise and will free-hand dark green mottles on the top of the Henschel
Wish me a good luck!

AussieReg
Associate Editor #007
Victoria, Australia
Joined: June 09, 2009
KitMaker: 8,156 posts
AeroScale: 3,756 posts
Posted: Tuesday, March 29, 2016 - 01:30 AM UTC
Quoted Text
So I did received the airbrush
Wish me a good luck!
Looks very nice Tom, it will be great to see what you can achieve with it!
Cheers, D
ON the bench
Revell 1/24 '53 Corvette (building as '54)
Revell 1/24 BMW 507 Coupe and Cabrio
Italeri 1/48 Me262 B-1a/U1 Nightfighter
Monogram 1/24 '57 Chevy Nomad
Dragon 1/350 USS Frank Knox DD-742
Nordrhein-Westfalen, Germany
Joined: March 22, 2015
KitMaker: 671 posts
AeroScale: 614 posts
Posted: Tuesday, March 29, 2016 - 06:25 PM UTC
Tom, nice new brush. I wish You good luck and a steady hand with this!
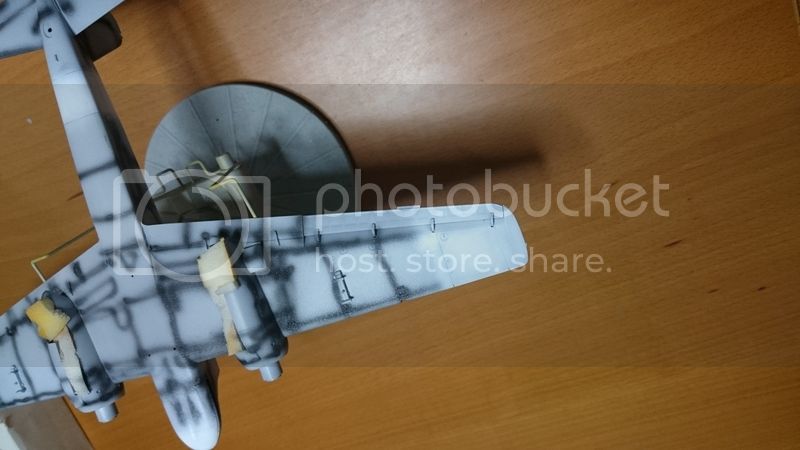
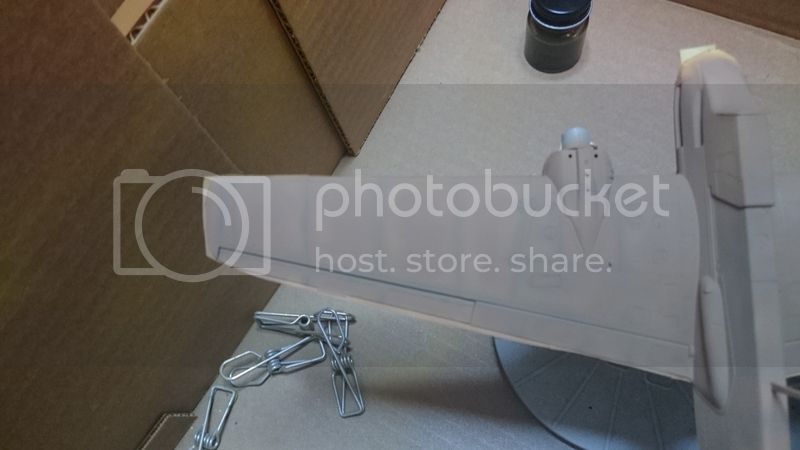
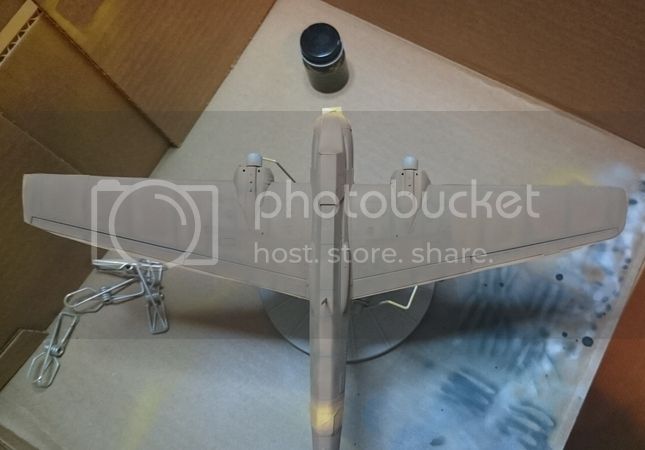
Yesterday I did some small work on the wings and applied some position lights out of old sprue. I drilled a small hole into it and filled it with paint.

After fixing the light, the sprue was shaped by sanding. I have to polish the surface a bit more, but so far, I am quite pleased with the result.

Not pleasing are the major sink areas onto the wing.

As Richard said, I masked the area first and applied the putty subsequently, trying to keep the putty as flat as possible to reduce the sanding-work. Hopefully, this will work.

Oliver
On the desk: Probably a Panzer III.
Berlin, Germany
Joined: October 12, 2008
KitMaker: 709 posts
AeroScale: 651 posts
Posted: Thursday, March 31, 2016 - 08:14 PM UTC
Wow! Really great work and activity here
Looks like all of the shown kits have their more or less issues

Oliver, nice work on the wings, hope the filler will help.
Styrene looks quite soft and difficult to sand.
Nice Airbrush, Tom! Hope you can effort yout plans on the painting.
As for my Lockheed Hudson I'm still cleaning parts and sub-assemble the office that have a lot of of parts spread over 3 floors and a turret. Never seen so many interior parts on a 1/72! Though moldings are not very nice, separating a bit difficult and the plastic is very soft
Thomas
Sometimes you need to distance yourself to see things clearly - Lao Tzu -
... in scale and in real life -T.