Air Campaigns
Want to start or join a group build? This is where to start.
OFFICIAL: WWII Twins Campaign
RadekZ
_VISITCOMMUNITY
Warszawa, Poland
Joined: March 12, 2013
KitMaker: 125 posts
AeroScale: 85 posts
Posted: Saturday, April 02, 2016 - 05:45 PM UTC
Hello fellow modellers,

I've managed to make some progress on Do-17.

Assembly is generally completed, so I primed the model with Surfacer 1500. Afterwards it was preshaded with Tamiya XF-63 and I applied the bottom layer of RLM65 (Gunze H67) followed by random pattern of H67 lightened with H1 White.

Few shots of progress so far:


AussieReg
Staff MemberAssociate Editor
AUTOMODELER
#007
_VISITCOMMUNITY
Victoria, Australia
Joined: June 09, 2009
KitMaker: 8,156 posts
AeroScale: 3,756 posts
Posted: Sunday, April 03, 2016 - 02:52 AM UTC
More progress reports coming in, great to see!

Oliver, very nice detail work on the wing tip light, it will come up well with a fine polish! I hope the repair work on the sink marks does not hold you up too much.

Radoslaw, the underside paintwork looks really nice, the pre-shading shows through well. Looking forward to the topside paint now.

Cheers, D
goodn8
_VISITCOMMUNITY
Berlin, Germany
Joined: October 12, 2008
KitMaker: 709 posts
AeroScale: 651 posts
Posted: Monday, April 04, 2016 - 03:59 PM UTC
Radek, nice build! The pre-shading works and the underside color looks good.

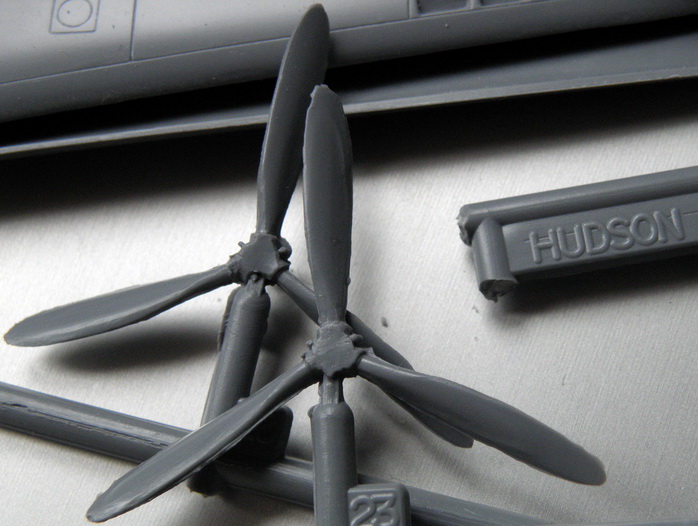
Here's where I'm with the "Old Boomerang". Estimated 541 parts were cut, cleaned, sanded and glued for the offices. Mybe I add some more scratched gizmos inside the fuselage halves and the cockpit depending on what you can see from outside. For the instrument panel I chose the decals from the kit because of scale.
I'm not happy with the propellers - badly molded and hard to separate without loosing the details there.


Thomas
SHAKY962
_VISITCOMMUNITY
Buenos Aires, Argentina
Joined: May 21, 2012
KitMaker: 765 posts
AeroScale: 316 posts
Posted: Monday, April 04, 2016 - 05:12 PM UTC
@RadekZ the paint is beautiful!!!!
windysean
_VISITCOMMUNITY
Wisconsin, United States
Joined: September 11, 2009
KitMaker: 1,917 posts
AeroScale: 563 posts
Posted: Monday, April 04, 2016 - 08:31 PM UTC
I'm finally dipping my toe into the waters here, in this campaign. Two months remaining!
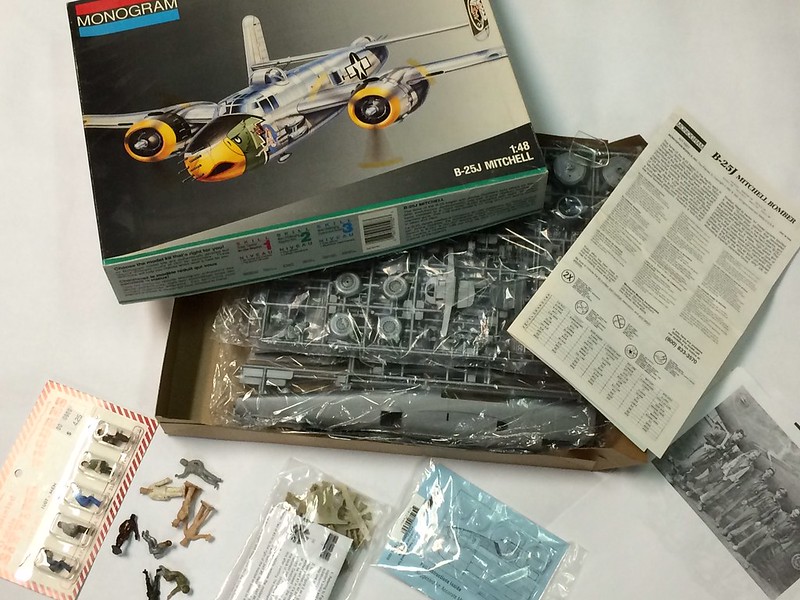
Here is my start. I'm going to make something out of all this. I've been collecting pieces and references for years, and it's time to starting gluing styrene.
Twin Engine Bomber starting kit by windysean, on Flickr


Cheers!
-Sean H.

PS: oh yeah, I'm going to try to rework 6 of those men into a passable bomber crew. (Crossing my fingers for luck!)
Antilles
_VISITCOMMUNITY
Nordrhein-Westfalen, Germany
Joined: March 22, 2015
KitMaker: 671 posts
AeroScale: 614 posts
Posted: Tuesday, April 05, 2016 - 01:53 AM UTC
RadekZ: Really fine toned lower side of the Dornier. Looking forward to see more of this one. I still got one in my stash.

Thomas: Please tell me more about the fit of this kit. The Props truly will loose some of the detail when cut out of the sprue. So good luck and a steady hand!

WindySean: Well the old Monogram kit brings back lovely memories! Nice choice!

I myself am lost between putty and sand paper. The fit of the wings is just . More pics to come.

Oliver
AussieReg
Staff MemberAssociate Editor
AUTOMODELER
#007
_VISITCOMMUNITY
Victoria, Australia
Joined: June 09, 2009
KitMaker: 8,156 posts
AeroScale: 3,756 posts
Posted: Tuesday, April 05, 2016 - 02:47 AM UTC
Thomas, great to see some progress on the sub assemblies here. I can feel your pain with those props, but I'm sure some careful razor saw and knife work will clean them up for you!

Sean, great to see you hitting the bench with your build here mate, best of luck! I'm looking forward to seeing what you can do with all of those extra goodies.

Oliver, keep pushing on, the end result will be worth it. The 335 is such a great looking airframe.

Roll Call/Build Status post updated once again.

Cheers, D
windysean
_VISITCOMMUNITY
Wisconsin, United States
Joined: September 11, 2009
KitMaker: 1,917 posts
AeroScale: 563 posts
Posted: Tuesday, April 05, 2016 - 07:05 PM UTC
"windysean (Sean) 1/48 Revell B-25J Plus extras Box opened, determined attitude applied"
Yes, undeniably!
I had said Revell earlier, but clearly my box says Monogram. I supposed this was the time of Revell/Monogram though. I don't know. Anyway, at 124 parts count, and skill level 2, the base kit won't slow me down too much. I bought this when I was younger and poorer
My plan is not a good one. The model I bought so many years ago is a B-25J solid gun nose, but my plan is to use the B-25B aftermarket parts to rework it into a glass nose, for a Corsica plane from the 488th BS, being a huge fan of Joseph Heller's novel Catch 22. The Squadron resin details include a Norden bomb sight, nose gun, and ammunition boxes. It also has better pilot and copilot seats-- the kit doesn't have a copilot seat, but only the gun operator's little one.
1/48 scale is outside my normal 1/72, and it's huge! My normal workspace is very crowded. It should help to better model the inside of the plane though, better than I could do in my normal scale.
Okay. Enough of my prattling on. Can't wait to get home and back to modeling.
Cheers!
-Sean H.
AussieReg
Staff MemberAssociate Editor
AUTOMODELER
#007
_VISITCOMMUNITY
Victoria, Australia
Joined: June 09, 2009
KitMaker: 8,156 posts
AeroScale: 3,756 posts
Posted: Wednesday, April 06, 2016 - 02:33 AM UTC

Quoted Text

"windysean (Sean) 1/48 Revell B-25J Plus extras Box opened, determined attitude applied"
Yes, undeniably!


I picked that up from the tone of your post, there was no "I hope I can get finished" or "We will see how far I get."

Quoted Text

I had said Revell earlier, but clearly my box says Monogram.


I missed that point, all sorted now!

Cheers, D
md72
#439
_VISITCOMMUNITY
Washington, United States
Joined: November 05, 2005
KitMaker: 4,950 posts
AeroScale: 3,192 posts
Posted: Wednesday, April 06, 2016 - 03:11 AM UTC
Best O Luck Sean. But I think the dorsal turret moved between the B and J also. Aft on the B's and Forward on the J's.
windysean
_VISITCOMMUNITY
Wisconsin, United States
Joined: September 11, 2009
KitMaker: 1,917 posts
AeroScale: 563 posts
Posted: Wednesday, April 06, 2016 - 06:55 PM UTC

Quoted Text

Best O Luck Sean. But I think the dorsal turret moved between the B and J also. Aft on the B's and Forward on the J's.


You're right, Mark, but I'm only messing with the nose. The kit is already a J, but with the gun nose. It's got the forward dorsal turret.
Also, caught myself again-- vacuform set is Squadron, resin and etch set is Verlinden.
thanks!
md72
#439
_VISITCOMMUNITY
Washington, United States
Joined: November 05, 2005
KitMaker: 4,950 posts
AeroScale: 3,192 posts
Posted: Wednesday, April 06, 2016 - 07:13 PM UTC
Have fun!. I need to get back to slogging along on the PV-1. I think the bomb bay is sorted out, now I need to work on the engines and wings....
Antilles
_VISITCOMMUNITY
Nordrhein-Westfalen, Germany
Joined: March 22, 2015
KitMaker: 671 posts
AeroScale: 614 posts
Posted: Wednesday, April 06, 2016 - 08:26 PM UTC

Quoted Text

Oliver, keep pushing on, the end result will be worth it. The 335 is such a great looking airframe.

Cheers, D


Thank You Damian. But the fit of this beast is really bad, concerning the gaps

and the alignment of the wing to the wing root.

But, most of the work is done, hopefully. Model is sanded and panel lines were rescribed.

Now comes the fun part. Let´s go to the paint shop!

Oliver
SHAKY962
_VISITCOMMUNITY
Buenos Aires, Argentina
Joined: May 21, 2012
KitMaker: 765 posts
AeroScale: 316 posts
Posted: Wednesday, April 06, 2016 - 10:29 PM UTC
Dam Oliver....... the fitting its really bad
goodn8
_VISITCOMMUNITY
Berlin, Germany
Joined: October 12, 2008
KitMaker: 709 posts
AeroScale: 651 posts
Posted: Wednesday, April 06, 2016 - 11:30 PM UTC
Oliver, very good work on the fit issues and rescribed lines!
I think you have to expect this more or less from a reboxed kit.
I'll bring up later some info and pics about the fit of my Hudson as requested.
Thomas
AussieReg
Staff MemberAssociate Editor
AUTOMODELER
#007
_VISITCOMMUNITY
Victoria, Australia
Joined: June 09, 2009
KitMaker: 8,156 posts
AeroScale: 3,756 posts
Posted: Thursday, April 07, 2016 - 02:32 AM UTC
Excellent work Oliver, you have overcome some serious issues there and at this point it looks really good. Can't wait to see some colour now!
The wingtip light seems to have cleaned up very nicely as well.

Cheers, D
MichaelSatin
Staff MemberCampaigns Administrator
AEROSCALE
_VISITCOMMUNITY
Colorado, United States
Joined: January 19, 2008
KitMaker: 3,909 posts
AeroScale: 2,904 posts
Posted: Saturday, April 09, 2016 - 04:02 AM UTC
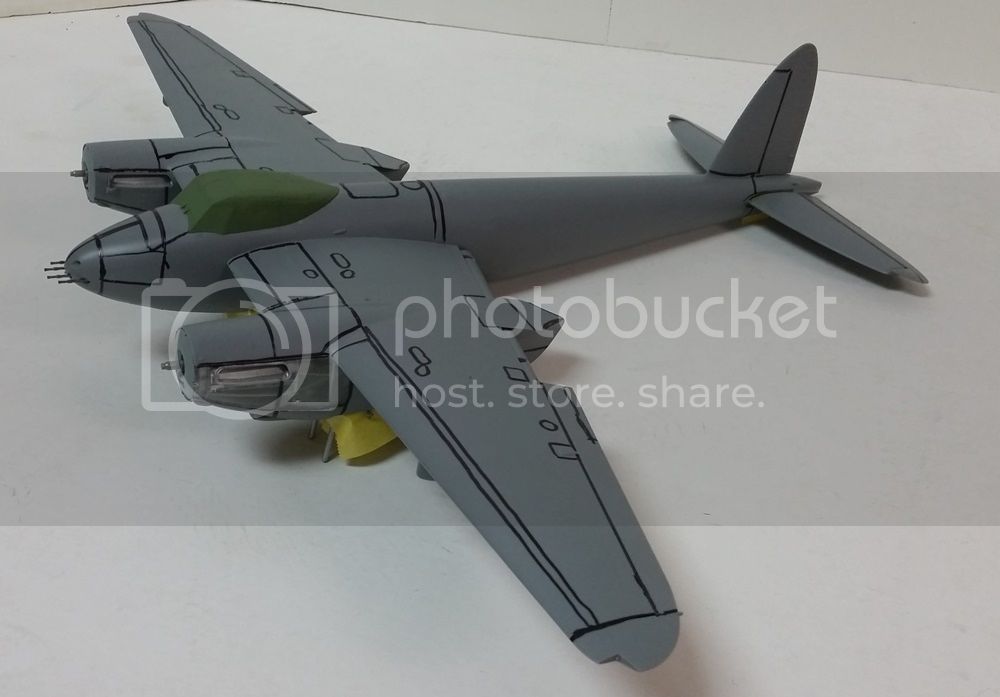
There is hope for the Tamiya 1/32 Mossie!

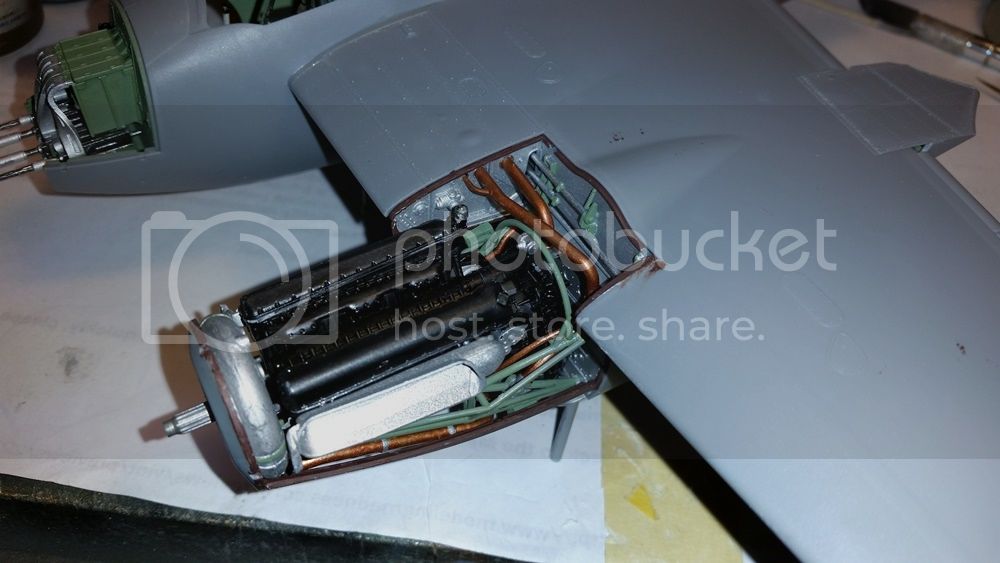
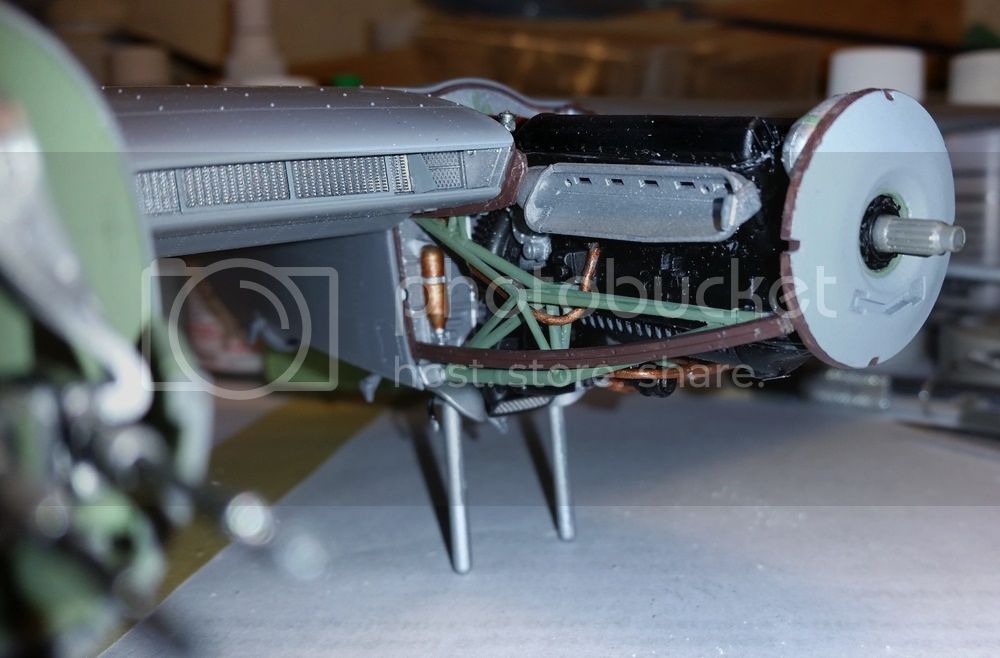
Say goodbye to the engines, couldn't get the panels to fit correctly without gluing so they'll be covered:

 photo 20160326_105346_zpsghyqxrc1.jpg

 photo 20160326_105407_zps6ya84siy.jpg

Ready for paint:

 photo 20160327_113033_zpsqdpsfg75.jpg

 photo 20160327_113048_zpsc1kv4qtr.jpg

And, after getting a new nozzle and needle for the airbrush:

 photo 20160409_151700_zpspayezxzw.jpg

 photo 20160409_151719_zpsb7hddrxk.jpg

Gloss coat goes on tomorrow. May make it yet!

Michael
AussieReg
Staff MemberAssociate Editor
AUTOMODELER
#007
_VISITCOMMUNITY
Victoria, Australia
Joined: June 09, 2009
KitMaker: 8,156 posts
AeroScale: 3,756 posts
Posted: Saturday, April 09, 2016 - 07:29 AM UTC
Looking good Michael, neat job on the camo. What was the issue with the cowls? It is a shame to cover up that work on the power plants.

You still have six weeks to go mate, plenty of time to get it done.

Cheers, D
MichaelSatin
Staff MemberCampaigns Administrator
AEROSCALE
_VISITCOMMUNITY
Colorado, United States
Joined: January 19, 2008
KitMaker: 3,909 posts
AeroScale: 2,904 posts
Posted: Saturday, April 09, 2016 - 06:22 PM UTC

Quoted Text

Looking good Michael, neat job on the camo. What was the issue with the cowls? It is a shame to cover up that work on the power plants.

You still have six weeks to go mate, plenty of time to get it done.

Cheers, D


Thanks D. Don't know if you've ever built one of these Tamiya 1/32 kits with the in-line engines but what they do is add magnets and small etched metal pieces to hold the cowl panels in place. It's a neat idea but unless every little part is exactly where it needs to be, they won't fit. Mossie cowls are a bit complicated shape-wise and the inevitable happened. Oh well, I'll live. I like things closed up as a rule anyway.

Michael
goodn8
_VISITCOMMUNITY
Berlin, Germany
Joined: October 12, 2008
KitMaker: 709 posts
AeroScale: 651 posts
Posted: Saturday, April 09, 2016 - 08:50 PM UTC
Micheal: Sorry for that issue with the engines, they're really worth to show! But you know they are there... So even all is closed up this bird will look great. Awaiting your next step.

Some updates from my Hudson:
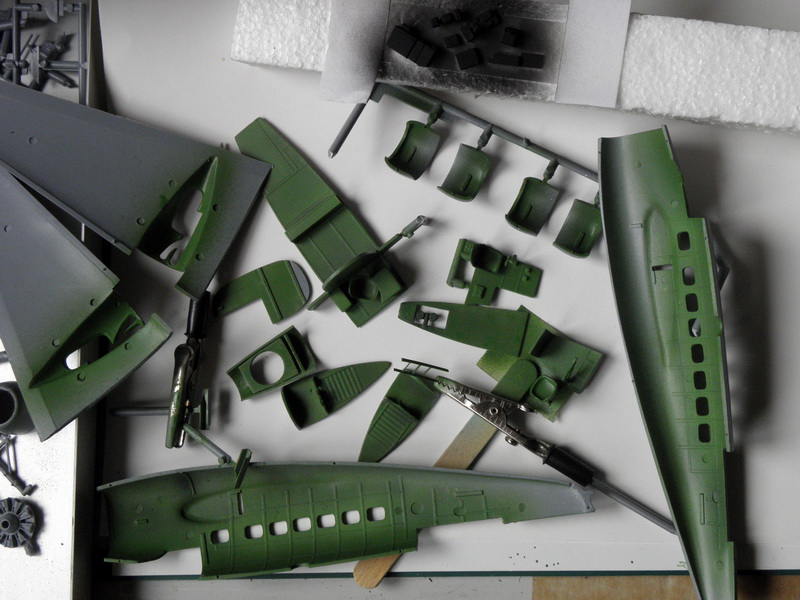
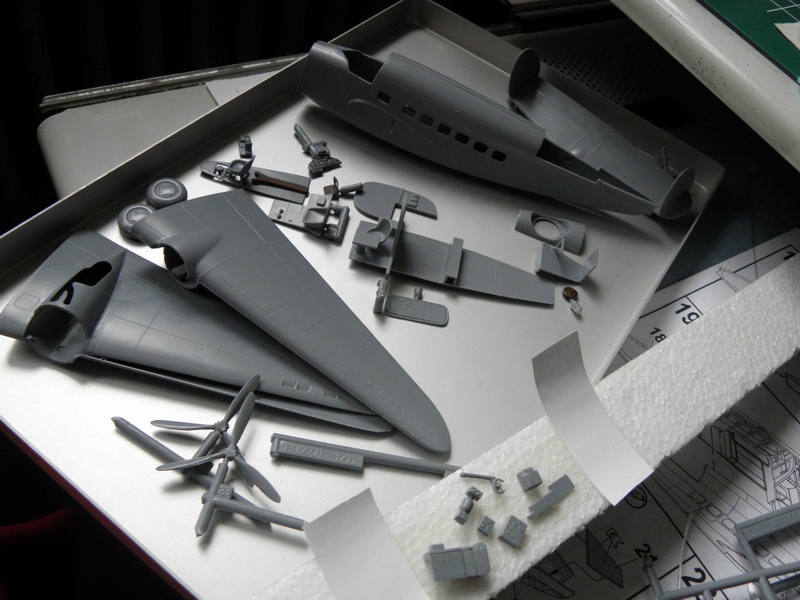
First: A short overview of the kit. It's MPM's molding and reboxed again from both Revell and Italeri. Both manufacturers have the same sprues inside, just different decal options. So you can build either a Mk. I/II or Italeris Mk. IV/V by just adding/changing some parts (i.e. the exhausts, engines, antennas). Both you can show with a seperate sidedoor opened after cutting the fuselage.
I decided to leave mine closed and I have to take the two "half-molded on a plate" Wright GR-1820-G102A Cylone instead the later Twin-P&W R-1830-SC34G (molded in two seperate parts each; nice for the spare box).

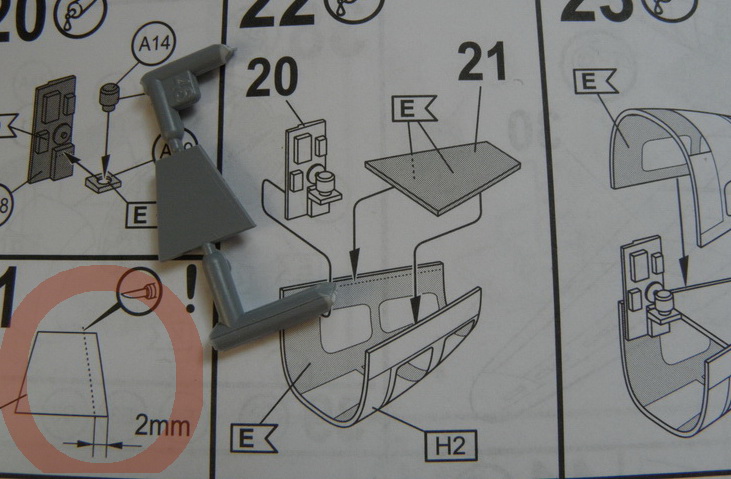
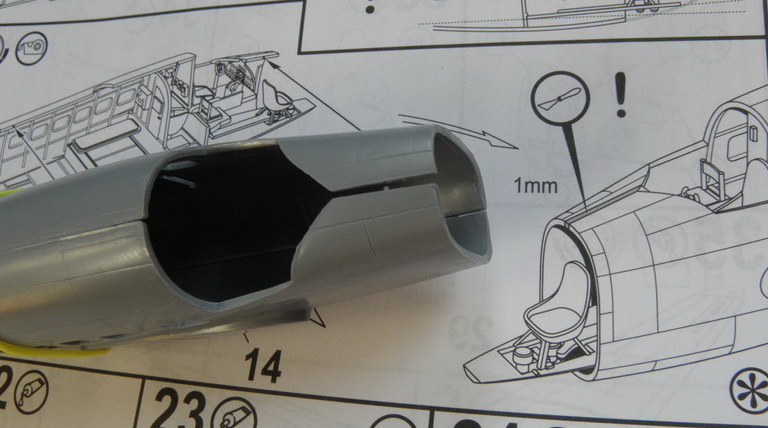
Second: The fit - didn't checked the wing/engines and wing/fuselage connection yet. But the the turret section needs help as well as the cockpit/nose part (well known problem of this kit and mentioned as well in the instructions to obtain a good fit). Overall the fit isn's bad!
Clear parts also not yet cleaned or dry fitted - so lets see later how they will go.

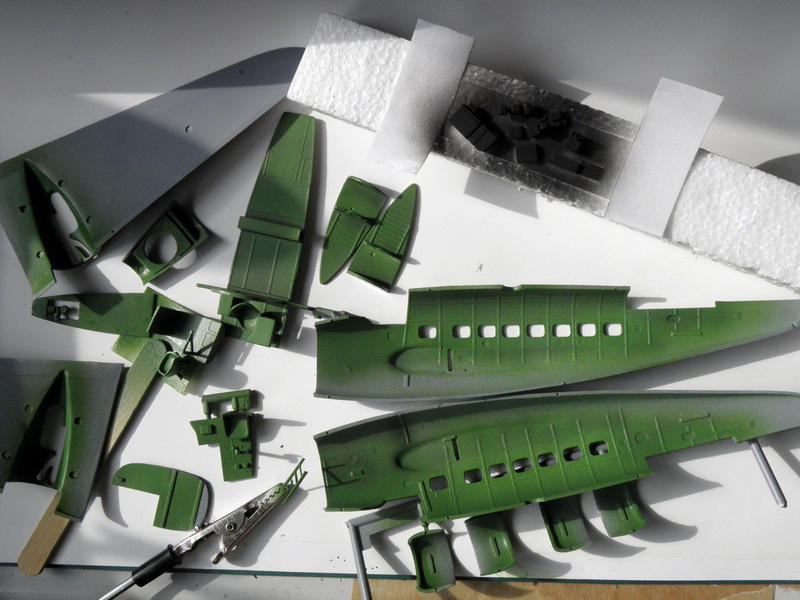
Meanwhile a step further with the build - first paint shop and some shades of green... and a few black parts

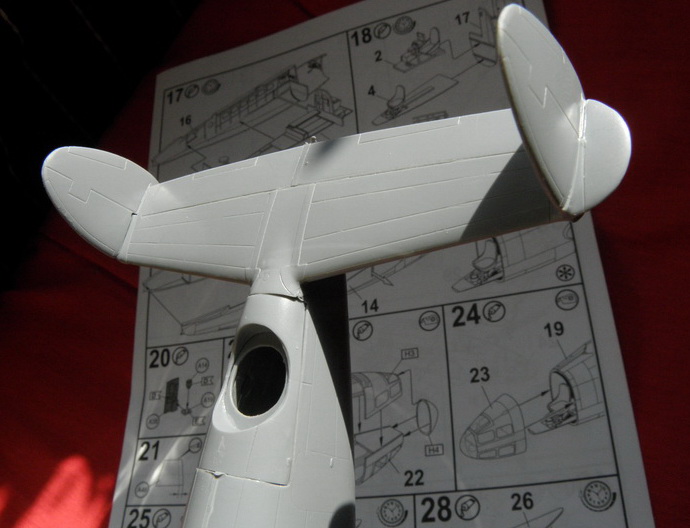
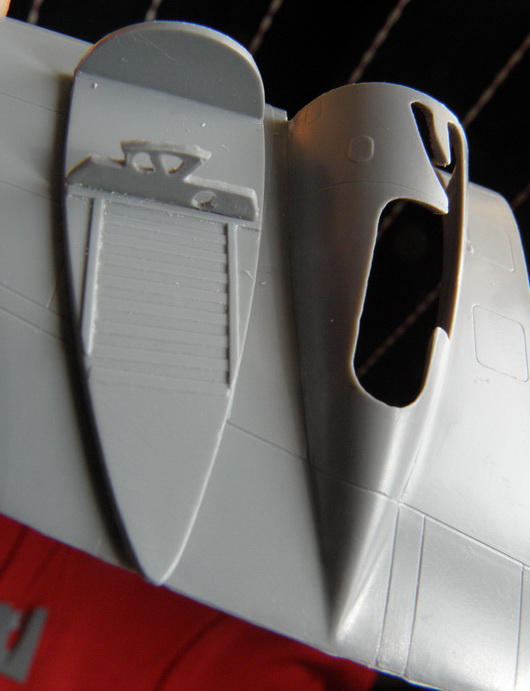
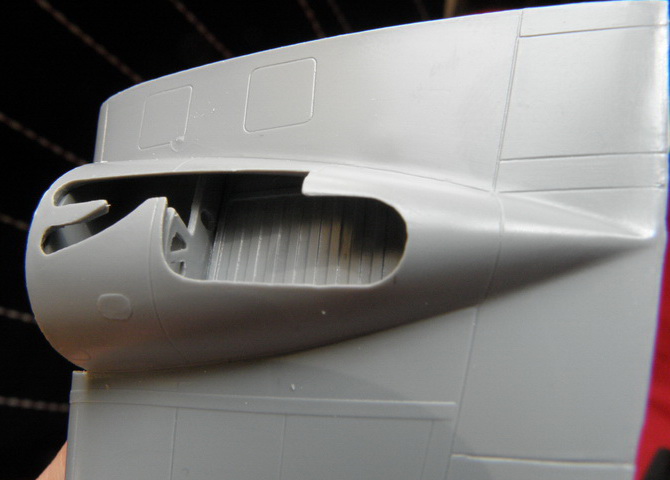
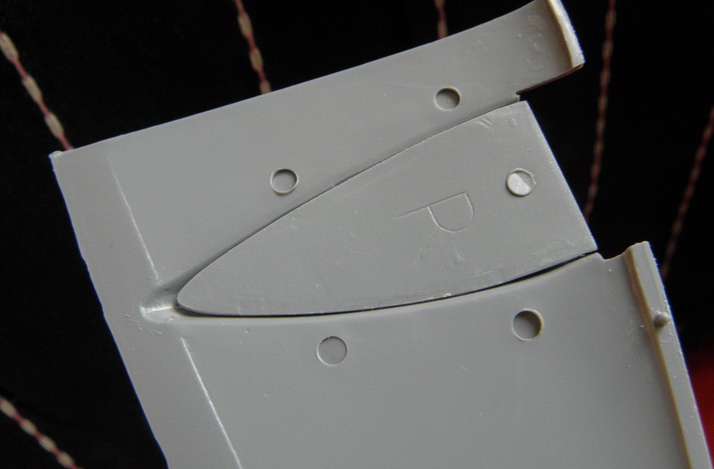


First color on, Tamiya flat black and Revell Aqua 360 farn green


Thomas
windysean
_VISITCOMMUNITY
Wisconsin, United States
Joined: September 11, 2009
KitMaker: 1,917 posts
AeroScale: 563 posts
Posted: Sunday, April 10, 2016 - 06:19 PM UTC
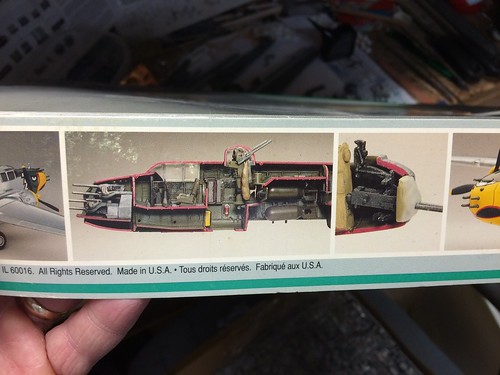
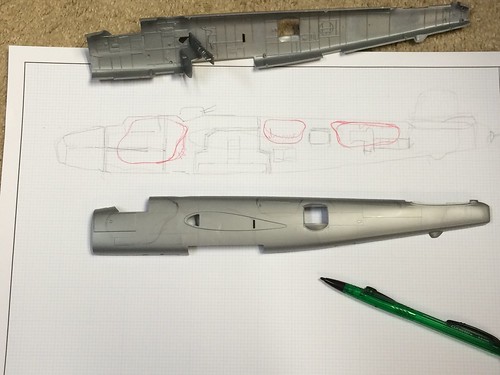
I believe I originally hatched my plan to illustrate the crew conditions in a B-25 based on these box cover photos of interior detail (in this ooooold Monogram kit).
Mitchell cutouts by windysean, on Flickr

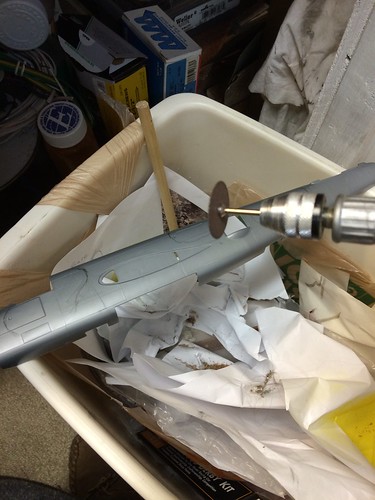
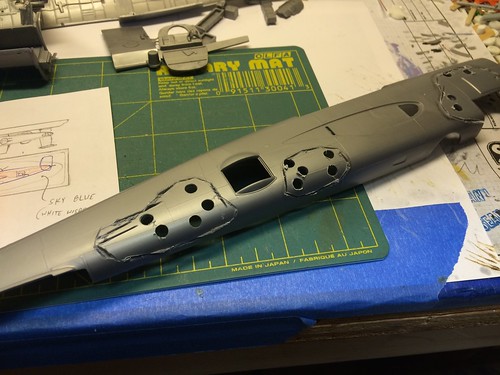
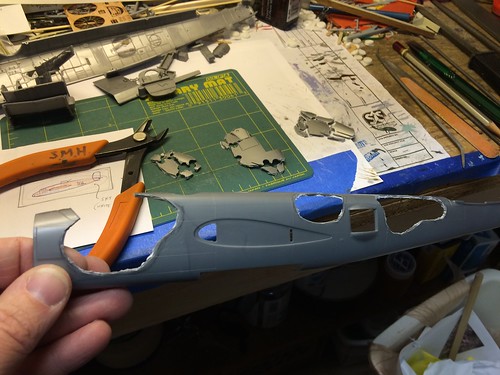
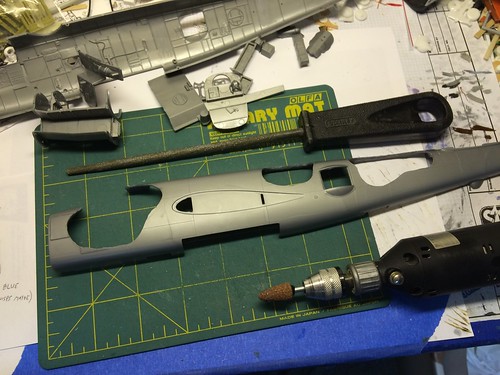
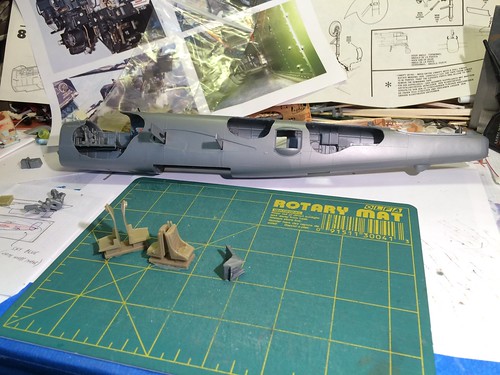
So I am trying my hand at a cut-away model. It's a heart attack moment when you first hack into the fuselage of a beautiful kit, but I took that leap of faith...
Mitchell cutouts by windysean, on Flickr
Heart attack time by windysean, on Flickr
cut-outs by windysean, on Flickr
Test fit for view by windysean, on Flickr

I think I came out of this okay! Now to improve the detail and figure out the best strategy for painting the inside and out. I think I'm in for a lot of masking and stuffing holes.
Cheers!
-Sean H.
Antilles
_VISITCOMMUNITY
Nordrhein-Westfalen, Germany
Joined: March 22, 2015
KitMaker: 671 posts
AeroScale: 614 posts
Posted: Monday, April 11, 2016 - 09:08 PM UTC
Michael: As Thomas said for the engines, You know, they are there! Nice job on the camo. Do You pre-shade with a pen? The edges of the black colour seem to be hard edged.

Thomas: Wow, this is the first instruction I have ever seen to point out where to use putty! A seam of 1 mm is quite big in this scale.

Sean: I have never tried to cut out several sections of my models, but I like it much.

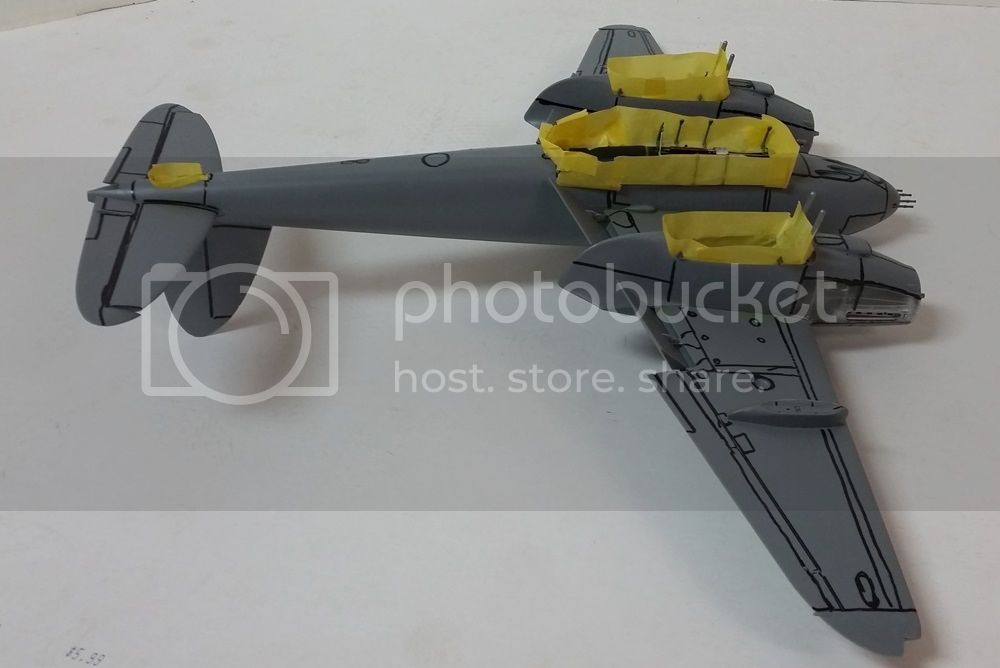
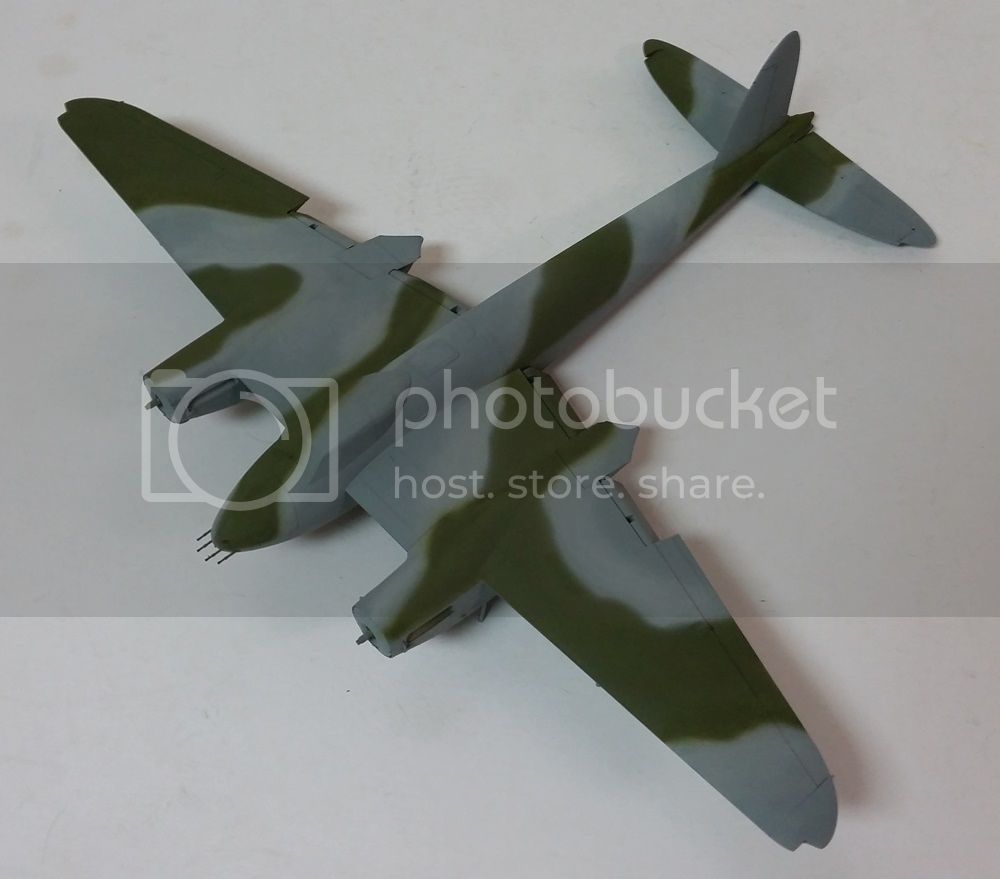
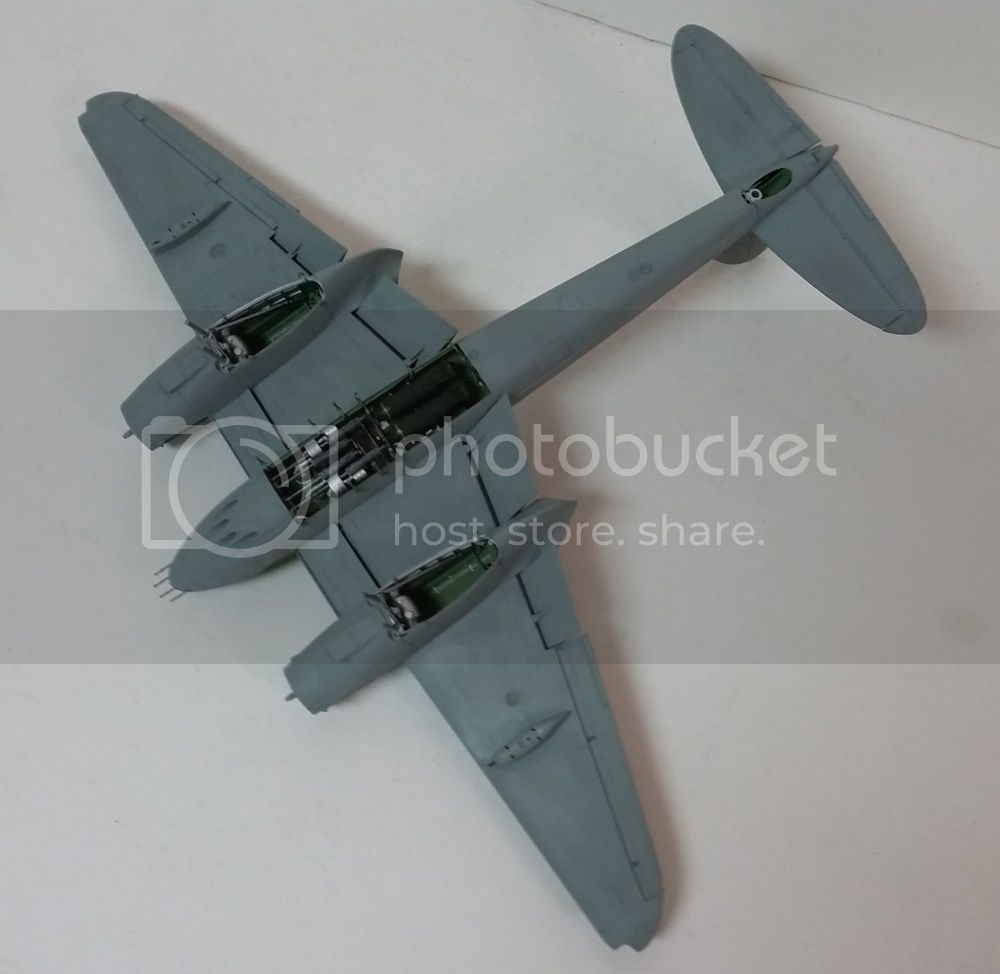
On my Anteater, the first colour is on.


The pre-shading effect was reduced to a minimum as this plane has not seen real action. Next I have to do some post-weathering to tone down the my self mixed RLM 83 signal color green. Probably a wash with some brown, orange or green. Suggestions are welcome!

Oliver
windysean
_VISITCOMMUNITY
Wisconsin, United States
Joined: September 11, 2009
KitMaker: 1,917 posts
AeroScale: 563 posts
Posted: Monday, April 11, 2016 - 11:22 PM UTC
Oliver, I'm impressed with the amount of shading. Very nice!
-Sean H
iflytb20
#501
_VISITCOMMUNITY
Kerala, India / भारत
Joined: August 25, 2009
KitMaker: 292 posts
AeroScale: 194 posts
Posted: Tuesday, April 12, 2016 - 12:35 AM UTC
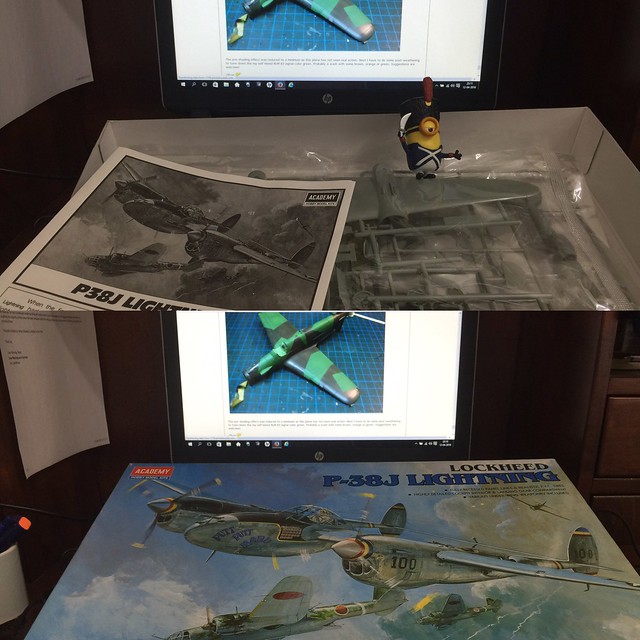
Time I got started on my build. My initial plan was to build a Revell 1/72 He219. One look at the sprues and I made a hasty retreat. It (to me) looks like a reboxed Airfix kit and right now is beyond my skill level. Maybe in a hundred years from now i'll take down the box, dust it, and store away for the next hundred

Here is my entry for the GB. I have a lot of history with this kit. I got it as a gift when I was 14 or 15. Tried building it with great gusto. Glued the kit using CA, the decals using white glue. Tried painting with household lacquer paint which promptly melted through the plastic. Aah...the fun days

So this will be my Take 2 for the kit. It comes with only one marking option - Putt Putt Maru of Col Charles H. McDonald. Will be my first attempt at NMF, so grab some popcorn and enjoy the headbashing, hairpulling, cussing etc


AussieReg
Staff MemberAssociate Editor
AUTOMODELER
#007
_VISITCOMMUNITY
Victoria, Australia
Joined: June 09, 2009
KitMaker: 8,156 posts
AeroScale: 3,756 posts
Posted: Tuesday, April 12, 2016 - 04:04 AM UTC
Great progress reports everybody, we have some really interesting builds going on here!

Thomas, great to see some colour going on the Hudson. Interesting that the instructions show the gap and the repairs required. I would think a styrene shim would work better than putty in a gap like that.

Sean, brave man! I like the look of the cutaways that you have made, really looking forward to following this one.

Oliver, very nice paint scheme, love the subtle shading and the splinter camo is very clean.

Raj, great to see you cracking the box and I'm sure that you will do a great job on the NMF. What paint are you planning to use?

Roll Call/Build Status just got a workover.

Cheers, D