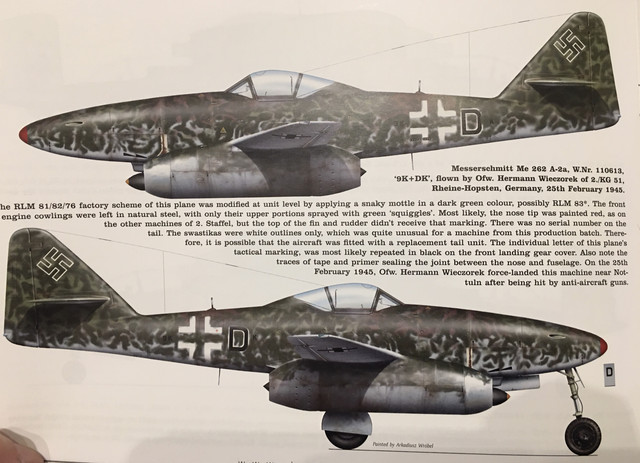
Air Campaigns
Want to start or join a group build? This is where to start.
OFFICIAL: Schwalbe II
forest1000
_VISITCOMMUNITY
Ontario, Canada
Joined: December 14, 2014
KitMaker: 80 posts
AeroScale: 31 posts
Posted: Wednesday, March 04, 2020 - 02:47 PM UTC
Me too. Its been sitting in my stash for years. We probably should have an old timer section for this model. The Cooper Details set says it was designed for the Hasegawa kit released in 1986.


Quoted Text

David, that is a real oldie of a swalbe kit. I wonder if I can find an old monogram or matchbox version in my stash. Then we can make a old timer kit parade

Looking forward to see how it builds up.

forest1000
_VISITCOMMUNITY
Ontario, Canada
Joined: December 14, 2014
KitMaker: 80 posts
AeroScale: 31 posts
Posted: Wednesday, March 04, 2020 - 02:48 PM UTC
Thanks for the welcome. Cleaning out the stash now. The kits not too bad considering the age. It does have recessed panel lines though they're heavy.


Quoted Text

David,
Welcome to the campaign. I've never known of Jo-Han models before so i had to look up your kit. It's definitely vintage... 1973. I was only 7 years old, then. I'm keen to see how it'll look.


Damian, there's certainly some detail disparity in the moldings between your two kits. Keep up the good work.

GazzaS
#424
_VISITCOMMUNITY
Queensland, Australia
Joined: April 23, 2015
KitMaker: 4,648 posts
AeroScale: 1,938 posts
Posted: Wednesday, March 04, 2020 - 04:54 PM UTC
Pedro,
Welcome to the campaign. Your Tamiya bird is welcome, too.

Gaz
bomber14
_VISITCOMMUNITY
New Jersey, United States
Joined: February 02, 2015
KitMaker: 330 posts
AeroScale: 286 posts
Posted: Saturday, March 07, 2020 - 04:44 PM UTC
Hello all. here is my build,an a2a bomber version.i'm waiting on the decals, going to try a paint scheme to christen my new airbrush with.


20200307_220331[1]" BORDER="0">
bomber14
_VISITCOMMUNITY
New Jersey, United States
Joined: February 02, 2015
KitMaker: 330 posts
AeroScale: 286 posts
Posted: Saturday, March 07, 2020 - 04:49 PM UTC

Quoted Text


Quoted Text

Damian it looks to me that the canopies on the dragon kis open and close. is that correct?


Hi Joe. It certainly looks that way, but then the support prop might fix it in the open position. I will let you know when we get to that stage!


Quoted Text

also i don't know why the hobby boss and tamiya kits waste plastic with radio details in the fuselage that can't be seen when at the very least a set of wing slats would be more useful. an engine would be too much to ask for too i guess. lol


Yes, some engine detail on at least one wing would be great. The other Dragon kits, and their Cyber Hobby releases, all have at least one engine with internals.

I will start the parts clean-up on stage 1 of both kits in the next couple of days, really looking forward to getting stuck in!

Shell, Pasi it will be great to see your work on the 2 large-scale kits here as well.

Cheers, D


i actually would have liked some slats. i am going to try to make my own. i got an idea on how to cast some resin ones. i am thinking on converting the canopy to be able to open and close too. good luck with yours, are you adding any photo etch?
joe
GazzaS
#424
_VISITCOMMUNITY
Queensland, Australia
Joined: April 23, 2015
KitMaker: 4,648 posts
AeroScale: 1,938 posts
Posted: Saturday, March 07, 2020 - 05:53 PM UTC
Joe,
Welcome to the campaign! I'll be looking forward to see how you go with your first airbrush. What kind of airbrush is it?


Gaz
GazzaS
#424
_VISITCOMMUNITY
Queensland, Australia
Joined: April 23, 2015
KitMaker: 4,648 posts
AeroScale: 1,938 posts
Posted: Saturday, March 07, 2020 - 06:13 PM UTC
Hi everyone,
Time for an update.

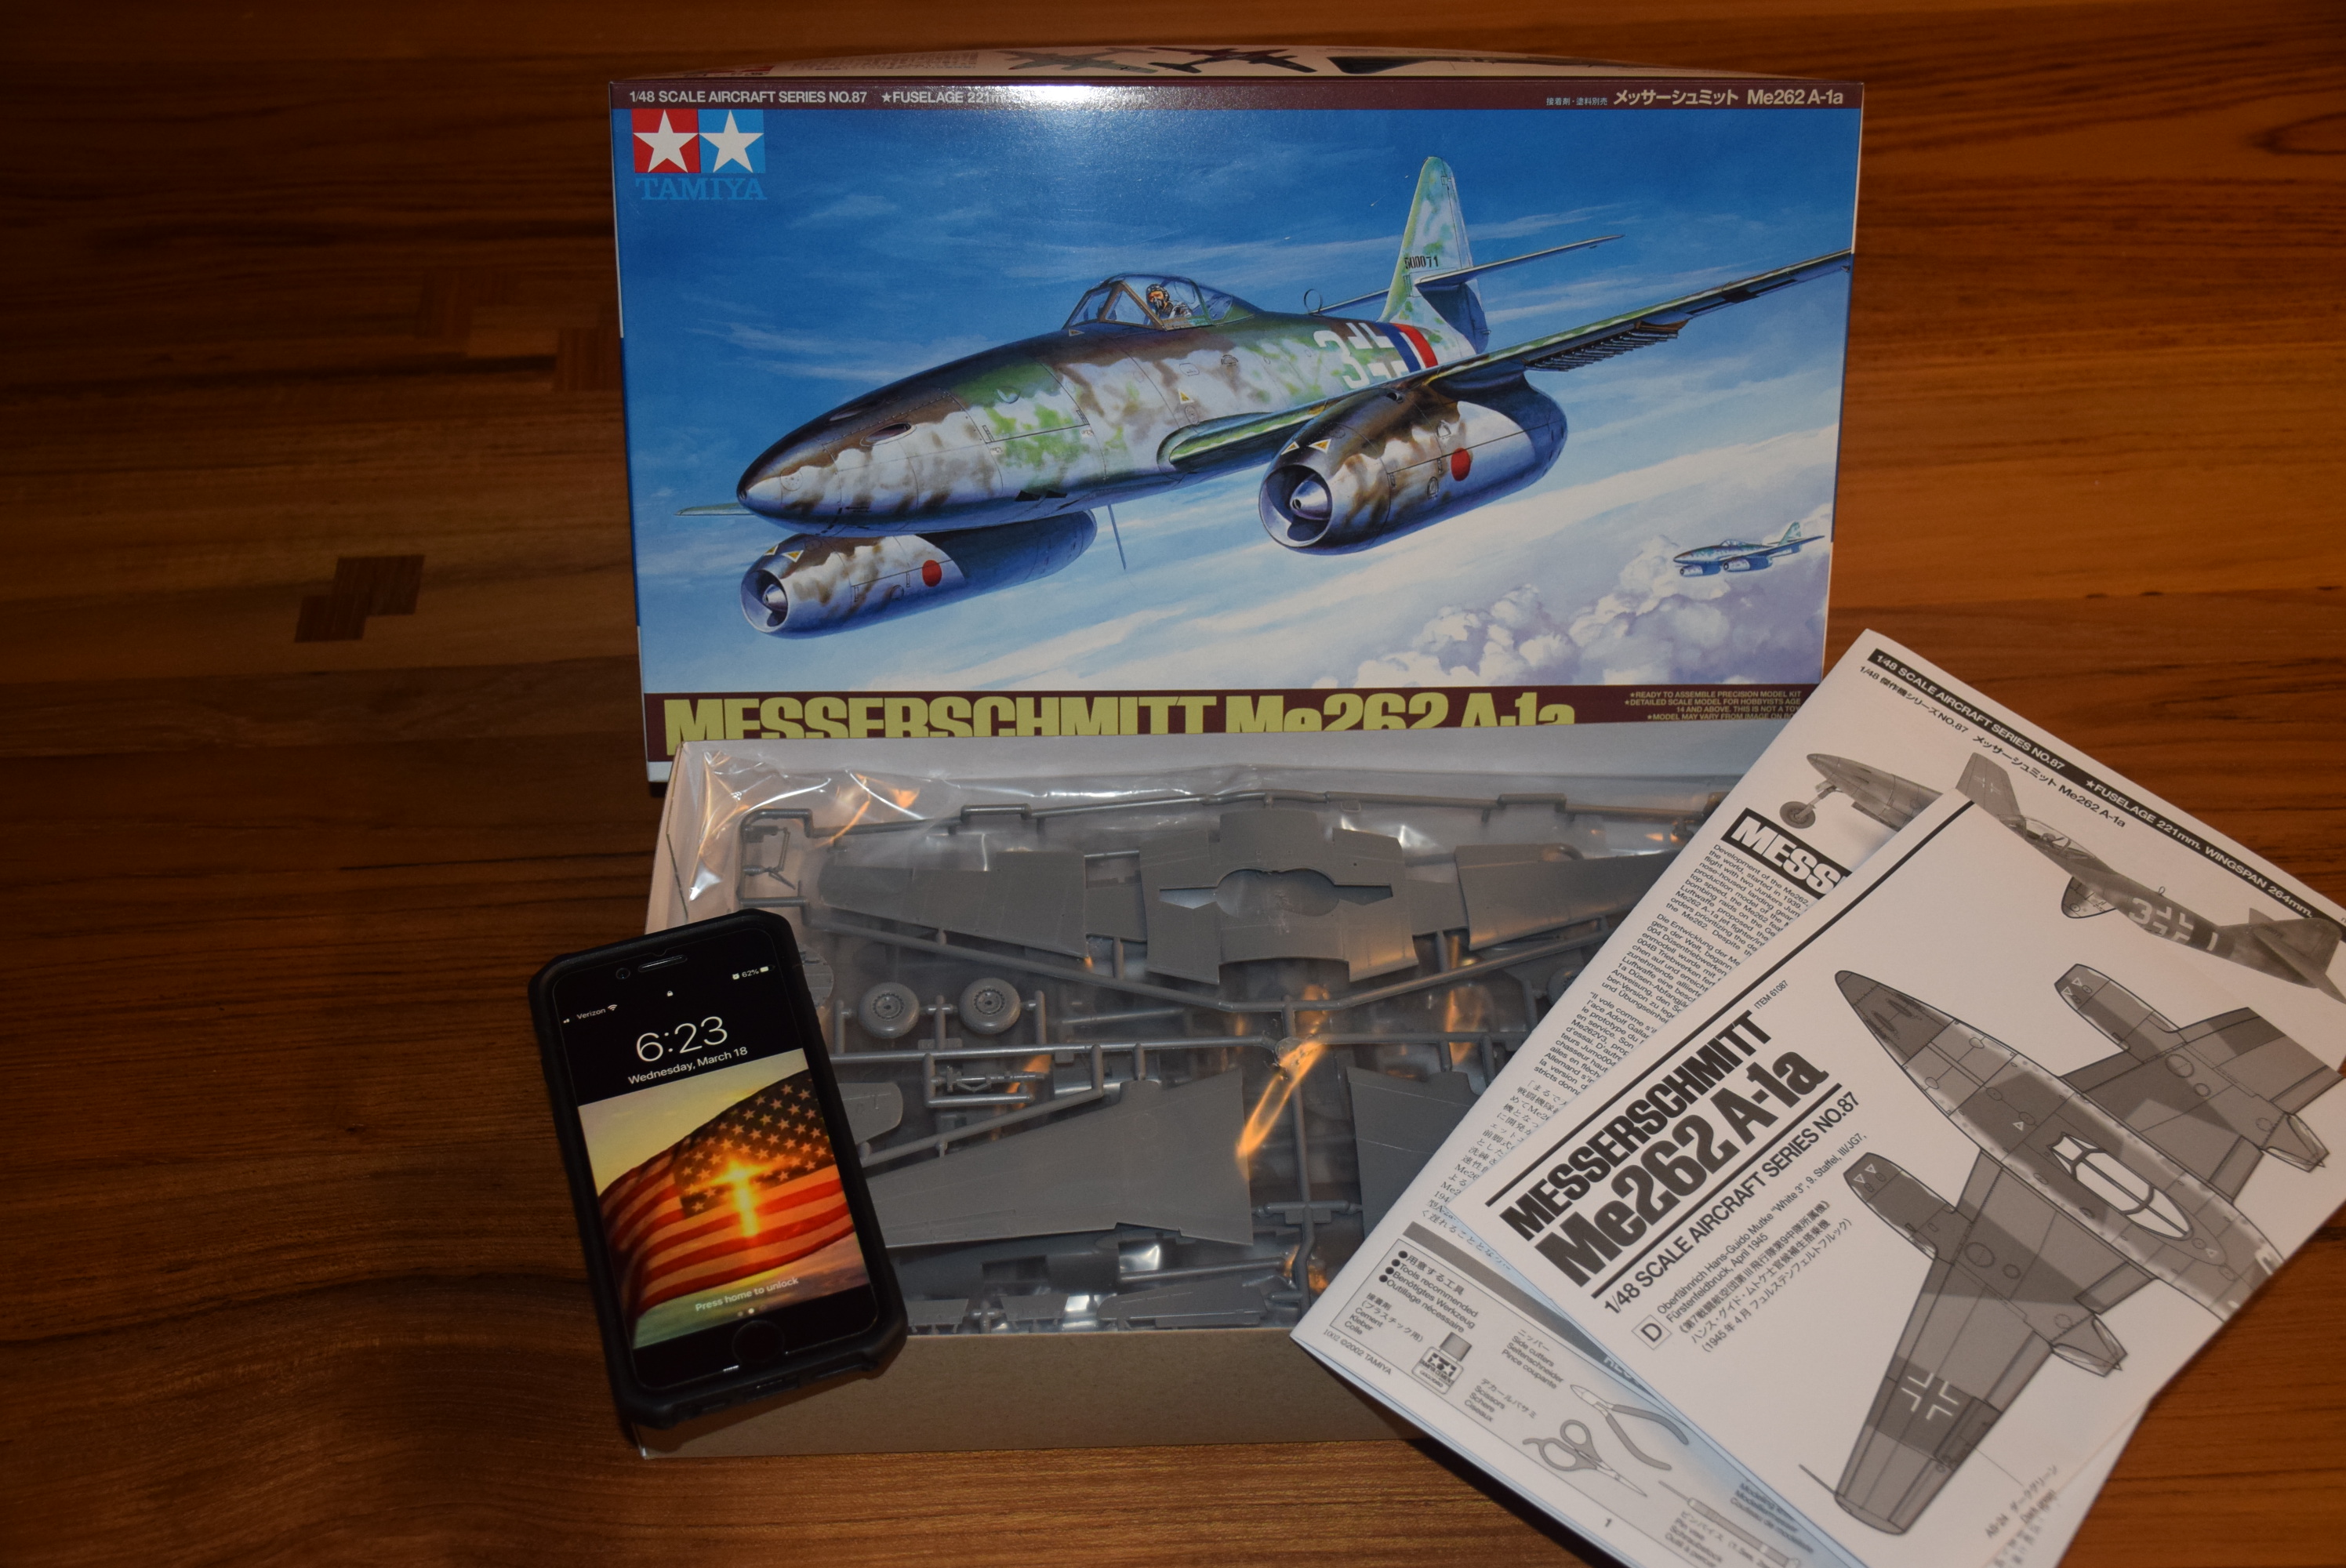
When I first bought this kit, I saw "2006" on the box and thought I was getting a nice, 'new' kit. Only when I opened it for this campaign, did I realise it was a 1978 molding. It even said "1978 Revell China" on the underside of the model's lower wings.

It has some old ideas like raised details and a clear post that goes under the belly to keep it from being a tail-sitter.

So... Here are my current build photos:

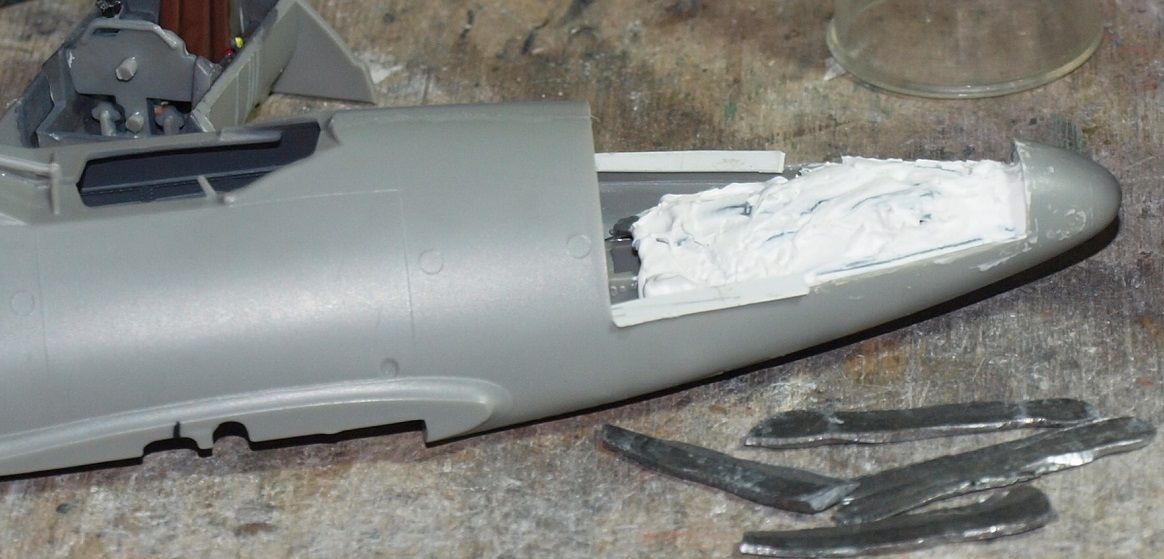
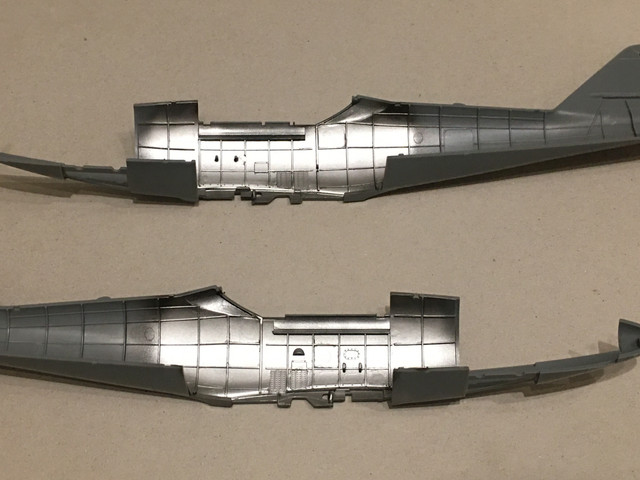
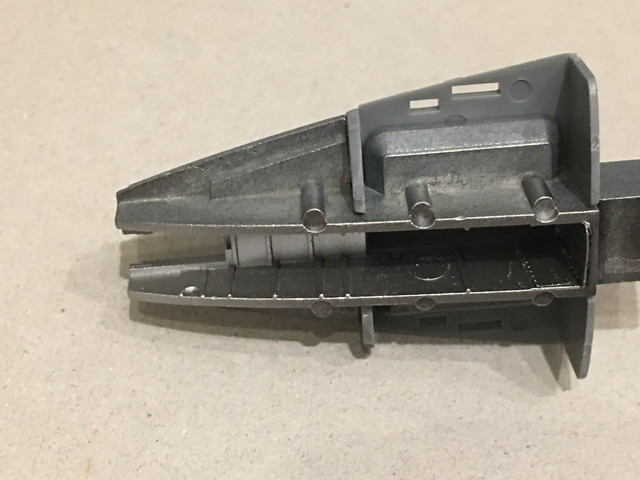
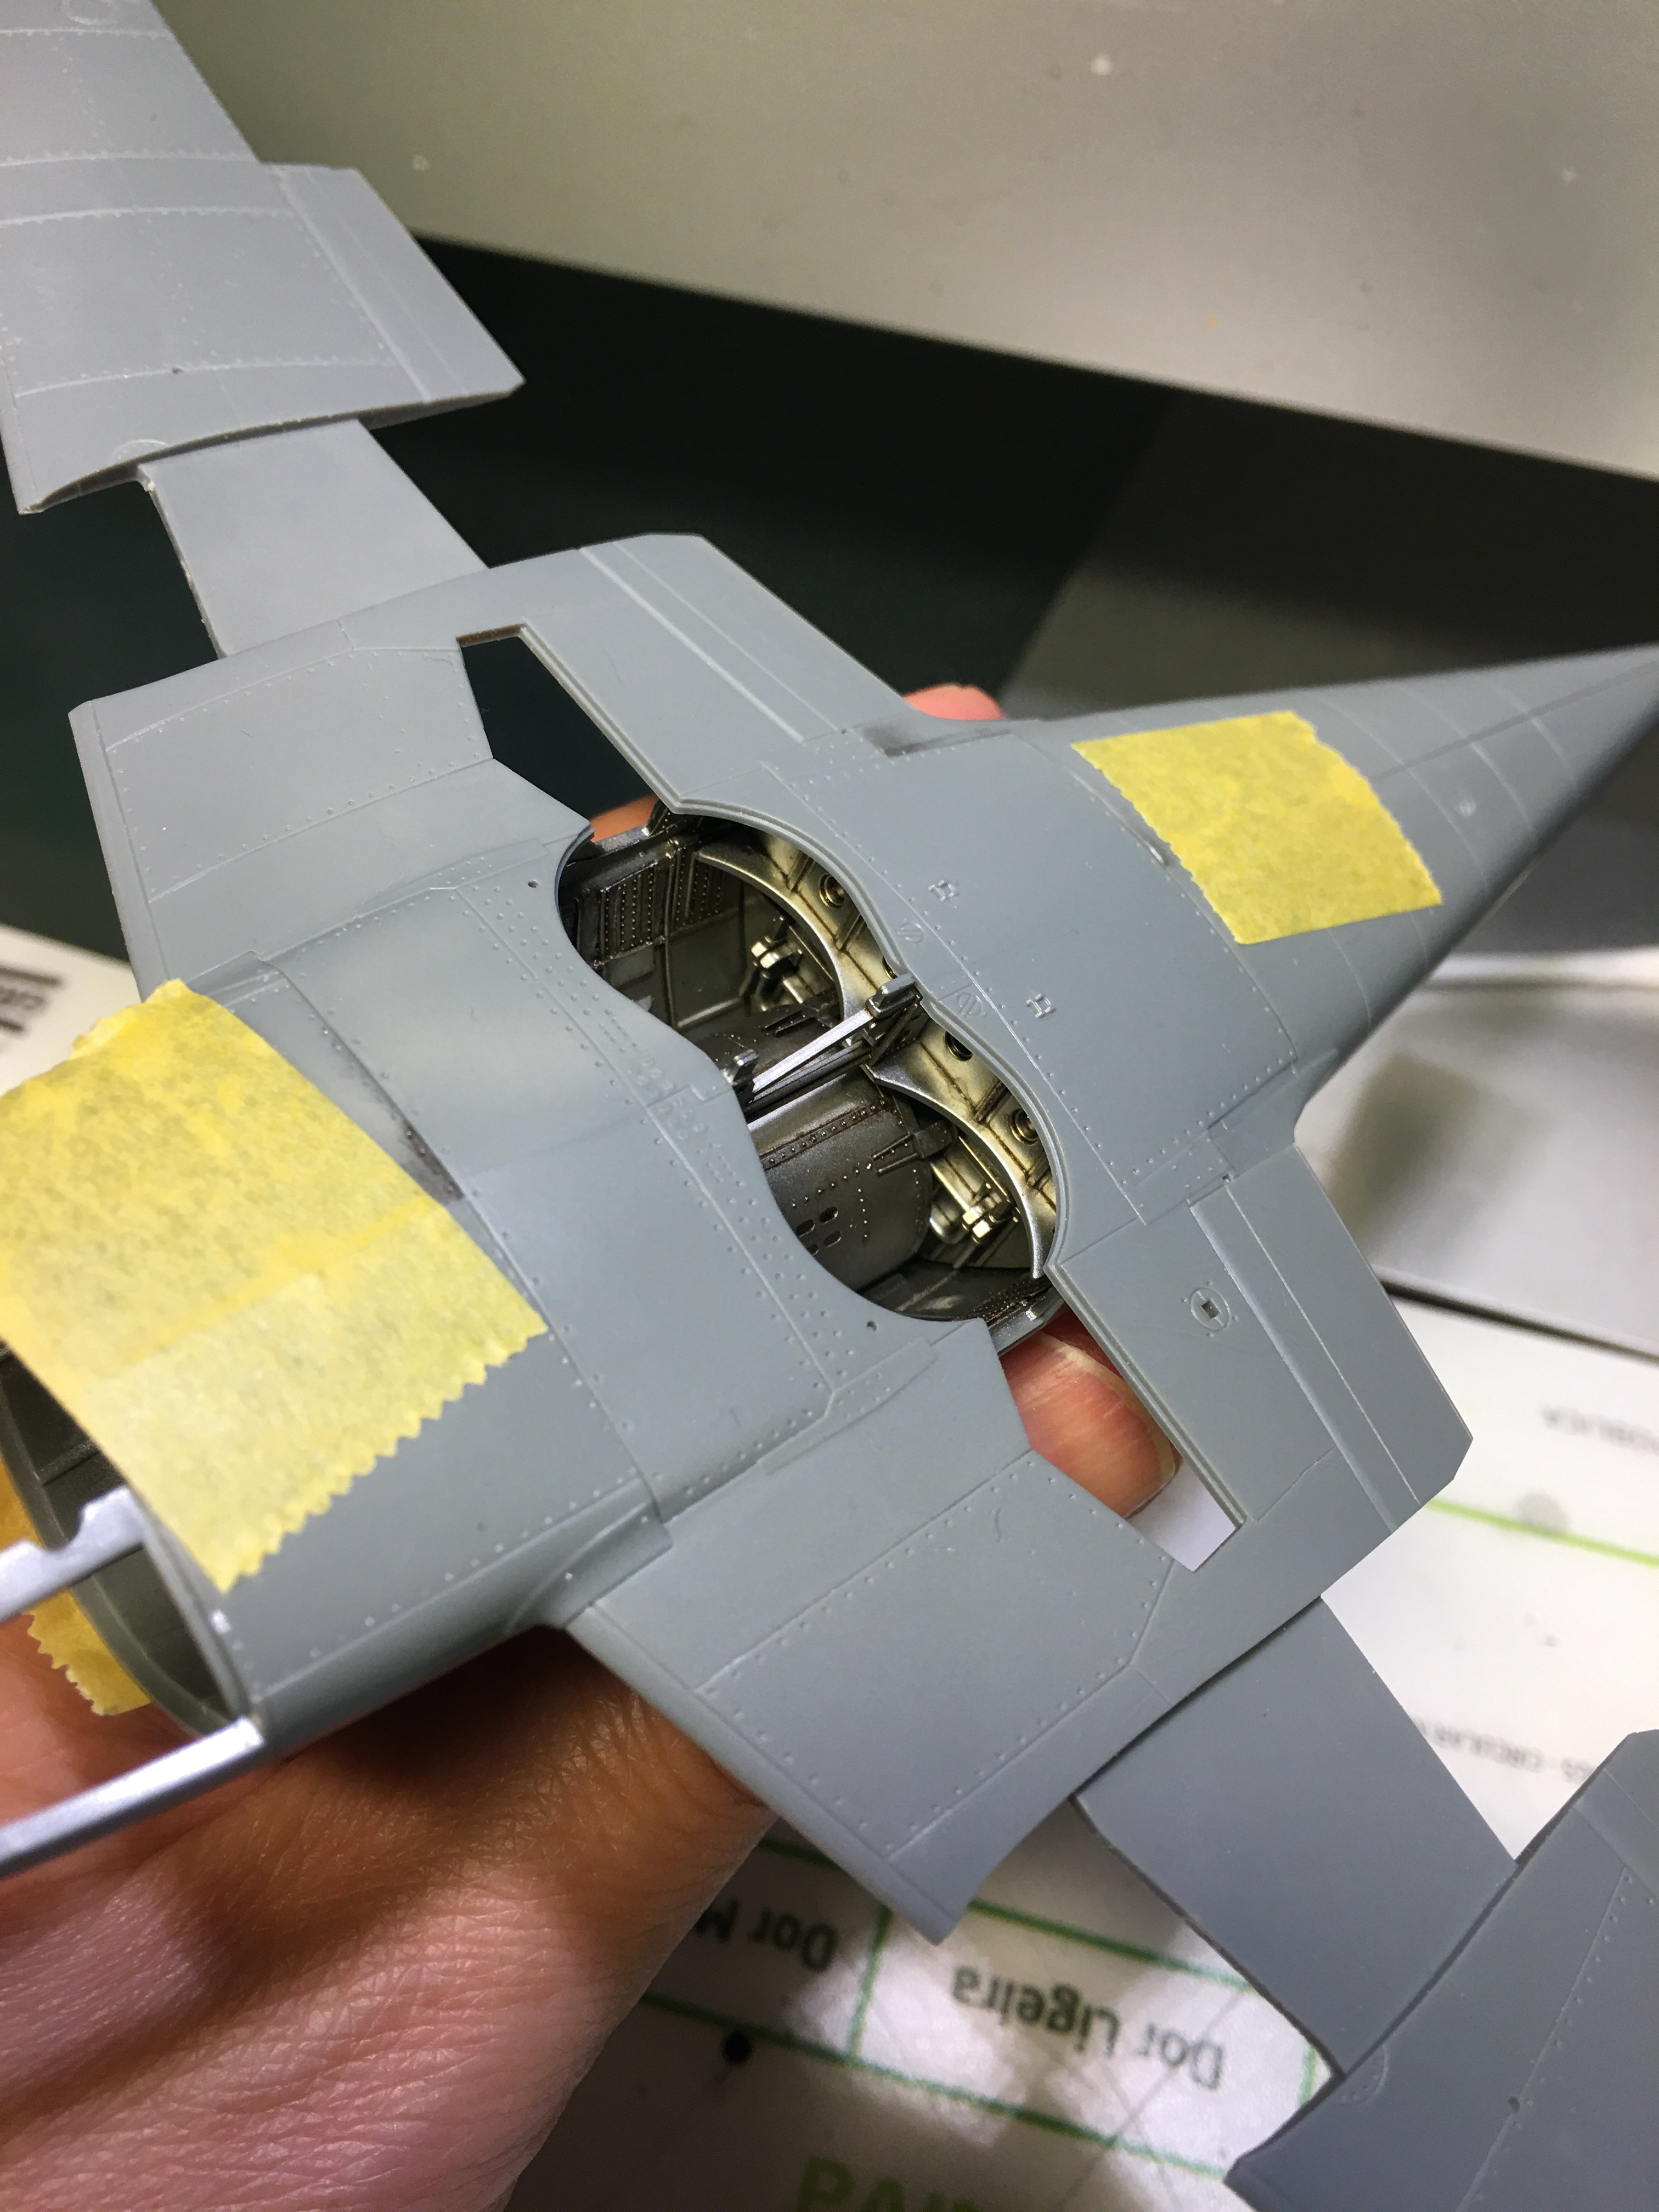
Thge kit was built to display the guns under open covers, leaving no room for nose weights. So, I've dispensed with the guns and made nose weights from some old sinkers flattened with a hammer, then snipped with metal cutting shears. The white stuff is acrylic based modelling paste. Along with CA, I hope that the weights will be kept from shifting.


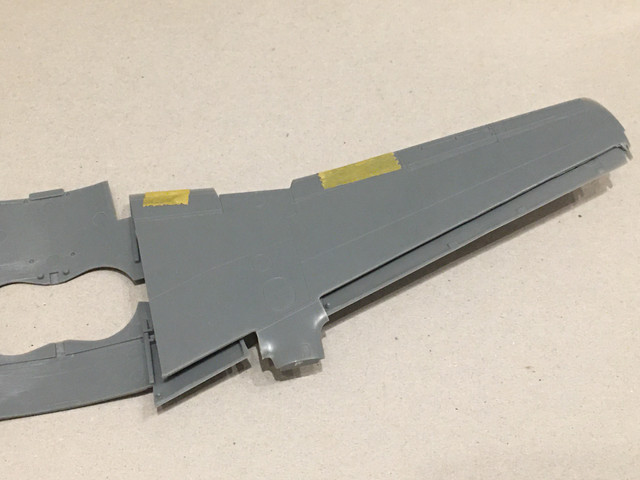
Because the gun hatches didn't need to fit, I was required to make some shims. Just dry fitted here.


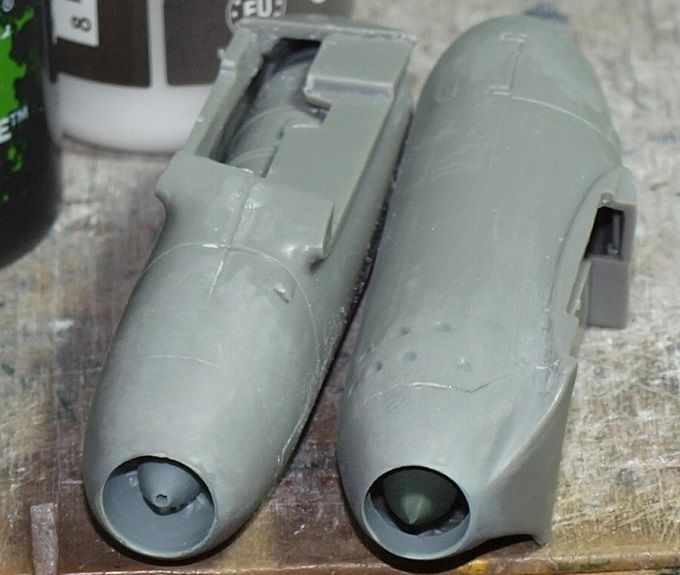
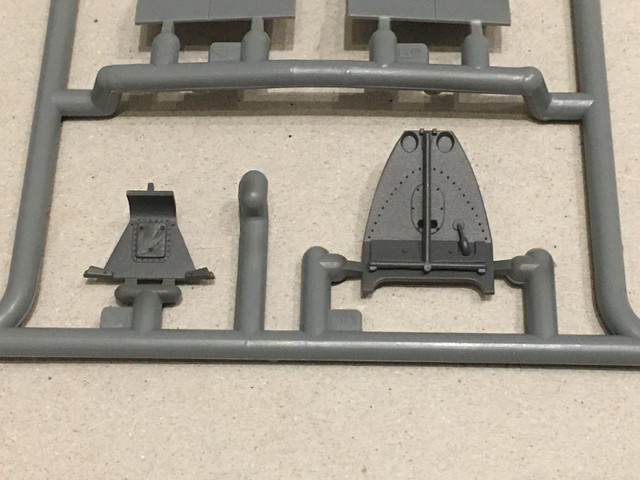
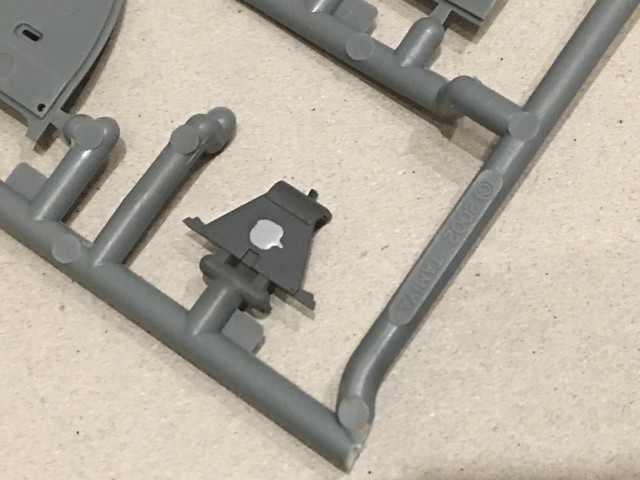
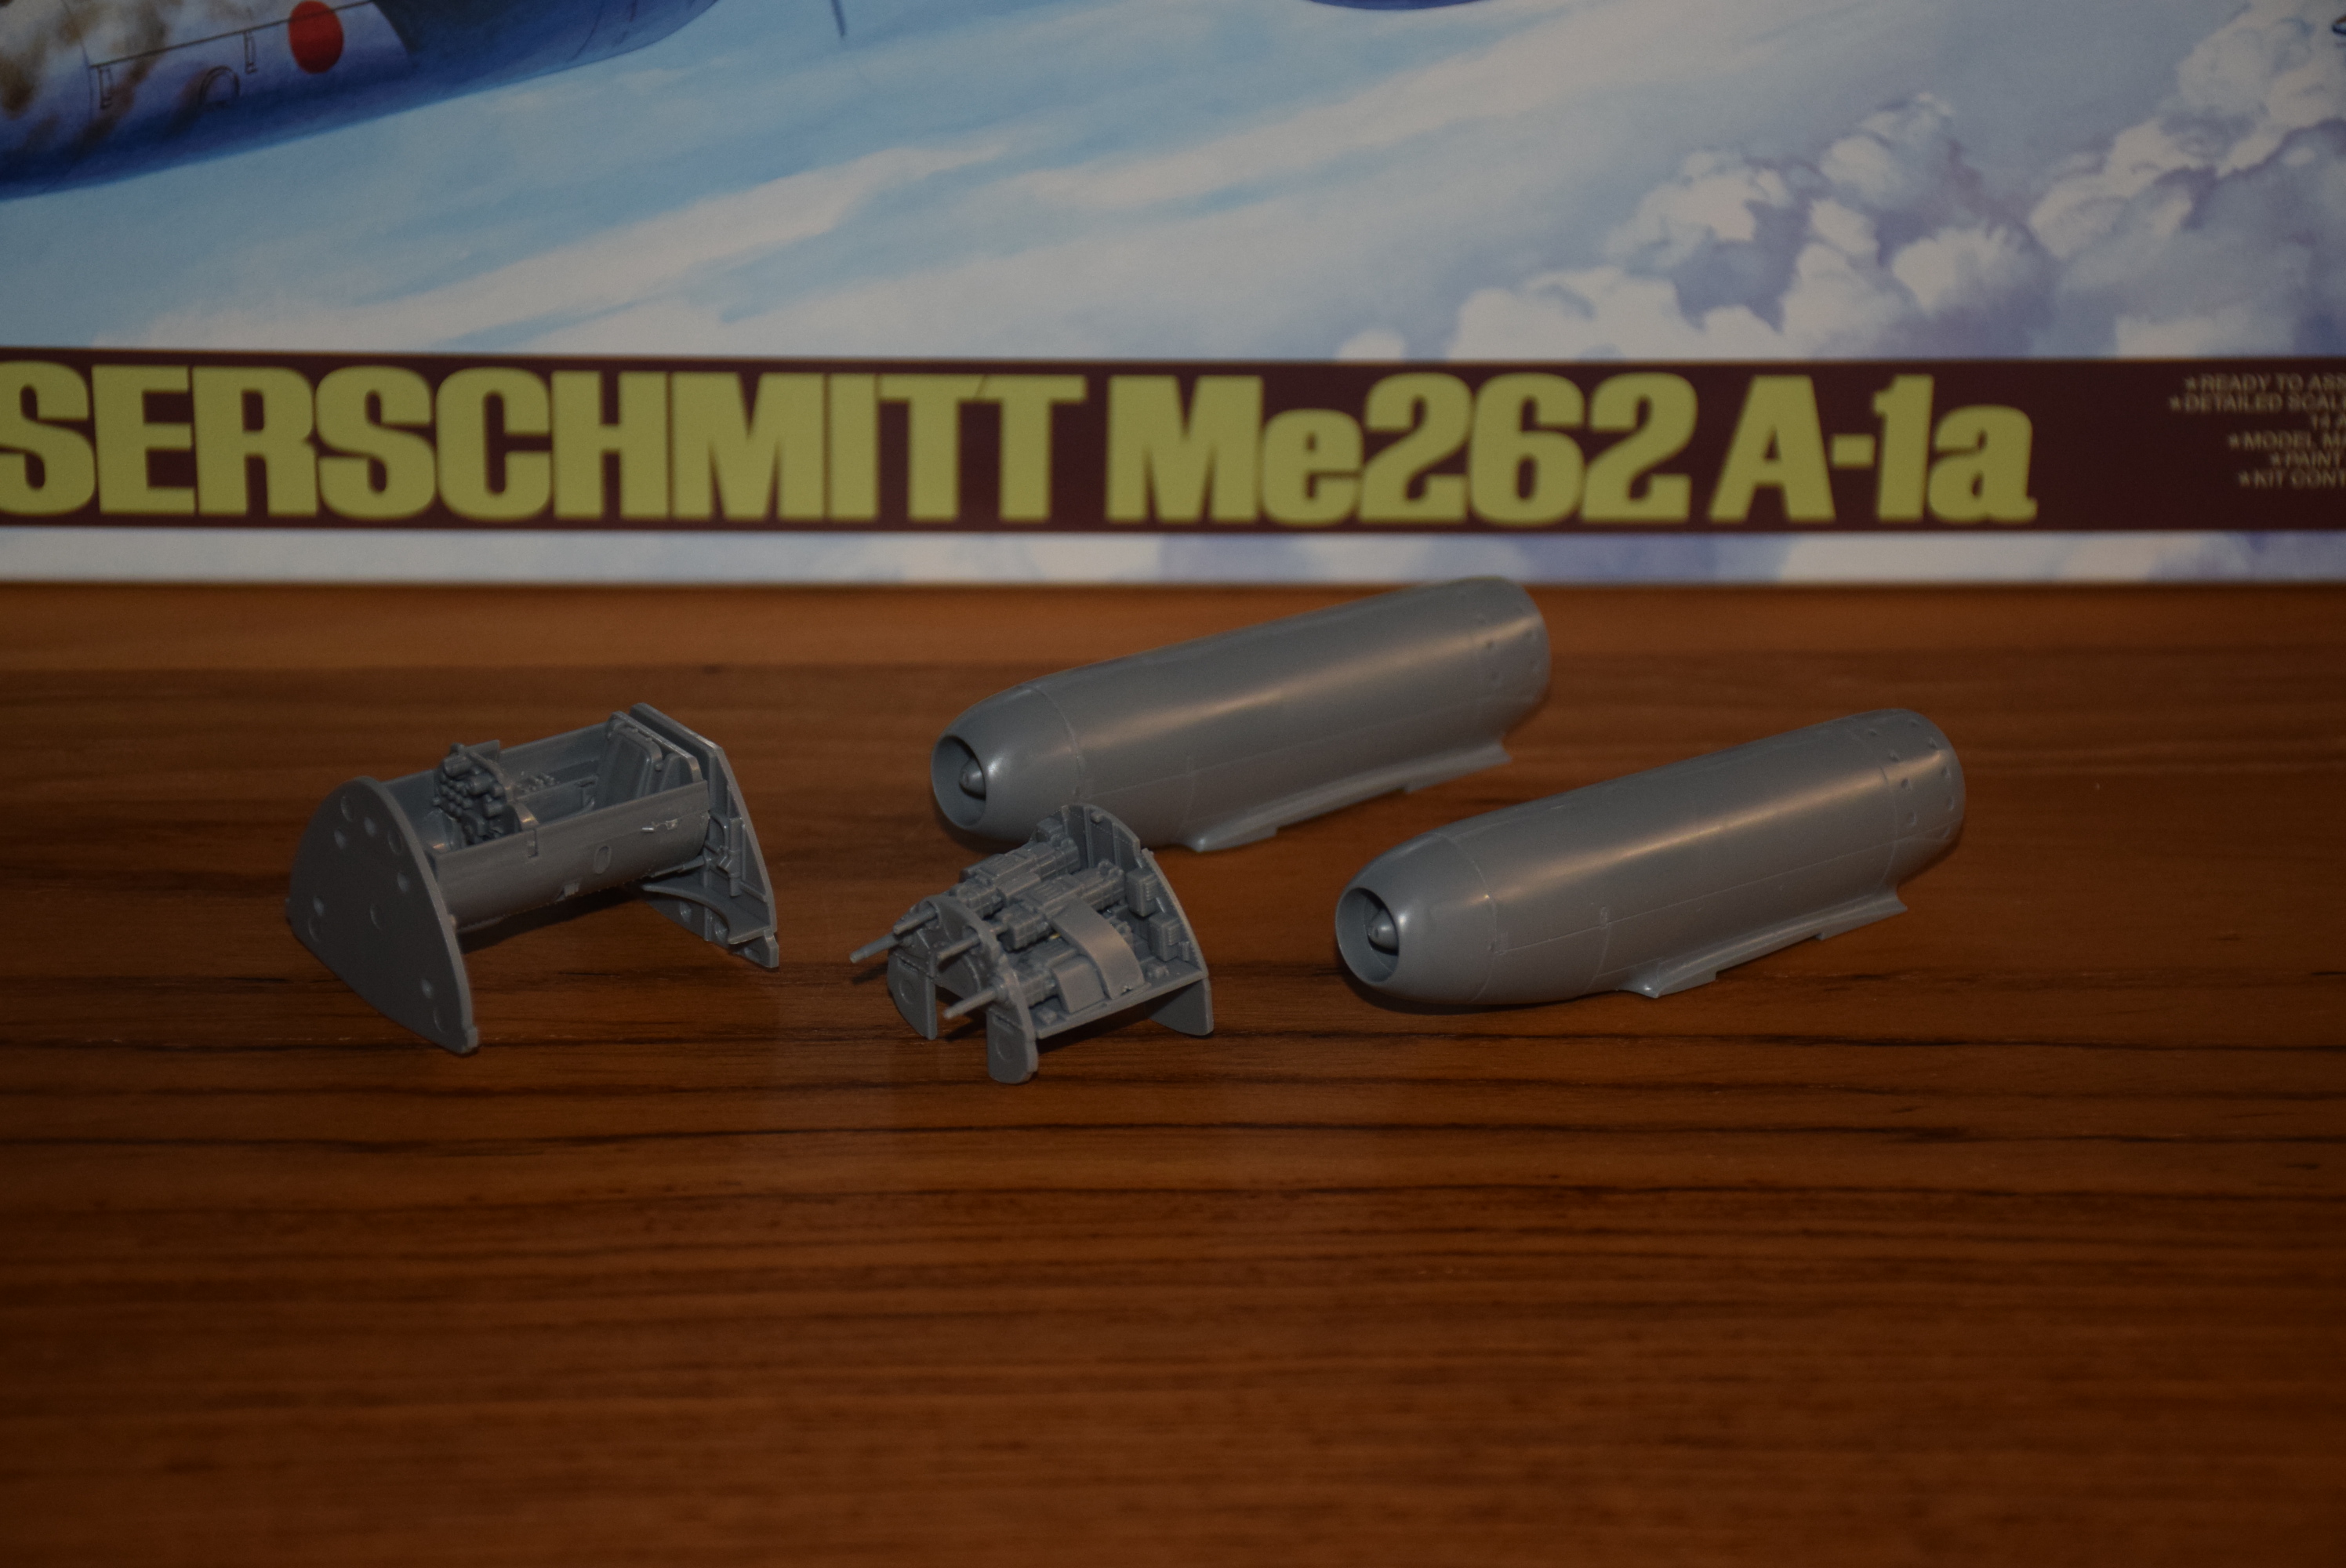
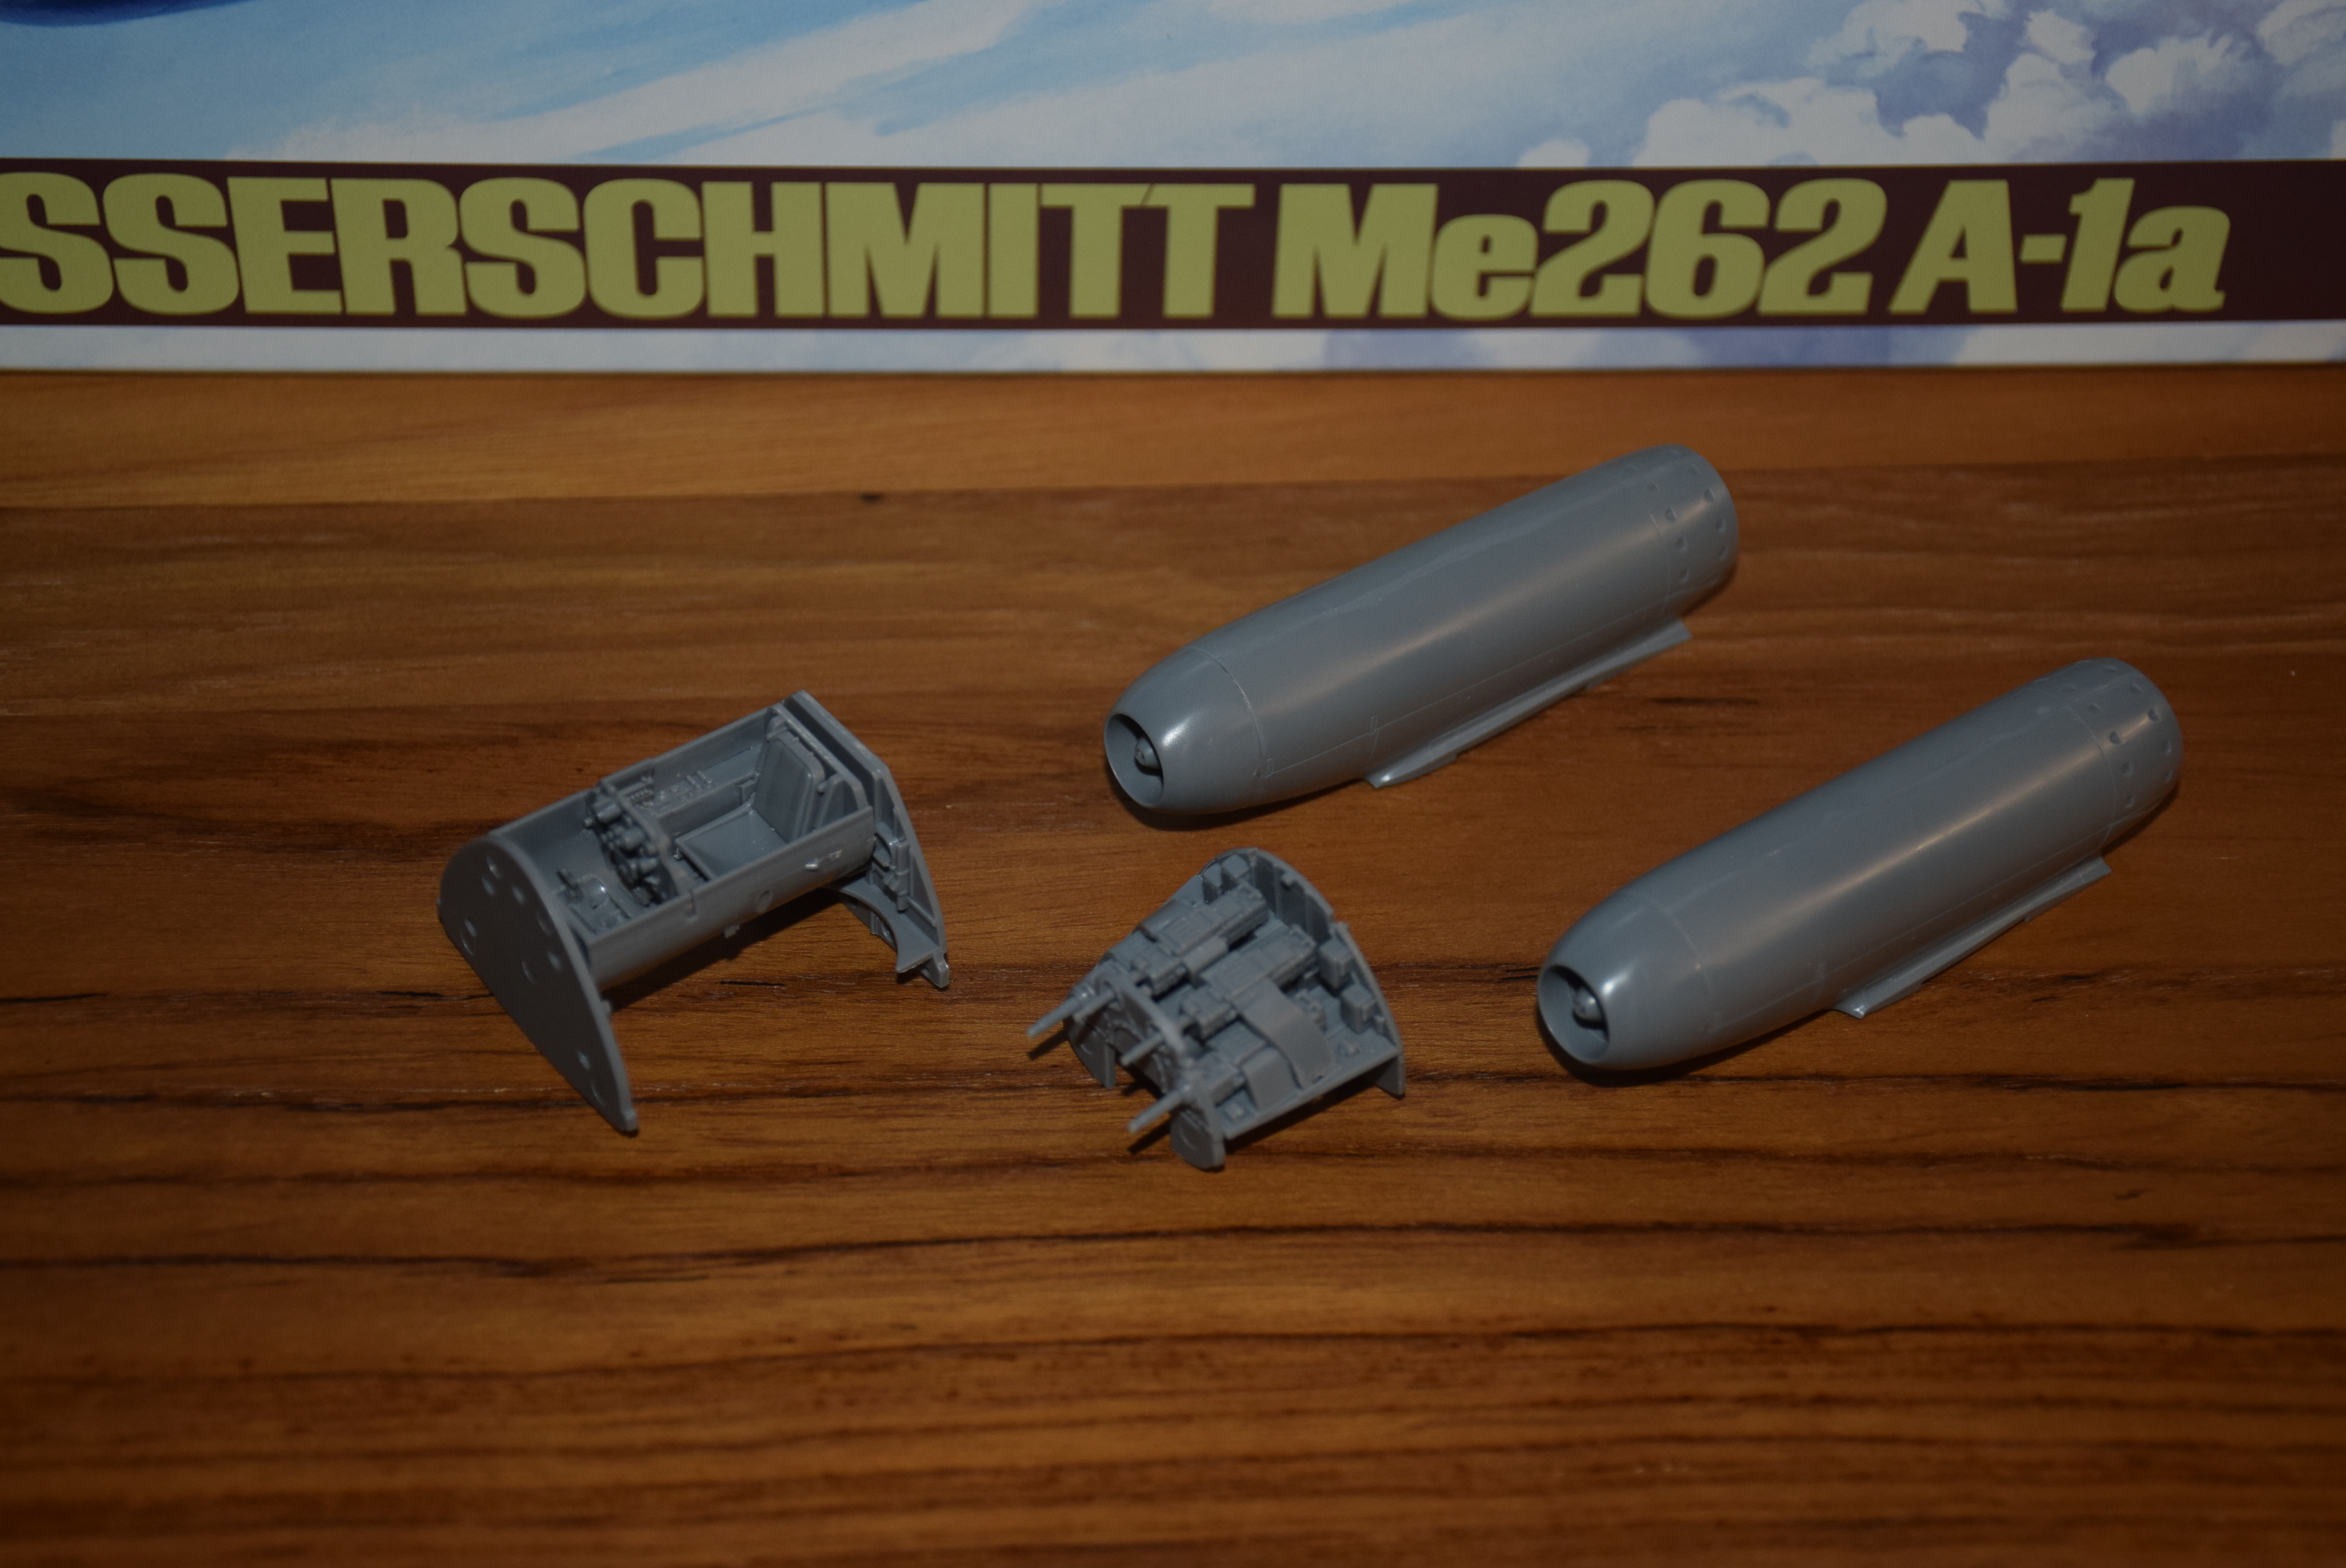
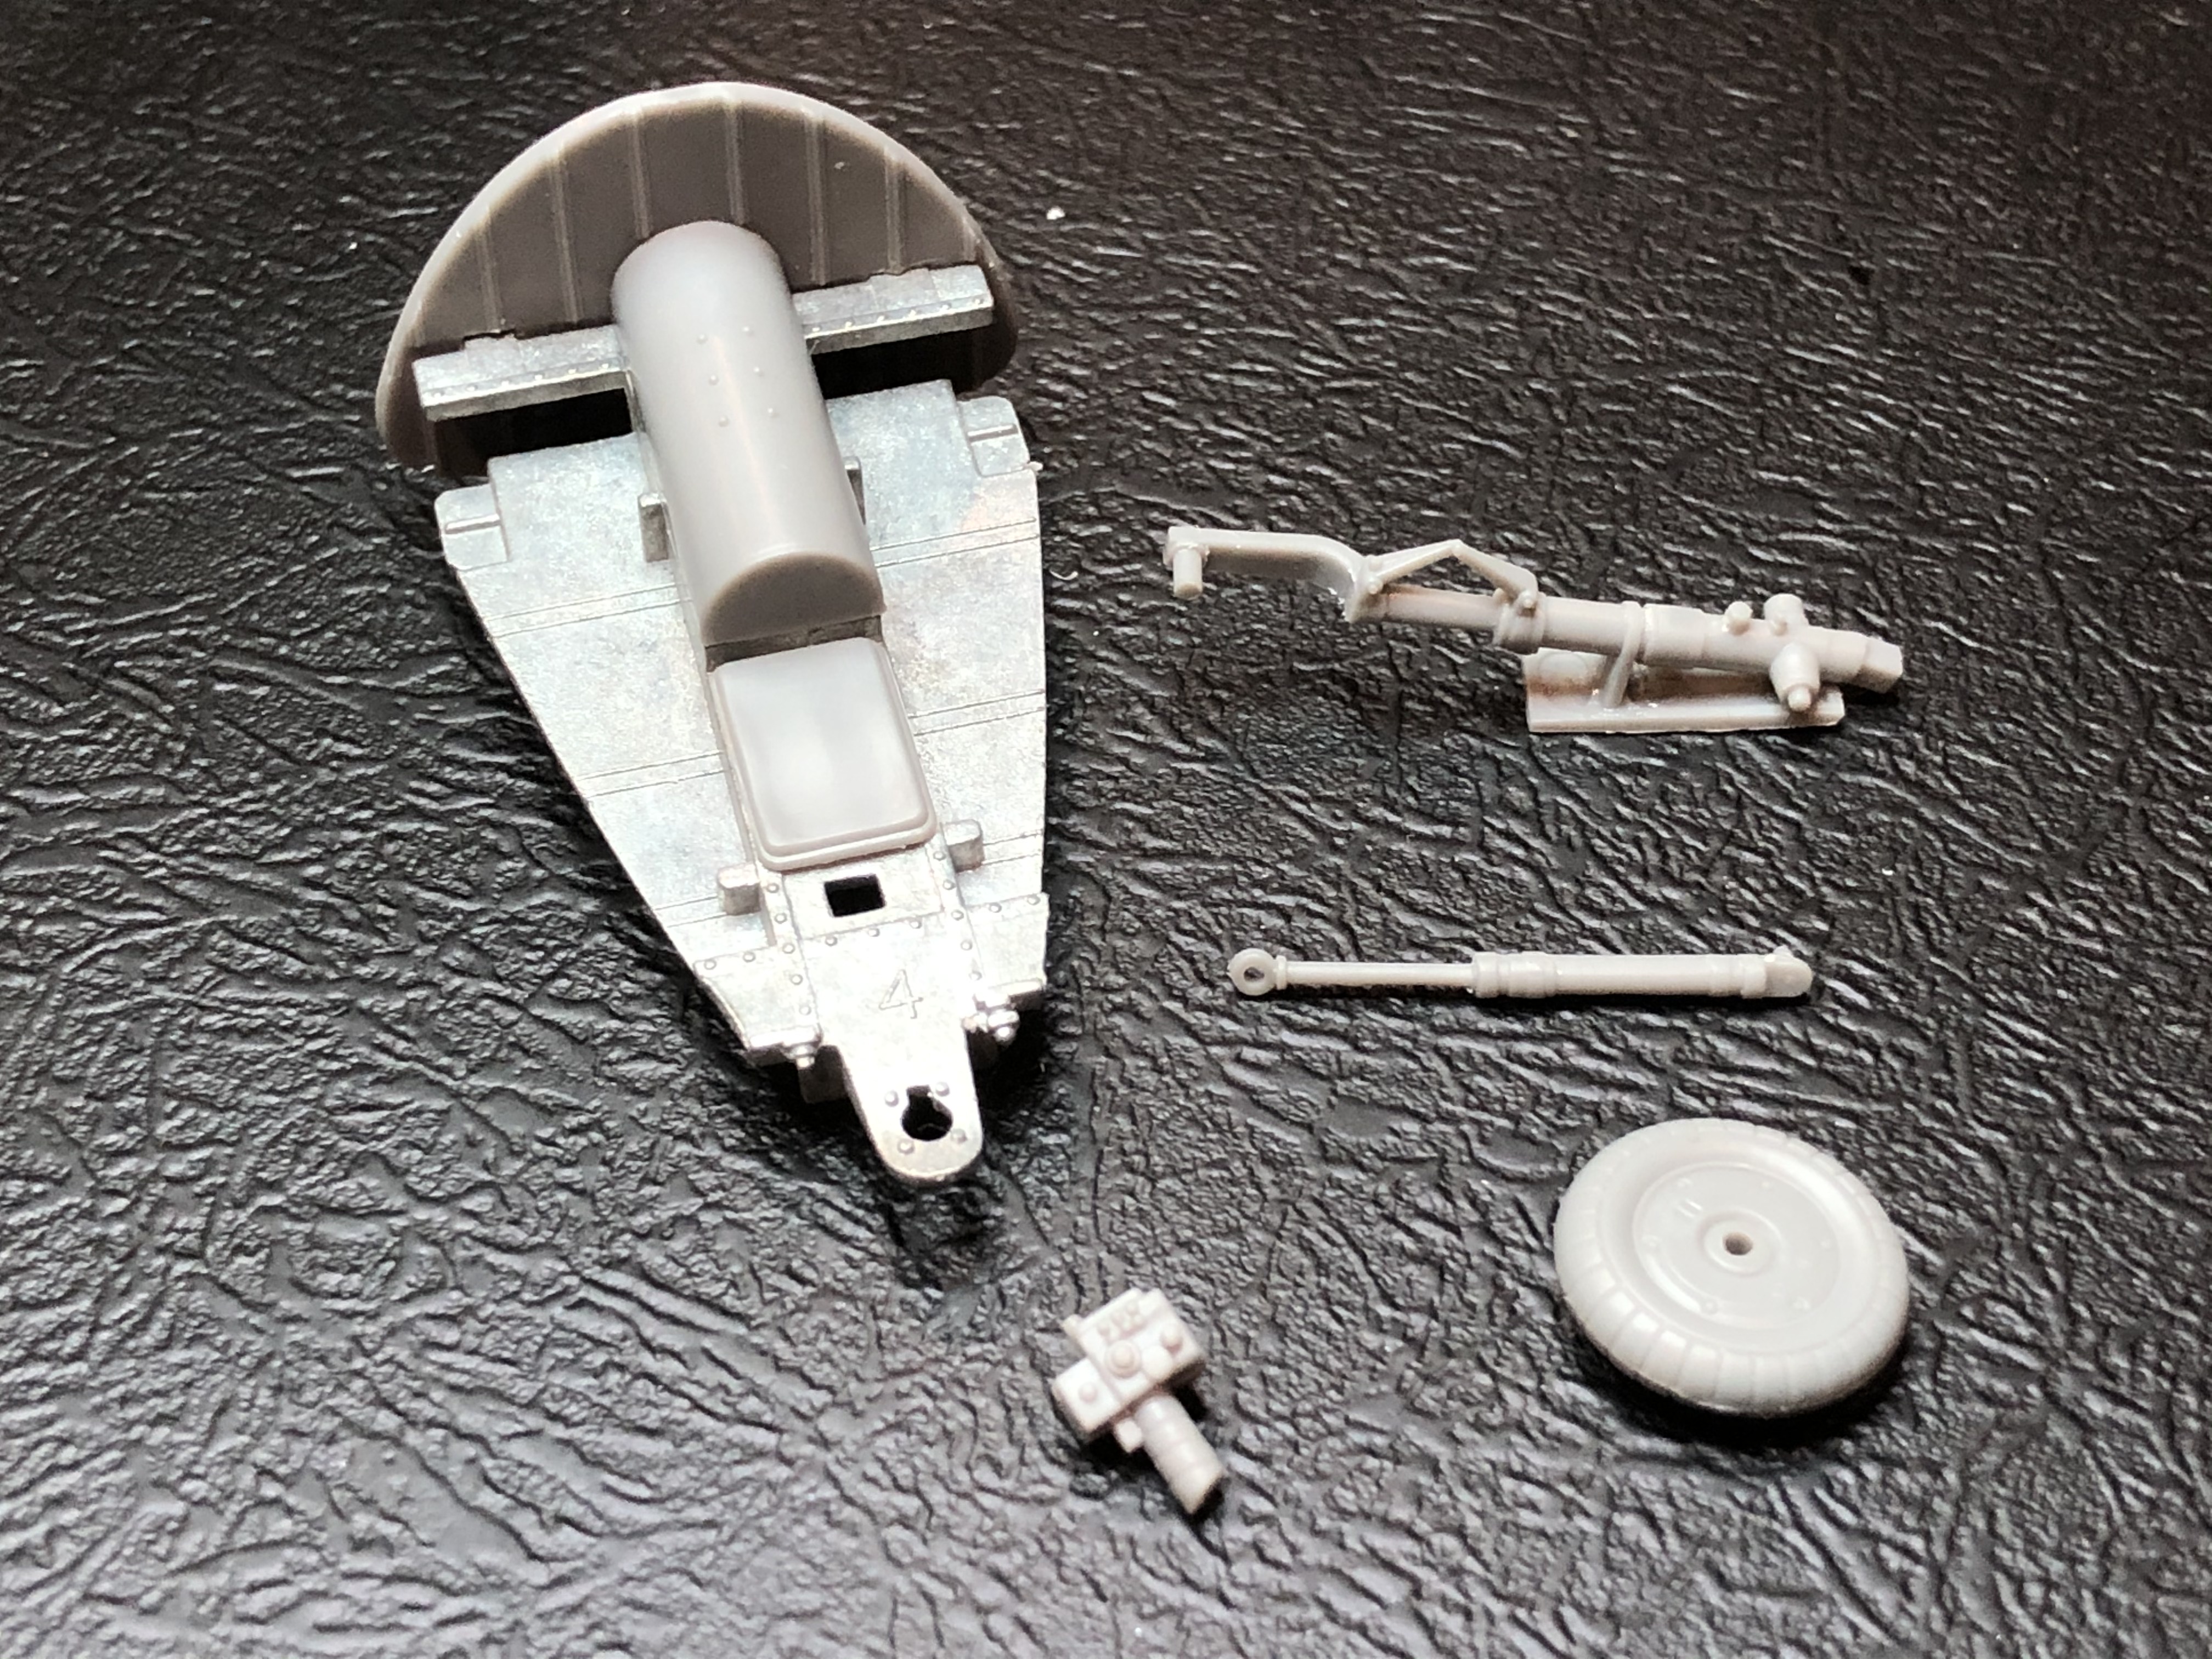
The nacelles required some shaping and sanding to get them to their true aerodynamic shape. I painted the insides of the apertures RLM 76 and the 'onion' RLM 70. I'm not quite sure what color the starter motor housing should be. The bird in Munich looks to me like they're either sanded aluminum, or RLM 76... but I can't be sure. Anybody know?


The cockpit is done. I'm never very happy with 1/48 scale cockpits are a bit small for me to detail paint very well. Thankfully, the decals for the IP didn't dissolve on me. Took a few coats of Mr Mark Softer to get it to conform with the details.


Happy Modeling!
AussieReg
Staff MemberAssociate Editor
AUTOMODELER
#007
_VISITCOMMUNITY
Victoria, Australia
Joined: June 09, 2009
KitMaker: 8,156 posts
AeroScale: 3,756 posts
Posted: Sunday, March 08, 2020 - 02:20 AM UTC

Quoted Text

good luck with yours, are you adding any photo etch?joe


Thanks Joe! The Dragon kit comes with a bit of photo-etch for the wheel bays and cockpit. The Hobby Boss kit I picked up from another modeler and came with an Eduard etch set. I will be using the PE on both kits.

Looking forward to your Hobby Boss build, they are putting out some very nice quality kits now.

Cheers, D
bomber14
_VISITCOMMUNITY
New Jersey, United States
Joined: February 02, 2015
KitMaker: 330 posts
AeroScale: 286 posts
Posted: Monday, March 09, 2020 - 12:57 AM UTC
hi gary. it's not my first ab, i have a neo gravity feed .35 needle that i added a pre set handle to. so i gave myself a xmas present this year and bought a grex xgi-.2m. i hope to be able to use it to do the squiggle lines on this build. i played with it a little and was able to do finer lines with lower pressure than the neo. i'm looking forward to using it.

gary what scale is your build? is it the old 1/48 monogram

joe
bomber14
_VISITCOMMUNITY
New Jersey, United States
Joined: February 02, 2015
KitMaker: 330 posts
AeroScale: 286 posts
Posted: Monday, March 09, 2020 - 01:00 AM UTC

Quoted Text


Quoted Text

good luck with yours, are you adding any photo etch?joe


Thanks Joe! The Dragon kit comes with a bit of photo-etch for the wheel bays and cockpit. The Hobby Boss kit I picked up from another modeler and came with an Eduard etch set. I will be using the PE on both kits.

Looking forward to your Hobby Boss build, they are putting out some very nice quality kits now.

Cheers, D


yes they are damian. their decals aren't bad either. i would be a little leery of their color call outs though.
GazzaS
#424
_VISITCOMMUNITY
Queensland, Australia
Joined: April 23, 2015
KitMaker: 4,648 posts
AeroScale: 1,938 posts
Posted: Monday, March 09, 2020 - 10:50 AM UTC

Quoted Text

hi gary. it's not my first ab, i have a neo gravity feed .35 needle that i added a pre set handle to. so i gave myself a xmas present this year and bought a grex xgi-.2m. i hope to be able to use it to do the squiggle lines on this build. i played with it a little and was able to do finer lines with lower pressure than the neo. i'm looking forward to using it.

gary what scale is your build? is it the old 1/48 monogram

joe


Yessir, it is. The box said 2006, but the plastic said 1978.
RussellE
#306
_VISITCOMMUNITY
Victoria, Australia
Joined: June 27, 2010
KitMaker: 3,959 posts
AeroScale: 598 posts
Posted: Monday, March 09, 2020 - 02:23 PM UTC

Quoted Text


Quoted Text

hi gary. it's not my first ab, i have a neo gravity feed .35 needle that i added a pre set handle to. so i gave myself a xmas present this year and bought a grex xgi-.2m. i hope to be able to use it to do the squiggle lines on this build. i played with it a little and was able to do finer lines with lower pressure than the neo. i'm looking forward to using it.

gary what scale is your build? is it the old 1/48 monogram

joe


Yessir, it is. The box said 2006, but the plastic said 1978.


Sorry to hear about your unfortunate discovery Gaz. A really good website to investigate kits is Scalemates which will provide you with a lineage of your chosen beasty
GazzaS
#424
_VISITCOMMUNITY
Queensland, Australia
Joined: April 23, 2015
KitMaker: 4,648 posts
AeroScale: 1,938 posts
Posted: Monday, March 09, 2020 - 04:59 PM UTC

Quoted Text


Quoted Text


Quoted Text

hi gary. it's not my first ab, i have a neo gravity feed .35 needle that i added a pre set handle to. so i gave myself a xmas present this year and bought a grex xgi-.2m. i hope to be able to use it to do the squiggle lines on this build. i played with it a little and was able to do finer lines with lower pressure than the neo. i'm looking forward to using it.

gary what scale is your build? is it the old 1/48 monogram

joe


Yessir, it is. The box said 2006, but the plastic said 1978.


Sorry to hear about your unfortunate discovery Gaz. A really good website to investigate kits is Scalemates which will provide you with a lineage of your chosen beasty


Thank you, Russell. Unfortunately, I bought the kit before I had ever heard of Scalemates. Since then, I've gotten into the habit of looking for reviews unless its for somebody like Dragon or Tamiya.

The more I build it, the more memories I think I have of 1978 when I built it the first time...
bomber14
_VISITCOMMUNITY
New Jersey, United States
Joined: February 02, 2015
KitMaker: 330 posts
AeroScale: 286 posts
Posted: Tuesday, March 10, 2020 - 07:51 AM UTC

Quoted Text


Quoted Text


Quoted Text


Quoted Text

hi gary. it's not my first ab, i have a neo gravity feed .35 needle that i added a pre set handle to. so i gave myself a xmas present this year and bought a grex xgi-.2m. i hope to be able to use it to do the squiggle lines on this build. i played with it a little and was able to do finer lines with lower pressure than the neo. i'm looking forward to using it.

gary what scale is your build? is it the old 1/48 monogram

joe


Yessir, it is. The box said 2006, but the plastic said 1978.


Sorry to hear about your unfortunate discovery Gaz. A really good website to investigate kits is Scalemates which will provide you with a lineage of your chosen beasty


Thank you, Russell. Unfortunately, I bought the kit before I had ever heard of Scalemates. Since then, I've gotten into the habit of looking for reviews unless its for somebody like Dragon or Tamiya.

The more I build it, the more memories I think I have of 1978 when I built it the first time...


i didn't realize that old kit had recessed panel lines and i never heard anyone say you had to use a clear sprue to keep the nose down. how about adding weight to the engines so you can keep the guns?
GazzaS
#424
_VISITCOMMUNITY
Queensland, Australia
Joined: April 23, 2015
KitMaker: 4,648 posts
AeroScale: 1,938 posts
Posted: Thursday, March 12, 2020 - 05:04 PM UTC
We must have got our wires crossed. There are no recessed panels lines on this Revell kit. It does have a clear piece to keep the nose down.
rochaped
_VISITCOMMUNITY
Lisboa, Portugal
Joined: August 27, 2010
KitMaker: 679 posts
AeroScale: 669 posts
Posted: Friday, March 20, 2020 - 07:56 AM UTC
Since I’m confined to be indoors due to the covid situation, going one week and god knows for how many more, I decided to get things going with my 262.
After some consideration I chose to build a Sturmvogel version more specifically this one


Started a bit every section of the kit- cockpit, wheel bays, nose, slats and engines. The slats and flaps resin set is the most challenging part for me. It’s the first time I do this sort of tiny detail that demands a lot of careful plastic chopping, but so far so good... for wish me luck!


Cheers!
Pedro

GazzaS
#424
_VISITCOMMUNITY
Queensland, Australia
Joined: April 23, 2015
KitMaker: 4,648 posts
AeroScale: 1,938 posts
Posted: Friday, March 20, 2020 - 09:10 AM UTC
Nice start, Pedro. I like that camo scheme.
zontar
_VISITCOMMUNITY
Hawaii, United States
Joined: August 27, 2006
KitMaker: 1,646 posts
AeroScale: 12 posts
Posted: Tuesday, March 24, 2020 - 06:32 PM UTC
Aloha All,

Much nice work so far.

I finally had some time to start in on this one. The fit is incredible so far. I'm trying to create sub-assemblies based on painting, but I fear I might have gone too far on the cockpit and the engines to paint them properly. We'll see when the time comes.


Happy Modeling and stay safe out there,
Zon
GazzaS
#424
_VISITCOMMUNITY
Queensland, Australia
Joined: April 23, 2015
KitMaker: 4,648 posts
AeroScale: 1,938 posts
Posted: Wednesday, March 25, 2020 - 12:40 PM UTC
Looking good, Zon! I'm wishing I had a Tamiya kit instead of a repop of the ancient Revell kit.
rochaped
_VISITCOMMUNITY
Lisboa, Portugal
Joined: August 27, 2010
KitMaker: 679 posts
AeroScale: 669 posts
Posted: Thursday, March 26, 2020 - 10:52 AM UTC

Quoted Text

Looking good, Zon! I'm wishing I had a Tamiya kit instead of a repop of the ancient Revell kit.


Yep, no doubt it would be a better deal mate!
Progress is steady and just now, while trying to see how the wheel pit looks like I dry fitted the cockpit tube (This one already glued) to both fuselage sides and inserted the remaining wheel bay parts and the lower wing...it just clicked and done! It holds together and no gaps whatsoever, amazing engineering indeed.
I sprayed a highly diluted clear yellow over the NMF of the parts to simulate the protective varnish used there. Not sure if it’s visible on the photos but frontal spar doesn’t have that clear yellow applied yet, and the difference shows.


Lots of other bits are almost done, areas like the cockpit will be assemble fully soon and the wheel also. Next comes the flaps and slats

Cheers
Pedro
AussieReg
Staff MemberAssociate Editor
AUTOMODELER
#007
_VISITCOMMUNITY
Victoria, Australia
Joined: June 09, 2009
KitMaker: 8,156 posts
AeroScale: 3,756 posts
Posted: Thursday, March 26, 2020 - 11:41 AM UTC
Neat work Pedro, moving along very nicely on your build here. You have chosen an interesting scheme, I'm looking forward to seeing how you handle that one!

Cheers, D
GazzaS
#424
_VISITCOMMUNITY
Queensland, Australia
Joined: April 23, 2015
KitMaker: 4,648 posts
AeroScale: 1,938 posts
Posted: Thursday, March 26, 2020 - 05:37 PM UTC
That wheel well looks pretty, Pedro. What paint did you use for the NMF?
rochaped
_VISITCOMMUNITY
Lisboa, Portugal
Joined: August 27, 2010
KitMaker: 679 posts
AeroScale: 669 posts
Posted: Thursday, March 26, 2020 - 08:34 PM UTC
Damian- thanks for good words, hoping to do justice to do the beautiful artwork when painting the model

Gary- I’m using AK Xtreme Metal Steel and also Aluminium for some minor parts. It’s a good product that paints smoothly
AussieReg
Staff MemberAssociate Editor
AUTOMODELER
#007
_VISITCOMMUNITY
Victoria, Australia
Joined: June 09, 2009
KitMaker: 8,156 posts
AeroScale: 3,756 posts
Posted: Friday, March 27, 2020 - 12:57 AM UTC
With everything going on lately I haven't managed any bench time until tonight. I spent an hour or so cleaning up and test fitting the parts for Step 2 of the HB kit.


A little more clean-up to do then assembly and primer.

Cheers, D
GazzaS
#424
_VISITCOMMUNITY
Queensland, Australia
Joined: April 23, 2015
KitMaker: 4,648 posts
AeroScale: 1,938 posts
Posted: Friday, March 27, 2020 - 08:54 AM UTC
Good to see more progress, Damian. I like how they've given you a weight that is an actual part of the model. The detail is pretty good.