New Jersey, United States
Joined: February 02, 2015
KitMaker: 330 posts
AeroScale: 286 posts
Posted: Friday, March 27, 2020 - 04:20 PM UTC
nice start pedro. i too am doing a sturmvogel, i believe from the same group. i am also plamming on adding slats and have a challenging scheme. just got the decals yesterday. i guess it is time to get moving.
Lisboa, Portugal
Joined: August 27, 2010
KitMaker: 679 posts
AeroScale: 669 posts
Posted: Saturday, March 28, 2020 - 04:40 AM UTC
Thanks Joe, I see your going for the HobbyBoss kit. That should be interesting seeing both kits are the same version but from distinct makers.
Hope all goes well with the build and your new AB
Been using H&S Evolution AB for years and cant praise it enough. Sadly a couple of nights back the tip must have cracked since the paint flow is unstopped. With all this Covid shutdown here in Europe I have not been able to get a new 0,15 tip anywhere, only by purchasing a full tip/head/needle set, something Im avoiding because the price tag is rather hefty. But for now I have 2 other AB to get along though the tip are not as fine (0,20 and 0,30).

#424
Queensland, Australia
Joined: April 23, 2015
KitMaker: 4,648 posts
AeroScale: 1,938 posts
Posted: Saturday, March 28, 2020 - 08:56 PM UTC
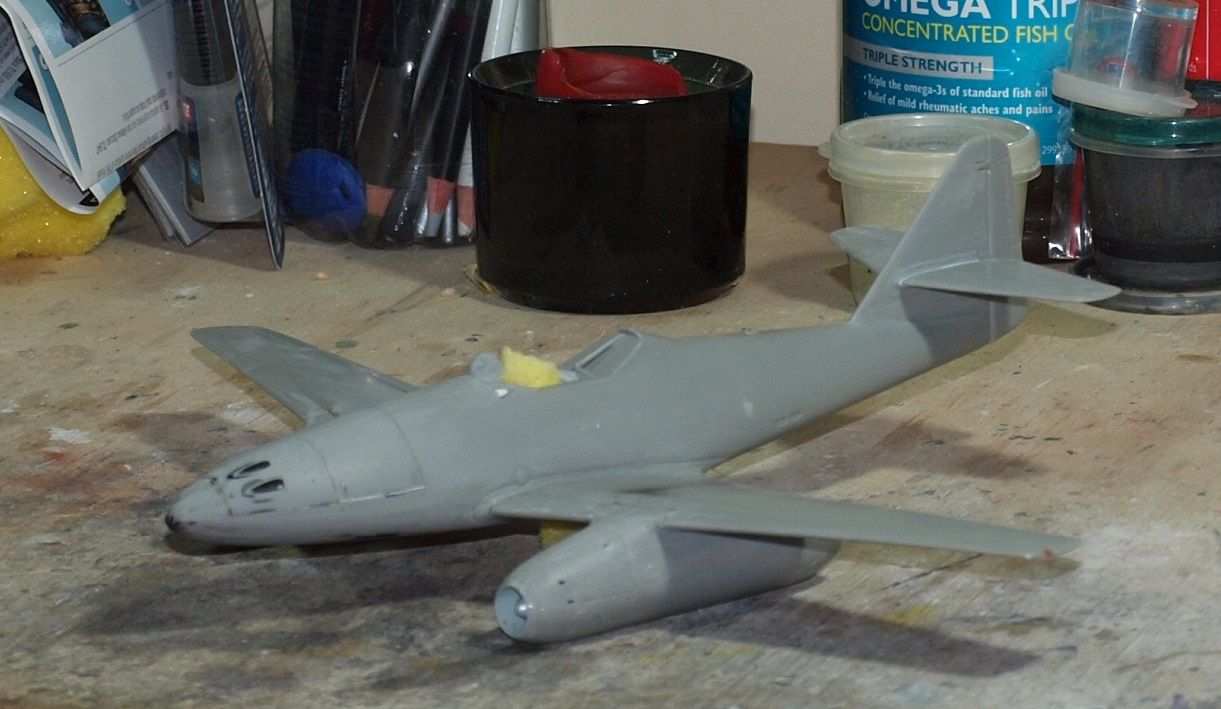
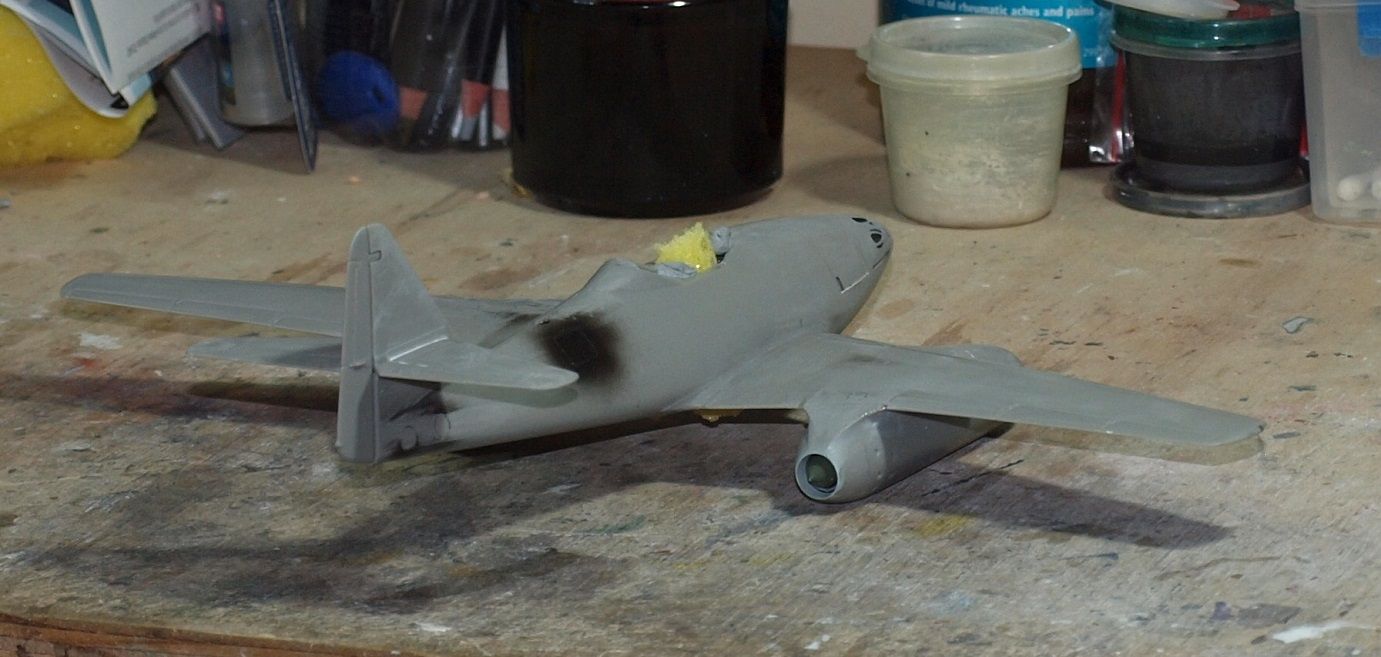
I've got the main parts together, so it finally has a shape, and smooth, merging lines.
Happy Modelling!
"Artillery adds dignity, to what would otherwise be an ugly brawl."
Frederick The Great
AussieReg
 Associate Editor
#007
Victoria, Australia
Joined: June 09, 2009
KitMaker: 8,156 posts
AeroScale: 3,756 posts
Posted: Sunday, March 29, 2020 - 12:33 AM UTC
Looking good Gazza, neat work!
Cheers, D
ON the bench
Revell 1/24 '53 Corvette (building as '54)
Revell 1/24 BMW 507 Coupe and Cabrio
Italeri 1/48 Me262 B-1a/U1 Nightfighter
Monogram 1/24 '57 Chevy Nomad
Dragon 1/350 USS Frank Knox DD-742
#306
Victoria, Australia
Joined: June 27, 2010
KitMaker: 3,959 posts
AeroScale: 598 posts
Posted: Sunday, March 29, 2020 - 02:45 PM UTC
hm, lots of good updates so far, maybe I'm gonna need to add to the 3 on the bench already and add the Me262!

Stay home and build models!
In 1/72
Gloster Gladiator MkII for the Bi-planes Campaign
In 1/350
Airfix 1:350 Type 45 Destroyer
AussieReg
Associate Editor #007
Victoria, Australia
Joined: June 09, 2009
KitMaker: 8,156 posts
AeroScale: 3,756 posts
Posted: Sunday, March 29, 2020 - 02:56 PM UTC
Quoted Text
hm, lots of good updates so far, maybe I'm gonna need to add to the 3 on the bench already and add the Me262!
There is NO maybe, you
must do it!

ON the bench
Revell 1/24 '53 Corvette (building as '54)
Revell 1/24 BMW 507 Coupe and Cabrio
Italeri 1/48 Me262 B-1a/U1 Nightfighter
Monogram 1/24 '57 Chevy Nomad
Dragon 1/350 USS Frank Knox DD-742
Lisboa, Portugal
Joined: August 27, 2010
KitMaker: 679 posts
AeroScale: 669 posts
Posted: Monday, March 30, 2020 - 05:48 AM UTC
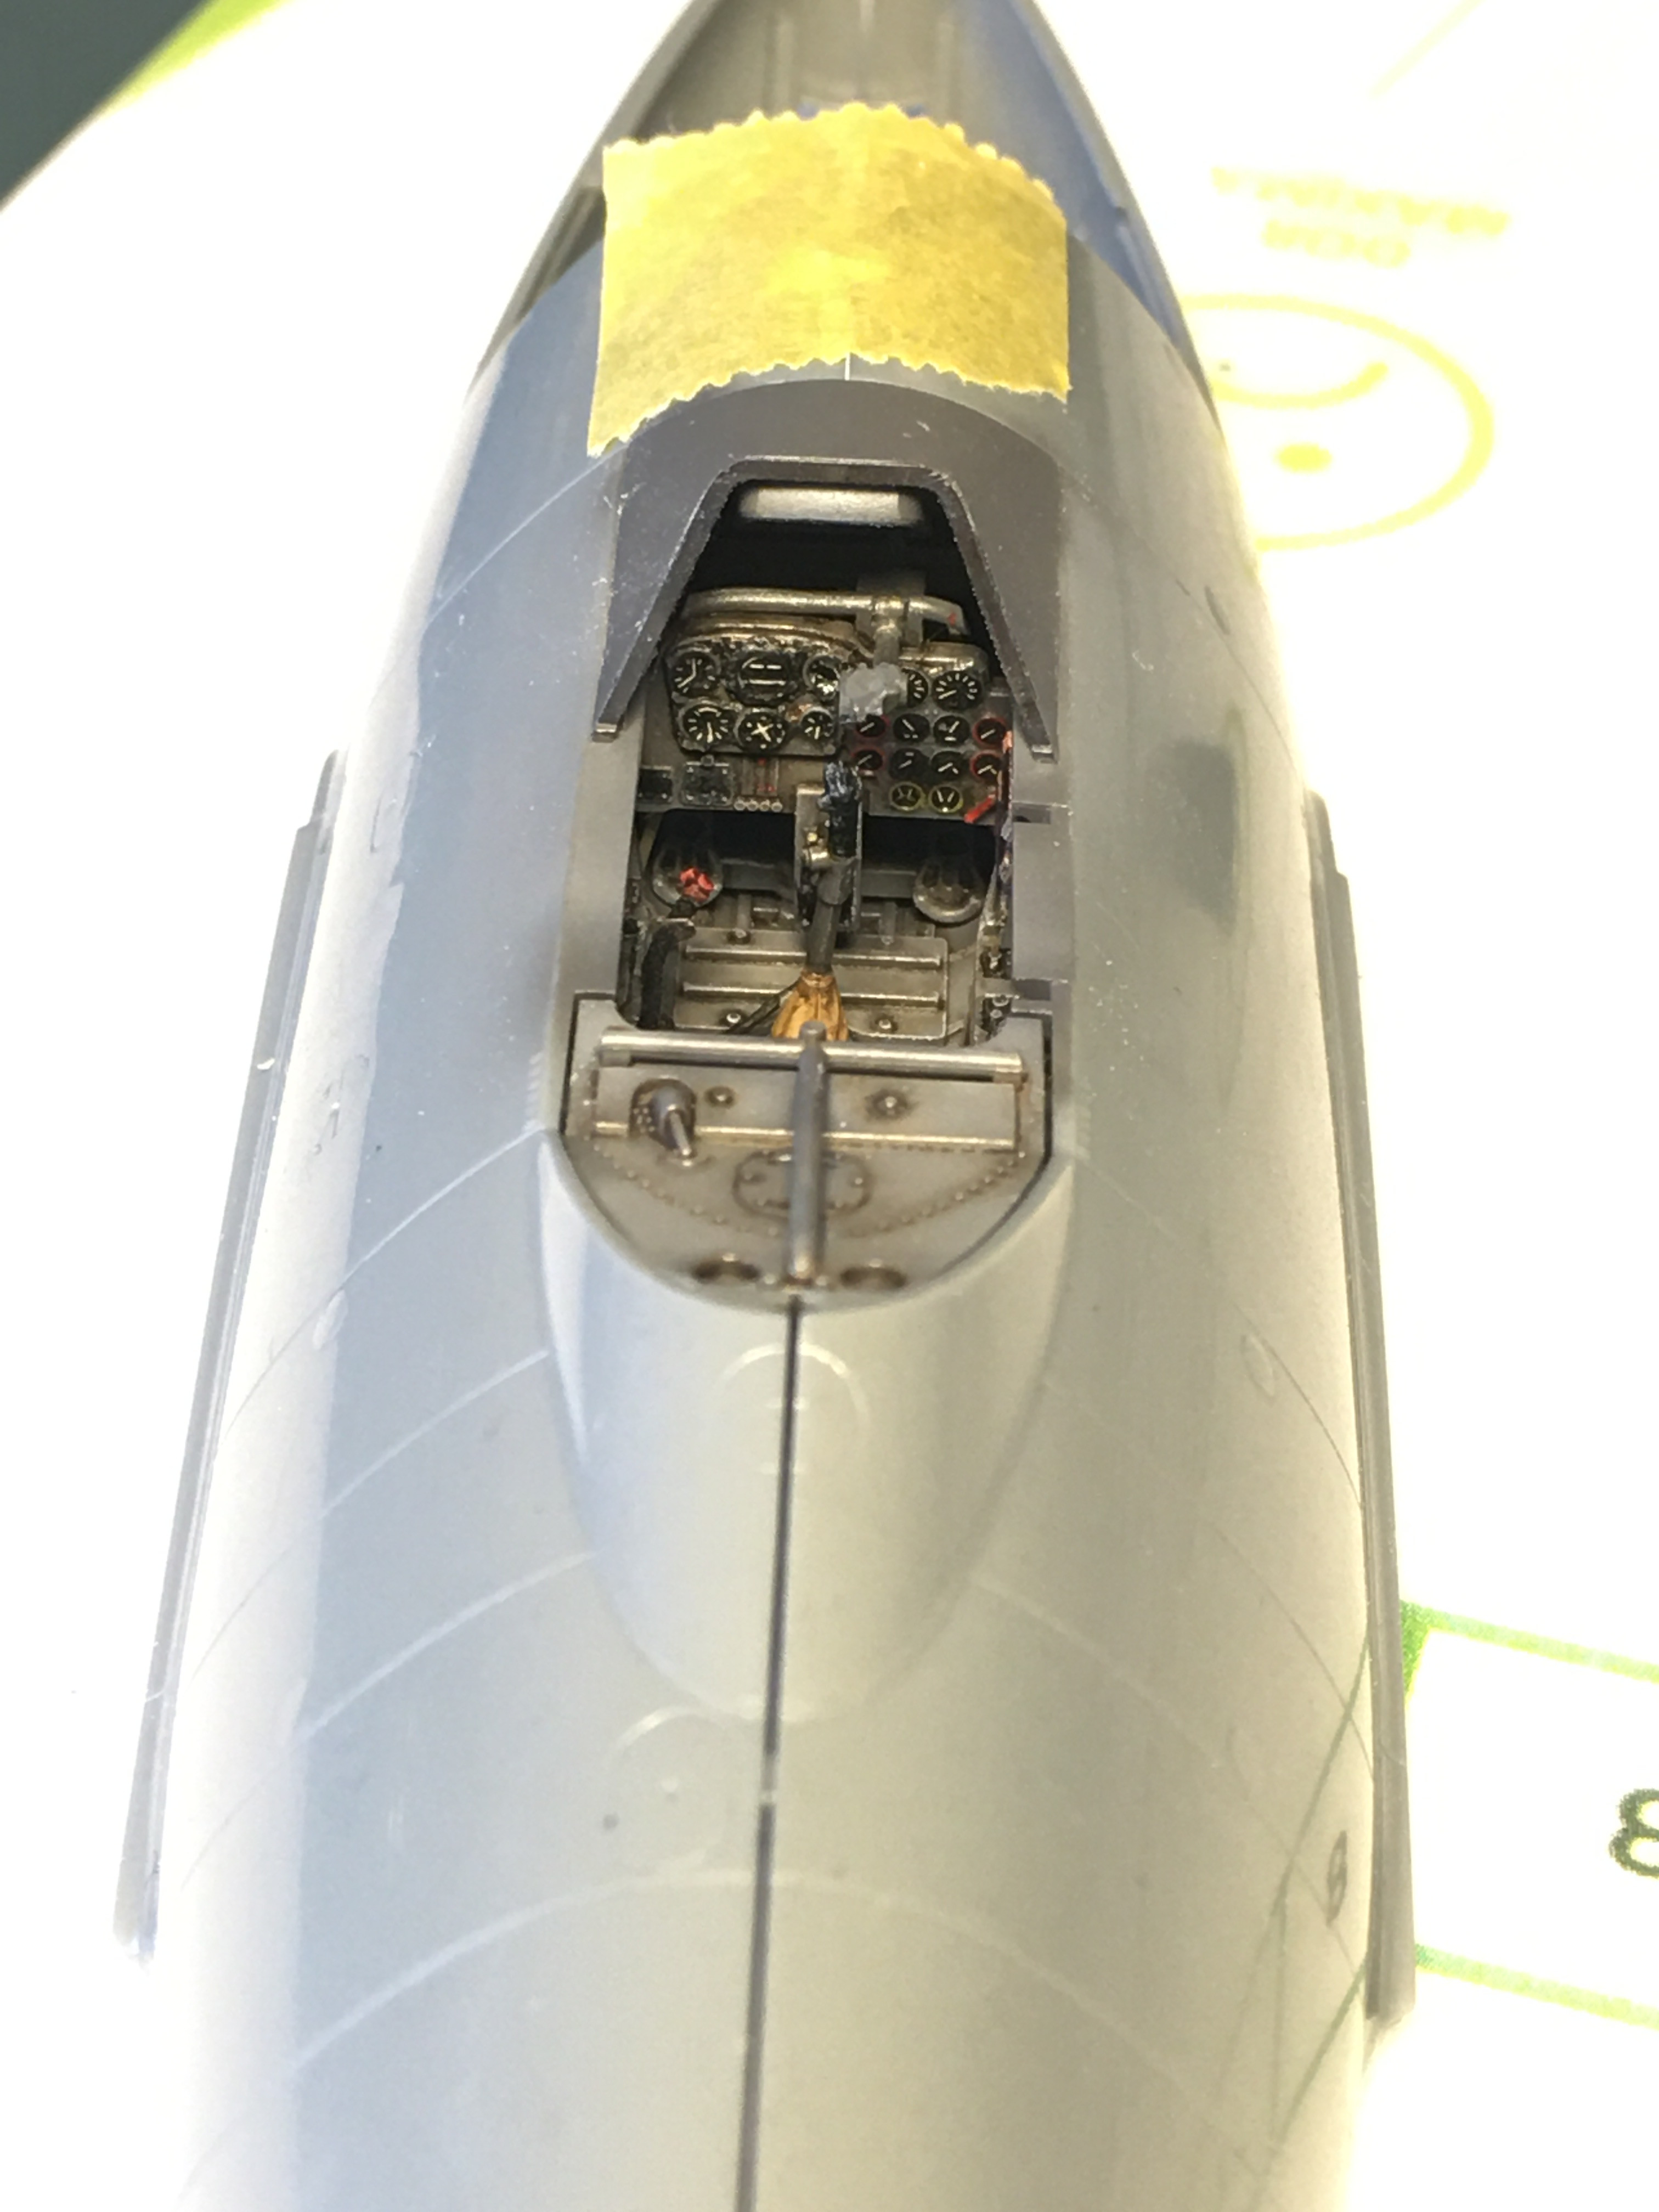
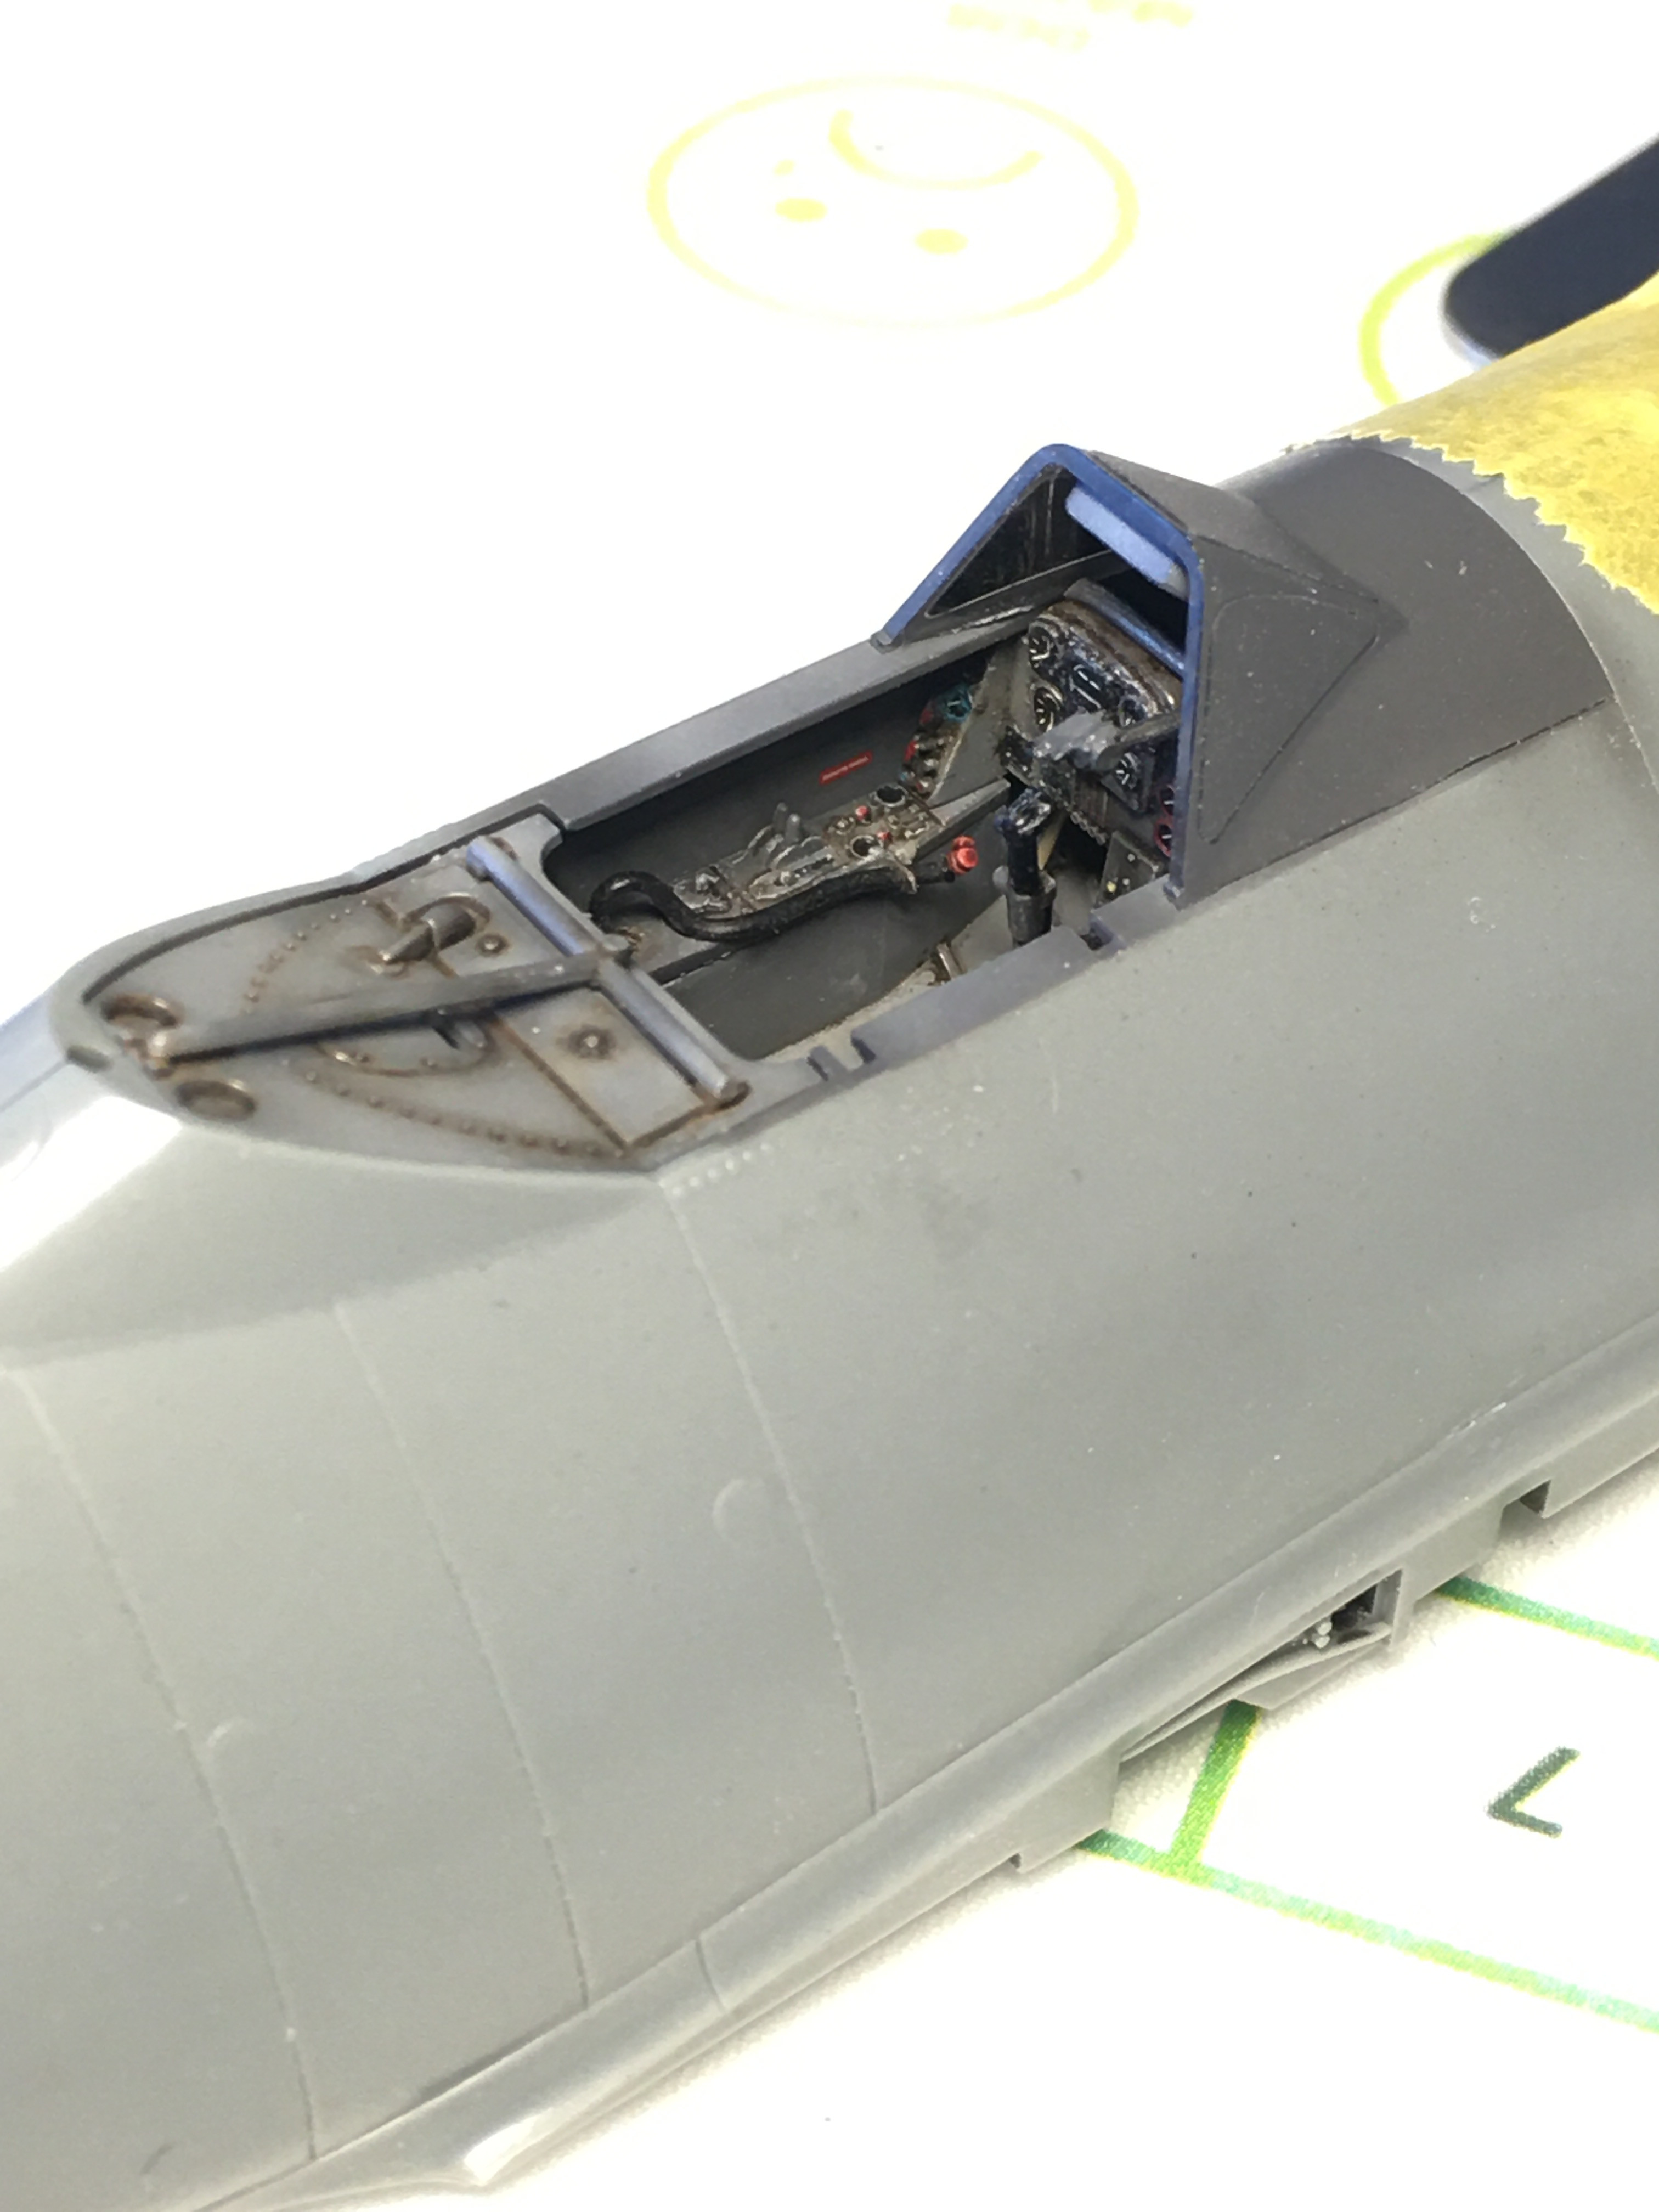
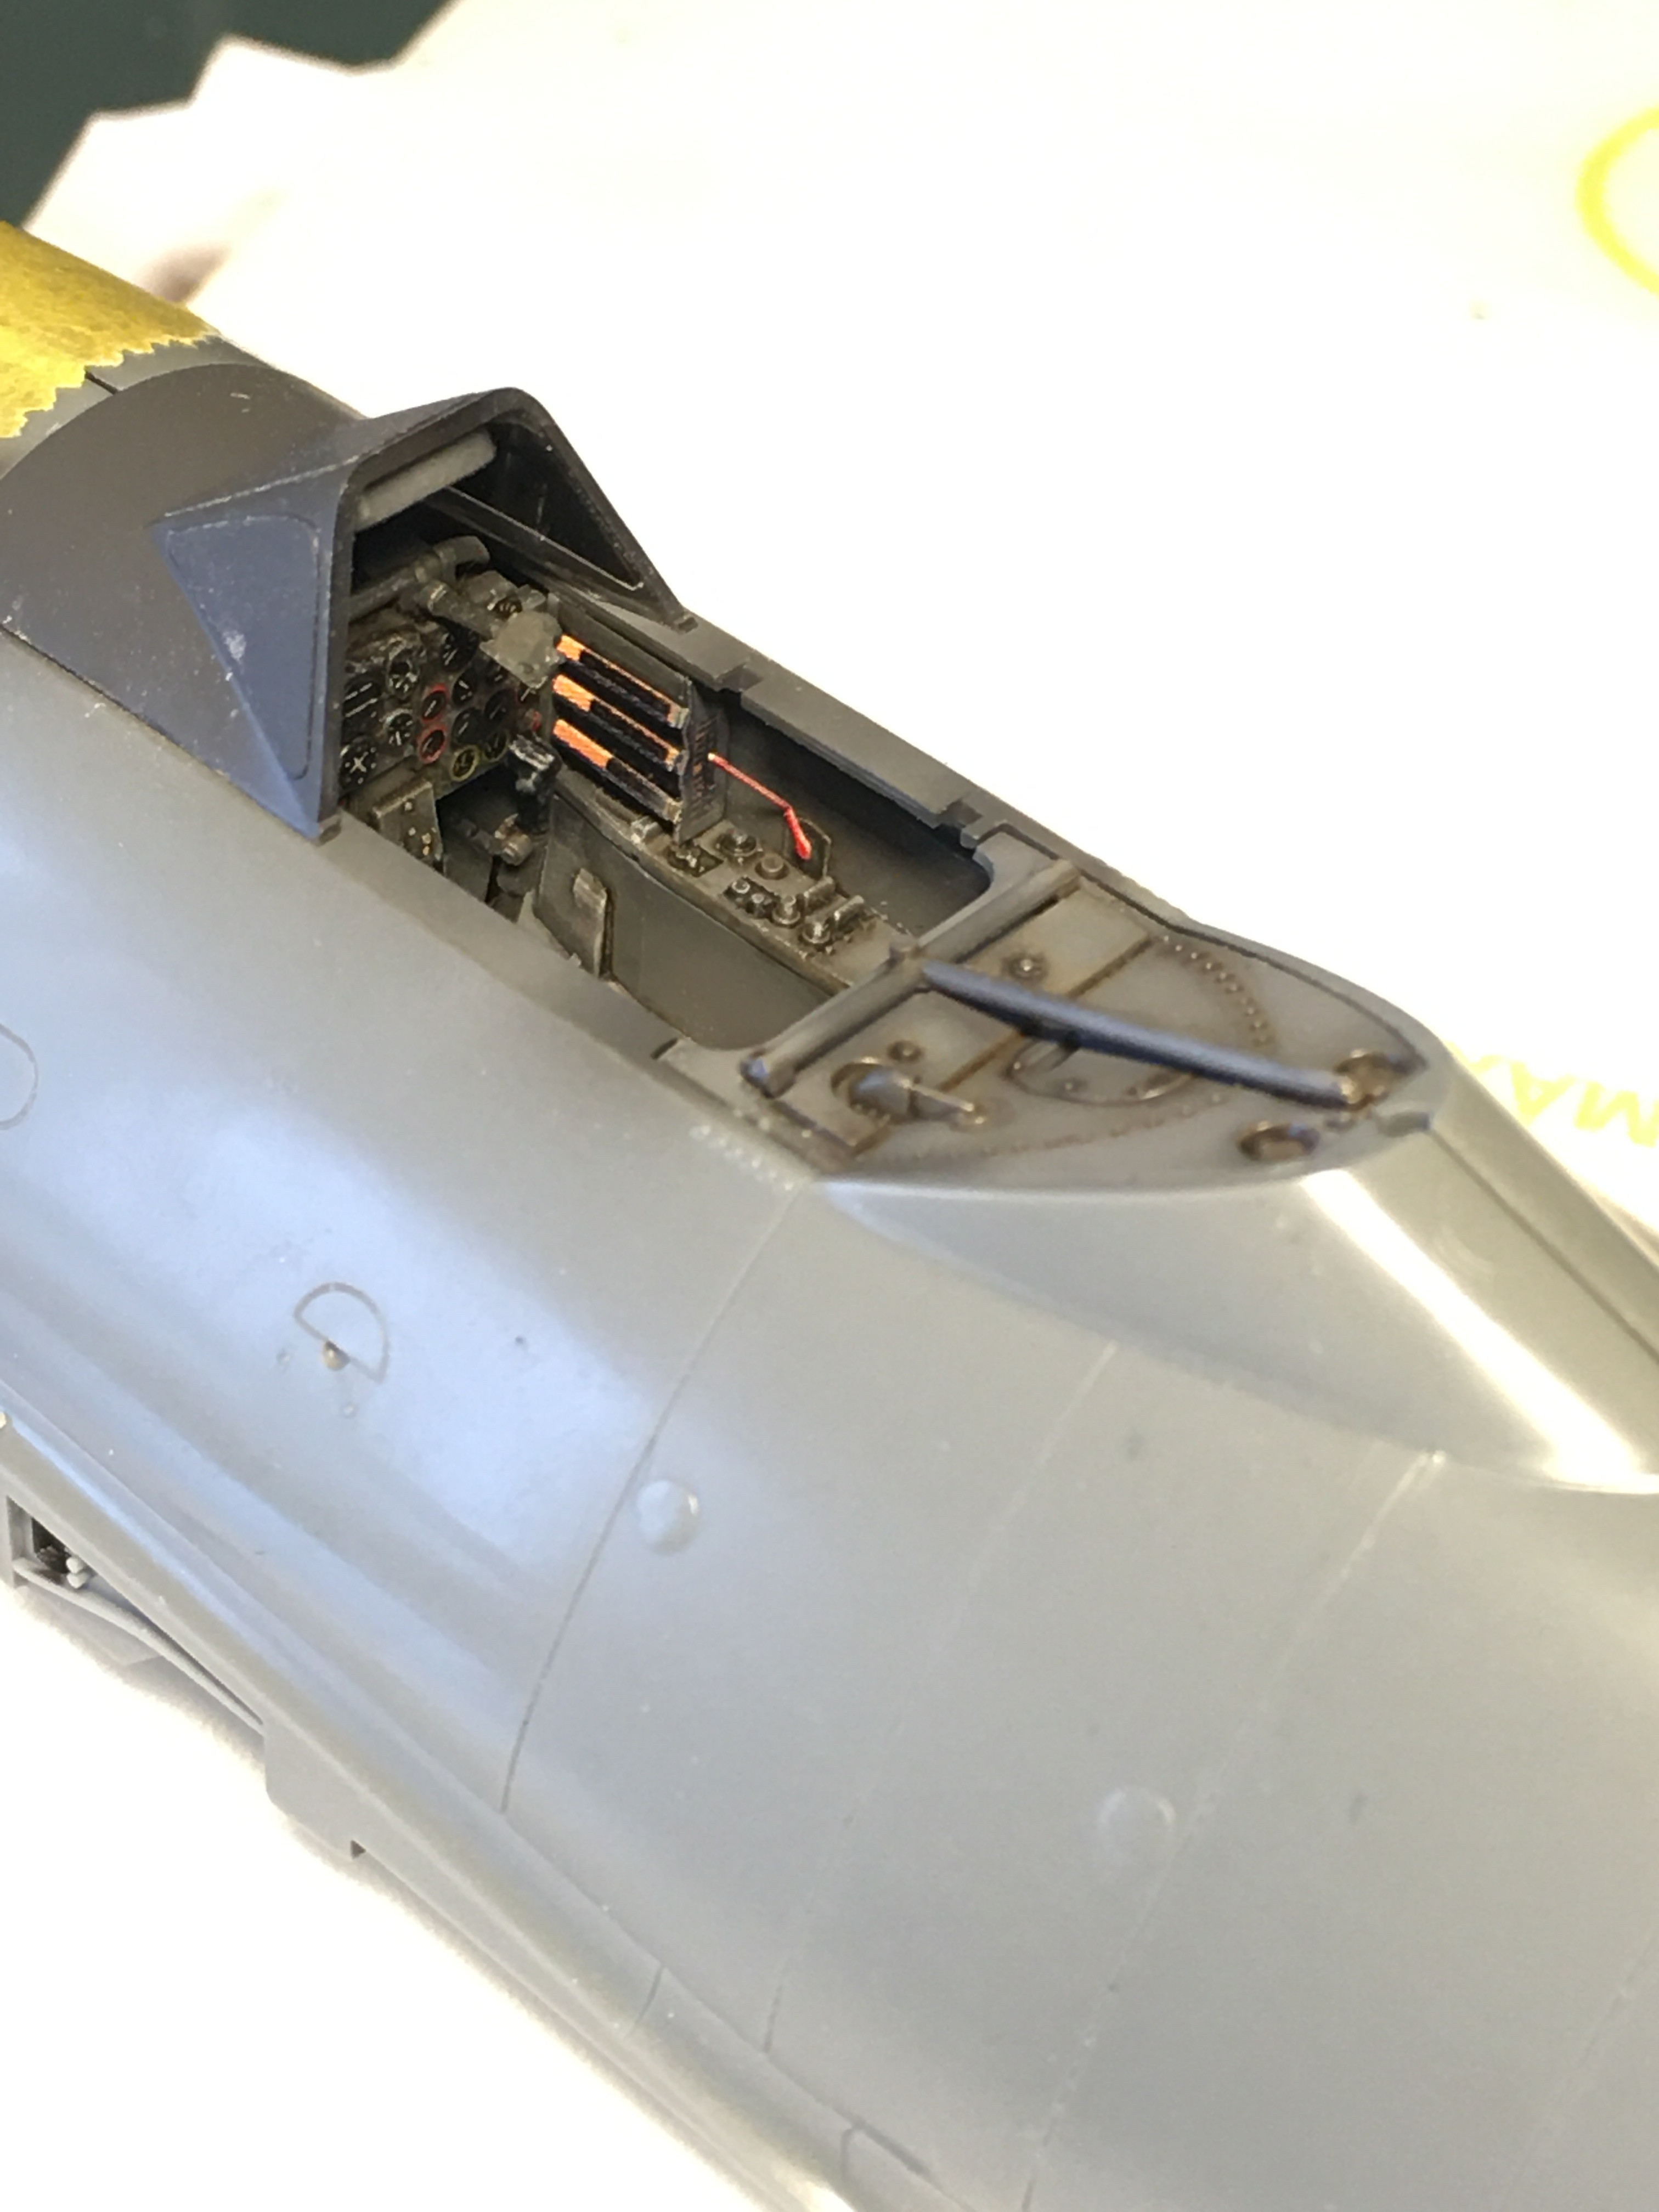
Another quick update on the WiP, cockpit almost done, a resin gunsight will be added and some minor details to wrap this section up
Cheers!
Pedro
AussieReg
Associate Editor #007
Victoria, Australia
Joined: June 09, 2009
KitMaker: 8,156 posts
AeroScale: 3,756 posts
Posted: Monday, March 30, 2020 - 09:48 AM UTC
Lovely work there Pedro, very nice detailing and weathering!
What did you use for the dirty wash?
Cheers, D
ON the bench
Revell 1/24 '53 Corvette (building as '54)
Revell 1/24 BMW 507 Coupe and Cabrio
Italeri 1/48 Me262 B-1a/U1 Nightfighter
Monogram 1/24 '57 Chevy Nomad
Dragon 1/350 USS Frank Knox DD-742
Lisboa, Portugal
Joined: August 27, 2010
KitMaker: 679 posts
AeroScale: 669 posts
Posted: Monday, March 30, 2020 - 10:45 AM UTC
Thanks Damian, I just used old school oil wash (a very thinned black+Burn Sienna) and a dry brush of some medium grey from Vallejo. Its pretty much my weapon of choice for tubes
Cheers
Pedro
Hawaii, United States
Joined: August 27, 2006
KitMaker: 1,646 posts
AeroScale: 12 posts
Posted: Monday, March 30, 2020 - 05:06 PM UTC
Pedro: Nice work. Your cockpit looks fantastic and the yellow tint to the wheel wells is a nice touch. I might try it.
Gaz: the fit on the Tamiya is definitely first rate, but you've done really well with yours. Looks good.
Happy Modeling,
zon
"Certainty of death.
Small chance of sucess.
What are we waiting for?"
-Gimli, Return of the King.
#424
Queensland, Australia
Joined: April 23, 2015
KitMaker: 4,648 posts
AeroScale: 1,938 posts
Posted: Monday, March 30, 2020 - 05:46 PM UTC
Pedro,
That is a thing of beauty!
"Artillery adds dignity, to what would otherwise be an ugly brawl."
Frederick The Great
#041
Kobenhavn, Denmark
Joined: July 20, 2006
KitMaker: 10,069 posts
AeroScale: 3,788 posts
Posted: Monday, March 30, 2020 - 07:04 PM UTC
Wow, Pedro. That cockpit is absolutly astonishing! A real work of art.
Campaign'oholic - 252+ campaigns completed
New Jersey, United States
Joined: February 02, 2015
KitMaker: 330 posts
AeroScale: 286 posts
Posted: Thursday, April 02, 2020 - 09:38 AM UTC
pedro nice start to your build. your cockpit looks great.
i got my decals. below is the aircraft i plan on making but i am having a hard time finding any diagrams of the squiggle camo on the starbord side fuselage and both wings. can anyone help me out. also i know it is not the standard splinter pattern under the squiggles,there are patches of brown violet but where and shape are hard to tell. any help would be appreciated.

![20200328_142316[1]](../../live.staticflickr.com/65535/49728856786_3a25be3bcc_z.jpg)
" BORDER="0">
i started the cockpit and such, not quite as far along as pedro. i am going with a scratch made interior instead of photo etch.i will post soon.
please if anyone has some info or a site they know on the squiggle pattern, hopefully it wont be one i checked out already
joe
New Jersey, United States
Joined: February 02, 2015
KitMaker: 330 posts
AeroScale: 286 posts
Posted: Thursday, April 02, 2020 - 02:55 PM UTC
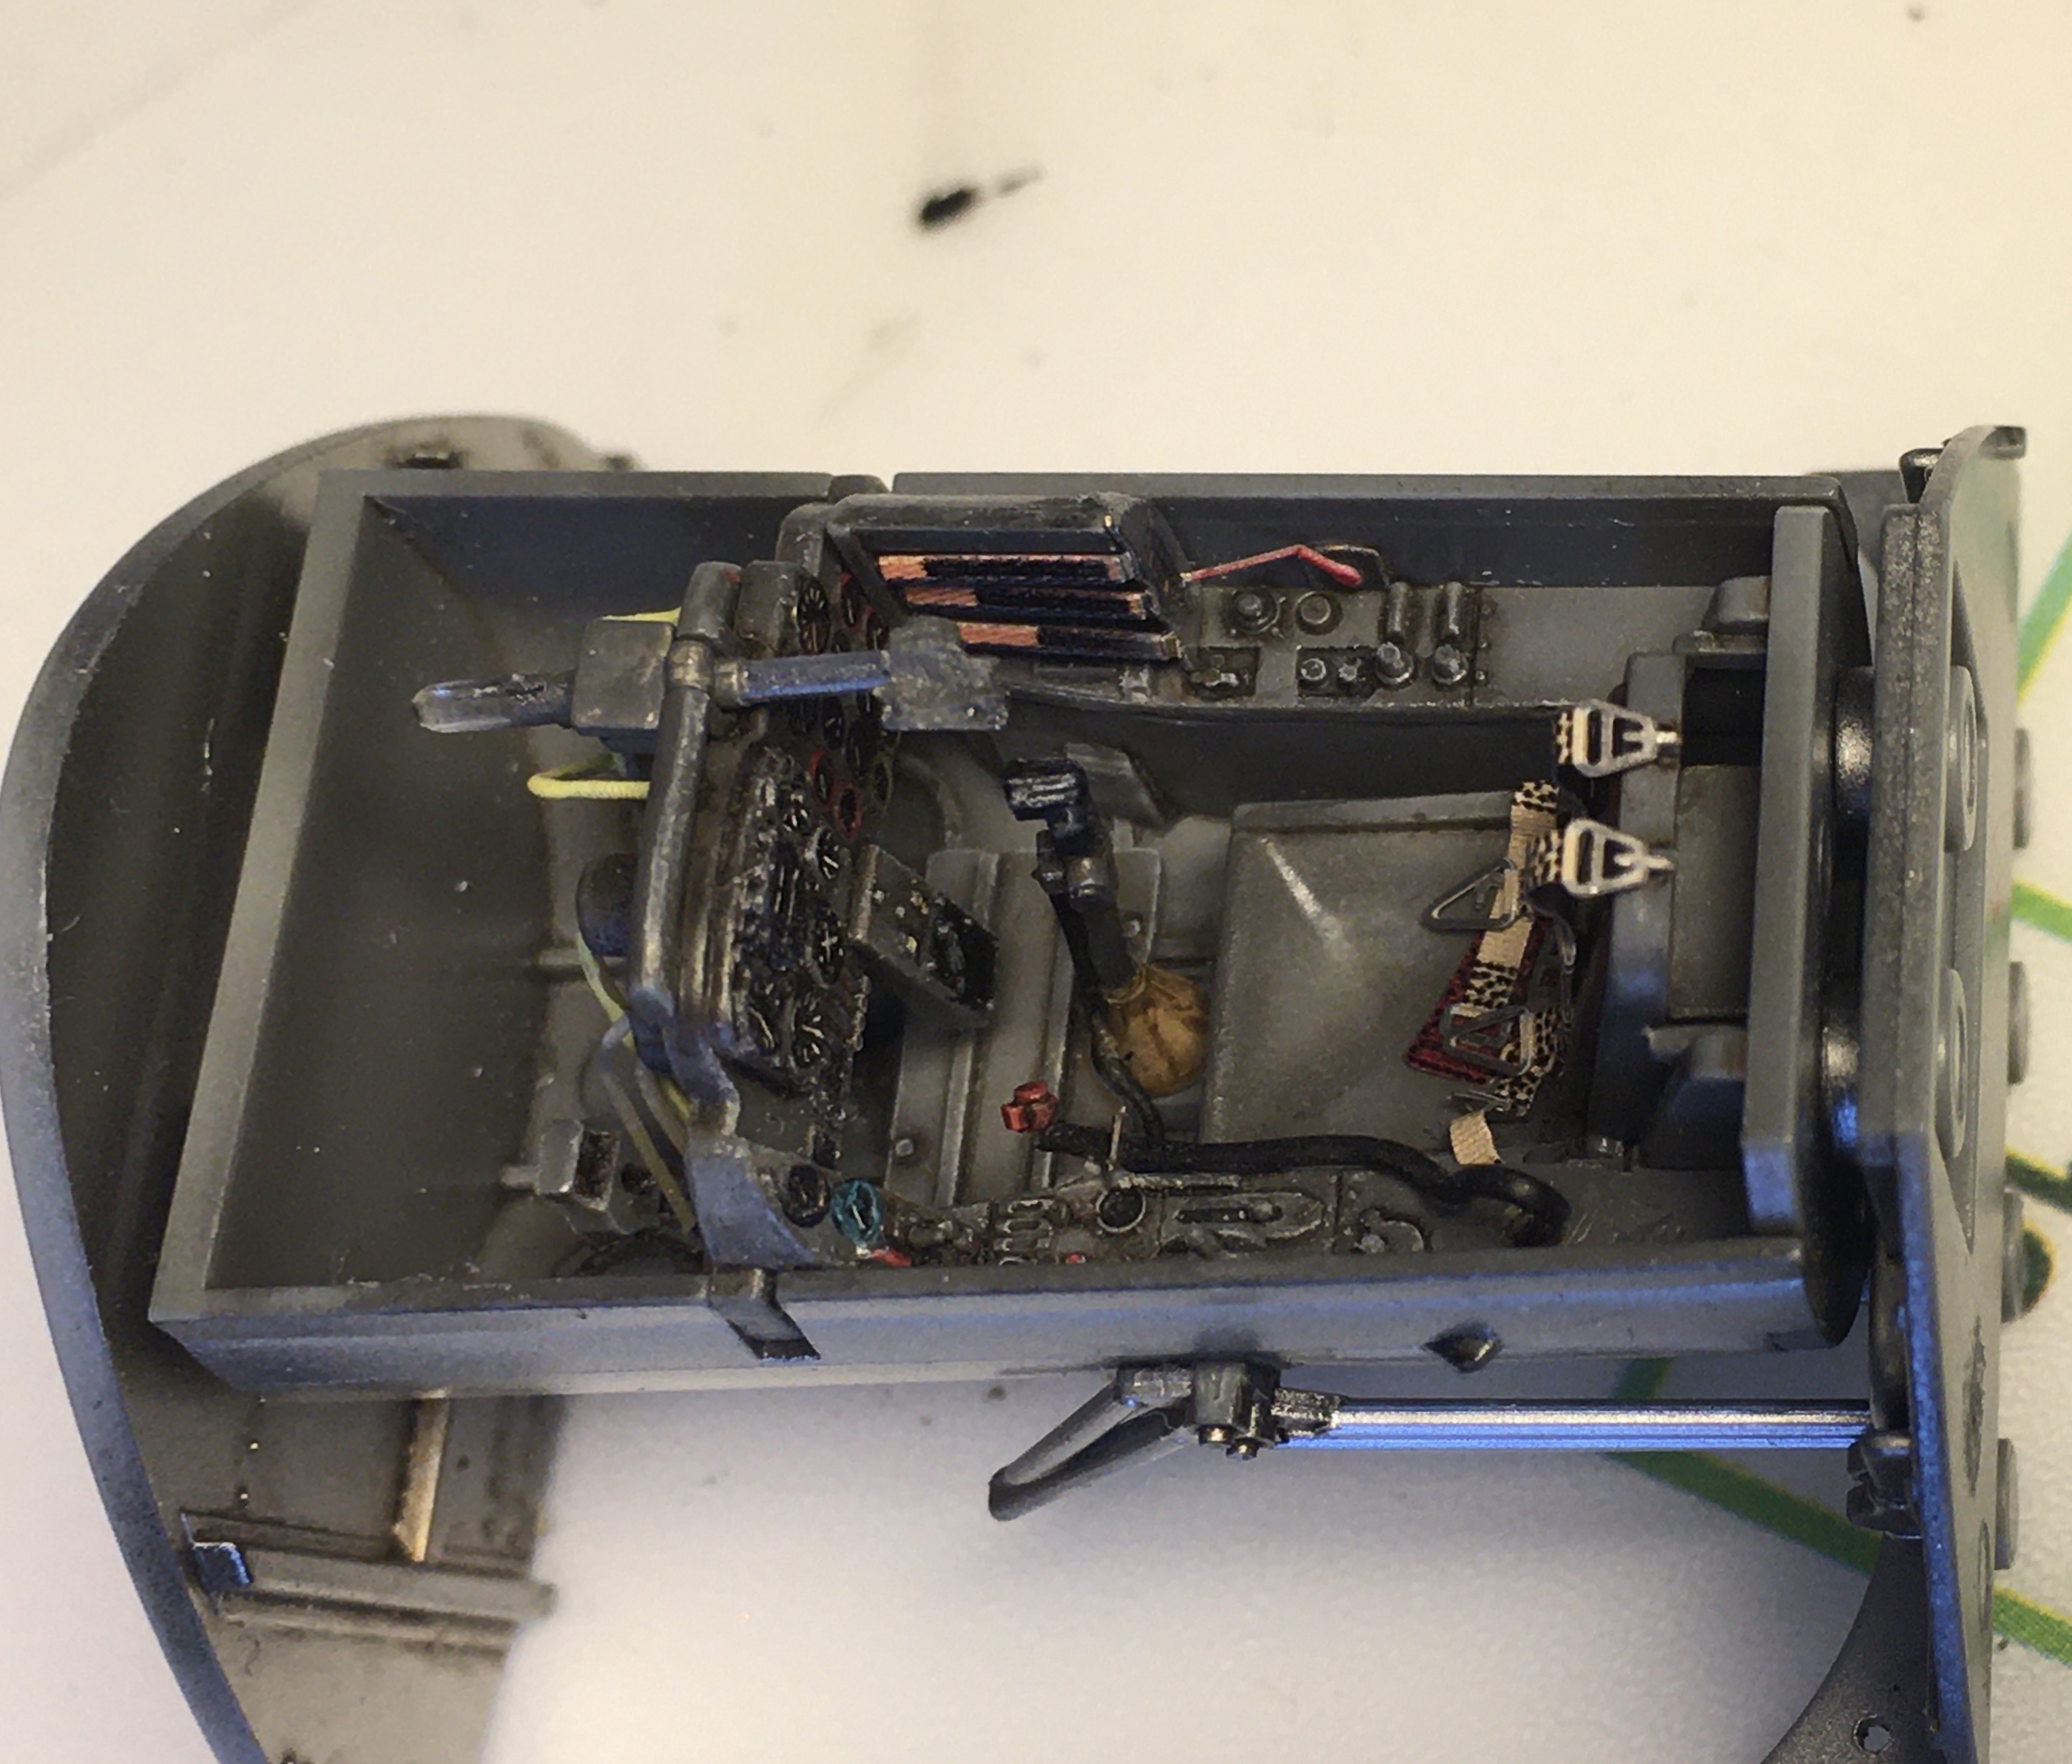
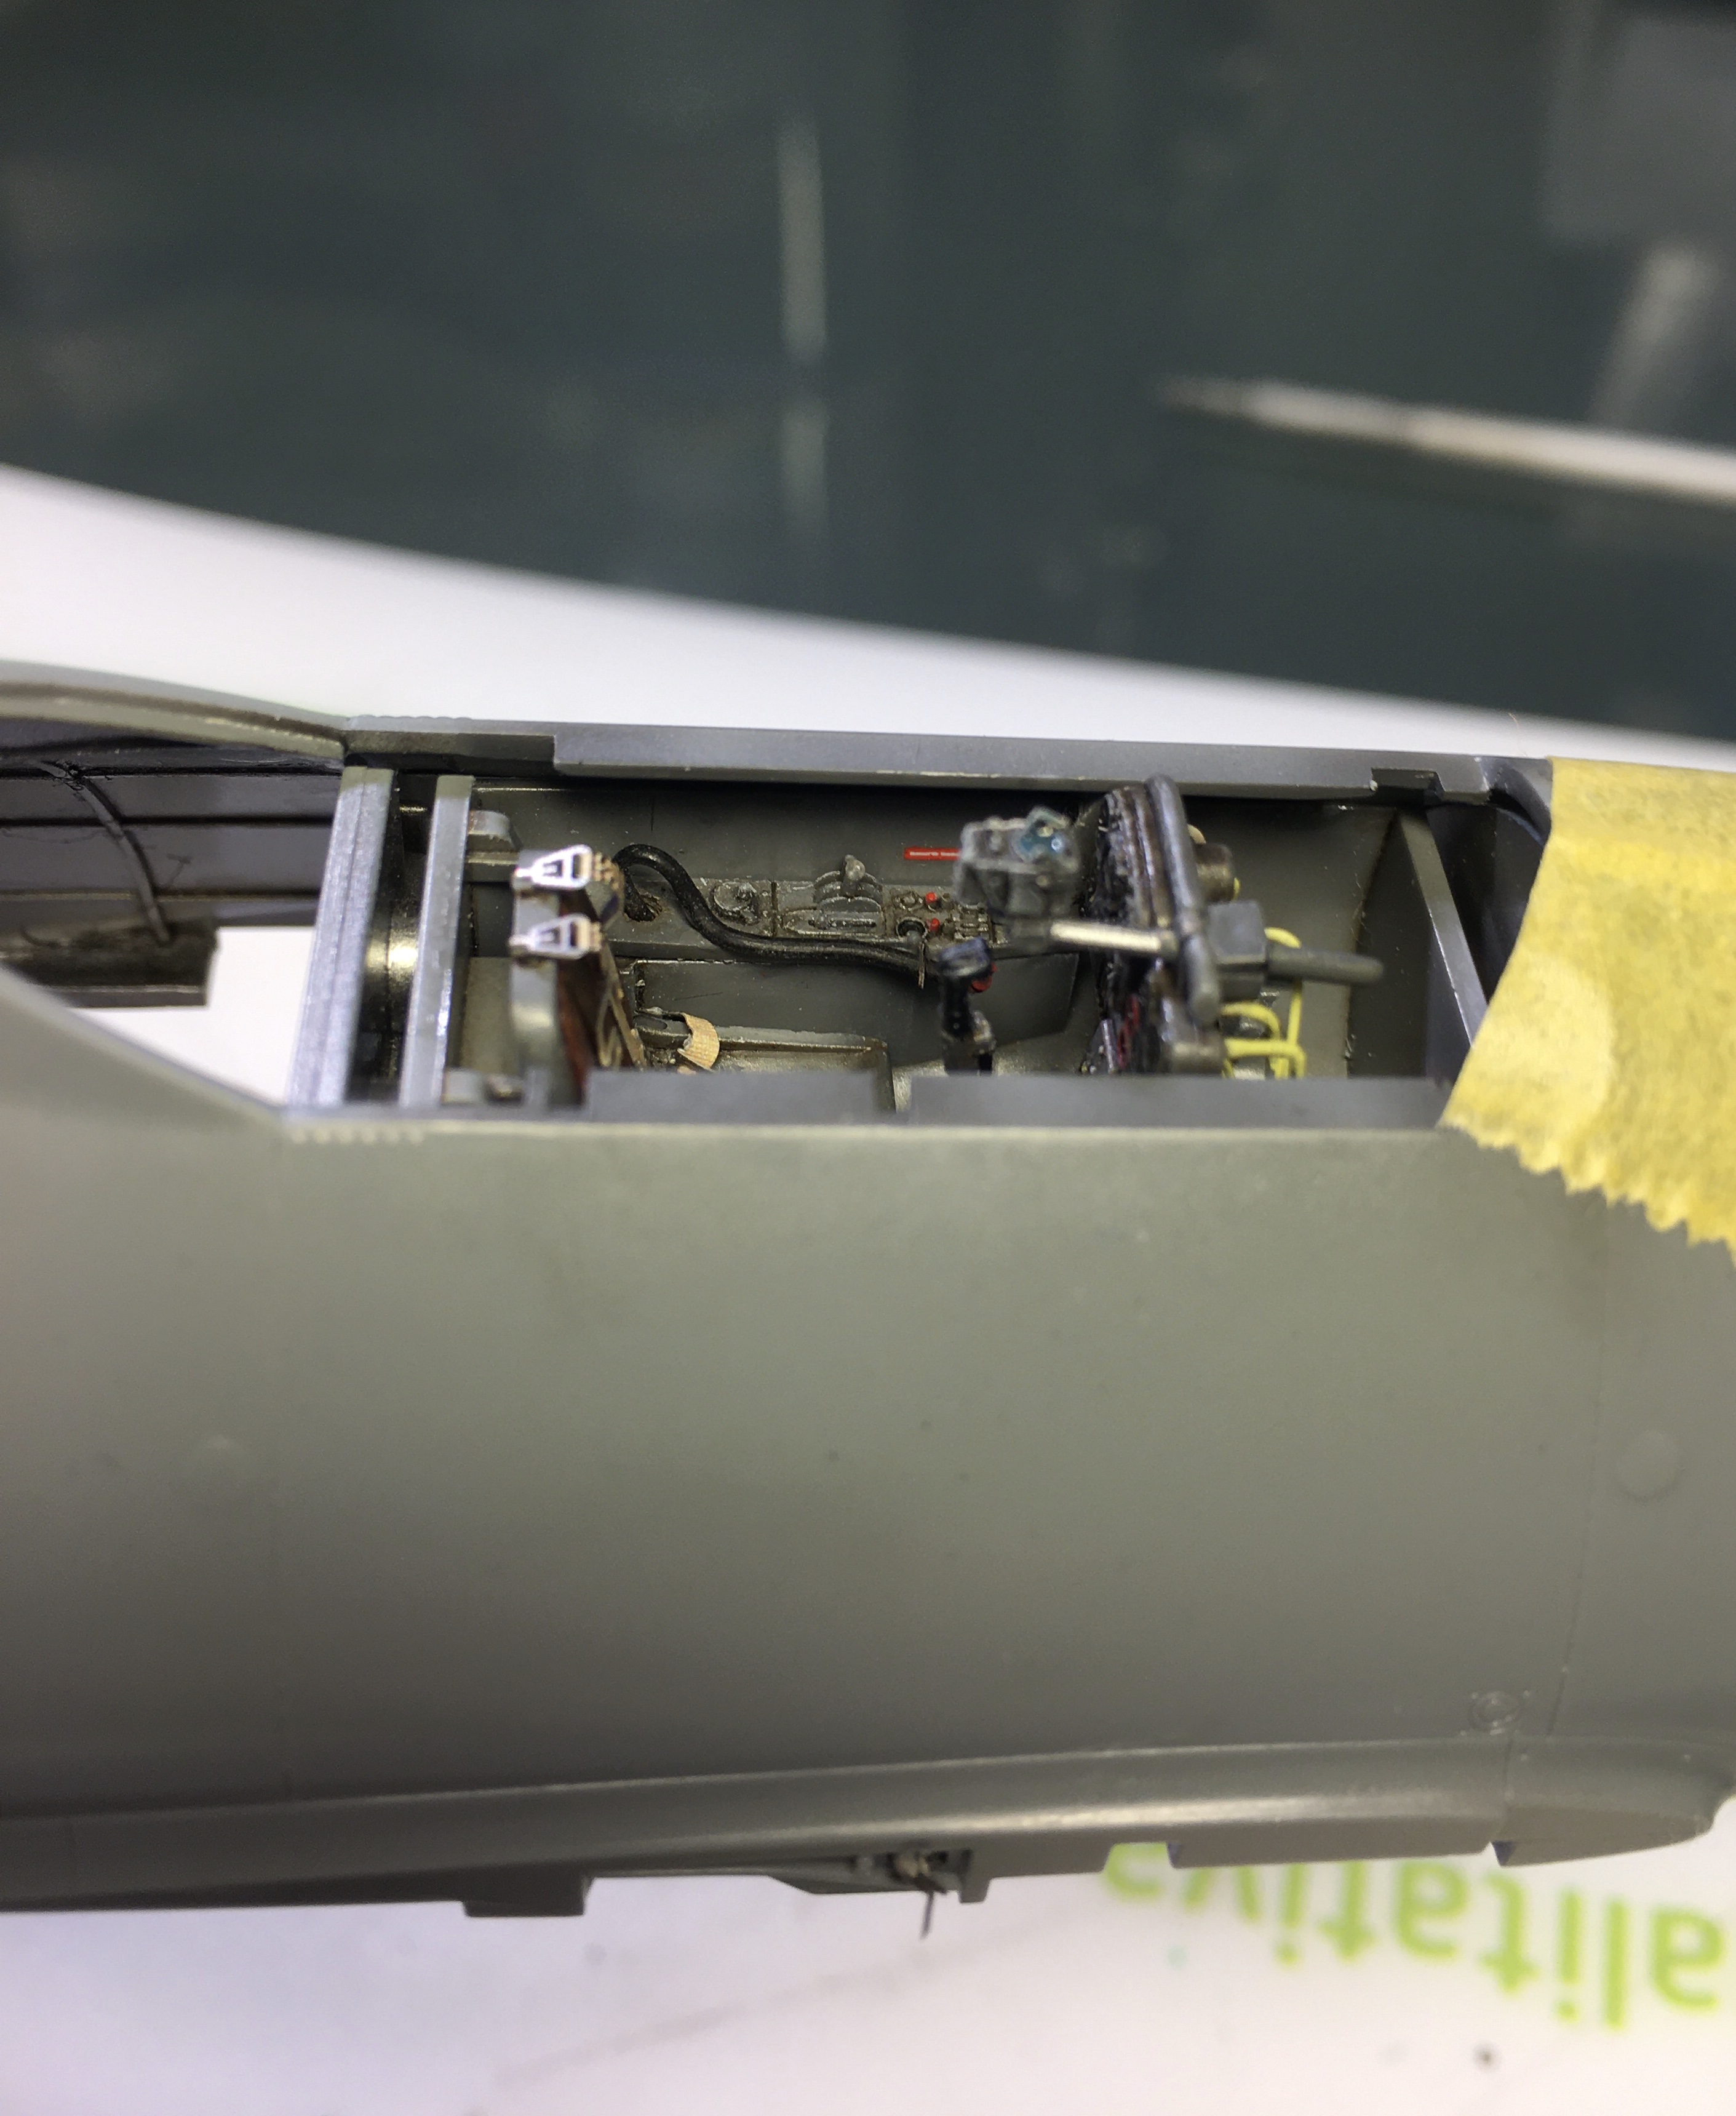
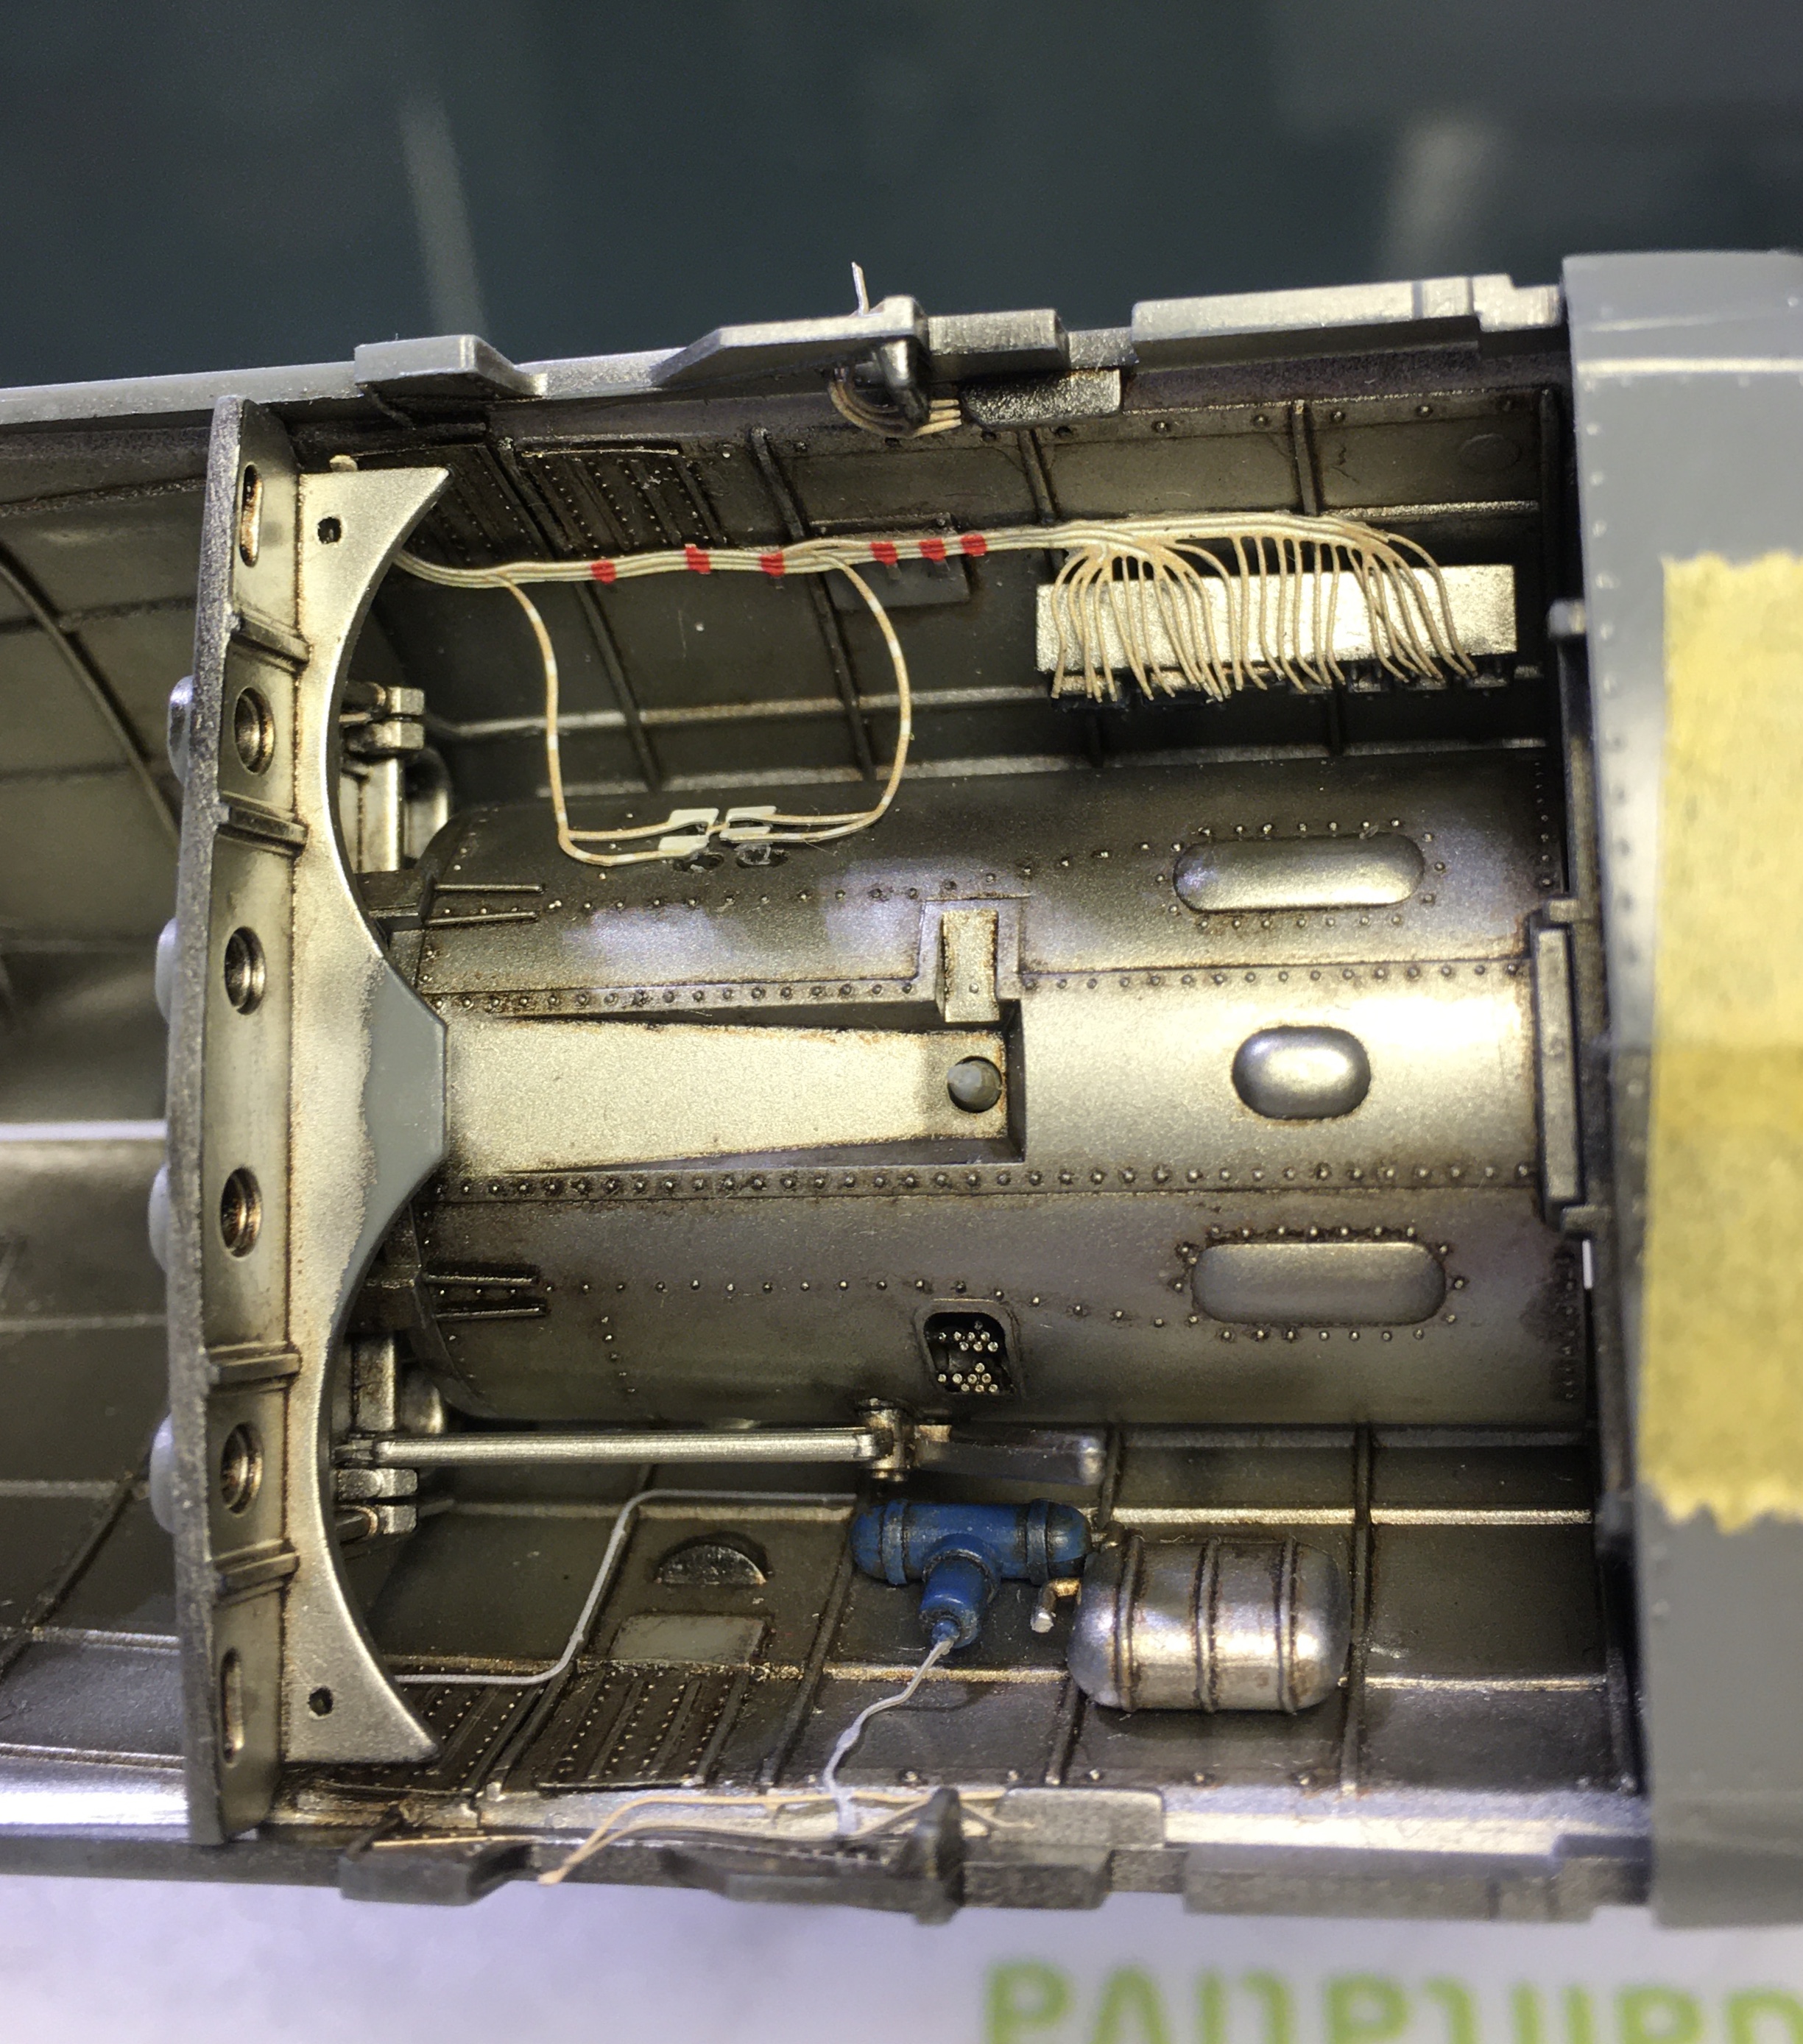
update on the cockpit.made the harness from brass binder ties with left over bits from some photo etch. i think i am going to redo the right shoulder belt though.scratch made the throttle levers from plastic strip and rod.i am using the cockpit decals from the kit, working on the IP and finishing up the gun bay too.
![20200402_214542[1]](../../live.staticflickr.com/65535/49729473901_8517049e6d_z.jpg)
" BORDER="0">
![20200402_214432[1]](../../live.staticflickr.com/65535/49729482381_0f889c2d2b_z.jpg)
" BORDER="0">
#424
Queensland, Australia
Joined: April 23, 2015
KitMaker: 4,648 posts
AeroScale: 1,938 posts
Posted: Thursday, April 02, 2020 - 06:40 PM UTC
Joe,
that cockpit looks great! Not much help for the camo, I'm sorry. Pictures from that period are really hard to figure out.
"Artillery adds dignity, to what would otherwise be an ugly brawl."
Frederick The Great
New Jersey, United States
Joined: February 02, 2015
KitMaker: 330 posts
AeroScale: 286 posts
Posted: Friday, April 03, 2020 - 02:39 AM UTC
thanks gary. i still need to give it a wash, iwanted to ask pedro or anyone else who could what they used to thin the oil for the wash. i have the oils but am out of mineral spirits. the spirits always dissolved my protective clear anyway, any thing else i could use? i have tamiya yellow cap thinner, and little vallejo.
as for the camo, yes i know. i can't say how many searches i did to find something. i thought maybe someone here that is more experienced in the subject may be able to help. i did find some info on the pilot and of course it would have helped if i put the unit too. i didn't realize it was too small to read on my first post. i found some photos of die cast and built models but the camo did not match up to the port side. i believe too that the squiggles on the fuselage continued down onto the wings.
if anyone has any info the unit is-
9k+bn of 5/kg(j) 51 170068 at swabisch hall 12/44
pilot OLTN Georg Richter- KIA 2/14/45
one thing i have not done is a search of the pilot. i will do that.
thanks- joe
Lisboa, Portugal
Joined: August 27, 2010
KitMaker: 679 posts
AeroScale: 669 posts
Posted: Friday, April 03, 2020 - 11:35 AM UTC
Hey Joe,
Tomorrow Ill have a look at my 262 titles in my little library, I have a feeling of seeing a pic from that bird somewhere.
As for the squiggles (Wullenmuster) Im quite sure they were applied over the wings and elevators also, just look at other planes from the same unit. My model is also from that unit though it has no wullenmuster pattern, but the random green blotches field applied were also present over the horizontal surfaces.
About the question you pose regarding oils and washes:
- if you want to use oils (like I did) white spirit is necessary to dilute and clean. I never use anything but...
- what paint did you sprayed on the cockpit? Acrylic or other? If you go with oils for the wash you must always use an acrylic varnish to prevent paint corrosion from the minerals. Future or similar brands are quite useful.
As an alternative you can always use acrylics to do the subtle weathering and contrast with good results. I use that too...Vallejo paint, black and some red brown wood, mixed and well diluted in plain water. Just remember that acrylic over acrylic is also tricky. In this case use a non acrylic varnish before the wash to prevent damages.
Hope this helps
Cheers
Pedro
New Jersey, United States
Joined: February 02, 2015
KitMaker: 330 posts
AeroScale: 286 posts
Posted: Saturday, April 04, 2020 - 05:58 PM UTC
thanks for your help pedro. looking forward to see what you find.
as for the wash isn't mineral spirits and white spirits the same thing?
joe
Uusimaa, Finland
Joined: October 01, 2016
KitMaker: 514 posts
AeroScale: 239 posts
Posted: Sunday, April 05, 2020 - 05:07 AM UTC
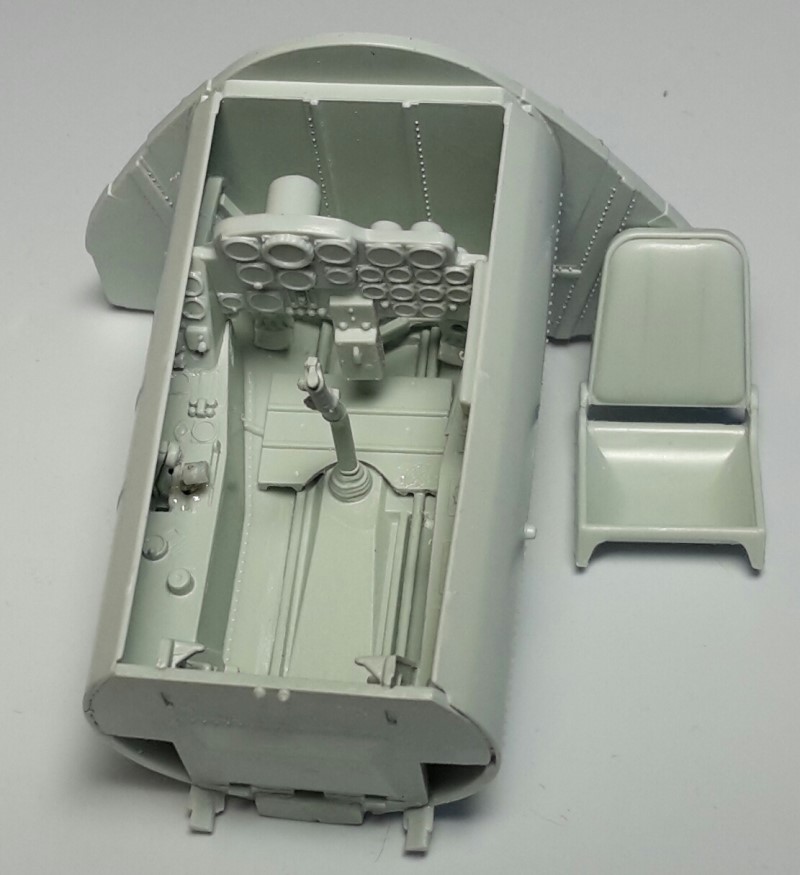
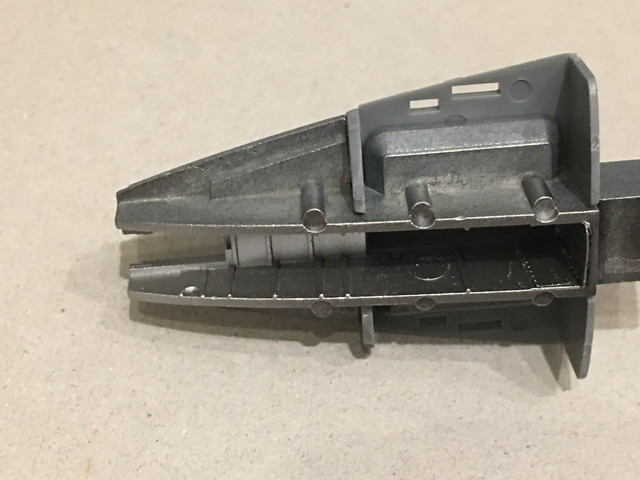
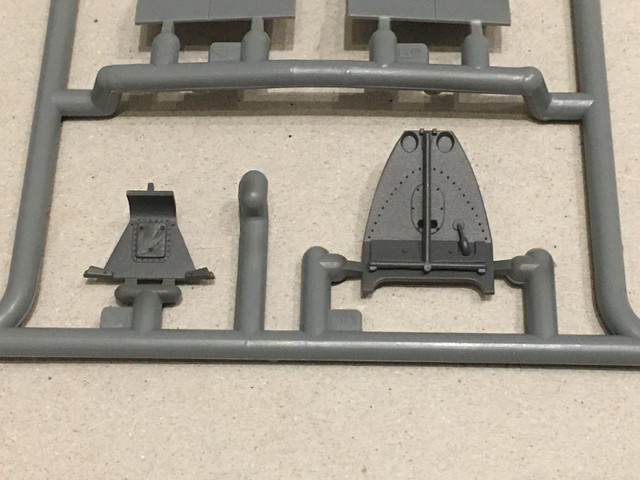
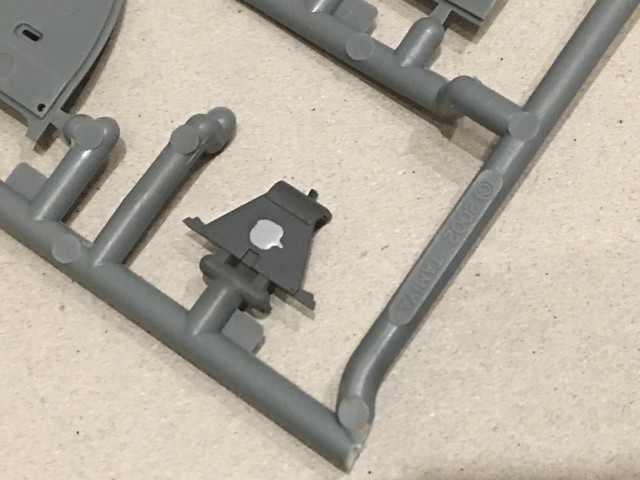
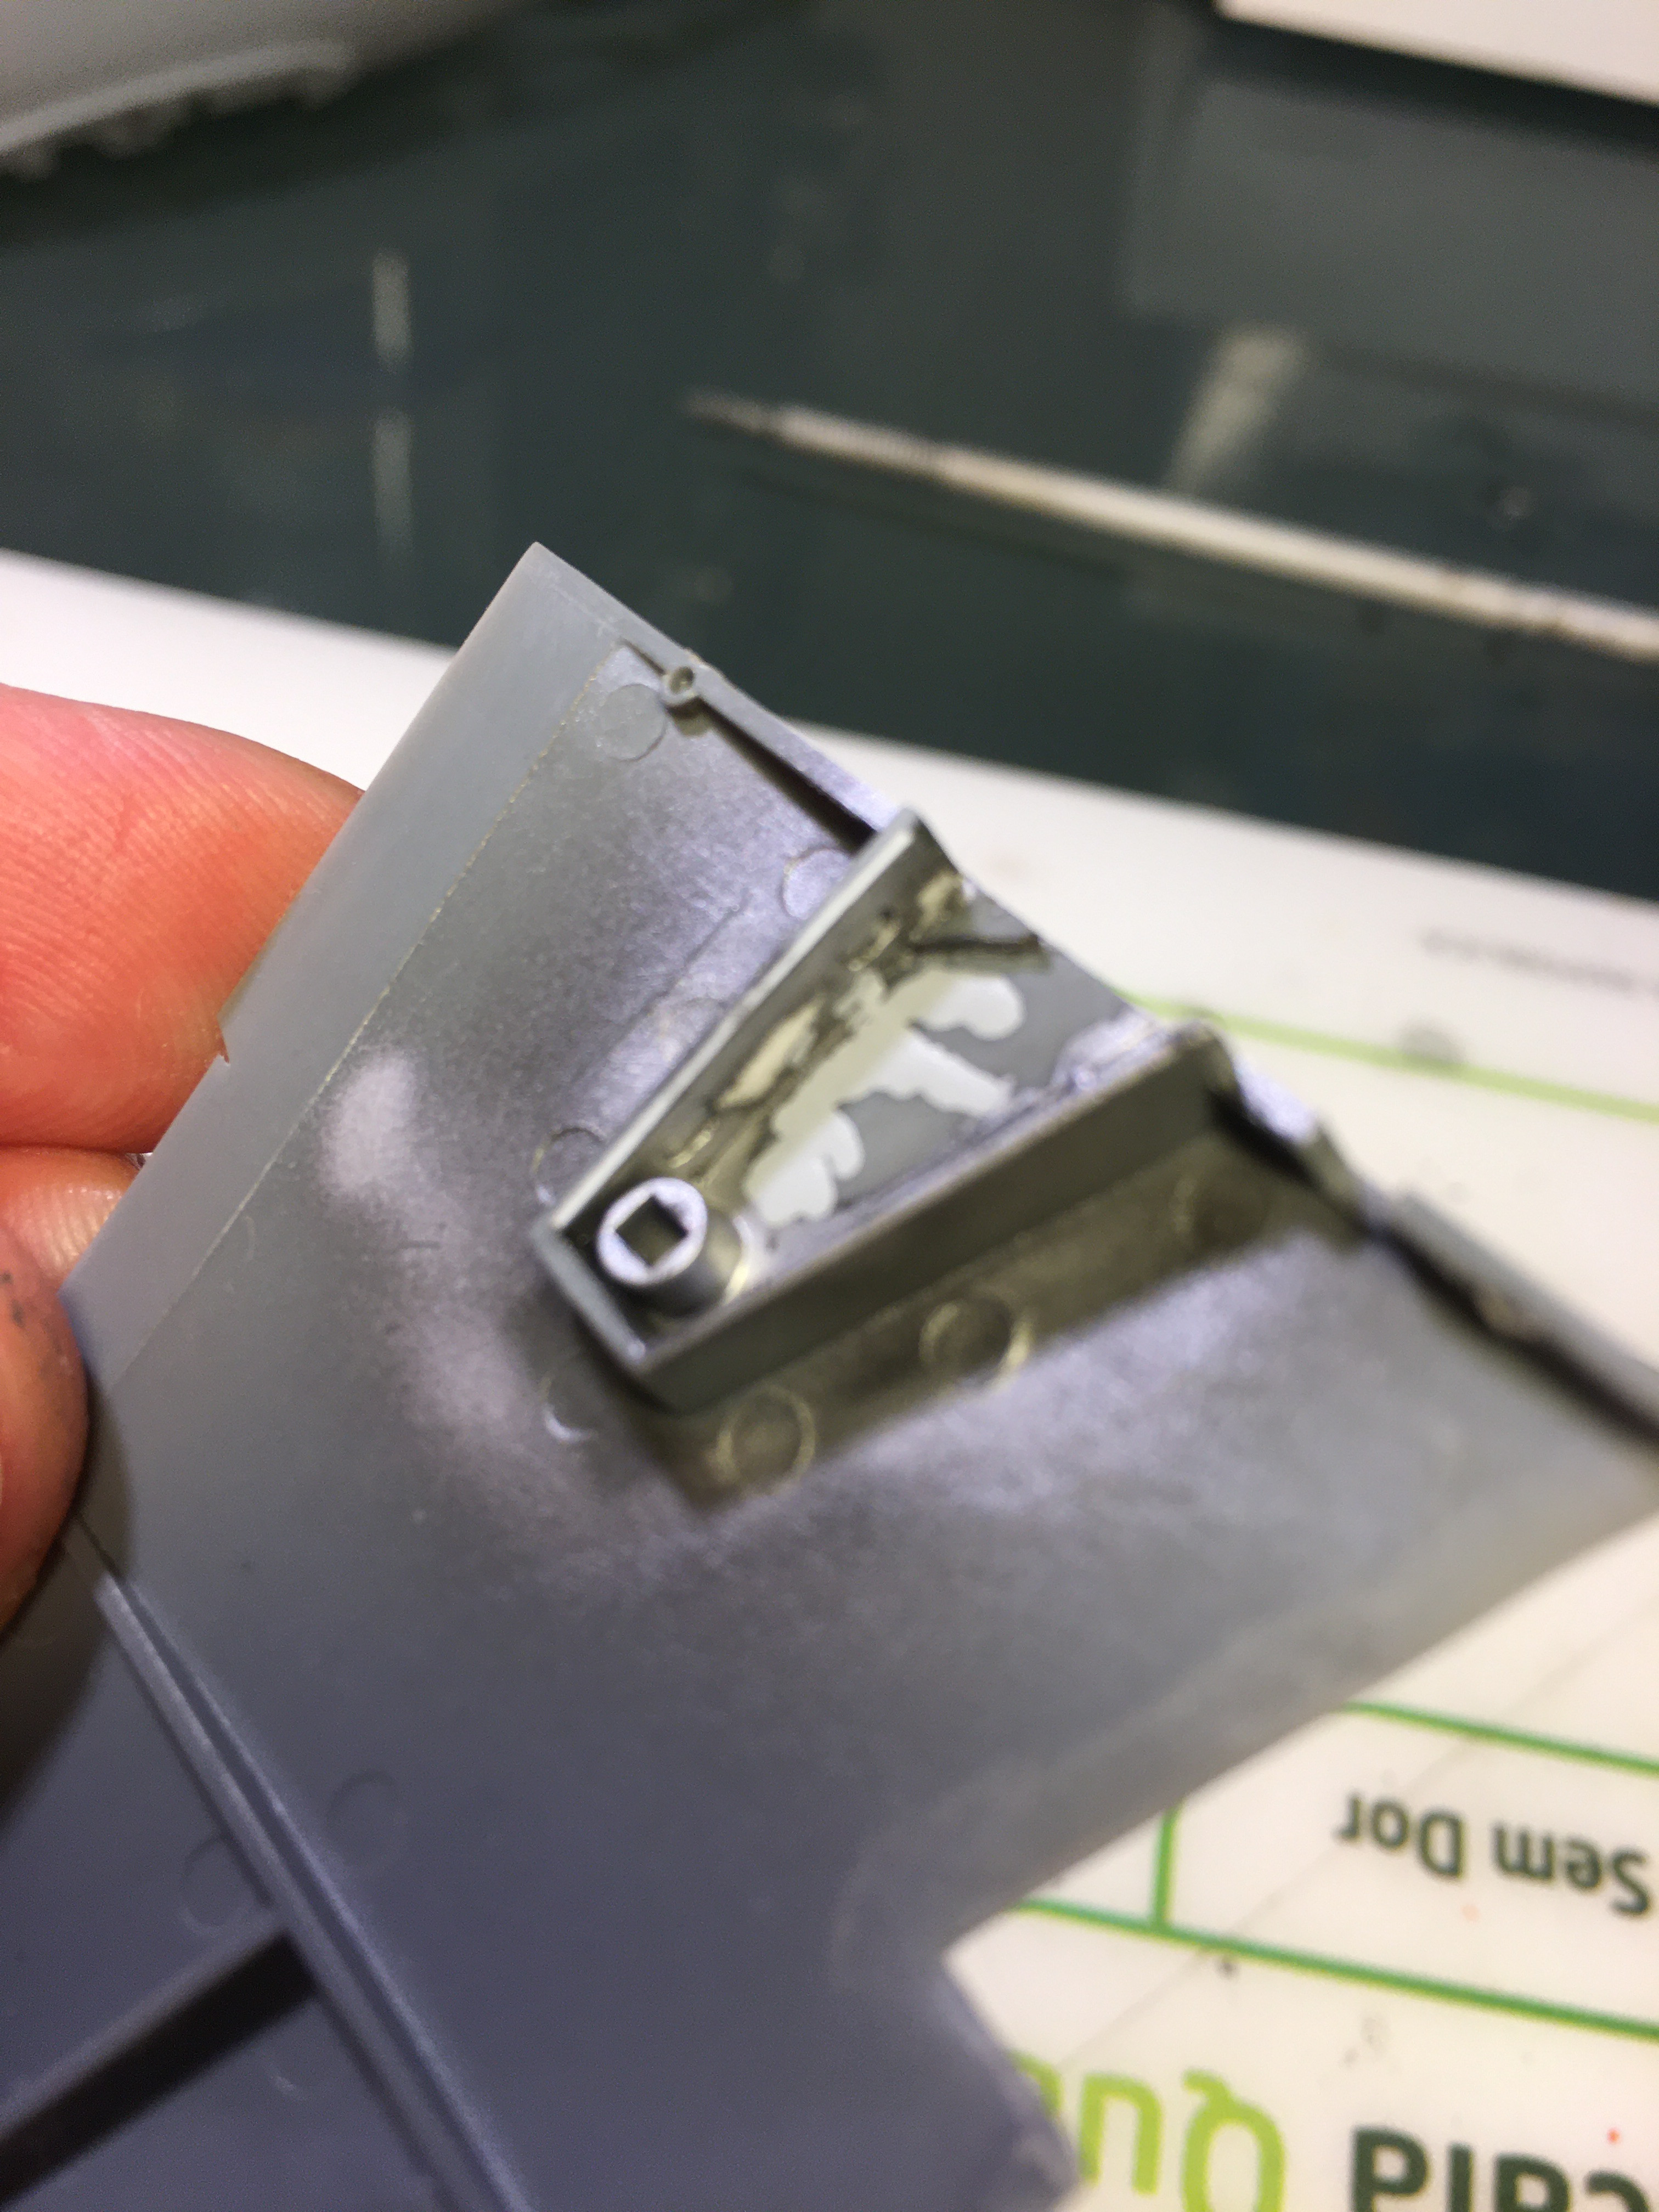
I lost one of the parts and had to remake it from brass and styrene tubing. Not perfect, but good enough for me. I'll make the two part handle to more like two part handle once glue dries. Little bit of carving should do it.
I've had quite mixed experiences with Revell kits, but the 32 scale 262 looks quite nice so far.
#424
Queensland, Australia
Joined: April 23, 2015
KitMaker: 4,648 posts
AeroScale: 1,938 posts
Posted: Sunday, April 05, 2020 - 10:15 AM UTC
That cockpit looks wonderful, Pasi.
"Artillery adds dignity, to what would otherwise be an ugly brawl."
Frederick The Great
Lisboa, Portugal
Joined: August 27, 2010
KitMaker: 679 posts
AeroScale: 669 posts
Posted: Monday, April 06, 2020 - 03:45 AM UTC
Quoted Text
thanks for your help pedro. looking forward to see what you find.
as for the wash isn't mineral spirits and white spirits the same thing?
joe
Joe,
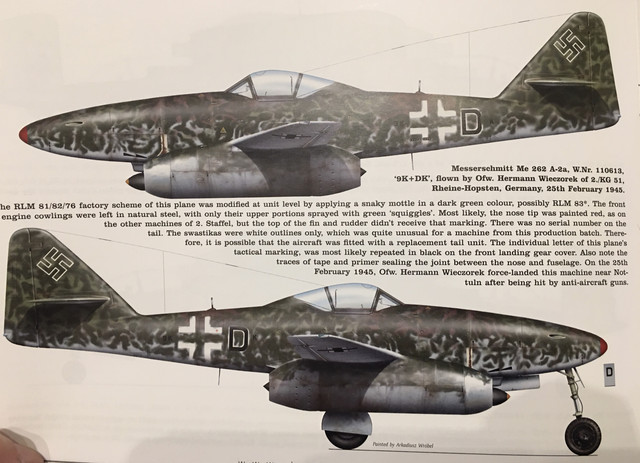
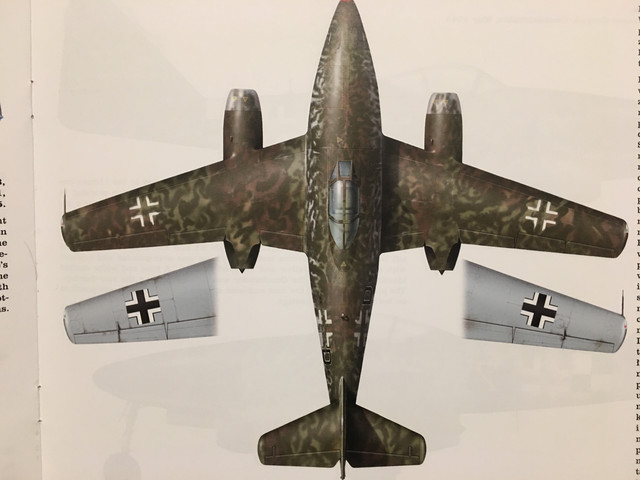
The only pic I could find that might be the plane depicted in the decals sheet is the one below, taken from the book Battle over Bavaria. The caption says the plane and pilots are from KG(J) 54, so not the same unit your decal sheet says, but either can be wrong, or this is probably a different 262 altogether. However the camo is very look alike, and one can see it extends from the fuselage to the wings.
Ive seen this photo on some online site, but couldnt find it so I took the pic from the book.

And yes, when I say minerals I was referring white spirit :-)
Cheers
Pedro
New Jersey, United States
Joined: February 02, 2015
KitMaker: 330 posts
AeroScale: 286 posts
Posted: Monday, April 06, 2020 - 04:01 AM UTC
Thank you pedro. i just found in the back of my stash last night a large testors bottle that i taped a label to marked mineral spirits. not much left and i don't remember marking it but it should be enough. it will not eat away the future clear?
i will do the best i can with the little info on the camo i have. thank you for your help pedro. i look forward to comparing builds when complete.
joe
Lisboa, Portugal
Joined: August 27, 2010
KitMaker: 679 posts
AeroScale: 669 posts
Posted: Tuesday, April 07, 2020 - 07:21 AM UTC
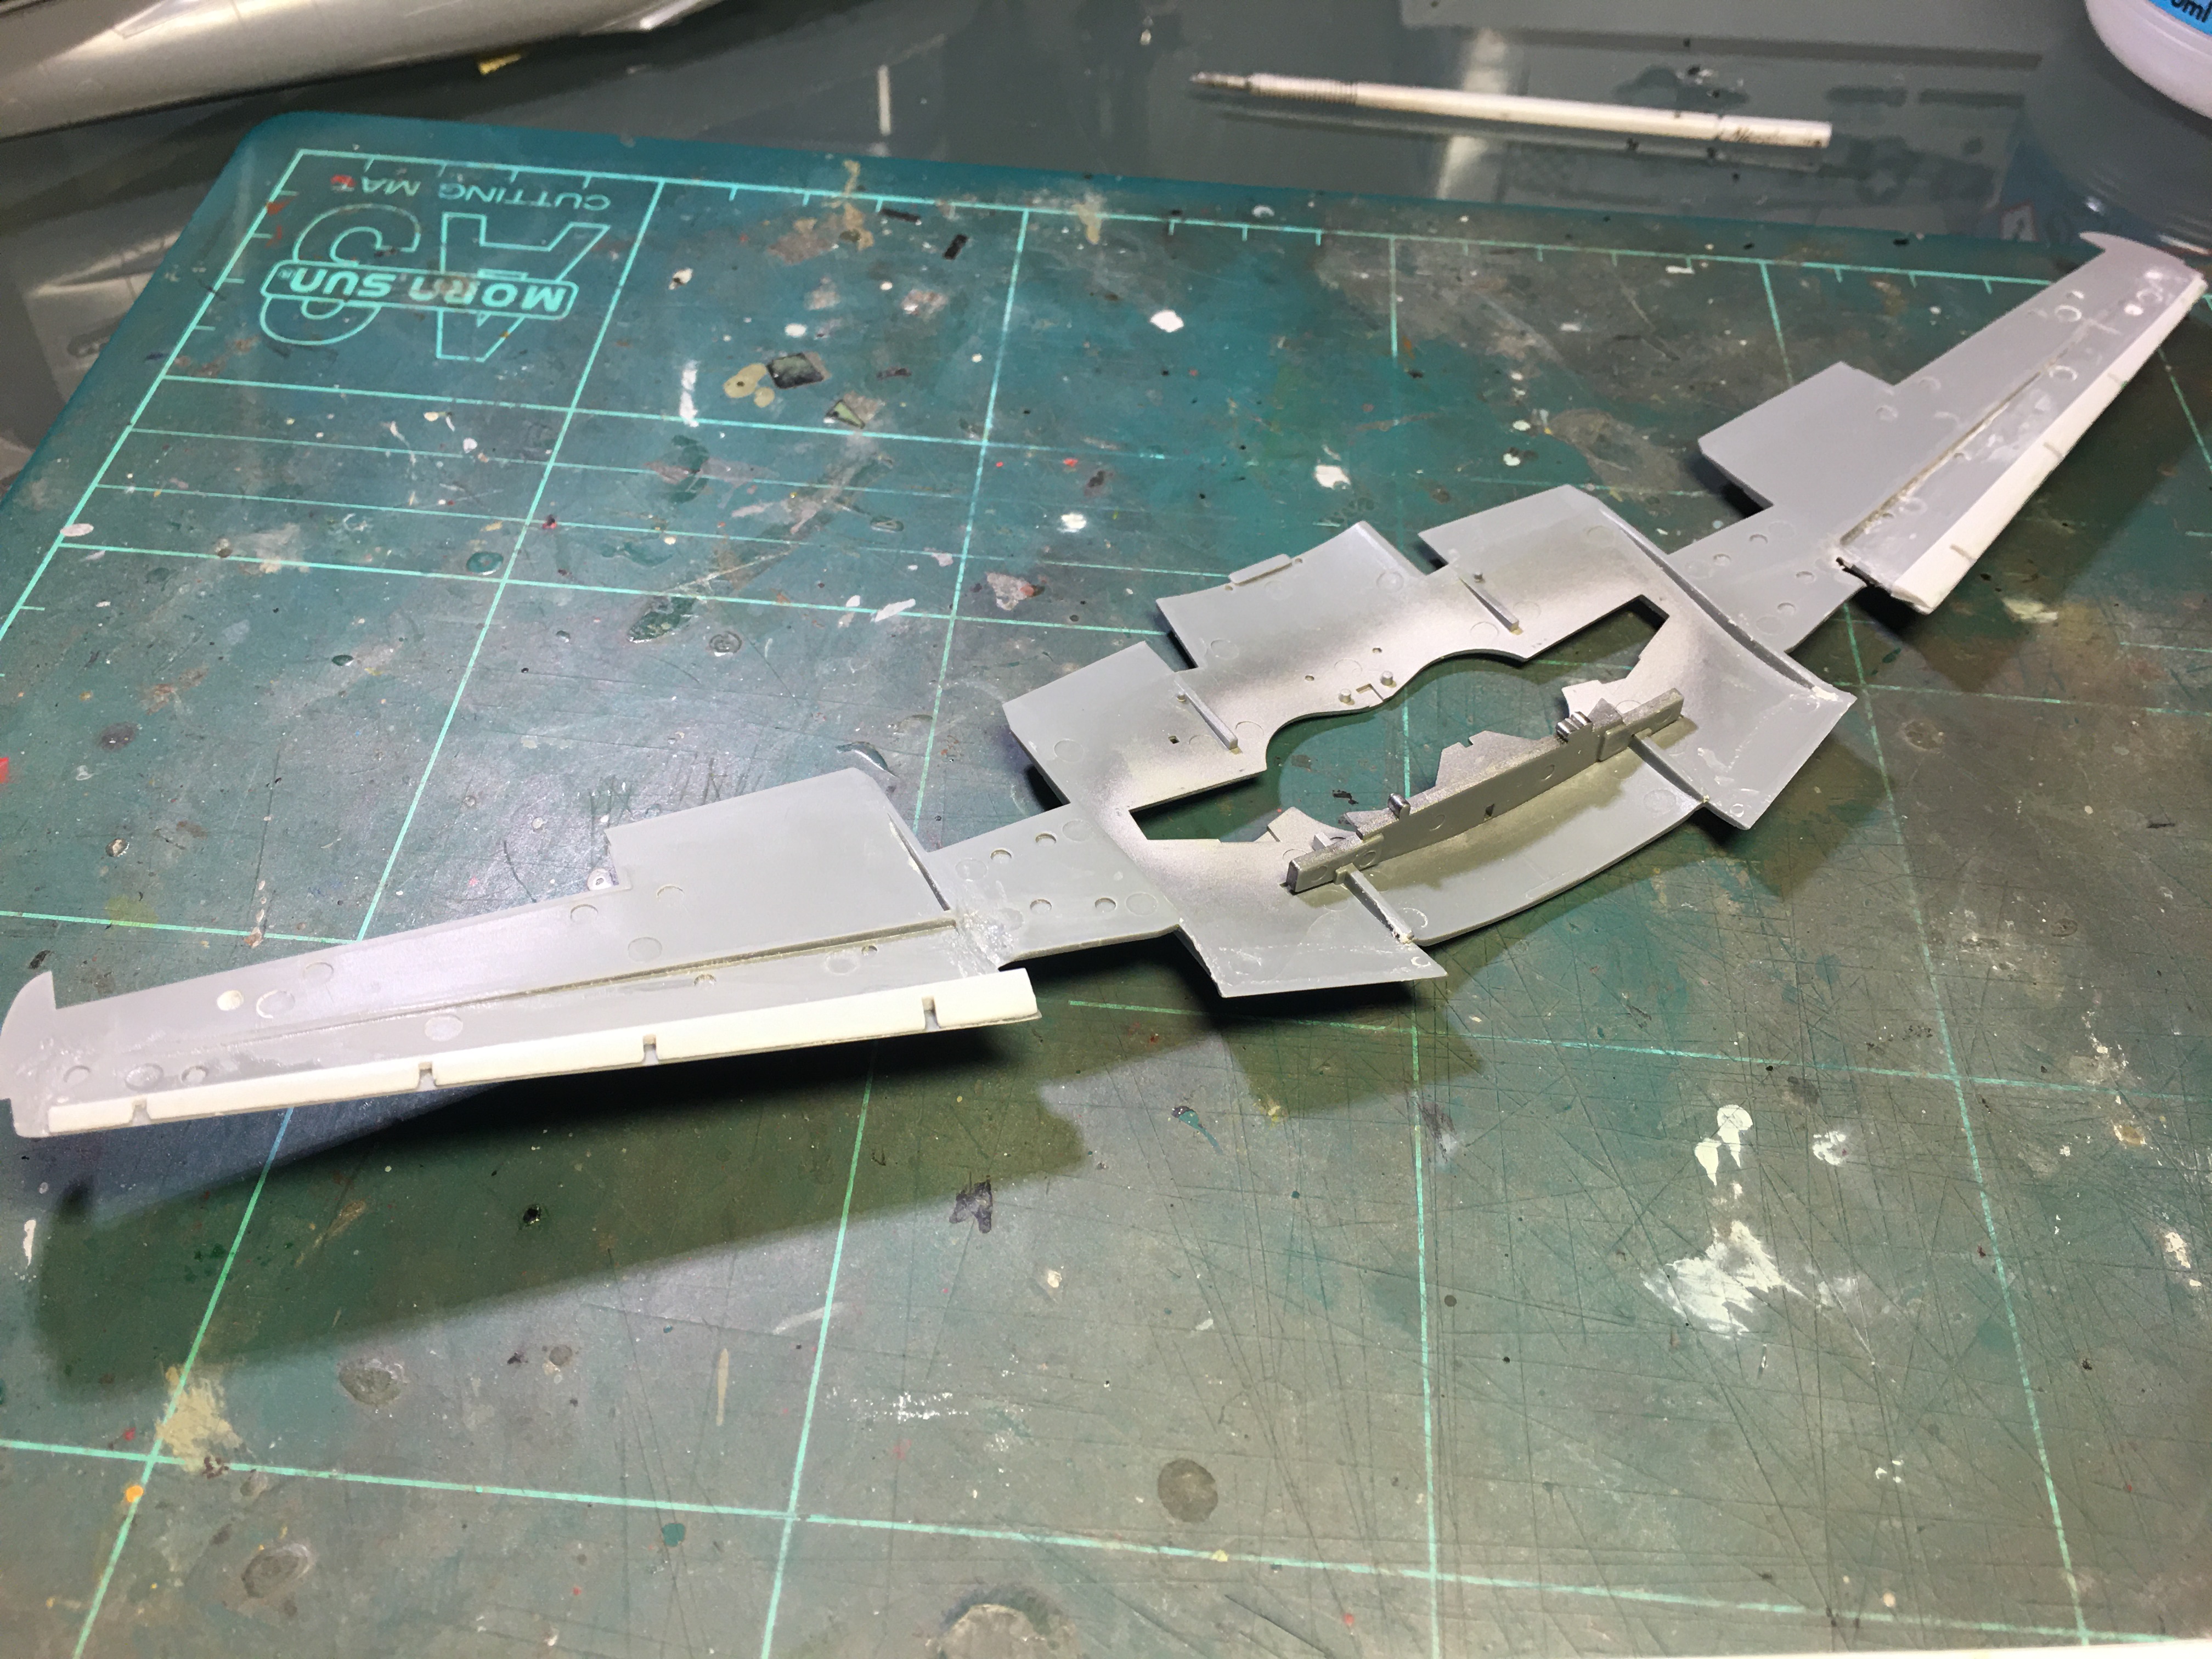
A brief update
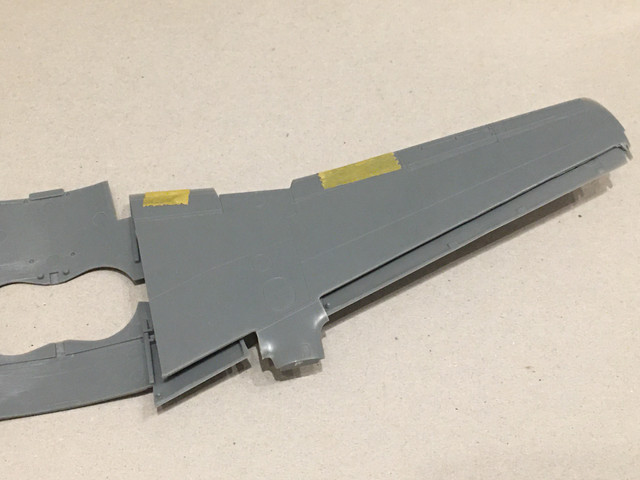
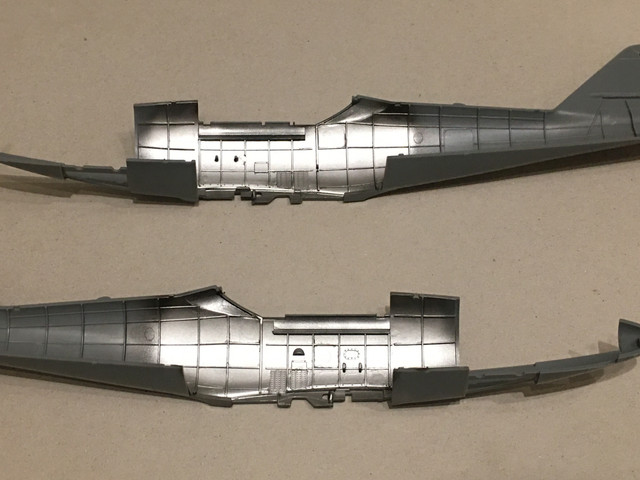
Cockpit is now done, working around the wheel pits. Also done some cutting and glue with the resin slats and flaps, and these are looking like they wont be an easy assembly. Will need to remake some plastic areas that were cut in excess.
Cheers
Pedro
#424
Queensland, Australia
Joined: April 23, 2015
KitMaker: 4,648 posts
AeroScale: 1,938 posts
Posted: Tuesday, April 07, 2020 - 11:06 AM UTC
Thats smart looking work, Pedro!
"Artillery adds dignity, to what would otherwise be an ugly brawl."
Frederick The Great
Lisboa, Portugal
Joined: August 27, 2010
KitMaker: 679 posts
AeroScale: 669 posts
Posted: Tuesday, April 07, 2020 - 11:15 AM UTC