Joe,
That wiring harness looks good enough for my eyes.
Actually, the masks were applied to the upper surface of the wings as it’s very difficult to work the other way around.
The mask cutter I used is called the Silhouette Portrait. There are other makers like Cricut. It is very handy, but not really good at small stencils. I think the smallest numerals I’ve had success with were about 2mm tall.
Air Campaigns
Want to start or join a group build? This is where to start.
Want to start or join a group build? This is where to start.
Hosted by Frederick Boucher, Michael Satin
OFFICIAL: Schwalbe II
Posted: Tuesday, April 28, 2020 - 02:01 PM UTC
Posted: Tuesday, May 05, 2020 - 05:21 PM UTC
I had to sand off most of the canopy detail to get the three parts to align properly. It's meant to be built with the canopy open. But I rarely do that.
I didn't want to mask alone, for I feared that the masks, once lifted, would look off-kilter. So, I decided to try the decal method.
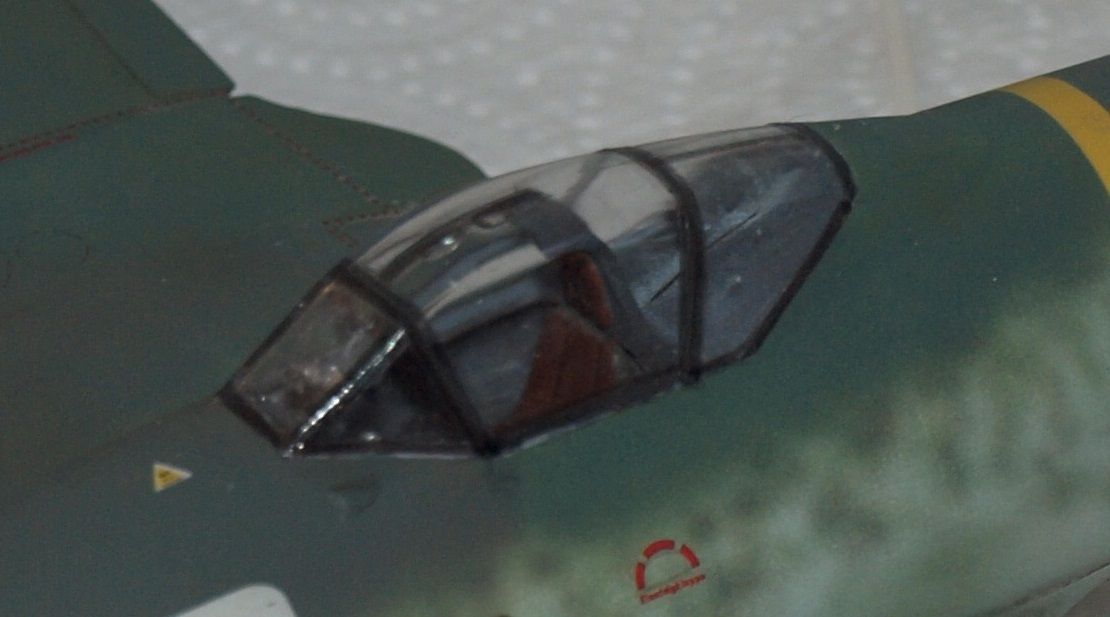
It came out alright, but the decals are a little transparent. So, once they've dried overnight, I'll be able to paint them to a more solid finish.
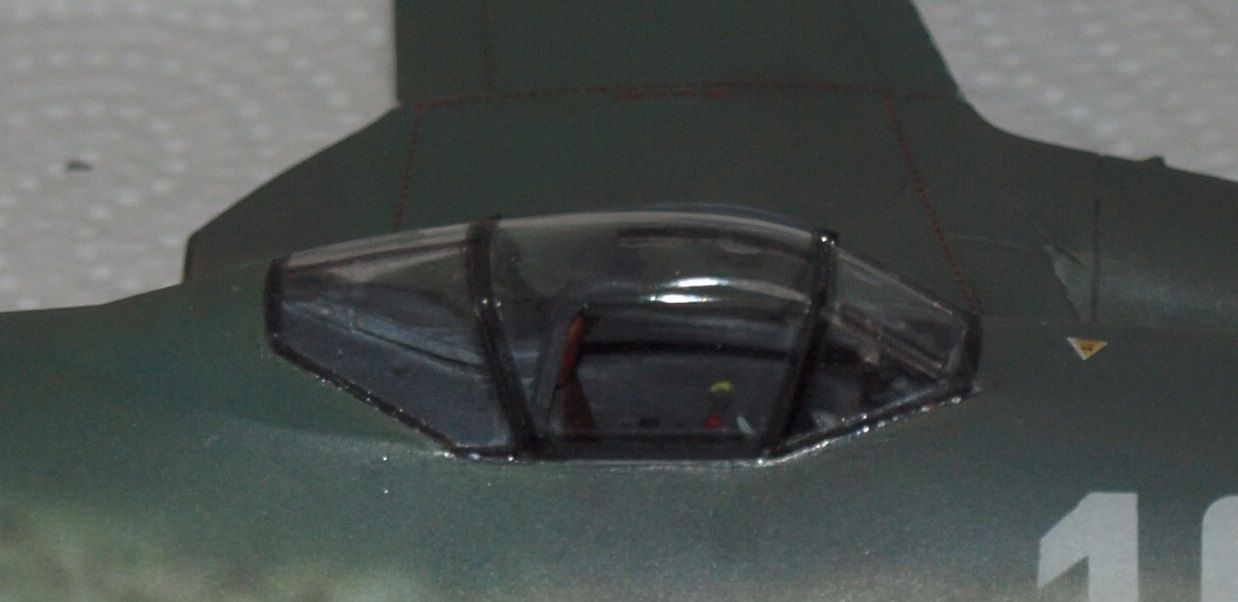
It was a tedious process and the wet decals liked to stick to anything else but the but the smooth canopy parts. In the end, it was easy to let the parts sink onto the canopy, than to try to press them into place.
Happy modelling!
I didn't want to mask alone, for I feared that the masks, once lifted, would look off-kilter. So, I decided to try the decal method.

It came out alright, but the decals are a little transparent. So, once they've dried overnight, I'll be able to paint them to a more solid finish.

It was a tedious process and the wet decals liked to stick to anything else but the but the smooth canopy parts. In the end, it was easy to let the parts sink onto the canopy, than to try to press them into place.
Happy modelling!

bomber14

Joined: February 02, 2015
KitMaker: 330 posts
AeroScale: 286 posts

Posted: Wednesday, May 06, 2020 - 12:57 AM UTC
gary i had to do the same thing for my hurricane build when i messed up the masking of the kit part. i had to vacume form a new one and the raised framing detail was too faint. of course i lost the canopy at a contest so i have to do it again. your canopy looks good i may do the same with my build.
joe
joe
Posted: Wednesday, May 06, 2020 - 04:46 PM UTC
Thank you, Joe! Hopefully my painting wont ruin it.
Posted: Thursday, May 07, 2020 - 04:11 PM UTC
HI all,
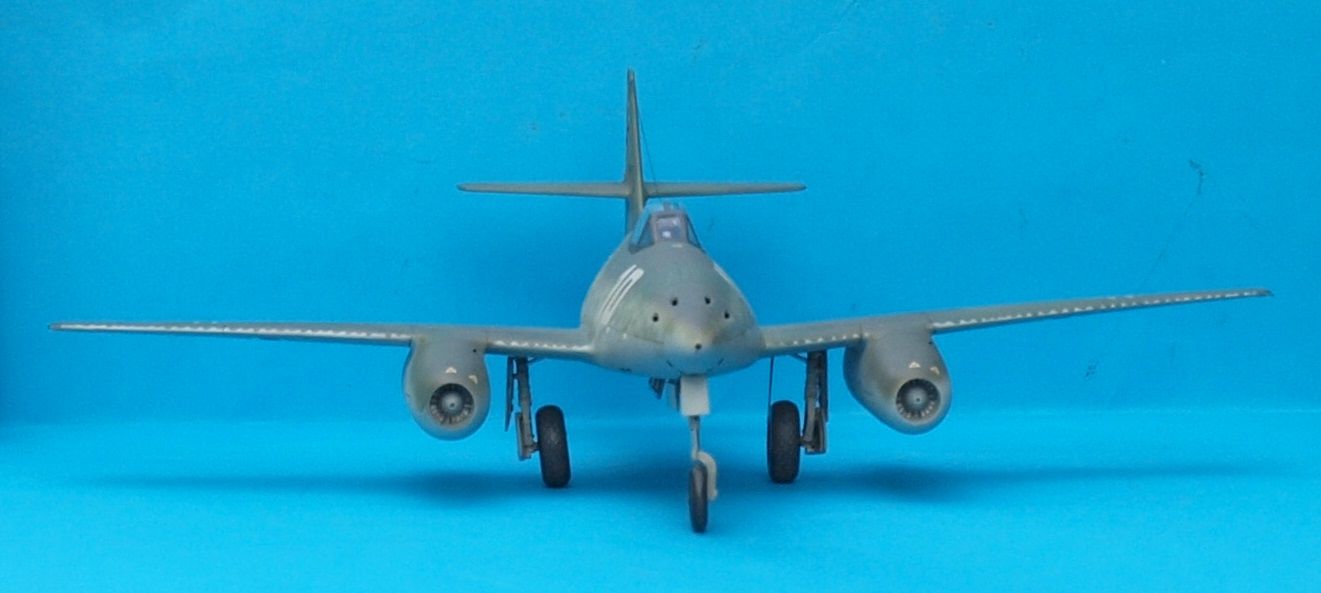
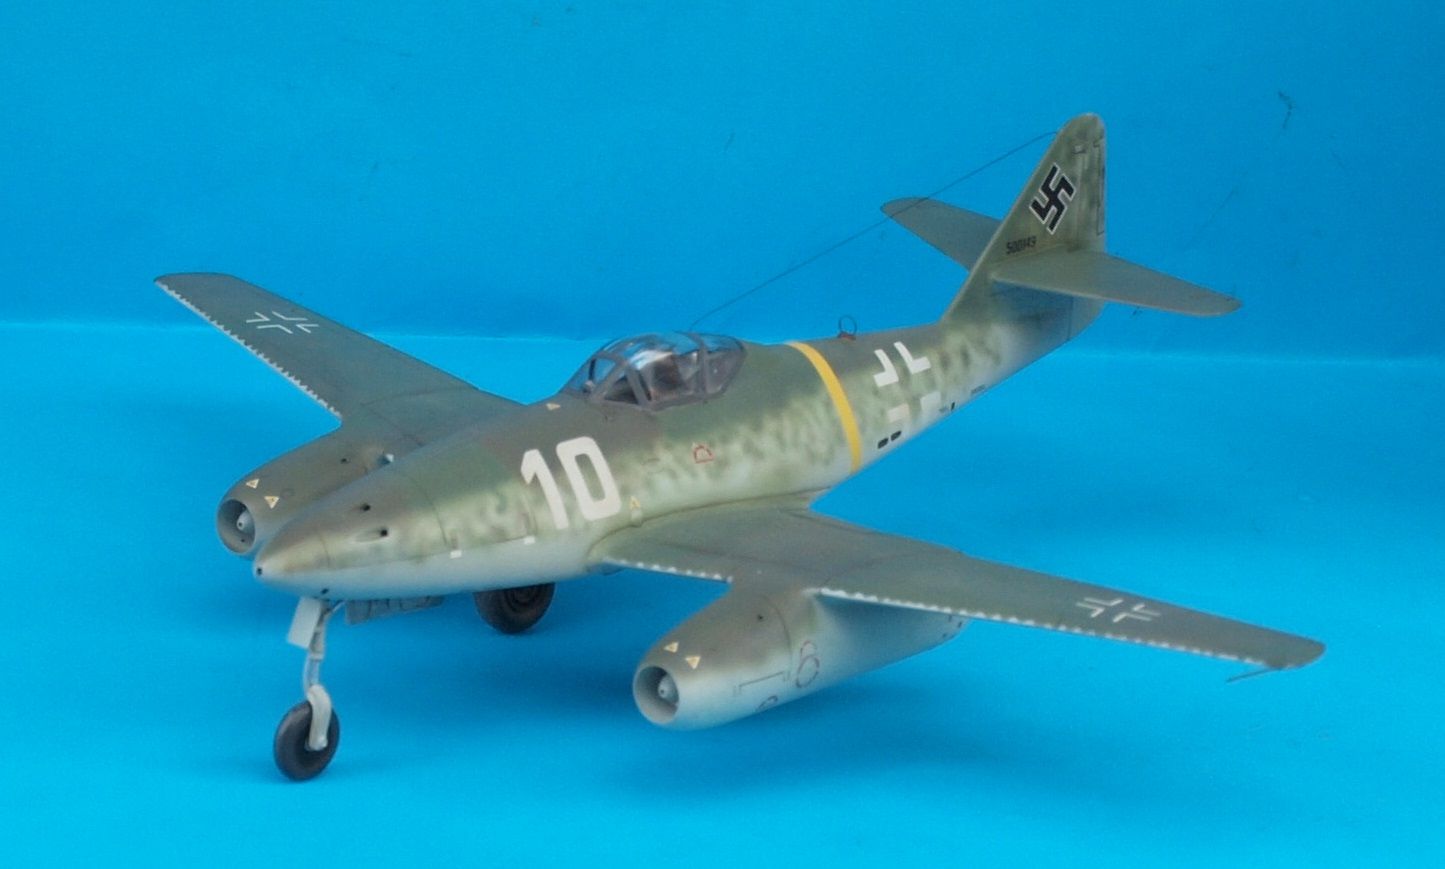
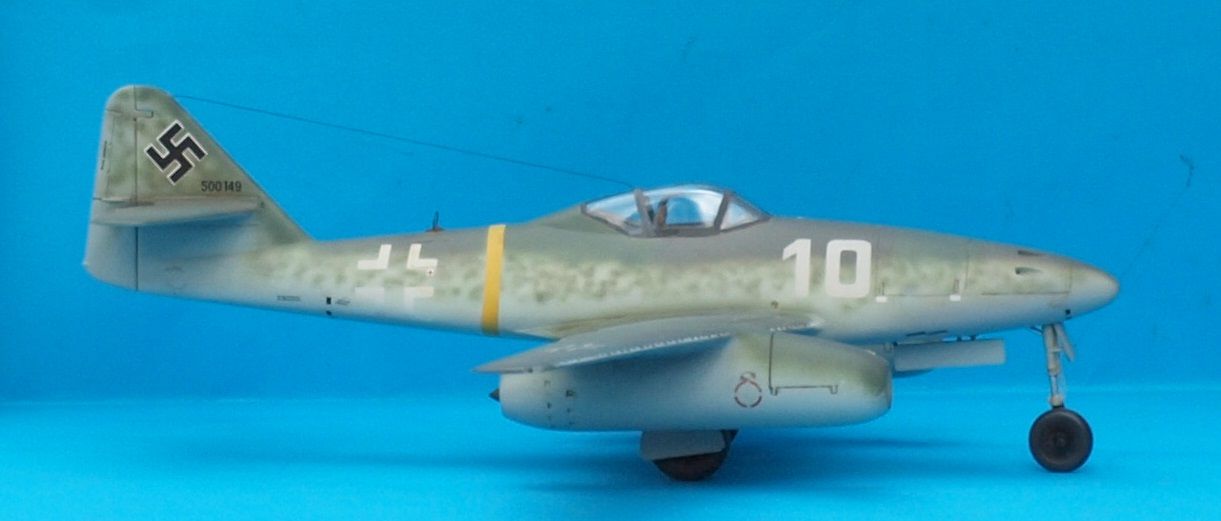
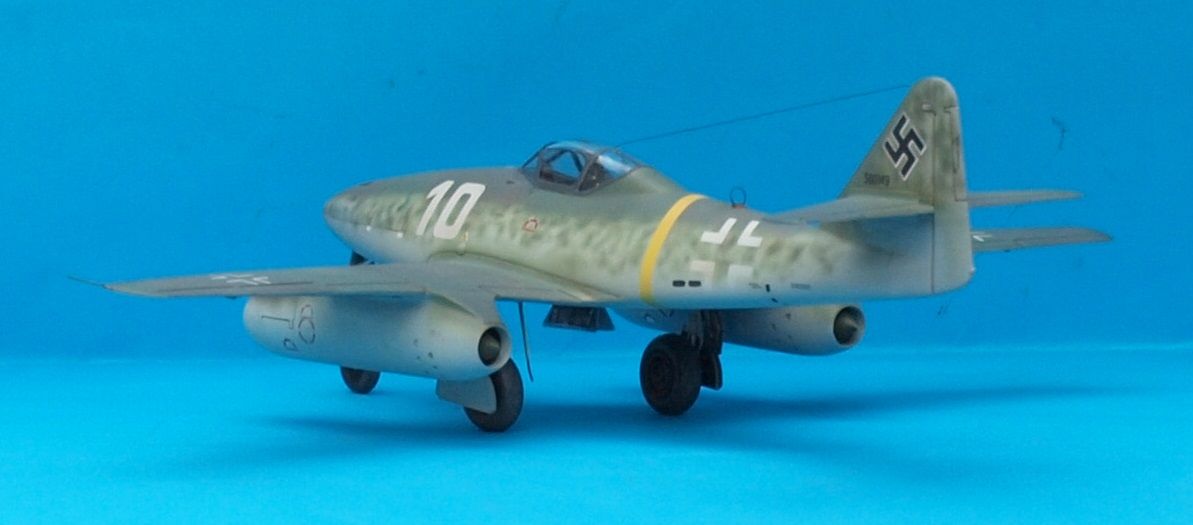
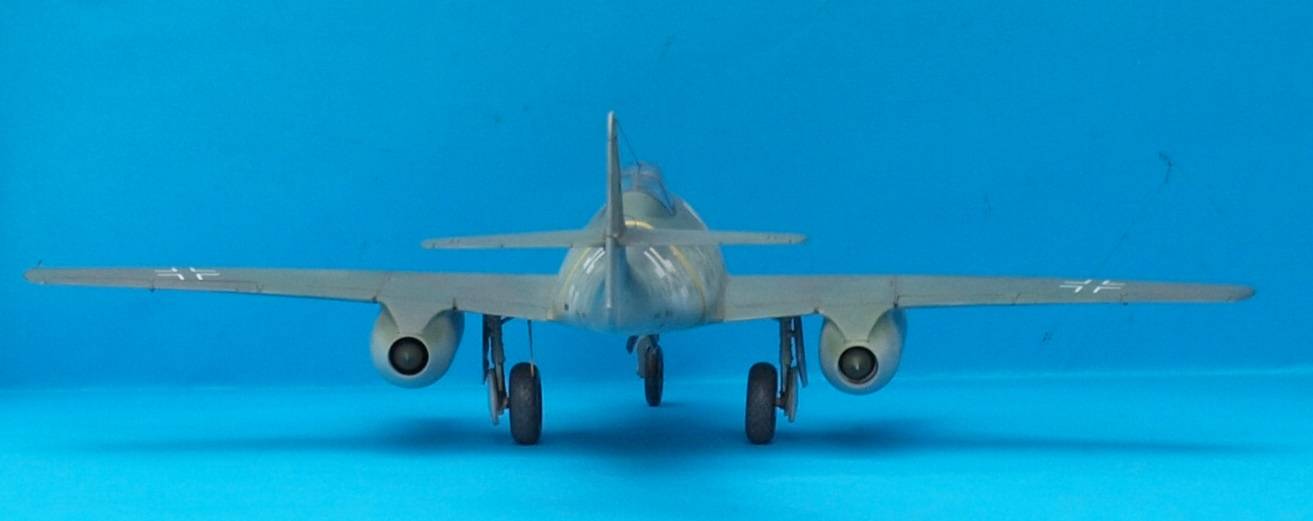
I wasn't overly happy with the results obtained by using decals to make the canopy framing. I've yet to find decal paper that acts anything like the stuff the pros use. It's thicker, more rubbery, and have undesired textures. I've used Squadron, Papillio, and some local Aussie Decal papers and they've all shared the same faults.
At any rate, I'll call my build finished. Here are some photos:
Happy Modelling!
I wasn't overly happy with the results obtained by using decals to make the canopy framing. I've yet to find decal paper that acts anything like the stuff the pros use. It's thicker, more rubbery, and have undesired textures. I've used Squadron, Papillio, and some local Aussie Decal papers and they've all shared the same faults.
At any rate, I'll call my build finished. Here are some photos:


Happy Modelling!
MichaelSatin


Joined: January 19, 2008
KitMaker: 3,909 posts
AeroScale: 2,904 posts

Posted: Friday, May 08, 2020 - 12:00 AM UTC
It would appear that I had forgotten to set up a gallery for this campaign. It would appear that I now have, and it apparently can be found here.
Sorry about that gang, and thanks for the nudge Gary!
Michael
Sorry about that gang, and thanks for the nudge Gary!
Michael

Posted: Friday, May 08, 2020 - 09:26 AM UTC
Thank you, Michael! I have also updated the front page to reflect current status of our membership, and the link to the gallery is there now, also.
Happy Modelling!
Happy Modelling!
Antilles

Joined: March 22, 2015
KitMaker: 671 posts
AeroScale: 614 posts

Posted: Sunday, May 10, 2020 - 05:02 AM UTC
Hello fellow modelers. There are really outstanding builts here in this thread.
Gary: Great looking Schwalbe.
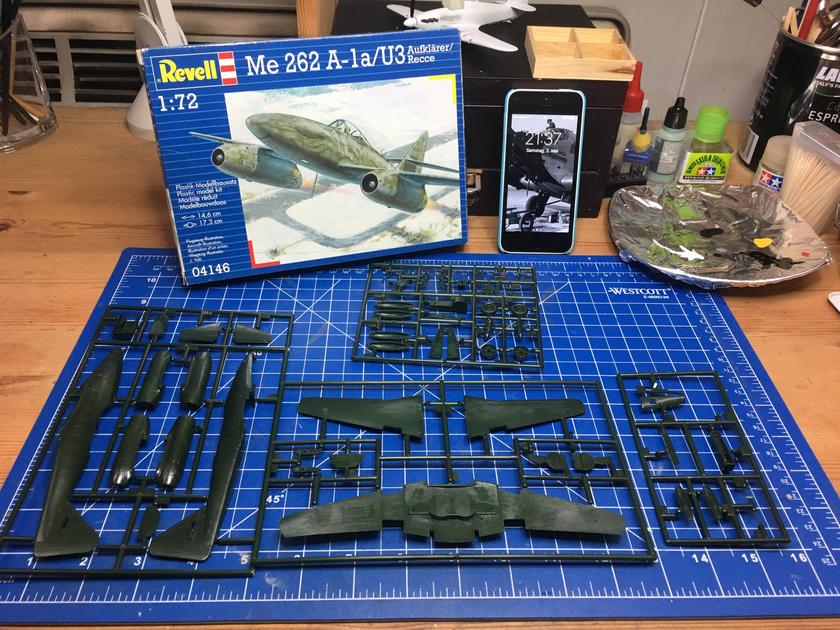
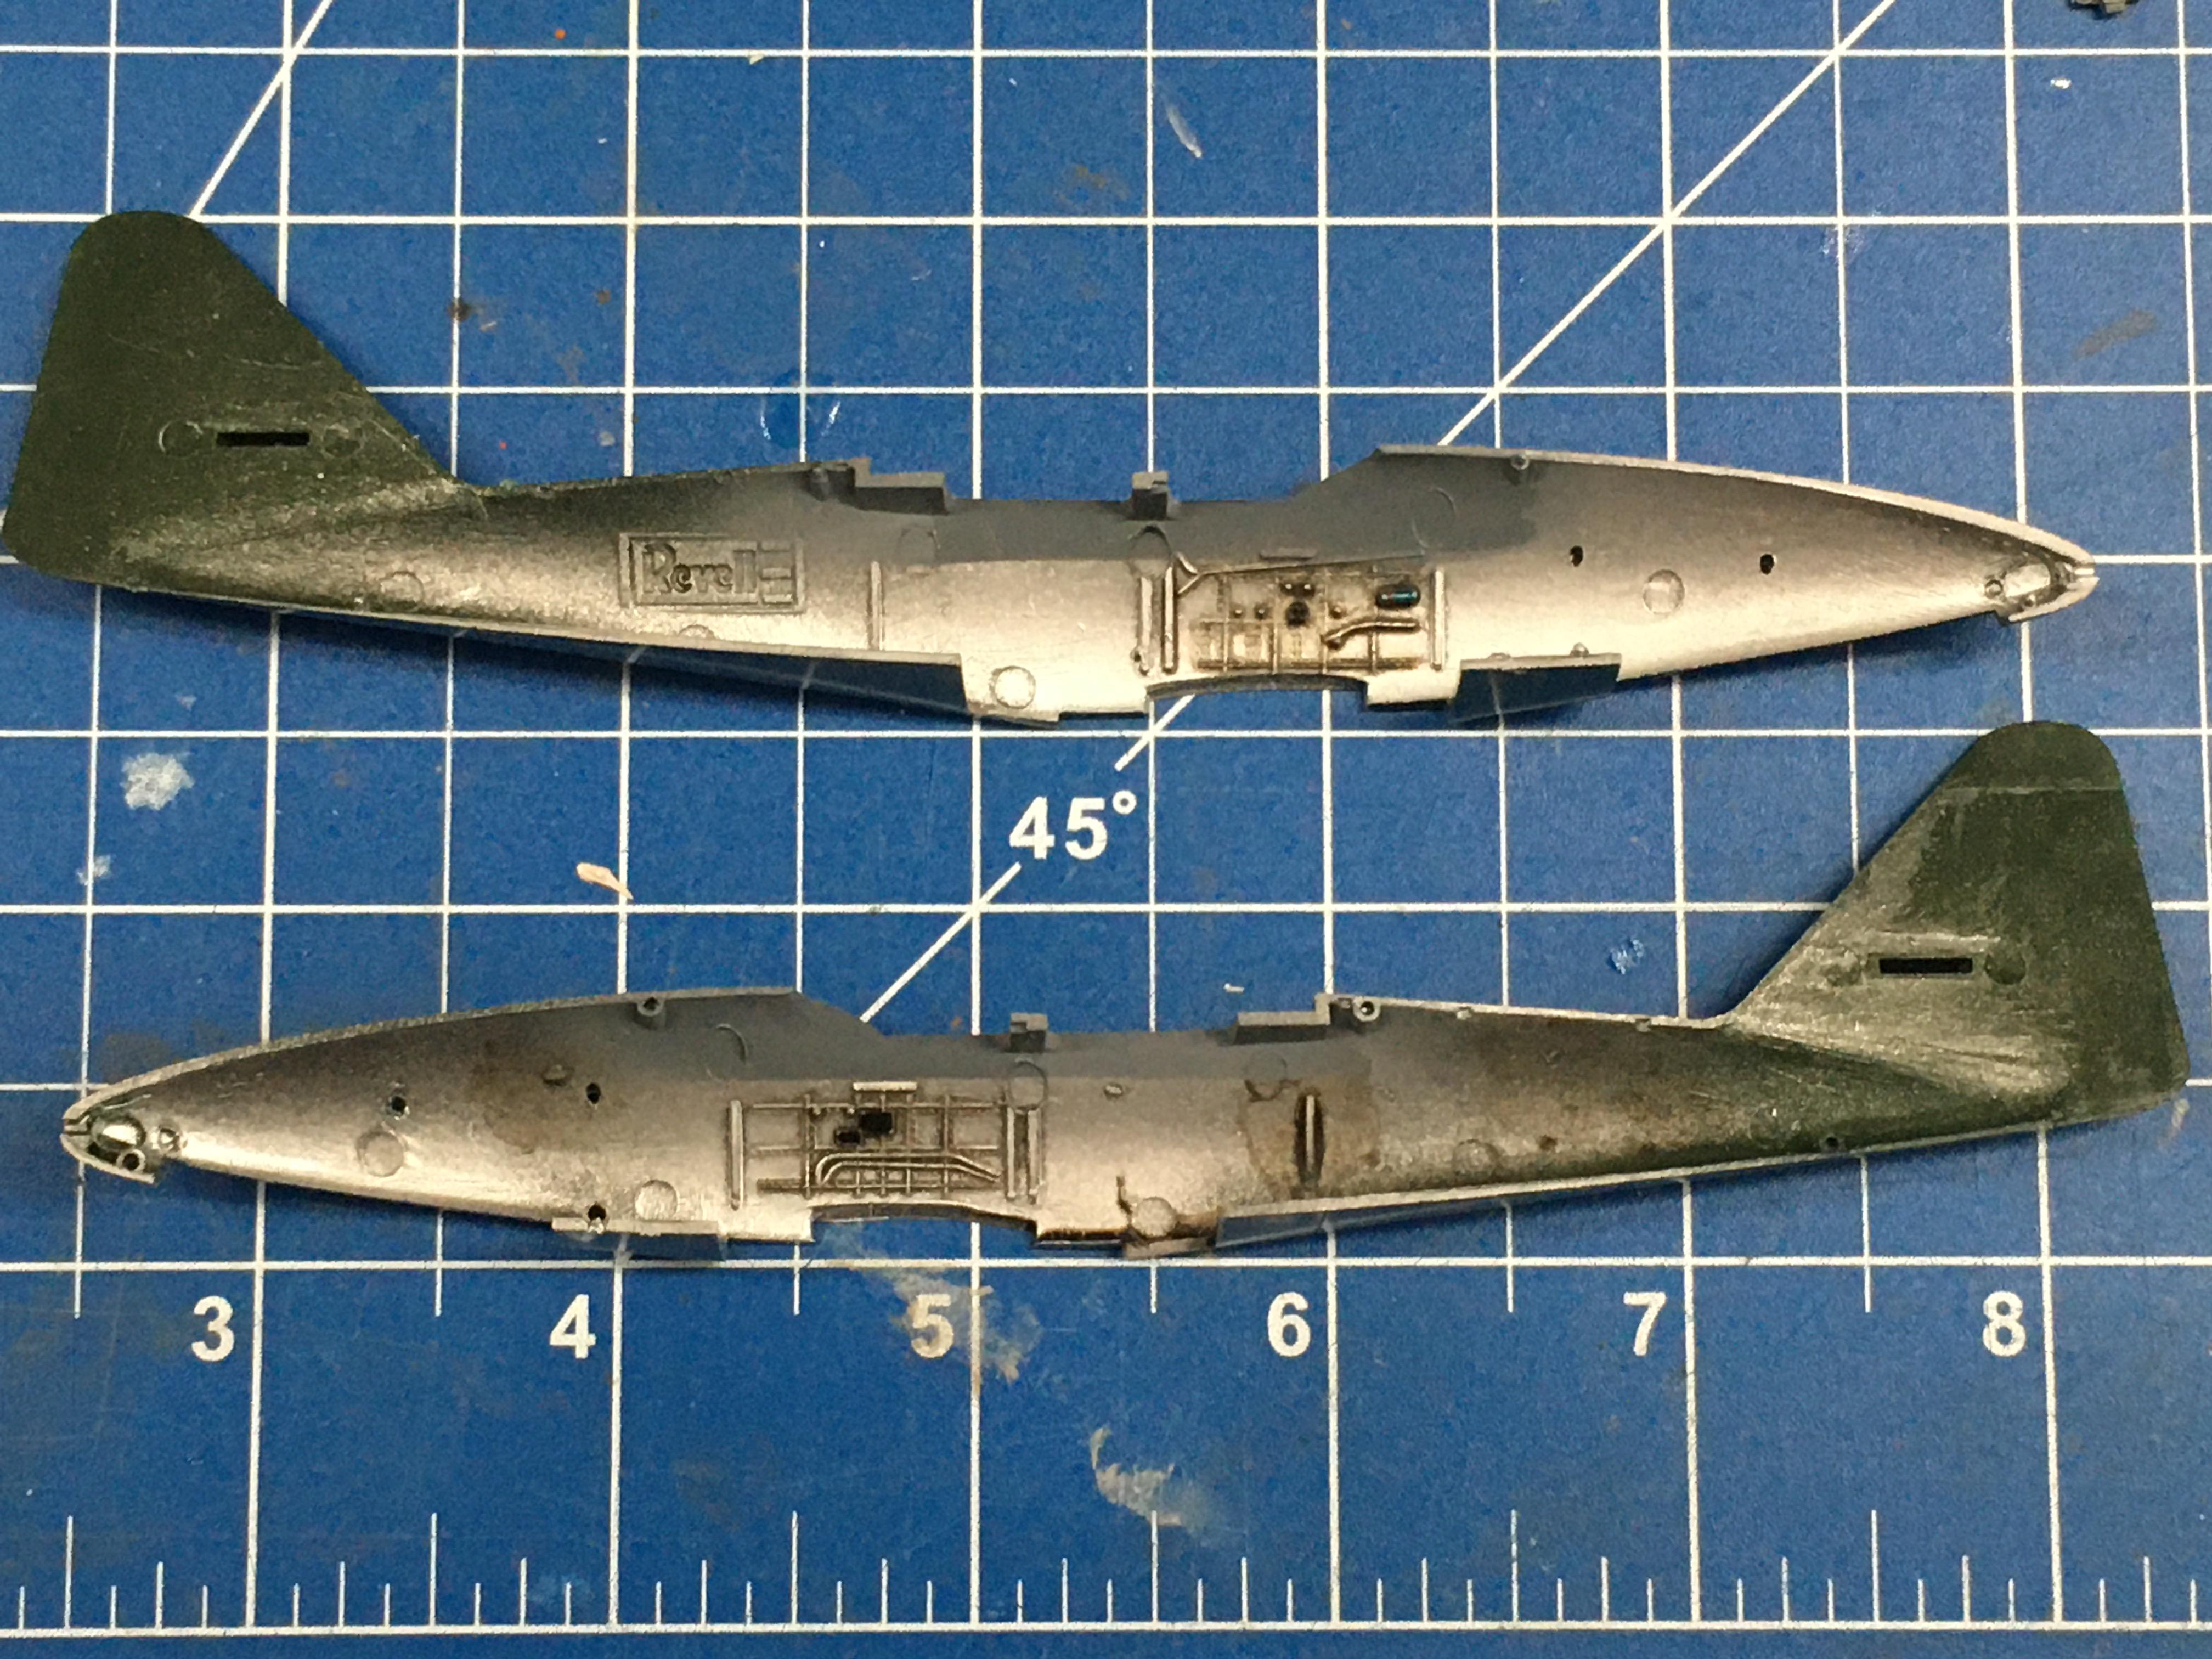
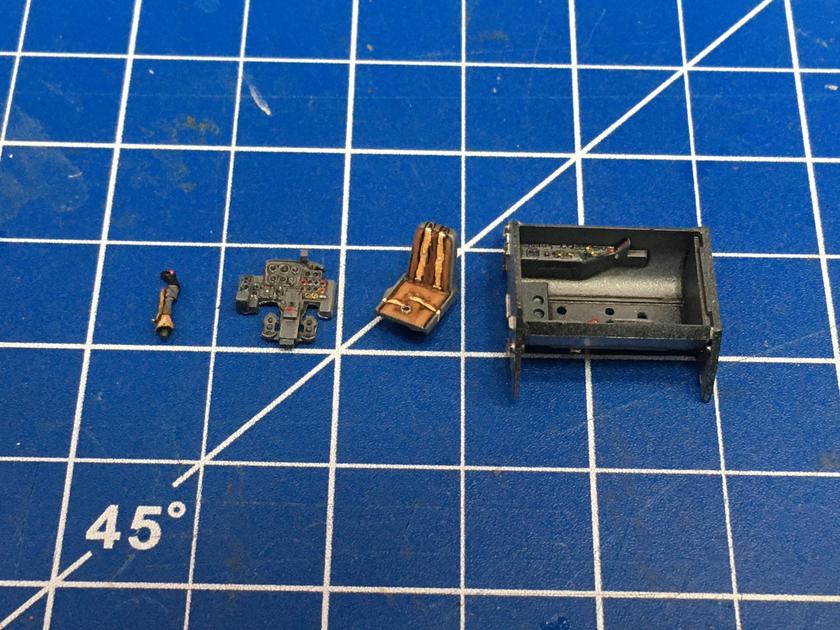
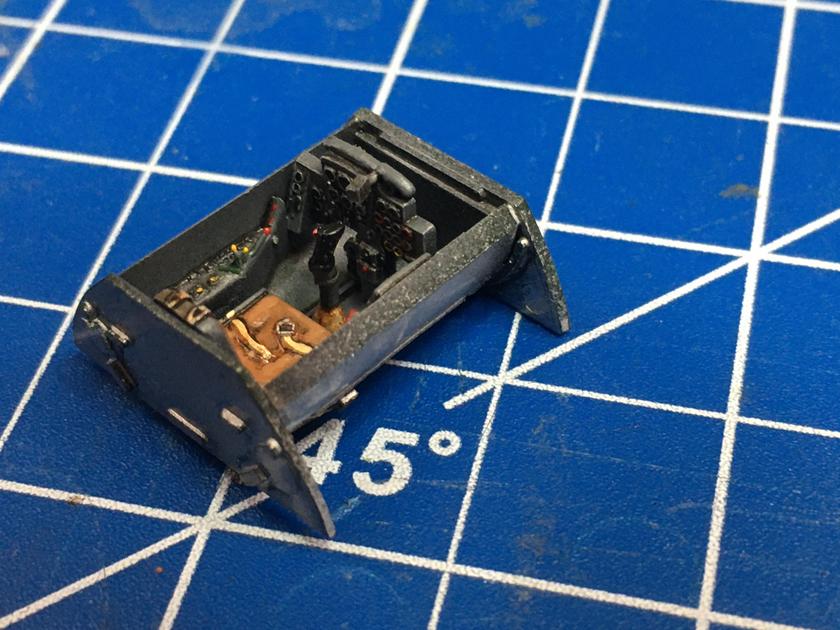
Started my Messerschmitt this week and finished the cockpit this weekend. Let´s get this one up!
Oliver
Gary: Great looking Schwalbe.
Started my Messerschmitt this week and finished the cockpit this weekend. Let´s get this one up!


Oliver

Posted: Sunday, May 10, 2020 - 12:02 PM UTC
Thank you Oliver!
Posted: Sunday, May 10, 2020 - 12:35 PM UTC
Great job on the old girl there Gaz, love it!
Nice work so far Oliver, welcome the Schwalbe-orama!
Cheers, D
Nice work so far Oliver, welcome the Schwalbe-orama!
Cheers, D
Posted: Sunday, May 10, 2020 - 03:21 PM UTC
Thanks, Damian!

Bigrip74

Joined: February 22, 2008
KitMaker: 5,026 posts
AeroScale: 2,811 posts

Posted: Sunday, May 10, 2020 - 03:42 PM UTC
Posted: Sunday, May 10, 2020 - 04:33 PM UTC
Quoted Text
Its been a while since Ive been on this site. Life or the doctors keep getting in the way.
G'day Bob. Hope you are ok mate. Get stuck into this build, it will definitely make you feel better!
Cheers, D

Bigrip74

Joined: February 22, 2008
KitMaker: 5,026 posts
AeroScale: 2,811 posts

Posted: Monday, May 11, 2020 - 11:19 AM UTC
D, thanks for the welcome. I just put the parts in to wash the release oil off. It will feel good to be building again.
Bob
Bob

Bigrip74

Joined: February 22, 2008
KitMaker: 5,026 posts
AeroScale: 2,811 posts

Posted: Monday, May 11, 2020 - 06:24 PM UTC
Well! 2 hours of work on the kit and Ive already lost 2 parts to the carpet monster 
Bob

Bob
Posted: Monday, May 11, 2020 - 09:32 PM UTC
Bob,
Thank you!! Looking forward to your Italeri 262. Hopefully the carpet monster will cough up those two pieces.
Gaz
Thank you!! Looking forward to your Italeri 262. Hopefully the carpet monster will cough up those two pieces.
Gaz

Bigrip74

Joined: February 22, 2008
KitMaker: 5,026 posts
AeroScale: 2,811 posts

Posted: Tuesday, May 12, 2020 - 08:22 AM UTC

bomber14

Joined: February 02, 2015
KitMaker: 330 posts
AeroScale: 286 posts

Posted: Tuesday, May 12, 2020 - 08:56 AM UTC
bob don't feel bad, i keep losing parts to the carpet monster (just today in fact) but the monster isn't a carpet but a tile floor 
didn't know italeri made a 262. is it a re box from another manufacturer? and why can't any of the manufacturers include leading edge slats? i'm trying to add them to my hobbyboss build and they are fighting me all the way.
joe

didn't know italeri made a 262. is it a re box from another manufacturer? and why can't any of the manufacturers include leading edge slats? i'm trying to add them to my hobbyboss build and they are fighting me all the way.
joe

Bigrip74

Joined: February 22, 2008
KitMaker: 5,026 posts
AeroScale: 2,811 posts

Posted: Tuesday, May 12, 2020 - 09:47 AM UTC
Joe, my floor is tile also. The part will hit my knee or foot and shoot off to another world. 
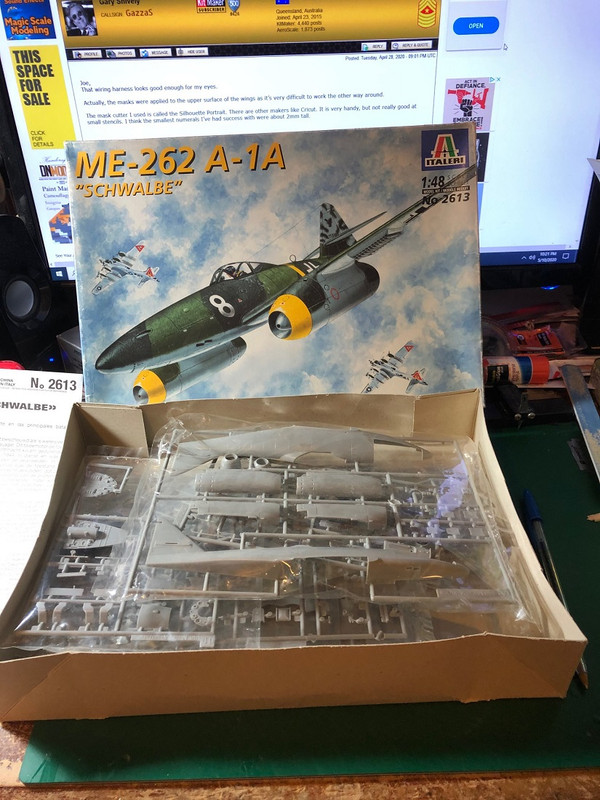
I do not know it this is a re-box, but the instructions state. Made in China and packed in Italy.
Bob

I do not know it this is a re-box, but the instructions state. Made in China and packed in Italy.
Bob
MichaelSatin


Joined: January 19, 2008
KitMaker: 3,909 posts
AeroScale: 2,904 posts

Posted: Tuesday, May 12, 2020 - 10:08 AM UTC
Quoted Text
Joe, my floor is tile also. The part will hit my knee or foot and shoot off to another world.
I do not know it this is a re-box, but the instructions state. Made in China and packed in Italy.
Bob
I think it's yet another re-pop of the venerable Trimaster/Dragon kit. Man those molds get a lot of use!
Michael

Posted: Tuesday, May 12, 2020 - 07:43 PM UTC
Bob,
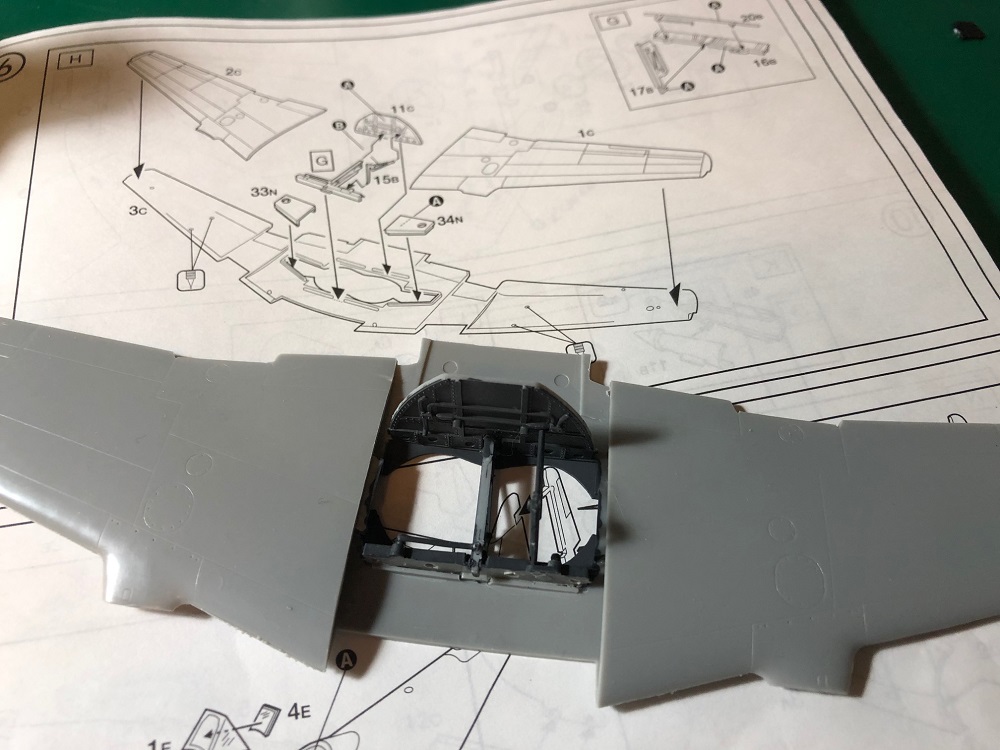
Great to see a start! The surface detail on those wings doesn't look too bad.
Great to see a start! The surface detail on those wings doesn't look too bad.

Bigrip74

Joined: February 22, 2008
KitMaker: 5,026 posts
AeroScale: 2,811 posts

Posted: Wednesday, May 13, 2020 - 05:38 AM UTC

Bigrip74

Joined: February 22, 2008
KitMaker: 5,026 posts
AeroScale: 2,811 posts

Posted: Wednesday, May 13, 2020 - 03:36 PM UTC
Posted: Wednesday, May 13, 2020 - 08:00 PM UTC
More good work Bob! Sanding is part and parcel of modelling. I get a bit tired of it too. They make power sanders for small things, but I haven't got one, yet.
zontar

Joined: August 27, 2006
KitMaker: 1,646 posts
AeroScale: 12 posts

Posted: Wednesday, May 13, 2020 - 08:19 PM UTC
Aloha All,
Gaz: really nice job. The cockpit came out well, as did the scallops on the wings.
Bob: nice start, but I don't envy you the sanding! also, hopefully you've been able to recover the parts from the carpet monster. I have wood floors, but I've still lost one of my trooper's heads!!
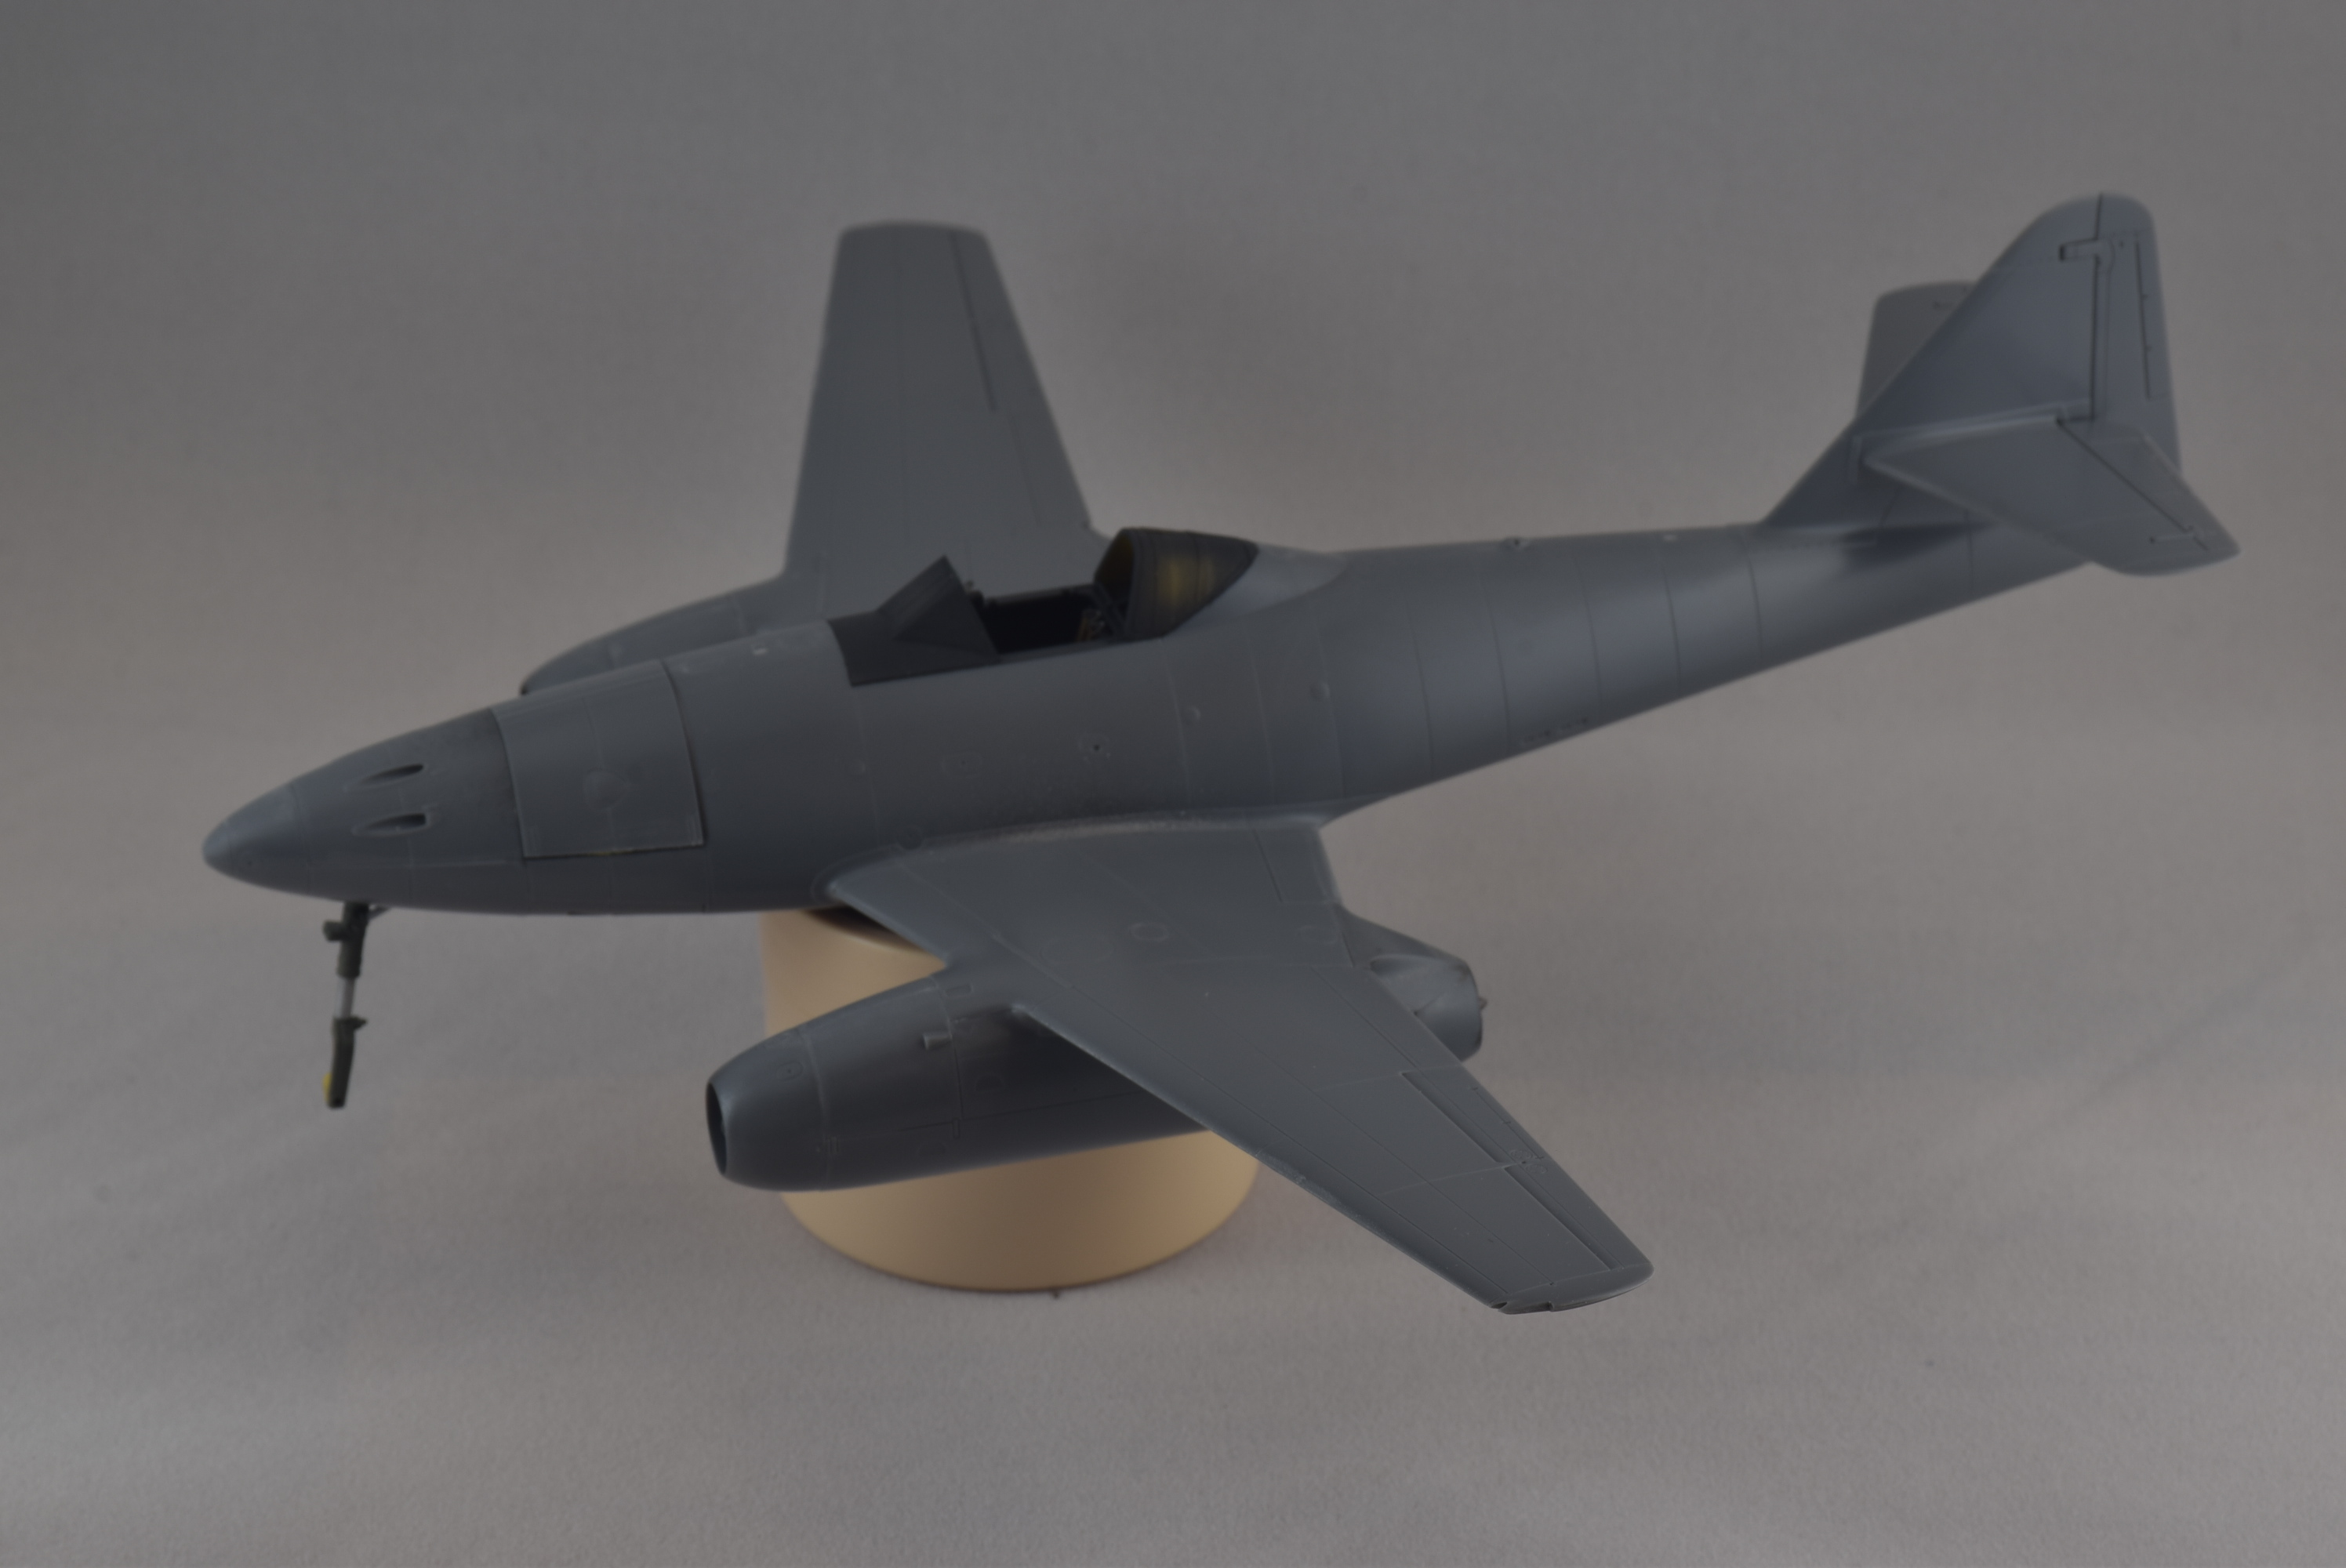
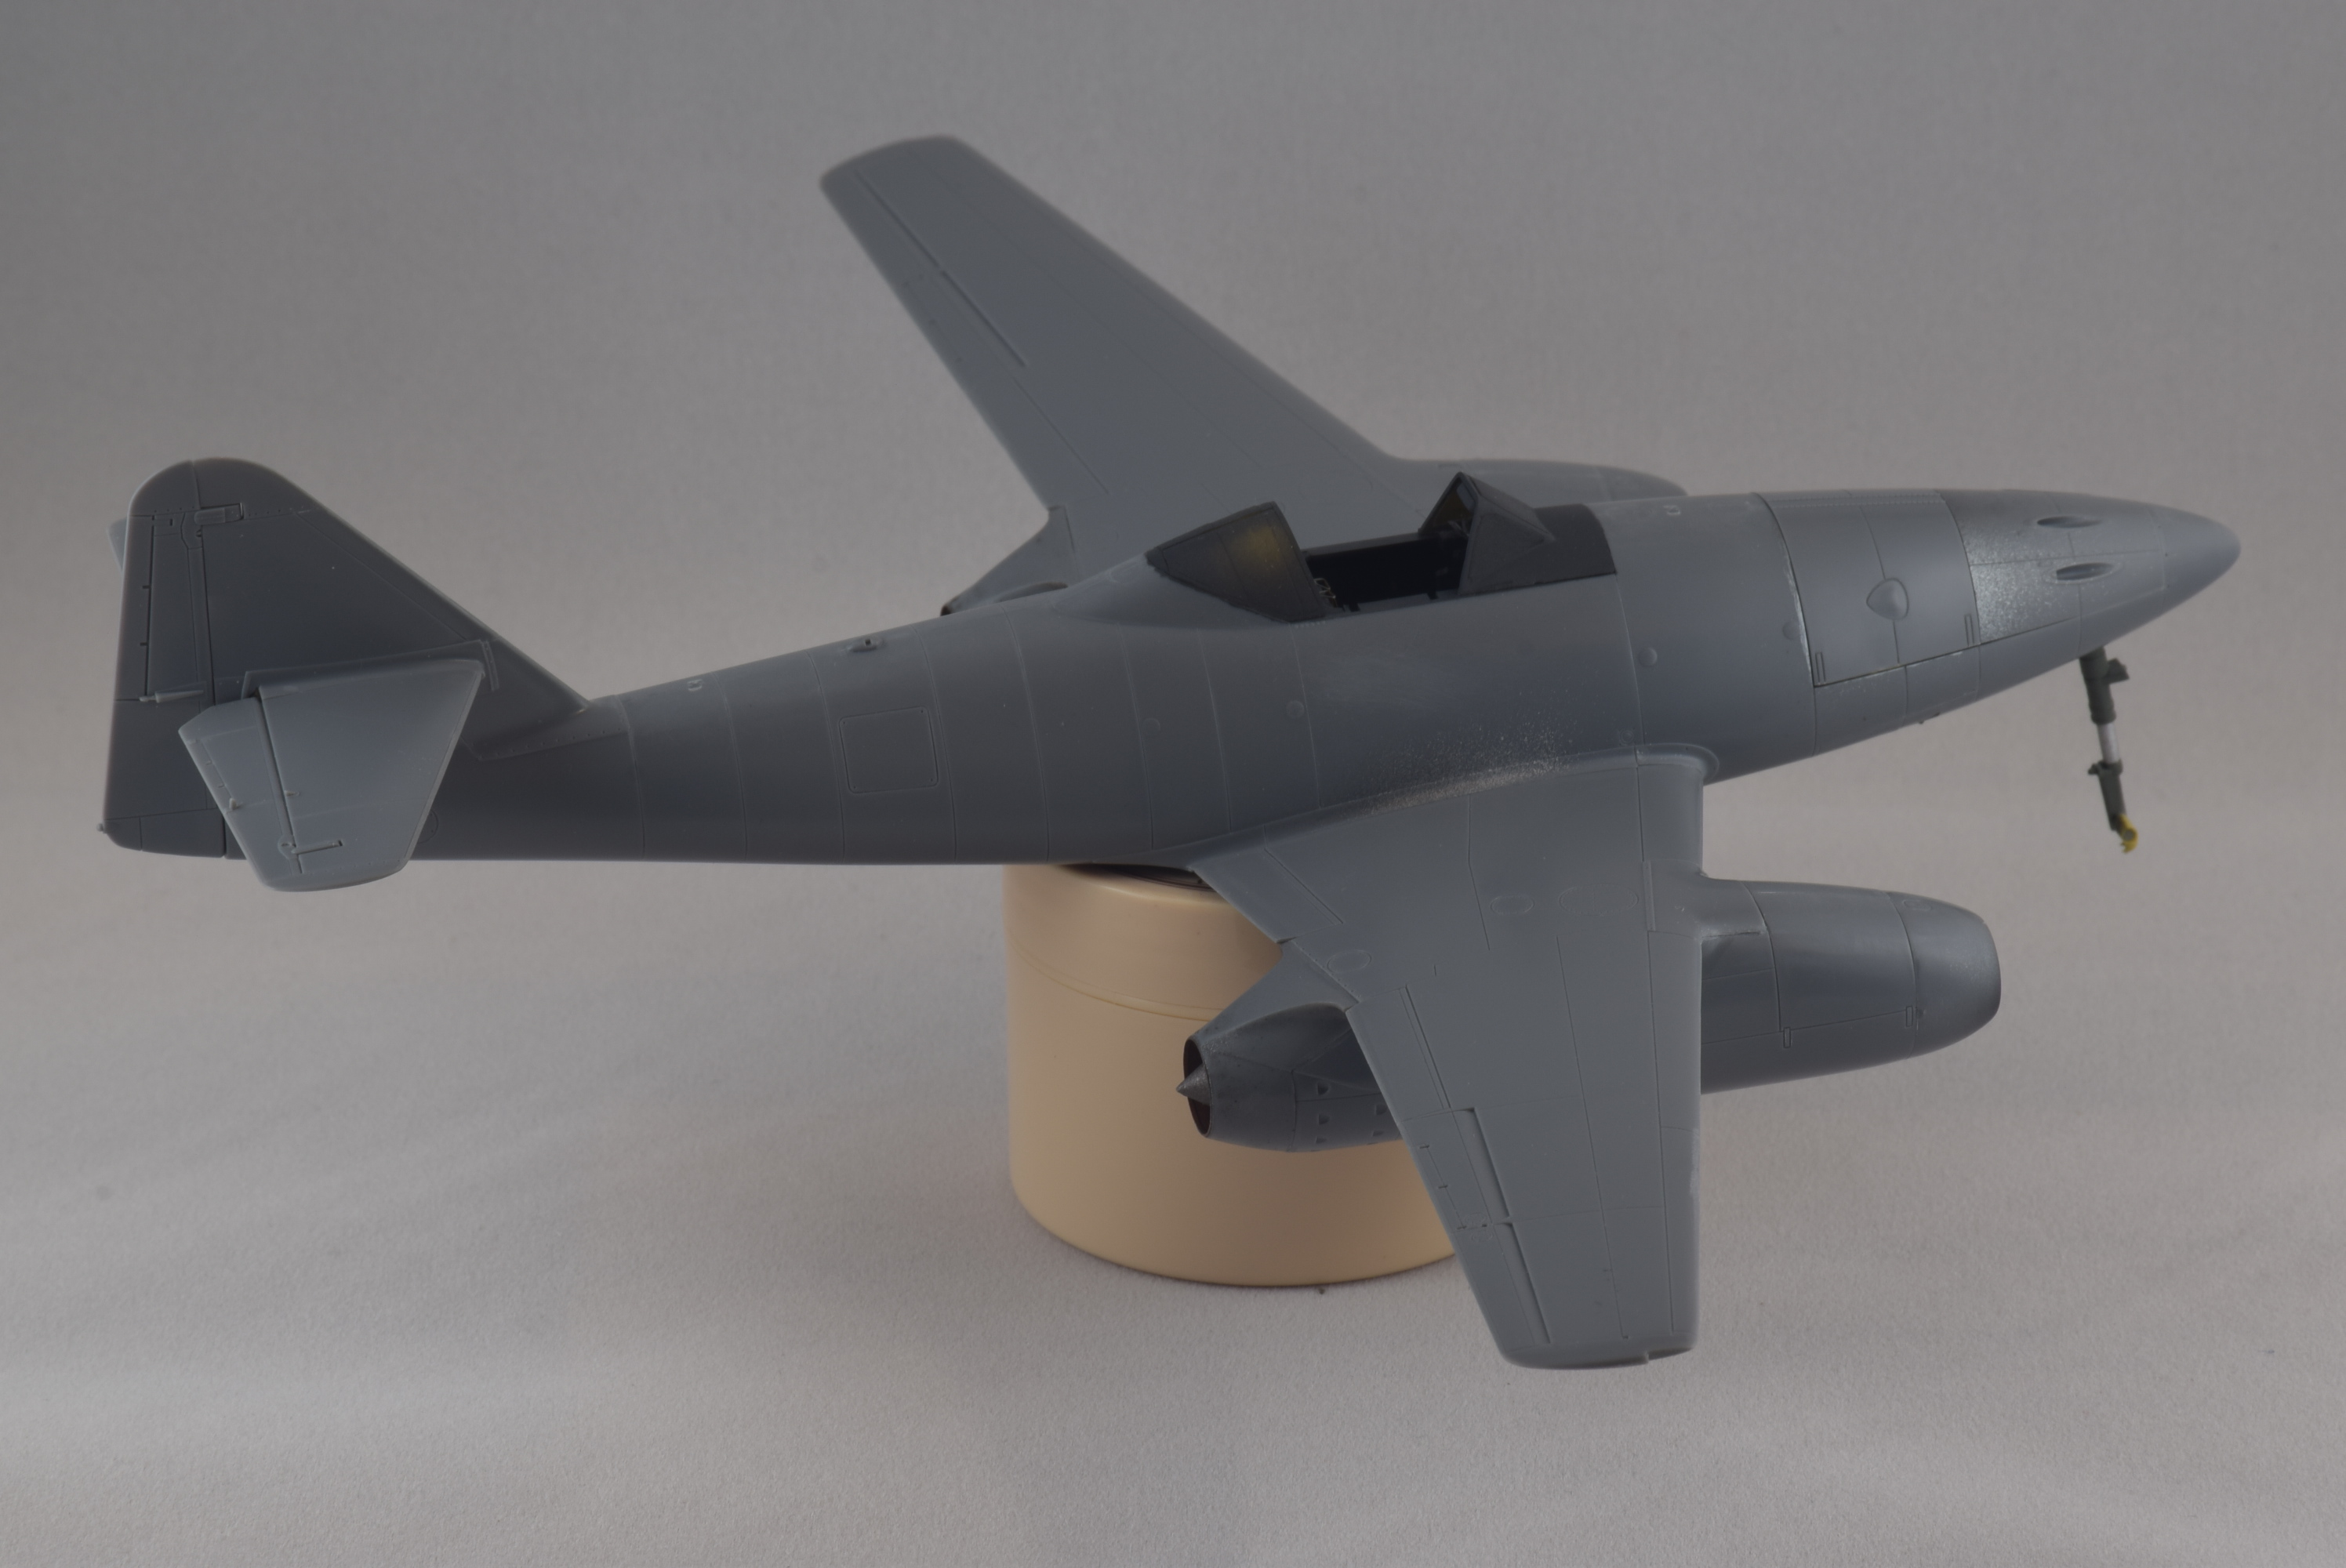
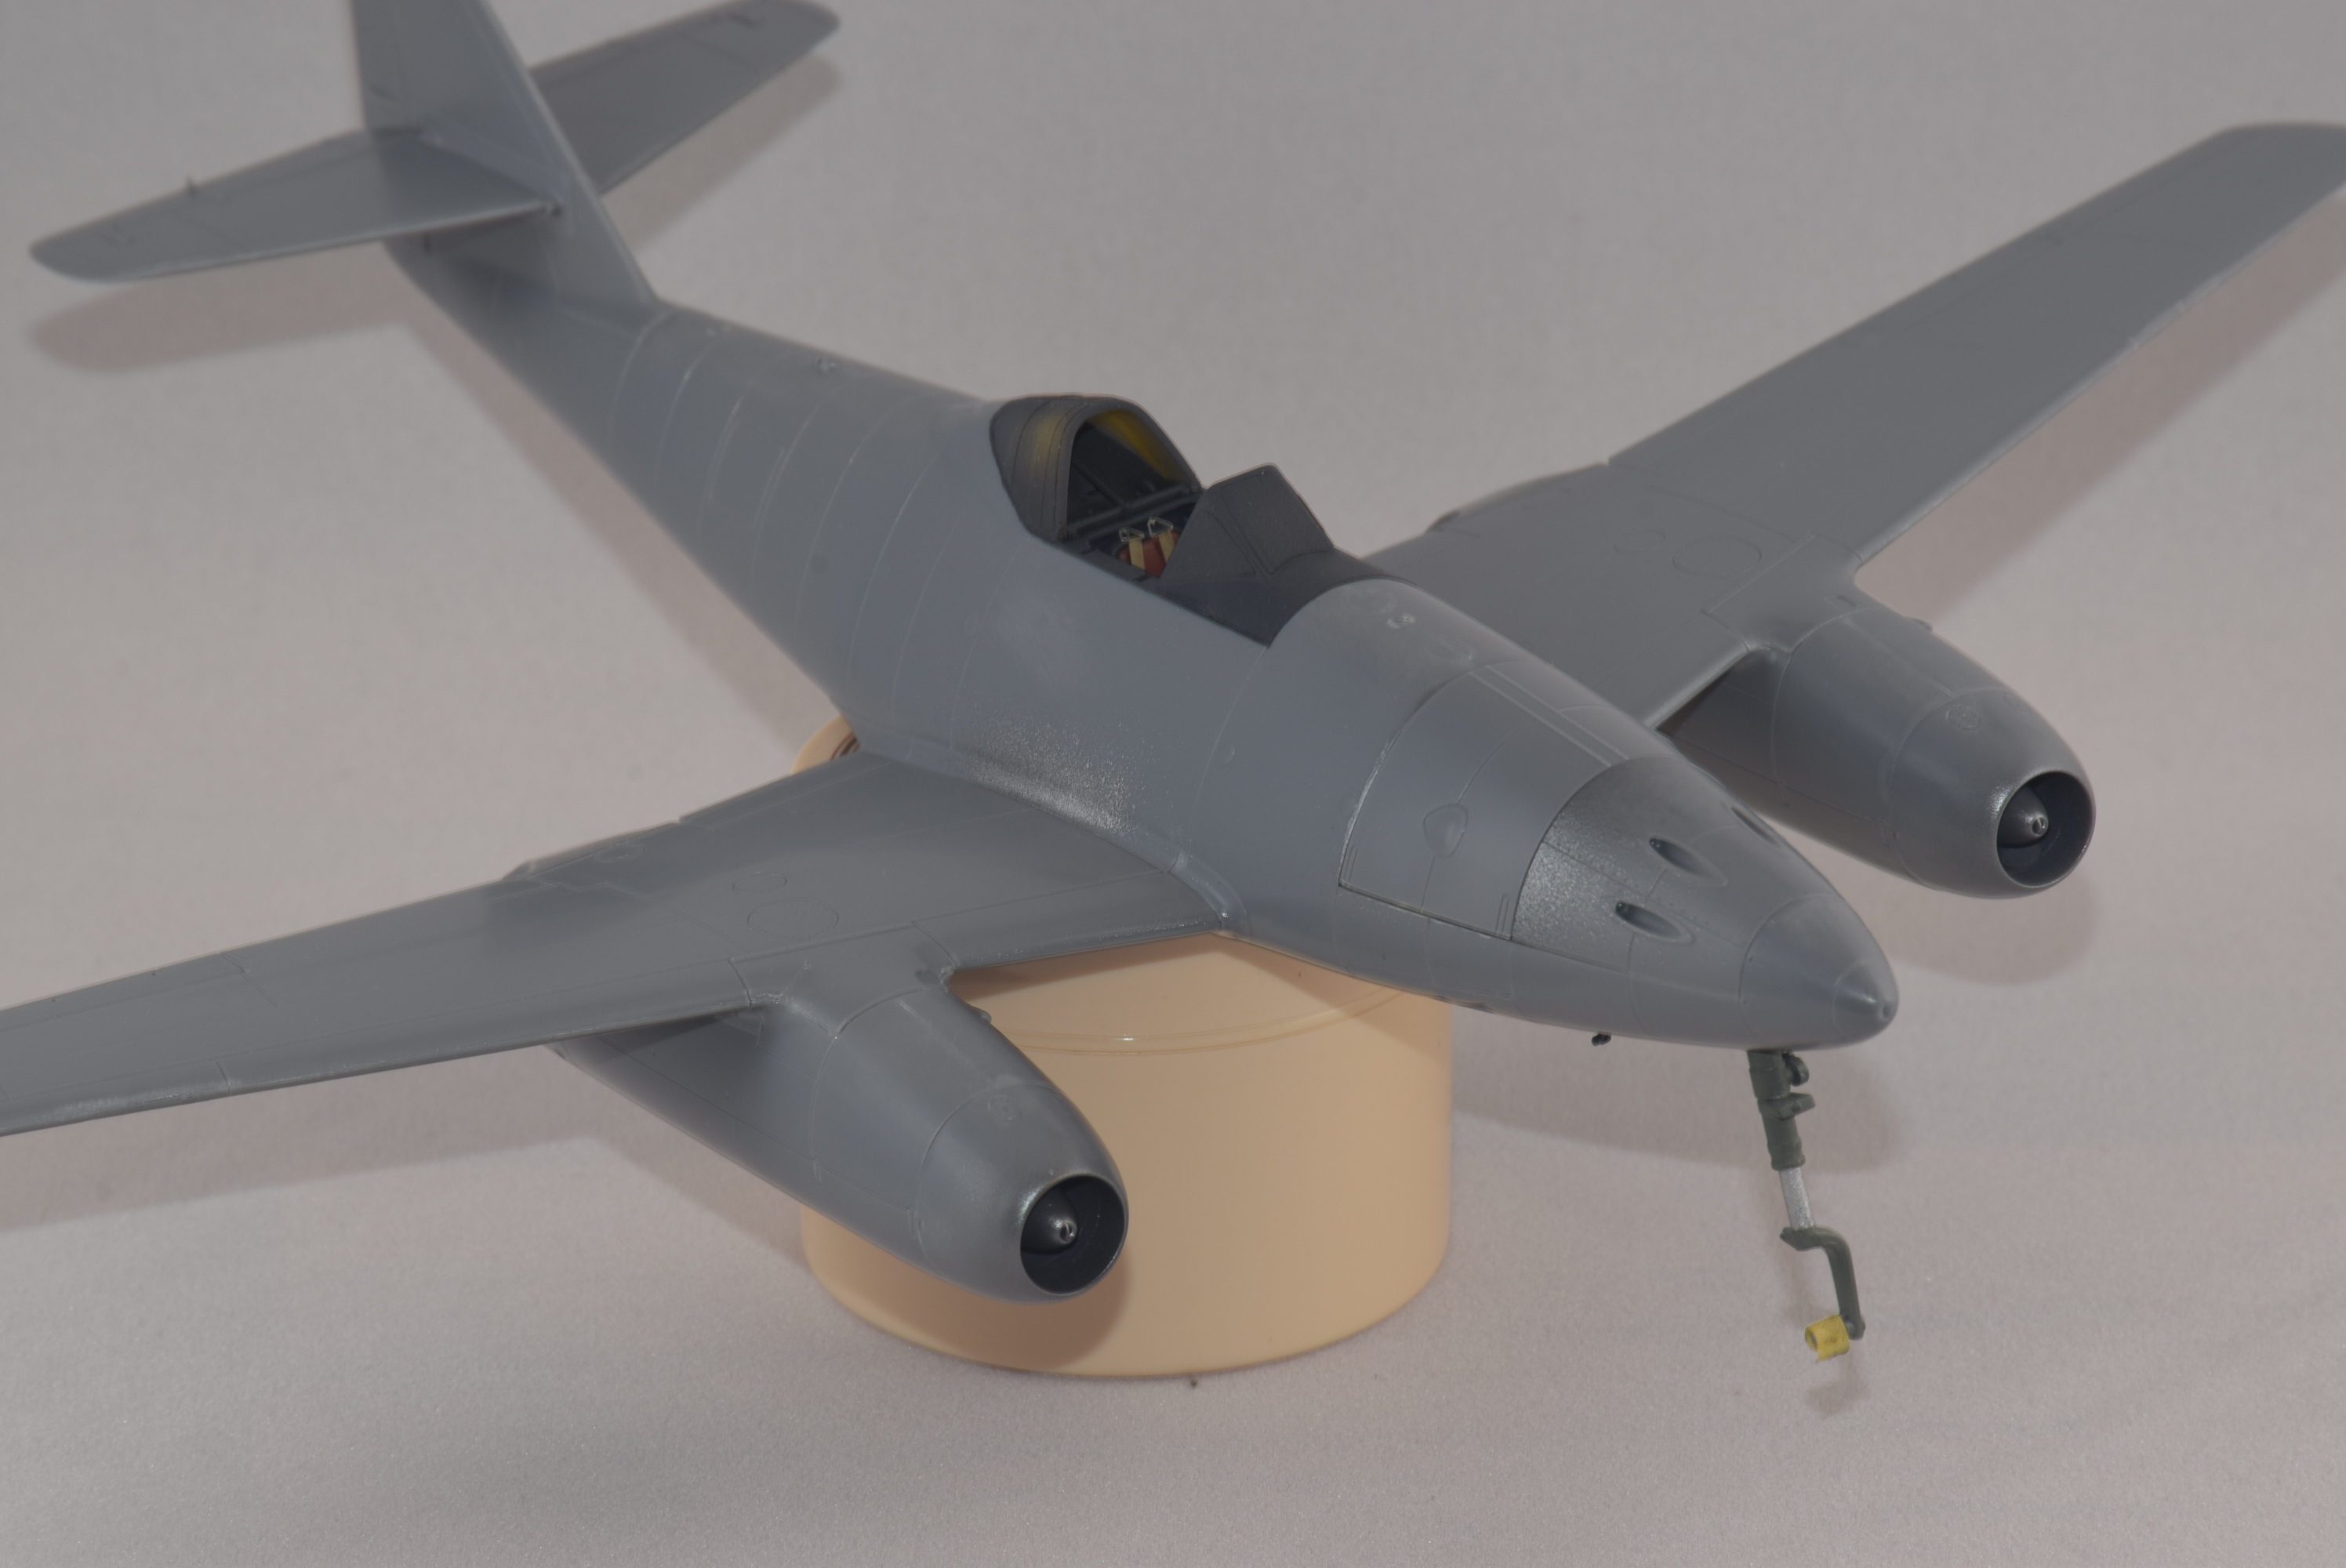
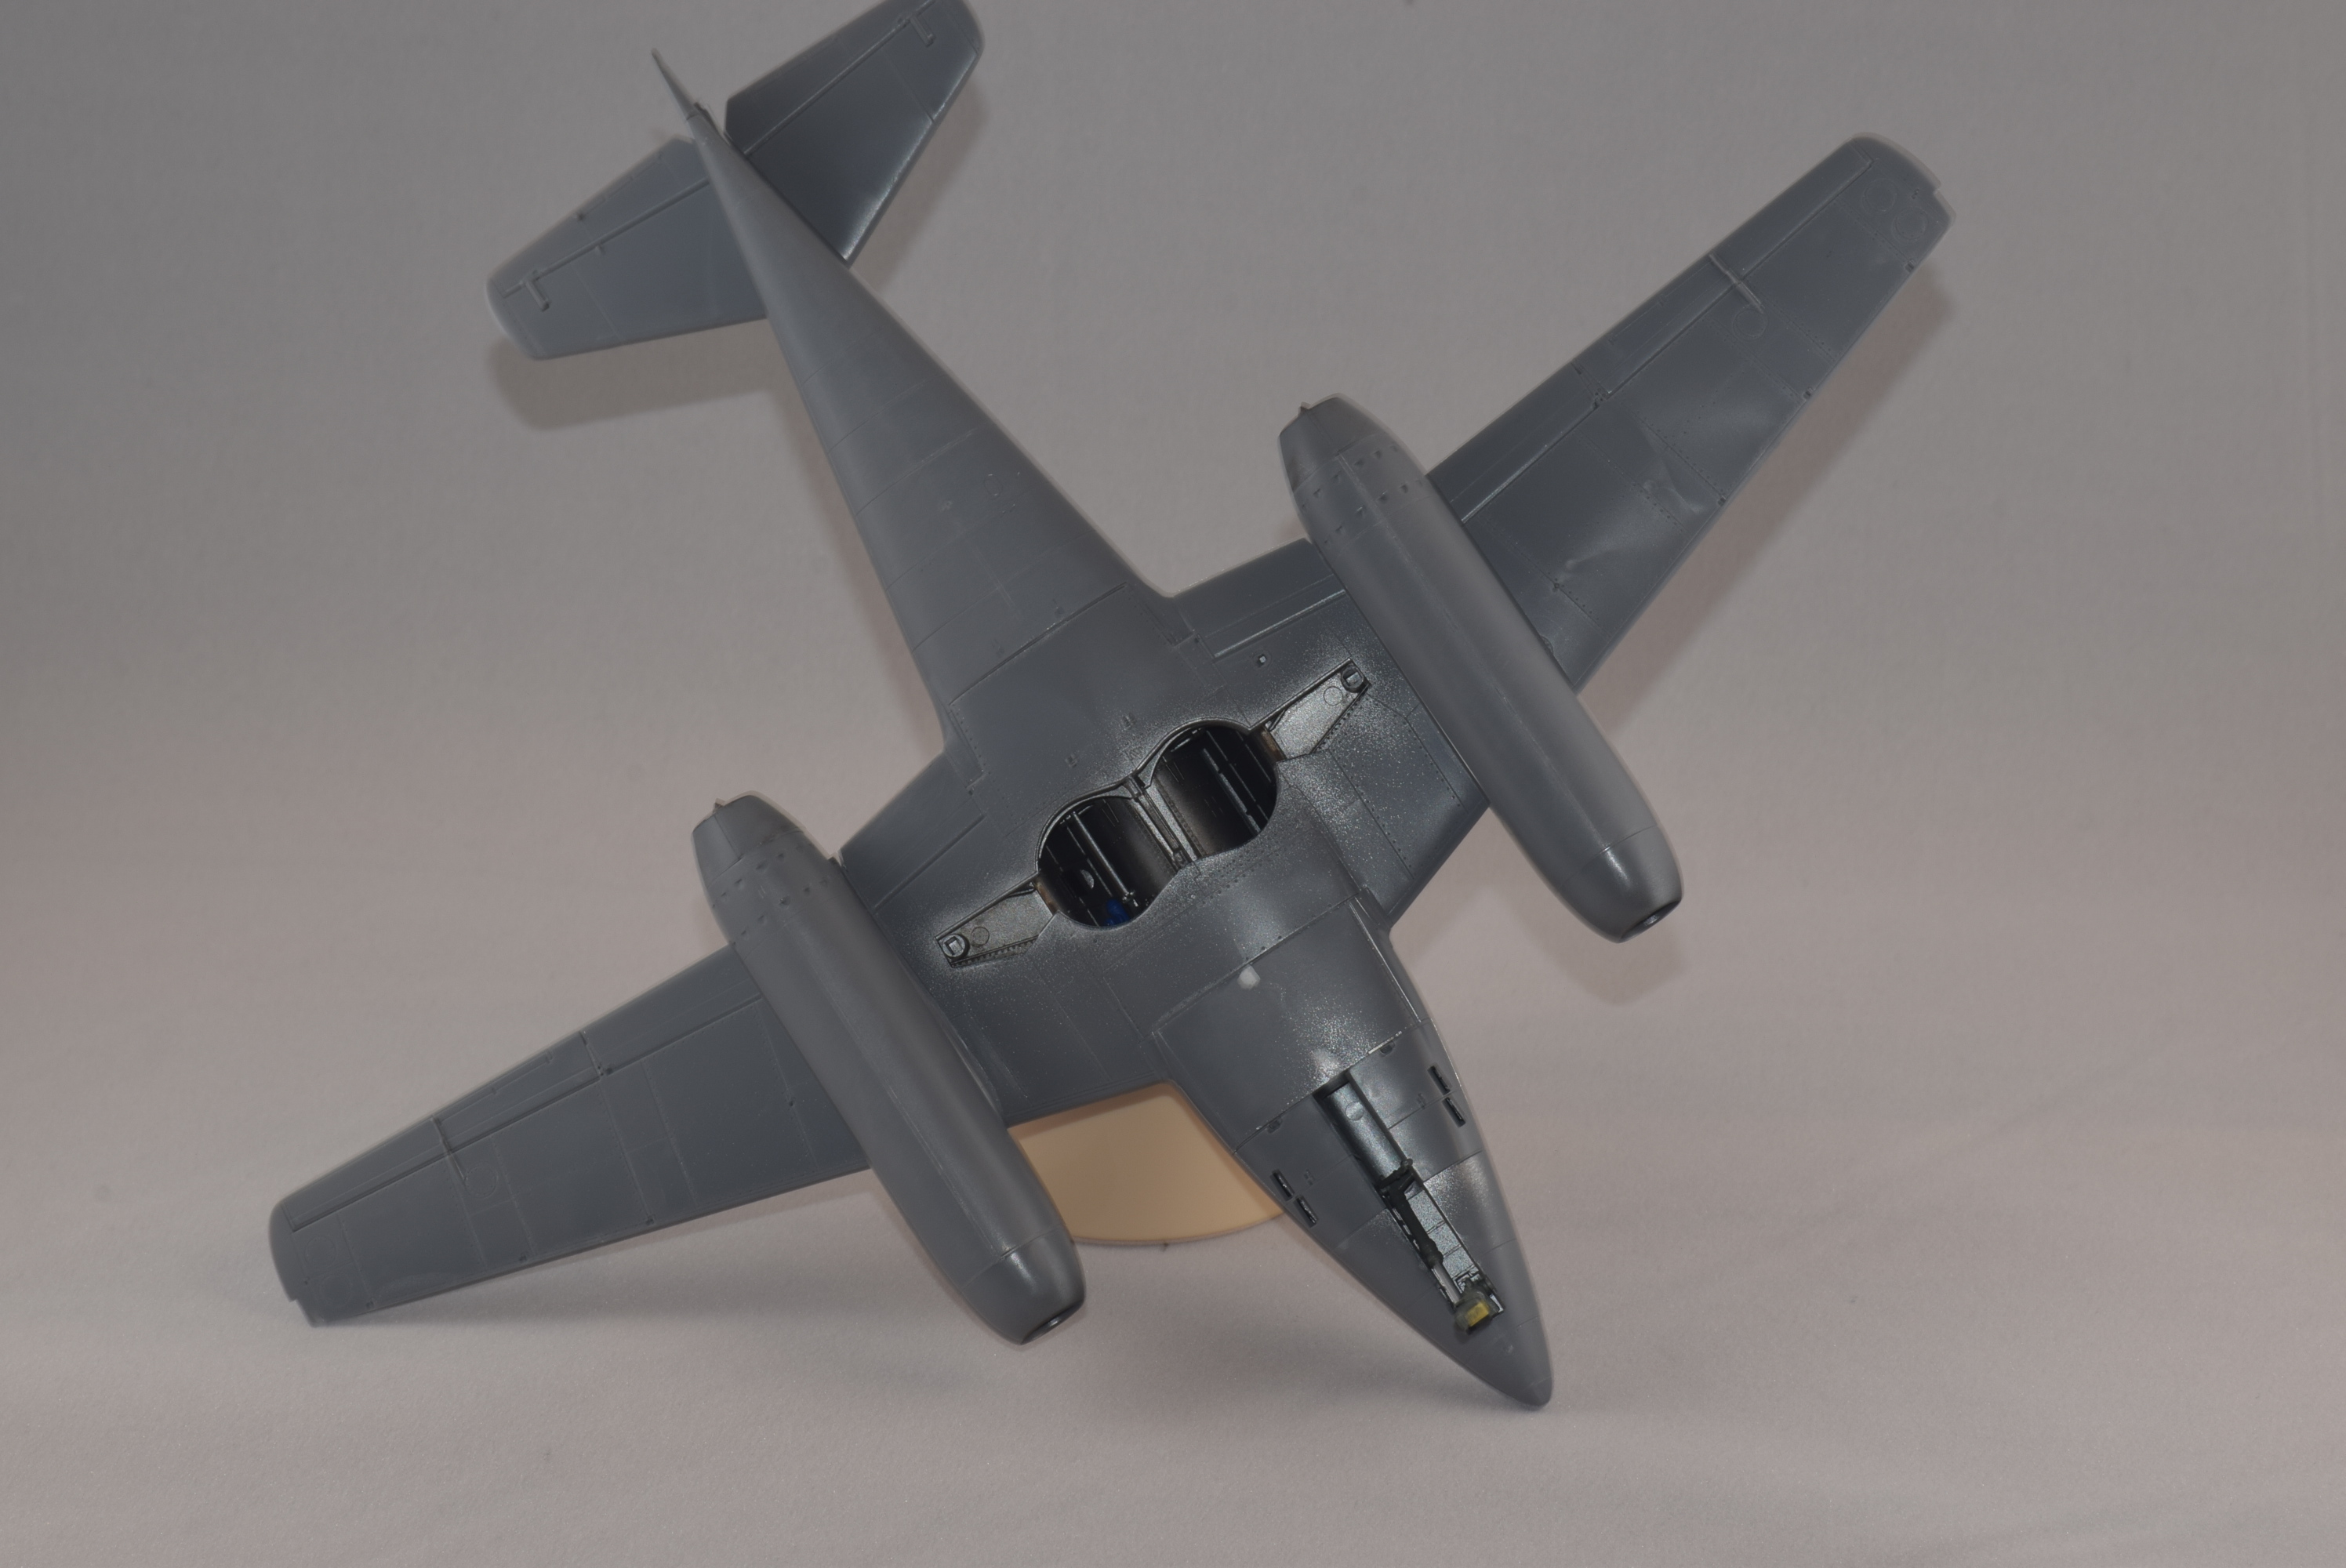
OK, hats off to all you that do these wingy things mostly. It seems like every time I think I'm ready to glue something together, there are two more things/areas that I need to paint. Anyway, I've got the wings, engines and front and rear canopy pieces glued on.
So, a question for my more airplane experienced fellows here: how best to mask across the open canopy portion? Tamiya has made it such that if you want the canopy closed, you have to cut off the mounts. Since my intent is to display it with the canopy open, I don't want to cut those bits off in order to temporarily close the canopy for painting. Any suggestions are appreciated.
Gaz: on the first page, you have me down as building the Revell, but I am working on the Tamiya.
Happy Modeling,
Zon
Gaz: really nice job. The cockpit came out well, as did the scallops on the wings.
Bob: nice start, but I don't envy you the sanding! also, hopefully you've been able to recover the parts from the carpet monster. I have wood floors, but I've still lost one of my trooper's heads!!
OK, hats off to all you that do these wingy things mostly. It seems like every time I think I'm ready to glue something together, there are two more things/areas that I need to paint. Anyway, I've got the wings, engines and front and rear canopy pieces glued on.
So, a question for my more airplane experienced fellows here: how best to mask across the open canopy portion? Tamiya has made it such that if you want the canopy closed, you have to cut off the mounts. Since my intent is to display it with the canopy open, I don't want to cut those bits off in order to temporarily close the canopy for painting. Any suggestions are appreciated.


Gaz: on the first page, you have me down as building the Revell, but I am working on the Tamiya.
Happy Modeling,
Zon
 |


