Air Campaigns
Want to start or join a group build? This is where to start.
"The Guardian Angel" Helicopter Campaign '07
Busybeas
_VISITCOMMUNITY
England - West Midlands, United Kingdom
Joined: January 26, 2007
KitMaker: 102 posts
AeroScale: 96 posts
Posted: Friday, February 23, 2007 - 10:42 PM UTC
Thanks Hermon

I am constantly amazed at the models you guys make in 1/48 & 1/72 scales.. the detailing you put in is amazing.

I struggle with 1/32 ~ 1/35 ! probably something to do with my age :-)

Thanks to all, for the encouragement you give us newbies,it sure helps us a lot.

Cheers
Steve
RotorHead67
_VISITCOMMUNITY
Virginia, United States
Joined: May 07, 2003
KitMaker: 1,174 posts
AeroScale: 226 posts
Posted: Sunday, February 25, 2007 - 01:14 AM UTC

Quoted Text


Todd, good to see you joined in, UH-1H sound great. Will you be doing more than a out of box build!

Great Job guys

Joe


Mother:
Yes it will deffinately be more than O.O.B.. I'll use an Eduard P.E set, several scratch built items,ie VIP interior, pilot/co-pilot seats,new rotorhead w/ better detail,homemade decals for sqd. emblem & tail# and placards. Im using the Italeri UH-1D kit updated to "H" standards.
This helo has been on the T.D. list for many yrs., since 92", so it will be satisfying to finally get it on the shelf.
almonkey
_VISITCOMMUNITY
England - East Midlands, United Kingdom
Joined: March 23, 2003
KitMaker: 2,124 posts
AeroScale: 788 posts
Posted: Sunday, February 25, 2007 - 01:17 AM UTC
heres where i am with my sea king, (actually since taking these pics i have done a bit more work on it) after seeing all the interior work on other peoples builds i almost feel guilty about mine being an oob build!
and just to show stevies not the only one who does this-

bounce19712
Joined: February 21, 2007
KitMaker: 80 posts
AeroScale: 59 posts
Posted: Tuesday, February 27, 2007 - 11:43 PM UTC
I got the Huskie Cobra kit in today!! man, do they do good work....and you'll pay for it too.

Now I'm pro-crash-tinating until I settle down with a particular paint scheme for both the Huskie and my Huey...and I may need some Cobra parts for the huey....yahoo!!!! lol....three months till the Vietnam Campaign is closed....
bounce19712
Joined: February 21, 2007
KitMaker: 80 posts
AeroScale: 59 posts
Posted: Thursday, March 01, 2007 - 03:24 AM UTC
sharing Kaman Huskie Silver / Grey paint scheme HH-43 b/h research photos.....phew...lotta beers and a couple hours....


I've weeded out dead links, crappy photos...I think I've found enough for anyone to do their paint scheme accordingly...inside and out.....

maybe there's a place to put threads like this...or maybe we can make one????


http://www.aircraftresourcecenter.com/walk-chopper.htm
http://www.cybermodeler.com/aircraft/hh-43/huskie.shtml
http://uscockpits.com/Helicopters/Helicopters.html#H43
http://www.helispot.com/photos/01298.html
http://www.helispot.com/photos/01299.html
http://www.h43-huskie.info/Buckeburg.htm
http://www.h43-huskie.info/PRESERVED/HH43F-600289.htm
http://www-rucker.army.mil/FTS/Helo%20Pages/hh43images.html
http://rides.webshots.com/photo/2422128680050399876WoxtKa
http://users.acninc.net/padipaul/pedrohome.htm
http://www.aircraftresourcecenter.com/AWA1/201-300/walk252_HH34_Husky/images_Terry_Sumner/hh43_11.jpg
http://www.amcmuseum.org/Images/hh-43cockpitLG.jpg
http://www.area51hangars.com/logbook/veteransVoices/JoeConnell/pictures/Vietnam/images.swf

http://www.h43-huskie.info/Photos/HH43F-00263-Museum-AFMagazine-Apr2002.jpg
http://www.raf-upper-heyford.org/62-4535_CIPDFCAR.jpg
http://commons.wikimedia.org/wiki/Image:Kaman_HH-43_F_Husky_II_Detail_Rotor.jpg
http://www.h43-huskie.info/
http://travel.webshots.com/photo/1424646775041492700KiOGNK
http://www.h43-huskie.info/SouthSeaSue.htm
http://www.talkingproud.us/Military020105B.html
http://avia.russian.ee/cockpits/us.html
http://www.daviator.com/photos/helos2.htm
http://www.warbirdregistry.org/heloregistry/heloregistry.html
http://www.h43-huskie.info/PRESERVED/Robins-Museum-81853.htm


mother
_VISITCOMMUNITY
New York, United States
Joined: January 29, 2004
KitMaker: 3,836 posts
AeroScale: 1,036 posts
Posted: Thursday, March 01, 2007 - 04:12 AM UTC
Phil your photo looks as if the Sea King is actually ready to take off…great work.

Hey bounce, looks like your pretty busy with your research. Thanks for the links, I have most booked marked for references. As for pinning them as an active thread I’ll talk with Melin.

Joe
HeavyArty
_VISITCOMMUNITY
Florida, United States
Joined: May 16, 2002
KitMaker: 17,694 posts
AeroScale: 1,728 posts
Posted: Thursday, March 01, 2007 - 05:59 AM UTC
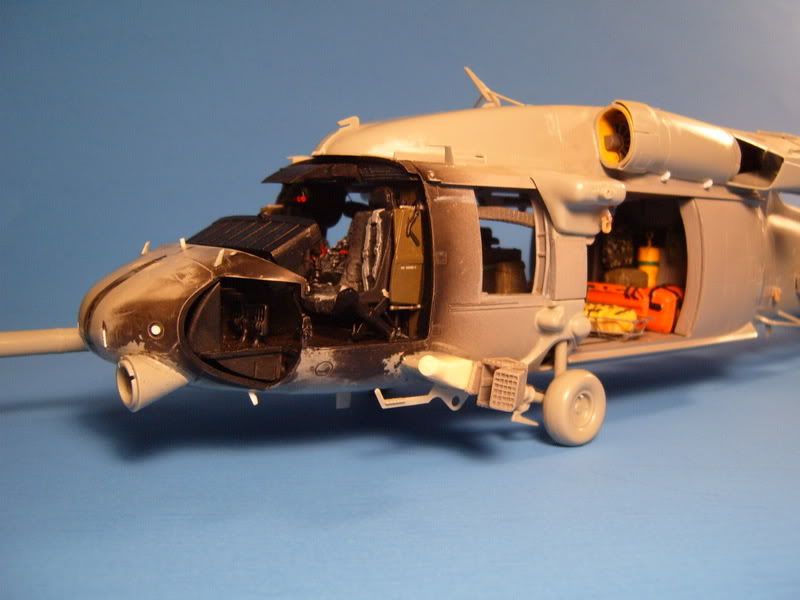
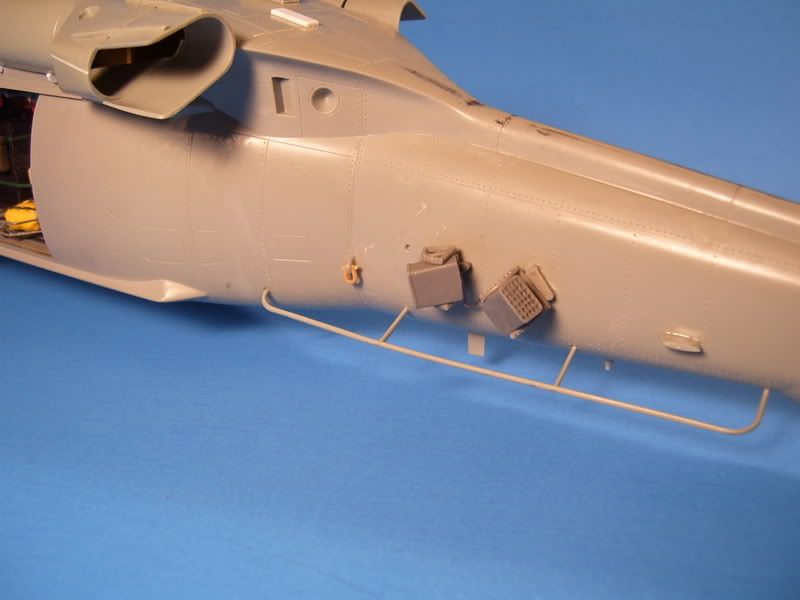
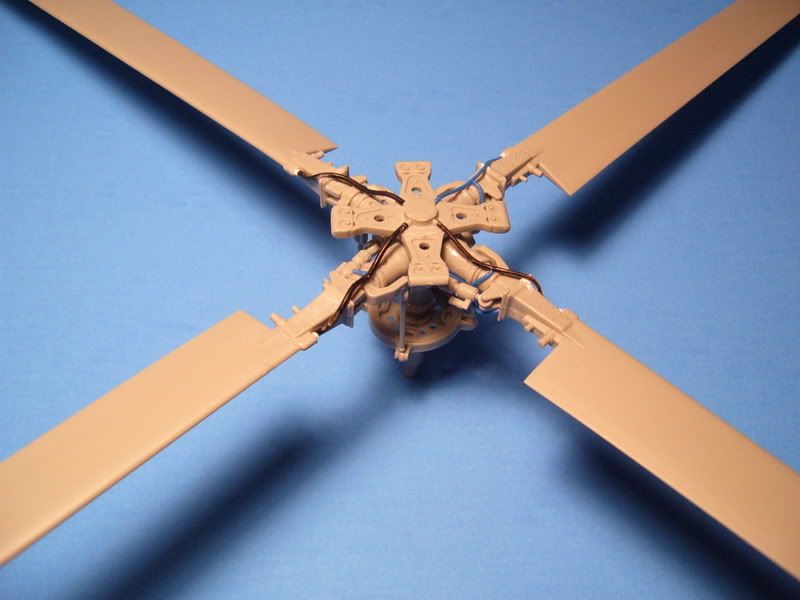
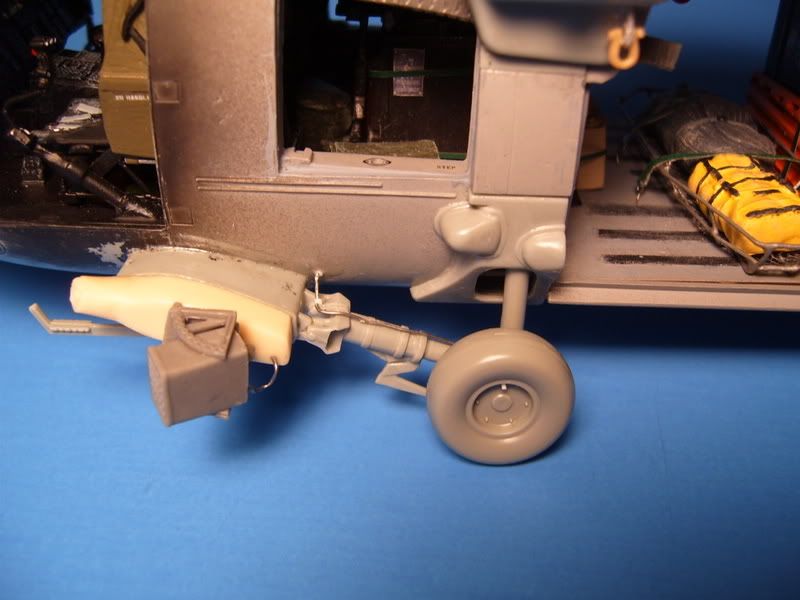
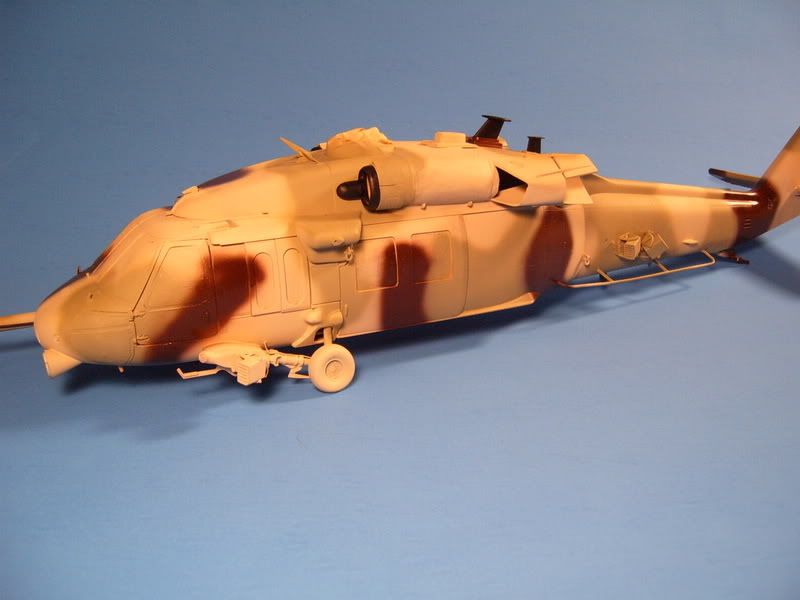
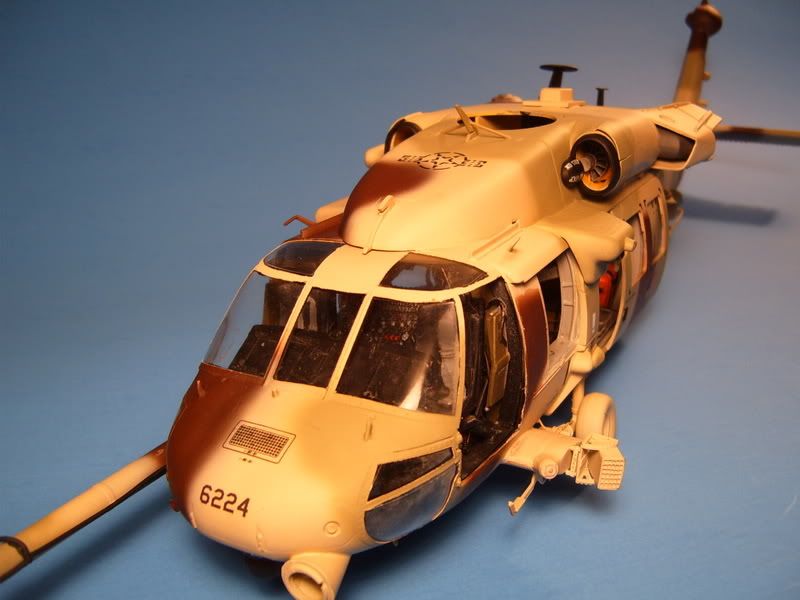
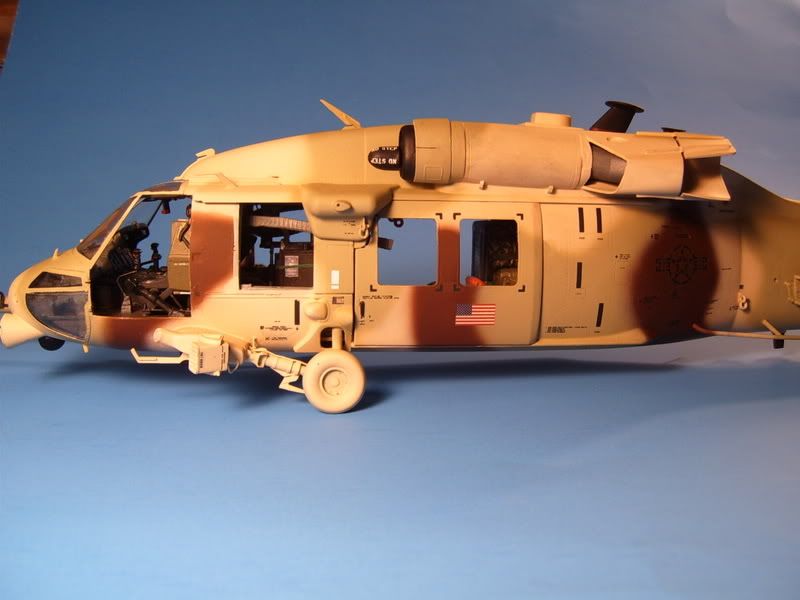
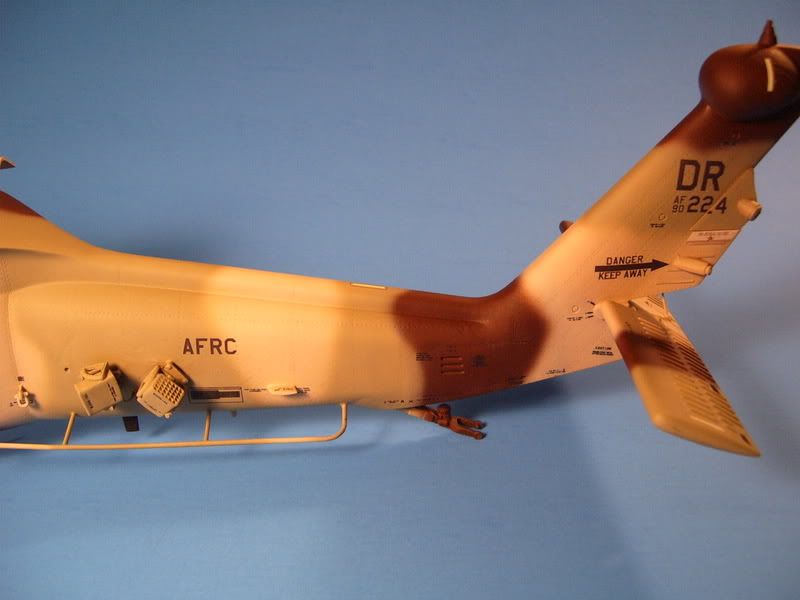
Here is the latest update on my 1/35 USAF Reserve HH-60G from Davis-Monthan AFB, AZ in OIF 1. It is just about ready for paint. I added quite a bit to the exterior as well. I have plumbed the brake lines for the main gear and tail wheel. Oil lines to the main rotor. Six Flare/Chaff launchers and their wiring. The launchers and their mounts are copies of the ones in the Academy MH-60L DAP kit with more defined boxes added. These are courtesy of a fellow modeler from Italy. I have also added the APR-39 antennas to the depressions in the nose, along with the diagnostic hook-up on the right side nose, and latches for the nose avionics bay. Various AM/FM and SATCOM antennas as well.

Here it is so far:


And the obligatory spinning rotors shot. :-)


More here.
mother
_VISITCOMMUNITY
New York, United States
Joined: January 29, 2004
KitMaker: 3,836 posts
AeroScale: 1,036 posts
Posted: Thursday, March 01, 2007 - 07:52 AM UTC
Wow Gino she really looks great, super looking detail, nice eye. Those Chaff launchers are sharp, he did a nice job fixing them up. What did you use for the shackles…Looking forward to see some paint.
Hey how’d you guys make out with all the bad weather and tornados.

Joe
HeavyArty
_VISITCOMMUNITY
Florida, United States
Joined: May 16, 2002
KitMaker: 17,694 posts
AeroScale: 1,728 posts
Posted: Thursday, March 01, 2007 - 08:47 AM UTC
Thanks Joe. We are all fine here, just a bunch of rain and some wind.

The shackles are from a Trumpeter Abrams kit, they run on the small side. They are mounted on pieces of sheet plastic.
bounce19712
Joined: February 21, 2007
KitMaker: 80 posts
AeroScale: 59 posts
Posted: Friday, March 02, 2007 - 01:45 AM UTC
humble beginnings...

I melted some spue to try and make some toggle switches to add to my center console panel....they really came out too tall...I ended up holding a match to them to bring them down .....


now I will bring them down further I guess and call it step one: toggle switch screw down bases....lol

must make the sprue thinner......

EDIT:...hehe...after sanding them down...I realized....I've sanded away all of my work and have sanded into the exixting panel buttons..to which I initially added the streched sprue to....

oh well....they needed to be brought down to look like the switch bases anyways....errrr...I 'd better get on with it and move on...lol

bounce19712
Joined: February 21, 2007
KitMaker: 80 posts
AeroScale: 59 posts
Posted: Friday, March 02, 2007 - 02:21 AM UTC
made smaller sprue...and made a placement hole with a t-pin...


also on the two rear switches I added the other side to the "bump" switch guard by just laying down some thicker sprue...Cobra Company had molded the other side for me....

I'm curious to see how the ca glue is going to show up once painted...I'm afraid I'm gonna have some blobs....

bounce19712
Joined: February 21, 2007
KitMaker: 80 posts
AeroScale: 59 posts
Posted: Saturday, March 03, 2007 - 05:29 PM UTC
OK...let's see some progress photos....

if you havent made any progress just rotate the picture and repost
HeavyArty
_VISITCOMMUNITY
Florida, United States
Joined: May 16, 2002
KitMaker: 17,694 posts
AeroScale: 1,728 posts
Posted: Saturday, March 03, 2007 - 08:38 PM UTC
Progress is being made on my HH-60G, but no pics yet. I have started laying down the paint on it. Hope to be completed painting it today and start on the decals soon. I'll post some pics when its done.
Busybeas
_VISITCOMMUNITY
England - West Midlands, United Kingdom
Joined: January 26, 2007
KitMaker: 102 posts
AeroScale: 96 posts
Posted: Saturday, March 03, 2007 - 10:18 PM UTC

A little more progress on the Rega,

here she has been primered and a basecoat of white


Then several hours masking and the bright red sprayed on. hmmm


I am my biggest critic, and can't say I am truly happy with this.. I spent an age masking, and burnishing the edges down to try and get a sharp separation line.. alas its not as good as I had hoped..

I am also using Tamiya "rattle cans".. so perhaps I laid the paint on too thick.. and too quickly...

I am seriously thinking of investing in an airbrush and compressor.. seems to me ( once I develop the skill to use it !) the paint control will be better ? Any advice on this would be appreciated.. I

I must also source some better glue for sticking the glazing in... and so have ordered some Pacer "canopy" glue..

All in all, I am a little disappointed.. however,, many, many lessons will / have been learned from this, my first build in around 30+ years...

I shall continue this to conclusion and use it as a reminder..

cos my NEXT model WILL be better !!


Cheers

Stevie B
HeavyArty
_VISITCOMMUNITY
Florida, United States
Joined: May 16, 2002
KitMaker: 17,694 posts
AeroScale: 1,728 posts
Posted: Saturday, March 03, 2007 - 10:32 PM UTC
I think it looks like it is coming out great. The paint doesn't really look that bad, but...


Quoted Text

am also using Tamiya "rattle cans".. so perhaps I laid the paint on too thick.. and too quickly...

I am seriously thinking of investing in an airbrush and compressor.. seems to me ( once I develop the skill to use it !) the paint control will be better ? Any advice on this would be appreciated.. I


You are correct on the airbrush. It will give you better control and you will be much more pleased with your paint jobs. Rattle-cans can be a pain in the butt, especially in gloss colors. I highly recommend getting an airbrush and compressor set-up. I have a Paasche H model with a home/garage compressor and tank. I have always been happy with it and can do just about any paint scheme needed with it.
bounce19712
Joined: February 21, 2007
KitMaker: 80 posts
AeroScale: 59 posts
Posted: Sunday, March 04, 2007 - 03:16 AM UTC
looks real good.....plus it's ORANGE!!!

you could pick up many more chicks with an orange chopper than olive drab.

I think rattle cans put out way too much volume unless you "move quickly"

i bought a 99$ compressor from sears a while ago....it works well....and I bought an airbrush off ebay......double action...adjusts the air and paint volume......just go water based paints for easy clean up!


VonCuda
_VISITCOMMUNITY
North Carolina, United States
Joined: November 28, 2005
KitMaker: 2,216 posts
AeroScale: 1,080 posts
Posted: Sunday, March 04, 2007 - 03:19 AM UTC
Stevie,
Personally I think your Rega is looking quite good. Don't be too hard on yourself. Not having an airbrush set up is really putting you at a disadvantage.
I too use a Paasche double action. There is just no substitute for a good airbrush.
As for glueing in the canopy glass, here's what I do. The most important step as I see it is to coat your canopy with Future, or Klear before you do anything else. The Future/Klear will greatly reduce fogging when glue is applied later on. I've actually used super glue to glue in a few airplane windows after applying future and had no bad effects what so ever. The special canopy glue you can buy at most hobby shops is OK but if I need to fill a gap between the frame and canopy I usually just use white glue since it dries clear.
Hope this helped a little.

So, here is an update on my Forest Service Huey. A little more painting and constructing and then she's ready for the decals. BTW, thanks to HeavyArty (Gino) for fixing me up with some custome decals. They look great and I'm anxious to see how well they turn out on the Huey.


Thanks for looking
HeavyArty
_VISITCOMMUNITY
Florida, United States
Joined: May 16, 2002
KitMaker: 17,694 posts
AeroScale: 1,728 posts
Posted: Sunday, March 04, 2007 - 03:40 AM UTC
The fire huey is coming along great Hermon. Can't wait to see it with the decals on.

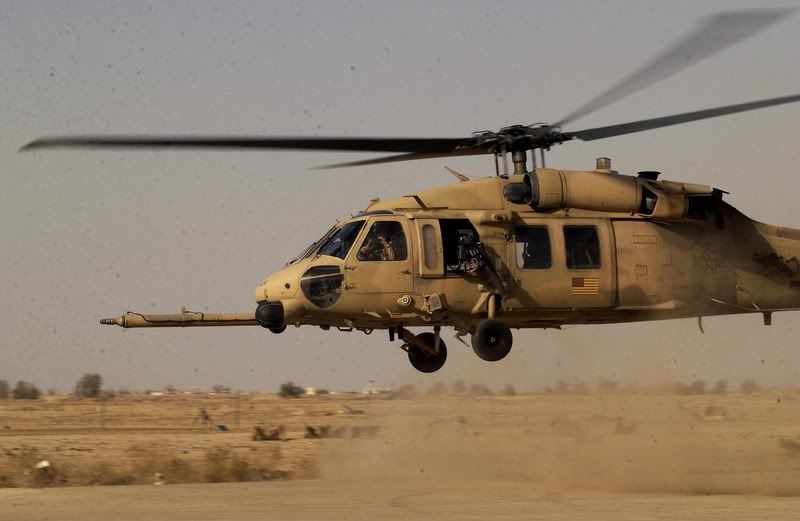
Here is the HH-60G with its initial paint applied. Now on to decaling and the weathering.

Here is the original that I am attempting to recreate.


And mine so far...


More to come as it continues....
Busybeas
_VISITCOMMUNITY
England - West Midlands, United Kingdom
Joined: January 26, 2007
KitMaker: 102 posts
AeroScale: 96 posts
Posted: Sunday, March 04, 2007 - 11:48 AM UTC
Thanks again guys ,
the words of encouragement keep me on target, cheers

I revisited the Rega last night, and she doesn't look as bad on a 2nd look... so onward onward...

I have managed to remove the windscreen with very little damage, and used the "dry Brasso" technique ( I found on this forum !) to polish out the little bloom I had.. and have ordered some canopy glue to re-attach it..
So I am a little happier now..

Thanks Hermon, also for the heads up on Klear, I have, at last, found some in the local supermarket.. and shall certainly be "dipping Klear" next time

I am now looking for airbrush & compressor..

I shall continue to go thro the learning curve, while watching some of you "master modellers" do your stuff

The pictures you guys post are real inspiring to us all.. Hermon your Forest Huey looks fab, and Gino... I am drooling at the paint work on your HH-60G .......keep em coming !

Bye for now

Stevie B
Busybeas
_VISITCOMMUNITY
England - West Midlands, United Kingdom
Joined: January 26, 2007
KitMaker: 102 posts
AeroScale: 96 posts
Posted: Monday, March 05, 2007 - 11:32 PM UTC
Okay,

Now look what you done... he hee..........

so I am now committed to this hobby.. I just bought an airbrush
I have settled on a Badger 200 as seems to be a mid range model,,and nearly everywhere sells them in Blighty.


I can only source 2 places in UK that stocked the Paasche airbrushes as used by Gino & Hermon, so was a little concerned about back up and spares availability..

Time will tell, if I made the right decision.. I am now sourcing a compressor , then practise, practise..

Hopefully I shall gain more control, when laying paint on my next helo

cheers

Stevie B

HeavyArty
_VISITCOMMUNITY
Florida, United States
Joined: May 16, 2002
KitMaker: 17,694 posts
AeroScale: 1,728 posts
Posted: Tuesday, March 06, 2007 - 07:59 AM UTC
Here it is with the decals on. It still needs some weathering and the smaller pieces and details added.


Busybeas
_VISITCOMMUNITY
England - West Midlands, United Kingdom
Joined: January 26, 2007
KitMaker: 102 posts
AeroScale: 96 posts
Posted: Tuesday, March 06, 2007 - 11:42 AM UTC
Wow, Gino thats looking fantastic, and not yet finished !!
You must be well pleased with that...

A question ? how do you get your decals to look so "integrated" on the fuselage , I cannot even discern the carrier film at all?

Your close up photography, shows the excellent finish off magically.

More, more.. please...

Steve B
bounce19712
Joined: February 21, 2007
KitMaker: 80 posts
AeroScale: 59 posts
Posted: Tuesday, March 06, 2007 - 12:50 PM UTC
Indeed!! very nice.....a Pro job for sure!!

I think I have one or two Blackhawks in my stash...but I'm scared of them cuz they have so many pieces...


SGTJKJ
#041
_VISITCOMMUNITY
Kobenhavn, Denmark
Joined: July 20, 2006
KitMaker: 10,069 posts
AeroScale: 3,788 posts
Posted: Tuesday, March 06, 2007 - 04:17 PM UTC
Wow, some really colourful birds in here. Nice to see things progress.

@Gino: Great job on your blackhawk. Very impressed!
HeavyArty
_VISITCOMMUNITY
Florida, United States
Joined: May 16, 2002
KitMaker: 17,694 posts
AeroScale: 1,728 posts
Posted: Tuesday, March 06, 2007 - 06:39 PM UTC
Thanks guys. Glad you all like it.

Stevie, to make the decals appear painted on, I use various coats of gloss and flat lacquer. After painting and allowing it to dry for a day, I gave it two coats of gloss. Once that was dry, I applied the decals, let dry. The next day, I applied another coat of gloss to blend the decals in. Lastly, there are 2 coats of flat to tone it all down again.