Air Campaigns
Want to start or join a group build? This is where to start.
"The Guardian Angel" Helicopter Campaign '07
Tomcat31
#042
_VISITCOMMUNITY
England - North East, United Kingdom
Joined: November 18, 2006
KitMaker: 2,828 posts
AeroScale: 1,720 posts
Posted: Wednesday, March 07, 2007 - 04:46 AM UTC

Quoted Text

Okay,

Now look what you done... he hee..........

so I am now committed to this hobby.. I just bought an airbrush
I have settled on a Badger 200 as seems to be a mid range model,,and nearly everywhere sells them in Blighty.

I can only source 2 places in UK that stocked the Paasche airbrushes as used by Gino & Hermon, so was a little concerned about back up and spares availability..

Time will tell, if I made the right decision.. I am now sourcing a compressor , then practise, practise..

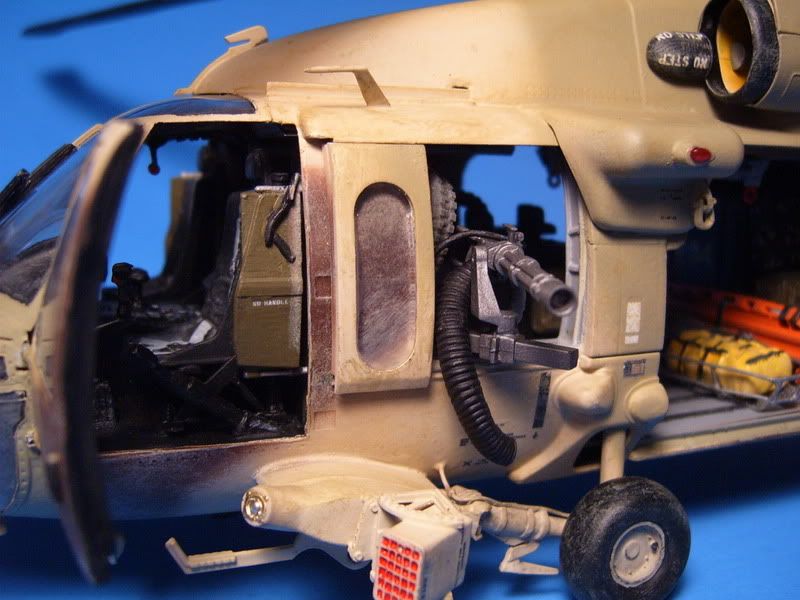
Hopefully I shall gain more control, when laying paint on my next helo

cheers

Stevie B


I've been using the Badger 200 for well over 15 years now and never had any major problems. Its a good all round Airbrush for starters, once you get confident them maybe start thinking about a double action airbrush (but thats when the price rises into the £100+ range) as for compressors maybe look out for the Ripmax compressors I have This One and it has worked flawlessly over the last two years since i got it. they also do This one but it doesn't come with the Moisture trap and pressure regulator. Hope this helps
mother
_VISITCOMMUNITY
New York, United States
Joined: January 29, 2004
KitMaker: 3,836 posts
AeroScale: 1,036 posts
Posted: Wednesday, March 07, 2007 - 11:08 AM UTC
Hey Steve the Rega doesn’t look that bad, one quick cure solution is to get some red decal paper and cut thin strips, then decal along the edges.

Here’s what I found that works pretty well for precision painting. After masking I’ll brush on a coat of acrylic floor wax like Future along the making edges. This will seal the masking and stop the paint from bleeding under the tape. Then spray on a few light coats and a final coat. Let the paint dry a day, then using my hobby knife with a new blade lightly score along the masking edges and slowly remove tape. Try to pull the tape up, not from behind. Again lightly score the masking edges, you just want to cut through the floor wax and not into the base or kit.

Congrats on your new Air Brush, and with practice you’ll be a pro in no time. Speaking of practice, get an old kit, diecast or toy and practice painting on it. This will help improve holding the airbrush and the movement of the piece your painting. Also do some masking techniques and camouflage tricks.

For years I used a simple single action Paasche, I thought it might be time to up grade. So I bought a Anthem 150 duel action, I worked with about an year and found that I missed my single action and went back to it. There are many types and you’ll here many suggestions but you’ll find what works for you.

Lets talk about rattle can paint for a moment, the next time you need to use a spray can warm up the paint. What you do is hold the can under hot/warm water for a few seconds. The can will feel warm at first, then shake it. The can will feel cool then, repeat over until the paint contents and can stay warm. By doing this the paint flows much better, more manageable and not so thick. Also spray on a few light coats, this helps as the final coat has something to bite onto and not run.

Great job so far and waiting to see her finished.

Happy Modeling,
Joe
Bigskip
_VISITCOMMUNITY
England - South East, United Kingdom
Joined: June 27, 2006
KitMaker: 2,487 posts
AeroScale: 575 posts
Posted: Wednesday, March 07, 2007 - 06:57 PM UTC
Stevie B

I've pm'd you - your envelope should be flashing

Andy
Busybeas
_VISITCOMMUNITY
England - West Midlands, United Kingdom
Joined: January 26, 2007
KitMaker: 102 posts
AeroScale: 96 posts
Posted: Wednesday, March 07, 2007 - 10:08 PM UTC


Thanks Joe, everyones been a great help on this forum
I hope to put into practise all the advice given, on my next helo model.. and of course.. improve !

Thanks again to everyone


Steve B
Busybeas
_VISITCOMMUNITY
England - West Midlands, United Kingdom
Joined: January 26, 2007
KitMaker: 102 posts
AeroScale: 96 posts
Posted: Friday, March 09, 2007 - 04:54 AM UTC
Still a little way to go yet, and despite my painful learning curve, she is coming along okay,,

Decalling has begun..

For this model, I am experimenting with Microscale micro set and micro sol solutions for the decals..
I don't think that they work anywhere near as well as what I have seen on Heavy Arty's Black Hawk.

I am thinking a final coat of Klear will help the decals appear better when I have finished..

? Whats the best way to add a coat of Klear /Future..thro airbrush or manual 1/2" brush as I have seen , advised on various forums.

If thro the airbrush,, does it need thinning ? if so how much and with what ? and how does one clean the airbrush thro , after ?

Sorry for all the questions, in this build, but I am keen to gain "the knowledge" and improve with my next model.


Oh , yes,, and here she is, as of this weeks efforts.. the main windscreen has yet to be (again) glued in situ.. and of course there's loads of decalling, still to do . painting of rotor blades, and various sub assemblies to be added.


Once again, thanks for the advice

Steve B
Percheron
_VISITCOMMUNITY
Washington, United States
Joined: September 23, 2006
KitMaker: 432 posts
AeroScale: 360 posts
Posted: Friday, March 09, 2007 - 11:23 PM UTC

Quoted Text

Still a little way to go yet, and despite my painful learning curve, she is coming along okay,,

Decalling has begun..

For this model, I am experimenting with Microscale micro set and micro sol solutions for the decals..
I don't think that they work anywhere near as well as what I have seen on Heavy Arty's Black Hawk.

I am thinking a final coat of Klear will help the decals appear better when I have finished..

? Whats the best way to add a coat of Klear /Future..thro airbrush or manual 1/2" brush as I have seen , advised on various forums.

If thro the airbrush,, does it need thinning ? if so how much and with what ? and how does one clean the airbrush thro , after ?

Sorry for all the questions, in this build, but I am keen to gain "the knowledge" and improve with my next model.


Once again, thanks for the advice

Steve B


Steve,

Very nice job on the chopper. To answer your question about the Kleer/Future, you won't need to thin it. It sprays quite well, but since it dries quickly it might start to clog the airbrush. Over decals I sometimes just brush thin coats on, just 'cause I'm to lazy to fire up the airbrush just for a few decals.

As for cleaning the airbrush, Windex or plain rubbing alcohol works perfectly. Though if the Kleer dries in your airbrush it may take a little soaking to get it to dissolve, but it will.

-Derek
Busybeas
_VISITCOMMUNITY
England - West Midlands, United Kingdom
Joined: January 26, 2007
KitMaker: 102 posts
AeroScale: 96 posts
Posted: Saturday, March 10, 2007 - 01:28 AM UTC
Cheers Derek ,

I shall give that a whirl... many thanks for the advice.

Steve
HeavyArty
_VISITCOMMUNITY
Florida, United States
Joined: May 16, 2002
KitMaker: 17,694 posts
AeroScale: 1,728 posts
Posted: Saturday, March 10, 2007 - 05:15 AM UTC
She is done!!! Here is my HH-60G from the USAF Reserve out of Davis-Monthan AFB in OIF 1. Only 4 helos carried this unique scheme. I used the Academy 1/35 MH-60G kit, along with Cobra Company's HH/MH-60 upgrade set, and lots of scratch items. Some of the other pieces came from fellow modelers too. The Stokes Litter is from our own Mother, and the chaff/flare launchers are from a modeler in Italy. The decals were custom made by a friend as well.

Here is the actual helo:


And my rendition of it:


More here.

I'll place a couple pics in the campaign finished builds thread too.

Once she was done, she attended a family reunion. Here is one of her and her cousin, hwo is in the US Army's 160th SOAR as an MH-60L DAP.


And one of the whole family. Their other cousin who serves as a UH-60L in the 101st Airborne (Air Assualt).


As always, comments are welcome.
VonCuda
_VISITCOMMUNITY
North Carolina, United States
Joined: November 28, 2005
KitMaker: 2,216 posts
AeroScale: 1,080 posts
Posted: Saturday, March 10, 2007 - 09:55 AM UTC
Dang!
If my cousins were that sexy................well, never mind.
Great family shot Gino. I'd love to have any one of them in my collection.
Busybeas
_VISITCOMMUNITY
England - West Midlands, United Kingdom
Joined: January 26, 2007
KitMaker: 102 posts
AeroScale: 96 posts
Posted: Saturday, March 10, 2007 - 12:11 PM UTC
Wow , Gino !!

Stunning model(s) from the helo "master"..
It has been a real treat and inspiration to watch your model evolve. The trio look ready for action, anywhere.

Amazing, wonderful modelling... well done !

Regards

Steve
bounce19712
Joined: February 21, 2007
KitMaker: 80 posts
AeroScale: 59 posts
Posted: Saturday, March 10, 2007 - 03:44 PM UTC
yeah man! those birds look nice.....lots and lots of work!! I love it.

I salute you!

bounce19712
Joined: February 21, 2007
KitMaker: 80 posts
AeroScale: 59 posts
Posted: Saturday, March 10, 2007 - 03:46 PM UTC
I'm moving along with instrumentation for my Huskie as well as the UH-1D for the Vietnam Campaign....

here's a photo...


to the right you may be able to see the toggle switches I installed on the center console....they will come out nicely with some silver paint later...actually they're rally hard to see...lol...but there on the grey portions of the console..srry

I did a mass assault of toggles with stretched sprue on the over head panel but did not wait till the CA glue dried...(and yes, they were in a nearly orderly set of rows..hehehe) .so when I snipped the excess....some came off....the detail on the base was ruined...I ended up completely sanding the panel flat and adding some portions I stole from a junked Apache instrument panel I bought on ebay years ago...so back to square one with that....(you can see the junked apache parts in the top photo...


there's the before attempt....heheheh

for the huskie panels' instrumentation i cut out each individual dial from either a panda huey or the huskies decal set...the panda decals kept shattering into tiny pieces...

I've got a couple more gauges to go then I go back and fill with clear after adding some more definition, red, yellow, green ...etc.

I'm gonna brush in the large gauge on the right side as that is the artificial horizon and should be fun to test my brushin lines...


cheers


Busybeas
_VISITCOMMUNITY
England - West Midlands, United Kingdom
Joined: January 26, 2007
KitMaker: 102 posts
AeroScale: 96 posts
Posted: Saturday, March 10, 2007 - 11:50 PM UTC
Hey Bounce, looks like you got quite a production line, going on there

I never realised there were so many decals for this Rega helo !
Here's the latest pics.. almost done with the decalling now.. some tidying up to do and fitting of other sub-assemblies,,


The Microscale set and sol solutions appear to have done their stuff.. (though my next model will improve),they have shrunk down very well over the rivet detailing. (Ignoring the poor masking lines:)


Okay, I am aware of the shortfalls of this model and to be honest, its nothing like my normal modelling standards..( in r/c & model railways) however, it has been a useful re-introduction to plastic heli-modelling after all these years !

Lessons learned so far :

Don't be in a rush !
Don't trust the instructions nor the order of them !
Add smaller / fragile external assemblies toward the end.
Test fit, and re-test fit parts until 100% happy ,
Dip clear parts in Klear
Use appropriate glues, not just what I have available.
Take extra care when masking off, burnish down well, particularly over rivet detail.. maybe seal the edges?
Spray paint, wherever possible, using an airbrush..( I get my compressor this week
Cover model with Klear, to allow full embeddment of decals into the finish.
Let paint fully dry.... do something else !
Be more patient.

The NEXT model WILL be an improvement !
Improvement is my goal.

I think that about covers it,

I am aware of my shortcomings and am happy to be self critical, one things for sure.... I am sooo glad I found this inspiring site.. The wealth of advice and help on this forum has been brilliant, and I am glad to be a part of it.

The finishing line is within sight, for this one anyway...

cheers all !

Steve B
bounce19712
Joined: February 21, 2007
KitMaker: 80 posts
AeroScale: 59 posts
Posted: Sunday, March 11, 2007 - 06:48 PM UTC
it will look great on display....

with civilain aircraft: when in doubt, put another clear coat on it.

hehehe....nah I just made that up.

I paid close attention to your list of to-do's for helos......

salute!
Busybeas
_VISITCOMMUNITY
England - West Midlands, United Kingdom
Joined: January 26, 2007
KitMaker: 102 posts
AeroScale: 96 posts
Posted: Monday, March 12, 2007 - 10:55 PM UTC
Main rotor assembly completed and cranked up :-)


Nearly there......

Stevie B
HeavyArty
_VISITCOMMUNITY
Florida, United States
Joined: May 16, 2002
KitMaker: 17,694 posts
AeroScale: 1,728 posts
Posted: Tuesday, March 13, 2007 - 03:31 AM UTC
Looking good Stevie. Keep up the good work.
Busybeas
_VISITCOMMUNITY
England - West Midlands, United Kingdom
Joined: January 26, 2007
KitMaker: 102 posts
AeroScale: 96 posts
Posted: Tuesday, March 13, 2007 - 08:05 PM UTC
Thanks Gino

I appreciate the encouragement

Well, I think she is just about done.. I shall post some pics in the Finished Guardian Angel thread also.

I am far from happy, and am very self critical, that said, I am encouraged by all the help I have had on this forum. I shall improve my skills with each model I build, of that I am most confident. I have learned thro so many mistakes on this one, it has been a useful re-introduction to plastic modelling,, above all I AM ENJOYING IT !!

I have already accumulated a " helo stash" and look forward to my next model build :-)

So here, she is, my first plastic rotary model in over 30 years


Once again, thanks to all for the advice...

till next time

Steve B

VonCuda
_VISITCOMMUNITY
North Carolina, United States
Joined: November 28, 2005
KitMaker: 2,216 posts
AeroScale: 1,080 posts
Posted: Saturday, March 17, 2007 - 08:37 AM UTC
Hi folks

Just a little update on my Forest Service Huey. I've started applying the decals, about half way done with that stage now. Lot's of little parts left to paint and glue on. The doors are just stuck on the fuselage right now just for the pictures, but I'm probably going to pose them in the open position later. So, here is where she stands right now.


Wish me luck on the rest of this one!
RotorHead67
_VISITCOMMUNITY
Virginia, United States
Joined: May 07, 2003
KitMaker: 1,174 posts
AeroScale: 226 posts
Posted: Saturday, March 17, 2007 - 09:02 AM UTC

Quoted Text

Hi folks
Just a little update on my Forest Service Huey.


Wish me luck on the rest of this one!


Hermon;
Looks great so far , Although, did you not notice the aircraft number that is assigned to this registration number. It's 11 not 12.
almonkey
_VISITCOMMUNITY
England - East Midlands, United Kingdom
Joined: March 23, 2003
KitMaker: 2,124 posts
AeroScale: 788 posts
Posted: Saturday, March 17, 2007 - 02:16 PM UTC
hi all! not had too much modelling time recently, but i've been tinkering about on this one, although it looks like i have today free to get something done. i have to say that there are a lot of great tips and hints on this thread, i just wish i had read joe's tip about using kleer to seal down masking before i painted a 737 i'm building on and off, that ended up with ragged lines.
anyway, heres how things stand at the minute

this stand is from another kit, but all older airfix kits have a slot you can cut out in the bottom so i decided to put my sea king up on it

and now a question- i noticed that the tail rotor and main rotor seem to be VERY close. is this how it is on the real aircraft?
Busybeas
_VISITCOMMUNITY
England - West Midlands, United Kingdom
Joined: January 26, 2007
KitMaker: 102 posts
AeroScale: 96 posts
Posted: Saturday, March 17, 2007 - 02:52 PM UTC
Hi

Hermon, the Huey is looking great Keep the pics coming, keeps me enthused

Phil, gee that main rotor DOES look incredibly close to the tail rotor.. be interesting to see if anyone has any tech info on this..

Looks cool though..

Yes, this is a fabulous place for build hints and tips.. I have learned a heck of a lot here

Steve
Removed by original poster on 03/18/07 - 18:25:54 (GMT).
bounce19712
Joined: February 21, 2007
KitMaker: 80 posts
AeroScale: 59 posts
Posted: Saturday, March 17, 2007 - 04:27 PM UTC


I would venture to say that that's pretty near to the correct scale.....a matter of inches not feet...from looking at some walkaround photos...in the pic below the blade farthest to the right is actually gonna be nearly a foot closer I would guess.....


http://data3.primeportal.net/hangar/bartolome_jordan/sh-3h/images/sh-3h_03_of_38.jpg

image problems...oops...

VonCuda
_VISITCOMMUNITY
North Carolina, United States
Joined: November 28, 2005
KitMaker: 2,216 posts
AeroScale: 1,080 posts
Posted: Sunday, March 18, 2007 - 06:16 AM UTC

Quoted Text

Looks great so far , Although, did you not notice the aircraft number that is assigned to this registration number. It's 11 not 12.


Todd,
That was just my own personal little touch on the project. I kept looking at the picture of the chopper with the #11 on it and thought maybe a 2 with it's rounded curves would look better than the straight 1's in between the green strips. Thanks for looking, and great eye!
Percheron
_VISITCOMMUNITY
Washington, United States
Joined: September 23, 2006
KitMaker: 432 posts
AeroScale: 360 posts
Posted: Sunday, March 18, 2007 - 06:48 AM UTC
Hermon,

Great job!

It is refreshing to see a Huey in non Vietnam colors. I'm getting ready to start my Italeri V-22 for this campaign, but I think I may wait a bit as I'm hoping that Eduard or some other company comes out with some AM stuff for the kit. Fingers crossed

-Derek