Air Campaigns
Want to start or join a group build? This is where to start.
Official tread: Rumble in the East Asian Sky
29Foxtrot
_VISITCOMMUNITY
Victoria, Australia
Joined: September 19, 2003
KitMaker: 708 posts
AeroScale: 674 posts
Posted: Wednesday, August 01, 2007 - 12:11 AM UTC
Bjorn,

I think you refer to the Sunderland III, their were Do 24's used in the Pacific by the NEIAF before there surrender in 1942 to the Japanese, 5 ended up in the Australian Air Force, that escaped.


Nige,

Thanks I hope the scans are of help.


I've done a little to a Tamiya 48 scale A6M2 Zero, the cockpit is very basic, with a decal for the instrument panel.

This colour is a mix of Tamiya Titanium and Clear Blue, [as it is needed for several other birds for this build]
sweaver
_VISITCOMMUNITY
Kentucky, United States
Joined: April 19, 2007
KitMaker: 759 posts
AeroScale: 184 posts
Posted: Thursday, August 02, 2007 - 12:29 AM UTC
Unfortunately I won't be starting my build now. I found that the cowling that Accurate Miniatures supplies for their SBD-3 kit is actually the one that is supposed to go with their SBD-5. So I'll have to call them and see if I can get replacements.
SGTJKJ
#041
_VISITCOMMUNITY
Kobenhavn, Denmark
Joined: July 20, 2006
KitMaker: 10,069 posts
AeroScale: 3,788 posts
Posted: Thursday, August 02, 2007 - 06:58 PM UTC
@Andy: Good choice, hope you find something nice. I have had the chance to see some of the Tamiya Beaufighters in my LHS. They look very nice although I have never build them.
The airfix Hudson - well, good luck

@Samuel: Too bad. I hope they will send you a replacement, so you can get started.

29Foxtrot
_VISITCOMMUNITY
Victoria, Australia
Joined: September 19, 2003
KitMaker: 708 posts
AeroScale: 674 posts
Posted: Friday, August 03, 2007 - 01:01 AM UTC
Andy,

The Tamiya Beaufighter's, Eagle Strike do a decal sheet for 93 Sqn RAAF 'Green Ghosts' and Cutting Edge do a sheet which has a SEAC subject included.

2 pix of a couple of RAAF examples:

A Mk VI [Mediteranian boxart], converted to a Mk IV with the Horizontal tailplane.

The Australian Produced Mk XXI, with Aussie Decals sheet.

Hope this helps.
Tigerbait
_VISITCOMMUNITY
North Carolina, United States
Joined: September 28, 2005
KitMaker: 347 posts
AeroScale: 179 posts
Posted: Friday, August 03, 2007 - 01:07 AM UTC
Hello all. Here's a minor start to my corsair...


I'll post more when I can. I should have the cockpit done this weekend... maybe
betheyn
Staff MemberSenior Editor
AEROSCALE
#019
_VISITCOMMUNITY
England - South East, United Kingdom
Joined: October 14, 2004
KitMaker: 4,560 posts
AeroScale: 2,225 posts
Posted: Friday, August 03, 2007 - 01:29 AM UTC
Thanks Rob, that will help with my search for the correct markings.
Andy
CaptainA
_VISITCOMMUNITY
Indiana, United States
Joined: May 14, 2007
KitMaker: 3,117 posts
AeroScale: 2,270 posts
Posted: Friday, August 03, 2007 - 04:35 AM UTC
I got a start on my B-25 Gun Nose. So far I have painted the fuselage interior. I got started on step 1 this morning, which is the cockpit. Not a lot of progress, and nothing worth picturing yet. I will probably finish the cockpit in the morning.

I have the same SBD-3 kit. Be sure to post your results on obtaining a replacement.

I picked up the Trump P-47 Razorback yesterday. It comes in Pacific Markings. The kit addresses a complete aircraft. It looks like just about everything that can be covered up with a panel is in there. But it does not appear to be to complicated of a build. Wow.
29Foxtrot
_VISITCOMMUNITY
Victoria, Australia
Joined: September 19, 2003
KitMaker: 708 posts
AeroScale: 674 posts
Posted: Friday, August 03, 2007 - 06:16 AM UTC
Todd,
Excellent progress so far on the Corsair.

Andy,
Whatever you decide on a Beufighter, let me know if you have a problem with decals, I have a spare Eagle Strike SEAC sheet and several RAAF extra's if you need help, one is the older OOP AeroMaster set for a 93 Sqn RAAF Beau.

I'll post some progress pix soon of the 'Irving' early production version.
29Foxtrot
_VISITCOMMUNITY
Victoria, Australia
Joined: September 19, 2003
KitMaker: 708 posts
AeroScale: 674 posts
Posted: Friday, August 03, 2007 - 07:44 PM UTC
Progress of my Early Production 'Irving' from the Tamiya Stable, this is the second of the Irving kits and is just as good as the first boxing of the Mid Production bird.
The interior is Tamiya Titanium, for the BM area's and a mix of Titanium and Clear Blue, for the remainder.
The aircraft has been painted in a Titanium base coat, with the Orange/Yellow wing bands being painted and masked over. The wing is dry fitted to the fuselage and has a rough coat of IJN Green applied.


The 'Office' area of this bird


The rear upper and lower forward firing gun mountings


lampie
#029
_VISITCOMMUNITY
England - East Midlands, United Kingdom
Joined: December 23, 2005
KitMaker: 6,249 posts
AeroScale: 3,270 posts
Posted: Friday, August 03, 2007 - 10:25 PM UTC
Some good looking work guys.
Its good to see this campaign kicking into gear nicely!
Ive made a small start on my P47 and hope to get really stuck into it early next week.
Nige
Karybdis
_VISITCOMMUNITY
Maryland, United States
Joined: December 27, 2006
KitMaker: 846 posts
AeroScale: 65 posts
Posted: Saturday, August 04, 2007 - 11:25 AM UTC
Boy howdy! Once I get some of these commission builds off my table, I'll get in gear on my Betty with Ohka.
SGTJKJ
#041
_VISITCOMMUNITY
Kobenhavn, Denmark
Joined: July 20, 2006
KitMaker: 10,069 posts
AeroScale: 3,788 posts
Posted: Saturday, August 04, 2007 - 08:47 PM UTC
Wow! A lot of progress being made here. That is very nice to see.

The campaign is getting of to a really great start. Great work guys. Thanks for sharing - I am looking forward to see more.
csch
_VISITCOMMUNITY
Buenos Aires, Argentina
Joined: December 27, 2002
KitMaker: 1,941 posts
AeroScale: 1,040 posts
Posted: Sunday, August 05, 2007 - 02:31 PM UTC
Hi Chaps:

I started with my Mosquito for this Campaign. It´s a FB VI Tamiya in 1/72.
It´ll be a bird of 45 Sqn. India 1945.

Build will be completely OOB. The scheme of the bird is NMF with red spinners. Decals are Eagle Strike.
I believe that it will be a fast build. This kit is a joy !
Here are a couple of pics:


goldstandard
_VISITCOMMUNITY
California, United States
Joined: March 29, 2007
KitMaker: 208 posts
AeroScale: 186 posts
Posted: Sunday, August 05, 2007 - 06:02 PM UTC
Well, I am getting started with my build. This one is a Mitsubishi Ki-83. From what I have read this never got past the prototype stage, so markings are simply some red meatballs and thats it.

29Foxtrot
_VISITCOMMUNITY
Victoria, Australia
Joined: September 19, 2003
KitMaker: 708 posts
AeroScale: 674 posts
Posted: Monday, August 06, 2007 - 02:51 AM UTC
Carlos,

Great progress on the FB VI Mossie.

Michael,

Your Ki-83 progress looks good. It seems a lot of twins ended at the Prototype stage.
JPTRR
Staff MemberManaging Editor
RAILROAD MODELING
#051
_VISITCOMMUNITY
Tennessee, United States
Joined: December 21, 2002
KitMaker: 7,772 posts
AeroScale: 3,175 posts
Posted: Monday, August 06, 2007 - 04:16 AM UTC
Hi Everyone,

Good looking models! I hope to be able to get back into building next week.

There is some disagreement about colors, and much of the 'old' info we grew up with has been found to be based on bad information, guesstimations, and pure flights of fancy. Now, with more artifacts showing up from the passing generations and museums able to allocate time and resources to what they have had boxed away for decades, scientific methods and recoveries, we are receiving clarifications. I will not mention that there are people well versed in the subject, here and in Japan, who are still in some disagreement

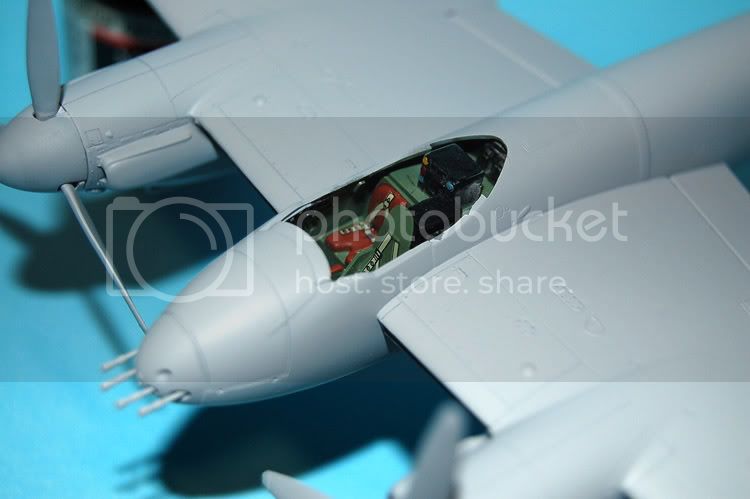
That said, a couple of comments. ll the A6Ms that have been recovered have had green cockpits. None have been found finished ( except for perhaps some individual components ) with Atoke, the blue or green-tinted clear coat that Tamiya and everybody else ( except Fujimi ) instructed cockpits to be painted in the 1960s-80s. Please see Zeros Cockpit Colors

Bjorn, the GREAT ZERO DEBATE rages about A6M2's exterior color. So far best evidence revolves around who built Zero, Mitsubishi outsourced Zeros to Nakajima, who put teir own paint on the exterior. Most sources now lean towards the light olive-gray exterior. Read A6M Zero Camoflauge and Imperial Japanese Navy Gray-Green Paint

Site member David Aiken has generously posted
Quoted Text

Aloha All,
For 40 years I have sought to locate, identify and hopefully recover the missing US and Japanese airmen from Pearl Harbor.

I see by some recent posts at J-aircraft.com that my former student has posted some of my research gleaned from a ten day trek to Oahu. I left a broad trail of marks in Hawaii. In his efforts since 1991, he has tried to pawn his version of history before he has the facts. Sorry about this.

Be aware that the photos showing BROWN relics were taken under tungsten lights...which causes a color shift. My former student has not learned about "metamerism" and has influenced museums to paint their A6Ms in a BROWN color, when the Japanese continue to teach the basic colors applied to Zeros and SOME others at Pearl Harbor were gray-green. The tungsten lighting has changed the gray-green relics to a BROWN...yet the daylight photos show the gray-green.

Here are some URLs UPDATED FROM MY EARLIER POST which MAY help:


Note: Mr Aiken is the expert, I get my info from him and others, including his aforementioned student. I do not / can not state either is more correct in their research. Caveat emptor.

His posting: David Aiken's Links
goldstandard
_VISITCOMMUNITY
California, United States
Joined: March 29, 2007
KitMaker: 208 posts
AeroScale: 186 posts
Posted: Monday, August 06, 2007 - 05:30 PM UTC
Point taken about the Atoke color. I am just doing this as an out of box build so I will stick with what I have done, even though it may not be accurate.

I have made some more progress with my project. The interior is finished and the fuselage and wing subassemblies are finished. Now all I have to do is join the wings to the fuselage. Given that they are butt joins this step will be more difficult, but before that I figured I would clean up the seams, as it will be easier at this stage.


All the side windows had to be sanded down to fit the openings, which were too small. It wasn't that hard thankfully, given the windows are rectangles. God help anyone having to sand down a round window...
SGTJKJ
#041
_VISITCOMMUNITY
Kobenhavn, Denmark
Joined: July 20, 2006
KitMaker: 10,069 posts
AeroScale: 3,788 posts
Posted: Monday, August 06, 2007 - 06:37 PM UTC
Carlos, Your Mossie looks good. Looking forward to see it take to the sky with that heavy load of MGs in the nose. Definently aggressive looking

Michael, You are making fast progress on your KI-83. I agree with you and would also keep it simple with the colours. Much is often uncertain anyway, so if it looks good, stick with it. Looking forward to see more.

Fred, thanks for all the info.
Bigskip
_VISITCOMMUNITY
England - South East, United Kingdom
Joined: June 27, 2006
KitMaker: 2,487 posts
AeroScale: 575 posts
Posted: Tuesday, August 07, 2007 - 10:05 AM UTC
Spotted the Tamiya 48 Scale Brewster Buffalo in my local LHS for a tenner. Campaign started tonight, Cockpit complete needs painting. Photos to follow soon.

@Andy B. I have the SAM Datafile on the Beau, if you want a loan of it, just shout.

Andy
csch
_VISITCOMMUNITY
Buenos Aires, Argentina
Joined: December 27, 2002
KitMaker: 1,941 posts
AeroScale: 1,040 posts
Posted: Tuesday, August 07, 2007 - 02:33 PM UTC
Hi fellows:

I decided to change the scheme of the Mossie. I´ll build an AC from the same Sqn. but with the Dark Green - Dark earth - Medium Sea Grey colours. I´ll leave the NMF for a second entry (if I have time).
I found this one more atractive:

SGTJKJ
#041
_VISITCOMMUNITY
Kobenhavn, Denmark
Joined: July 20, 2006
KitMaker: 10,069 posts
AeroScale: 3,788 posts
Posted: Tuesday, August 07, 2007 - 06:34 PM UTC
Andy, great to have you onboard. Looking forward to see your build progress

Carlos, good choice. I would have gone with the camouflaged one as well. For a bird the size of the mossie it will look stunning with the camouflage.
sweaver
_VISITCOMMUNITY
Kentucky, United States
Joined: April 19, 2007
KitMaker: 759 posts
AeroScale: 184 posts
Posted: Thursday, August 09, 2007 - 03:09 AM UTC

Quoted Text

I have the same SBD-3 kit. Be sure to post your results on obtaining a replacement.


I e-mailed the product support guy and he says that they are on the way. It was pretty easy. Since it was their problem, they shouldn't give you grief over it.
csch
_VISITCOMMUNITY
Buenos Aires, Argentina
Joined: December 27, 2002
KitMaker: 1,941 posts
AeroScale: 1,040 posts
Posted: Friday, August 10, 2007 - 02:35 PM UTC
Hi all:

I made some progress since the last post. I finished the gral. building, smooth surfaces, erased joins and a gral. primer coat was applied.
Now the bird is ready for painting and for start with the main landing gears.
Here are some pics:


TedMamere
_VISITCOMMUNITY
Moselle, France
Joined: May 15, 2005
KitMaker: 5,653 posts
AeroScale: 4,347 posts
Posted: Friday, August 10, 2007 - 07:25 PM UTC

Quoted Text

primer coat was applied.


Hi Carlos!

Very nice finish! I can't wait to see the NMF on this one!

What Primer did you use? I know someone who is about to change his brand of primer (see Emeritus' Lag-7 in the VVS thread)

Jean-Luc
csch
_VISITCOMMUNITY
Buenos Aires, Argentina
Joined: December 27, 2002
KitMaker: 1,941 posts
AeroScale: 1,040 posts
Posted: Saturday, August 11, 2007 - 12:11 AM UTC
Hi Jean Luc:

Thank you.
For primming I use Mr. Surfacer 1200 (Spray Can). It´s a little tricky to apply but when you get practice it´s a fantastic stuff.
I change the scheme of the bird, it´ll be a Dark Green, Dark Earth & Medium Sea Grey camo, same Sqn.

Regards.
Carlos