Hi all!

Now I have come to the paint booth, and as usual I started with the Azure Blue underside.
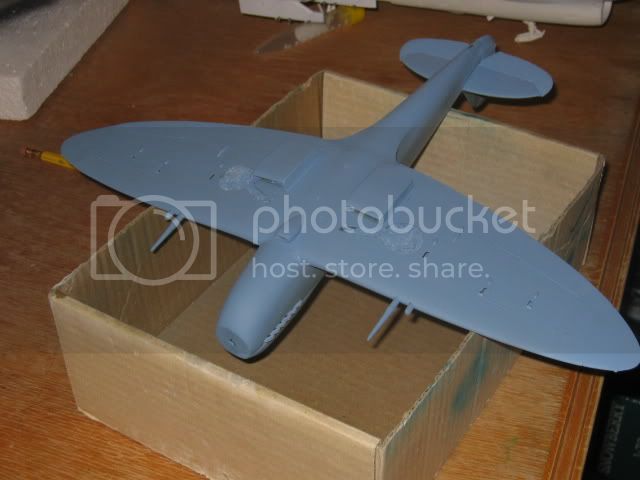
I masked off the underside with tape and then it was time to paint Middle Stone;

Now we come to the interesting part when painting Spitfires, creating the cammo pattern!
On the real aircraft the workers used rubber mats to mask, and that´s exactly how I will do, using masks made of tape.
I had a drawing in 1/48 from a Tamiya Spitfire MkVc, blew it up with 150% to get a 1/32nd scale plan.
Some concerns about the scale accuracy have come up around this kit, but I can tell that the 1/32 model fitted the plans PERFECTLY!
Only exception was in the length of the nose as the MkIXc is slightly longer, and so was the model!
The camouflage is the same "A-pattern" as the Tamiya kit, but the colors are inverted and the Dark Green is replaced with Dark Earth.

So here we go, with a scalpel I cut out the sections of the camouflage I wanted to use.
Then I placed the piece of paper over some strips of tape and traced the contours with the scalpel,

Then I peeled it off the table and placed the mask on the model.
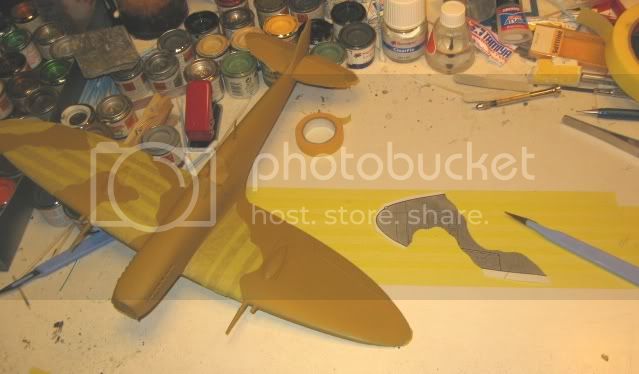
After a few hours of work I had the model completly masked and ready for the Dark Earth.

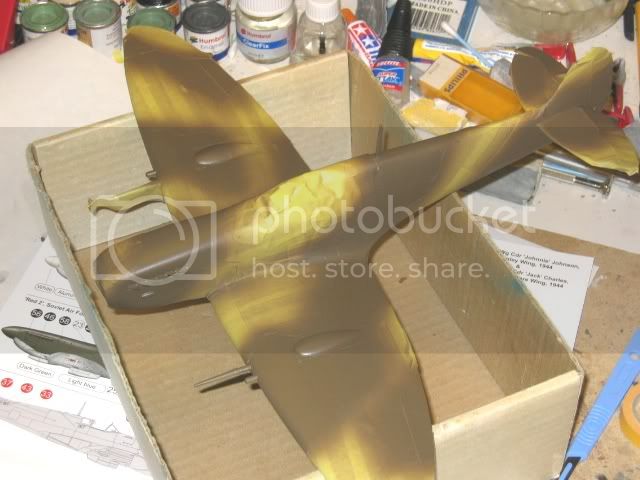
Then I left it a few days to fully cure.
With so much tape on the model, the demasking took me almost half an hour!
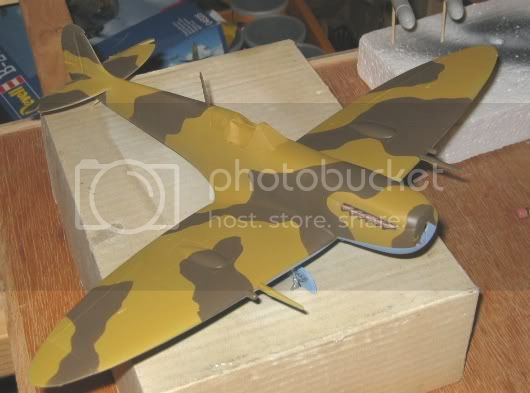
I had almost no creeping paint and no lift-offs in the paintjob, what a relief!

The small blemishes was easily worked out.
I fitted the landing gears, and added the braking wires from a piece of black cable from my railroad´s electrical stock.
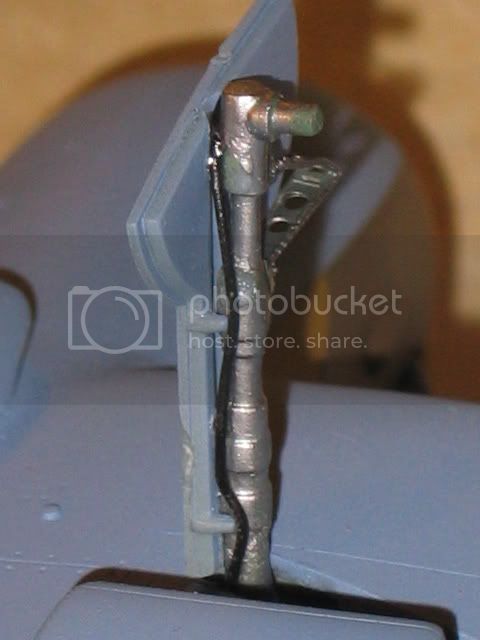
Then it was off for a good clear coat and then I left it to dry for a couple of days.
The Decals from Cartograph was excellent and worked perfectly, no bleed trough from the camouflage beneath and they settled down with no silvering.
Using decals as this good is always a joy!
Only snag was the big top wing roundels that had to go over some raised details.
Soaking in HOT water and a liberally dose of Micro-sol made this to the decal;

NEVER touch a decal that looks like this!
Go take a coffee brake and when you return it will look like this;

Snuggled down in the recesses and over the raised details and looks as it was painted on!
Note that the roundels always goes OVER the walkway markings on all Spitfires!
All other decals settled down with only hot water and Micro-set, and they looked exactly as beautiful.


A lightly applied black wash, and then I could finish with the final satin clear coat.
Cockpit masks was removed and all small parts like the wheels and prop could now be attatched to the model.

Yup, my Spitfire Is finished!


More pics coming soon!
Cheers!


Stefan E


