
Air Campaigns
Want to start or join a group build? This is where to start.
Want to start or join a group build? This is where to start.
Hosted by Frederick Boucher, Michael Satin
FW 190 Campaign. It will really be cool!
thegirl

Joined: January 19, 2008
KitMaker: 6,743 posts
AeroScale: 6,151 posts

Posted: Thursday, May 14, 2009 - 06:16 AM UTC
Just have the front windscreen and she is done .....pic's to follow very very soon ............... 

hkopper

Joined: March 01, 2008
KitMaker: 529 posts
AeroScale: 340 posts

Posted: Thursday, May 14, 2009 - 12:18 PM UTC
Just found out of the campaign when I was half way through my FW-190 build. I'm currently building a FW-190A8-R2 from Tamiya mostly straight out of the box except for additional cockpit details from Eduard. I have posted my progress and photo updates under the world War II aeroscale forum. I'm currently in the weathering phase, having completed most of the construction, painting and decal application.
Below is the thread to my WIP:
http://aeroscale.kitmaker.net/forums/138423&page=1
Below is the thread to my WIP:
http://aeroscale.kitmaker.net/forums/138423&page=1

AirLedge

Joined: July 26, 2007
KitMaker: 292 posts
AeroScale: 265 posts

Posted: Friday, May 15, 2009 - 05:39 AM UTC
Nice work Matthew, Allen, Terri and Taylor!
Eetu: I'll be watching the rest of your Revell build with interest as I'm doing the nightfighter version for the night stalker campaign. It's looking really good so far. Have you dry-fitted the fuselage to the wings yet? I've noticed a pretty big gap at the wing root so I'll be looking to you on how to deal with it.
Thanks,
Mike.

Emeritus

Joined: March 30, 2004
KitMaker: 2,845 posts
AeroScale: 1,564 posts

Posted: Friday, May 15, 2009 - 07:19 AM UTC
Quoted Text
Eetu: I'll be watching the rest of your Revell build with interest as I'm doing the nightfighter version for the night stalker campaign. It's looking really good so far. Have you dry-fitted the fuselage to the wings yet? I've noticed a pretty big gap at the wing root so I'll be looking to you on how to deal with it.
Thanks.
Oh yes, I've been dryfitting and noticed the rather large gap between the wing and fuselage.
I think I'm going to glue styrene sheet shims glued to the wings to close the gaps.
Another way could be installing a spreader bar inside the fuselage, but I'm a little wary of that, as it could crack the gluings (
thegirl

Joined: January 19, 2008
KitMaker: 6,743 posts
AeroScale: 6,151 posts

Posted: Friday, May 15, 2009 - 07:33 AM UTC
Thanks Mike !
I have finished my build for this campaign . Here is a pic . I will start a thread in the WW2 forums , I have a lot of pic's to post of this build .......

I have finished my build for this campaign . Here is a pic . I will start a thread in the WW2 forums , I have a lot of pic's to post of this build .......
cinzano

Joined: January 13, 2009
KitMaker: 419 posts
AeroScale: 378 posts

Posted: Friday, May 15, 2009 - 08:00 AM UTC
Ooh, yes. Very nice.
Better focus will make for more enjoyment, though.
Better focus will make for more enjoyment, though.

hkopper

Joined: March 01, 2008
KitMaker: 529 posts
AeroScale: 340 posts

Posted: Friday, May 15, 2009 - 08:20 AM UTC
Terri, beautiful butcher bird you got there!! Is that Eduard's?
thegirl

Joined: January 19, 2008
KitMaker: 6,743 posts
AeroScale: 6,151 posts

Posted: Friday, May 15, 2009 - 09:08 AM UTC
Thanks Fred , The camera is my worst enemy . Some times I do good , other times well.......
Hermann , it is the Eduard kit rebox by Accurate Miniatures . Thanks for the comment .
I have thread started in the WW2 forums with 23 pic's of the build with better focus , or at least on some .......
Hermann , it is the Eduard kit rebox by Accurate Miniatures . Thanks for the comment .
I have thread started in the WW2 forums with 23 pic's of the build with better focus , or at least on some .......
Blackwulf

Joined: April 20, 2004
KitMaker: 215 posts
AeroScale: 120 posts

Posted: Friday, May 15, 2009 - 11:17 AM UTC
I think that is Willi Maximowitz's(not sure of spelling) mount. That bird just looks bad_ss. I have always seen that plane with a black 8 but the other day I was reading an article(can't remember where) and they were saying he had a red 8. I was wondering if he used both colors at some point maybe on different planes?. Maybe Steffen can enlighten me.
thegirl

Joined: January 19, 2008
KitMaker: 6,743 posts
AeroScale: 6,151 posts

Posted: Friday, May 15, 2009 - 05:56 PM UTC
Hi Patrick . Yes it is Willi Maximowitz aircraft . I can't remember if it was this site or on another site there was a discussion on the colour of the 8 . I looked on the net and some say red while others say black . So rather then have a huge argument over it I went with the kit supplied decals . I'm sure Steffen can put some light on the topic of colour . 

hkopper

Joined: March 01, 2008
KitMaker: 529 posts
AeroScale: 340 posts

Posted: Saturday, May 16, 2009 - 12:54 AM UTC
I'm about done with the weathering process..just need to add a few finishing touches and a dull finish to wrap up the build


thegirl

Joined: January 19, 2008
KitMaker: 6,743 posts
AeroScale: 6,151 posts

Posted: Saturday, May 16, 2009 - 02:27 AM UTC
Go Hermann go , great job done on the weathering ! not overly done at all . I always like the light weathering better . Looking forward to see the final touches on her .................
hkopper

Joined: March 01, 2008
KitMaker: 529 posts
AeroScale: 340 posts

Posted: Saturday, May 16, 2009 - 02:38 AM UTC
Thanks Terri for your comments and your recommendations on the application of pastels, they really added depth to the finished product!!! I believe that I'm hooked on building planes. This build has been pure joy and fun and the help and insight given by all throughout the build was the icing on the cake!! I sould have a bit more time now to finish my ME-110 and I'm eagerly awaiting the arrival of Eduard's BF-109 

thegirl

Joined: January 19, 2008
KitMaker: 6,743 posts
AeroScale: 6,151 posts

Posted: Saturday, May 16, 2009 - 03:11 AM UTC
Glad you are hooked . I have been using pastels for years now , just could never get it right with paint . If I did like it they wash off easily . The list of colours go on and on ...........takes time to get used to them , but the different effects one can achieve with them can be endless . Get your self some nice soft brushes and q-tips and have fun !
Red4

Joined: April 01, 2002
KitMaker: 4,287 posts
AeroScale: 1,164 posts

Posted: Saturday, May 16, 2009 - 03:42 AM UTC
Nice looking build Hermann. Your's came out well too Terri  Thanks for sharing your work. "Q"
 Thanks for sharing your work. "Q"

Emeritus

Joined: March 30, 2004
KitMaker: 2,845 posts
AeroScale: 1,564 posts

Posted: Saturday, May 16, 2009 - 06:12 AM UTC
Quoted Text
It will be interesting to see what the extra control surfaces do to the finished kit.
Well, here's a little sneak & peek.
I've been working on the Dora:

Now I also have the fuselage together. The wings are being testfitted here.

Almost flawless fit. The only thing that needs to be done is some very slight sanding on top of the fuselage wing root on the left side to achieve a smooth joint line, as there's a tiny step in the joint near the trailing edge.

The cockpit slipped in nicely. It seems some of the dimensions in the office are a bit off, causing the lower portion of the instrument panel being placed too far, but honestly, who can tell?
Prior to gluing the fuselage together, I cut the opening for the reflector gunsight in the right side half. Partly because of my clumsiness, partly due to the slightly brittle plastic, I snapped off the narrow piece on the back edge. Some strip styrene ought to fix that. The coaming also needs a tiny bit of putty to fill that small depression in the front. The picture was taken after some filing, and the area needing the putty is visible as little darker than the rest.
As people have also built (or are currently building) this Academy kit, could someone shed some light on the subject of getting the front piece of the nose in place. There is hardly any gluing surface and the nose appears tricky to line up correcly.

I'm pretty much at the same stage with my A8 as well. Fuselage is together, wings being fitted and are almost ready, etc.
Here's the wing-to-fuselage gap at all its grandeur:

Note that that's ALL of the gap, I lined up the fuselage so it's on one side only for the photo. I'm going to glue styrene sheet on the gluing surfaces on both wings to close the gaps.

The lower wing test fitted. The red circles show the mismatch between the lower portion and the fuselage halves, requiring either a spreader bar inside the fuselage or pieces of styrene to force the fuselage halves to the right position.
Here's the underside of the wing, with the PE landing flap bay interior pieces glued in place as well as a piece of strip styrene forming a new wing trailing edge. The assembled flap clearly shows I'm in need of a PE bending tool. All those tiny bends in the middle were quite tricky to fold, visible as not-so-clean folds. Oh well, they're not the most visible details in the finished model anyway.

The last photo this time. The flap is testfitted to the wing. The hasegawa kit this PE set was meant for clearly has smaller flaps, indicated by the gaps forming near the wing root. Some styrene sheet will fill those.

That's it for this update.
See ya.

Ps. I wonder what manufacturer was the first to get the open, engine-rear-exposing main wheel well of the long-noses correct?
Posted: Saturday, May 16, 2009 - 09:00 AM UTC
Very nice progress everyone!!
this is a great campaing with many really good finished entries already!
all the best
Steffen
this is a great campaing with many really good finished entries already!
all the best
Steffen

AirLedge

Joined: July 26, 2007
KitMaker: 292 posts
AeroScale: 265 posts

Posted: Sunday, May 17, 2009 - 04:52 AM UTC
Hi everyone!
@ Terri and Hermann: Nice 190s. Some great additions to the campaign!
@ Eetu: The fit of the cowling on the Academy Dora is a bit fiddly, watch out.
Well here is my finished entry. It's only taken 5 months to do
It's the Academy Dora in 1/72 with the Eduard Zoom PE set. I also scratchbuilt the wing cannons and gun sights and crash moulded the canopy. This model represents quite a leap forward for me as it's the first time I've used PE, scratchbuilt anything, tried a mottled camo scheme and made a base. Generally, I'm pleased with the outcome.


And on its base:


Well that's it. Thanks for a great campaign.
All the best,
Mike.
@ Terri and Hermann: Nice 190s. Some great additions to the campaign!
@ Eetu: The fit of the cowling on the Academy Dora is a bit fiddly, watch out.
Well here is my finished entry. It's only taken 5 months to do

It's the Academy Dora in 1/72 with the Eduard Zoom PE set. I also scratchbuilt the wing cannons and gun sights and crash moulded the canopy. This model represents quite a leap forward for me as it's the first time I've used PE, scratchbuilt anything, tried a mottled camo scheme and made a base. Generally, I'm pleased with the outcome.


And on its base:


Well that's it. Thanks for a great campaign.
All the best,
Mike.
Posted: Sunday, May 17, 2009 - 04:58 AM UTC
Very nice, Mike!!
The Dora came out really well and looks great in JV 44 markings!
all the best
Steffen.
The Dora came out really well and looks great in JV 44 markings!
all the best
Steffen.

LongKnife

Joined: April 25, 2006
KitMaker: 831 posts
AeroScale: 688 posts

Posted: Sunday, May 17, 2009 - 05:56 AM UTC
Wow Mike. That's reeeally nice. I'd say you smashed all your firsts right on the line.
Terri, nice job on your open hatches too. I've got to try that soon (but of course on a 109)
 Tony
Tony
Terri, nice job on your open hatches too. I've got to try that soon (but of course on a 109)
 Tony
Tonyhkopper

Joined: March 01, 2008
KitMaker: 529 posts
AeroScale: 340 posts

Posted: Sunday, May 17, 2009 - 02:52 PM UTC
Mike excellent job there, let alone in that scale!! Love how the build came out (great camo and stripes)!
hkopper

Joined: March 01, 2008
KitMaker: 529 posts
AeroScale: 340 posts

Posted: Monday, May 18, 2009 - 01:34 AM UTC
It's a wrap!! The campaign entry is finished and can't wait for my next one!!
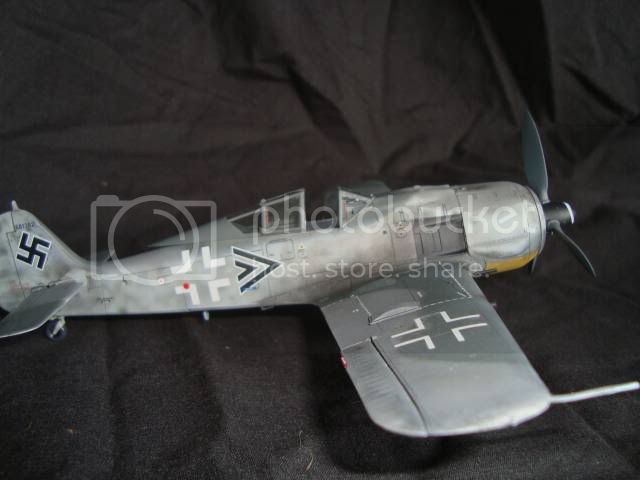
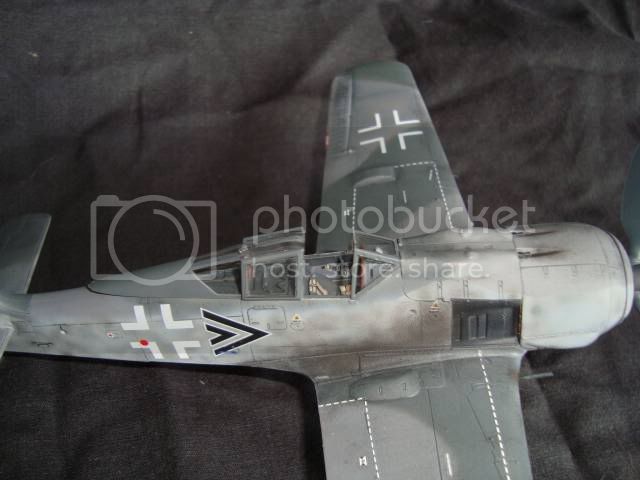
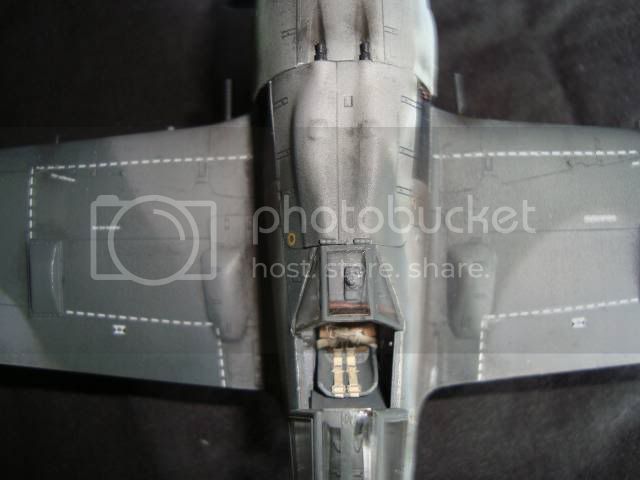
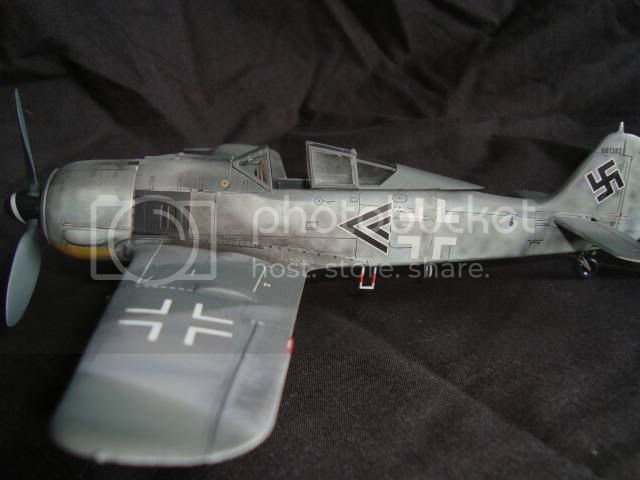
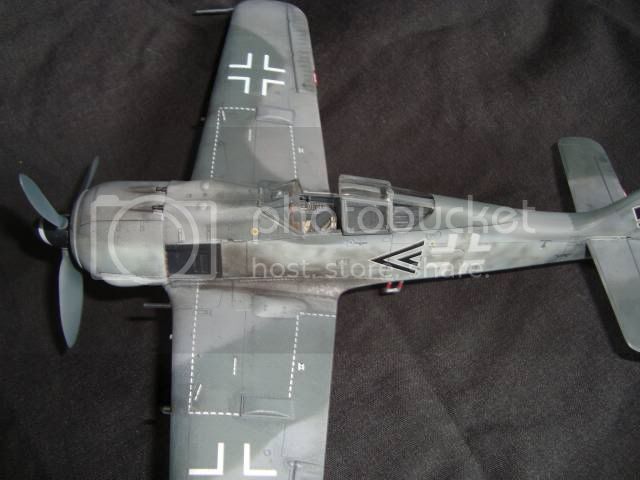
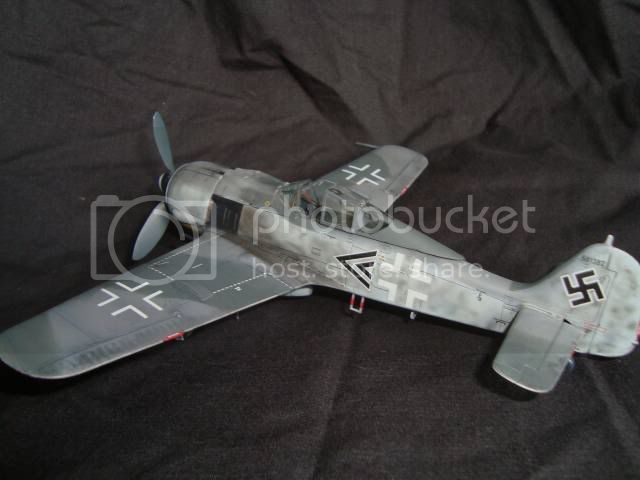
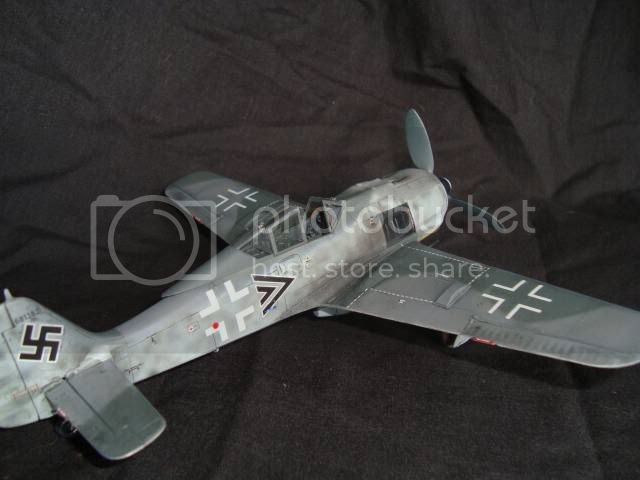
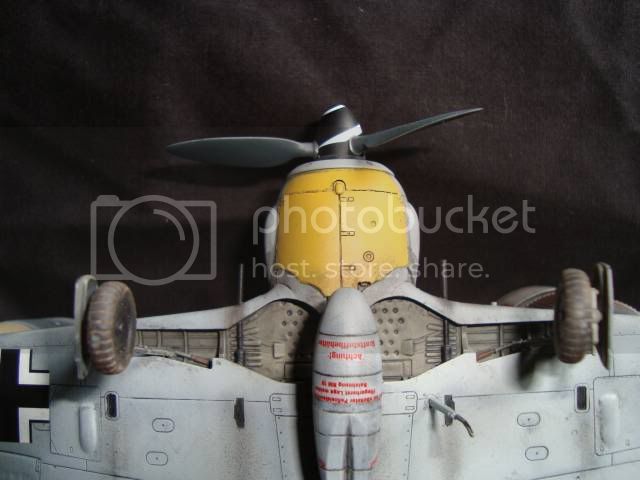
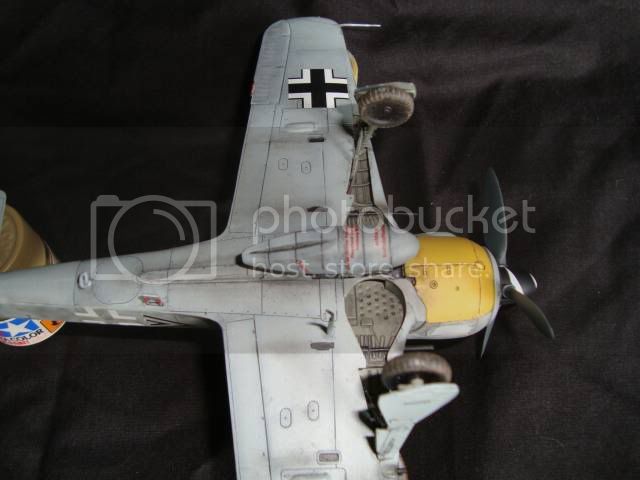
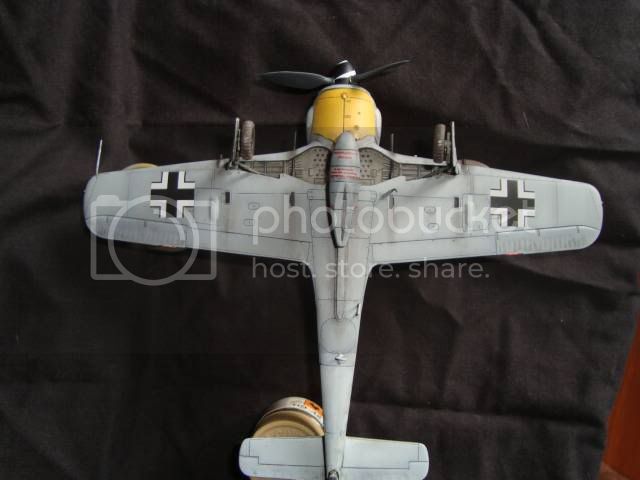
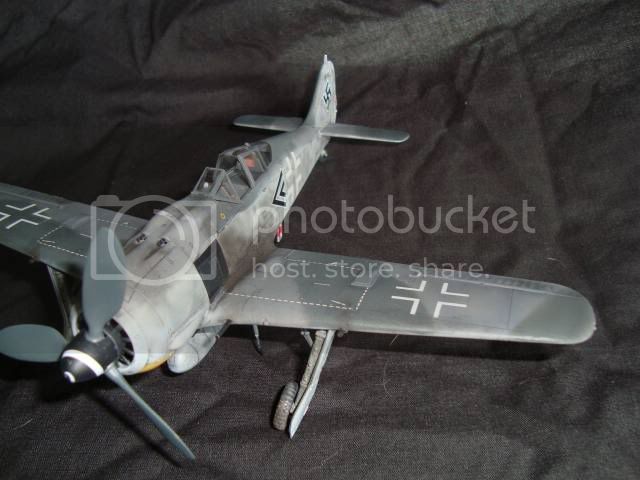
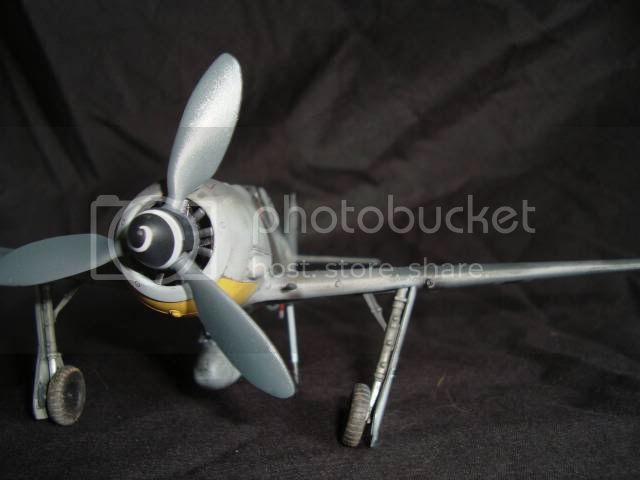
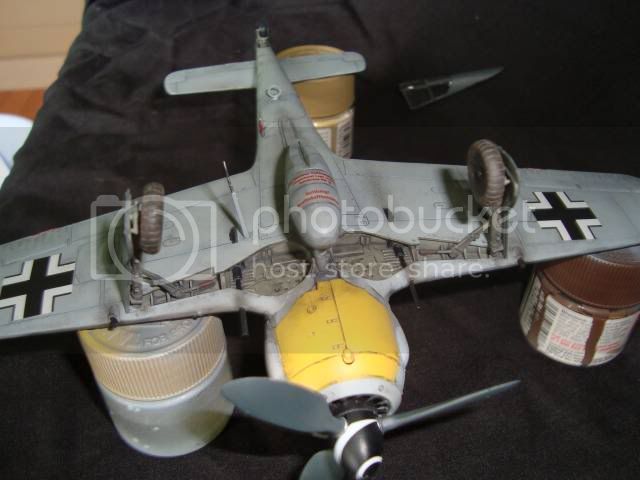
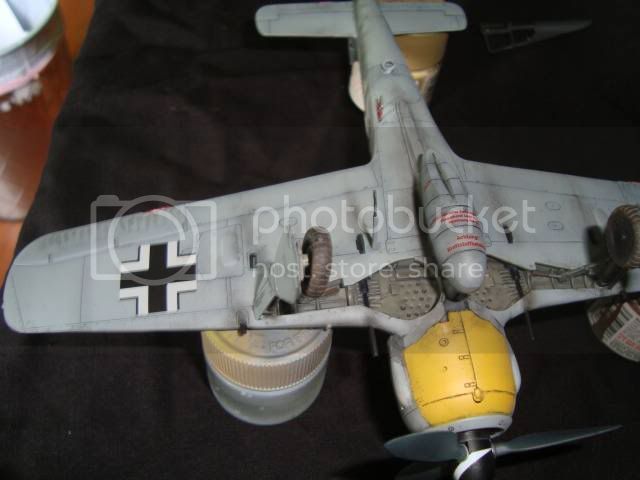
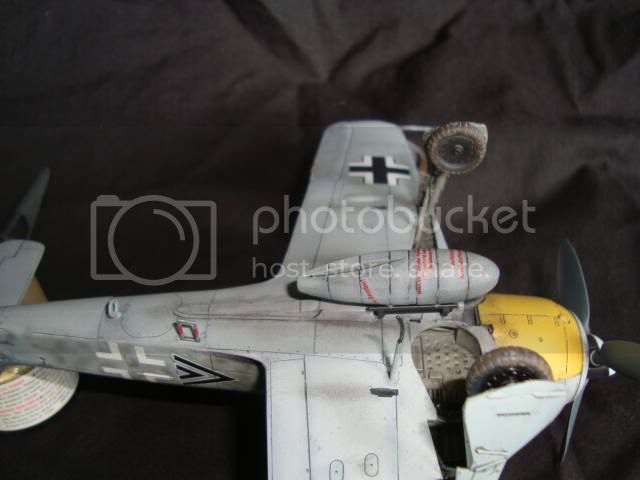
Thanks for watching!!


Thanks for watching!!
thegirl

Joined: January 19, 2008
KitMaker: 6,743 posts
AeroScale: 6,151 posts

Posted: Monday, May 18, 2009 - 05:36 AM UTC
Awesome job done Hermann ! A small little suggestion though on the weathering . Where the in board guns are the powder staining should be carried over the landing gear cover as well as some exhaust staining on the very lower part of the leg cover . But this is just me .
hkopper

Joined: March 01, 2008
KitMaker: 529 posts
AeroScale: 340 posts

Posted: Monday, May 18, 2009 - 05:46 AM UTC
Thanks for the pointer Terri. I'll keep it in mind for the next build!!

Emeritus

Joined: March 30, 2004
KitMaker: 2,845 posts
AeroScale: 1,564 posts

Posted: Monday, May 18, 2009 - 11:40 PM UTC
Some great entries and good progress here!
Mike, your D9 turned out really nice.
After fiddling with the parts, I decided to bolster the fit of the cowling by gluing a couple of pieces of styrene to the fuselage, then sanding them until the cowling fit over them. I may have to still have to narrow them down a bit though, but the fit is fine now.

Yesterday I also worked on the A8. The day before that I slapped a piece of milliput over the rear fuselage's underside seam. It looked like this before the sanding operation:

In retrospect, I should have used quite a lot less as the sanding took a while.
Well, at least I didn't have to apply more putty along the way.
And here is the same area after sanding, but still prior to re-scribing that single panel line going across the problem area:

After finishing the underside seam and associated panel lines, I started working on the wing-to-fuselage joints. As shims are the way to go with gaps like this, I cut two pieces of styrene sheet to conform to the space inside wing and glued them to the wings' gluing surfaces.
This looks like I've glued the wing in place, but it's only the shims that are glued at this point.


Mike, your D9 turned out really nice.

Quoted Text
@ Eetu: The fit of the cowling on the Academy Dora is a bit fiddly, watch out.
After fiddling with the parts, I decided to bolster the fit of the cowling by gluing a couple of pieces of styrene to the fuselage, then sanding them until the cowling fit over them. I may have to still have to narrow them down a bit though, but the fit is fine now.

Yesterday I also worked on the A8. The day before that I slapped a piece of milliput over the rear fuselage's underside seam. It looked like this before the sanding operation:

In retrospect, I should have used quite a lot less as the sanding took a while.
Well, at least I didn't have to apply more putty along the way.
And here is the same area after sanding, but still prior to re-scribing that single panel line going across the problem area:

After finishing the underside seam and associated panel lines, I started working on the wing-to-fuselage joints. As shims are the way to go with gaps like this, I cut two pieces of styrene sheet to conform to the space inside wing and glued them to the wings' gluing surfaces.
This looks like I've glued the wing in place, but it's only the shims that are glued at this point.


 |


