

Ok Mark, you are off and running. I guess I need to open the bag on my kit now and join you.
Bob
Air Campaigns
Want to start or join a group build? This is where to start.
Want to start or join a group build? This is where to start.
Hosted by Frederick Boucher, Michael Satin
P51 campaign proposal for 2010

Bigrip74

Joined: February 22, 2008
KitMaker: 5,026 posts
AeroScale: 2,811 posts

Posted: Friday, June 04, 2010 - 06:48 PM UTC

md72

#439
Joined: November 05, 2005
KitMaker: 4,950 posts
AeroScale: 3,192 posts

Posted: Friday, June 04, 2010 - 06:57 PM UTC
Off, Yes. Running, that's a stretch. 


Keeperofsouls2099
Joined: January 14, 2009
KitMaker: 2,798 posts
AeroScale: 2,443 posts
Posted: Saturday, June 05, 2010 - 12:38 AM UTC
I plan on posting pic's tonight still dont have it fitting just right.


cinzano
Joined: January 13, 2009
KitMaker: 419 posts
AeroScale: 378 posts
Posted: Saturday, June 05, 2010 - 07:37 AM UTC
Quoted Text
Frederick, nice looking kit. What are your impressions of it so far?
Bob
So far so good.
The canopies are thin, transparent and free of distortions. As one would expect from Accurate, the sprues are free of flash and the surface detail is clean with light panel line engravings.
Not keen on the tail plug approach to the fuselage but I'm not expecting it to be too much of a challenge.
Won't know more until I open the poly bag and start doing some dry fitting.
Cheers,
Fred
Keeperofsouls2099
Joined: January 14, 2009
KitMaker: 2,798 posts
AeroScale: 2,443 posts
Posted: Saturday, June 05, 2010 - 01:24 PM UTC
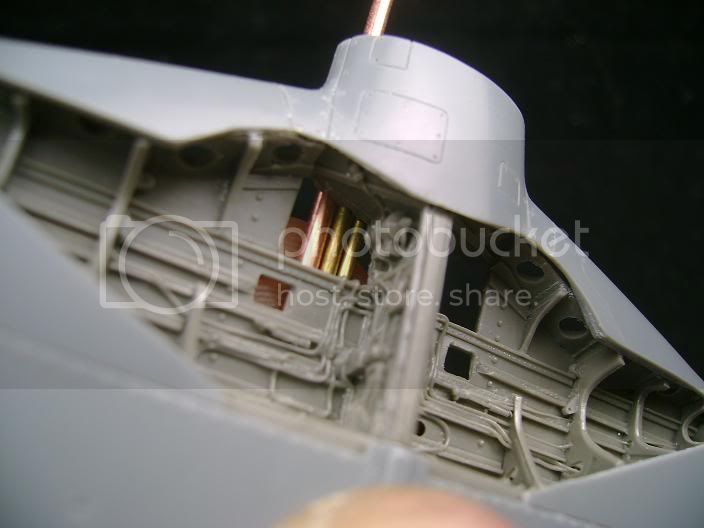
OK here are some progress shots I finally got the the lower wing half to where it will be a close enough fit with minimal work to fit with the fuselage....

Looks ruff on the inside so Then I installed it with CA and blasted it with accelarator.....

To get this result...

Looks pretty good I will spray it with polyscale interior green soon and detail.The resin cooling hoses look good....
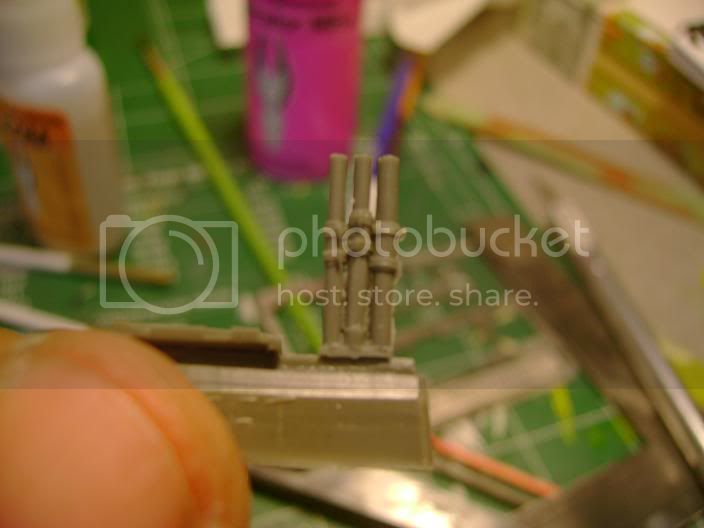
But I want them to look more real so I will replace them with metal tubing and detail...heres a look at what it will kinda look like....
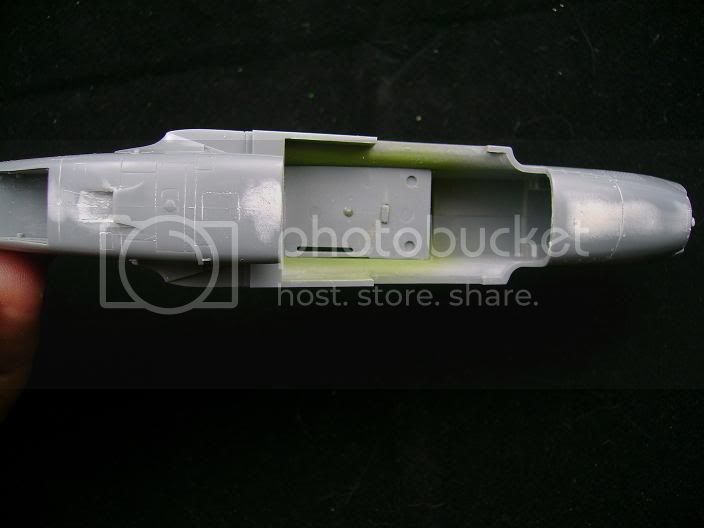
Working on seam lines right now.The area with the red circle around it is proving difficult because of all the detail here..

More later..Hope you like...
Build On,
Justin
Looks ruff on the inside
so Then I installed it with CA and blasted it with accelarator.....To get this result...
Looks pretty good I will spray it with polyscale interior green soon and detail.The resin cooling hoses look good....
But I want them to look more real so I will replace them with metal tubing and detail...heres a look at what it will kinda look like....
Working on seam lines right now.The area with the red circle around it is proving difficult because of all the detail here..
More later..Hope you like...
Build On,
Justin
cinzano
Joined: January 13, 2009
KitMaker: 419 posts
AeroScale: 378 posts
Posted: Saturday, June 05, 2010 - 01:54 PM UTC
Really really nice.
In the past, I've poo pooed the notion of aftermarket wheel wells as extravagant. After seeing that I'm sold. Is that a kit specific offering BTW.
Cheers,
Fred
In the past, I've poo pooed the notion of aftermarket wheel wells as extravagant. After seeing that I'm sold. Is that a kit specific offering BTW.
Cheers,
Fred

AussieReg

#007

Joined: June 09, 2009
KitMaker: 8,156 posts
AeroScale: 3,756 posts
Posted: Saturday, June 05, 2010 - 02:44 PM UTC
Justin you blow me away with how quick you work and the extra goodness you add in !!
Looks superb so far mate.
Cheers, D
Looks superb so far mate.
Cheers, D

Bigrip74
Joined: February 22, 2008
KitMaker: 5,026 posts
AeroScale: 2,811 posts
Posted: Saturday, June 05, 2010 - 02:47 PM UTC
Justin, did you have to enlarge or reshape the landing gear opeings? BTW what you have done looks like it was hard work not going through the plastic while thinning out for the wheel well.
Bob
Bob
Keeperofsouls2099
Joined: January 14, 2009
KitMaker: 2,798 posts
AeroScale: 2,443 posts
Posted: Saturday, June 05, 2010 - 03:56 PM UTC
@Fred They offer them for Tamiya and hasagawa I believe but its a resin PC.so I'm sure you could get it to fit in any kit I would think the wheel wells in 1/48 are pretty universal unless anyone disagrees.
@D Thanks man I try.Got to keep up to your hero standards
@Big No noting done to the kit openings at all except there is a little lip that runs allthe way around that gets removed but you see the resin takes up for that.Now you can understand why I didn't want to post pic's so quick.I used my dremel tool with a sanding drum of 320 grit and slowly nicked away at it.It was worth it.
@D Thanks man I try.Got to keep up to your hero standards
@Big No noting done to the kit openings at all except there is a little lip that runs allthe way around that gets removed but you see the resin takes up for that.Now you can understand why I didn't want to post pic's so quick.I used my dremel tool with a sanding drum of 320 grit and slowly
nicked away at it.It was worth it.
Tojo72
Joined: June 06, 2006
KitMaker: 4,691 posts
AeroScale: 238 posts
Posted: Saturday, June 05, 2010 - 04:05 PM UTC
Wow Justin,off to a fast start,looks real good Be awhile before I can get started.I'm building Accurate Minatures P-51-C in Tuskeegee Airman markings.
Bigrip74
Joined: February 22, 2008
KitMaker: 5,026 posts
AeroScale: 2,811 posts
Posted: Saturday, June 05, 2010 - 05:25 PM UTC
@ Anthony: nice kit and scheme choice, I will watch for the finished build that you and Frederick are entering.
@ Justin: I was reading a review on Hyperscale re: a P-51 kit, I forgot which one. It was stating that the wheel well openings were too square. Should have paid more attention. Well I played with my Revell P-51B by gluing the wing halves together, the only way that I could get the edge seems to close was to use tape (I dont like doing this since the glue smears at times). Like Mark, the drop tanks were assembled, and I glued some of the cockpit sidewall details in place. I was impressed with the seat so no aftermarket there. The Prop is another story, I may send off for an Ultra Cast replacement.
Bob
Keeperofsouls2099
Joined: January 14, 2009
KitMaker: 2,798 posts
AeroScale: 2,443 posts
Posted: Saturday, June 05, 2010 - 05:46 PM UTC
Big I've referenced the countless pics's I have of the real deal and they seem accurate enough to me.  I'm also not a rivet counter.Just try to get as close as I possibly can.
Look forward to your pic's.
Build On,
Justin
I'm also not a rivet counter.Just try to get as close as I possibly can.Look forward to your pic's.
Build On,
Justin
Bigrip74
Joined: February 22, 2008
KitMaker: 5,026 posts
AeroScale: 2,811 posts
Posted: Saturday, June 05, 2010 - 06:17 PM UTC
@ Justin: I also am not a rivit counter, love the build journey. Here are some pics of where I am at.
this is the kit prop, I think I will replace it.

the next (3) shots are of the seat which I like


here are the drop tanks that I put up for Mark.

the wing after being taped together

Justin this is a shot of the kit wheel well

fuselage right side next (2) shots


fuselage left side next (2) shots


there are still the oxygne mask, control column, hydraulic hand pump to paint and install. I have decided to use the decal instrument panel. Next to dust off the airbrush and set up the paint table .
.
Bob
this is the kit prop, I think I will replace it.

the next (3) shots are of the seat which I like


here are the drop tanks that I put up for Mark.

the wing after being taped together

Justin this is a shot of the kit wheel well

fuselage right side next (2) shots


fuselage left side next (2) shots


there are still the oxygne mask, control column, hydraulic hand pump to paint and install. I have decided to use the decal instrument panel. Next to dust off the airbrush and set up the paint table
.Bob

Griffon65
Joined: November 06, 2008
KitMaker: 363 posts
AeroScale: 51 posts
Posted: Sunday, June 06, 2010 - 02:01 AM UTC
I've finally decided to stop being an indecisive fusspot and sign up as enlistee #40 
 .
.
I haven't decided what kit I will build, although I'm leaning toward aither an Academy or Revell 1:72 P-51A, B or D (I really don't like the C with its "fishbowl" canopy ).
).
Don't hold your breath to see progress pics from me, though . I'm still quite a distance away from actually building a kit.
Just a thought, shouldn't we have a pinned campein thread? We're still posting in the campaign proposal thread .
. I haven't decided what kit I will build, although I'm leaning toward aither an Academy or Revell 1:72 P-51A, B or D (I really don't like the C with its "fishbowl" canopy
).Don't hold your breath to see progress pics from me, though
. I'm still quite a distance away from actually building a kit.Just a thought, shouldn't we have a pinned campein thread? We're still posting in the campaign proposal thread
.Keeperofsouls2099
Joined: January 14, 2009
KitMaker: 2,798 posts
AeroScale: 2,443 posts
Posted: Sunday, June 06, 2010 - 07:16 AM UTC
Big after you said that I did some research just to make sure I was correct..Here is a pic of the real deal...

Almost exact Tamiya did a good job I dont know what hyperscale was looking at.
Also for all you P-51 Campaigners here is some good reference pic's and info...
P-51 Info
Almost exact Tamiya did a good job I dont know what hyperscale was looking at.
Also for all you P-51 Campaigners here is some good reference pic's and info...
P-51 Info
Keeperofsouls2099
Joined: January 14, 2009
KitMaker: 2,798 posts
AeroScale: 2,443 posts
Posted: Sunday, June 06, 2010 - 01:14 PM UTC
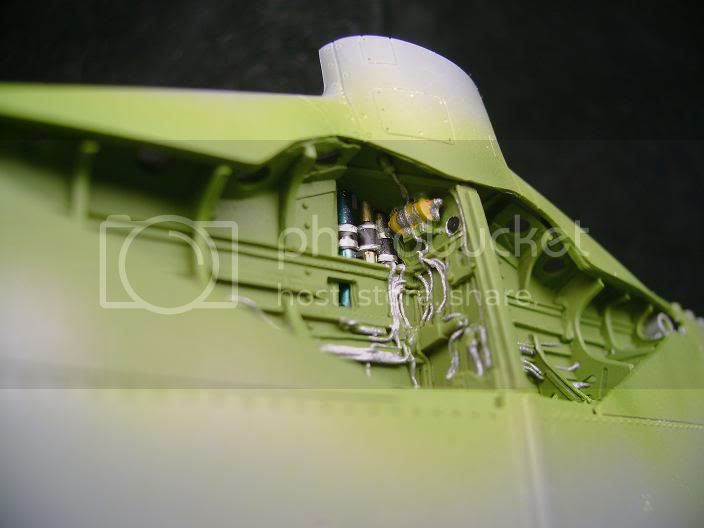
Alright heres todays progress my fine pony builders...
Started out by boxing in the top of the resin casting where im going to put my pipes.

I then started working on the pipes first painting the main coolant pipes Tamiya clear blue...

next I cut pc's of heat shrink usally I would use black but red is all I have left no biggy....

I then took these put them on my pipes and hit them with a lighter...

Painting these flat black I then prepared to cut my strips of tin foil for the hose clamps I also use it for struts to.

After spraying the wheel bays with Polyscale US.INT green and detailing with a tooth pick this is the end result..


Hope you like more soon..
Build On,
Justin
Started out by boxing in the top of the resin casting where im going to put my pipes.
I then started working on the pipes first painting the main coolant pipes Tamiya clear blue...
next I cut pc's of heat shrink usally I would use black but red is all I have left no biggy....
I then took these put them on my pipes and hit them with a lighter...
Painting these flat black I then prepared to cut my strips of tin foil for the hose clamps
I also use it for struts to.After spraying the wheel bays with Polyscale US.INT green and detailing with a tooth pick this is the end result..
Hope you like more soon..
Build On,
Justin
Bigrip74
Joined: February 22, 2008
KitMaker: 5,026 posts
AeroScale: 2,811 posts
Posted: Sunday, June 06, 2010 - 01:49 PM UTC
Justin: I am jealous  great work on the wheel well. I have not touched the kit today. Life keeps getting in the way
Bob
great work on the wheel well. I have not touched the kit today. Life keeps getting in the way Bob
Keeperofsouls2099
Joined: January 14, 2009
KitMaker: 2,798 posts
AeroScale: 2,443 posts
Posted: Sunday, June 06, 2010 - 02:07 PM UTC
Thank you sir. It tends to do that
It tends to do thatmd72
#439
Joined: November 05, 2005
KitMaker: 4,950 posts
AeroScale: 3,192 posts
Posted: Sunday, June 06, 2010 - 02:10 PM UTC
Wow, that's great. There's just going to be abig empty space in my LG on this build.

thegirl

Joined: January 19, 2008
KitMaker: 6,743 posts
AeroScale: 6,151 posts
Posted: Sunday, June 06, 2010 - 02:54 PM UTC
most excellent Justin , at this rate we could all mail you are kits for the build with the speed your at .
Bigrip74
Joined: February 22, 2008
KitMaker: 5,026 posts
AeroScale: 2,811 posts
Posted: Sunday, June 06, 2010 - 03:57 PM UTC
Quoted Text
most excellent Justin , at this rate we could all mail you are kits for the build with the speed your at .
Terri, you have hit on an idea! Becareful Justin you might be inundated with our kits to help us complete them

Bob
Keeperofsouls2099
Joined: January 14, 2009
KitMaker: 2,798 posts
AeroScale: 2,443 posts
Posted: Sunday, June 06, 2010 - 04:16 PM UTC
Thanks terry,
Excellent Idea more kit for the stash
Excellent Idea more kit for the stash
md72
#439
Joined: November 05, 2005
KitMaker: 4,950 posts
AeroScale: 3,192 posts
Posted: Sunday, June 06, 2010 - 04:38 PM UTC
Well, It's not Justin's speed, But this is a lot of progress for me.

Filled the sink in the head rest. One pass with the Mr. Surfacer on the drop tank. The gear struts painted (can anyone see the 2 metallic colors?) and the tires clean up and painted flat black (over black plastic!!), And a coat of paint on the prop blades.
Filled the sink in the head rest. One pass with the Mr. Surfacer on the drop tank. The gear struts painted (can anyone see the 2 metallic colors?) and the tires clean up and painted flat black (over black plastic!!), And a coat of paint on the prop blades.
Griffon65
Joined: November 06, 2008
KitMaker: 363 posts
AeroScale: 51 posts
Posted: Sunday, June 06, 2010 - 05:20 PM UTC
I really like the wheel well plumbing work Justin. I might try that if I decide to display one of my models with the landing gear down.
@ Mark, is the bottom half of the suspension a different colour to the top half? Sorry, my eyes are not the best.
@ Mark, is the bottom half of the suspension a different colour to the top half? Sorry, my eyes are not the best.
md72
#439
Joined: November 05, 2005
KitMaker: 4,950 posts
AeroScale: 3,192 posts
Posted: Sunday, June 06, 2010 - 05:56 PM UTC
Close but no cigar. I tried to paint the main part of the strut Tamiya flat aluminum and the oleo (at least that's what I think its called) between the scissors in Testors steel. Nice idea but doesn't seem to work so well. I may try to get an ink wash on these b4 I'm done to see if that helps.
 |

WEB HOSTING BY


Copyright ©2021 AeroScale and Kitmaker Network, a subsidiary of Silver Star Enterprises
All Rights Reserved. Please read our Conditions of Use and Privacy Policy.
All Rights Reserved. Please read our Conditions of Use and Privacy Policy.