Official Sea Plane Campaign Thread
Colorado, United States
Joined: January 25, 2004
KitMaker: 11,669 posts
AeroScale: 11,011 posts
Posted: Thursday, December 31, 2009 - 02:30 PM UTC
". . .The most important thing is to know why you build and then get the most that you can out of building." via D.D.
Florida, United States
Joined: January 14, 2009
KitMaker: 2,798 posts
AeroScale: 2,443 posts
Posted: Thursday, December 31, 2009 - 03:07 PM UTC
Great builds everyone good job cant wait to see the rest.....
Build On,
Justin

"From time to time, the tree of liberty must be watered with the blood of
tyrants and patriots."
- Thomas Jefferson
IPMS#47611
Merlin
 Senior Editor
#017
United Kingdom
Joined: June 11, 2003
KitMaker: 17,582 posts
AeroScale: 12,795 posts
Posted: Friday, January 01, 2010 - 03:31 AM UTC
Hi there
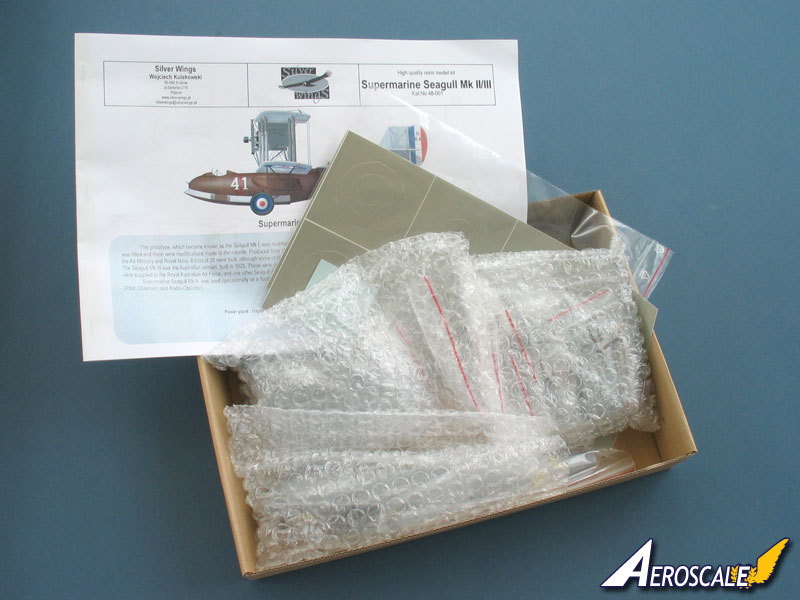
Well, I'll officially declare my change of entry - the dear old Widgeon goes back into the stack in favour of the new Silver Wings Seagull:
I'll try to get started in a few days time, once I've got some other things sorted out and made some extra space to keep three Review-builds on the go - GULP! I've got a biplane assembly rig on order that I think might come in handy on this beauty!

All the best
Rowan

BEWARE OF THE FEW...
As I grow older, I regret to say that a detestable habit of thinking seems to be getting a hold of me. - H. Rider Haggard
#041
Kobenhavn, Denmark
Joined: July 20, 2006
KitMaker: 10,069 posts
AeroScale: 3,788 posts
Posted: Friday, January 01, 2010 - 03:45 AM UTC
Quoted Text
Quoted Text
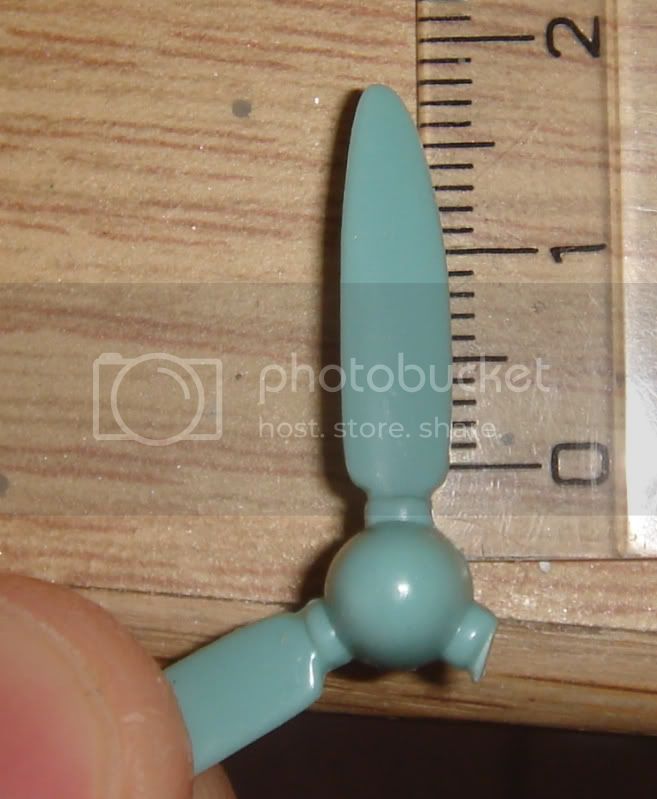
Can anybody help with a spare propeller(blade)?
Hi Jesper,
I received a bunch of spare aircraft parts from Spongya awhile back. I am not sure what all is in there but I might be able to help you out. If you could give me the basic measurements and all of that good stuff I can see what I have and maybe I will have what you need.
HARV
Hi Harv
Sounds great. The propeller blade is 18mm long and 5mm wide at the widest point. I hope something in your spare parts stash will fit.

Campaign'oholic - 252+ campaigns completed
Colorado, United States
Joined: January 25, 2004
KitMaker: 11,669 posts
AeroScale: 11,011 posts
Posted: Friday, January 01, 2010 - 09:42 PM UTC
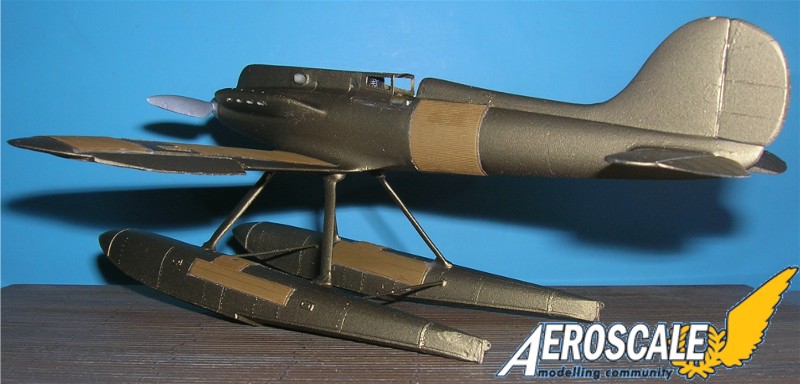
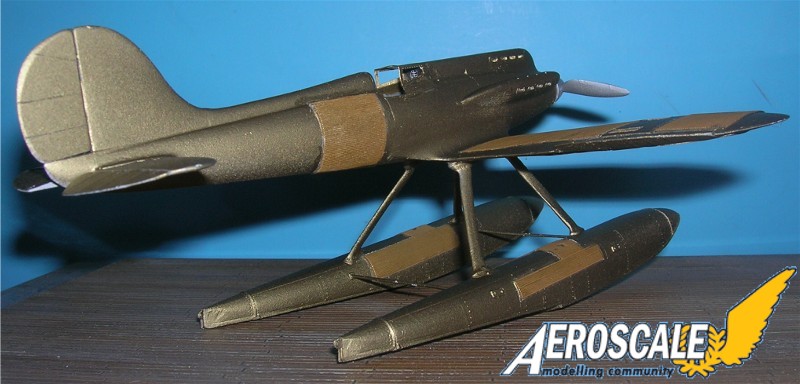
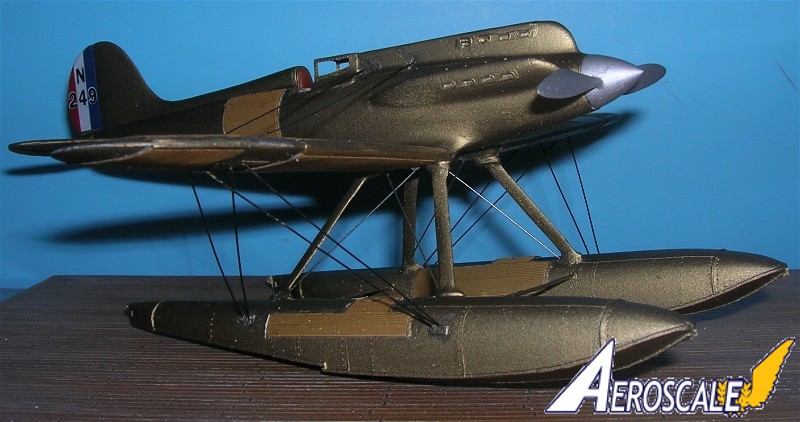
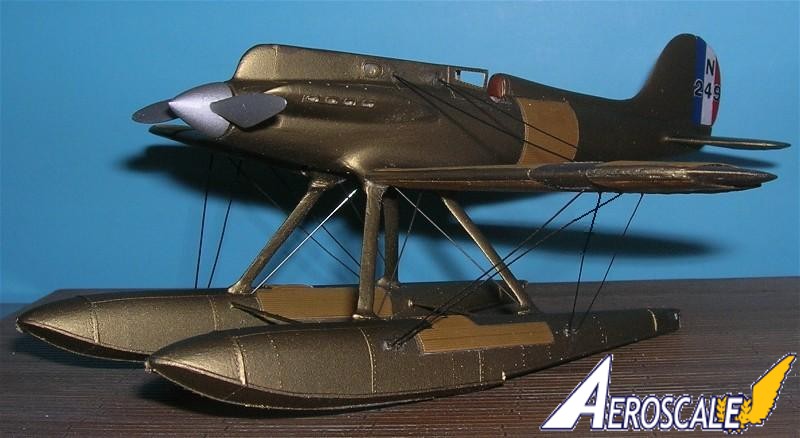
Well folks it is almost done. The rigging is completed and the decals are on. One note for anyone building this kit. Spray coat the decals with a clear gloss and let dry. Then cut each individual decal out with a sharp Xacto blade. The rudder and serial number decals are commendably thin but will tear badly without a gloss coat over them.
". . .The most important thing is to know why you build and then get the most that you can out of building." via D.D.
Ontario, Canada
Joined: January 03, 2007
KitMaker: 1,505 posts
AeroScale: 595 posts
Posted: Saturday, January 02, 2010 - 02:33 AM UTC
Thanks for the tips, Stephen!..its a beutiful kit youve put together there..
Projects:
K44 Anti Tank gun
Diana
Albatros DIII
Colorado, United States
Joined: January 25, 2004
KitMaker: 11,669 posts
AeroScale: 11,011 posts
Posted: Saturday, January 02, 2010 - 02:09 PM UTC
". . .The most important thing is to know why you build and then get the most that you can out of building." via D.D.
Florida, United States
Joined: January 14, 2009
KitMaker: 2,798 posts
AeroScale: 2,443 posts
Posted: Saturday, January 02, 2010 - 04:32 PM UTC
Congrats Jack that rigging is awesome good job....
Build On,
Justin
"From time to time, the tree of liberty must be watered with the blood of
tyrants and patriots."
- Thomas Jefferson
IPMS#47611
Merlin
Senior Editor #017
United Kingdom
Joined: June 11, 2003
KitMaker: 17,582 posts
AeroScale: 12,795 posts
Posted: Saturday, January 02, 2010 - 09:01 PM UTC
Hi Stephen
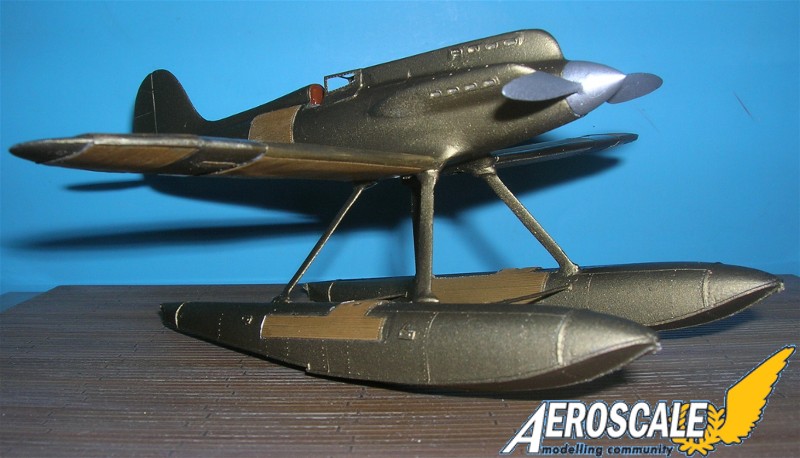
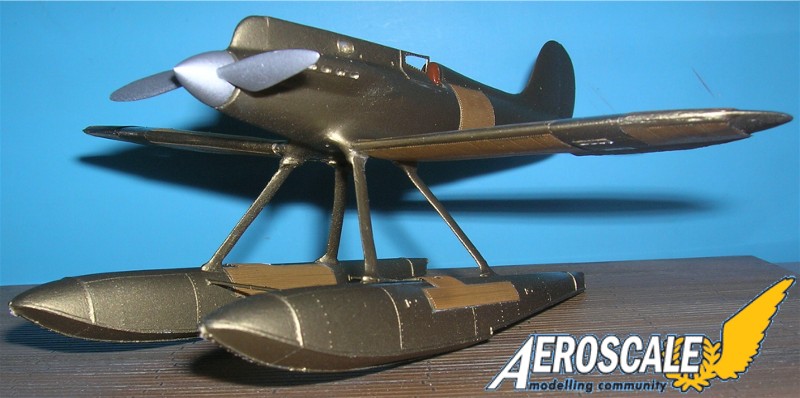
Very nice job! I'd just pick out the exhausts to differentiate them from the surrounding paintwork.
It does look a gorgeous kit!
It's weird to think that I'd have had a grandstand view of the 1929 and '31 Schneider Trophy races from my house on the seafront at Ryde!
All the best
Rowan
BEWARE OF THE FEW...
As I grow older, I regret to say that a detestable habit of thinking seems to be getting a hold of me. - H. Rider Haggard
AussieReg
Associate Editor #007
Victoria, Australia
Joined: June 09, 2009
KitMaker: 8,156 posts
AeroScale: 3,756 posts
Posted: Sunday, January 03, 2010 - 02:30 PM UTC
G'day all, snuck a few mintues in on this in between playing gigs on Band Hero with my 7yo boy.
Got the engines painted and installed (please ignore the interior void, as I said earlier this is an exterior exercise for me)

And the wings on

I fitted the wings to make sure of minimal gap on top which left a small gap on the port underside wing root, but the starboard is a big issue with the lower wing half deformed and a large gap to contend with.

I will fill the gap with some thin stock and glue some scrap in the sunken area, then begin filling to rebuild the wing shape. (That is unless I get called back on stage with Josh

)
Cheers, D
ON the bench
Revell 1/24 '53 Corvette (building as '54)
Revell 1/24 BMW 507 Coupe and Cabrio
Italeri 1/48 Me262 B-1a/U1 Nightfighter
Monogram 1/24 '57 Chevy Nomad
Dragon 1/350 USS Frank Knox DD-742
#041
Kobenhavn, Denmark
Joined: July 20, 2006
KitMaker: 10,069 posts
AeroScale: 3,788 posts
Posted: Sunday, January 03, 2010 - 08:48 PM UTC
Nice start, Damian. There are definitely some fitting issues in this kit, but luckily it looks like they are on the underside.
What kind of camouflage are you going for?
Looking forward to see more.
Campaign'oholic - 252+ campaigns completed
Ontario, Canada
Joined: January 03, 2007
KitMaker: 1,505 posts
AeroScale: 595 posts
Posted: Monday, January 04, 2010 - 08:40 AM UTC
Looking good Damian..the engines dont look bad at all, and Im sure that with the cowl in place and a prop in front, the void will basically be non-existant
Projects:
K44 Anti Tank gun
Diana
Albatros DIII
#021
Joined: August 02, 2007
KitMaker: 2,458 posts
AeroScale: 197 posts
Posted: Monday, January 04, 2010 - 12:57 PM UTC
Hello All,
Good looking builds going on around here.
I read a tip about a product called Gorilla Super Glue, as it dries it expands to fill gaps and it you wait 1-2 hours (no more then that) you can scrape off the extra with a hobby knife. It seems to double to triple its amount.
I read it in a 2010 magazine. If you want to know which one, PM me.
Thanks for all of the photos and updates,
Cheers,
Bruce
Fair Winds and Following Sea's, Always.
To my Friends, Death is as Light as a Feather, Duty is as Heavy as a Mountain.
I will all have my Hand on your Shoulder. Do not grieve for me I will allways be there for You.
#012
Wyoming, United States
Joined: November 07, 2003
KitMaker: 3,098 posts
AeroScale: 79 posts
Posted: Monday, January 04, 2010 - 02:06 PM UTC
Hi Jesper, did you give up on me?!
Here are the pictures of the propeller assembly that I have. Sorry to take so long in posting them.


I don't know what kit it is from and I don't know what scale it is. It is the only spare propeller that I have. I thought there were others but I was wrong. The blades are bigger that the ones on your kit but you can probably sand them down...or trim all three down and replace the whole propeller assembly. Anyway if you want it you can have it. If so just PM me your address and I will get them out to you in the mail this week.
Thanks also for re-posting your pictures of your propeller. Sorry for taking up your time. I was at work when I replied to you and my work computer blocks a lot of photos. So I didn't see that you had already posted a picture of what you had until I got home.
Anyway please let me know if this will work for you.
HARV
If any white man tries to destroy what is mine, or take what is mine, or take my lands, I will take my gun, get on my horse, and go punish him. Chief Low Dog - Oglala Sioux Chief
litespeed
News Reporter England - North West, United Kingdom
Joined: October 15, 2009
KitMaker: 1,976 posts
AeroScale: 1,789 posts
Posted: Tuesday, January 05, 2010 - 04:22 AM UTC
Hi all
It;s been bitterly cold in my workshop outside, but a few mild days has enabled me to make some progress. Lots of trouble with the struts for the floats, not sure if it's me being careless or it's plastic fatigue.

Strut supplied with the kit is top left, my repair is next to it and the two new struts are top right and bottom left.
Tried to repair broken strut reinforcing it with some 1.5mm copper wire. I filled down the wire to try and create a more aerofoil section. Used Araldite to glue the copper to the plastic, but the bond was very brittle. In the end replaced the kit struts with copper wire super glued to a strip of plastic card. Araldite mixed with the copper fillings was used to blend in the wire with the plastic strip again for a more aerofoil section. Looks a bit clunky, but it's much stronger. Could not resist dry fitting the top wing. I think I might have been bitten by the biplane bug!


tim
Ontario, Canada
Joined: January 03, 2007
KitMaker: 1,505 posts
AeroScale: 595 posts
Posted: Tuesday, January 05, 2010 - 05:46 AM UTC
Looks good Tim..did you do any re-scribing?
Projects:
K44 Anti Tank gun
Diana
Albatros DIII
litespeed
News Reporter England - North West, United Kingdom
Joined: October 15, 2009
KitMaker: 1,976 posts
AeroScale: 1,789 posts
Posted: Tuesday, January 05, 2010 - 06:17 AM UTC
Hi Jim
Yes I did around the engine covers and the hatch just behind the pilot on the right side. Also the small cockpit doors. To be honest there is not the trenches that normally indicates panel lines on this kit, I think the navie that normally did the trenches for Matchbox was off on holiday when this was produced. This a great kit and I am really enjoying building this thing. I am going to try and acquire another for the winter wonderland campaign.
tim
#041
Kobenhavn, Denmark
Joined: July 20, 2006
KitMaker: 10,069 posts
AeroScale: 3,788 posts
Posted: Tuesday, January 05, 2010 - 11:06 PM UTC
Thanks for checking the stash, Randy. I knew I could count on you
That propeller will be too big unfortunently, but I appreciate the effort. Nice of you to try and help.
Maybe I will have try and scratch build a new blade. Maybe twist the plastic over some heat or simply try bending it by hand.
Thanks for the effort

Campaign'oholic - 252+ campaigns completed
#012
Wyoming, United States
Joined: November 07, 2003
KitMaker: 3,098 posts
AeroScale: 79 posts
Posted: Wednesday, January 06, 2010 - 01:52 AM UTC
You're welcome Jesper. Sorry that I couldn't help you out. Oh well, maybe next time.
Good luck with your project.
HARV
If any white man tries to destroy what is mine, or take what is mine, or take my lands, I will take my gun, get on my horse, and go punish him. Chief Low Dog - Oglala Sioux Chief
Ontario, Canada
Joined: January 03, 2007
KitMaker: 1,505 posts
AeroScale: 595 posts
Posted: Wednesday, January 06, 2010 - 02:04 AM UTC
Quoted Text
That propeller will be too big unfortunently, but I appreciate the effort. Nice of you to try and help.
Maybe I will have try and scratch build a new blade.
Possibly you could take the oversize propeller blade and carve it down to the appropriate size? The plastic will already have the proper bend to it that you can use to "guide your mojo" so to speak?
Projects:
K44 Anti Tank gun
Diana
Albatros DIII
Merlin
Senior Editor #017
United Kingdom
Joined: June 11, 2003
KitMaker: 17,582 posts
AeroScale: 12,795 posts
Posted: Wednesday, January 06, 2010 - 11:30 AM UTC
Hi Jesper
I've hunted through my old stash of wrecks and nothing comes close to that style of prop (and sadly I ditched a load of old 1:72 spares when I cleared out my basement last summer!).
Have you thought of moulding a new blade using one of the intact ones as a master? It'd be a bit of a chore, but quite do-able.
All the best
Rowan
BEWARE OF THE FEW...
As I grow older, I regret to say that a detestable habit of thinking seems to be getting a hold of me. - H. Rider Haggard
Merlin
Senior Editor #017
United Kingdom
Joined: June 11, 2003
KitMaker: 17,582 posts
AeroScale: 12,795 posts
Posted: Wednesday, January 06, 2010 - 11:35 AM UTC
Hi there
Just to give us all a bit of inspiration (or is than an inferiority complex!?
):
Scratchbuilt H8K EmilyAll the best
Rowan
BEWARE OF THE FEW...
As I grow older, I regret to say that a detestable habit of thinking seems to be getting a hold of me. - H. Rider Haggard
AussieReg
Associate Editor #007
Victoria, Australia
Joined: June 09, 2009
KitMaker: 8,156 posts
AeroScale: 3,756 posts
Posted: Wednesday, January 06, 2010 - 11:47 AM UTC
Quoted Text
Hi there
Just to give us all a bit of inspiration (or is than an inferiority complex!? ):
Scratchbuilt H8K Emily
All the best
Rowan

(speechless)
ON the bench
Revell 1/24 '53 Corvette (building as '54)
Revell 1/24 BMW 507 Coupe and Cabrio
Italeri 1/48 Me262 B-1a/U1 Nightfighter
Monogram 1/24 '57 Chevy Nomad
Dragon 1/350 USS Frank Knox DD-742
#041
Kobenhavn, Denmark
Joined: July 20, 2006
KitMaker: 10,069 posts
AeroScale: 3,788 posts
Posted: Thursday, January 07, 2010 - 12:24 AM UTC
Thanks for the comments, Rowan and Jim. I think I will try to carve a propeller from scratch plastic. Nothing compared to that Emily!
I actually also considered buying another kit, but that seems a bit extreme.
Looking forward to get started.
Campaign'oholic - 252+ campaigns completed
Ontario, Canada
Joined: January 03, 2007
KitMaker: 1,505 posts
AeroScale: 595 posts
Posted: Thursday, January 07, 2010 - 01:43 AM UTC
Rowan...after seeing that Emily, I cant breathe..*gasp..wheeze....cough...all I can say is ..spectacular,,
Projects:
K44 Anti Tank gun
Diana
Albatros DIII