Air Campaigns
Want to start or join a group build? This is where to start.
Official Sea Plane Campaign Thread
BobCard
_VISITCOMMUNITY
Florida, United States
Joined: August 09, 2006
KitMaker: 1,008 posts
AeroScale: 14 posts
Posted: Monday, November 16, 2009 - 02:34 AM UTC
Sorry Herman, I wouldn't know what to do without my 2 Beagles,
Hope you’re feeling better soon and thanks for the comment.
Justin is putting a bunch more details in his then I am and is looking great.
This is my first bird in a long time and it is pretty large.
I figure on trying my weathering of tanks out on this plane to see how it looks, should be the same principle correct?
Have to wait and see.
Hang in there Herman,
Bob

mj
_VISITCOMMUNITY
Illinois, United States
Joined: March 16, 2002
KitMaker: 1,331 posts
AeroScale: 325 posts
Posted: Monday, November 16, 2009 - 06:19 AM UTC
Here's some progress on my Japanese floatplane; painted, clear-coated, and ready for some decals. Haven't painted the dolly yet - it's next up.


Hermon, I am very sorry to hear about your dog. You truly lose a member of the family, and that is very sad. My condolences


Cheers,
MIke

ludwig113
_VISITCOMMUNITY
England - South East, United Kingdom
Joined: February 05, 2008
KitMaker: 1,381 posts
AeroScale: 1,110 posts
Posted: Monday, November 16, 2009 - 08:17 AM UTC
ok heres a small update...
the parts you can see have mostly been sanded within an inch of their tiny plastic lives(infact the ones you cant see have been given the same treatment)due to raised detail and sink marks except the wings as i dont want to re scibe those


paulo
JimMrr
_VISITCOMMUNITY
Ontario, Canada
Joined: January 03, 2007
KitMaker: 1,505 posts
AeroScale: 595 posts
Posted: Monday, November 16, 2009 - 08:21 AM UTC
nice work Guys!..everyone seems to be just groovin right along
VonCuda
_VISITCOMMUNITY
North Carolina, United States
Joined: November 28, 2005
KitMaker: 2,216 posts
AeroScale: 1,080 posts
Posted: Monday, November 16, 2009 - 11:10 AM UTC
Thanks for the kind words guys. And I really mean that. My wife and kids and I have been crushed since last saturday. I know this isn't the place for this but here is a pic of good old Max the wonder dog. He will never be forgotten.


And here is an update on my Goose. Interior is almost done. The seats are not glued in yet since I still have to apply a wash. Should have the fuselage together sometime this week.


Again, thanks for the kind words. They really help.
Hermon
JimMrr
_VISITCOMMUNITY
Ontario, Canada
Joined: January 03, 2007
KitMaker: 1,505 posts
AeroScale: 595 posts
Posted: Monday, November 16, 2009 - 11:34 AM UTC
no problem at all Hermon,and please dont feel that this is not the place to express yourself after such a tragedy. This forum is about modeling, but its about people too,right? we are here for ya ! I have 2 dogs myself, and our oldest is a Basset hound..we have no idea how old he is as he was a rescue dog...and a very gentle soul..
I just heard from Bruce guys! Hes home now and sounds like hes very very tired ,but chomping at the bit to get back at 'em!....welcome back Illustrious Leader!
Keeperofsouls2099
_VISITCOMMUNITY
Florida, United States
Joined: January 14, 2009
KitMaker: 2,798 posts
AeroScale: 2,443 posts
Posted: Monday, November 16, 2009 - 01:36 PM UTC
Bob bad thing about these planes is that although i put all yhe detail into it
you will never see it because the front is all buttoned up.all well i know its there
and thats what counts.are builds seem to be running side by side interesting...
..... ..............................Bob.........................are you in my head?........


Build On,
Justin


Ps.Great work Bob
Keeperofsouls2099
_VISITCOMMUNITY
Florida, United States
Joined: January 14, 2009
KitMaker: 2,798 posts
AeroScale: 2,443 posts
Posted: Monday, November 16, 2009 - 01:39 PM UTC
Sorry almost forgot hermon wiring is awsome great work
Siderius
_VISITCOMMUNITY
Tennessee, United States
Joined: September 20, 2005
KitMaker: 1,747 posts
AeroScale: 1,673 posts
Posted: Monday, November 16, 2009 - 04:04 PM UTC
Hermon, I'm sorry about your loss. Words are often inadequate when it comes to the passing of a friend, even a four legged one. I worked at a pet day care for two and a half years in Northeast Tennessee and know how attached people get to their animals. I grew up with dogs as well. Schnauzers are fun little dogs. When the time is right you'll get another dog I'm sure and start making new memories. Just a few thoughts. Russell
BobCard
_VISITCOMMUNITY
Florida, United States
Joined: August 09, 2006
KitMaker: 1,008 posts
AeroScale: 14 posts
Posted: Tuesday, November 17, 2009 - 02:39 AM UTC
Now that was a cute dog, hang in there Herman .

....Justin ....Work Slower Justin.... .........

Everyone seems to be coming along, some really good work.
I'm starting to wonder if I should start weathering now or after completely finished like when I'm working on AFV's?
Hopefully some more time this weekend.
Bob
JimMrr
_VISITCOMMUNITY
Ontario, Canada
Joined: January 03, 2007
KitMaker: 1,505 posts
AeroScale: 595 posts
Posted: Tuesday, November 17, 2009 - 03:17 AM UTC
Bob, Im an AFV guy too,and I tend to paint aircraft following the same procedure as AFVs ..
update on the Stranny: doing the putty thing right now and once its all cleaned up Ill scribe,then on to the wings..
grayghost666
#021
Joined: August 02, 2007
KitMaker: 2,458 posts
AeroScale: 197 posts
Posted: Tuesday, November 17, 2009 - 09:53 AM UTC
Hello All,
I hope all is well with each and everyone of you.
Thanks for all of the Photo's and updates that you have shared with all of us, Plus the great tips on how you did what you did.
I have asked Jim to remain as by XO for a while till I get my strength back, He has done a great job while I was away. Thanks to all of you for the support you have given Jim during his time as the "Pilot In Command".
I have not started my build yet, I have 2 others that have to be done in 16 days. I am glad I put a long build time in the campaign, It will help me.
I am allowed only a few hours at the workbench and on line a day for a while, So it will be hit and miss for a while for me.
Thank You for all of your Kind Words, Support and Prayers during my surgery. I know they helped.
Cheers,
Bruce
JimMrr
_VISITCOMMUNITY
Ontario, Canada
Joined: January 03, 2007
KitMaker: 1,505 posts
AeroScale: 595 posts
Posted: Tuesday, November 17, 2009 - 09:58 AM UTC
were all just glad youre back!
BobCard
_VISITCOMMUNITY
Florida, United States
Joined: August 09, 2006
KitMaker: 1,008 posts
AeroScale: 14 posts
Posted: Tuesday, November 17, 2009 - 10:49 AM UTC
Agreed, welcome back and it's great to hear everything went fine.
Bob
CMOT70
_VISITCOMMUNITY
Victoria, Australia
Joined: August 23, 2007
KitMaker: 629 posts
AeroScale: 539 posts
Posted: Tuesday, November 17, 2009 - 03:26 PM UTC
First progress shot on the "Pete". I took a pic before assembling the left side sidewalls because not much can be got at with a camera once they are on.

I pretty much have everything else like the wings, struts etc assembled already and waiting for the fuselage halves to go together. This kit is an example of Hasegawa at their very best, in fact i believe they actually take their Japanese subjects just a bit more seriously than others.


More to come once the fuselage halves go together.

Andrew
Keeperofsouls2099
_VISITCOMMUNITY
Florida, United States
Joined: January 14, 2009
KitMaker: 2,798 posts
AeroScale: 2,443 posts
Posted: Tuesday, November 17, 2009 - 04:04 PM UTC
WOW impressive work andrew very good.
Bob im in a stall pattern waiting for paint from testors and contemplating
new airbrush so you have time to get way ahead......
Bruce glad to see your back to the stressful world of modeling


Build On,
Justin
jaypee
_VISITCOMMUNITY
Scotland, United Kingdom
Joined: February 07, 2008
KitMaker: 1,699 posts
AeroScale: 1,384 posts
Posted: Tuesday, November 17, 2009 - 07:17 PM UTC
Slainte Bruce. Glad to hear you're back. All the very best with the convalesence.

As for me. Research and experimenting with alu finish continues before I commit to plastic.
Also new spinners and canopies for the sunderland ordered from aeroclub.

Kit 2nd Hand £8
Engines £13
Props and spinners £7
Canopies £10 (although this also includes an eclectic mix of RAF types)
Sheet of BMF £5
Decal paper £2
Tamiya Spray £5
Total £40. On the steep side but well worth it I think to have a big shiny sunderland.

JimMrr
_VISITCOMMUNITY
Ontario, Canada
Joined: January 03, 2007
KitMaker: 1,505 posts
AeroScale: 595 posts
Posted: Wednesday, November 18, 2009 - 02:53 AM UTC
I agree,Andrew..brilliant work! I have this kit on my list of imminent builds,so Im watching with keen interest!..
Im sorry those engines didnt work out JP...it looks like thats the highest dollar(read:pound) figure on the inventory...
jaypee
_VISITCOMMUNITY
Scotland, United Kingdom
Joined: February 07, 2008
KitMaker: 1,699 posts
AeroScale: 1,384 posts
Posted: Wednesday, November 18, 2009 - 03:59 AM UTC
Fear not Jim. They shall not go to waste. Indeed if you want all or any of them back
just holler. Plenty of decent looking a/c use the twin wasp. Anyone hear want them for their Catalina?
1/72 Aeroclub metal twin wasps.
Emeritus
_VISITCOMMUNITY
Uusimaa, Finland
Joined: March 30, 2004
KitMaker: 2,845 posts
AeroScale: 1,564 posts
Posted: Wednesday, November 18, 2009 - 07:47 AM UTC
I've been doing some progress with my entry as well:

As those couple of Vallejo Model Air metallics I got somehow aren't waterproof when dry, I airbrushed the seat, prop and the machine gun charging handles with Citadell mithril silver.

It ain't alclad, but it turned out pretty good I think.

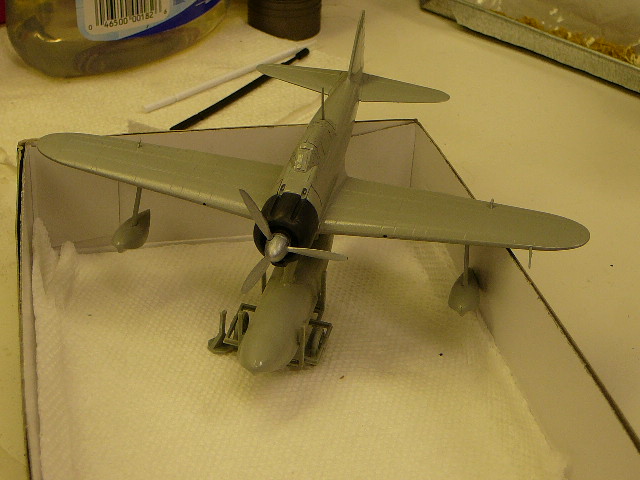
The only parts in the kit to display any significant mould seams were the float struts, which sported a surprisingly (for a kit of this kind) hefty seam on the sides, but as they're smooth, it was no big deal to sand them down. A few minutes of work with a couple of grades of sanding sticks

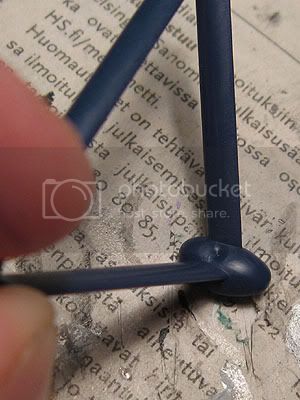
The seams already gone in the pic above, it shows instead the only single sink mark found on my sample, on the bottom of the rear float strut. The location made filling and sanding tricky, but I think I got it filled and sanded.

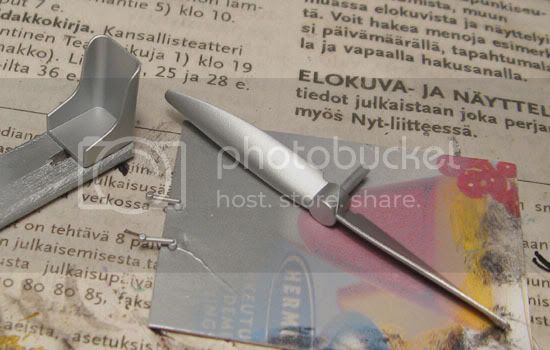
Exhaust pipes and control stick painted:

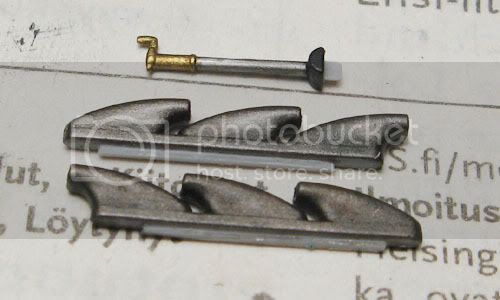
Following the film and not the instructions, the handle of the was painted brass. The shaft is Citadell 'chainmail'. As I didn't have any Citadell brass at hand for the handle, I had to resort to Vallejo's Model Color acrylic instead. Because of its less-than-ideal coverage and largish metallic flake size, I sort of semi-drybrushed it on, taking my time with three coats. I didn't look as good I'd have hoped, but a black wash I applied to tone down the metallic gleam of both the shaft and handle improved it significantly.

Next was painting the instrument panel. As drybrushing the dial details after painting the panel itself would most likely result in the need for touch-ups, I took a reverse approach and painted the dials first, and when dry, applied masking fluid to each gauge, then painted the panel with the interior color, a 2:1 mix of non-specular sea blue and intermediate blue.

When dry, I removed the masking fluid from the dials, applied gloss varnish for the glass and painted the two handles on each side of the panel:


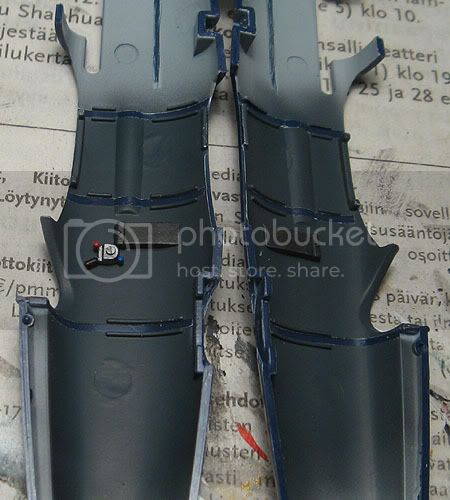
While I was at it, I airbrushed the interior color to the fuselage halves as well. In the photo below I have already removed the masking from the gluing surfaces and glued in the throttle quadrant and machine gun ammo containers to the cockpit sidewalls. Now a word of warning, I did a few test mixes and decided this one matched the movie machine's interior close enough. No real-life references used here, sorry.

The color of the throttle quadrant is also suspect, silver following the instructions, with different color handles just to keep things interesting. I even watched the movie's flight scenes closely a couple of times, but couldn't see a glimpse of the throttle shown.

And to close this update, here's the rest of the stuff going inside the fuselage halves, painted and ready for assembly:

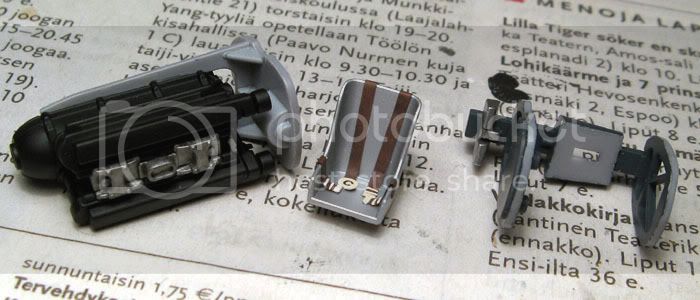
Even though the engine looked nice, I didn't paint it any further than the black primer and steel colored doohickey on the top, as it can't be seen in the model when finished (well, actually the top can be seen if you leave one the top nose panel off).
although the decal seatbelts looked OK, I'm not that big a fan, so I opted for PE straps found in my parts box, with only the letter C sliced from the decal harness and applied on the centre buckle. Vallejo's offwhite I painted the buckles was nearly a perfect match for the decal color. As a pure color would look a bit too clean (though not a bright white in the first place) even on a glossy and pristine plane as this, I applied a sepia wash on the belts to finish them off.

Next stop: assembling the interior and joining the fuselage halves.

JimMrr
_VISITCOMMUNITY
Ontario, Canada
Joined: January 03, 2007
KitMaker: 1,505 posts
AeroScale: 595 posts
Posted: Wednesday, November 18, 2009 - 08:29 AM UTC
Nice work Eetu!....very clean ....
Looking foreward to your next update!
CMOT70
_VISITCOMMUNITY
Victoria, Australia
Joined: August 23, 2007
KitMaker: 629 posts
AeroScale: 539 posts
Posted: Wednesday, November 18, 2009 - 02:33 PM UTC
All the airframe bits for the Pete are now together. No serious drama encountered, just a very slight sanding on the nose cowl joins being all that is needed before primer. I'm not really sure why the cowl is broken down into 3 parts, ive seen far more complicated cowls done in one piece. Maybe it's to do the earlier version at a later date?

The subassemblies fit so well that i will be painting them seperately as they are in the pic. This will make masking easier for painting. Then just assemble at the end. Easiest bi-plane ever.


Andrew
Keeperofsouls2099
_VISITCOMMUNITY
Florida, United States
Joined: January 14, 2009
KitMaker: 2,798 posts
AeroScale: 2,443 posts
Posted: Thursday, November 19, 2009 - 12:29 AM UTC
Just an Upadate my paint should arrive today so i can move forward YES!
I also found a great deal on an IWATA HP-CR for $73.00 and free shipping and
it comes with 10' of IWATA air hose on ebay and yes its brand new.


Build On,
Justin
JimMrr
_VISITCOMMUNITY
Ontario, Canada
Joined: January 03, 2007
KitMaker: 1,505 posts
AeroScale: 595 posts
Posted: Thursday, November 19, 2009 - 01:33 AM UTC
@Andrew- tha is a nice looking bird...Im glad to see these in progress shots before I do mine.....the wings look great!
@Justin...youll be very very happy with that brush...and thats a good deal yes...I got mine last spring and I love it for fine work. I spoke with a fella who used to work for Iwata here, and went on to service brushes and do custom work on his own..he said that I would never need any more brush for the kind of work we do as modellers..enough said as far as Im concerned..
skyhawk
_VISITCOMMUNITY
Florida, United States
Joined: June 03, 2003
KitMaker: 1,095 posts
AeroScale: 52 posts
Posted: Thursday, November 19, 2009 - 09:24 AM UTC

Quoted Text

....I'm not really sure why the cowl is broken down into 3 parts, ive seen far more complicated cowls done in one piece. Maybe it's to do the earlier version at a later date?...
Andrew


The early version is already out...saw it on a vendors table at the Warner Robins show a few weeks back.

i need to get a Pete kit...LHS has one....mmmmmm