

Guys I'm loving the way this thread has become a source of historical education as well as modeling fun for me.
I really have to get on to my build, don't I ??
Jesper your Beau is looking great, I'm looking forward to seeing some colour on it.
Cheers, D
Air Campaigns
Want to start or join a group build? This is where to start.
Want to start or join a group build? This is where to start.
Hosted by Frederick Boucher, Michael Satin
OFFICIAL: Anti-Shipping Campaign

AussieReg

#007

Joined: June 09, 2009
KitMaker: 8,156 posts
AeroScale: 3,756 posts
Posted: Monday, November 15, 2010 - 08:30 PM UTC


Tomcat31
#042

Joined: November 18, 2006
KitMaker: 2,828 posts
AeroScale: 1,720 posts

Posted: Tuesday, November 16, 2010 - 09:29 AM UTC
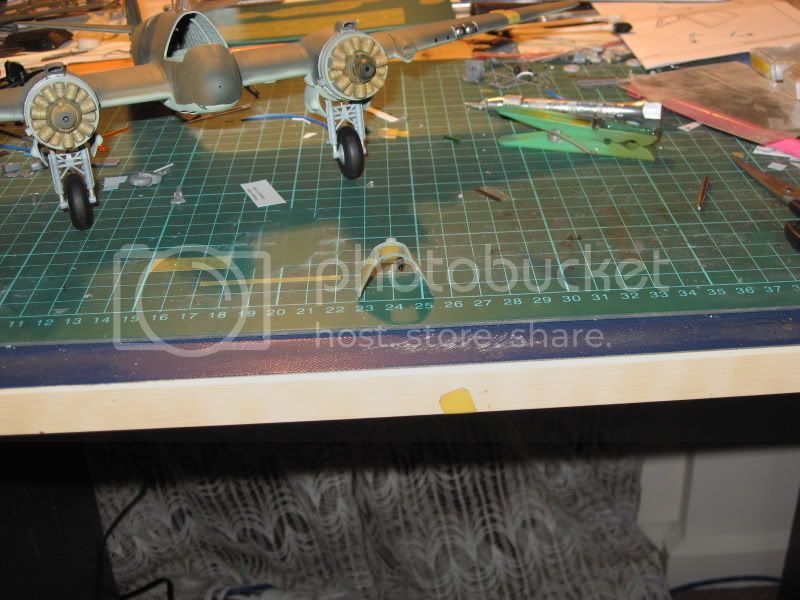
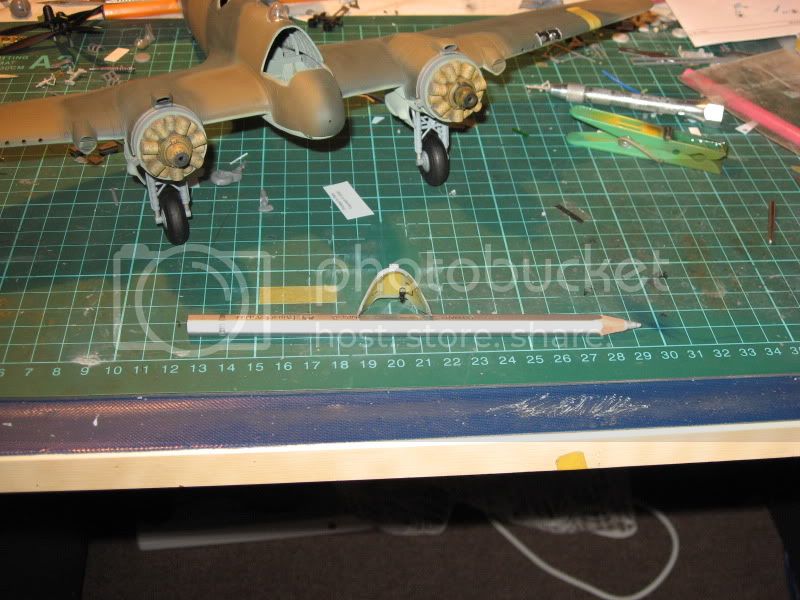
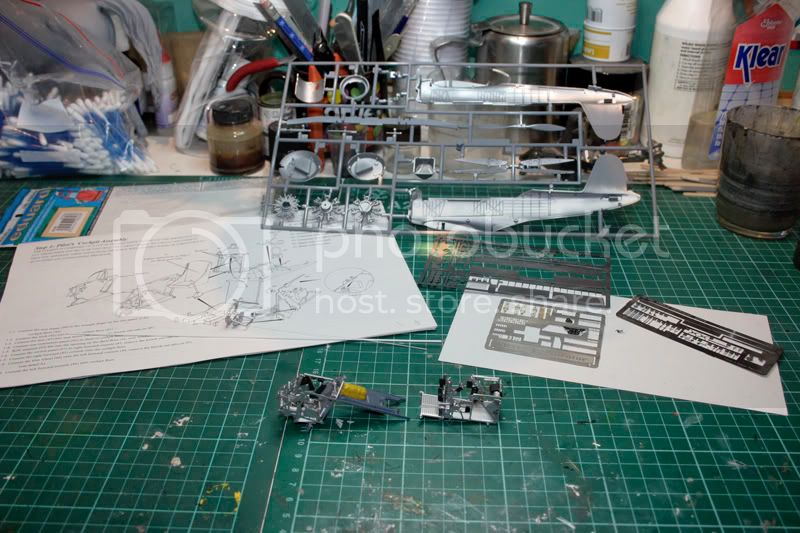
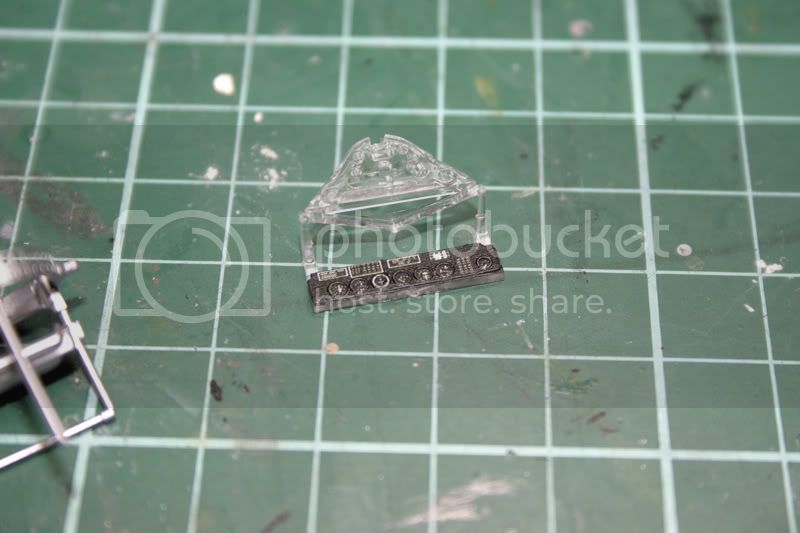
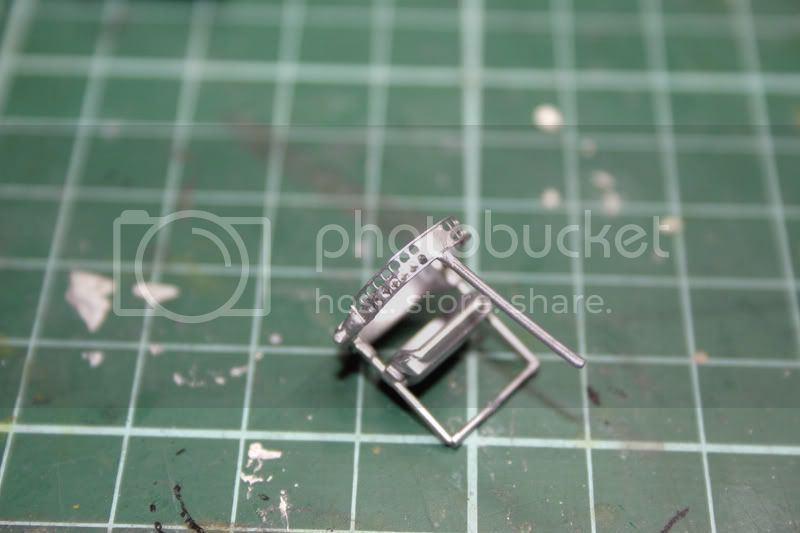
I managed to get the Vindicator started last week while I was on holiday
Basic components of the cockpit assembled and started to throw in some etch


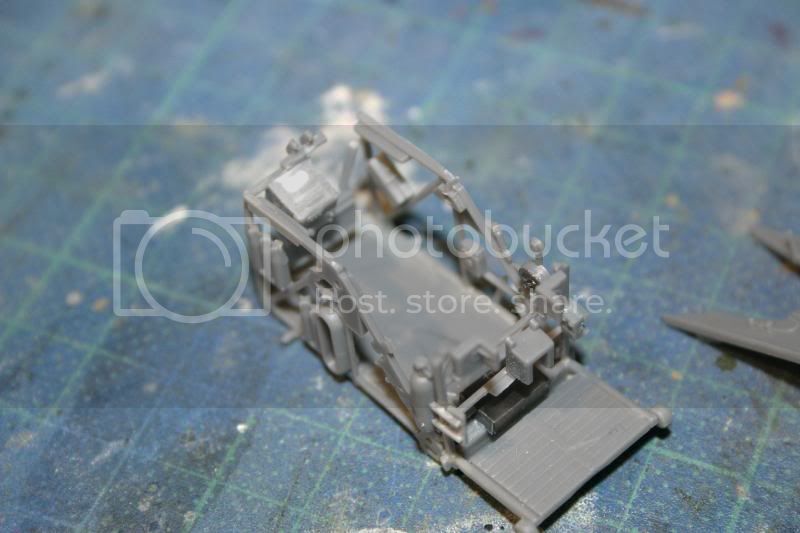
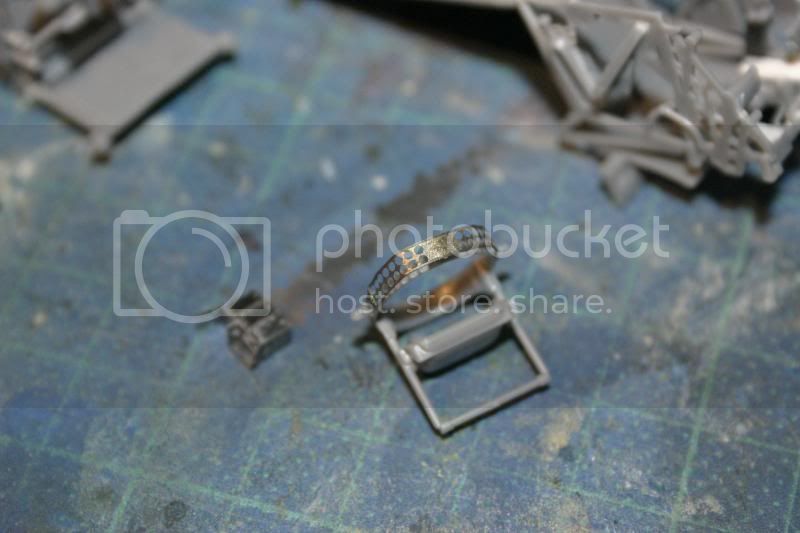
I can't seem to get the perforated part on the gun ring round and I keep flattening it with my fat fingers
Hopefully more will be done at the weekend now that I'm back to work.
Basic components of the cockpit assembled and started to throw in some etch
I can't seem to get the perforated part on the gun ring round and I keep flattening it with my fat fingers
Hopefully more will be done at the weekend now that I'm back to work.

SGTJKJ
#041

Joined: July 20, 2006
KitMaker: 10,069 posts
AeroScale: 3,788 posts

Posted: Wednesday, November 17, 2010 - 02:57 AM UTC
Thanks for the comments, guys. The Matchbox Beaufighter shapes up quite nicely despite the obvious lack of fine detail.
Thanks for the info on the rockets, Rob. I will go for black as the main colour. I thought "white" colour reference in the instructions looked strange.
More to follow
Thanks for the info on the rockets, Rob. I will go for black as the main colour. I thought "white" colour reference in the instructions looked strange.
More to follow


29Foxtrot
Joined: September 19, 2003
KitMaker: 708 posts
AeroScale: 674 posts

Posted: Thursday, November 18, 2010 - 02:58 AM UTC
Graham,
Good progress on your Avenger, I have the same kit in the stash that I intend to do as an Atlantic theatre bird with the red outline insignia.
Jesper,
I agree in regard to the Matchbox instruction sheet painting guide, it leaves a lot of miss conceptions in reference to paint colours.
My 'beau' has stalled for the time being, due to a commitment on a consignment build of a JSDF Navy PT Boat in 72 scale, {the old mid '70's Tamiya 'toy' - talk about a nightmare - the split deck system needs almost 1/4 inch spacers just to fill the gaps}.
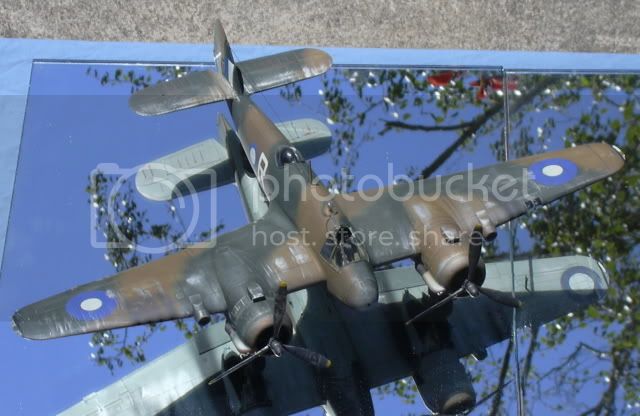
Here are some pix of an RAAF Mk IVc Beau I did some years back.
{Note it has the horizontal tail plane and the open exhaust stub}.
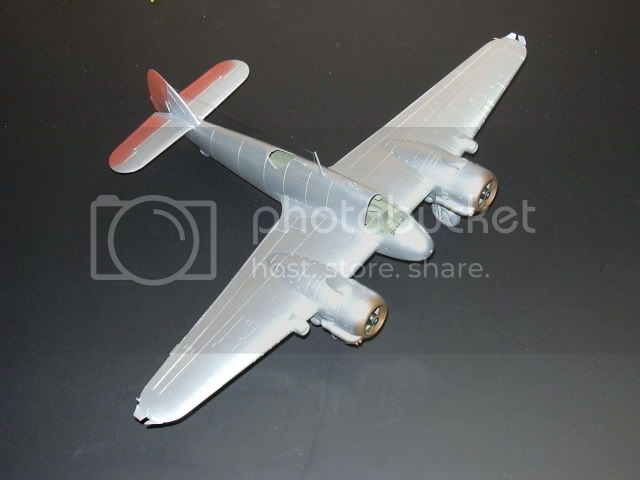
I used Humbrol 132 for the red oxide and 191 as the silver base coat.
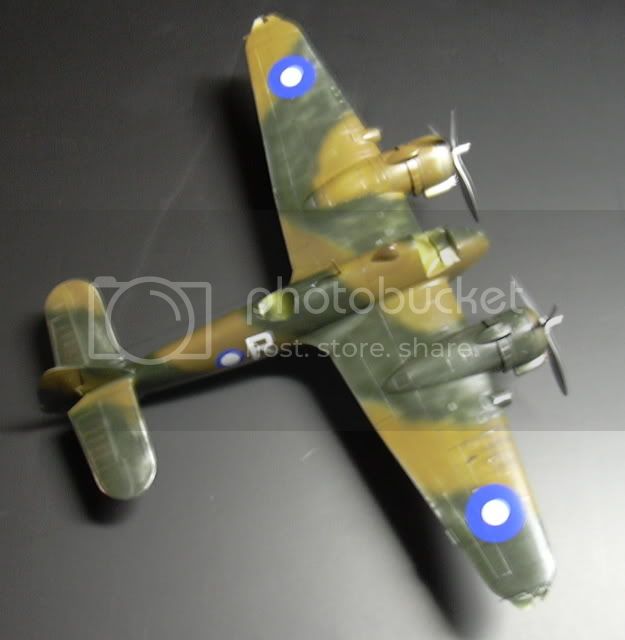
Applied a patchy top coat using the Model Master colors of Sky, RAF Dark Earth toned down with a few drops of white and RAF Dark Green toned down with a few drops of yellow, replicating a faded appearence.
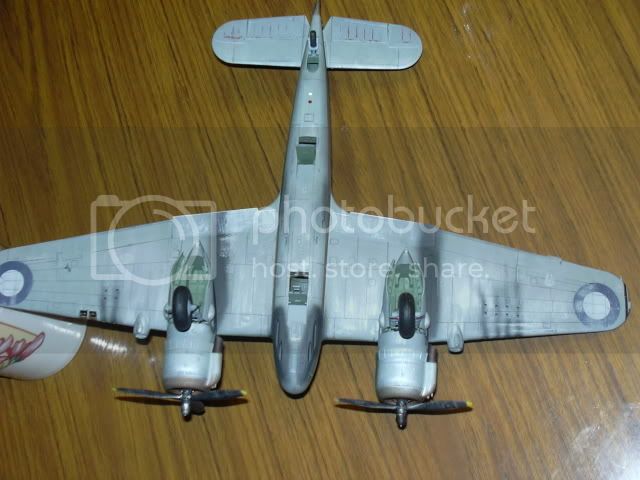
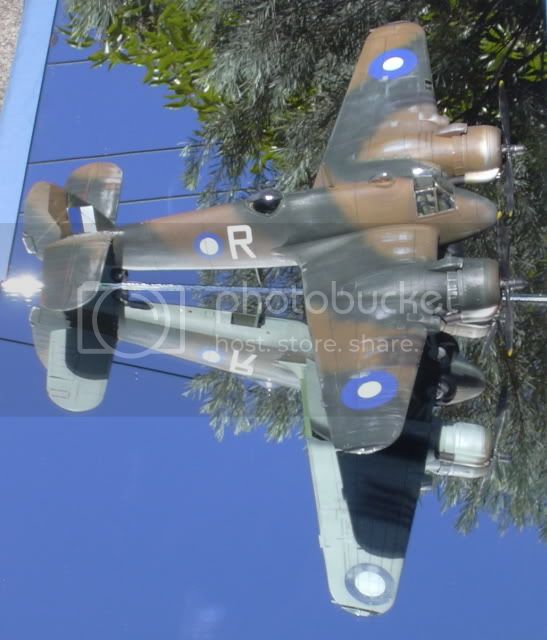
After the decals set i rubbed a fine emery board over the model surface in an attempt to expose the 'BMF" base and a well weathered subject.

Good progress on your Avenger, I have the same kit in the stash that I intend to do as an Atlantic theatre bird with the red outline insignia.
Jesper,
I agree in regard to the Matchbox instruction sheet painting guide, it leaves a lot of miss conceptions in reference to paint colours.
My 'beau' has stalled for the time being, due to a commitment on a consignment build of a JSDF Navy PT Boat in 72 scale, {the old mid '70's Tamiya 'toy' - talk about a nightmare - the split deck system needs almost 1/4 inch spacers just to fill the gaps}.
Here are some pix of an RAAF Mk IVc Beau I did some years back.
{Note it has the horizontal tail plane and the open exhaust stub}.
I used Humbrol 132 for the red oxide and 191 as the silver base coat.
Applied a patchy top coat using the Model Master colors of Sky, RAF Dark Earth toned down with a few drops of white and RAF Dark Green toned down with a few drops of yellow, replicating a faded appearence.
After the decals set i rubbed a fine emery board over the model surface in an attempt to expose the 'BMF" base and a well weathered subject.


Kiwi_Modeller
Joined: August 13, 2010
KitMaker: 188 posts
AeroScale: 62 posts

Posted: Thursday, November 18, 2010 - 10:16 PM UTC
Gday Rob, yeh its a nice kit all in all ti fits pritty well but the pe in the cockpit is real fiddly and the bay doors the whole inner skin is etch and lining it up ya need 3 pairs of hands LOL, same goe for gluing the fuse together i just got mine buttoned up tonight and started on the wing roots with the fold mech, its very loose tho it needs a little glue to stiffen it up then slowly move it so the glue dont actually stick.
i used a drop od ca on the pins or they fall out am going to try a tiny bit of pva to stiffen the pins to plastic and see what happens, ill take a couple of pics tomorrow when i get home from work.
if i find any other little silly bits to help anyone else thats got this kit i'll drop a note.
the Beau's looking good mate like the colors.
cheers,
Graham
29Foxtrot
Joined: September 19, 2003
KitMaker: 708 posts
AeroScale: 674 posts
Posted: Friday, November 19, 2010 - 05:09 AM UTC
Graham,
I look forward to seeing the wing fold progress on your Avenger.
Thanks for the kind words on the 'Beau' but it's from a few years ago and not the one I am doing for this campaign.
All:
A little more progress on the 'Beau', a few changes made on this build are pieces of BMF to replicate the landing light lenses in the port wing, drilled out the wing tip nav light lenses in an attempt to replicate the globe, the gun sight is mounted in the 'TRAVELING' position and I added a pe rear view mirror to the upper canopy frame. A few more fidly bits to add to the in side of the canopy before it's secured, such as the emergency hatch release handle, slide bar and side window release handles.
The pix on the process so far:
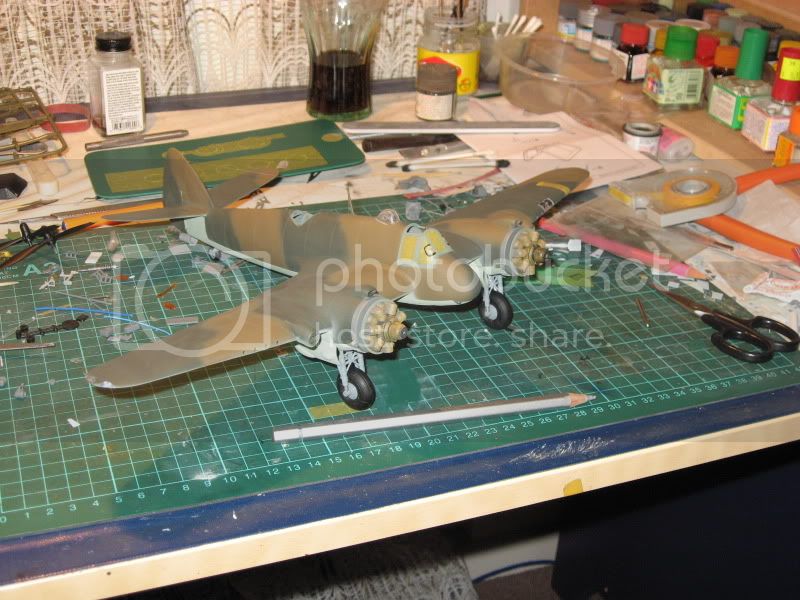
NOTE: The black frame outline on the canopy is the COLD AIR inlet window and note the position of the gunsight
I look forward to seeing the wing fold progress on your Avenger.
Thanks for the kind words on the 'Beau' but it's from a few years ago and not the one I am doing for this campaign.
All:
A little more progress on the 'Beau', a few changes made on this build are pieces of BMF to replicate the landing light lenses in the port wing, drilled out the wing tip nav light lenses in an attempt to replicate the globe, the gun sight is mounted in the 'TRAVELING' position and I added a pe rear view mirror to the upper canopy frame. A few more fidly bits to add to the in side of the canopy before it's secured, such as the emergency hatch release handle, slide bar and side window release handles.
The pix on the process so far:
NOTE: The black frame outline on the canopy is the COLD AIR inlet window and note the position of the gunsight
Kiwi_Modeller
Joined: August 13, 2010
KitMaker: 188 posts
AeroScale: 62 posts
Posted: Friday, November 19, 2010 - 05:18 PM UTC
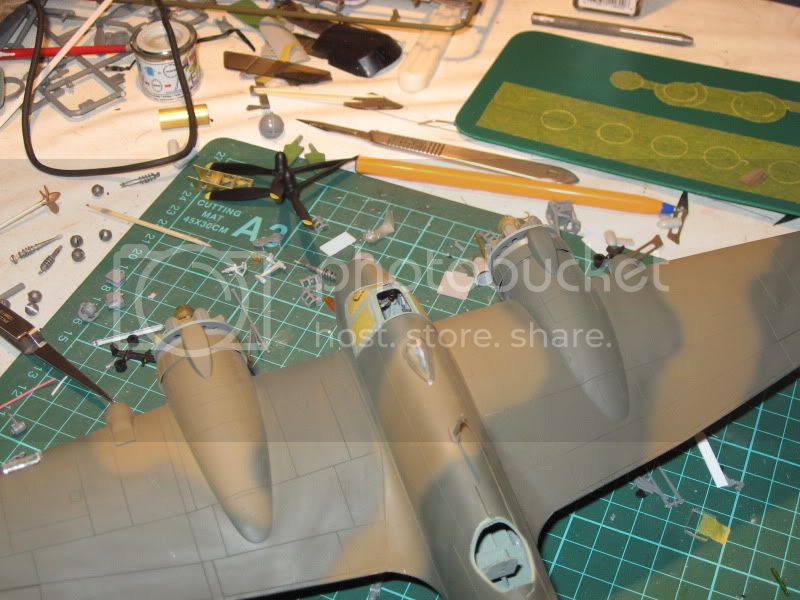
hey guys, heres pics of of current progress, fuse together, wing fold under way, bomb doors made still need weathering plus few little bits made up ready for wings..
hey Rob , oh bugga that old one still looks good new one aint bad either LOL, wing fold is a pain when ya come to build yours do HEAPS of dry fitting the fold mech is very sloopy but im picking its so they actually will fold because the PE strips that go top an bottom are nice neat fit, i tacked em on with masking tape then used thin ca glue which wicked under them nicely (using loctite brand its damn good).
ive tryed every type i can find and loctite is the only one ive found that dont dry out in the bottle plus i got both thin and gel for diff things.


now the fuse is together it ticks me off i cant see anything lol, they also dont allow you to close the bay doors (in our case that is good) but if ya did want to close em you have to cut the door tags off , at least you can bend the pe thats glued to the doors to any angle u want, its just little things trumpy didnt think of, they named the ailerons as flaps in the instructions maybe they not know the diff ? LOL
anyway hopefully bit more done tomorrow.
cheers,
Graham
hey Rob , oh bugga that old one still looks good
new one aint bad either LOL, wing fold is a pain when ya come to build yours do HEAPS of dry fitting the fold mech is very sloopy but im picking its so they actually will fold because the PE strips that go top an bottom are nice neat fit, i tacked em on with masking tape then used thin ca glue which wicked under them nicely (using loctite brand its damn good).ive tryed every type i can find and loctite is the only one ive found that dont dry out in the bottle plus i got both thin and gel for diff things.
now the fuse is together it ticks me off i cant see anything lol, they also dont allow you to close the bay doors (in our case that is good) but if ya did want to close em you have to cut the door tags off , at least you can bend the pe thats glued to the doors to any angle u want, its just little things trumpy didnt think of, they named the ailerons as flaps in the instructions maybe they not know the diff ? LOL
anyway hopefully bit more done tomorrow.
cheers,
Graham
AussieReg
#007
Joined: June 09, 2009
KitMaker: 8,156 posts
AeroScale: 3,756 posts
Posted: Friday, November 19, 2010 - 05:39 PM UTC
Rob your Beau looks great. Excellent detail as always with your builds.
Graham your big Avenger is coming along really nicely also, and you will always know the details are there, just tucked away out of sight !
Sorry for my lack of attention this week folks but I've been laid low by a nasty virus, running high fevers and such. I'm almost back to normal (well, as normal as I can get) so I'll be with you a lot more now.
Cheers, D
29Foxtrot
Joined: September 19, 2003
KitMaker: 708 posts
AeroScale: 674 posts
Posted: Friday, November 19, 2010 - 07:47 PM UTC
Damian,
Thanks for the kind words on the Beaufighter build, {had to put it aside AGAIN - due to other consignment builds, - the USS Franklin 1944 and a DKM type XXI sub, both in 350 scale}, also glad to note your back on your feet and looking forward to seeing your progress.
Graham,
Nice progress on your Avenger and that wing fold info will be something to remember when I get to do my kit, I also have the 48 scale offering with some resin bits, the RNFAA scheme would look good on one of these birds.
I have used the thin 'Locktite' ca glue in the past and i agree it is one of the better for use on plastic subjects.
Kiwi_Modeller
Joined: August 13, 2010
KitMaker: 188 posts
AeroScale: 62 posts
Posted: Saturday, November 20, 2010 - 09:50 PM UTC
well it took all day but they work it pays to not put all pe on as per instructions, i found its better to do it after wings are built and glued to fuse then you can align it all and tweak if nessercary.


have the one PE bit on top aft of the wing works fine but the others get it the way, i also didnt make the wings like the instructions say but i think there way might be easier LOL , im thinking i'll leave the starboard wing extended and port wing folded that way i can leave the crew door open and you can see a little of whats inside.
also will leave external ordinance off port wing to save stress on the hinge.
well thats it for this week hopefully start to get it ready for paint next week.
cheers,
Graham
it pays to not put all pe on as per instructions, i found its better to do it after wings are built and glued to fuse then you can align it all and tweak if nessercary.have the one PE bit on top aft of the wing works fine but the others get it the way, i also didnt make the wings like the instructions say but i think there way might be easier LOL , im thinking i'll leave the starboard wing extended and port wing folded that way i can leave the crew door open and you can see a little of whats inside.
also will leave external ordinance off port wing to save stress on the hinge.
well thats it for this week hopefully start to get it ready for paint next week.
cheers,
Graham
AussieReg
#007
Joined: June 09, 2009
KitMaker: 8,156 posts
AeroScale: 3,756 posts
Posted: Sunday, November 21, 2010 - 12:50 AM UTC
Looking good Graham. Man she's a BIG unit !!
Cheers, D
Cheers, D
AussieReg
#007
Joined: June 09, 2009
KitMaker: 8,156 posts
AeroScale: 3,756 posts
Posted: Sunday, November 21, 2010 - 05:13 PM UTC
Ok guys, just to prove I'm not just a spectator in my own campaign, here's a quick pic of some sub-assemblies painted ready for detailing. I didn't have the right colour in the stash, so I resorted to a mixture of 95% XF 71 Cockpit Green and 5% XF 18 Medium Blue. I came up pretty close to the reference sample I had.

More soon. Cheers, D
More soon. Cheers, D

AaronW

Joined: August 03, 2003
KitMaker: 197 posts
AeroScale: 42 posts
Posted: Monday, November 22, 2010 - 06:35 AM UTC
I forgot this started Nov 1, I had it in my head it started next month, thats what I get for listening to the voices in my head. 
Still trying to decide on a subject, but have a question, for early ASW aircraft that were used in hunter (detection) / killer (armed) pairs, is the hunter side of the pair acceptable or only the armed "killer" aircraft?
Still trying to decide on a subject, but have a question, for early ASW aircraft that were used in hunter (detection) / killer (armed) pairs, is the hunter side of the pair acceptable or only the armed "killer" aircraft?
AussieReg
#007
Joined: June 09, 2009
KitMaker: 8,156 posts
AeroScale: 3,756 posts
Posted: Tuesday, November 23, 2010 - 05:21 PM UTC
Now there's a REALLY good question Aaron. I hadn't even considered that angle !! I suppose that the "hunter" part of the equation is equally as important as the killer. What kit did you have in mind, and what unit markings?
Any comments from the masses?
A ltittle progress from me. Detail painting, dry-brushed the interior with flat aluminium, then a quick wash of Future with a few drops of Burnt Umber artists water-colour added to make the details pop a bit better.


Cheers, D
Any comments from the masses?
A ltittle progress from me. Detail painting, dry-brushed the interior with flat aluminium, then a quick wash of Future with a few drops of Burnt Umber artists water-colour added to make the details pop a bit better.
Cheers, D
Kiwi_Modeller
Joined: August 13, 2010
KitMaker: 188 posts
AeroScale: 62 posts
Posted: Tuesday, November 23, 2010 - 09:49 PM UTC
Gday D , yep she is big i decided to glue the wings extended the hinges and pe wont keep everything in place plus i think it looks more like it means bussiness wiht the full loadout of weapons LOL.
its about 450-500mm wingspan as she sits i got the landing gear legs on tonite to save the bomb door parts from breaking under the wieght shes a tad heavy too.
your looks great mate lookin forward to seeing that finihed, im hoping to thro some color on mune this weekend, prolly just the white under side and dark grey in middle all the maskin goin to take as bit.
hmm as for hunter part ya right they just as important as the killer personally i dont have any probs aith it , its still anti shipping.
cheers,
Graham
i decided to glue the wings extended the hinges and pe wont keep everything in place plus i think it looks more like it means bussiness wiht the full loadout of weapons LOL.its about 450-500mm wingspan as she sits i got the landing gear legs on tonite to save the bomb door parts from breaking under the wieght shes a tad heavy too.
your looks great mate lookin forward to seeing that finihed, im hoping to thro some color on mune this weekend, prolly just the white under side and dark grey in middle all the maskin goin to take as bit.
hmm as for hunter part ya right they just as important as the killer personally i dont have any probs aith it , its still anti shipping.
cheers,
Graham

bf443
Vendor
Joined: May 16, 2003
KitMaker: 895 posts
AeroScale: 457 posts

Posted: Wednesday, November 24, 2010 - 08:54 PM UTC
Greetings everyone,
I found another photo of a OS2U that was land based. The information indicated Kingfishers were prone to ground loops in the constant blowing winds. From NAS Kodiak.
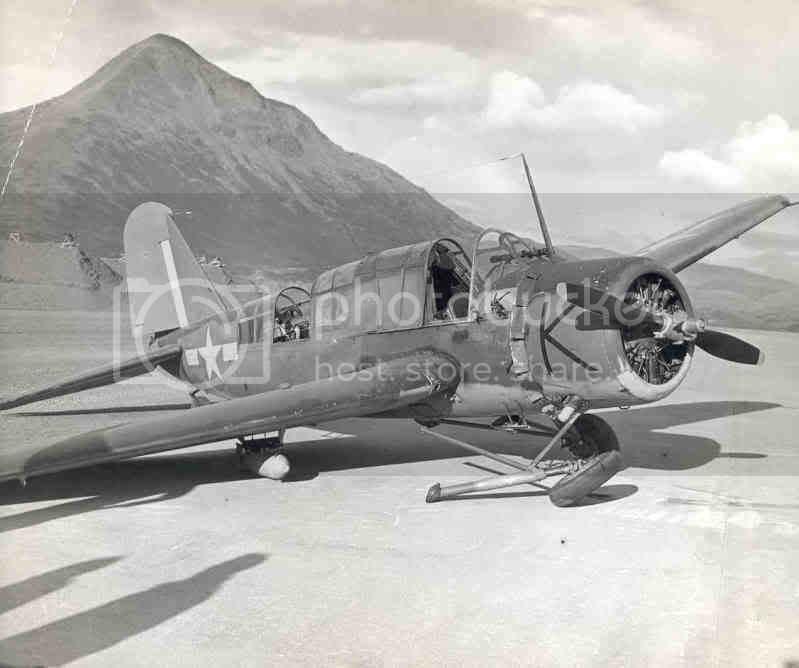
Brian
I found another photo of a OS2U that was land based. The information indicated Kingfishers were prone to ground loops in the constant blowing winds. From NAS Kodiak.
Brian
AussieReg
#007
Joined: June 09, 2009
KitMaker: 8,156 posts
AeroScale: 3,756 posts
Posted: Wednesday, November 24, 2010 - 10:19 PM UTC
Great pic Brian, thanks for sharing. That could have turned real nasty real quick with those bombs rattling around too !!
Cheers, D
Cheers, D
29Foxtrot
Joined: September 19, 2003
KitMaker: 708 posts
AeroScale: 674 posts
Posted: Thursday, November 25, 2010 - 02:59 PM UTC
Damian,
Good progress on your SM 79, I have seen a couple built in the past where they used the RAF Grey/Green as the interior colour. I have considered the Trumpeter 48 scale as a build but that is as far as I got.
If been doing a {consignment build} Tamiya Swordfish Mk I as a Bismarck attacker, as well as a Trumpeter 32 scale Mk I Swordfish and if it's ok with you I'd like to add both too this campaign.
On the weekend I hope to get the decals on my Beaufighter.
Kiwi_Modeller
Joined: August 13, 2010
KitMaker: 188 posts
AeroScale: 62 posts
Posted: Saturday, November 27, 2010 - 06:31 PM UTC
gday guys, well camo is on an most of the ordinance is painted just some little bits to paint then assemble it all.


canopy still to mask up and paint thats the slow bit LOL.
cheers,
Graham
canopy still to mask up and paint thats the slow bit LOL.
cheers,
Graham
AussieReg
#007
Joined: June 09, 2009
KitMaker: 8,156 posts
AeroScale: 3,756 posts
Posted: Saturday, November 27, 2010 - 07:21 PM UTC
Very nice job on the camo Graham, it's really looking the part now. I love the nice subtle "grimy" look on the engine as well.
Rob, if your other 2 Swordfish were started within the Campaign dates you are most welcome to add them to the gallery. Speaking of which, I better go arrange a gallery, thanks for reminding me
Cheers, D
Rob, if your other 2 Swordfish were started within the Campaign dates you are most welcome to add them to the gallery. Speaking of which, I better go arrange a gallery, thanks for reminding me
Cheers, D

camogirl
Joined: October 20, 2005
KitMaker: 1,045 posts
AeroScale: 622 posts

Posted: Saturday, November 27, 2010 - 09:05 PM UTC
I am still here working away on mine but the instructions are redicuosly complex in areas the long descriptive writing for each step does not necessarily match up with the step pic  The daft thing is the Vindicator Tomcat is building by Accurate Miniatures has much better and clearer instructions grrrrrrrr
The daft thing is the Vindicator Tomcat is building by Accurate Miniatures has much better and clearer instructions grrrrrrrr 
AaronW
Joined: August 03, 2003
KitMaker: 197 posts
AeroScale: 42 posts
Posted: Monday, November 29, 2010 - 06:09 AM UTC
Quoted Text
Now there's a REALLY good question Aaron. I hadn't even considered that angle !! I suppose that the "hunter" part of the equation is equally as important as the killer. What kit did you have in mind, and what unit markings?
Any comments from the masses?
I'm not set on anything specific, more curiosity. I have several clearly acceptable kits (torpedo planes etc) so that is not a problem, just getting a feel for what kind of stuff is acceptable, before I commit to something.
I do like early helicopters which usually worked in pairs or found the target so a ship could move in for the kill. There isn't much difference between the hunter and killer with these except for armament, but I am not aware of any ASW weapons available for these kits, so they would have to be built as hunters. I'm thinking of helos like the Bell HSL, or Sikorsky HO4S-3, and SH-34.
I may very well go with something clearly within the anti-ship theme, like I said just testing the waters to see what works, before I select something.
29Foxtrot
Joined: September 19, 2003
KitMaker: 708 posts
AeroScale: 674 posts
Posted: Tuesday, November 30, 2010 - 04:48 AM UTC
Damian,
Thanks, Neither kit has arrived as yet but both of them are a January start and are both the Mk II Swordfish, a 48 Tamiya and a 32 Trumpeter, the Tamiya kit is to be a rocket armed, in the RNFAA Atlantic scheme complete with the AEAF bands, {as per the consignment of it's owner and I need more info on this one before I start it}. The Trumpeter is open to my creative process, { North Africa as per consignment instructions of the kits owner}, which I think is Black on the under surfaces.
As for the Beaufighter I'm sorting out some suitable decals to use as RAAF type and I'll have more pix within a few days.
camogirl
Joined: October 20, 2005
KitMaker: 1,045 posts
AeroScale: 622 posts
Posted: Tuesday, November 30, 2010 - 09:47 AM UTC
Heres some update pics from me I will be glad when its all together and ready for airbrushing I think once the fuselage is together it will go alot better as no more fidly interior


I think once the fuselage is together it will go alot better as no more fidly interior Tomcat31
#042
Joined: November 18, 2006
KitMaker: 2,828 posts
AeroScale: 1,720 posts
Posted: Wednesday, December 01, 2010 - 09:53 AM UTC
Some progress photos from the weekend. been having some internet issues lately so i've only just managed to upload them
Mainly work on building the cockpit tubs, painting and adding etch.
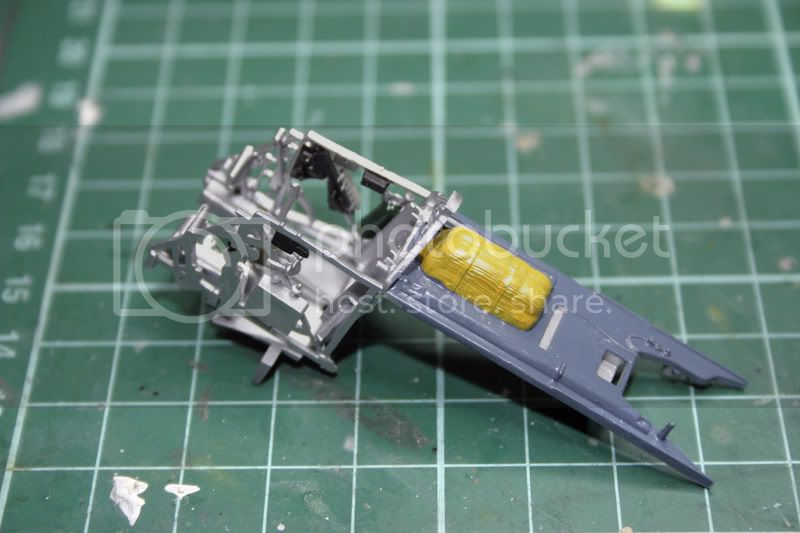
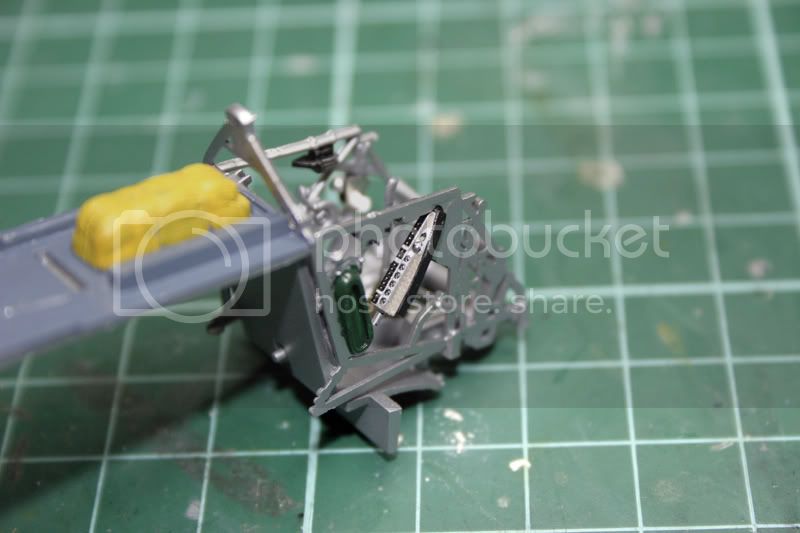
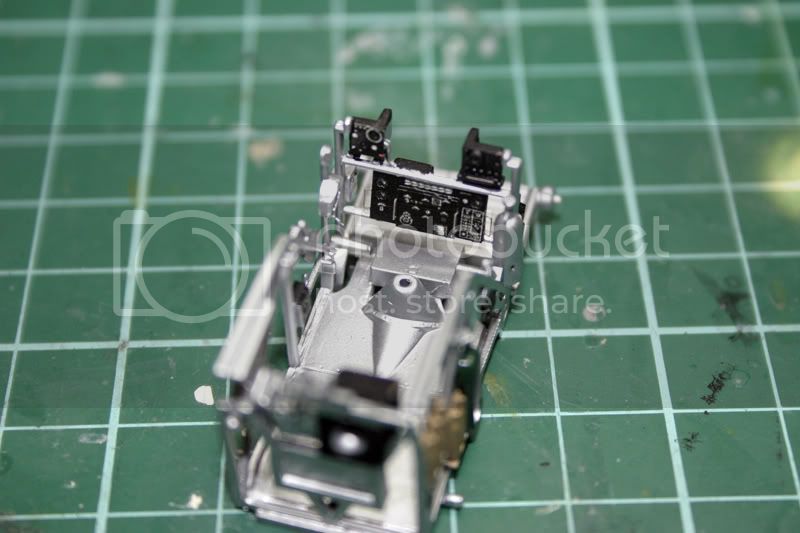

Mainly work on building the cockpit tubs, painting and adding etch.
 |

WEB HOSTING BY


Copyright ©2021 AeroScale and Kitmaker Network, a subsidiary of Silver Star Enterprises
All Rights Reserved. Please read our Conditions of Use and Privacy Policy.
All Rights Reserved. Please read our Conditions of Use and Privacy Policy.