

Hermon, while I was stationed at Patuxent River Maryland (NATTC) for aircrew/maintenance on P3's the S3 was also being tested for fleet service trials. I had a family aquaintence that worked with Vought who was doing the electronics and I was able to see the early S3 in the hangers while they were in various stages of paint/primer and while the engines were in testing. At the time scuttlebut was that the fleet Admirals and the VP squadron commanders were not convinced that the S3 was needed or wanted. The $ that it took away from the established squadrons and carrier funds was in question. This was back in late 1972 early 1973.
Bob
Air Campaigns
Want to start or join a group build? This is where to start.
Want to start or join a group build? This is where to start.
Hosted by Frederick Boucher, Michael Satin
OFFICIAL: Anti-Shipping Campaign

Bigrip74

Joined: February 22, 2008
KitMaker: 5,026 posts
AeroScale: 2,811 posts

Posted: Saturday, December 25, 2010 - 04:29 PM UTC

md72

#439
Joined: November 05, 2005
KitMaker: 4,950 posts
AeroScale: 3,192 posts

Posted: Saturday, December 25, 2010 - 05:36 PM UTC
I spent a year in LA while my dad designed the hydralics on the S-3. That was 68-69. He was a Vought employee, but the entire hydraulics group had been Shanghaied for the project.


warreni

Joined: August 14, 2007
KitMaker: 5,926 posts
AeroScale: 2,201 posts

Posted: Saturday, December 25, 2010 - 07:24 PM UTC
Finally started my Dauntless. Here is a few hours worth of work.

This would have to be one of the nicest out of the box cockpits there is IMHO. This one is going to be totally OOB.
Cheers
Warren
This would have to be one of the nicest out of the box cockpits there is IMHO. This one is going to be totally OOB.
Cheers
Warren

VonCuda
Joined: November 28, 2005
KitMaker: 2,216 posts
AeroScale: 1,080 posts
Posted: Sunday, December 26, 2010 - 01:50 PM UTC
Bob, Mark, that's one of the most amazing things about Aeroscale. All these little tid bits of information you get while building a kit make it all the more fun. The closest I've gotten to an S-3 is climbing around on the one on display down in Charleston at Patriots Point. After spending an hour looking at it I decided to build one for this campaign. The S-3 on display had the markings of VS-33 Screwbirds.
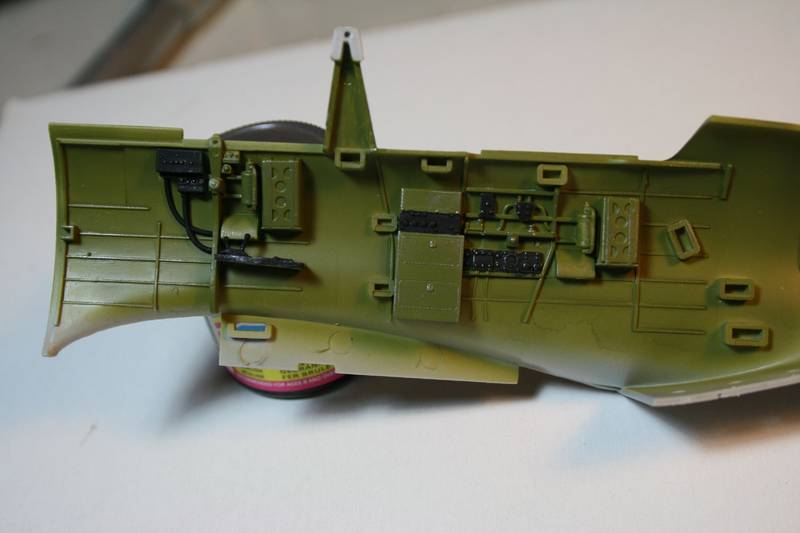
Here is a pic of something that will undoubtedly give me many headaches as this build progresses. There are no less than 6 antenna molded into the fuselage halves. Not only are they a pain to sand around but the likelyhood of them surviving the build is not good.

Also, since our infamous leader has decided that all torpedos must be visible I'm gonna have to spruce up the detailess bombay. As you can see in the photo there is basically nothing there right now.

I'll just go ahead and let you guys know that all the added scratchbuilding I plan on doing in the bombay will be entirely of my own design. Nothing will be even close to historically accurate.
Hermon
Here is a pic of something that will undoubtedly give me many headaches as this build progresses. There are no less than 6 antenna molded into the fuselage halves. Not only are they a pain to sand around but the likelyhood of them surviving the build is not good.
Also, since our infamous leader has decided that all torpedos must be visible I'm gonna have to spruce up the detailess bombay. As you can see in the photo there is basically nothing there right now.
I'll just go ahead and let you guys know that all the added scratchbuilding I plan on doing in the bombay will be entirely of my own design. Nothing will be even close to historically accurate.
Hermon


AussieReg

#007
Joined: June 09, 2009
KitMaker: 8,156 posts
AeroScale: 3,756 posts
Posted: Sunday, December 26, 2010 - 02:40 PM UTC
Quoted Text
Nothing will be even close to historically accurate.
Hermon
Henceforth to be known as "Hysterically accurate" !


VonCuda
Joined: November 28, 2005
KitMaker: 2,216 posts
AeroScale: 1,080 posts
Posted: Sunday, December 26, 2010 - 03:39 PM UTC
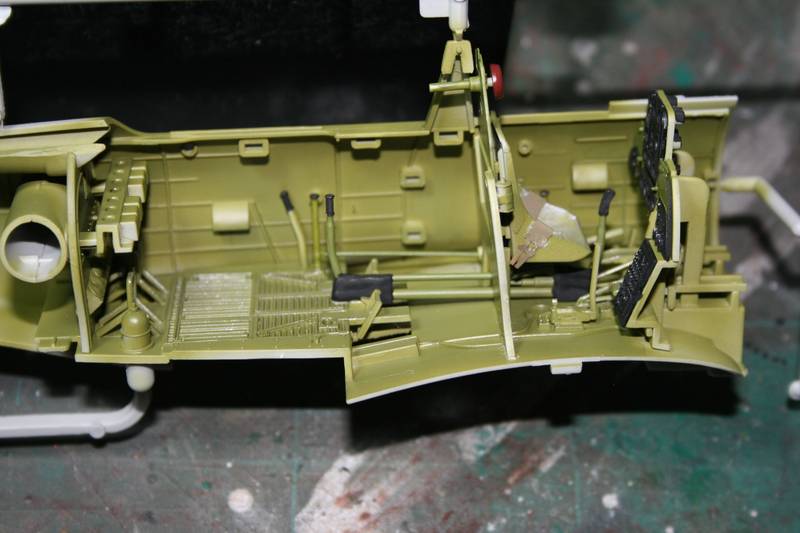
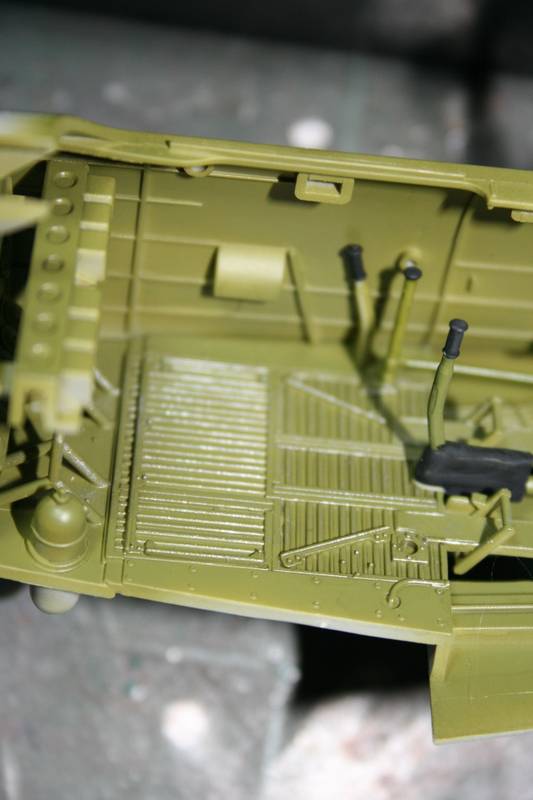
After an hour of "hysterically accurate" cutting and glueing, I'm satisfied. Besides, I live on a farm 30 miles from the nearest 2 lane highway. None of my friends and neighbors will know I made up all the gizmos in the bombay and wheel wells. 

Before:

And After:

I think after painting and a good oil wash it'll look OK. Now I'll see if I can make the seam lines around all those antenna dissappear.

Hermon
Before:
And After:
I think after painting and a good oil wash it'll look OK. Now I'll see if I can make the seam lines around all those antenna dissappear.
Hermon
warreni
Joined: August 14, 2007
KitMaker: 5,926 posts
AeroScale: 2,201 posts
Posted: Sunday, December 26, 2010 - 05:39 PM UTC
Looking good Hermon!
Here are some progress shots of my Dauntless.

This has been worn as far as I want it to be worn. You can't see the effects of the washes etc in the pictures here. Before the dirt lovers come out of the woodwork remember I am modelling an aircraft that was flying from the carriers in 1940, well before the USA entered the war and the aircraft would have recieved a lot more tender loving care than they would a few years later after the US entered the war. Hence the relative cleanliness of the cockpit.
Here are some progress shots of my Dauntless.
This has been worn as far as I want it to be worn. You can't see the effects of the washes etc in the pictures here. Before the dirt lovers come out of the woodwork remember I am modelling an aircraft that was flying from the carriers in 1940, well before the USA entered the war and the aircraft would have recieved a lot more tender loving care than they would a few years later after the US entered the war. Hence the relative cleanliness of the cockpit.
md72
#439
Joined: November 05, 2005
KitMaker: 4,950 posts
AeroScale: 3,192 posts
Posted: Sunday, December 26, 2010 - 06:24 PM UTC
Nice work H. Since you live so far off the paved road, are you sure all of the neighbor's cars will start in the morning after you collected all those gizmos?

mpatman
Joined: March 09, 2006
KitMaker: 248 posts
AeroScale: 160 posts

Posted: Sunday, December 26, 2010 - 06:58 PM UTC
Great work guys! That Dauntless is progressing quickly Warren. Better get back away from the PC and work on my B7A2....
Mark
Mark
VonCuda
Joined: November 28, 2005
KitMaker: 2,216 posts
AeroScale: 1,080 posts
Posted: Monday, December 27, 2010 - 07:06 AM UTC
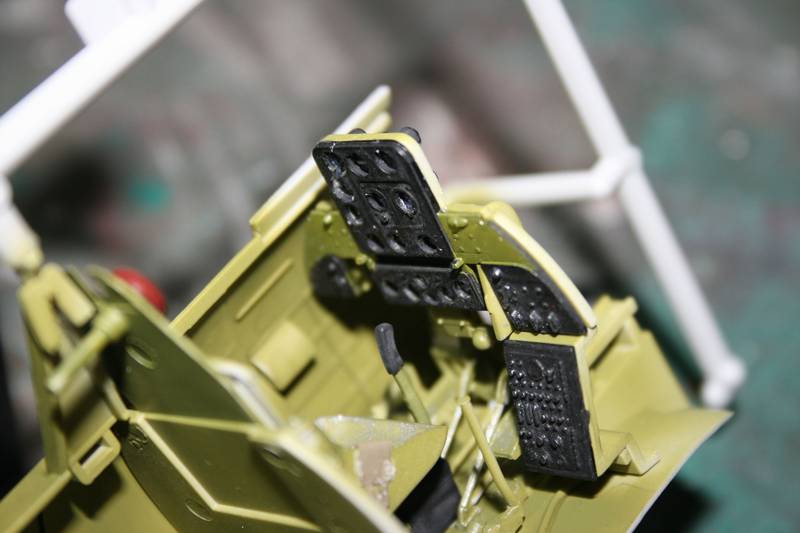
A few quick update pics.
Engine nacelles had sink marks in them that had to be filled and smoothed. 1st pic is before, during, and after.

A shot of the cockpit. Not much detail but the canopy is very dark tinted so little will be seen when the build is complete.

I'm finding quit a few little gaps here and there that will have to be filled with styrene strips. This one is at the radome door.

I'm gonna get as much as I can done tonight since I have to go back to work tomorrow.
Hermon
Engine nacelles had sink marks in them that had to be filled and smoothed. 1st pic is before, during, and after.
A shot of the cockpit. Not much detail but the canopy is very dark tinted so little will be seen when the build is complete.
I'm finding quit a few little gaps here and there that will have to be filled with styrene strips. This one is at the radome door.
I'm gonna get as much as I can done tonight since I have to go back to work tomorrow.
Hermon
md72
#439
Joined: November 05, 2005
KitMaker: 4,950 posts
AeroScale: 3,192 posts
Posted: Monday, December 27, 2010 - 03:43 PM UTC
Hermon, from the too little to late department; could you have filled those ejector dimples with punched out styrene?

AussieReg
#007
Joined: June 09, 2009
KitMaker: 8,156 posts
AeroScale: 3,756 posts
Posted: Tuesday, December 28, 2010 - 12:01 AM UTC
Looking good Hermon, I'm sure those gaps will get the "mad skills" treatment and soon be totally invisible !
Along with Mark I'll join the maybe too late club, but I find it easy to use a paintbrush and put a drop of Mr Surfacer 500 in those ejector pin holes and fill them flush with the surrounds. If you do it just right you don't even need to sand.
Either way, keep it cooking mate.
Cheers, D
Along with Mark I'll join the maybe too late club, but I find it easy to use a paintbrush and put a drop of Mr Surfacer 500 in those ejector pin holes and fill them flush with the surrounds. If you do it just right you don't even need to sand.
Either way, keep it cooking mate.
Cheers, D
VonCuda
Joined: November 28, 2005
KitMaker: 2,216 posts
AeroScale: 1,080 posts
Posted: Tuesday, December 28, 2010 - 12:41 AM UTC
Quoted Text
Along with Mark I'll join the maybe too late club, but I find it easy to use a paintbrush and put a drop of Mr Surfacer 500 in those ejector pin holes and fill them flush with the surrounds. If you do it just right you don't even need to sand.
Cheers, D
Ya know............I'm entering my 6th year of modeling since I rejoined the hobby and I've learned alot......but I never even thought about doing it the way you suggested.
Makes way more sense your way though.
Anyhoo.......I'm at work today and then I have 5 days in a row off so I'm looking forward to getting back to the viking.
Hermon
Tailor

Joined: May 26, 2008
KitMaker: 1,168 posts
AeroScale: 199 posts

Posted: Tuesday, December 28, 2010 - 08:18 AM UTC
Good things happening here, gentlemen!
It's a lot of fun follwoing his thread.
Of cause during the holidays there wasn't as much modelling time as I would have wished for, however I made some progress mainly today.
I applied the last batch of decals and sealed off the surface with yet another layer of Future.


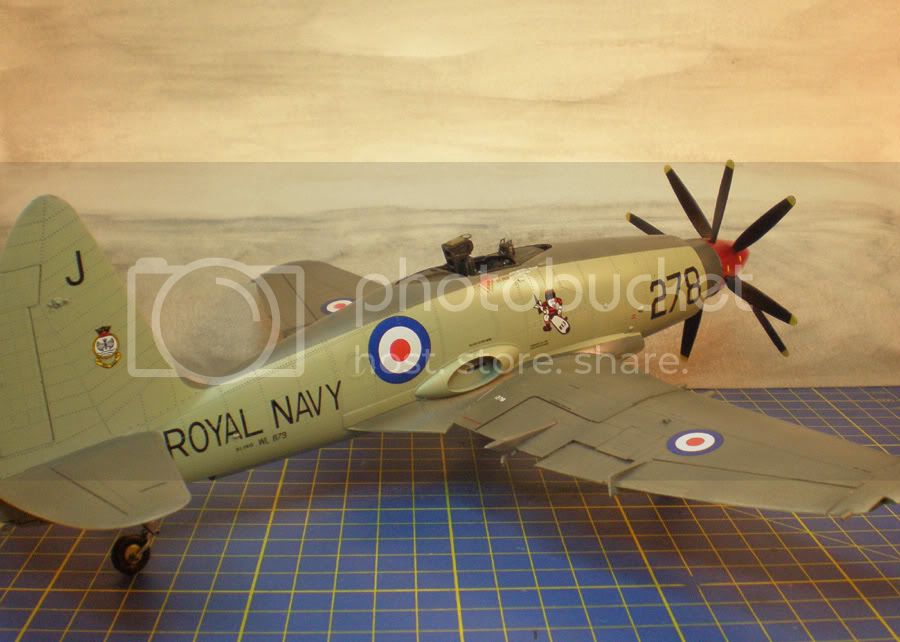

The decals were quite nice, but a tad bit brittle. I used Mr. Mark Softener and Mr. Mark Setter, where appropriate.
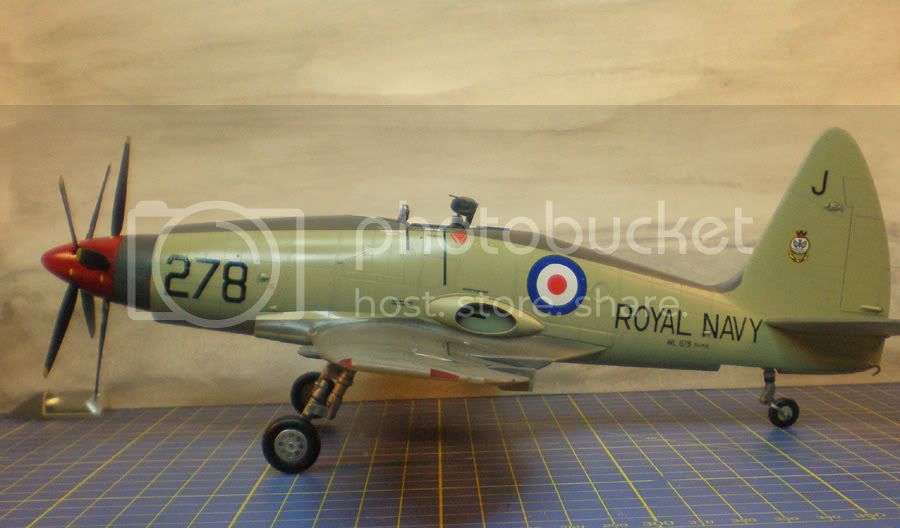
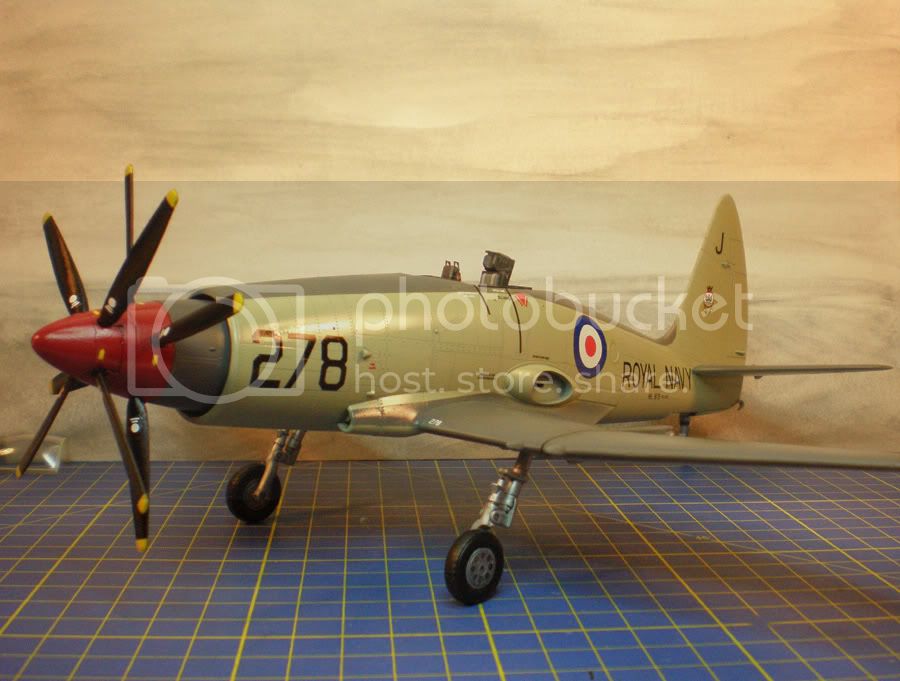
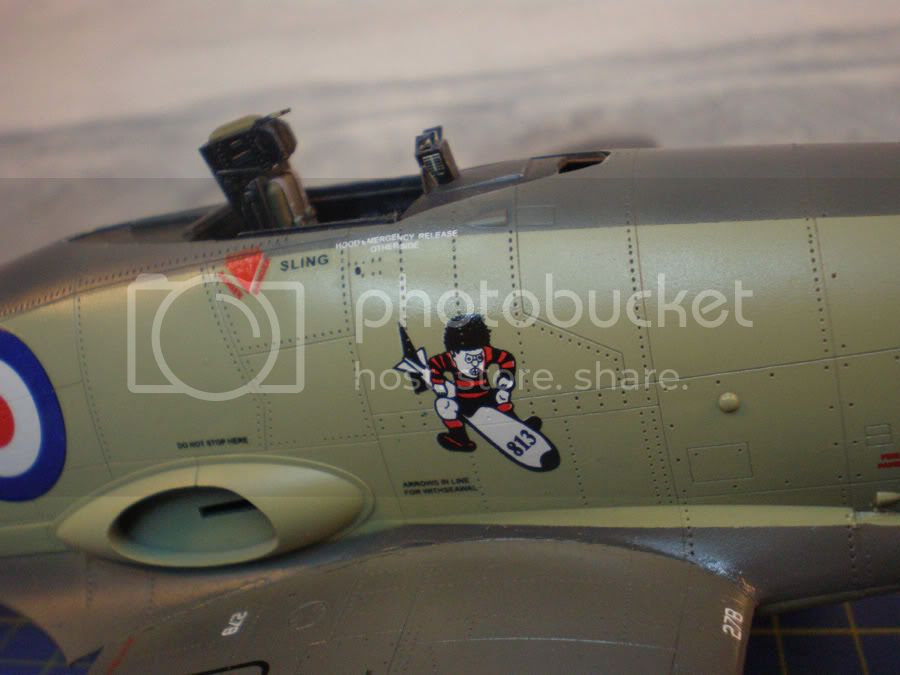
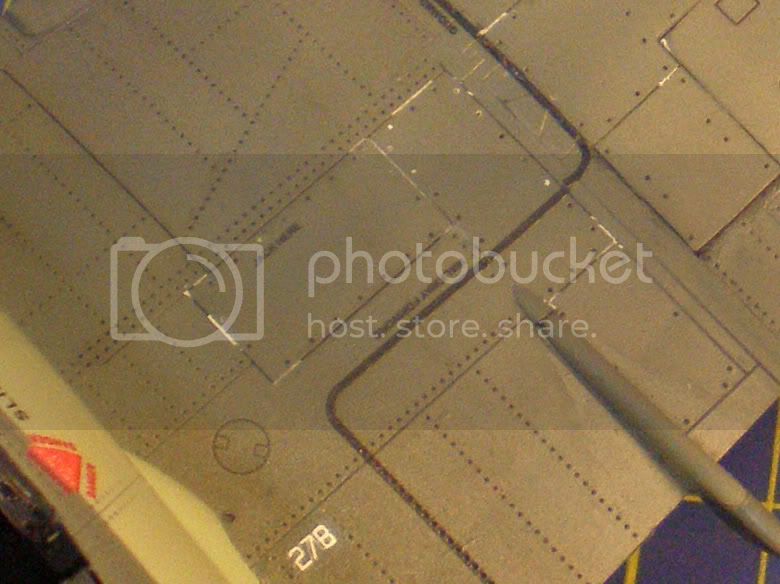
Later I started a bit of after shading using washes. I am trying different things on one side and will document my proceedings and findings in a coupel of days.

I didn't quite know which one to post so I went on posting all of them. Sorry for wasting up so much board space! I made quite a few craftsmanship errors and am learning along the way.
Cheers,
Guido
It's a lot of fun follwoing his thread.
Of cause during the holidays there wasn't as much modelling time as I would have wished for, however I made some progress mainly today.
I applied the last batch of decals and sealed off the surface with yet another layer of Future.
The decals were quite nice, but a tad bit brittle. I used Mr. Mark Softener and Mr. Mark Setter, where appropriate.
Later I started a bit of after shading using washes. I am trying different things on one side and will document my proceedings and findings in a coupel of days.
I didn't quite know which one to post so I went on posting all of them. Sorry for wasting up so much board space! I made quite a few craftsmanship errors and am learning along the way.
Cheers,
Guido
Bigrip74
Joined: February 22, 2008
KitMaker: 5,026 posts
AeroScale: 2,811 posts
Posted: Tuesday, December 28, 2010 - 08:30 AM UTC
@ Mark: did your dad have a hang over and sore head after the Shanghai 
@ Hermon: I would have rather been and aircrew on the S3, it is a sexy a/c and the adventure for a 20 year old was enticing. Your build is interesting are there any issues?
@ Guido: I am amazed at the panel method that you shared with us, your build is looking really good.
Bob
@ Hermon: I would have rather been and aircrew on the S3, it is a sexy a/c and the adventure for a 20 year old was enticing. Your build is interesting are there any issues?
@ Guido: I am amazed at the panel method that you shared with us, your build is looking really good.
Bob
VonCuda
Joined: November 28, 2005
KitMaker: 2,216 posts
AeroScale: 1,080 posts
Posted: Tuesday, December 28, 2010 - 08:32 AM UTC
Guido, outstanding job! The decals look like they snugged down nicely and the demarkation lines between the two colors are nice and crisp. That dual prop is flawless. Really nice job all around.
Hermon
Hermon

vonHengest
Joined: June 29, 2010
KitMaker: 5,854 posts
AeroScale: 372 posts

Posted: Tuesday, December 28, 2010 - 02:00 PM UTC
Wow this thread is moving along! Great looking builds too! It'll be a while before I can start mine, but I'll give you all a quick peek at what I'm going to be building if I can get my hands on the camera again...
VonCuda
Joined: November 28, 2005
KitMaker: 2,216 posts
AeroScale: 1,080 posts
Posted: Tuesday, December 28, 2010 - 03:22 PM UTC
Got in a little bench time tonight and the Viking is mooooving right along. So far I've only run into a couple of little problems, but tonight I found a rathar large one.

The top of the wing/fuselage joint is perfect, however on the bottom side there seems to be about a 3 meter gap...........well actually only 1mm. I'll have glue on a strip of thin styrene then sand it down accordingly to fill said gap. Not tonight though.
Hermon
ps: Jeremy, I have to steal my wifes Nikon to do all my pic's. If you'll hold your kit up real high I'll snap a pic of it for ya.
warreni
Joined: August 14, 2007
KitMaker: 5,926 posts
AeroScale: 2,201 posts
Posted: Tuesday, December 28, 2010 - 03:29 PM UTC
Hello again.
That Wyvern looks great Guido! All it needs is a canopy....
Here are some more in progress shots of the SBD-1/2 Dauntless.

The power egg...

And the left and right sides of the fuselage just before I start to button her up.
So far no problems, oh except that the instructions were not clear as to where the exhausts went and I had to remove them and re-glue them.
On on on!
Warren
That Wyvern looks great Guido! All it needs is a canopy....
Here are some more in progress shots of the SBD-1/2 Dauntless.
The power egg...
And the left and right sides of the fuselage just before I start to button her up.
So far no problems, oh except that the instructions were not clear as to where the exhausts went and I had to remove them and re-glue them.
On on on!
Warren
VonCuda
Joined: November 28, 2005
KitMaker: 2,216 posts
AeroScale: 1,080 posts
Posted: Tuesday, December 28, 2010 - 03:37 PM UTC
Warren, for a while I wondered how you could crank out these beautiful kits so fast...........then I remembered you're 12 hours ahead of me.
Really nice. The cockpit looks great and shows a very steady hand.
Hermon
Really nice. The cockpit looks great and shows a very steady hand.
Hermon
MikeMx

Joined: May 22, 2008
KitMaker: 649 posts
AeroScale: 434 posts

Posted: Wednesday, December 29, 2010 - 02:43 AM UTC
My first completed build is up in the gallery for this campaign. I have a couple more to take some pics of and several more to build!
thanks
Mike
thanks
Mike
VonCuda
Joined: November 28, 2005
KitMaker: 2,216 posts
AeroScale: 1,080 posts
Posted: Wednesday, December 29, 2010 - 02:22 PM UTC
Almost ready for paint. Yes, the panel lines are done with a Sharpie fine tip marker and yes, I know you're not supposed to do that. I only use this technique when I follow it up with enamel paints, never acrylic. So far in the last 5 years I've had no problems and NO ink bleed-through.

I'm leaving the engines off until after painting since it would be almost impossible to paint the inboard sections once installed.
Hermon
I'm leaving the engines off until after painting since it would be almost impossible to paint the inboard sections once installed.
Hermon
vonHengest
Joined: June 29, 2010
KitMaker: 5,854 posts
AeroScale: 372 posts
Posted: Wednesday, December 29, 2010 - 08:43 PM UTC
Quoted Text
ps: Jeremy, I have to steal my wifes Nikon to do all my pic's. If you'll hold your kit up real high I'll snap a pic of it for ya.
Score! Looks like you got it, thanks Hermon

And here she is all nice and freshly packaged inside

SGTJKJ
#041

Joined: July 20, 2006
KitMaker: 10,069 posts
AeroScale: 3,788 posts

Posted: Wednesday, December 29, 2010 - 08:46 PM UTC
That is a new technique for me, Hermon. Very interesting. Looks very sharp now - I look forward to see how it looks under a coat of paint.

Bigrip74
Joined: February 22, 2008
KitMaker: 5,026 posts
AeroScale: 2,811 posts
Posted: Wednesday, December 29, 2010 - 09:00 PM UTC
Hermon, I need some photos taken can ya do them for me? Around (113) should do me, maybe more.
Bob
Bob
 |

WEB HOSTING BY


Copyright ©2021 AeroScale and Kitmaker Network, a subsidiary of Silver Star Enterprises
All Rights Reserved. Please read our Conditions of Use and Privacy Policy.
All Rights Reserved. Please read our Conditions of Use and Privacy Policy.