Gentlemen-
With just a few hours left in this old year, I want to wish all of you All The Best for a Happy and Prosperous New Year.
Thank you for all the encouragement along the way of his campaign.
Hermon- The Viking is looking really really good and I think that the highlighting effects show very nicely. I bet they are even better in real life.
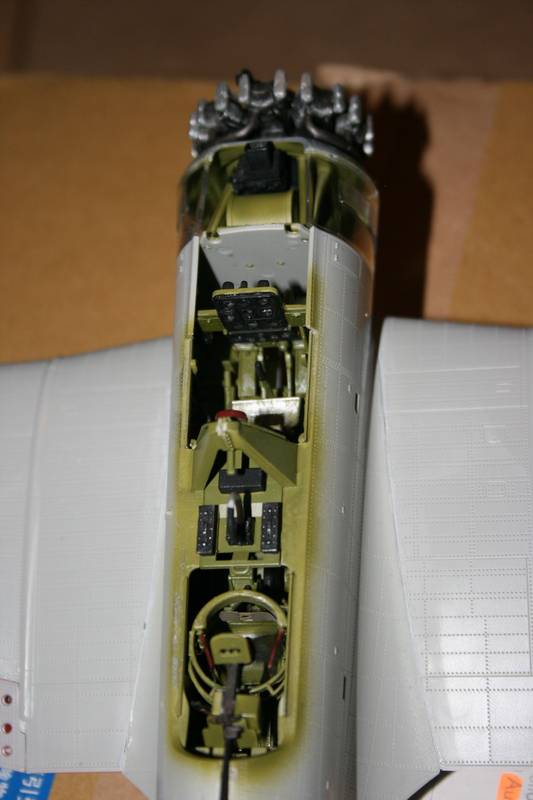
Warren- Very nice wear on the cockpit! I like the used, but not abused look.
Against my best intentions I wasnt able get the build finished today, but hey there are new resolutions to be made. How about this one: Get the Wyvern-build finished sometime soon!
That should be a resolution I can fulfil within a week. Now that I write this, there are only the antennae of the plane and the hinges of the landing gear doors to be added.
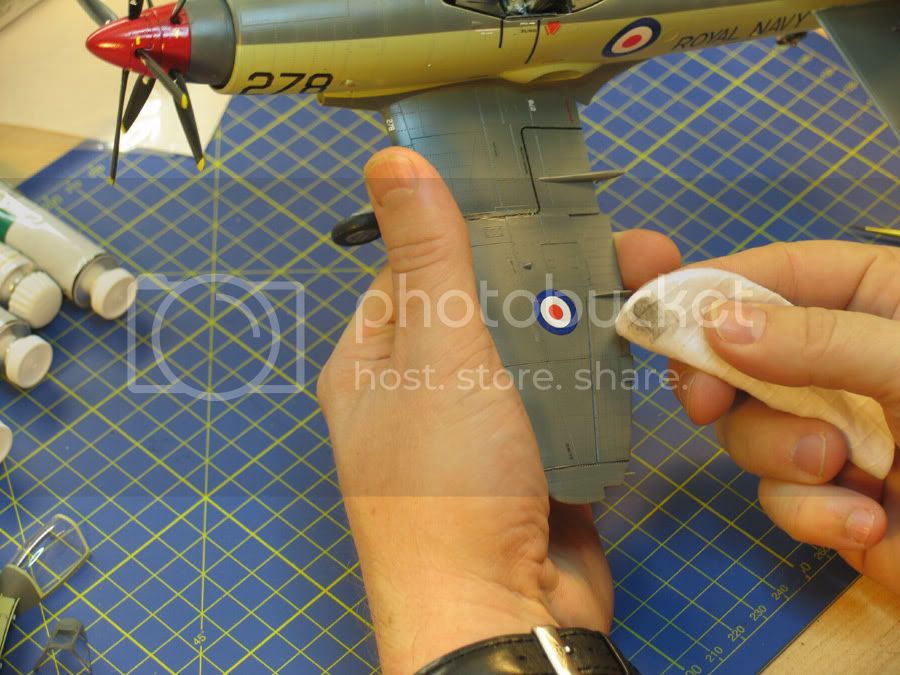
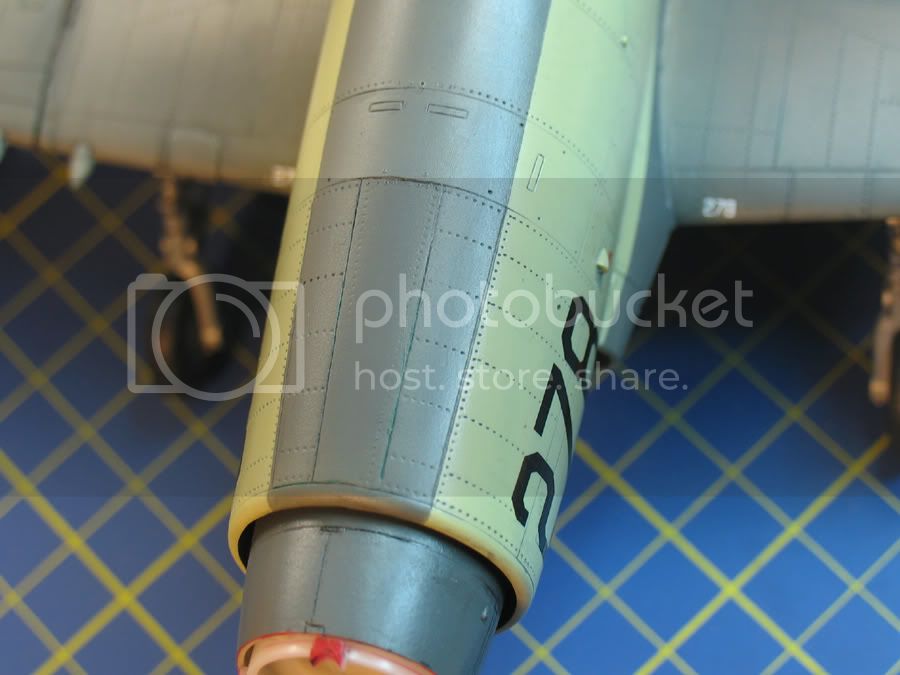
As promised I like to share a bit of the washing method I tried.
I used a range of artists acrylic paints, alcohol, a fine paintbrush, Q-tips and make-up removal pads. A bit of water helps, as well.
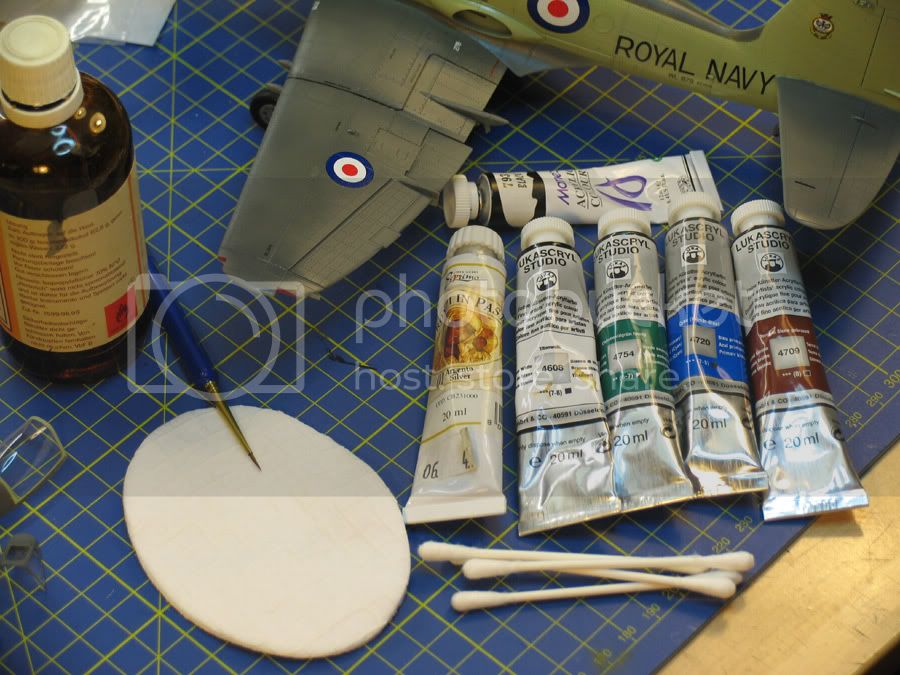
I mix various shades of grey and green (with added alcohol as thinner) and apply them to the panel line with the paintbrush. I keep the paint thick and covering. I dont like runny washes so much.

Then I take the moistened Q-tip and rub off the excess paint. The Q-tip should be moved in a 90° angle to the panel line to allow remnants of paint to stay in the recesses.
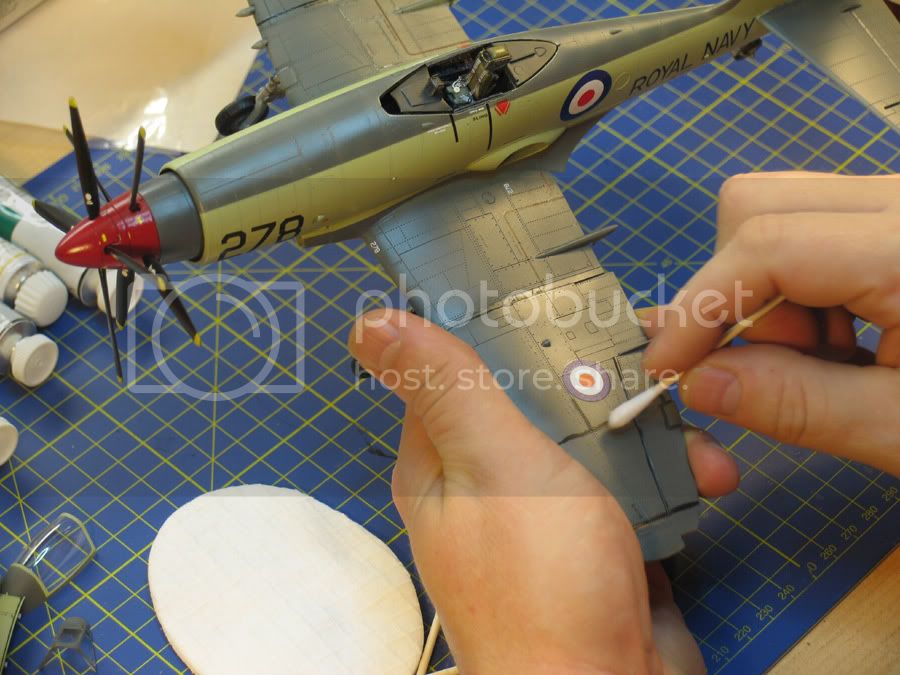
As soon as the thick of the paint is removed I switch to the make-up pad and clean the area.
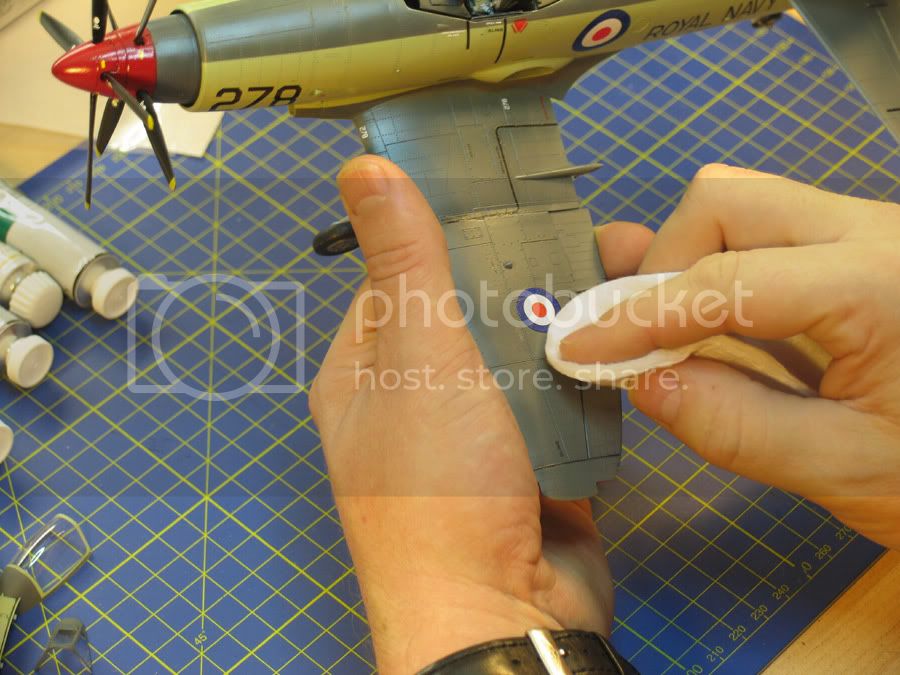
The paint that accumulates on the q-tip and the pad may be used to apply some weathering streak along the wings and fuselage.
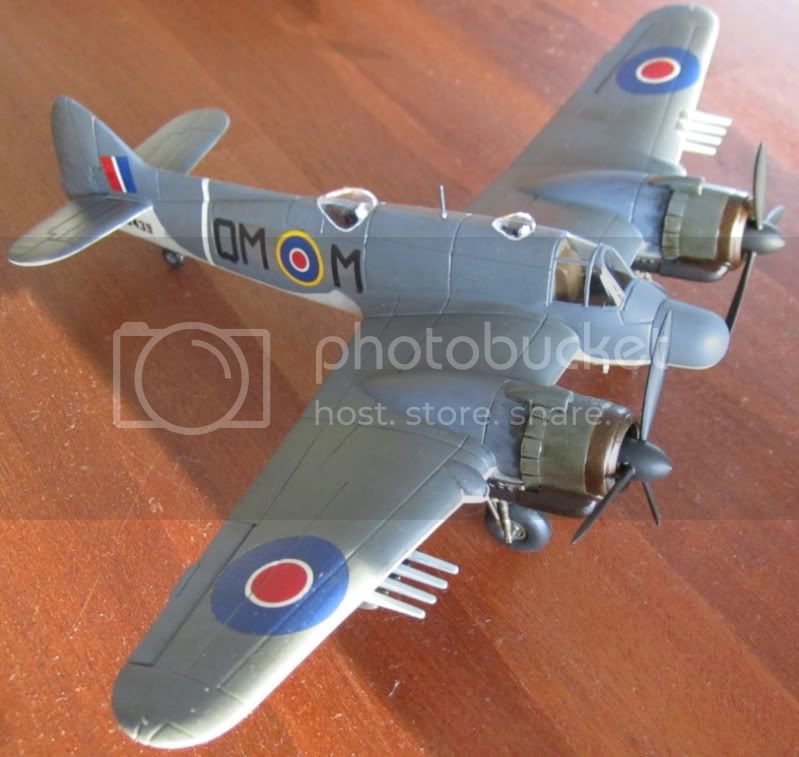
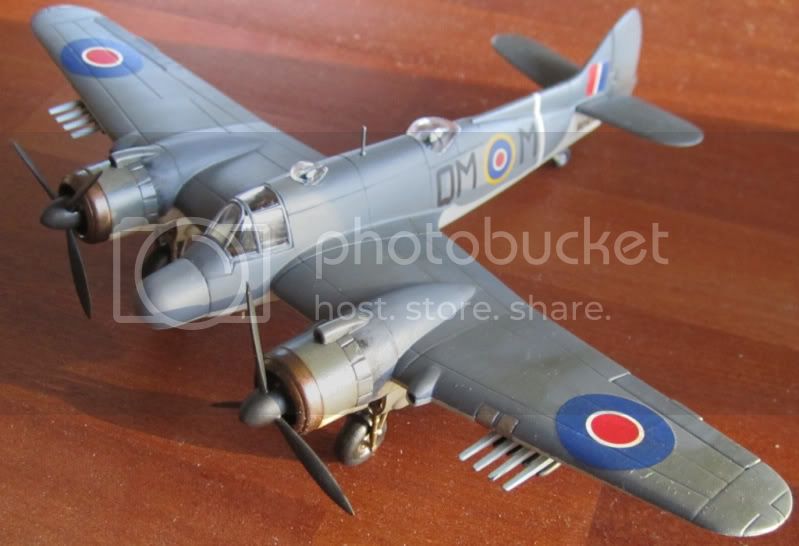
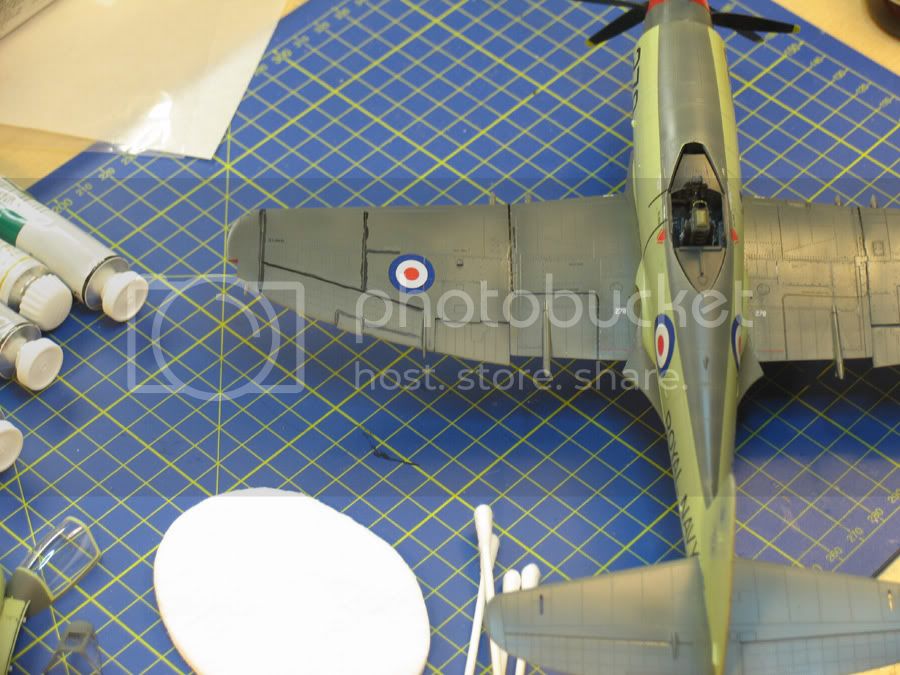
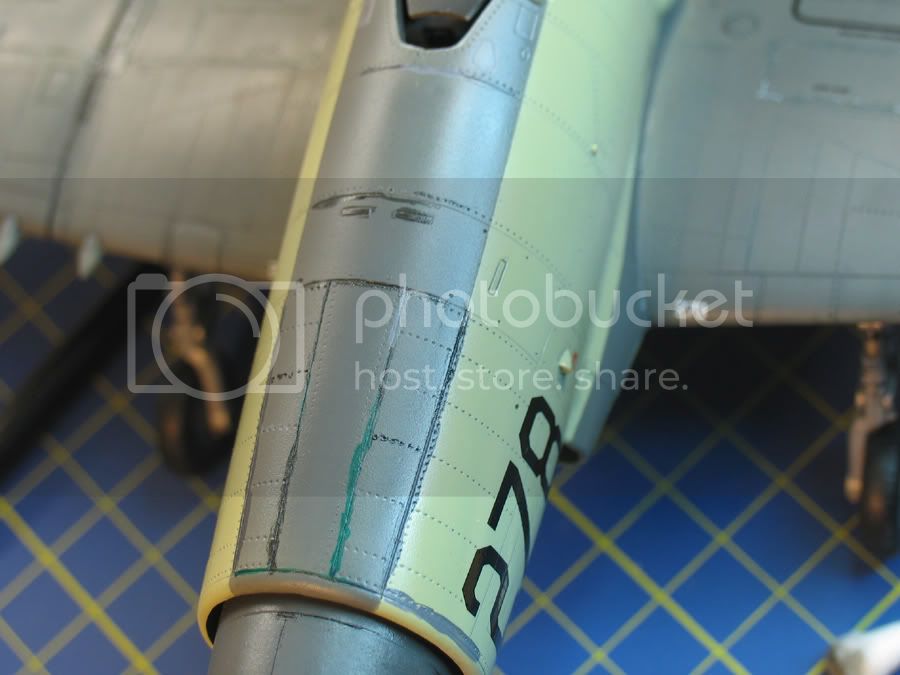
I tried not to over-emphasise and I think it came out quite well for a first try: Before and after
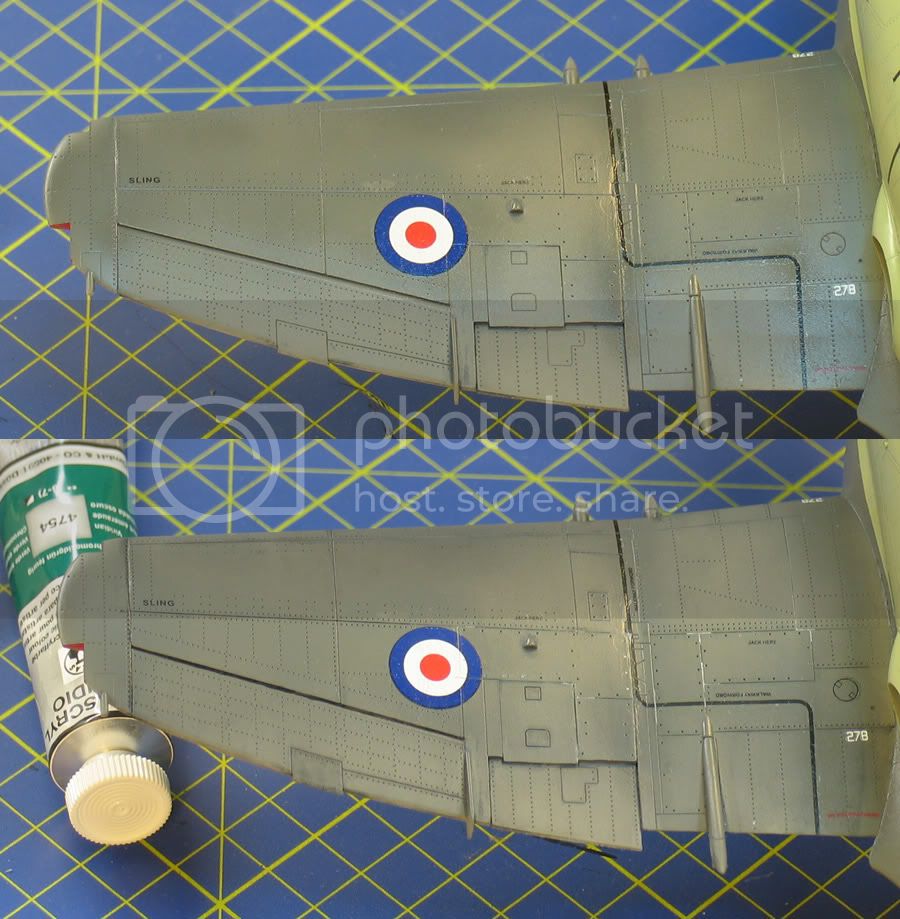
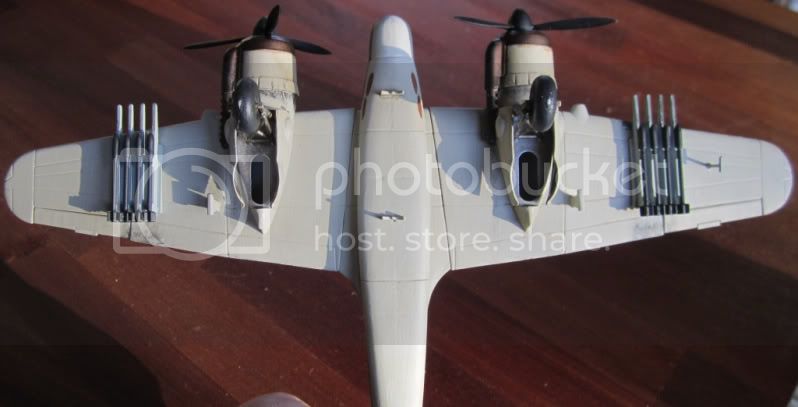
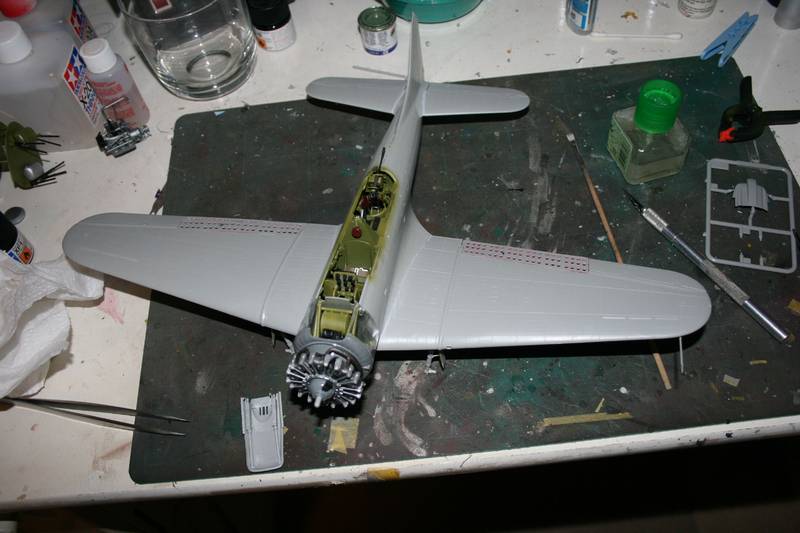
A few more in progress pics: Please note that I used dark to light greys, a bit of black or green:
And a few more:
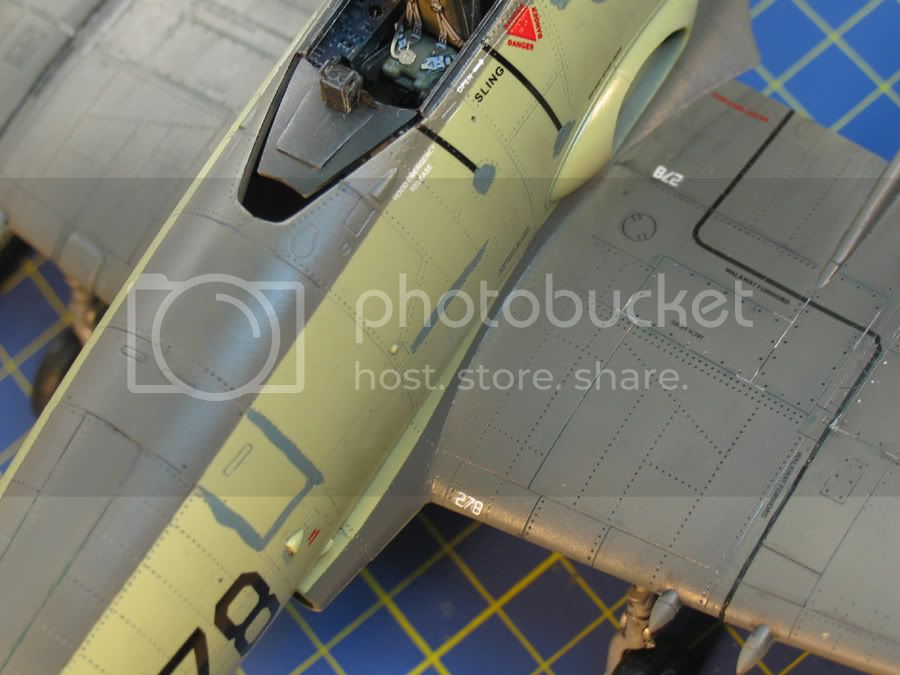
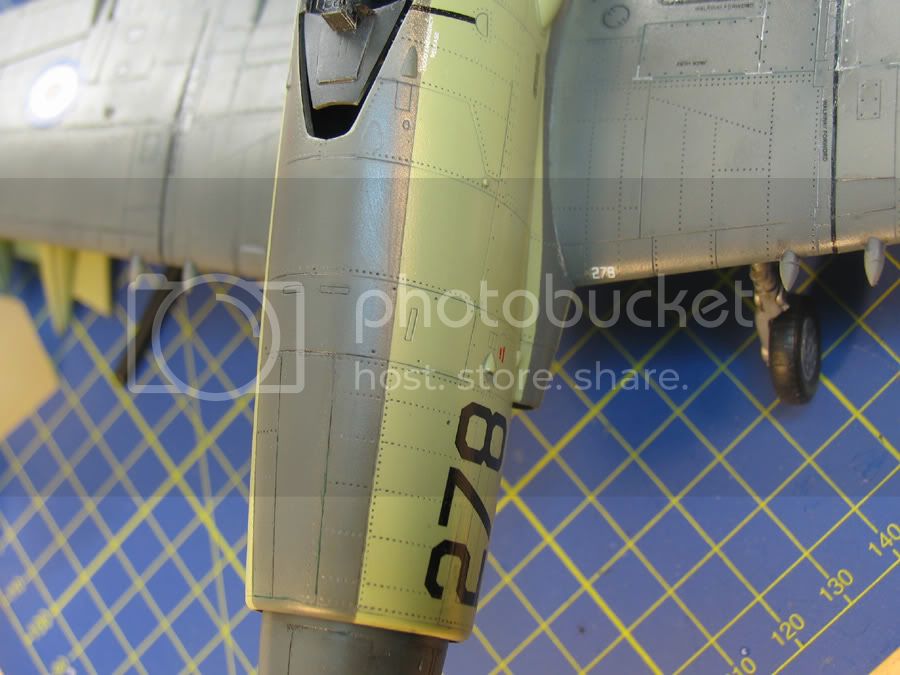
I did not apply washing to all the panel lines as the pre-washing did stay visible nicely enough in most places and I didnt want the plane to look too used.
I guess there a re many way to do it. This one did good for me. Onb my next plane Ill ry something different.
Now go party! I have to go to work!
Happy new year!
Guido


 I will be like a BANK that you can withdraw a kit when you need one the rest will be protected from the beast within you


 Take a little break from the kit and get back to it later when the motivation is back.