Air Campaigns
Want to start or join a group build? This is where to start.
OFFICIAL: The Century Series Campaign
md72
#439
_VISITCOMMUNITY
Washington, United States
Joined: November 05, 2005
KitMaker: 4,950 posts
AeroScale: 3,192 posts
Posted: Wednesday, January 12, 2011 - 08:06 AM UTC

Quoted Text

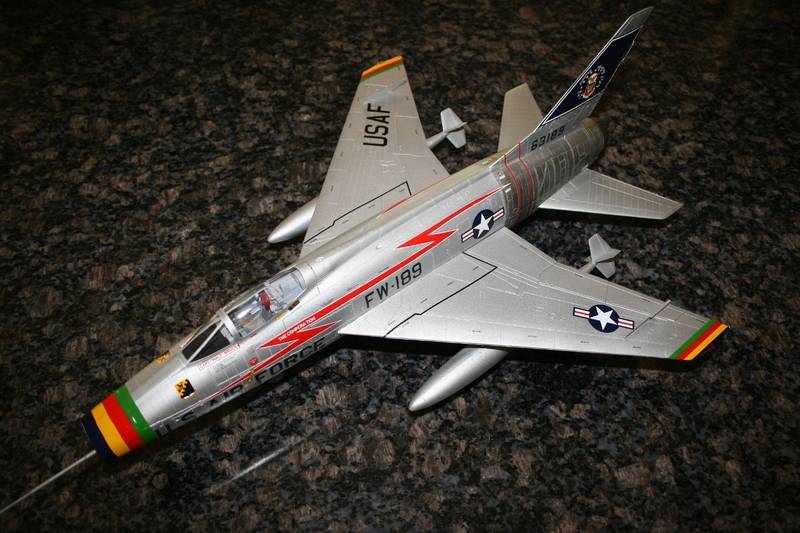
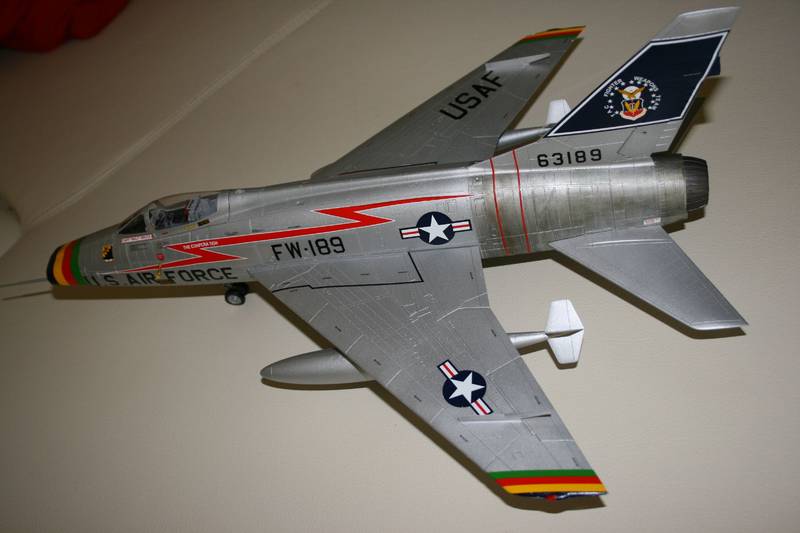
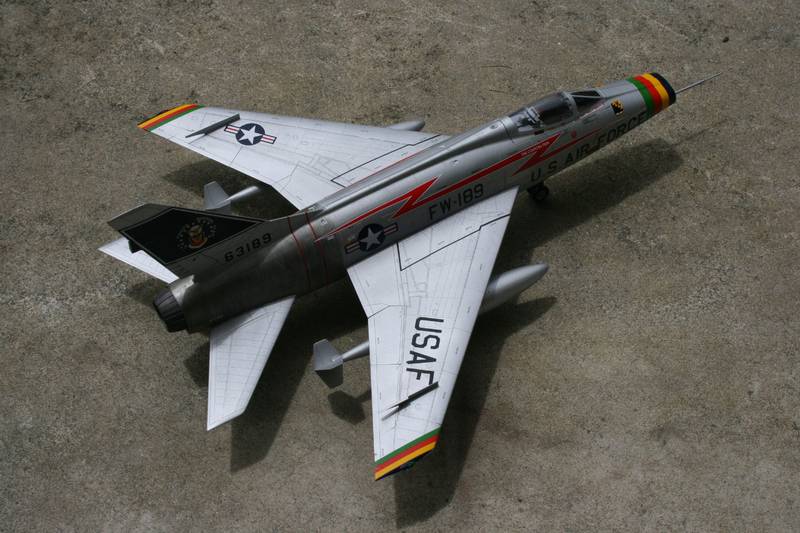
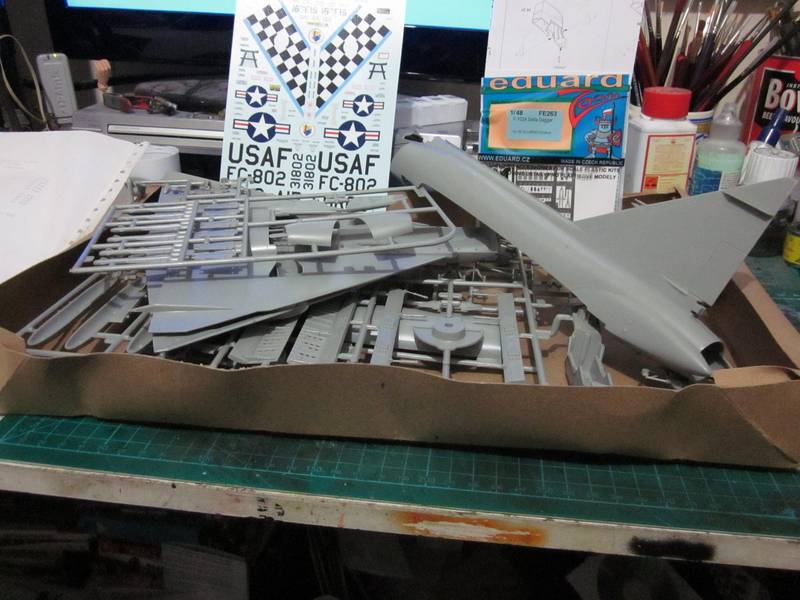
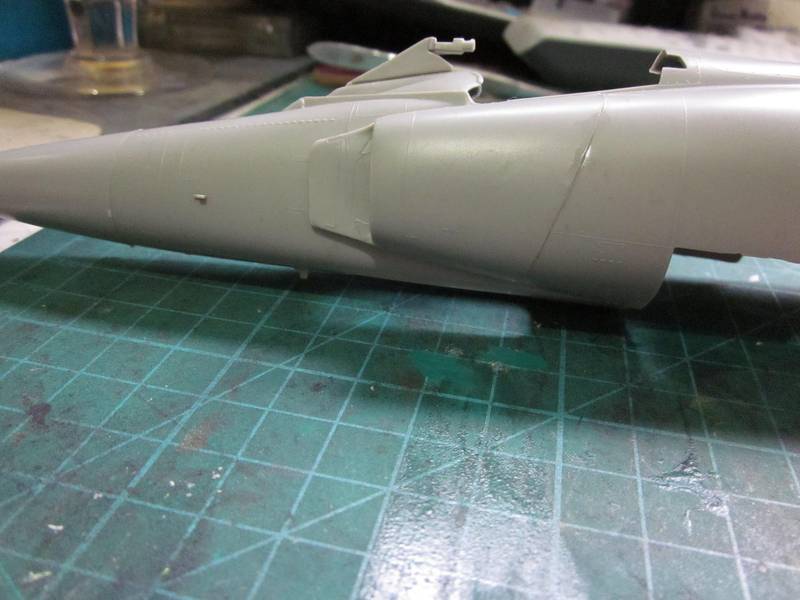
MAN these things are big compared to the WW2 birds I'm used to.


Wow, you're right D! I've got an SBD, F2H and a F-84 on the desk right now and they're a lot smaller than the F-105.
VonCuda
_VISITCOMMUNITY
North Carolina, United States
Joined: November 28, 2005
KitMaker: 2,216 posts
AeroScale: 1,080 posts
Posted: Wednesday, January 12, 2011 - 12:17 PM UTC
Hey guys,

If anyone plans on building an F-102 in 1/48 scale for this campaign I have a new AeroMaster sheet that I'll probably never use. It includes these two options:

FIS 431 Satans Kittens
&
FIS 196 California National Guard.

Hermon
warreni
_VISITCOMMUNITY
South Australia, Australia
Joined: August 14, 2007
KitMaker: 5,926 posts
AeroScale: 2,201 posts
Posted: Wednesday, January 12, 2011 - 01:39 PM UTC
Hi Everyone.

I am calling this one finished, EXCEPT for the External tanks. Let me explain, the real aircraft had markings on the external tanks as well which did not come with the kit, in fact not even mentioned in the kit, so for the moment the plane will be finished with the tanks bolted on when the tanks with the markings went unserviceable and had to be replaced for the next days exercise on the firing range. If I ever find the markings, or get up enough courage to do them myself, I will. But for the moment it is fine and dandy the way it is.

This is Trumpeter's 1/32 North American F-100D as flown by Capt 'Walt' Bruce.


This was my first attempt at the afterburner heat effects.. Not bad I suppose for a first go..


No real problems with the build except I had to stop building every so often to either go to work or prepare my house for more flooding rains!

I started this kit on the 1st of January 2011 so it took me 13 days from go to whoa.

Regards
Warren

Keeperofsouls2099
_VISITCOMMUNITY
Florida, United States
Joined: January 14, 2009
KitMaker: 2,798 posts
AeroScale: 2,443 posts
Posted: Wednesday, January 12, 2011 - 02:12 PM UTC
nice finish bro
VonCuda
_VISITCOMMUNITY
North Carolina, United States
Joined: November 28, 2005
KitMaker: 2,216 posts
AeroScale: 1,080 posts
Posted: Wednesday, January 12, 2011 - 03:25 PM UTC
Nice one Warren. The heated metal effect turned out great and I don't see any seam lines anywhere. Great job.


I originally wanted to finish my 102 by the first of February so I could give it to my friend from work at his retirement party. Right now I'm wondering if I'll have it finished by 2012. There are so many gaps on this kit that it's taking all of my time just filling and sanding them.

These are two of the worst gaps on the kit so far.


And here's the other side half way through surgery.


I'm using a combination of added styrene strips, Zap-a-Gap CA glue, and Tamiya surface primer to hide and smooth everything out. Like I said, it's a killer on time. Each step has to completely dry to be sanded and readied for the next step.

Hermon
warreni
_VISITCOMMUNITY
South Australia, Australia
Joined: August 14, 2007
KitMaker: 5,926 posts
AeroScale: 2,201 posts
Posted: Wednesday, January 12, 2011 - 05:33 PM UTC
Perserver Brother Hermon...

Thanks guys. That was the last of the six..

Regards
Warren
AussieReg
Staff MemberAssociate Editor
AUTOMODELER
#007
_VISITCOMMUNITY
Victoria, Australia
Joined: June 09, 2009
KitMaker: 8,156 posts
AeroScale: 3,756 posts
Posted: Wednesday, January 12, 2011 - 06:11 PM UTC
Hermon, looks like you've got a pointy version of my F-82 kit, nothing fits !!

Stick with it bro, with your mad skills it will look amazing.

Excellent finish on your 100, the afterburner effect looks great.

Cheers, D
warreni
_VISITCOMMUNITY
South Australia, Australia
Joined: August 14, 2007
KitMaker: 5,926 posts
AeroScale: 2,201 posts
Posted: Wednesday, January 12, 2011 - 06:24 PM UTC
Damien I presume that was for me.. Thank you.
AussieReg
Staff MemberAssociate Editor
AUTOMODELER
#007
_VISITCOMMUNITY
Victoria, Australia
Joined: June 09, 2009
KitMaker: 8,156 posts
AeroScale: 3,756 posts
Posted: Wednesday, January 12, 2011 - 11:49 PM UTC

Quoted Text

Damien I presume that was for me.. Thank you.


Um, yep . . . . . . . . oops, sorry Warren.
md72
#439
_VISITCOMMUNITY
Washington, United States
Joined: November 05, 2005
KitMaker: 4,950 posts
AeroScale: 3,192 posts
Posted: Thursday, January 13, 2011 - 04:05 AM UTC
Hermon, on your "Sharpie preshading" do you use a 'fine' or a 'regular' tip?
csch
_VISITCOMMUNITY
Buenos Aires, Argentina
Joined: December 27, 2002
KitMaker: 1,941 posts
AeroScale: 1,040 posts
Posted: Thursday, January 13, 2011 - 07:46 AM UTC

Quoted Text

Hi Everyone.

I am calling this one finished, EXCEPT for the External tanks. Let me explain, the real aircraft had markings on the external tanks as well which did not come with the kit, in fact not even mentioned in the kit, so for the moment the plane will be finished with the tanks bolted on when the tanks with the markings went unserviceable and had to be replaced for the next days exercise on the firing range. If I ever find the markings, or get up enough courage to do them myself, I will. But for the moment it is fine and dandy the way it is.

This is Trumpeter's 1/32 North American F-100D as flown by Capt 'Walt' Bruce.


This was my first attempt at the afterburner heat effects.. Not bad I suppose for a first go..


No real problems with the build except I had to stop building every so often to either go to work or prepare my house for more flooding rains!

I started this kit on the 1st of January 2011 so it took me 13 days from go to whoa.

Regards
Warren


Very nice your F 100. I like it very much !
The afterburmer in the Hun is really dificult., maybe a little more shading with Burnt Metal. I´m bulding one (not for this campaign) and I think I painted to dark.
Congrats
warreni
_VISITCOMMUNITY
South Australia, Australia
Joined: August 14, 2007
KitMaker: 5,926 posts
AeroScale: 2,201 posts
Posted: Thursday, January 13, 2011 - 08:02 AM UTC
Thank you Carlos.

I have looked at many pictures of the F-100 and the ones in the 1950's, especially those at places like the place where this one was used are pretty clean and well maintained. Not so much the Natural Metal which suffered from harsh sunlight etc, but the afterburner sections were kept pretty clean from what I can see. But once they went to Vietnam the effort put into cleaning seemed to slacken off. I suppose there just wasn't the time available between missions, servicing and repairs.

Regards
Warren
Torchy
#047
_VISITCOMMUNITY
England - East Anglia, United Kingdom
Joined: September 13, 2005
KitMaker: 2,016 posts
AeroScale: 475 posts
Posted: Friday, January 14, 2011 - 01:52 AM UTC
Hi Guys,
Blimey theres some rapid builds on here!!!, not this one!


Hermon, I've got the sames gaps as you

your tub looks great,what colour grey did you use?

Ayhan, that Hun looks superb,I like your choice of markings and love the paint job
Carlos,good choice of kit,what markings are you going to use?
Warren,beauty mate well done,I'm still tempted by this baby!
Q, are those AM wings resin?
D,hows the Voodoo going mate?

Keep up the great work fellas
Andy
warreni
_VISITCOMMUNITY
South Australia, Australia
Joined: August 14, 2007
KitMaker: 5,926 posts
AeroScale: 2,201 posts
Posted: Friday, January 14, 2011 - 07:10 AM UTC
It is a large model but the fit is great. No seams needed any filling at all. The only small problems I had were with the main undercarriage doors which I wanted in the closed position. On did not fit extemely well and took a little fiddling to get right.

The only othe hassle were the decals. You can't see it in the photos but one of the big flashes is not printed correctly and one end looks rubbish missing part of the white border. And the stencils are 90% wrong. Either spelt wrongly or just having black boxes instead of letters. Strange as there Dauntless, F-105 etc etc are perfect in this regard. And of course the markings for the tanks have gone AWOL. And in no place do they mention the stripes you apply to the wingtips.. Go figure!

Of course all the decal concerns disappear if you do a SEA camo bird.
Blueheeler
_VISITCOMMUNITY
New South Wales, Australia
Joined: March 18, 2008
KitMaker: 347 posts
AeroScale: 223 posts
Posted: Friday, January 14, 2011 - 10:43 AM UTC
Decided to get my entry kicked off yesterday; its Hasegawas F-105D Thunderchief. To say I was dissapointed with what was in the box was an understatement. The sprues had so much flash on them that it took me most of the night watching the cricket (Aussies won, finally!!) to get rid of it all. The rest of the detail, what there was, is pretty poor, especially the cockpit. Anyway, hoping this is going to be a quick build, signed up for a few too many campaigns


Cheers,
Nick.
Keeperofsouls2099
_VISITCOMMUNITY
Florida, United States
Joined: January 14, 2009
KitMaker: 2,798 posts
AeroScale: 2,443 posts
Posted: Friday, January 14, 2011 - 01:35 PM UTC
is that flash in the wheel bays that's crazy man
VonCuda
_VISITCOMMUNITY
North Carolina, United States
Joined: November 28, 2005
KitMaker: 2,216 posts
AeroScale: 1,080 posts
Posted: Friday, January 14, 2011 - 01:46 PM UTC
Andy, if you think that gap is bad, wait till you see the wingroot-fuselage joint.

I used a custom mix of 5 different grays on my cockpit to get it just the right shade....no.....actually I used Tamiya medium gray cause it was the only thing I had handy in acrylic.

Nick, is your kit 1/72 or 1/48? Must be a really old mold. Either way, any THUD is a good THUD.


Hermon
Blueheeler
_VISITCOMMUNITY
New South Wales, Australia
Joined: March 18, 2008
KitMaker: 347 posts
AeroScale: 223 posts
Posted: Friday, January 14, 2011 - 01:59 PM UTC
Yeah Justin, that is flash inside the wheel bays, and thick flash too!
Not too sure how old the kit is but seems like an old mold (hopefully for there sake!) Its 1/72 and like you said, any Thud's a good Thud! Its also the only reason Im kicking with it and will attempt to make the best of a bad kit.
Cheers,
Nick.
warreni
_VISITCOMMUNITY
South Australia, Australia
Joined: August 14, 2007
KitMaker: 5,926 posts
AeroScale: 2,201 posts
Posted: Friday, January 14, 2011 - 03:33 PM UTC
That is a very old mould Nick. Hasegawa should never have let it out the door. The Trumpeter one is much better.
Keeperofsouls2099
_VISITCOMMUNITY
Florida, United States
Joined: January 14, 2009
KitMaker: 2,798 posts
AeroScale: 2,443 posts
Posted: Saturday, January 15, 2011 - 10:55 AM UTC
My alclad arrived today so I can finally start finishing this turkey just as soon as I figure out what my wife did with my masking tape
VonCuda
_VISITCOMMUNITY
North Carolina, United States
Joined: November 28, 2005
KitMaker: 2,216 posts
AeroScale: 1,080 posts
Posted: Saturday, January 15, 2011 - 02:19 PM UTC
Well she's sitting on landing gear now and all the paint is on. I have a few boo-boos to fix once it's dry enough to handle but it ain't so bad. I decided to lay the aircraft gray paint on a little thick over the preshading so it wasn't quite so pronounced.


Dunno if it's the humidity or what, but this MM enamel paint is taking like foooorrrreeeevvvvveeeerrrrr to dry. I'll try and have a coat of Future on her and the decals started by Monday.

Hermon
warreni
_VISITCOMMUNITY
South Australia, Australia
Joined: August 14, 2007
KitMaker: 5,926 posts
AeroScale: 2,201 posts
Posted: Saturday, January 15, 2011 - 03:24 PM UTC
Well done Hermon. Patience is a virtue...
vonHengest
_VISITCOMMUNITY
Texas, United States
Joined: June 29, 2010
KitMaker: 5,854 posts
AeroScale: 372 posts
Posted: Saturday, January 15, 2011 - 03:51 PM UTC
Man you build fast Hermon, as do a lot of the regs here. Building is such a slow process for me, am I missing something?
VonCuda
_VISITCOMMUNITY
North Carolina, United States
Joined: November 28, 2005
KitMaker: 2,216 posts
AeroScale: 1,080 posts
Posted: Saturday, January 15, 2011 - 04:03 PM UTC

Quoted Text

Man you build fast Hermon, as do a lot of the regs here. Building is such a slow process for me, am I missing something?


Yup. My trick is I usually only paint and decal one side of an airplane. It's alot quicker than building and decaling the whole thing.
Actually, I do much the same thing as Warren. While I'm waiting on paint or glue to dry on one section there are usually 2 or 3 other things I can do to pass the time......such as assembling the landing gear, paint wheels, etc. And, I also work on more than one kit at a time. Right now I have 2 trucks and 3 planes on the workbenches and another cake pan full of bombs and missles prepped and ready for paint.

Hermon
vonHengest
_VISITCOMMUNITY
Texas, United States
Joined: June 29, 2010
KitMaker: 5,854 posts
AeroScale: 372 posts
Posted: Saturday, January 15, 2011 - 04:09 PM UTC
Man, I guess I'm just pretty wiped out at the end of the day... that and I'm sure the tv and the fact that I've just started scale modeling may play a part in it