OFFICIAL: The Century Series Campaign
AussieReg
 Associate Editor
#007
Victoria, Australia
Joined: June 09, 2009
KitMaker: 8,156 posts
AeroScale: 3,756 posts
Posted: Sunday, February 13, 2011 - 07:41 PM UTC
Progress time, I got some work done on the wheel bays and flap details today

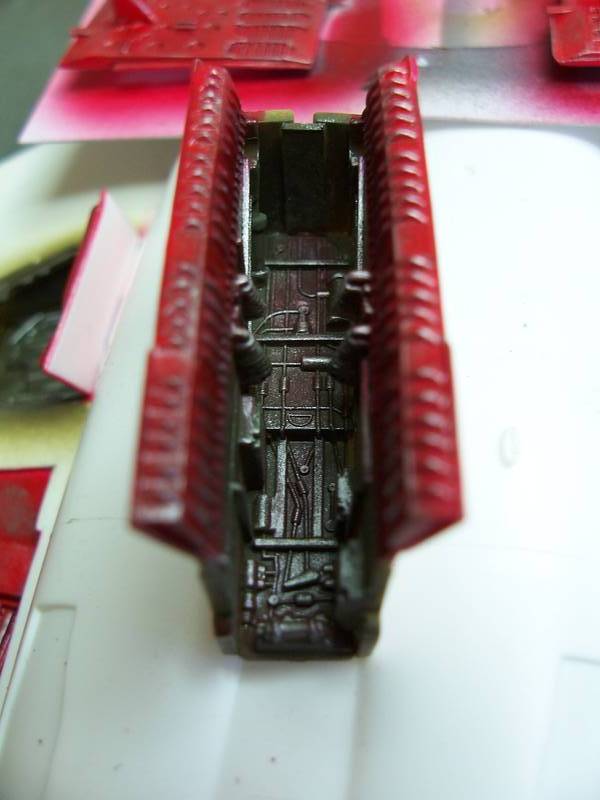
Also found a trouble spot, the speed brakes on both sides have some serious sink-holes to deal with
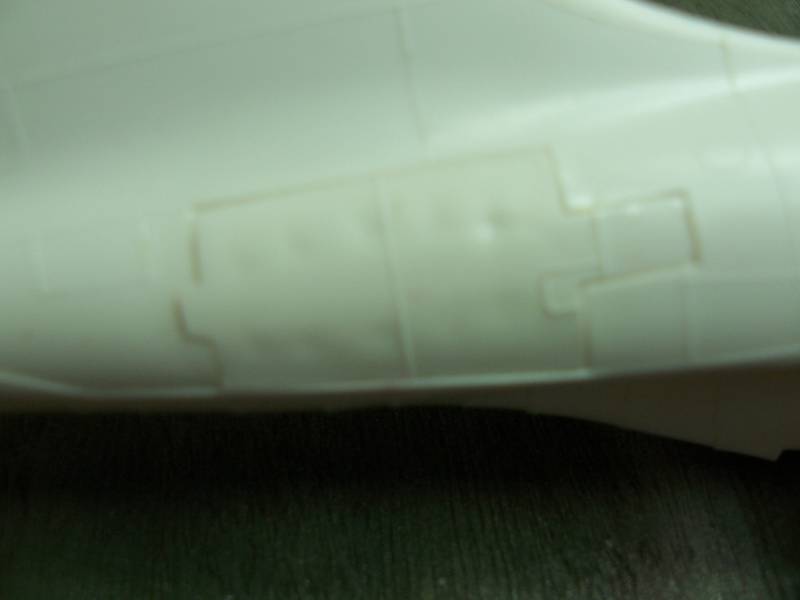
Sorry for the crappy pic, but you can make out 2 rows of sink marks, and the other side is pretty much the same. Mr Surfacer, come on down !
ON the bench
Revell 1/24 '53 Corvette (building as '54)
Revell 1/24 BMW 507 Coupe and Cabrio
Italeri 1/48 Me262 B-1a/U1 Nightfighter
Monogram 1/24 '57 Chevy Nomad
Dragon 1/350 USS Frank Knox DD-742
California, United States
Joined: April 01, 2002
KitMaker: 4,287 posts
AeroScale: 1,164 posts
Posted: Wednesday, February 16, 2011 - 03:33 AM UTC
Very nice looking Damian. I hate dealing with sink marks myself. Mr. Surfacer and Tamiya Basic Putty have been life savers on numerous occasions. Looking forwards to seeing more.

"Q"
"Don't fear the night, fear what hunts at night"

#047
England - East Anglia, United Kingdom
Joined: September 13, 2005
KitMaker: 2,016 posts
AeroScale: 475 posts
Posted: Wednesday, February 16, 2011 - 07:30 PM UTC
Looking good D,gota love all that red paint, adds that spash of colour!
Andy


Major Caryle,
"Shall we have a go at the far end now,sir?"
Lt Colonel "Johnny" Frost,
"Having a go,is hardly text book terminology Harry"
Major Caryle,
"But you'll let us try sir?"
A Bridge Too Far
Lottery Campaign "Oh de Vichy"
AussieReg
 Associate Editor
#007
Victoria, Australia
Joined: June 09, 2009
KitMaker: 8,156 posts
AeroScale: 3,756 posts
Posted: Saturday, February 19, 2011 - 08:55 PM UTC
Thanks guys. You're spot on Andy, the red livens it right up. I was wondering why there would be a combination of red and olive on the innards of this, but no matter, it's on there now !!
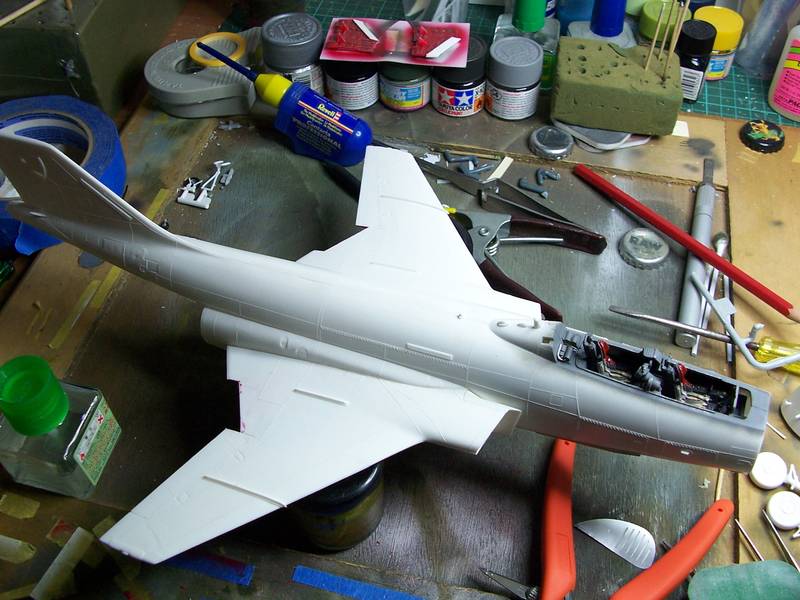
Basic assembly completed, time to mask and paint !

Cheers, D
ON the bench
Revell 1/24 '53 Corvette (building as '54)
Revell 1/24 BMW 507 Coupe and Cabrio
Italeri 1/48 Me262 B-1a/U1 Nightfighter
Monogram 1/24 '57 Chevy Nomad
Dragon 1/350 USS Frank Knox DD-742

#439
Washington, United States
Joined: November 05, 2005
KitMaker: 4,950 posts
AeroScale: 3,192 posts
Posted: Wednesday, February 23, 2011 - 08:36 AM UTC
Starting to look like a Thud.

Hanger Queens in Waiting:
Monogram 1/72 F8F-1
Corsair the Sky Pirate - 1/72 Ace A-7D
Century Series - Airfix 1/72 F-105G
Anti Shipping - Academy 1/72 PBJ-1D
Academy 1/72 F-84E

#047
England - East Anglia, United Kingdom
Joined: September 13, 2005
KitMaker: 2,016 posts
AeroScale: 475 posts
Posted: Monday, March 07, 2011 - 11:55 PM UTC
Hi Guys
Sorry not been on for a while ,mrs Torch is none too clever.
D ,thats looking great mate
Mark,yep looking like a grand Thud.
I'm gona try and scare the 102 with some paint this week

pics soon
Andy
Major Caryle,
"Shall we have a go at the far end now,sir?"
Lt Colonel "Johnny" Frost,
"Having a go,is hardly text book terminology Harry"
Major Caryle,
"But you'll let us try sir?"
A Bridge Too Far
Lottery Campaign "Oh de Vichy"
AussieReg
 Associate Editor
#007
Victoria, Australia
Joined: June 09, 2009
KitMaker: 8,156 posts
AeroScale: 3,756 posts
Posted: Wednesday, March 09, 2011 - 01:26 AM UTC
ON the bench
Revell 1/24 '53 Corvette (building as '54)
Revell 1/24 BMW 507 Coupe and Cabrio
Italeri 1/48 Me262 B-1a/U1 Nightfighter
Monogram 1/24 '57 Chevy Nomad
Dragon 1/350 USS Frank Knox DD-742
Texas, United States
Joined: June 29, 2010
KitMaker: 5,854 posts
AeroScale: 372 posts
Posted: Saturday, March 12, 2011 - 10:20 AM UTC
Just a quick question here, how do you effectively mask off the painted areas under the wings and fuselage before painting the bird?
Florida, United States
Joined: January 14, 2009
KitMaker: 2,798 posts
AeroScale: 2,443 posts
Posted: Saturday, March 12, 2011 - 11:22 AM UTC
layers of future and a few days dry time for me.then i mask with no problems .this goes on the assumption that the bird is properly cleaned before the painting begins

"From time to time, the tree of liberty must be watered with the blood of
tyrants and patriots."
- Thomas Jefferson
IPMS#47611
Texas, United States
Joined: June 29, 2010
KitMaker: 5,854 posts
AeroScale: 372 posts
Posted: Saturday, March 12, 2011 - 06:39 PM UTC
Always clean on my end sir! Well this is going to be interesting... will be my first time using Future. Hope you don't mind waiting a little longer for my build Justin?

#372
United Kingdom
Joined: March 10, 2010
KitMaker: 2,568 posts
AeroScale: 1,619 posts
Posted: Sunday, March 20, 2011 - 11:10 AM UTC
I'd like to count myself in with this one. I've probably got a few in the stash that fit the bill, but at the moment I might be going with my ye olde matchbox F-101. I've been looking for an excuse to do it anyway. I'll also be adding some aeroclub metal seats, improving the cockpit and might go for a late CAF scheme. I'll get some pics up tomorow.
On the bench: 1/72 Mosquito, Lightning F.6, DH.2,
AMT Vulcan Shuttle Surak.
Cyber-Hobby 1:35 Sherman Firefly IC - still stalled.

#047
England - East Anglia, United Kingdom
Joined: September 13, 2005
KitMaker: 2,016 posts
AeroScale: 475 posts
Posted: Sunday, March 20, 2011 - 11:42 PM UTC
Top Bloke Steve and welcome onboard,another Voodoo is allways welcome,we will forward to seeing some pics
Andy
Major Caryle,
"Shall we have a go at the far end now,sir?"
Lt Colonel "Johnny" Frost,
"Having a go,is hardly text book terminology Harry"
Major Caryle,
"But you'll let us try sir?"
A Bridge Too Far
Lottery Campaign "Oh de Vichy"

#372
United Kingdom
Joined: March 10, 2010
KitMaker: 2,568 posts
AeroScale: 1,619 posts
Posted: Monday, March 21, 2011 - 02:14 AM UTC
Cheers mate.
A Voodoo it is then. The cool thing I always like about this kit is the optional recce nose. I might have to look about for another or 2. The F-101 had a lot great colour schemes and I do like the Texas ANG markings.

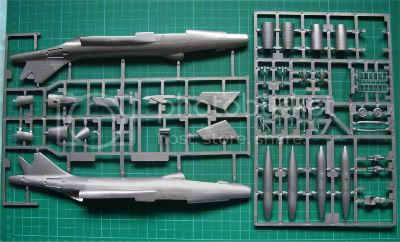
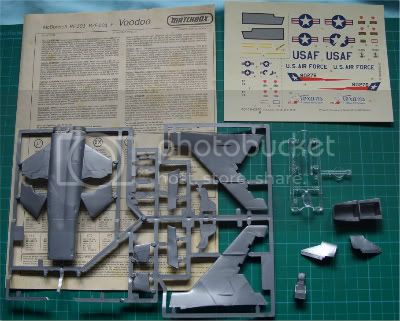
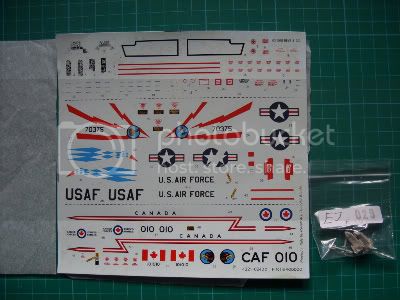
I have the decal sheet for the Revell F-101 which comes with CAF markings which I'll be using. I was given this sheet by a mate a few months ago. He was moving and had to get rid of a few things and I ended up with a load of unused decals and a few kits. They all went to a good home.
On the bench: 1/72 Mosquito, Lightning F.6, DH.2,
AMT Vulcan Shuttle Surak.
Cyber-Hobby 1:35 Sherman Firefly IC - still stalled.

#057
Bayern, Germany
Joined: May 11, 2010
KitMaker: 248 posts
AeroScale: 123 posts
Posted: Tuesday, March 22, 2011 - 06:55 AM UTC
Hi all.
You guys hit it off! The campaign's only a mere two months old and you' blasting away!
Damain, you get high respect marks on my list for takling THAT kit btw. I'm just a kit sticker I'm afraid and very much addicted to prime material.
Will be joining in with a Trumpy F-100c. Will not be using the decals much as they are to watery a yellow for my tastes.
As usual for me it'll be next to no special attention to pit and wells (sorry, I just don't look at them aferwards that much) just fun glueing and spraying.
The masking will not be fun though.
But we'll see.
Have fun all!!
If thou art pained by any external thing, it is not this that disturbs thee, but thy own judgment about it.
Marcus Aurelius

#047
England - East Anglia, United Kingdom
Joined: September 13, 2005
KitMaker: 2,016 posts
AeroScale: 475 posts
Posted: Wednesday, March 23, 2011 - 07:14 AM UTC
Hi Leo,welcome to the campaign,another 100 is more than welcome.
lets see some pics
Andy
Major Caryle,
"Shall we have a go at the far end now,sir?"
Lt Colonel "Johnny" Frost,
"Having a go,is hardly text book terminology Harry"
Major Caryle,
"But you'll let us try sir?"
A Bridge Too Far
Lottery Campaign "Oh de Vichy"
England - East Anglia, United Kingdom
Joined: March 21, 2011
KitMaker: 11 posts
AeroScale: 10 posts
Posted: Wednesday, March 23, 2011 - 11:56 AM UTC
Some awesome builds on this campaign. Keep up the excellent work.
tom
Nevada, United States
Joined: December 12, 2010
KitMaker: 24 posts
AeroScale: 18 posts
Posted: Monday, March 28, 2011 - 06:17 PM UTC
your future hasn't been written yet. No one's has. Your future is whatever you make it. So make it a good one

#041
Kobenhavn, Denmark
Joined: July 20, 2006
KitMaker: 10,069 posts
AeroScale: 3,788 posts
Posted: Thursday, March 31, 2011 - 05:02 AM UTC
Nice build, Brandon How is this kit? I have seen it in the Monogram boxing, but the details looked a little on the heavy side judging from the pictures on the box. However, I did not have a chance to see the kit "in the flesh".
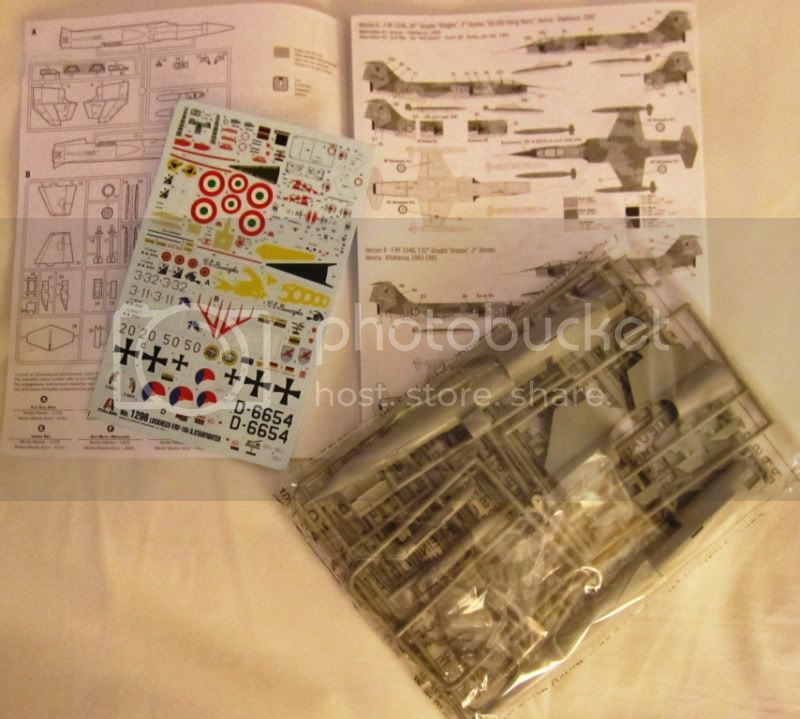
I am going to start my entry for this campaign. The F-104 Starfighter. I will probably go for the markings on the box art, but have not decided yet.
More to follow.


Campaign'oholic - 252+ campaigns completed

#372
United Kingdom
Joined: March 10, 2010
KitMaker: 2,568 posts
AeroScale: 1,619 posts
Posted: Thursday, March 31, 2011 - 06:33 AM UTC
Nice. I've been on the look out for a decent F-104 so I'll be interested to see how it turns out. Good selection of markings too, Italeri can be very generous with decals! Shame they couldn't do the Ferrari scheme.
On the bench: 1/72 Mosquito, Lightning F.6, DH.2,
AMT Vulcan Shuttle Surak.
Cyber-Hobby 1:35 Sherman Firefly IC - still stalled.
Nevada, United States
Joined: December 12, 2010
KitMaker: 24 posts
AeroScale: 18 posts
Posted: Friday, April 01, 2011 - 08:20 PM UTC
Jesper its not a bad kit some of the gaps are annoying they could have saved a lot of time by just making the rudder a separate peace but it isnt a bad kit. very little flash. quite i nice kit if in the right hands
your future hasn't been written yet. No one's has. Your future is whatever you make it. So make it a good one

#047
England - East Anglia, United Kingdom
Joined: September 13, 2005
KitMaker: 2,016 posts
AeroScale: 475 posts
Posted: Tuesday, April 05, 2011 - 05:41 AM UTC
Hi all

I've been away for a couple of weeks ,there are some great builds going on here,I must bosh on with mine,as I need to start my big mossie for the Zerstorer campaign.
Brandon that 106 looks ace mate.
Keep up the great work boys
Andy
Major Caryle,
"Shall we have a go at the far end now,sir?"
Lt Colonel "Johnny" Frost,
"Having a go,is hardly text book terminology Harry"
Major Caryle,
"But you'll let us try sir?"
A Bridge Too Far
Lottery Campaign "Oh de Vichy"

#047
England - East Anglia, United Kingdom
Joined: September 13, 2005
KitMaker: 2,016 posts
AeroScale: 475 posts
Posted: Friday, April 08, 2011 - 11:32 PM UTC
BUMMOX


I give the 102 a light coat from a Tammy rattle can ,and this sh*t happened
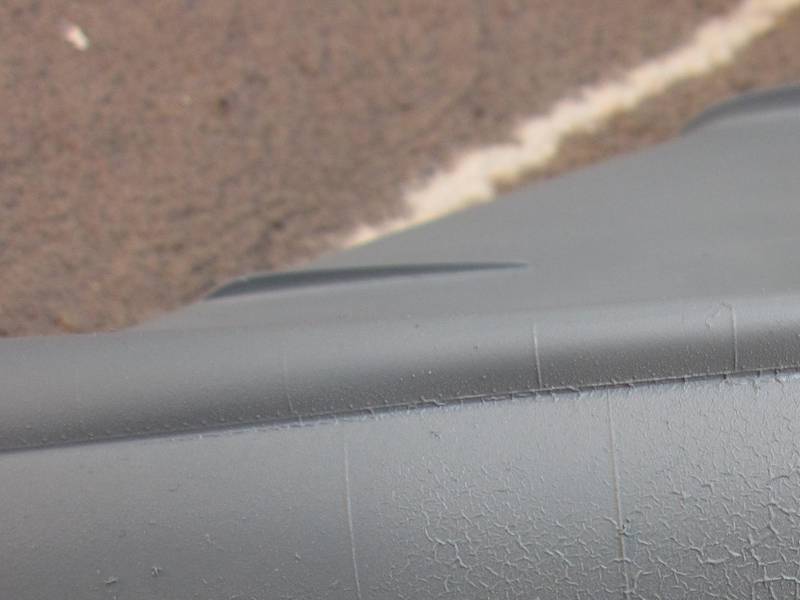
I don't know what to do.....
1 ,leave it for a few days to let the paint cure ,then rub down and respray.
2,take it into the garden and use it as a sighting drone for my air rifle.
3. build somthing else!
BUGGER,BUM PANTS


Major Caryle,
"Shall we have a go at the far end now,sir?"
Lt Colonel "Johnny" Frost,
"Having a go,is hardly text book terminology Harry"
Major Caryle,
"But you'll let us try sir?"
A Bridge Too Far
Lottery Campaign "Oh de Vichy"

#372
United Kingdom
Joined: March 10, 2010
KitMaker: 2,568 posts
AeroScale: 1,619 posts
Posted: Sunday, April 10, 2011 - 08:16 AM UTC
I had the same thing happen on a 1:48 meteor. The first (and last) time I used tamiya sprays. And that was after washing and priming. Difficult to say what caused. Never had it happen with other sprays I've used.
The usually faithful Mr muscle oven cleaner spray just wouldn't shift it and that stuff usually takes off any paint. Only way I could get rid of it was sanding it off and respraying. Ended up losing a lot of the fine detail. Given your 102 has a lot of raised panel lines I can see sanding being very risky!
How about a rub with a meths soaked rag? Sometimes gets off paint if it hasnt been on too long.
Its not good when something goes wrong so close to the end of a build.
On the bench: 1/72 Mosquito, Lightning F.6, DH.2,
AMT Vulcan Shuttle Surak.
Cyber-Hobby 1:35 Sherman Firefly IC - still stalled.

#047
England - East Anglia, United Kingdom
Joined: September 13, 2005
KitMaker: 2,016 posts
AeroScale: 475 posts
Posted: Monday, April 11, 2011 - 02:22 AM UTC
Quoted Text
I had the same thing happen on a 1:48 meteor. The first (and last) time I used tamiya sprays. And that was after washing and priming. Difficult to say what caused. Never had it happen with other sprays I've used.
The usually faithful Mr muscle oven cleaner spray just wouldn't shift it and that stuff usually takes off any paint. Only way I could get rid of it was sanding it off and respraying. Ended up losing a lot of the fine detail. Given your 102 has a lot of raised panel lines I can see sanding being very risky!
How about a rub with a meths soaked rag? Sometimes gets off paint if it hasnt been on too long.
Its not good when something goes wrong so close to the end of a build.
Hi Steve,
I feel your pain mate,I wont be using tammy rattle cans again either
Tried all of the above plus model strip,NFG I'm affraid

,I'm going to bite the bullet and bin it.
Ordered a replacment build (not a 102) but it may take a week or so to get here,plus my big Airfix mossie has a whole sprue missing,so its not been a great weekend

,but Spurs won and I had great curry and beer on saturday night

Andy
Major Caryle,
"Shall we have a go at the far end now,sir?"
Lt Colonel "Johnny" Frost,
"Having a go,is hardly text book terminology Harry"
Major Caryle,
"But you'll let us try sir?"
A Bridge Too Far
Lottery Campaign "Oh de Vichy"

#041
Kobenhavn, Denmark
Joined: July 20, 2006
KitMaker: 10,069 posts
AeroScale: 3,788 posts
Posted: Monday, April 11, 2011 - 12:15 PM UTC
Thanks for the comments on the F-104G kit. Progress is slow, but it looks good so far. More to follow

Stephen, I agree with you Italeri really supplies the modeller with great choices. The combination of camouflage and colourfull markings always looks attractive to me.
Sorry to hear your problems over the weekend, Andy. Luckily Curry and beer can cure a bad mood easily


Campaign'oholic - 252+ campaigns completed


 "Q"
"Q" 


 ,I'm going to bite the bullet and bin it.
 ,but Spurs won and I had great curry and beer on saturday night


