Torsten,
Not only you are one of the fastest builders around here, but you still manage to deliver well done and researched models. I particularly liked your Mk.1 Hurricane.
Congrats
Pedro
World War II
Discuss WWII and the era directly before and after the war from 1935-1949.
Hosted by Rowan Baylis
What lately left my assembly line
rochaped
Lisboa, Portugal
Joined: August 27, 2010
KitMaker: 679 posts
AeroScale: 669 posts
Joined: August 27, 2010
KitMaker: 679 posts
AeroScale: 669 posts
Posted: Tuesday, October 03, 2017 - 02:21 AM UTC
Posted: Tuesday, October 03, 2017 - 10:48 AM UTC
Torsten,
Another very nice Hurri! Well done!
Gaz
Another very nice Hurri! Well done!
Gaz
BlackWidow
European Union
Joined: August 09, 2009
KitMaker: 1,732 posts
AeroScale: 1,336 posts
Joined: August 09, 2009
KitMaker: 1,732 posts
AeroScale: 1,336 posts
Posted: Tuesday, October 03, 2017 - 11:04 PM UTC
Pedro, I'm not that fast, believe me. I have built both Hurricanes at the same time and needed about 6 weeks for both. The VVS-Hurri just needed a little longer because of the conversion and the more work for filling and sanding. In fact I cannot tell which of both I like more. They both look nice to me and I'm satisfied with the results. But a russian Hurricane is not seen often. They have been to the Augsburg Expo last weekend.
Gary, also thanks for your feedback. I'm glad you like this Hurricane too. My next build will take a while. It's a Ventura for the ANZAC Campaign and I hope to finish it by the end of November.
Torsten
Gary, also thanks for your feedback. I'm glad you like this Hurricane too. My next build will take a while. It's a Ventura for the ANZAC Campaign and I hope to finish it by the end of November.
Torsten
BigZimmo
Baden-Württemberg, Germany
Joined: December 06, 2016
KitMaker: 132 posts
AeroScale: 117 posts
Joined: December 06, 2016
KitMaker: 132 posts
AeroScale: 117 posts
Posted: Wednesday, November 15, 2017 - 09:08 PM UTC
Very nice Hurricane-Threesome, Torsten. The russian is my favourite, it's not to seen so often as a model.
A finnish Hurri is also on my to-do-list......but at first a new "Dora".....!!!
Cheers from the Black Forest
Zimmo
A finnish Hurri is also on my to-do-list......but at first a new "Dora".....!!!
Cheers from the Black Forest
Zimmo
BlackWidow
European Union
Joined: August 09, 2009
KitMaker: 1,732 posts
AeroScale: 1,336 posts
Joined: August 09, 2009
KitMaker: 1,732 posts
AeroScale: 1,336 posts
Posted: Wednesday, December 13, 2017 - 12:52 AM UTC
Thanks for your feedback, Stefan. As I mentioned before, I can't tell which of them I like more. And I guess you have noticed both Hurricanes on my table at the Augsburg Expo in October.
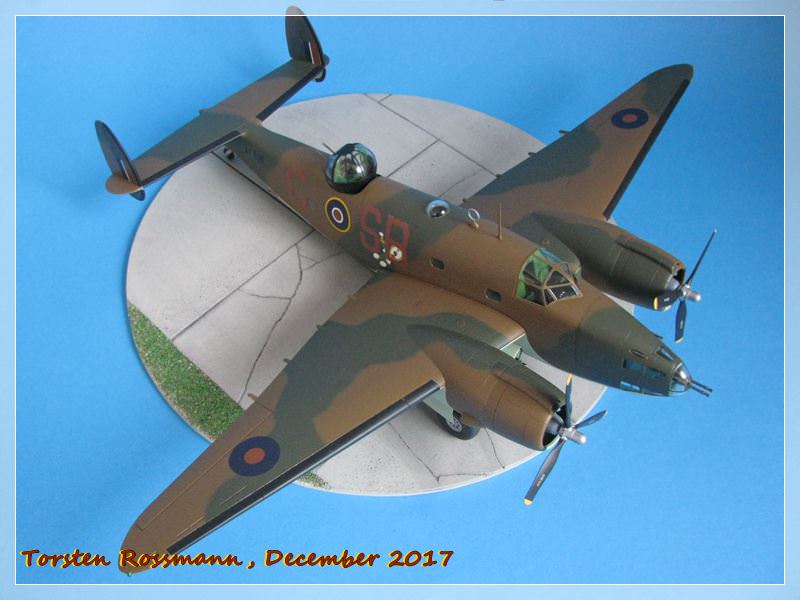
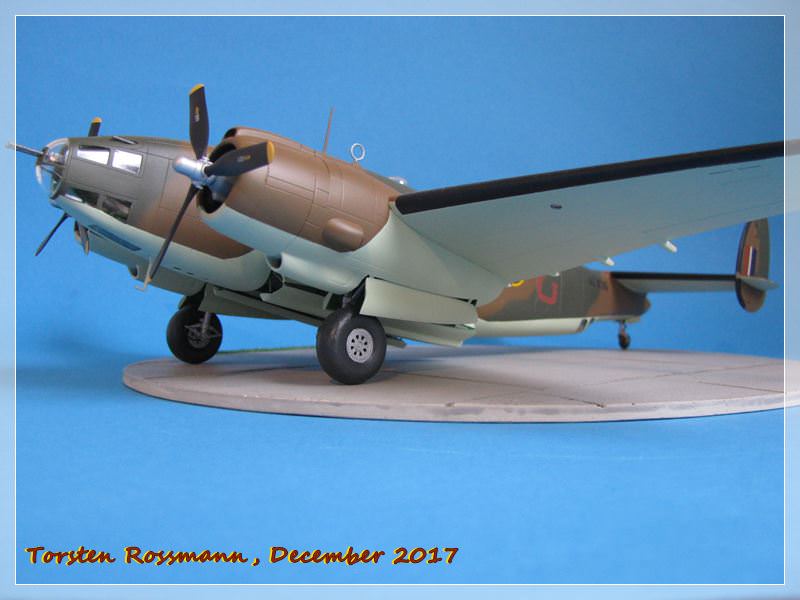
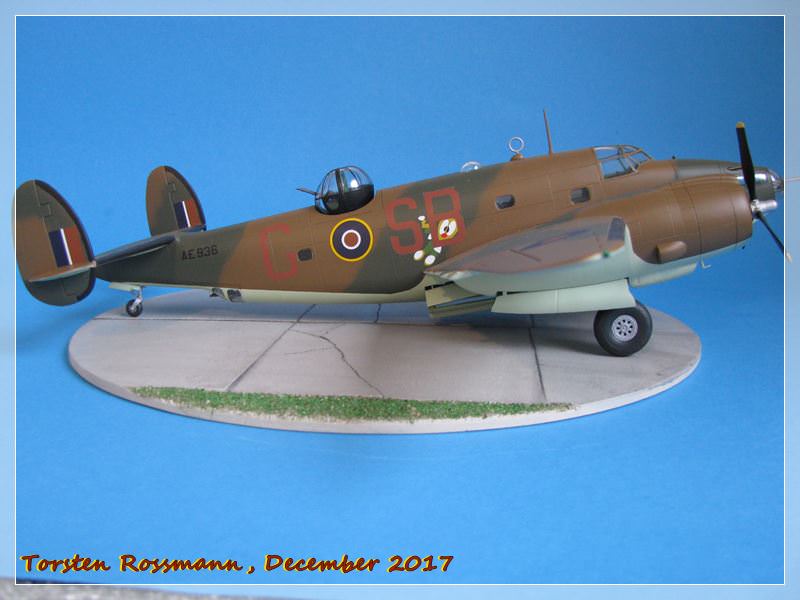
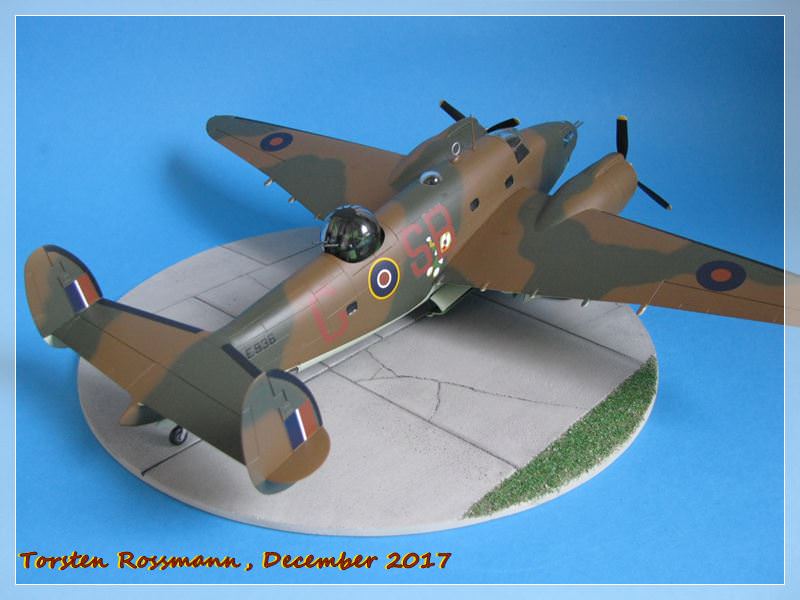
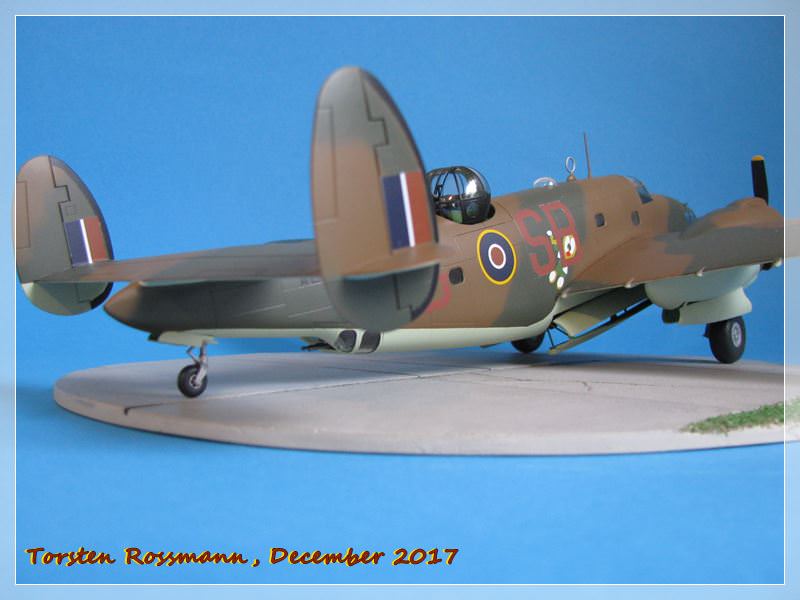
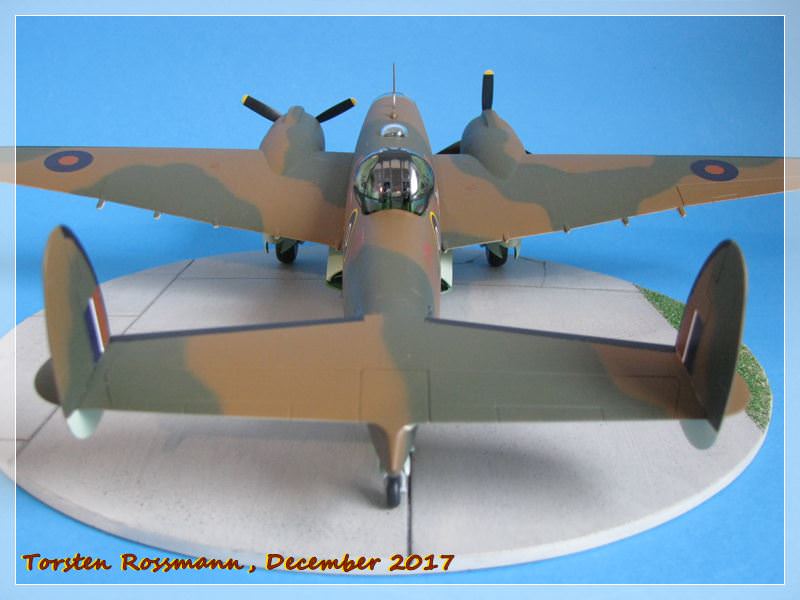
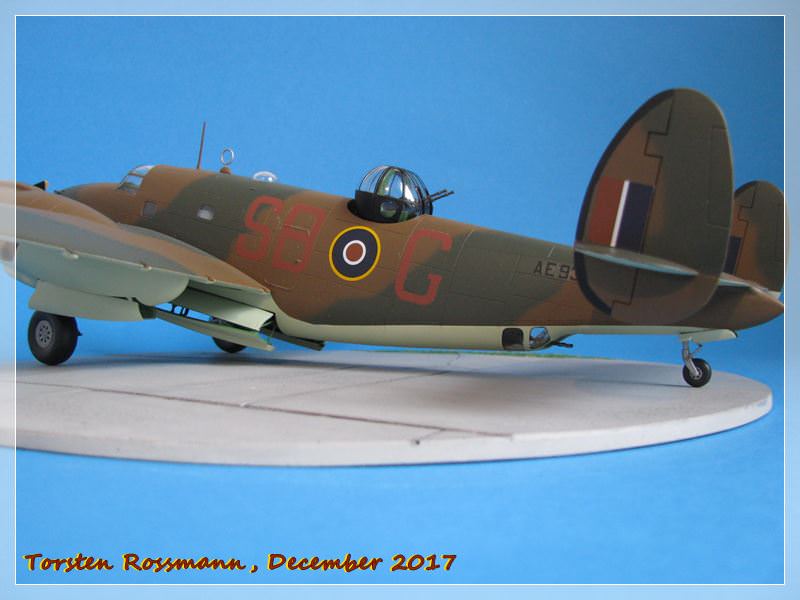
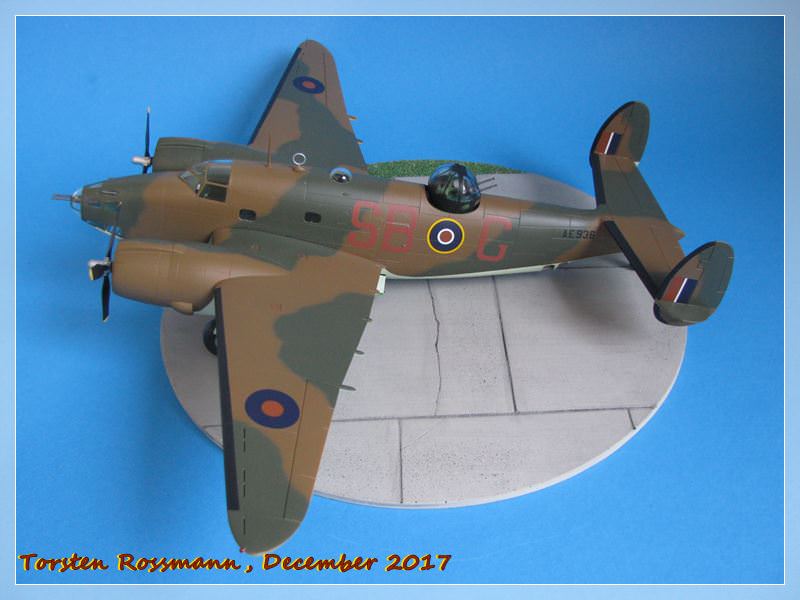
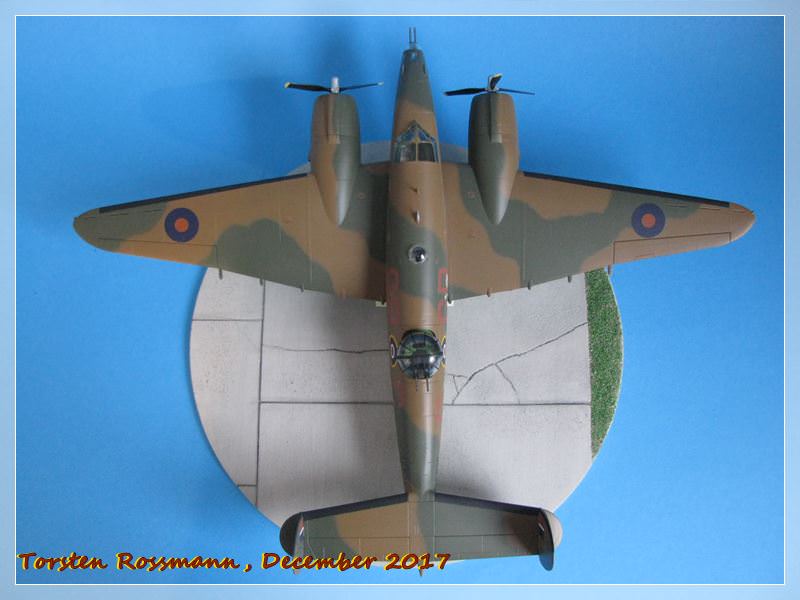
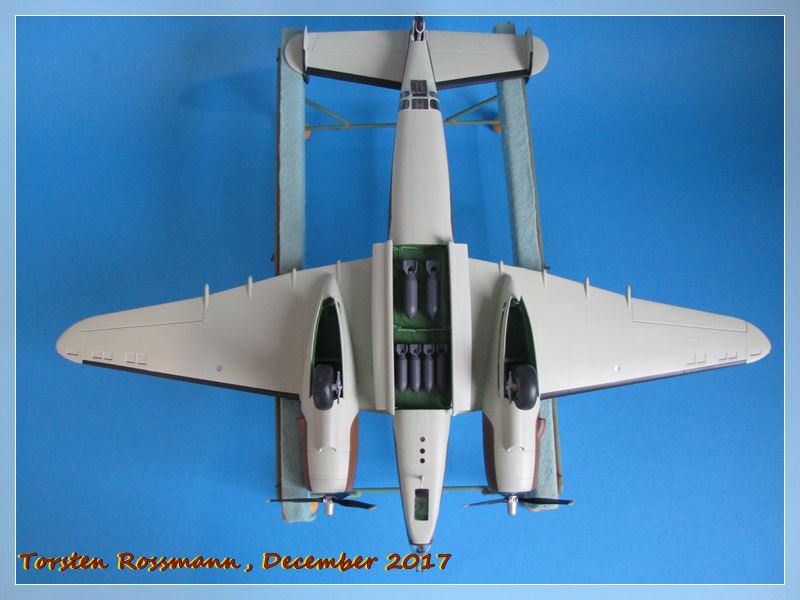
Well, folks, last week I have finished my last campaign for this year, the ANZAC Campaign and today I would like to show you the result of my efforts. It's the Lockheed Ventura Mk. II from Revell and of course it's in 1/48 ....
.... the Ventura, a derivative of the popular Hudson then in service with Coastal Command on anti-shipping and reconnaissance tasks, replaced Blenheim day bombers in No 2 Group. By the time it entered service with Bomber Command, it was outdated and suffered heavy losses. The Ventura entered service with No 21 Squadron at the end of May 1942, some 18 months later than planned and made its debut in November. A month later, Venturas joined other aircraft from No 2 Group (Mosquitos and Bostons), in the famous raid on the Philips works at Eindhoven. The aircraft was not popular with its crews and earned the nickname 'The Pig'. By April 1943, Ventura losses were beginning to mount and a month later the aircraft's inadequacies were shown in a daylight attack on a power station near Amsterdam. The final bomber op for the Ventura was flown in September 1943, by which time Ventura squadrons had transferred to the Second Tactical Air Force. Some were also transferred to duties in the Middle East and to Coastal Command. The Ventura was powered by 2 Pratt & Whitney Double Wasp GR2800 engines with 1200 hp each, which gave the aircraft a maximum speed of 480 km/h. The service ceiling was about 7600 meters and the range a bit over 1500 kilometers. It was capable to carry 1135 kg of bombs and had a defensive armament of 2 x 0,50 inch and 2 x 0,303 inch guns in the nose, up to 4 x 0,303 inch guns in a top turret and 2 x 0,303 inch guns in the mid lower section of the fuselage (text taken in parts from the RAF side) ....
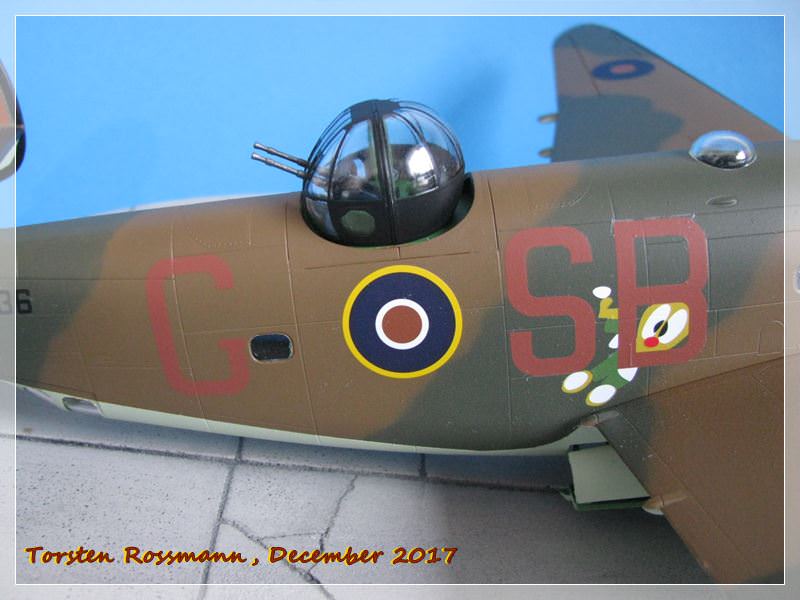
... I have built SB-G (AE936) of No. 464 Sqn, Royal Australian Air Force, based at Feltwell, England, in spring 1943. I couldn't find anything about the fate of the aircraft or its crew in the internet ....
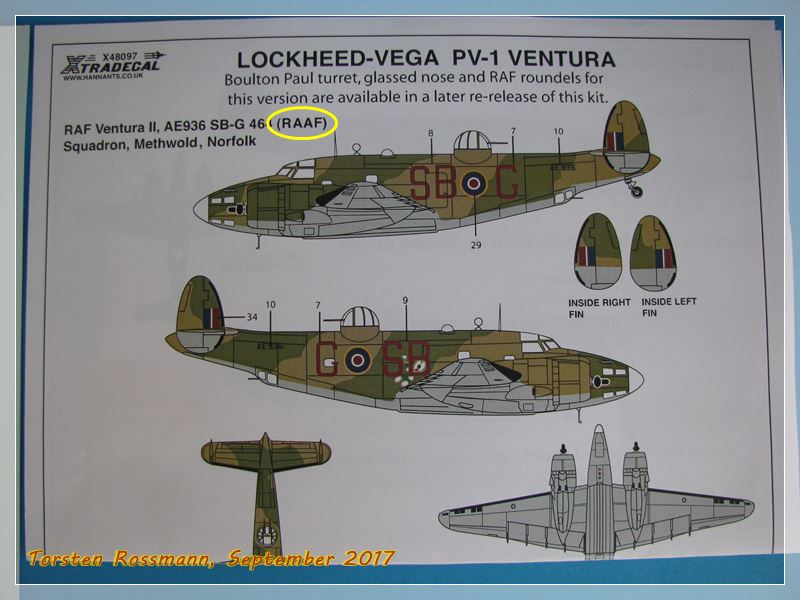
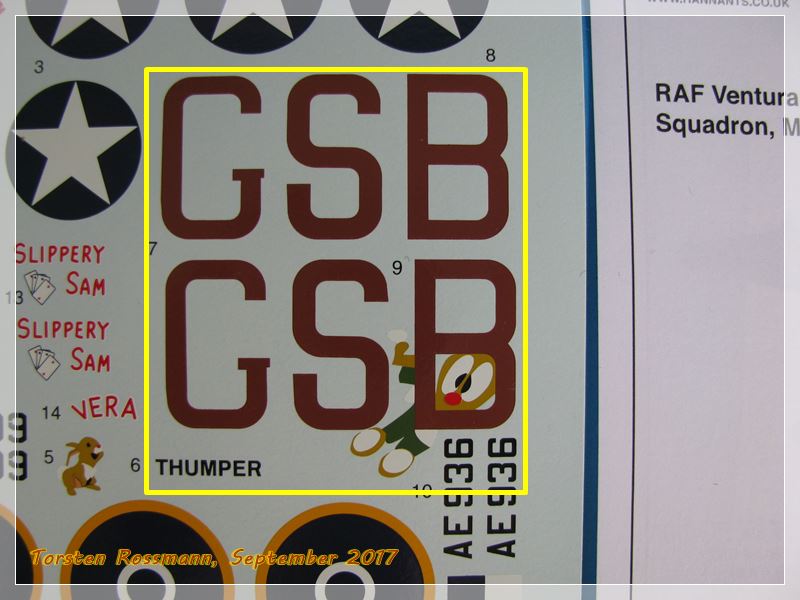
.... Revell Germany came out with this kit in 2016 and I didn't hesitate to get it. While other kits wait for years and years in my stash to be build (or never ....), it was a quick decision to take this kit for the ANZAC Campaign because I had this nice AM decals. The kit consists of only 142 parts (of which not all are to be used here) and it's very easy to build. The big advantage here is, that you can build fuselage and wing seperately and glue them together when you have finished the main painting. There are no major problems with this kit, or should I say, it's really fun to build it. Only at the front fuselage there are some minor problems with the nose section. There's an ugly gap which must be filled and sanded. Very usefull and recommended is the Eduard mask EX538 for the clear parts. Just look at the windows on the top turret. You'll get crazy when you try to cut them on your own The main paints I have used here are Sky 59 for the underside, Dark Earth 82 (both Revell Aqua) and Dark Green 71016 (Vallejo) for the upperside. Dark Green is airbrushed free hand as usual but I did a lot of masking to get a sharp edge between Sky and Dark Earth. Click the link of the campaign side and you see. Further I used Fern Green 360 for the interior and Black 302 (both Revell again) for the turret and the de-icing rubbers, though they are also on the decal sheet. But I prefered to paint them. All national insignias were taken from the decal sheet of the kit. I was surprised to find no RAF roundels on it for the underside. Was that true? The special markings for SB-G come from Xtradecal No. X48097 but I made a little compromise because the "G" on the right side is a bit more on the aft fuselage because otherwise it would be right over the window. But the red letter is barely visible on Dark Earth anyway. Unfortunatly there is a little silvering at some parts of the decals which is my fault. As usual with all my builds the Ventura is build straight out of box and not weathered. It took me 8 weeks to build this nice aircraft and in between I tested my skills also on something with 4 wheels and built the legendary Land Rover of the British Forces Germany ....
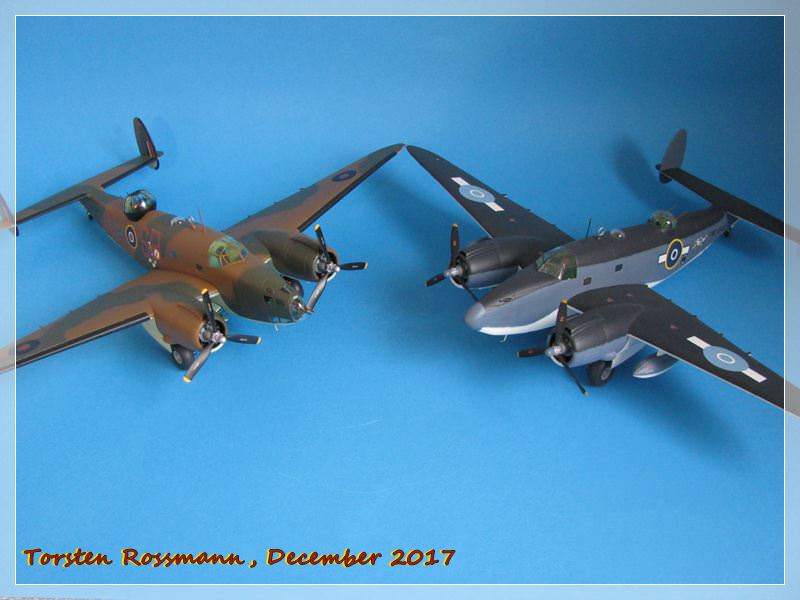
.... finally a little family photo. It doesn't look like it but this is really ANZAC (Australian-New Zealand Air Corps ). I've built the Kiwi-Ventura in 2012, right after Revell Germany came out with the kit. In my stash is another PV-1, which will be painted in Atlantic camo of a USN unit, flying from Morocco. I guess, that trio will look nice once ready but I have made no plans yet when I'll build it. So, for today I say again thanks for stepping in and walking around my new aviation museum member. Hope you have enjoyed it.
Happy modelling!
Torsten
Well, folks, last week I have finished my last campaign for this year, the ANZAC Campaign and today I would like to show you the result of my efforts. It's the Lockheed Ventura Mk. II from Revell and of course it's in 1/48 ....
.... the Ventura, a derivative of the popular Hudson then in service with Coastal Command on anti-shipping and reconnaissance tasks, replaced Blenheim day bombers in No 2 Group. By the time it entered service with Bomber Command, it was outdated and suffered heavy losses. The Ventura entered service with No 21 Squadron at the end of May 1942, some 18 months later than planned and made its debut in November. A month later, Venturas joined other aircraft from No 2 Group (Mosquitos and Bostons), in the famous raid on the Philips works at Eindhoven. The aircraft was not popular with its crews and earned the nickname 'The Pig'. By April 1943, Ventura losses were beginning to mount and a month later the aircraft's inadequacies were shown in a daylight attack on a power station near Amsterdam. The final bomber op for the Ventura was flown in September 1943, by which time Ventura squadrons had transferred to the Second Tactical Air Force. Some were also transferred to duties in the Middle East and to Coastal Command. The Ventura was powered by 2 Pratt & Whitney Double Wasp GR2800 engines with 1200 hp each, which gave the aircraft a maximum speed of 480 km/h. The service ceiling was about 7600 meters and the range a bit over 1500 kilometers. It was capable to carry 1135 kg of bombs and had a defensive armament of 2 x 0,50 inch and 2 x 0,303 inch guns in the nose, up to 4 x 0,303 inch guns in a top turret and 2 x 0,303 inch guns in the mid lower section of the fuselage (text taken in parts from the RAF side) ....
... I have built SB-G (AE936) of No. 464 Sqn, Royal Australian Air Force, based at Feltwell, England, in spring 1943. I couldn't find anything about the fate of the aircraft or its crew in the internet ....
.... Revell Germany came out with this kit in 2016 and I didn't hesitate to get it. While other kits wait for years and years in my stash to be build (or never ....), it was a quick decision to take this kit for the ANZAC Campaign because I had this nice AM decals. The kit consists of only 142 parts (of which not all are to be used here) and it's very easy to build. The big advantage here is, that you can build fuselage and wing seperately and glue them together when you have finished the main painting. There are no major problems with this kit, or should I say, it's really fun to build it. Only at the front fuselage there are some minor problems with the nose section. There's an ugly gap which must be filled and sanded. Very usefull and recommended is the Eduard mask EX538 for the clear parts. Just look at the windows on the top turret. You'll get crazy when you try to cut them on your own The main paints I have used here are Sky 59 for the underside, Dark Earth 82 (both Revell Aqua) and Dark Green 71016 (Vallejo) for the upperside. Dark Green is airbrushed free hand as usual but I did a lot of masking to get a sharp edge between Sky and Dark Earth. Click the link of the campaign side and you see. Further I used Fern Green 360 for the interior and Black 302 (both Revell again) for the turret and the de-icing rubbers, though they are also on the decal sheet. But I prefered to paint them. All national insignias were taken from the decal sheet of the kit. I was surprised to find no RAF roundels on it for the underside. Was that true? The special markings for SB-G come from Xtradecal No. X48097 but I made a little compromise because the "G" on the right side is a bit more on the aft fuselage because otherwise it would be right over the window. But the red letter is barely visible on Dark Earth anyway. Unfortunatly there is a little silvering at some parts of the decals which is my fault. As usual with all my builds the Ventura is build straight out of box and not weathered. It took me 8 weeks to build this nice aircraft and in between I tested my skills also on something with 4 wheels and built the legendary Land Rover of the British Forces Germany ....
.... finally a little family photo. It doesn't look like it but this is really ANZAC (Australian-New Zealand Air Corps ). I've built the Kiwi-Ventura in 2012, right after Revell Germany came out with the kit. In my stash is another PV-1, which will be painted in Atlantic camo of a USN unit, flying from Morocco. I guess, that trio will look nice once ready but I have made no plans yet when I'll build it. So, for today I say again thanks for stepping in and walking around my new aviation museum member. Hope you have enjoyed it.
Happy modelling!
Torsten
Joel_W
Associate Editor
New York, United States
Joined: December 04, 2010
KitMaker: 11,666 posts
AeroScale: 7,410 posts
Joined: December 04, 2010
KitMaker: 11,666 posts
AeroScale: 7,410 posts
Posted: Wednesday, December 13, 2017 - 02:52 AM UTC
Torsten,
Now that's one impressive Ventura. As usual just a flawless build in 8 weeks time. For me would be record by a good month or two.
The pair really does look rather well together. Can't wait to see the 3rd one join the party.
I've got one in the display that I'm still thinking about stripping and repainting as the fuselage feathered edge on one side isn't really right. Will most likely do it in USN markings this time.
Joel
Posted: Wednesday, December 13, 2017 - 04:29 AM UTC
Nice one Torsten!
I've resisted the temptation to buy Revell's Ventura Mk.II until now because I still haven't built the PV-1 I got when it first came out. Seeing your excellent build is a reminder that I really should get one...
All the best
Rowan
I've resisted the temptation to buy Revell's Ventura Mk.II until now because I still haven't built the PV-1 I got when it first came out. Seeing your excellent build is a reminder that I really should get one...
All the best
Rowan
Joel_W
Associate Editor
New York, United States
Joined: December 04, 2010
KitMaker: 11,666 posts
AeroScale: 7,410 posts
Joined: December 04, 2010
KitMaker: 11,666 posts
AeroScale: 7,410 posts
Posted: Wednesday, December 13, 2017 - 04:37 AM UTC
Quoted Text
Nice one Torsten!
I've resisted the temptation to buy Revell's Ventura Mk.II until now because I still haven't built the PV-1 I got when it first came out. Seeing your excellent build is a reminder that I really should get one...
All the best
Rowan
Rowan,
Good thinking. I should also pick up a Mk II kit. As there's just something about the Ventura that appeals to me.
Joel
Posted: Wednesday, December 13, 2017 - 10:40 AM UTC
Very nice, Torsten!
Gaz
Gaz
Posted: Wednesday, December 13, 2017 - 10:00 PM UTC
G'day Torsten. Lovely work as always, a really nice build and I have been following along in the ANZAC thread.
For interest, I tried to look up RAAF Ventura SB-G AE-936 and could find no reference to this specific code.
http://www.adf-serials.com.au/ventura.htm
I am wondering if it could be SB-C AE-939?
Looking forward to your next addition.
Cheers, D
For interest, I tried to look up RAAF Ventura SB-G AE-936 and could find no reference to this specific code.
http://www.adf-serials.com.au/ventura.htm
I am wondering if it could be SB-C AE-939?
Looking forward to your next addition.
Cheers, D
BlackWidow
European Union
Joined: August 09, 2009
KitMaker: 1,732 posts
AeroScale: 1,336 posts
Joined: August 09, 2009
KitMaker: 1,732 posts
AeroScale: 1,336 posts
Posted: Thursday, December 14, 2017 - 12:06 AM UTC
Wow! Thanks for all your replies, guys! Didn't expect that.
Joel, I remember your PV-1 and to me it looks really fine. If I were you I wouldn't strip the paint off, I would build another one in a different camo. So you would have something like "Attempt 1" and "Attempt 2". Think about it.
Rowan, I'm glad to hear that my Ventura breaks down your resistance to get this kit. It's really nice to build and gives no major problems. Only the gap between the fuselage and nose section is a bit annoying. But you are a better builder than I am, so it should be no problem for you. As far as I can remember the US version PV-1 has not this gap because of the different nose. From the kit you can also build a machine of No. 21 Sqn, RAF which might be more interesting for you.
Damian, a special thanks to you for linking that list. To my surprise, Hannants (Xtradecal) got the code and the serial wrong for this bird. I didn't expect that, because I thought, the search for AM decals is more serious and deeper than by the kit company.
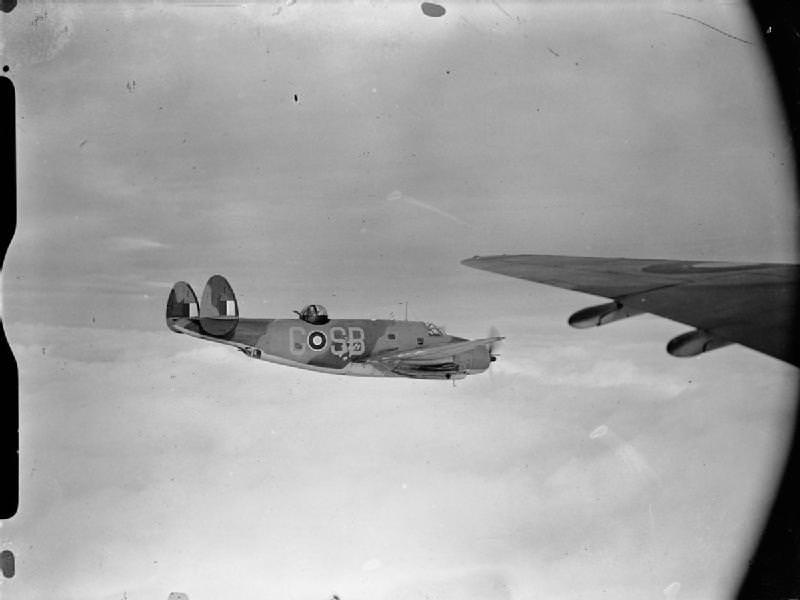
So, this Ventura has the serial AE939 and the code SB-C. The bird is clearly recognisable in this inflight photo with the little figure looking through the letter "B". I trusted the sheet which clearly shows SB-G and AE 936. I have to apologize for that inaccuracy but it's too late now to change it ....
Torsten
Joel_W
Associate Editor
New York, United States
Joined: December 04, 2010
KitMaker: 11,666 posts
AeroScale: 7,410 posts
Joined: December 04, 2010
KitMaker: 11,666 posts
AeroScale: 7,410 posts
Posted: Thursday, December 14, 2017 - 03:25 AM UTC
Torsten,
You're most likely right about going to far with the stripping of the paint. Odds are I'd ruin the model in my attempt to improve the camo. Just have to decide which version I want to build, and buy the kit. Of course working it into my every changing build schedule will be a real challenge.
Joel
You're most likely right about going to far with the stripping of the paint. Odds are I'd ruin the model in my attempt to improve the camo. Just have to decide which version I want to build, and buy the kit. Of course working it into my every changing build schedule will be a real challenge.
Joel
BlackWidow
European Union
Joined: August 09, 2009
KitMaker: 1,732 posts
AeroScale: 1,336 posts
Joined: August 09, 2009
KitMaker: 1,732 posts
AeroScale: 1,336 posts
Posted: Friday, December 15, 2017 - 12:32 AM UTC
Joel, you can't go wrong with another Ventura kit, no matter if it's a PV-1 or a Mk. II. At the moment here in Germany Revell has only the Mk. II in its programm. But I can imagine to get some more PV-1 kits when there's a re-release. I still have so many decals for it (AUS/NZ/US) and it's fun to build. Though with a wing span of 32 cm and a length of 42 cm it's not a small kit.
I hear you with that changing mind what to build. That's so wonderfull about our great hobby. We can do what we want. There's only a "can" and never a "must". So on my work bench at the moment there are 2 big cats who listen to the name "Leopard" ....
Happy modelling!
Torsten
I hear you with that changing mind what to build. That's so wonderfull about our great hobby. We can do what we want. There's only a "can" and never a "must". So on my work bench at the moment there are 2 big cats who listen to the name "Leopard" ....
Happy modelling!
Torsten
BlackWidow
European Union
Joined: August 09, 2009
KitMaker: 1,732 posts
AeroScale: 1,336 posts
Joined: August 09, 2009
KitMaker: 1,732 posts
AeroScale: 1,336 posts
Posted: Monday, April 16, 2018 - 12:38 AM UTC
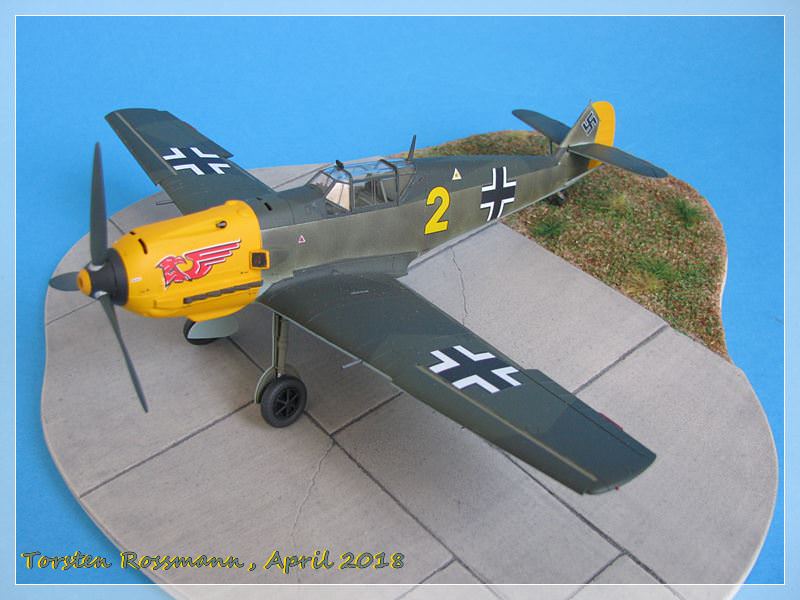
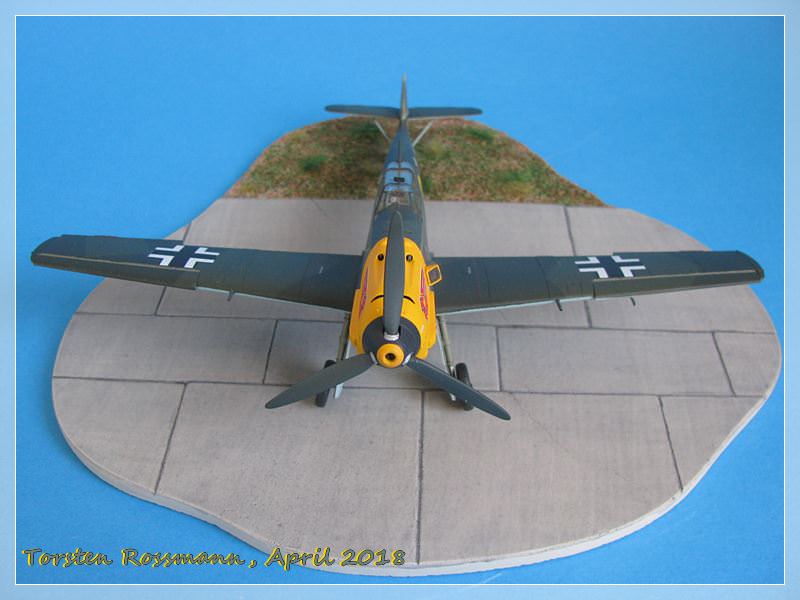
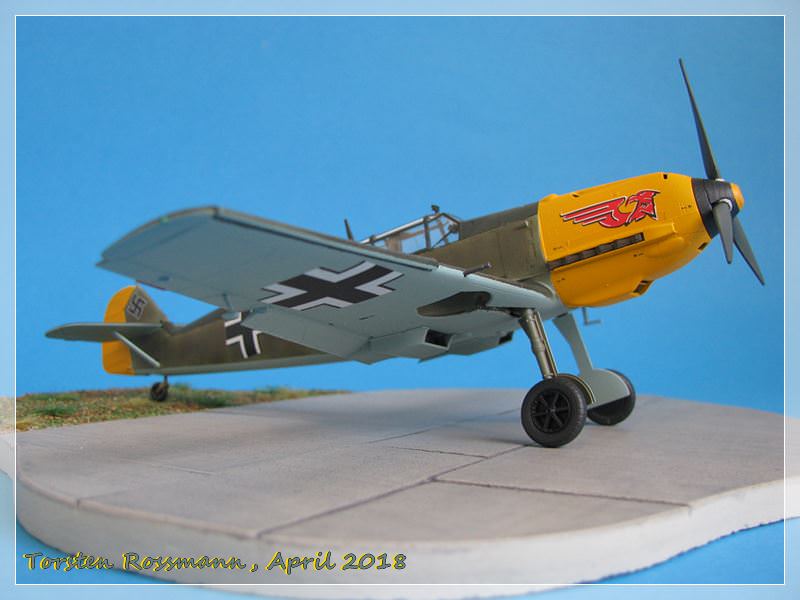
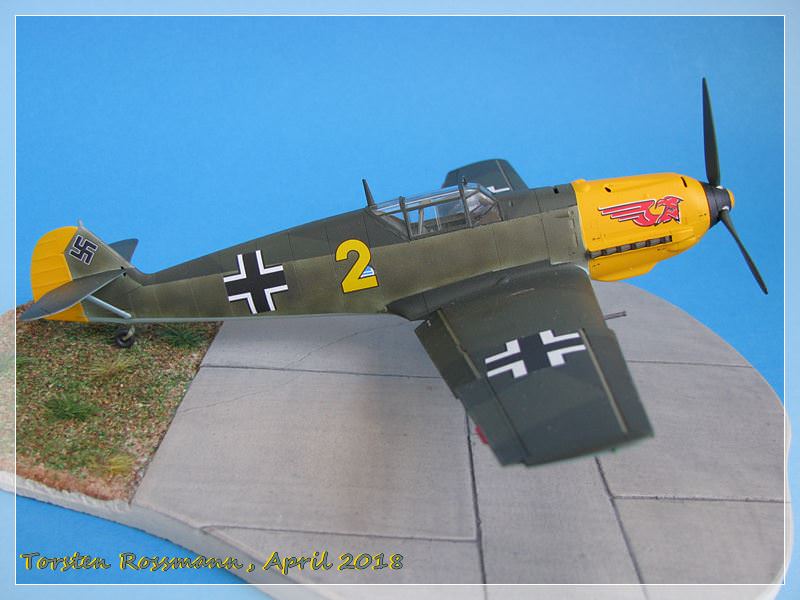
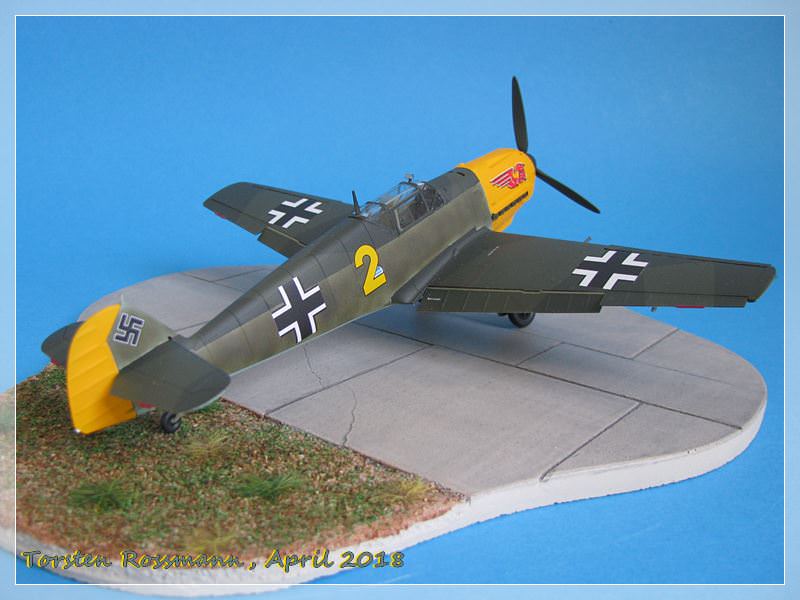
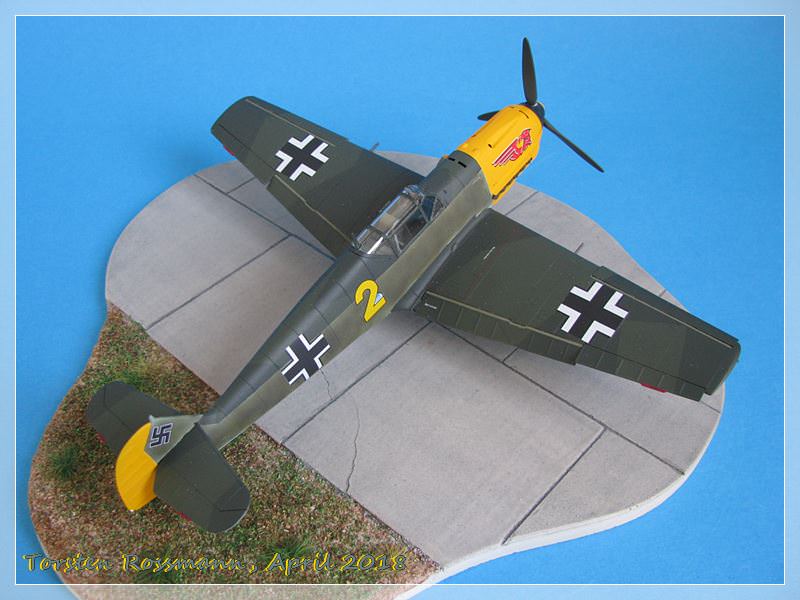
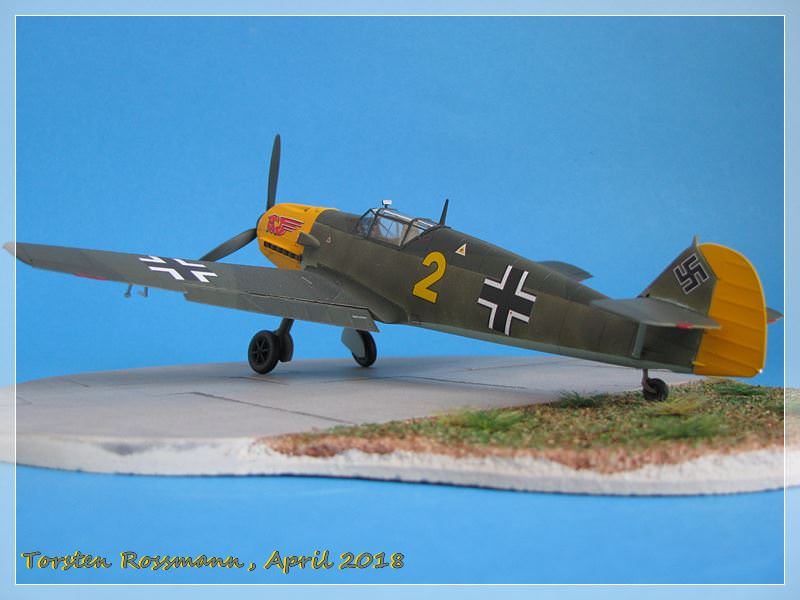
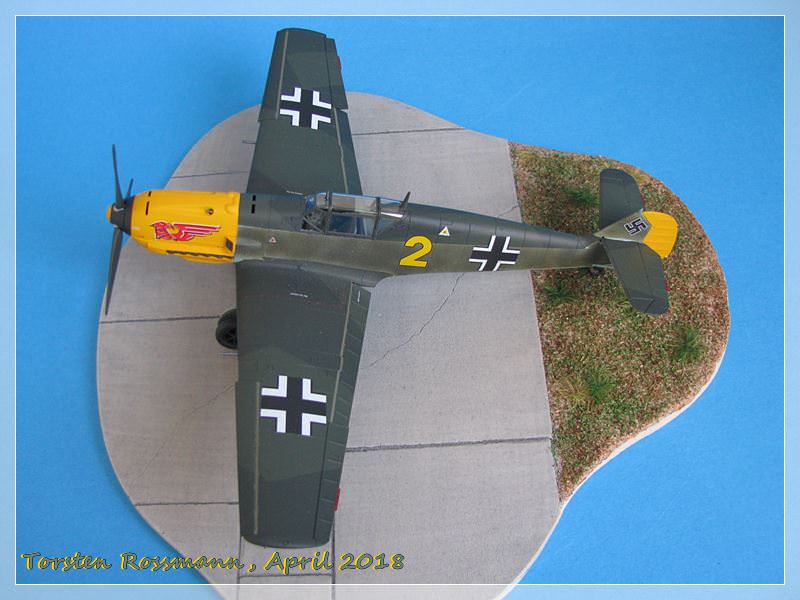
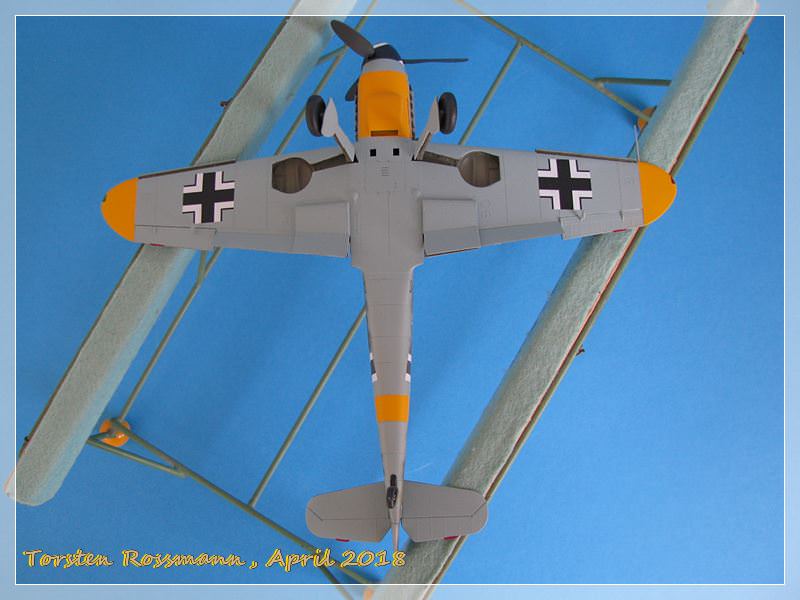
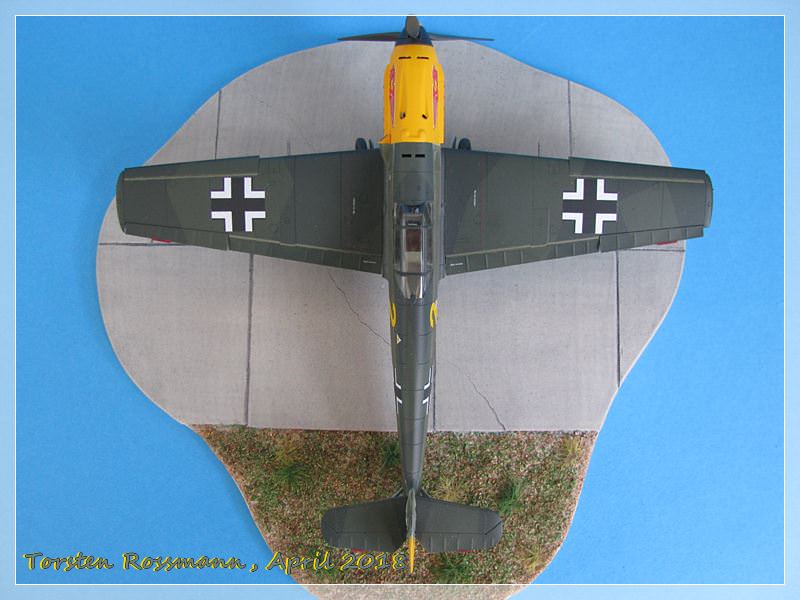
I finally started a long planned long-term project and today I can show you Part 1 of it. This is my new Messerschmitt Bf 109 E-1 from Eduard (Weekend Edition) in 1/48 ....
.... the story of the "One O Nine" is well known, so I don't think I need to write many details about the development etc. The E-1 was powered by a DB 601 engine with 990 hp which gave the "Emil" a speed of 570 km/h in 5000 meters. With the 400 liters internal tank (105 gallons) it had a range of 800 kilometers. The aircraft had an armament of 4 x MG 17 (7,92 mm). A total of 1464 E-1 were built ....
.... I have built "Yellow 2" of the 6./JG 52, based at Peupelingues/Northern France in October 1940. It was flown during the BoB by an unknown Lt. Gerhard Barkhorn. On the 29. October 1940 he flew again an escort mission to London (it was his 38. sortie) and on the way back he was attacked by Spitfires over the Channel. His "Yellow 2" was so badly shot up in the dogfight that he had no other choice but to ditch it in the Channel and managed to land in the water without overturning. The next 2 hours he spent in his inflatable dinghy until he was picked up by the german air-sea-rescue service. 6 days later Barkhorn was flying again ....
.... this Eduard kit is really nice to build, there are no major problems and no putty is needed. Only to get the spinner on the fuselage is a bit tricky. There is a short pin coming from the motor but it's too short to keep the spinner right in place. So I have cut the pin off and glued the whole propeller section at the fuselage. There is no need for the propeller to turn. The model is not a toy, I don't wanna play with it .... This kit also offers the possibility to show the complete engine without the cowling. But I didn't want that because of the nice red eagle on it. Please note the mirror on the canopy. It's clearly visible on the photo and profile I have but it's not included in the kit, so the Royal Air Force was more than kind to sponsor it from one of their Spits .... I'm not completly satisfied with my painting here as the mottling on the fuselage sides is too tranparent. It should be more opaque. But after 2 corrections I stopped before there's no mottling to see at all. I have used various paint brands on this bird. The underside is airbrushed with Revell No. 49 Light Blue, which comes close to RLM 65. The upperside is painted with my old Agama paints from Czech Republic. It's Black Green N1 (RLM 70) and Dark Green N2 (RLM 71). The yellow nose and the side ruder are painted with Revell No. 310 which Revell calls "Lufthansa Yellow". I think it comes pretty close to RLM 04. The "mottling" is done with Vallejo 71044 Grey-Green (RLM 02), which you can't see at all now and Vallejo 71015 Dark Green (RLM 71). There are coming only a few decals with this Weekend Kit and no stecils at all. Some stencils I took from another Bf 109 Eduard kit. Only the Balkenkreuze and the swastika are taken from the kits sheet. The special markings to build Barkorn's "Yellow 2" are taken from the sheet "The forgotten ace", which features all aircraft which were flown by Gerhard "Gerd" Barkhorn during WW 2. It's a limited edition made by Cartograph for the german publisher "Luftfahrtverlag Start" and it comes together with a fantastic and invaluable book about the life of Gerhard Barkhorn. And now you know what my long-term project is ....
.... I hope you enjoyed walking around my new aviation museum member despite its "home made" painting flaws. I showed it last weekend at the expo in Thun/Switzerland and had nice feedback for it. So I'm probably more critical with it than others ....
Happy modelling!
Torsten
And if you wonder what I did at the beginning of 2018, well, then I suggest you have a look here ....
.... the story of the "One O Nine" is well known, so I don't think I need to write many details about the development etc. The E-1 was powered by a DB 601 engine with 990 hp which gave the "Emil" a speed of 570 km/h in 5000 meters. With the 400 liters internal tank (105 gallons) it had a range of 800 kilometers. The aircraft had an armament of 4 x MG 17 (7,92 mm). A total of 1464 E-1 were built ....
.... I have built "Yellow 2" of the 6./JG 52, based at Peupelingues/Northern France in October 1940. It was flown during the BoB by an unknown Lt. Gerhard Barkhorn. On the 29. October 1940 he flew again an escort mission to London (it was his 38. sortie) and on the way back he was attacked by Spitfires over the Channel. His "Yellow 2" was so badly shot up in the dogfight that he had no other choice but to ditch it in the Channel and managed to land in the water without overturning. The next 2 hours he spent in his inflatable dinghy until he was picked up by the german air-sea-rescue service. 6 days later Barkhorn was flying again ....
.... this Eduard kit is really nice to build, there are no major problems and no putty is needed. Only to get the spinner on the fuselage is a bit tricky. There is a short pin coming from the motor but it's too short to keep the spinner right in place. So I have cut the pin off and glued the whole propeller section at the fuselage. There is no need for the propeller to turn. The model is not a toy, I don't wanna play with it .... This kit also offers the possibility to show the complete engine without the cowling. But I didn't want that because of the nice red eagle on it. Please note the mirror on the canopy. It's clearly visible on the photo and profile I have but it's not included in the kit, so the Royal Air Force was more than kind to sponsor it from one of their Spits .... I'm not completly satisfied with my painting here as the mottling on the fuselage sides is too tranparent. It should be more opaque. But after 2 corrections I stopped before there's no mottling to see at all. I have used various paint brands on this bird. The underside is airbrushed with Revell No. 49 Light Blue, which comes close to RLM 65. The upperside is painted with my old Agama paints from Czech Republic. It's Black Green N1 (RLM 70) and Dark Green N2 (RLM 71). The yellow nose and the side ruder are painted with Revell No. 310 which Revell calls "Lufthansa Yellow". I think it comes pretty close to RLM 04. The "mottling" is done with Vallejo 71044 Grey-Green (RLM 02), which you can't see at all now and Vallejo 71015 Dark Green (RLM 71). There are coming only a few decals with this Weekend Kit and no stecils at all. Some stencils I took from another Bf 109 Eduard kit. Only the Balkenkreuze and the swastika are taken from the kits sheet. The special markings to build Barkorn's "Yellow 2" are taken from the sheet "The forgotten ace", which features all aircraft which were flown by Gerhard "Gerd" Barkhorn during WW 2. It's a limited edition made by Cartograph for the german publisher "Luftfahrtverlag Start" and it comes together with a fantastic and invaluable book about the life of Gerhard Barkhorn. And now you know what my long-term project is ....
.... I hope you enjoyed walking around my new aviation museum member despite its "home made" painting flaws. I showed it last weekend at the expo in Thun/Switzerland and had nice feedback for it. So I'm probably more critical with it than others ....
Happy modelling!
Torsten
And if you wonder what I did at the beginning of 2018, well, then I suggest you have a look here ....
magnusf
Stockholm, Sweden
Joined: May 02, 2006
KitMaker: 1,953 posts
AeroScale: 1,902 posts
Joined: May 02, 2006
KitMaker: 1,953 posts
AeroScale: 1,902 posts
Posted: Monday, April 16, 2018 - 01:01 AM UTC
Torsten! I was a bit worried that your production line had ground to a halt ! A nice 109 and well done on that Leo, I sometimes start an armour build but I never get around to finish them ! Looking forward to more Barkhorn-builds!
Magnus
Magnus
thegirl
Alberta, Canada
Joined: January 19, 2008
KitMaker: 6,743 posts
AeroScale: 6,151 posts
Joined: January 19, 2008
KitMaker: 6,743 posts
AeroScale: 6,151 posts
Posted: Monday, April 16, 2018 - 04:46 AM UTC
Nice job on the 109 Torsten
Terri
Terri
Joel_W
Associate Editor
New York, United States
Joined: December 04, 2010
KitMaker: 11,666 posts
AeroScale: 7,410 posts
Joined: December 04, 2010
KitMaker: 11,666 posts
AeroScale: 7,410 posts
Posted: Monday, April 16, 2018 - 05:25 AM UTC
Torsten,
Like Mangnus,, I was starting to worry that you've became a full time armor builder
Your 109E-1 is certainly up to your usual high museum finishes, but for the 1st time I did notice that the Mottling camo was on the light side for a fresh factory paint job. Just figured that if you painted it, it had to be right. So now we know that you're actually human.
Checked out your Jaguar build (which I've previously seen), and it's certainly well done, with great paint modulation. Another museum quality build for sure.
Joel
Szmann
Netherlands Antilles
Joined: September 02, 2014
KitMaker: 1,977 posts
AeroScale: 295 posts
Joined: September 02, 2014
KitMaker: 1,977 posts
AeroScale: 295 posts
Posted: Monday, April 16, 2018 - 07:21 PM UTC
Great job, Torsten!
The "dingy" episode was a life changer for the "unknown" Barkhorn. He and "Buby" Hartmann came to personify the "cerebral" pilots, that will never attack blindly and will never engage if the odds were against. And the final numbers speak!
As for the build, I take the risk of being redundant: museum quality!
Cheers!
Gabriel
The "dingy" episode was a life changer for the "unknown" Barkhorn. He and "Buby" Hartmann came to personify the "cerebral" pilots, that will never attack blindly and will never engage if the odds were against. And the final numbers speak!
As for the build, I take the risk of being redundant: museum quality!
Cheers!
Gabriel
BlackWidow
European Union
Joined: August 09, 2009
KitMaker: 1,732 posts
AeroScale: 1,336 posts
Joined: August 09, 2009
KitMaker: 1,732 posts
AeroScale: 1,336 posts
Posted: Monday, April 16, 2018 - 11:11 PM UTC
Thanks for your feedback, folks!
Magnus, there's no need to worry. My production runs the whole year through, 12 months nearly every day. The only break is during my summer holiday. And be patient, I've been with 2 "Barkhorns" to the expo last weekend. I'm just sorting out the photos. I can probably show them here this coming weekend.
Joel, you also don't need to worry. I'm just a part-time armor model builder. Over the past few years I've built only 8 AFV's, that's about 2 per year. Still have a Leopard 1NO (Norway) on my workbench, but their 4-tone splinter camo is a real challenge to bring on, so I give it time the whole year. And the little kitty in the other thread, starring at us, ready to jump is a Leopard, not a Jaguar. They are not easy to distinguish, the Leopard is slender and the Jaguar has a wider head. The easiest distinctive feature between them are the small dots in the blotches on the fur which the Jaguar has but the Leopard not, so this is a Leopard and this is a Jaguar. Both beautiful animals. During my trip in South Africa in 2009 I saw one Leopard at night. I was really excited.
Gabriel, I wrote "unknown" in purpose, because in 1940 he was still "one of the many" and it took him 120 missions to score his first kill. It was never easy for him to score, the highest during one mission was 4, if I remember correctly. You're right, Hartmann and Barkhorn were outstanding aviators and had the luck to survive the whole tragedy. While Barkhorn spent only 5 months in american captivity, Hartmann was in Russia for nearly 10 1/2 years. But they stayed friends for nearly 40 years.
Happy modelling!
Torsten
BlackWidow
European Union
Joined: August 09, 2009
KitMaker: 1,732 posts
AeroScale: 1,336 posts
Joined: August 09, 2009
KitMaker: 1,732 posts
AeroScale: 1,336 posts
Posted: Saturday, April 21, 2018 - 04:52 PM UTC
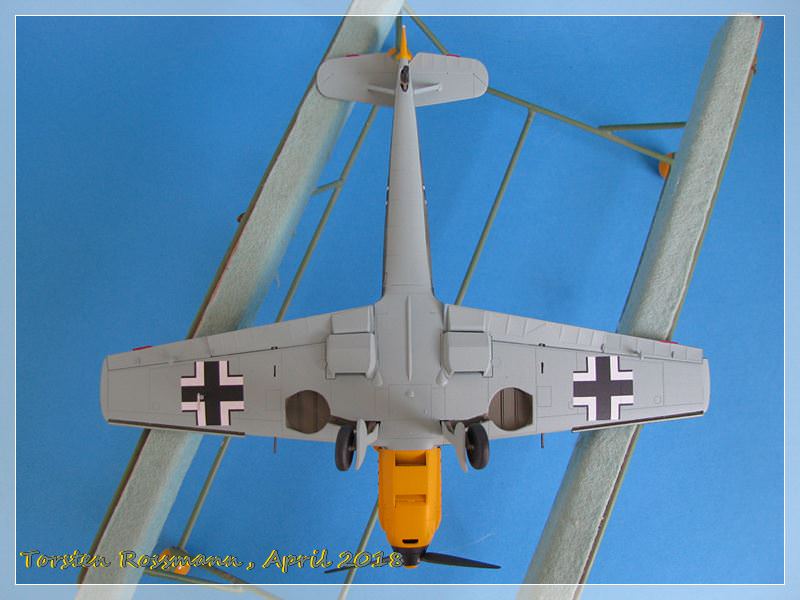
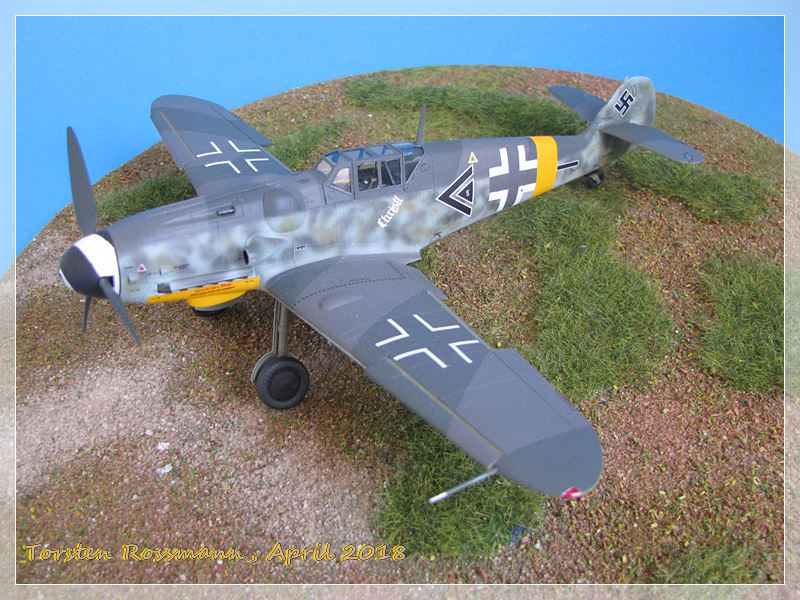
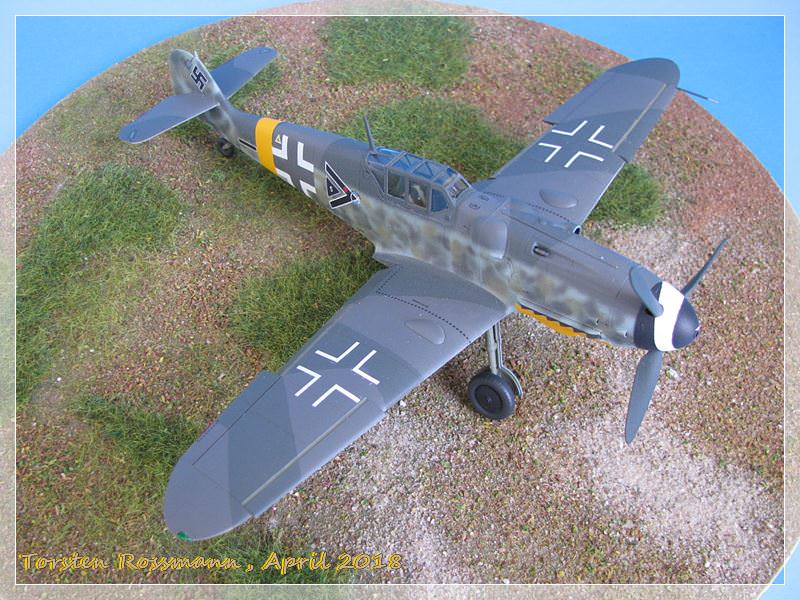
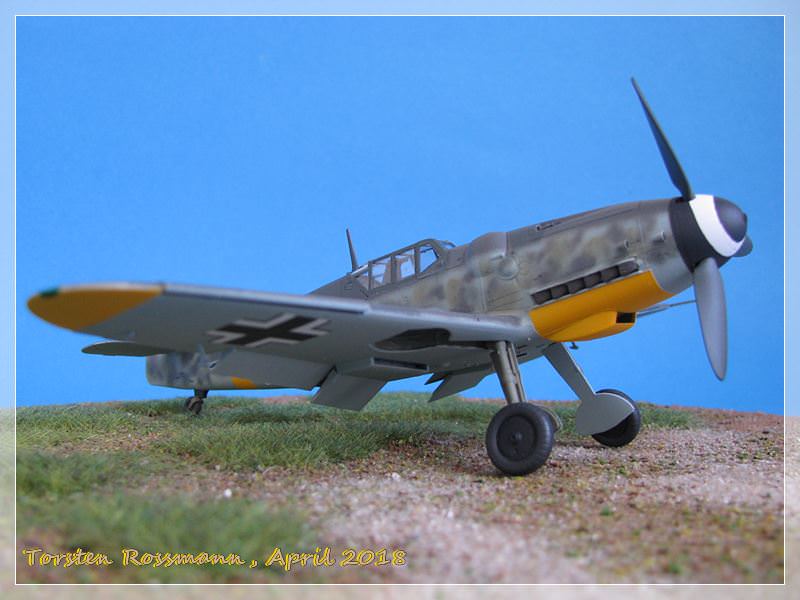
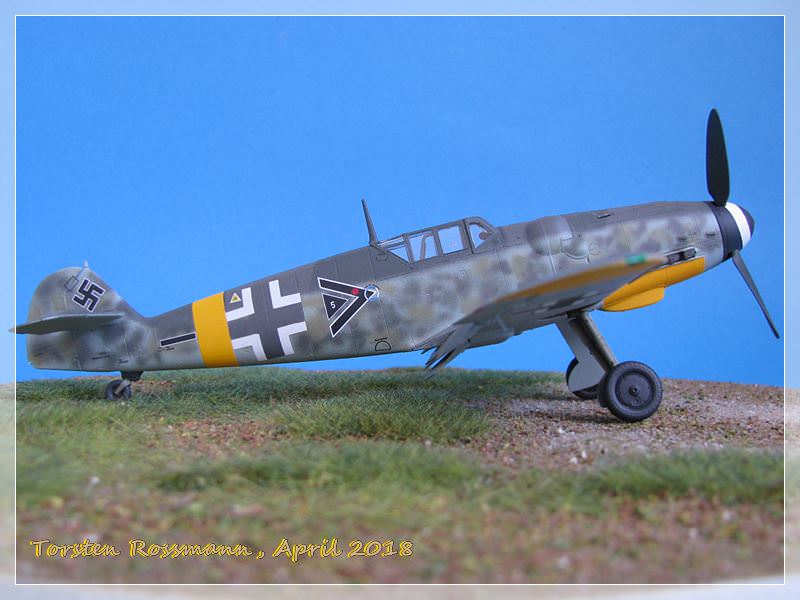
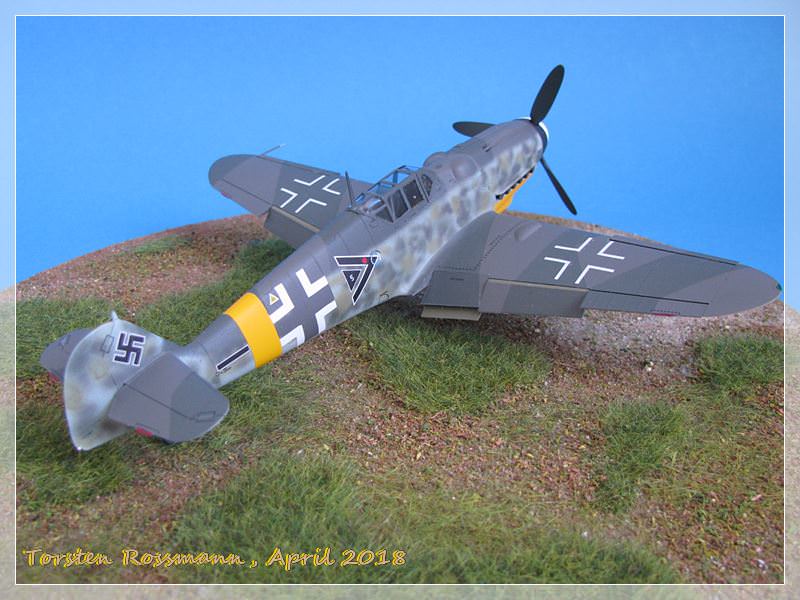
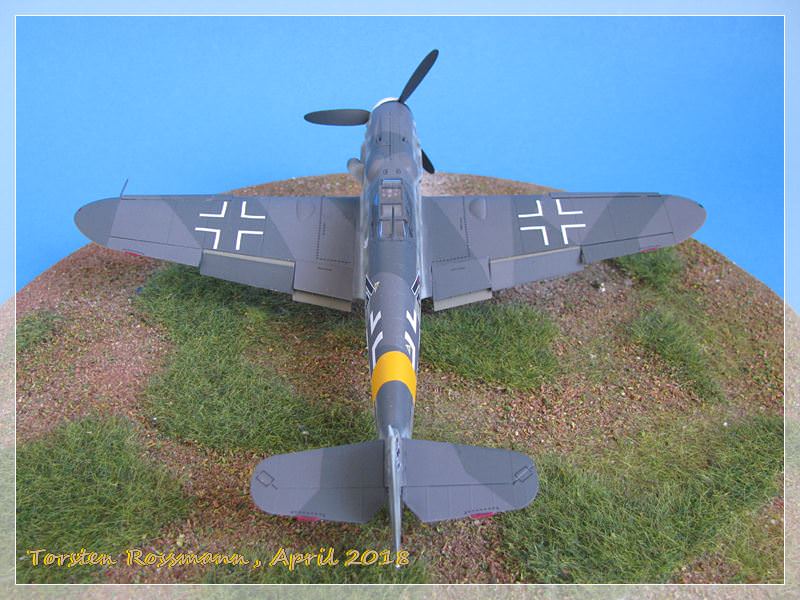
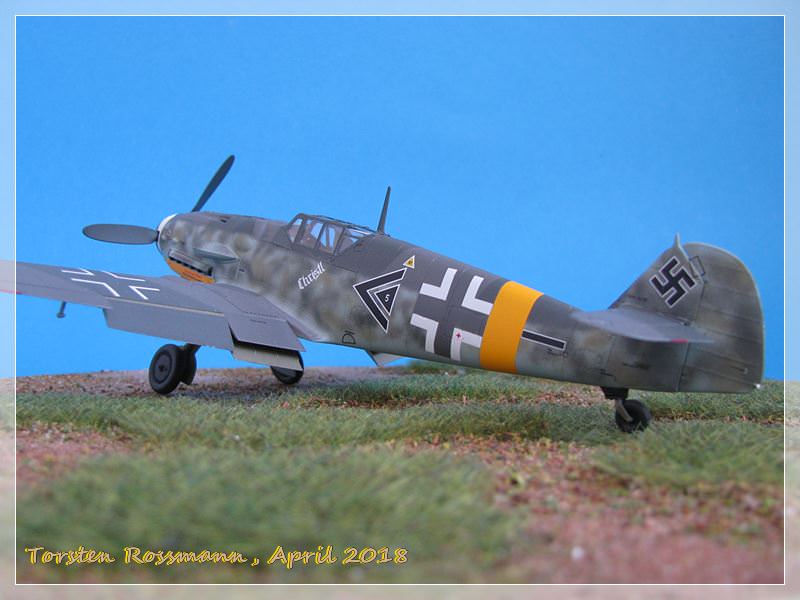
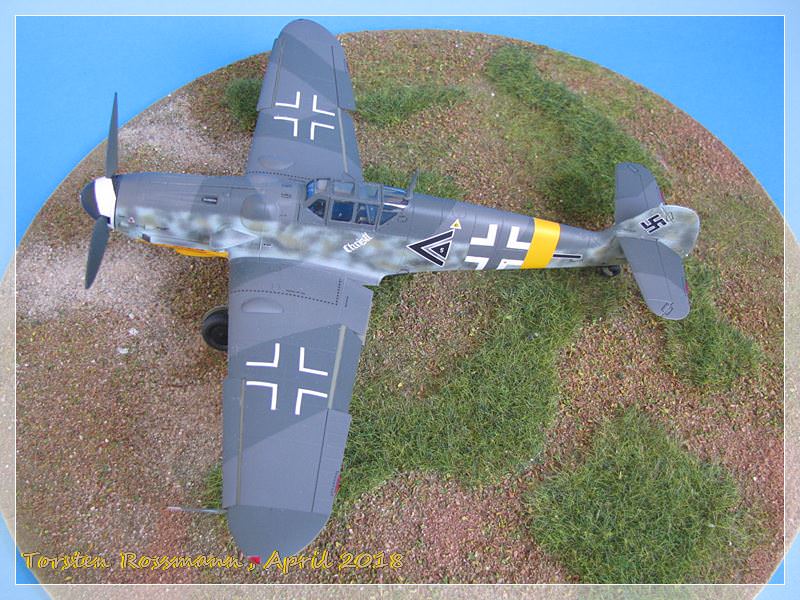
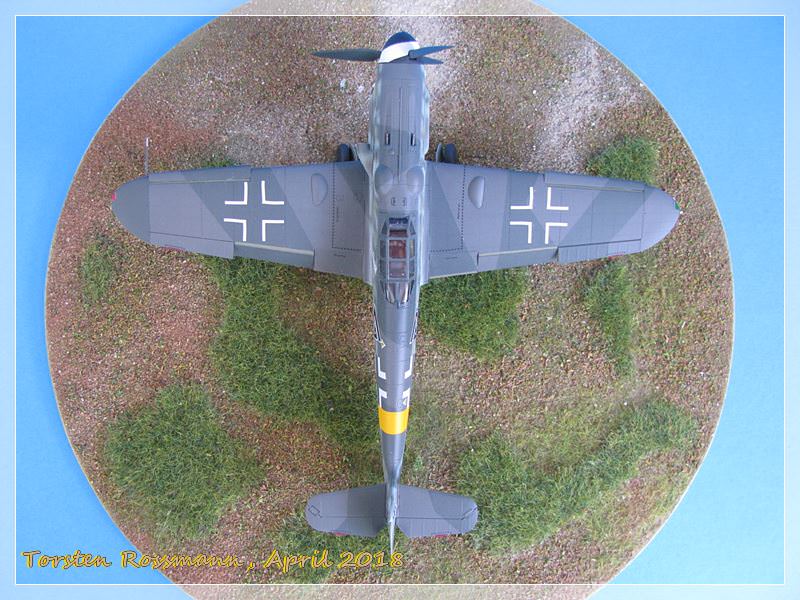
As I mentioned before here comes Part 2 of my long-term Barkhorn project. This time it's a Messerschmitt Bf 109 G-6 and it's again an Eduard weekend kit (their "size-corrected" release) ....
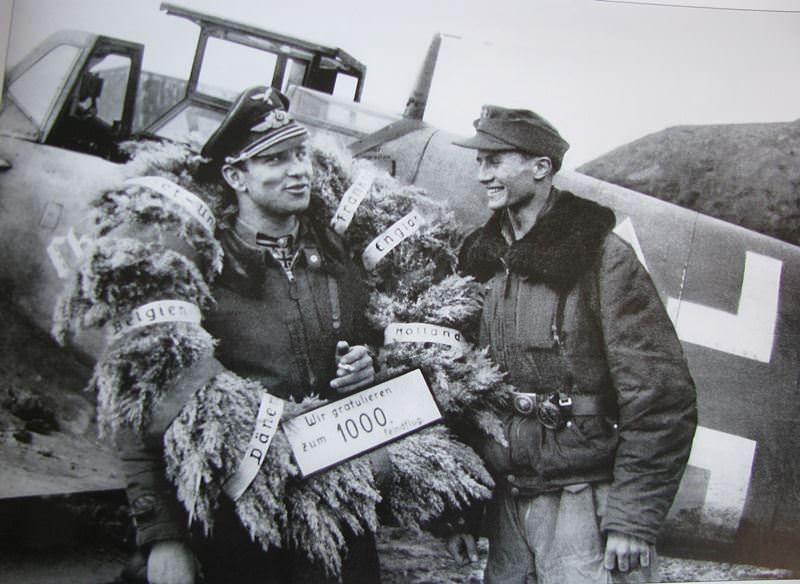
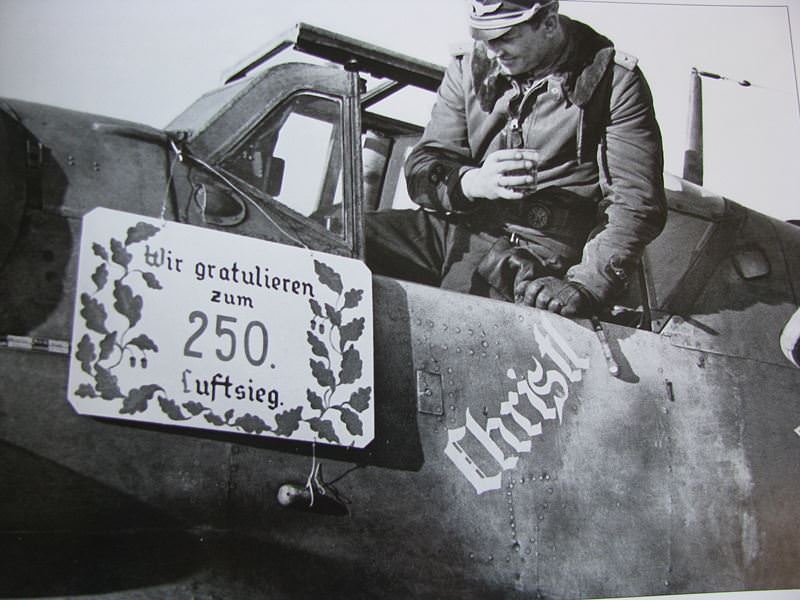
.... now we jump from October 1940 to February 1944 and from west to east. This model shows "Chevron Triangle 5" flown by Hptm (Captain) Gerhard Barkhorn as CO of the II./JG 52 (2. Group of Fighter Wing 52)in Bagerowo on Crimea. In fact this aircraft is quite special, because it's a "double jubilee" aircraft for him. Now I'm posting 2 well known photos of these events ....
.... on the 23. January 1944 around midday Gerd Barkhorn returned from his 1000. sortie, seen here with his long time Katschmarek (wing man) Uffz. Heinz Ewald (an ace himself with 84 "kills"). During this mission 2 Airacobras fell to their guns ....
.... on the 13. February 1944 Barkhorn shot down his 250. opponent with the same aircraft. His victim was a Yak 1. The beer was well deserved ....
.... this kit is as easy to assemble as the "Emil" in my posting above. Again no putty is needed, it's just the normal sanding. But again I had problems with the pin of the spinner. So I cut it off and glued the spinner to the fuselage. Some care is also needed with the pitot tube, because it's moulded to the upper wing half and can easily break. But I was carefull enough as it stayed in place through the whole assembly. I also wish Eduard would take clear parts for the position lights. It would sure look better. They had the chance to do so when they corrected the form but maybe it was too expensive. Such a form easily can cost 300.000 Euros or more. I wanted to open the cockpit but the white glue I used is so strong that I was afraid to break the clear parts so I leave it this way. Well the next "One O Nine" surely comes ....
.... most of the paints I have used here come from Vallejo. They have expanded their colour range recently and here I have used 71257 (RLM 76) for the underside, 71258 (RLM 74) and 71259 (RLM 75) for the upperside camouflage. Yellow is again Revell 310, Black and White also are Revell Aquas. I have airbrushed the spinner spiral and used the Eduard mask EX500 for it. Black Green RLM 70 for the propeller is 71021 from Vallejo. They slowly become my favourite brand for painting. Opposite to the "Emil" above, I like the mottling on this bird. I have used highly thinned RLM 74, 75 and 02 sprayed with low pressure on the fuselage sides. Some decals are taken from the kit, like all stencils and the Balkenkreuze. I had some problems with them because they are so extremely thin, that they warped, especially those on the wings. But with patience, some "loud speaking" and a lot of water I could save and bring them right in place. The special decals to build "Chevron Triangle 5" are again taken from that Cartograph decal sheet I have mentioned in the other posting. The name "Christl" under the left cockpit side refers to Barkhorn's wife Christa, whom he married in 1943. The couple had 3 daughters.
So, again I thank you for stepping in and walking around my latest Messerschmitt. Both "Barkhorns" can be seen on the next expos I attend in southern Germany and Switzerland.
Happy modelling and have a nice Sunday!
Torsten
Szmann
Netherlands Antilles
Joined: September 02, 2014
KitMaker: 1,977 posts
AeroScale: 295 posts
Joined: September 02, 2014
KitMaker: 1,977 posts
AeroScale: 295 posts
Posted: Saturday, April 21, 2018 - 09:19 PM UTC
Thank you, Torsten! Same there! Are you going to make the whole Jagdgeschwader 52?
Nice Nine-o-Nine again. I remember I've seen a double chevron 5 over "crazy paving" scheme, but I cannot remember who was the pilot. The photo was taken in Romania, during or before Marita, and it's an E-3 (or 4?). I would love to make that one some day...
Cheers!
Gabriel
Nice Nine-o-Nine again. I remember I've seen a double chevron 5 over "crazy paving" scheme, but I cannot remember who was the pilot. The photo was taken in Romania, during or before Marita, and it's an E-3 (or 4?). I would love to make that one some day...
Cheers!
Gabriel
Joel_W
Associate Editor
New York, United States
Joined: December 04, 2010
KitMaker: 11,666 posts
AeroScale: 7,410 posts
Joined: December 04, 2010
KitMaker: 11,666 posts
AeroScale: 7,410 posts
Posted: Saturday, April 21, 2018 - 09:37 PM UTC
Torsten,
Another top quality build to your museum standards. The Biography of Gerd Barkhorn is as interesting as viewing your builds. Thanks for taking the time to share it with us.
Joel
Another top quality build to your museum standards. The Biography of Gerd Barkhorn is as interesting as viewing your builds. Thanks for taking the time to share it with us.
Joel
Posted: Sunday, April 22, 2018 - 11:18 AM UTC
Torsten,
Two excellent 109's! I am doing the Barkhorn G-6 as well, but waiting for new upper wings as mine were flawed.
Very nice work!
Gaz
Two excellent 109's! I am doing the Barkhorn G-6 as well, but waiting for new upper wings as mine were flawed.
Very nice work!
Gaz
BlackWidow
European Union
Joined: August 09, 2009
KitMaker: 1,732 posts
AeroScale: 1,336 posts
Joined: August 09, 2009
KitMaker: 1,732 posts
AeroScale: 1,336 posts
Posted: Monday, April 23, 2018 - 01:02 AM UTC
Thanks again for your feedback, guys! Glad you also like this work.
Gabriel, no, not really. My project is Barkhorn, not the JG 52. That will bring out another 12 different machines he flew, from his first "Emil", when he was still in JG 2 to the Me 262 he flew in April 1945. But that project will go over several years, I hope I can finish it one day. But of course I must also build a Bf 109 from Hartmann. A collection of Luftwaffe planes would be incomplete without him - and Marseille. Barkhorn flew also a "Double Chevron 5". I think it was the plane before this "Chevron Triangle 5".
Joel, the pleasure is all mine, it's also a joy for me. I'm glad you like the way I present my finished models. Barkorn's military life is indeed remarkable. Beside being the 2. ranking fighter ace of WW2, he flew 1104 sorties in 5 years, was shot down at least 3 times and severely wounded in 1944, which kept him in hospitals for 4 months. He lost both brothers Helmut and Dieter and his father Wilhelm in the war and was ill and completely exhausted in the end. Being an aviator from head to toe he agreed to help building up the new Bundesluftwaffe in 1955, flying F-84 and F-104 and became CO of JaboG 31. In 1974 he finally retired for good. Sadly, he left us much too early when he died together with his wife in a car crash near Cologne in January 1983. The accident was not his fault.
Gary, what kit do you use and what markings will your 109 get? With this Eduard kit you can build the "Double Chevron 5" of Barkhorn I mentioned above. But be carefull with the decals, they are very thin and tend to warp. My next 109 is already planned for 2019 and it will get no german markings ....
Happy modelling!
Torsten
Posted: Monday, April 23, 2018 - 01:56 PM UTC
Quoted Text
Gary, what kit do you use and what markings will your 109 get? With this Eduard kit you can build the "Double Chevron 5" of Barkhorn I mentioned above. But be carefull with the decals, they are very thin and tend to warp. My next 109 is already planned for 2019 and it will get no german markings ....
Hi Torsten,
This is the kit and Barkhorn's markings I'm using:
I prefer to find German markings that aren't used by many model builders. I am always looking for interesting pilots. But since I'm doing a comparison build between Tamiya and Eduard, I will use their decals.
Gaz