

Air Campaigns
Want to start or join a group build? This is where to start.
Want to start or join a group build? This is where to start.
Hosted by Frederick Boucher, Michael Satin
OFFICIAL: FW190 'Wurger' Campaign
SGTJKJ

#041

Joined: July 20, 2006
KitMaker: 10,069 posts
AeroScale: 3,788 posts

Posted: Sunday, February 19, 2012 - 03:45 PM UTC
Nice work on that cowling, Chris! It will look stunning on the finished Butcher bird.


bdanie6

Joined: November 09, 2008
KitMaker: 615 posts
AeroScale: 459 posts

Posted: Monday, February 20, 2012 - 01:04 AM UTC
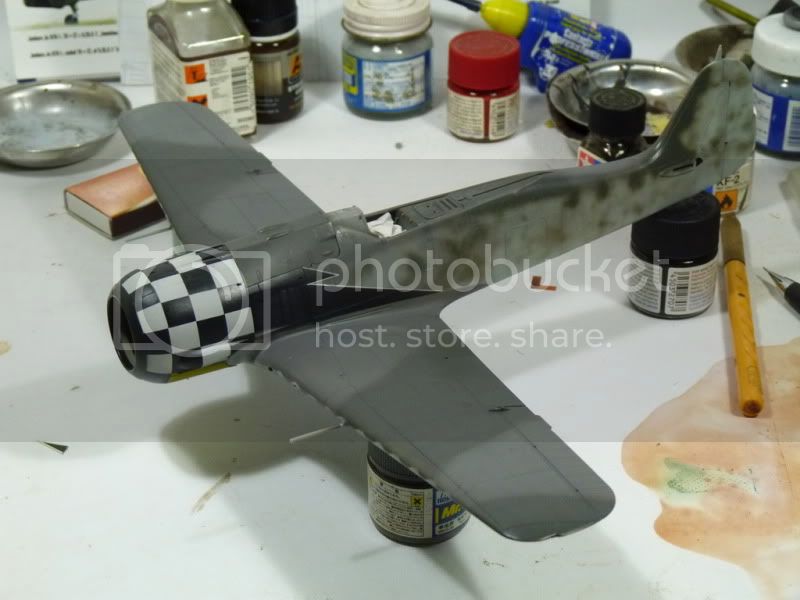
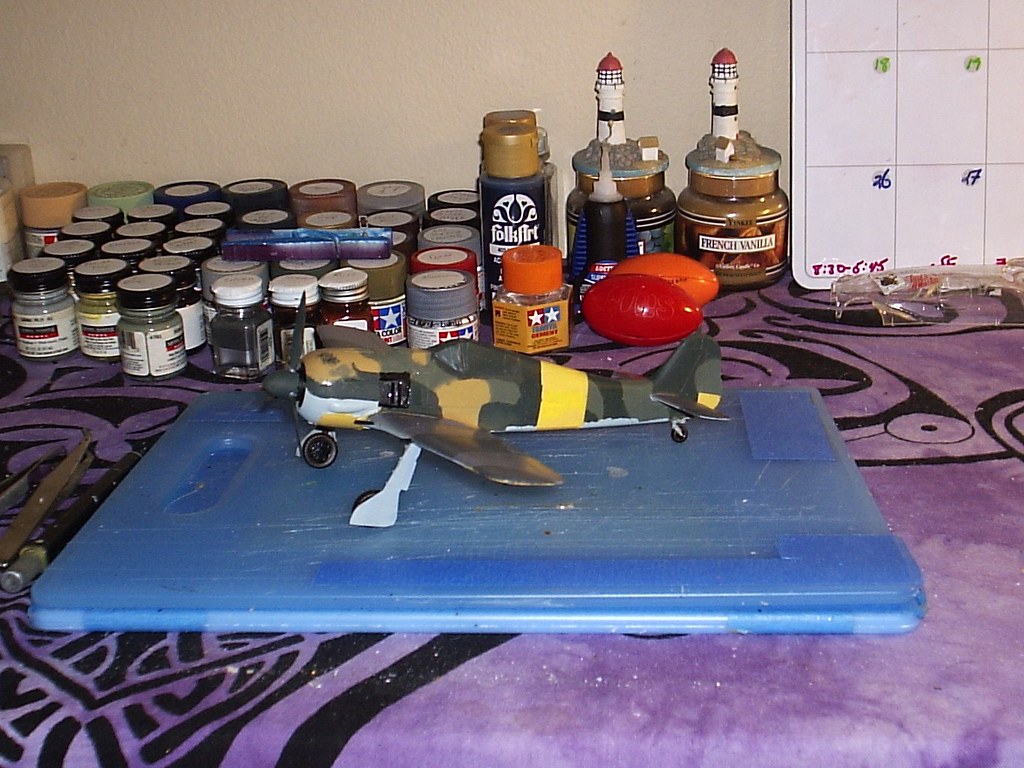
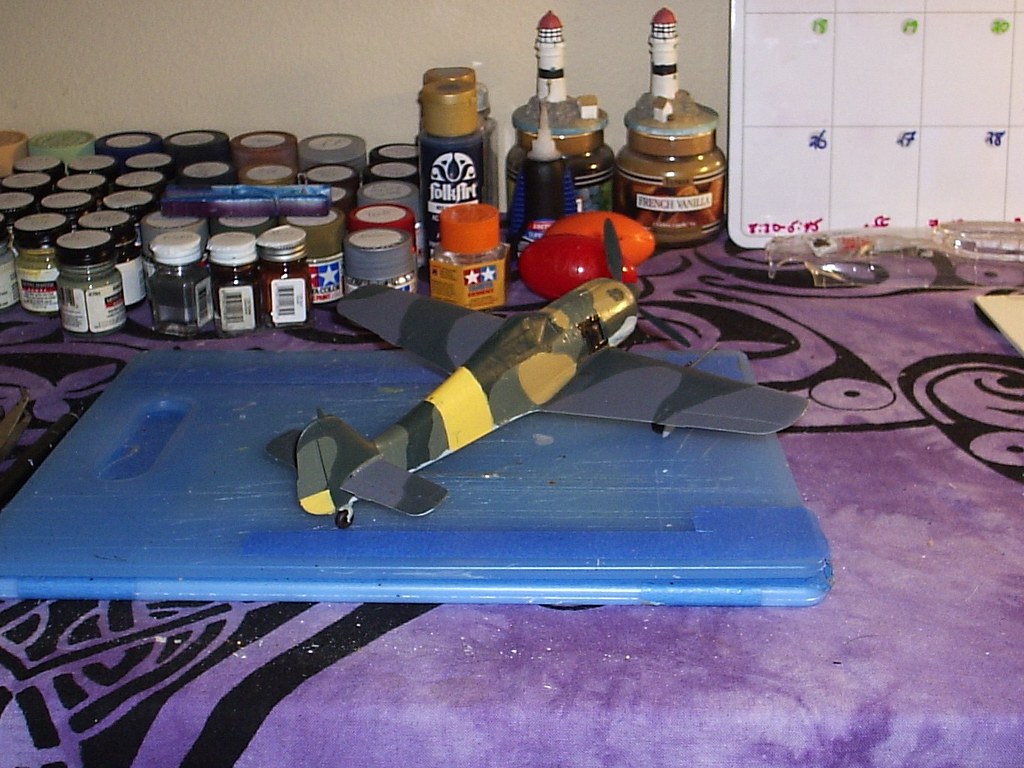
Just two progress pictures to let everyone know I'm still here and watching and working 
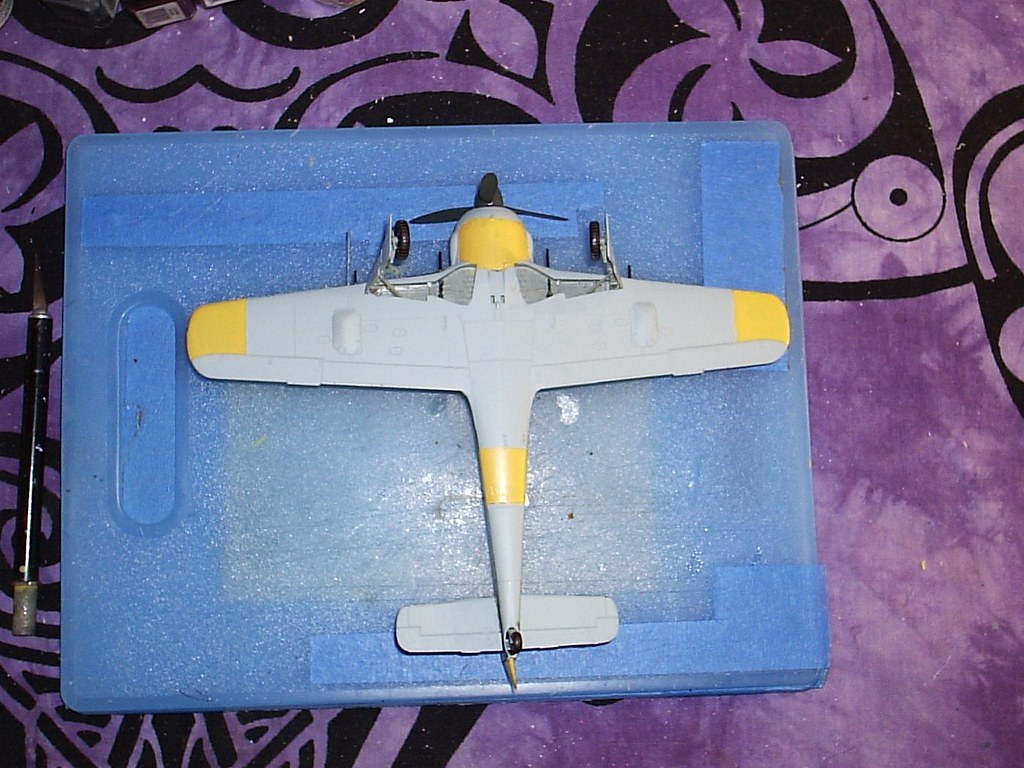
This is how my work space is looking right now
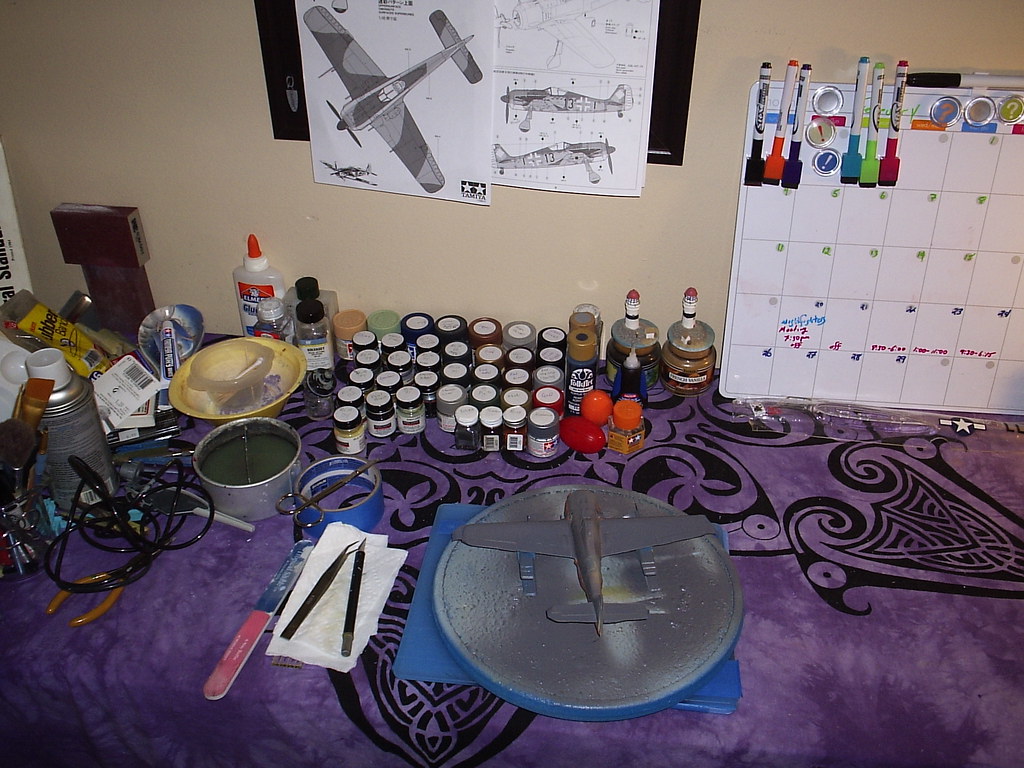
And this is my A-5 with three colours on it. The RLM 04 and RLM 76 are masked, the colour visible is RLM 74. Next comes RLM 75.
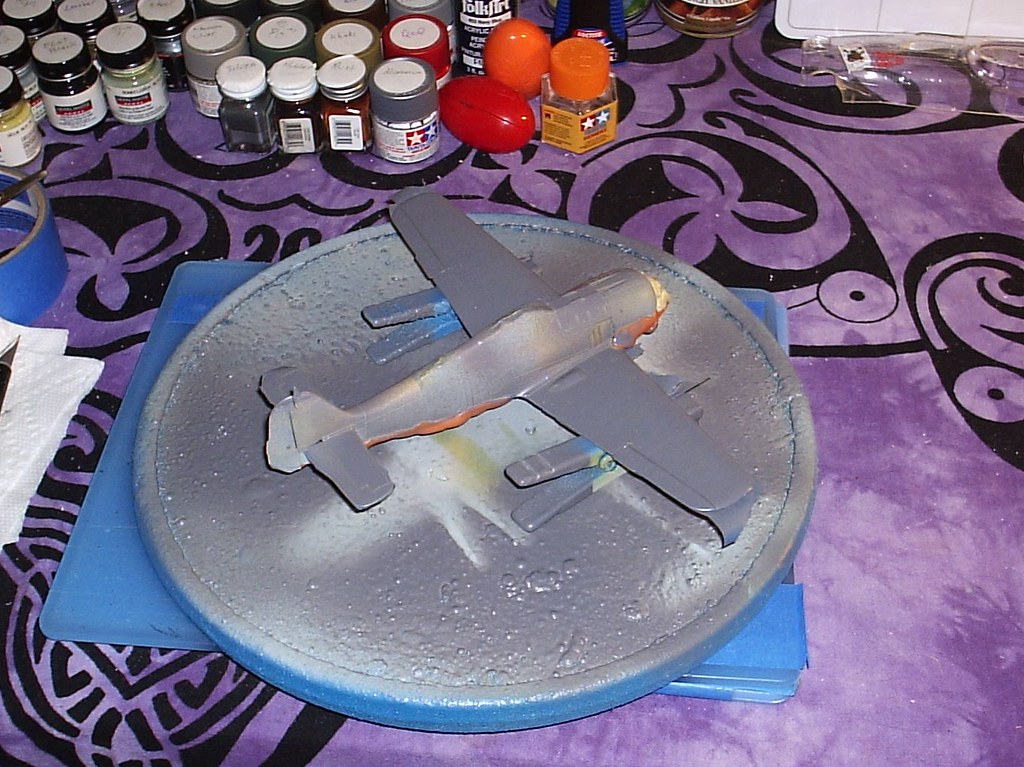
I am using Silly Putty for the masking (for the first time ) I am trying for a soft edged demarcation line.
Later
This is how my work space is looking right now
And this is my A-5 with three colours on it. The RLM 04 and RLM 76 are masked, the colour visible is RLM 74. Next comes RLM 75.
I am using Silly Putty for the masking (for the first time
) I am trying for a soft edged demarcation line.Later
fockewulf

Joined: November 04, 2004
KitMaker: 145 posts
AeroScale: 10 posts
Posted: Tuesday, February 21, 2012 - 03:52 AM UTC
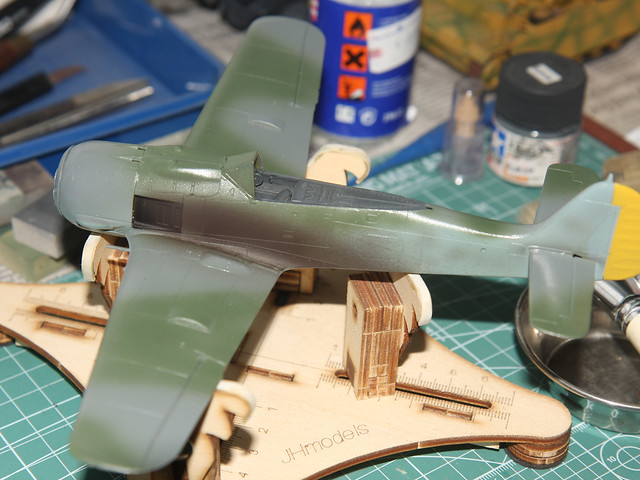
more progress of my wurger. masking, masking and masking...


oraora

Joined: June 19, 2002
KitMaker: 216 posts
AeroScale: 128 posts

Posted: Tuesday, February 21, 2012 - 01:06 PM UTC
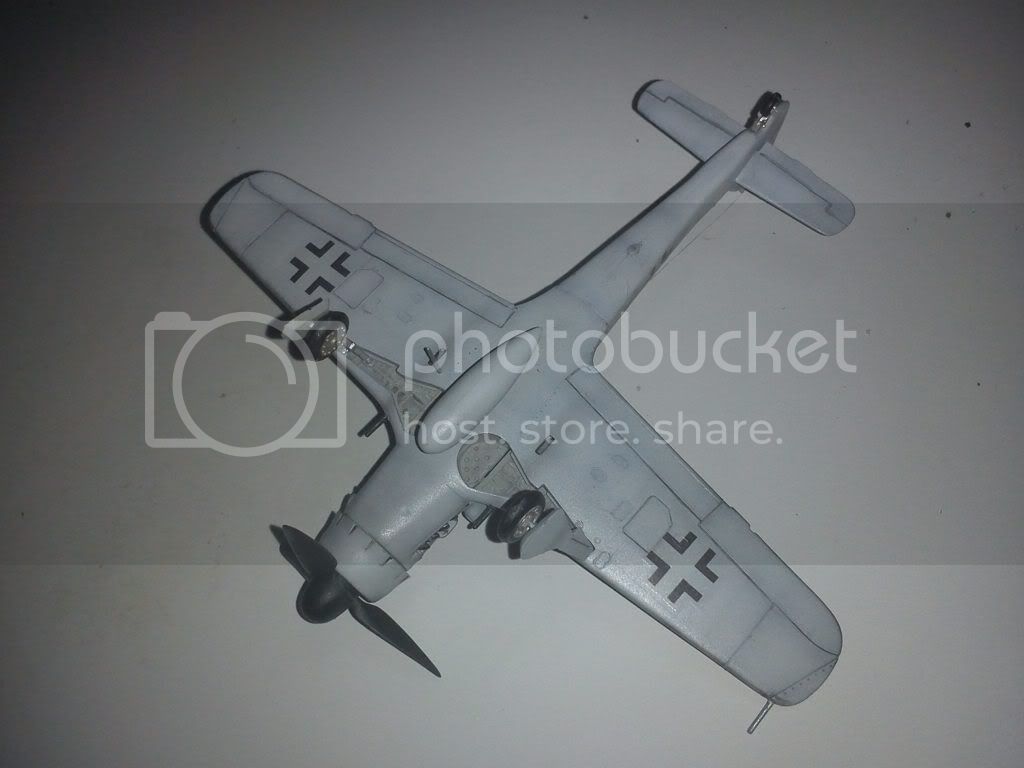
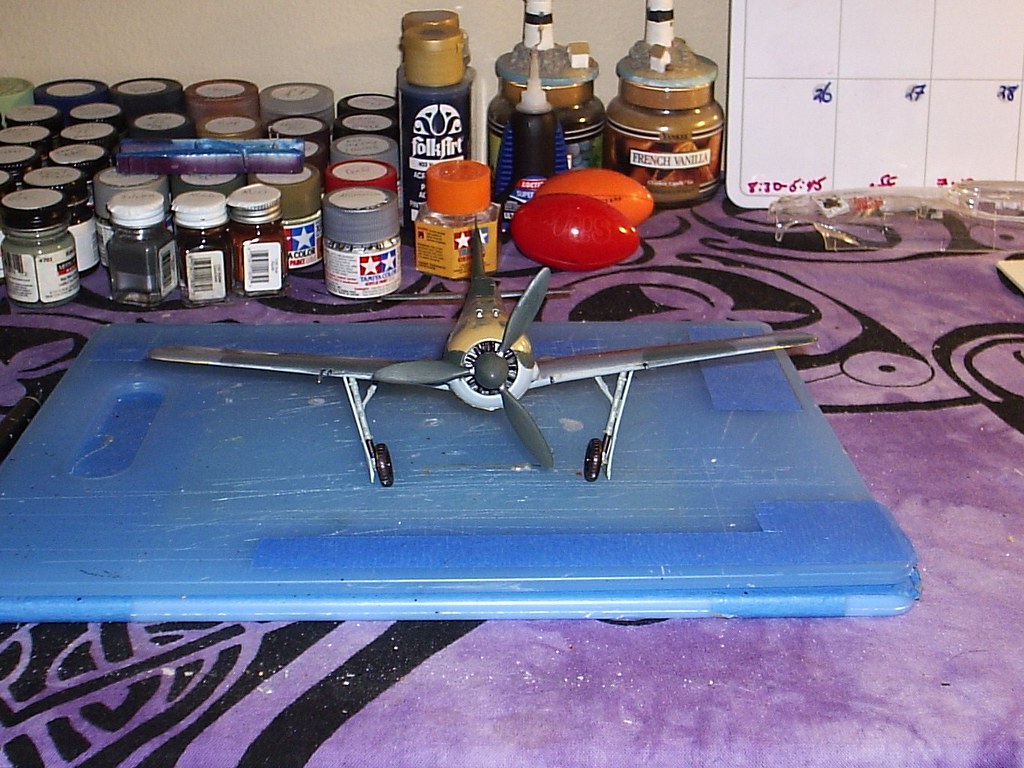
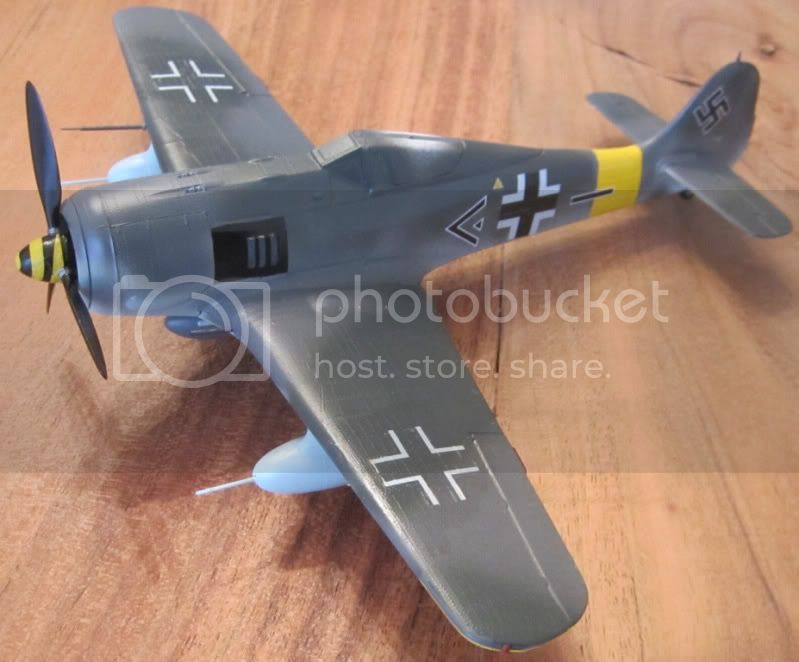
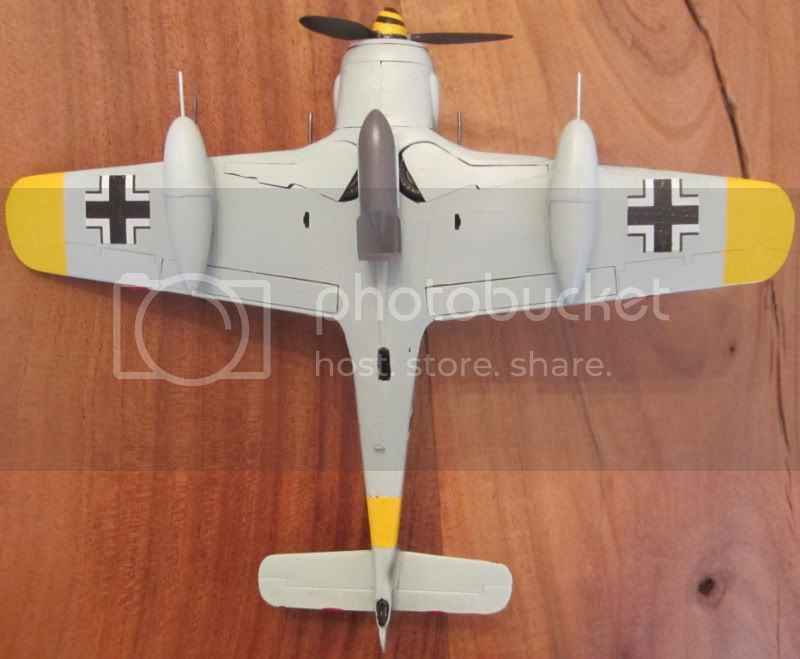
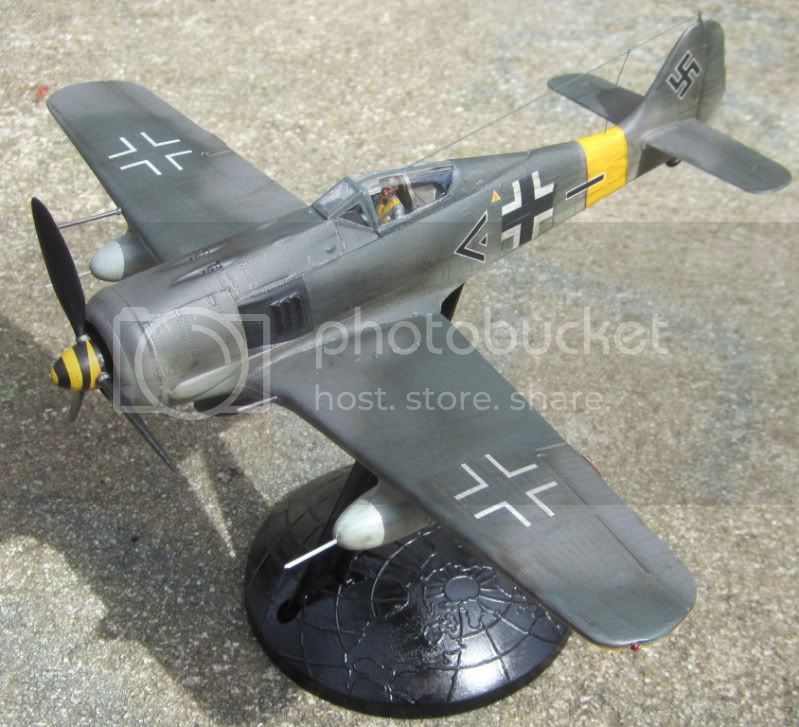
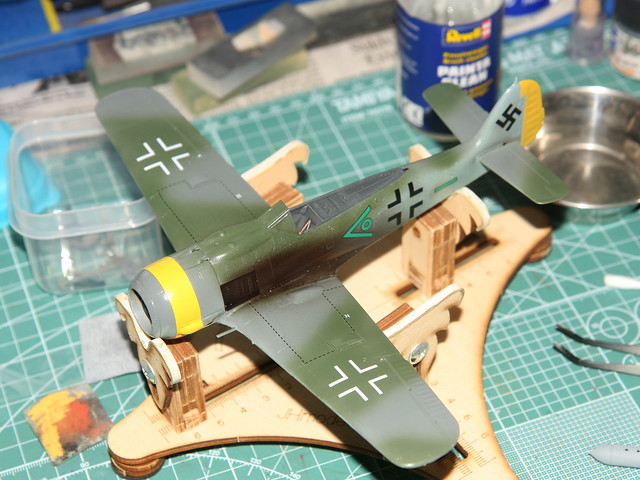
I have just completed my Airfix FW190 D-9. An easy build, on frustration I had were the paints, i dunno why it became so glossy, i had to tone it down with alot of layers of flat coat...
Starboard side
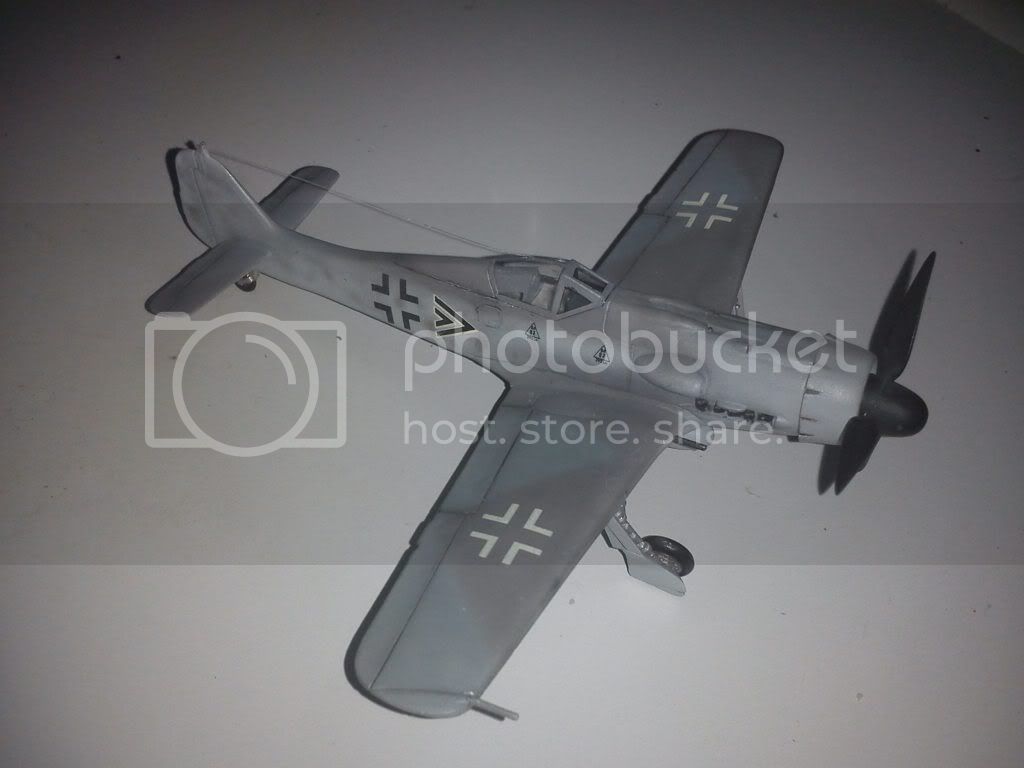
Port Side
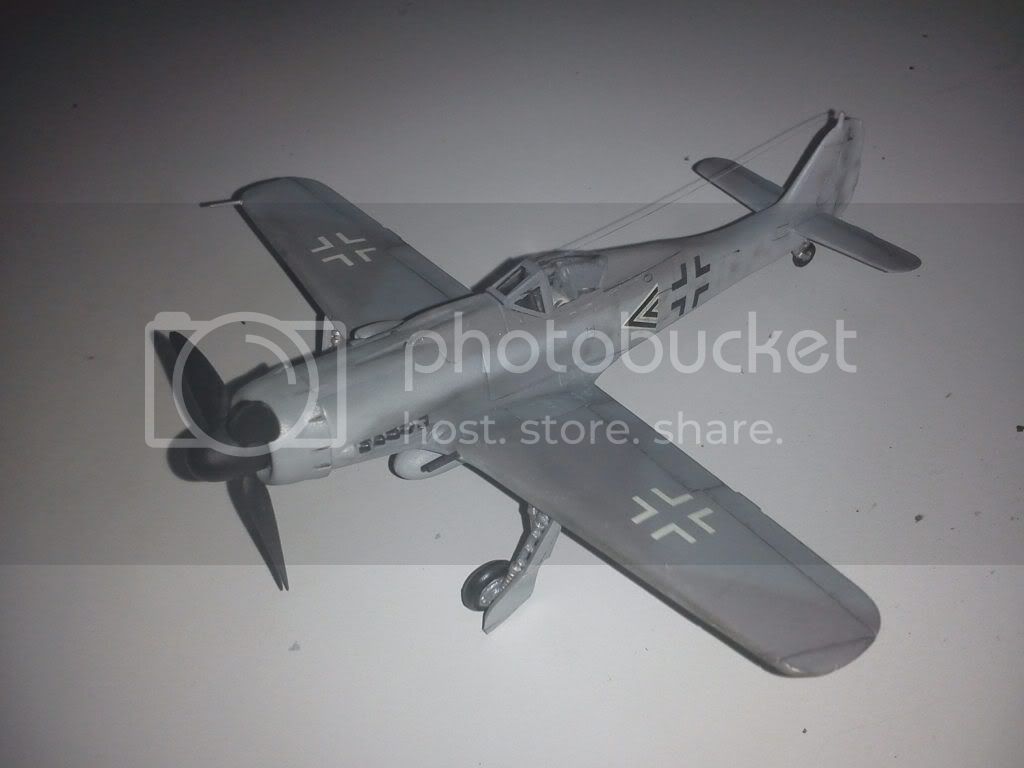
Bottom view
Starboard side
Port Side
Bottom view

Jessie_C


Joined: September 03, 2009
KitMaker: 6,965 posts
AeroScale: 6,247 posts

Posted: Tuesday, February 21, 2012 - 01:11 PM UTC
German paintwork tended to be pretty glossy. I think that the level of gloss you've attained looks pretty realistic in those pictures. Very nicely done 
Relax and celebrate!
Relax and celebrate!
SGTJKJ
#041
Joined: July 20, 2006
KitMaker: 10,069 posts
AeroScale: 3,788 posts
Posted: Wednesday, February 22, 2012 - 05:42 AM UTC
Nice build, Ken. Your Fw 190D looks nice.
oraora
Joined: June 19, 2002
KitMaker: 216 posts
AeroScale: 128 posts
Posted: Wednesday, February 22, 2012 - 12:16 PM UTC
Thanks, Jessica, Jesper.
bdanie6
Joined: November 09, 2008
KitMaker: 615 posts
AeroScale: 459 posts
Posted: Thursday, February 23, 2012 - 04:05 AM UTC
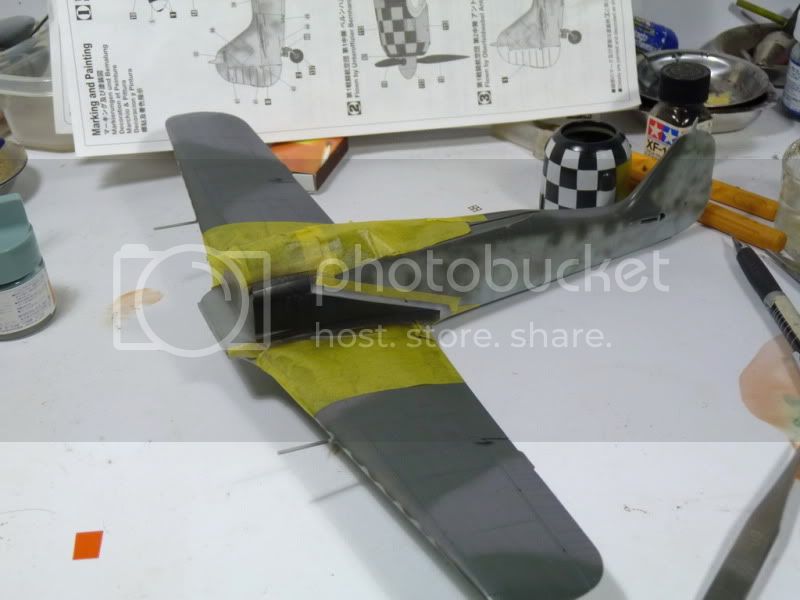
Finally have an update on the A-5. I tried the silly putty trick for soft edge masking. Obviously I need to practice this trick a few more times. I did some touch-ups with a brush. Next comes the gloss coat, decals, flat coat and some weathering. 
And that is it so far folks. More to come...eventually
Later
And that is it so far folks. More to come...eventually
Later

Snorri23
Joined: March 25, 2010
KitMaker: 514 posts
AeroScale: 244 posts
Posted: Thursday, February 23, 2012 - 04:24 AM UTC
I usually use Humbrol satin varnish which gives a slight sheen which I view is appropriate. I have found that the tinlet is a different formula than the bottle and is more aggressive and cuts the future quite nicely. The bottle I need to use a flat coat then use the satin to bring up the sheen. For my build the cast resin fuselage is together now in the process of shoehorning the cockpit into it.

iflytb20

#501

Joined: August 25, 2009
KitMaker: 292 posts
AeroScale: 194 posts

Posted: Thursday, February 23, 2012 - 06:52 AM UTC

SGTJKJ
#041
Joined: July 20, 2006
KitMaker: 10,069 posts
AeroScale: 3,788 posts
Posted: Thursday, February 23, 2012 - 03:09 PM UTC
Nice paint job, Raj.
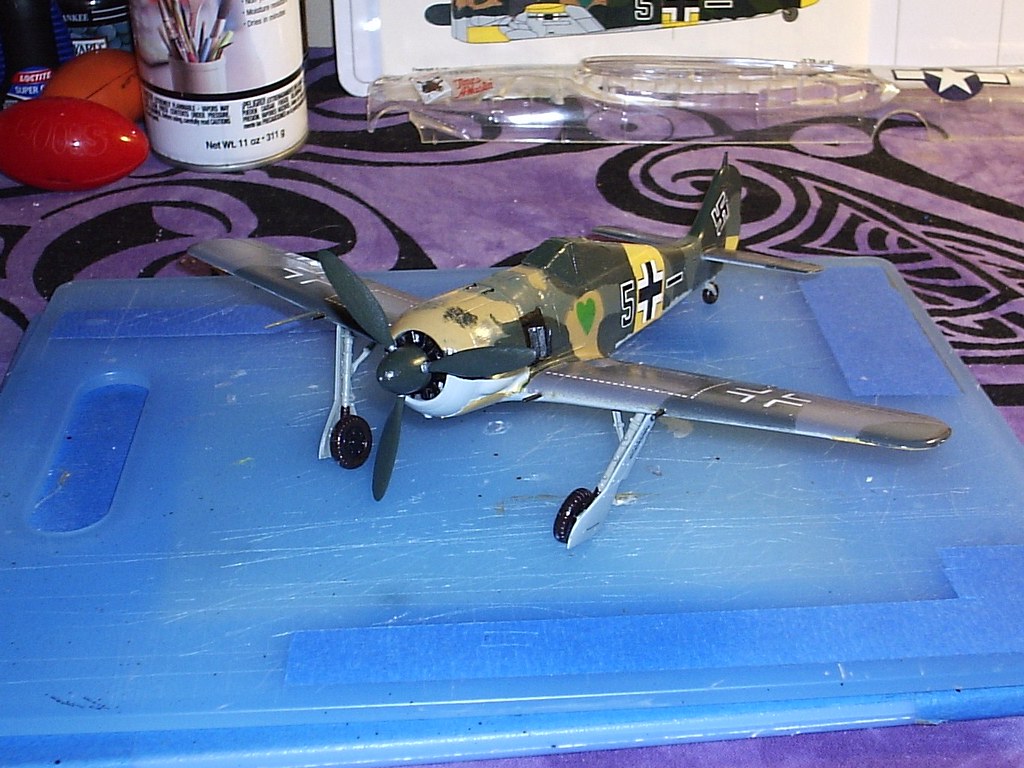
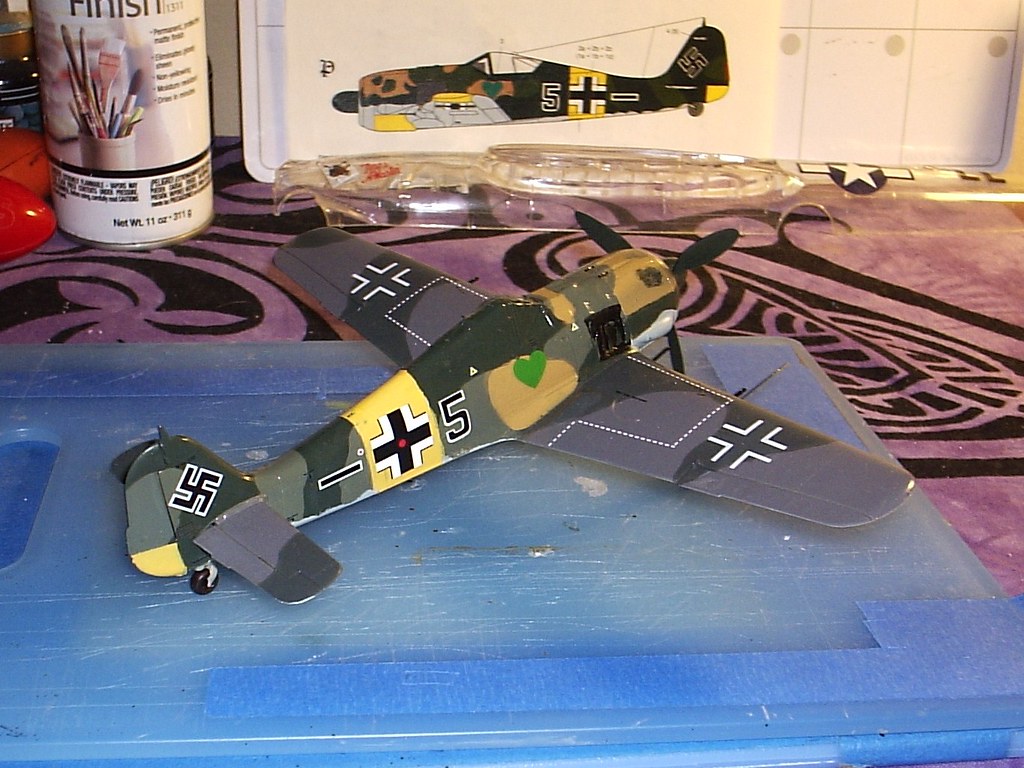
I have made some progress on my Fw190G-3. Next is some weathering and the final details. Work has actually progressed beyond these pictures so more soon.
I have made some progress on my Fw190G-3. Next is some weathering and the final details. Work has actually progressed beyond these pictures so more soon.

magnusf

Joined: May 02, 2006
KitMaker: 1,953 posts
AeroScale: 1,902 posts
Posted: Friday, February 24, 2012 - 08:48 AM UTC

shorty53

#330

Joined: July 15, 2011
KitMaker: 175 posts
AeroScale: 103 posts

Posted: Friday, February 24, 2012 - 06:11 PM UTC
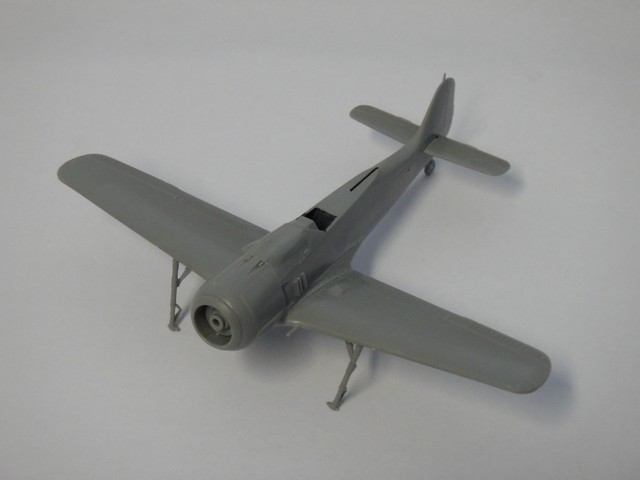
My Fw190, just about ready to get some paint.

oraora
Joined: June 19, 2002
KitMaker: 216 posts
AeroScale: 128 posts
Posted: Friday, February 24, 2012 - 10:04 PM UTC
Jesper, nice built you got there, you even have the swatika, mine was not included..
Chris, I like the engine cowling scheme, very nice.
Bruce, nice camo scheme you got there.
Chris, I like the engine cowling scheme, very nice.
Bruce, nice camo scheme you got there.

eMan
#298

Joined: August 08, 2002
KitMaker: 1,182 posts
AeroScale: 351 posts

Posted: Saturday, February 25, 2012 - 12:45 AM UTC
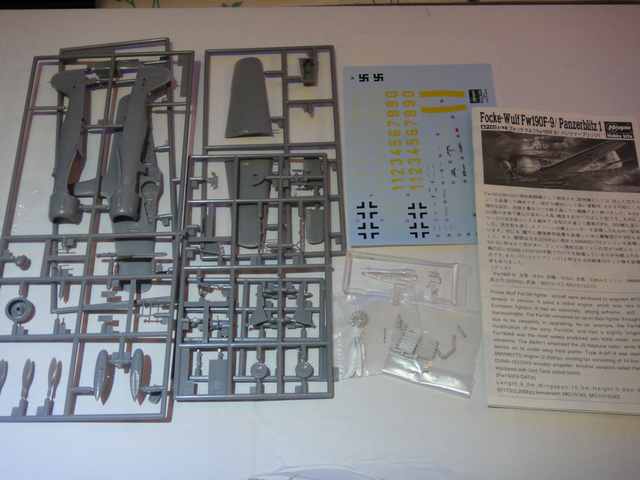
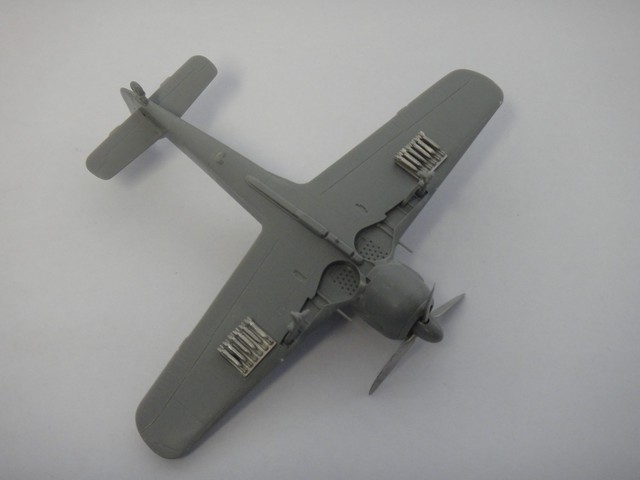
Here is my entry, Hasegawa 1/72 Fw-190F-9 Panzerblitz1.
SGTJKJ
#041
Joined: July 20, 2006
KitMaker: 10,069 posts
AeroScale: 3,788 posts
Posted: Saturday, February 25, 2012 - 06:13 AM UTC
Thanks for the comment, Ken. The swastika was not included in my kit either, but I had some extras from a AM decal sheet.
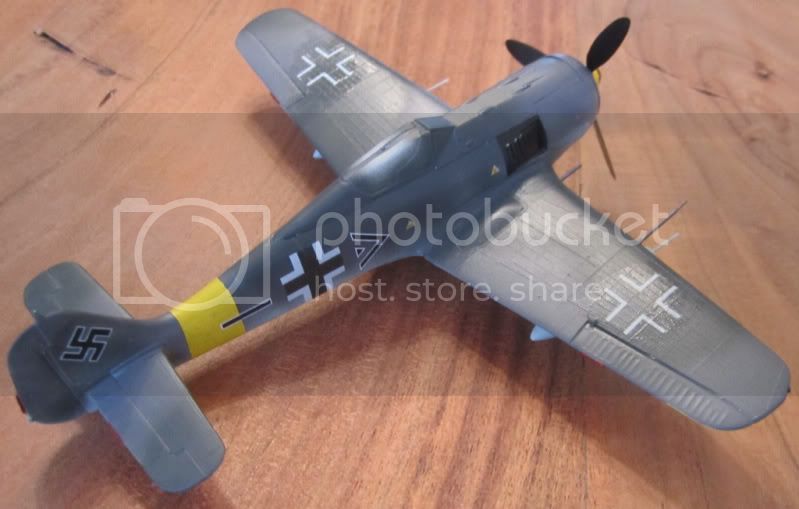
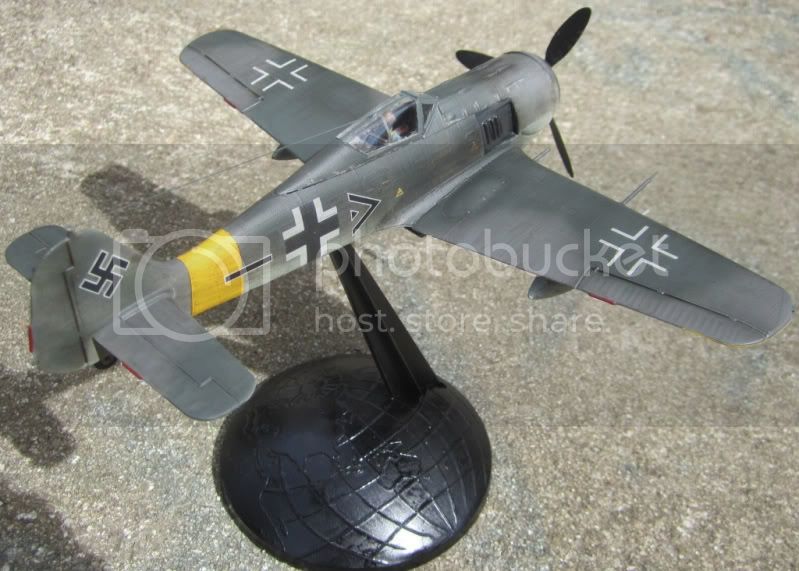
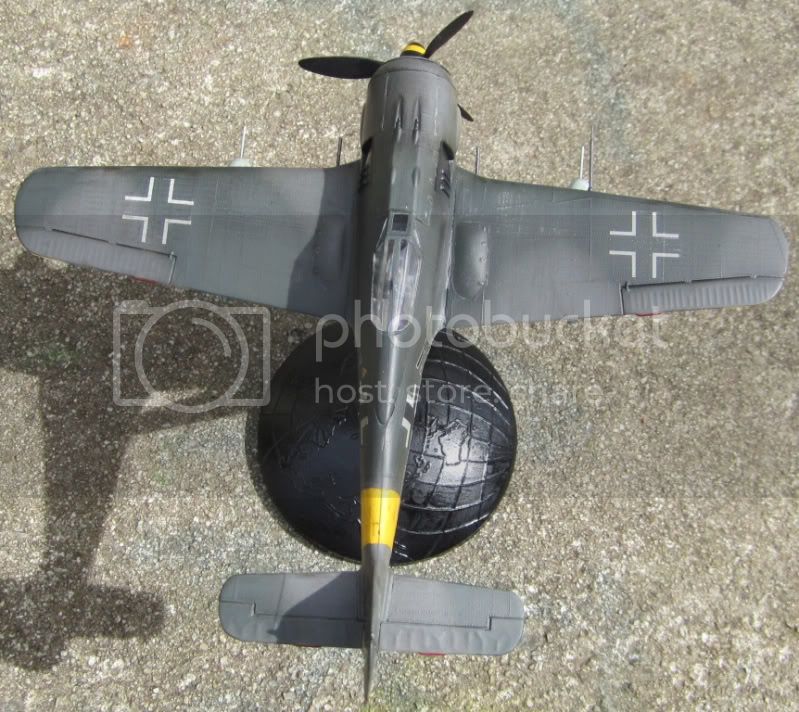
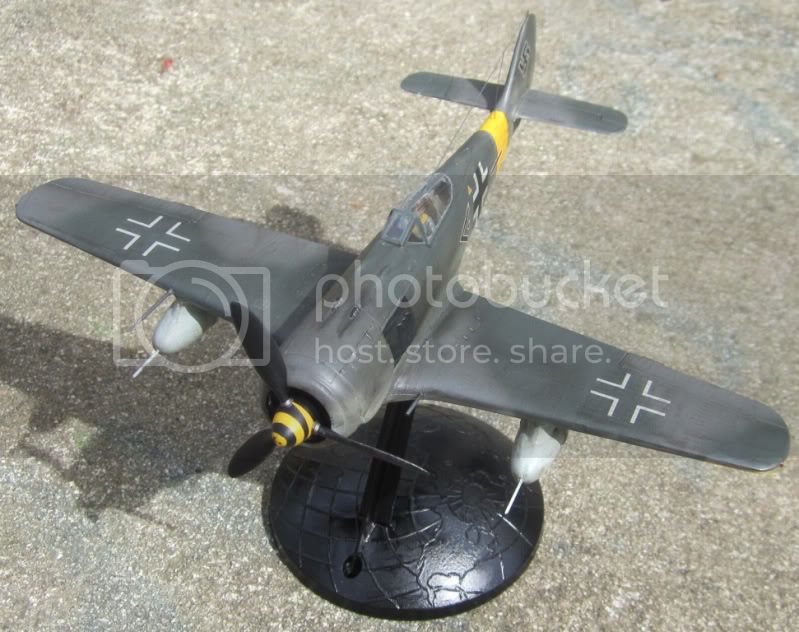
I have now finished my build. An Fw 190G-3 on the Eastern front. It was very difficult to find solid references for this version of the Wurger, so I made a likely marking scheme myself.
Comments welcome
I have now finished my build. An Fw 190G-3 on the Eastern front. It was very difficult to find solid references for this version of the Wurger, so I made a likely marking scheme myself.
Comments welcome

matrixone
Joined: February 07, 2004
KitMaker: 869 posts
AeroScale: 862 posts

Posted: Saturday, February 25, 2012 - 06:43 AM UTC
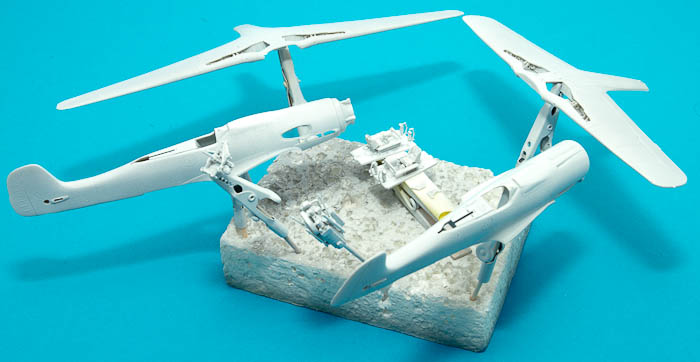
Better late than never, here is my entry for this GB. Its the Otaki 1/48 scale kit.
My model will be built as an abandoned Fw 190 that was discovered months after the war ended and it will have some extreme weathering done to it. I have never built a model like this before so this will be a painting experiment and will be learning as I go.

Matrixone
My model will be built as an abandoned Fw 190 that was discovered months after the war ended and it will have some extreme weathering done to it. I have never built a model like this before so this will be a painting experiment and will be learning as I go.
Matrixone
SGTJKJ
#041
Joined: July 20, 2006
KitMaker: 10,069 posts
AeroScale: 3,788 posts
Posted: Sunday, February 26, 2012 - 11:15 AM UTC
Interesting project, Matrixone. I am sure some excellent photography will follow your finished build.
matrixone
Joined: February 07, 2004
KitMaker: 869 posts
AeroScale: 862 posts
Posted: Monday, February 27, 2012 - 11:43 AM UTC
Thank you Jesper!
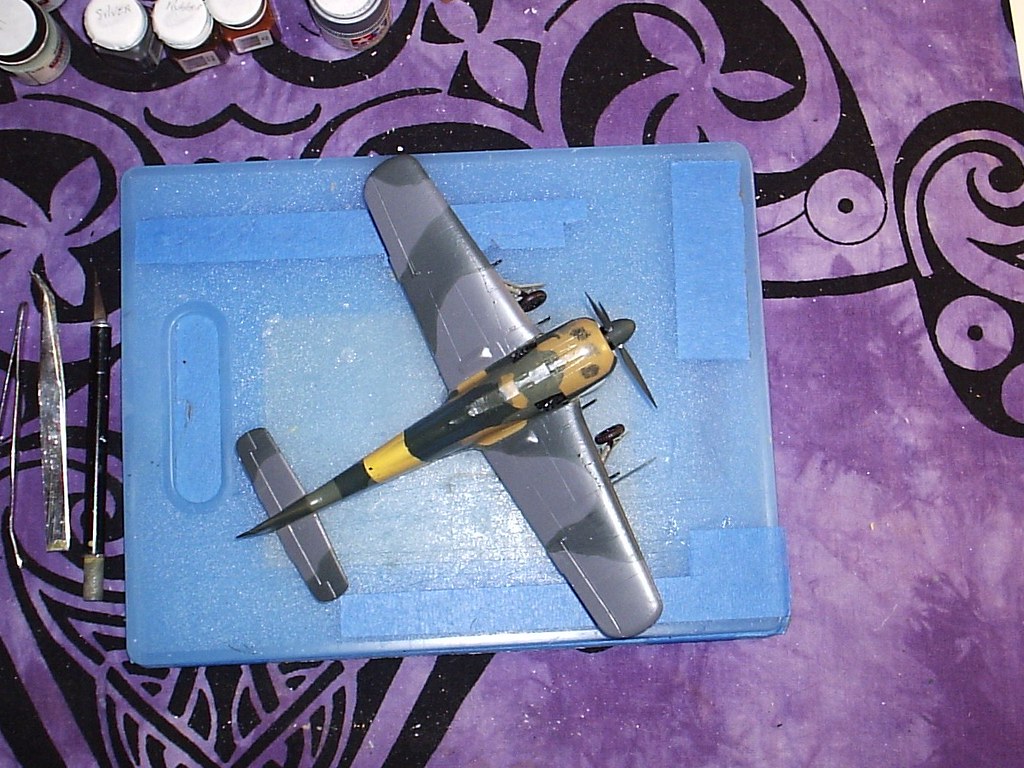
Here is another in-progress pic of my build, this time I painted the uppersurface colors on the wings and tailplane, the wing root was masked off so I could have a sharp line at that area but all other areas were painted free handed with the airbrush. On the wing root you can barely see where I chipped the paint, this was done by using the salt weathering technique. On the fuselage sides I faded out the RLM 76 a little but won't do anymore paint fading until after I get all the markings put on so the markings will look as faded as the rest of the aircraft.

Matrixone
Here is another in-progress pic of my build, this time I painted the uppersurface colors on the wings and tailplane, the wing root was masked off so I could have a sharp line at that area but all other areas were painted free handed with the airbrush. On the wing root you can barely see where I chipped the paint, this was done by using the salt weathering technique. On the fuselage sides I faded out the RLM 76 a little but won't do anymore paint fading until after I get all the markings put on so the markings will look as faded as the rest of the aircraft.
Matrixone
bdanie6
Joined: November 09, 2008
KitMaker: 615 posts
AeroScale: 459 posts
Posted: Tuesday, February 28, 2012 - 07:57 AM UTC
Decals are now on and set. Next comes weathering and then final matting. Just to let everyone know I haven't been sitting around all day doing nothing 
And, of course the display box for it ....but that is coming soon 
Later
And, of course the display box for it
....but that is coming soon Later
eMan
#298
Joined: August 08, 2002
KitMaker: 1,182 posts
AeroScale: 351 posts
Posted: Tuesday, February 28, 2012 - 06:43 PM UTC
Progress update of my Fw190F-9.

matrixone
Joined: February 07, 2004
KitMaker: 869 posts
AeroScale: 862 posts
Posted: Wednesday, February 29, 2012 - 06:11 AM UTC
Nice work everybody!
Here are a couple more pics of entry, since these pics were taken the rest of the camo was painted on and the model clear coated and decals are being put on right now.


The pre-shading on the undersurfaces are too heavy for my taste but after the decals are put on the model there will be more weathering done that will tone down the pre-shading nicely.
Matrixone
Here are a couple more pics of entry, since these pics were taken the rest of the camo was painted on and the model clear coated and decals are being put on right now.
The pre-shading on the undersurfaces are too heavy for my taste but after the decals are put on the model there will be more weathering done that will tone down the pre-shading nicely.
Matrixone

mpatman
Joined: March 09, 2006
KitMaker: 248 posts
AeroScale: 160 posts
Posted: Thursday, March 01, 2012 - 10:38 AM UTC
Wow, some great build in there, congrats to those who have finished already, I have to get my butt into gear and make some progress on mine
Mecenas
Joined: December 23, 2007
KitMaker: 1,596 posts
AeroScale: 1,275 posts
KitMaker: 1,596 posts
AeroScale: 1,275 posts

Posted: Thursday, March 01, 2012 - 08:49 PM UTC
Hi Lap Man!
Do I see the Panzerblitz 1 projectiles and missiles under the wings? Where have you found them?
iflytb20
#501
Joined: August 25, 2009
KitMaker: 292 posts
AeroScale: 194 posts
Posted: Friday, March 02, 2012 - 05:58 AM UTC
 |

WEB HOSTING BY


Copyright ©2021 AeroScale and Kitmaker Network, a subsidiary of Silver Star Enterprises
All Rights Reserved. Please read our Conditions of Use and Privacy Policy.
All Rights Reserved. Please read our Conditions of Use and Privacy Policy.