


Air Campaigns
Want to start or join a group build? This is where to start.
Want to start or join a group build? This is where to start.
Hosted by Frederick Boucher, Michael Satin
OFFICIAL: FW190 'Wurger' Campaign

shorty53

#330

Joined: July 15, 2011
KitMaker: 175 posts
AeroScale: 103 posts

Posted: Monday, January 23, 2012 - 09:07 PM UTC
This my entry for the group build, will be OOB.

greif8

Joined: January 17, 2006
KitMaker: 673 posts
AeroScale: 492 posts

Posted: Saturday, January 28, 2012 - 08:36 PM UTC
And the great work continues on the builds here.
Torsten, your pair of Butcher Birds is looking very nice indeed.
Aaron, the feathering on the paint job of the Dora also looks really good.
Kevin, the office of you Würger looks outstanding. Excellent job on the seatbelts.
I have made some progress on my A-5. I decided to show it closed up which turned out to be a lot of work. Eduard engineered the parts to be show open and they needed some work to get them aligned properly while closed.
flyboy92187

Joined: March 30, 2011
KitMaker: 199 posts
AeroScale: 150 posts

Posted: Monday, January 30, 2012 - 08:50 AM UTC
Count me in, I got the Hasegawa D9 combo kit, So I will double down. Got a start this morning, did up the cockpits, and joined the Fuselage, and masked the gear bays. I found that using a kneadable eraser and a sculpting tool, I can get a pretty good seal, which leaves no residue, and is much less time consuming then taping off.


This is what I get for refilling my coffee....

This is what I get for refilling my coffee....

mpatman
Joined: March 09, 2006
KitMaker: 248 posts
AeroScale: 160 posts

Posted: Tuesday, January 31, 2012 - 10:22 AM UTC
Welcome aboard guys!
Ernest, the engine looks great, its a shame that they look so much better closed up
I will be doing the same with my Eduard kit.
Ernest, the engine looks great, its a shame that they look so much better closed up
I will be doing the same with my Eduard kit.

eseperic

Joined: November 06, 2009
KitMaker: 624 posts
AeroScale: 609 posts

Posted: Tuesday, January 31, 2012 - 10:43 AM UTC


bdanie6
Joined: November 09, 2008
KitMaker: 615 posts
AeroScale: 459 posts

Posted: Wednesday, February 01, 2012 - 02:43 AM UTC
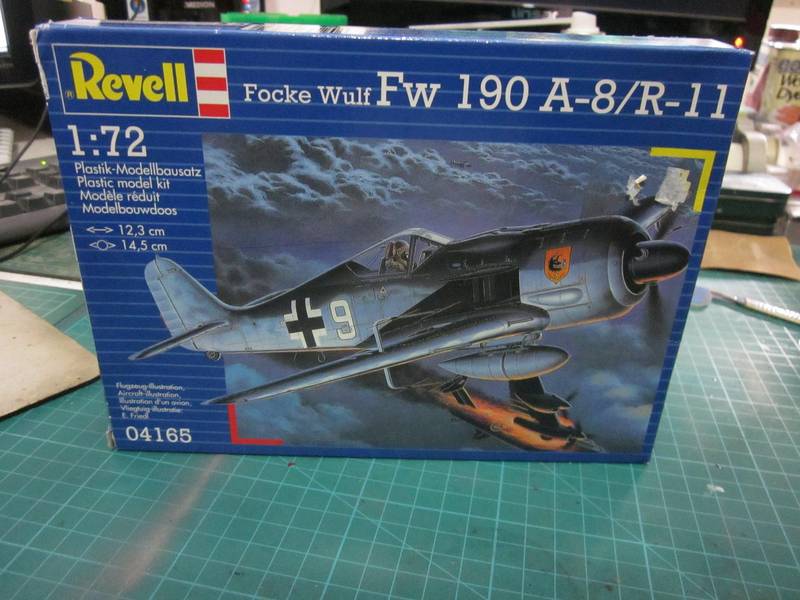
 BLAST! The mythical "unbuildable" kit monster strikes again!
 Okay, I've been working on my Eduard Weekend Fw-190A-8 and have had nothing but problems with it. I suspect a warped fuselage but I can't for the life of me see where it goes bad. I installed the cockpit with no problems. Putting in the forward machine gun bay was a nightmare tho. I test fit it a few times as I was building it and didn't see any problems, but as soon as I applied glue, everything went pear shaped. I took it out, cleaned everything off and re-installed, and repeat 4 more times. Okay, so we keep the machine gun cover closed.
Attached fuselage to wings. Absolutely perfect fit on the port side. At least 2mm gap on starboard side
 Can we say putty? Attached ailerons...eh. Passable.
Glued upper instrument panel to cowling...good, gun sight installed, also good, mount cowl to plane..not good, the gap between the combing is so wide the whole thing just drops thru. Squeeze the combing tight enough to get the cowling on and the instrument panel won't fit into the gap.
Anybody got a Tamyia 190?

Oh well, I maybe a bit late getting this one done in time Sam, but I haven't quit yet.

Later


BlackWidow

Joined: August 09, 2009
KitMaker: 1,732 posts
AeroScale: 1,336 posts
Posted: Wednesday, February 01, 2012 - 05:28 AM UTC
I'm sorry to hear about all the problems you have with the "Hundredninety", Bruce. That's why I kicked my Eduard Weekend A-8 in the bin after 2 weeks and went for the Tamiya kit. A bit more expensive than Eduard but worth every Cent. On the other hand Eduard's "190s" (yes, all of them) are well known for causing problems if you don't build the kit Eduard wants you to do .....
Anyway, I call my dual combo clear for Take-Off. Both kits were started on 1. January 2012 and finished on 31. January 2012. I think that's a new speed record for me, but not in purpose. These beauties gave me no problems building them but the paint job was another story ....
  First the problems with Testors RLM 76, which came off again with the tape and afterwards my always faithfull Agama paints made a mess when RLM 81 left a grey dust on the surface So everything had to be repainted with Gunze. This time everything went fine. Finally after completing the D-9 and carrying away from the workbench to the shelf I banged my ellbow on a stool and the "Dora" fell about 1,50 meters down on its landing gear. I was shocked for a minute or so but fortunatly nothing serious happened. Only the Morane antenna broke off and one main wheel got loose. Repairs took 5 minutes and now here she is, my "Diva Dora" ....
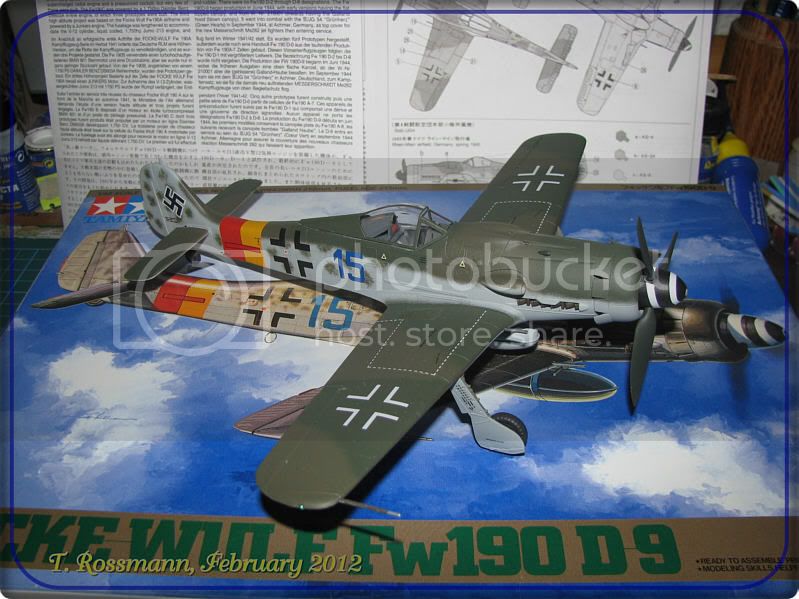
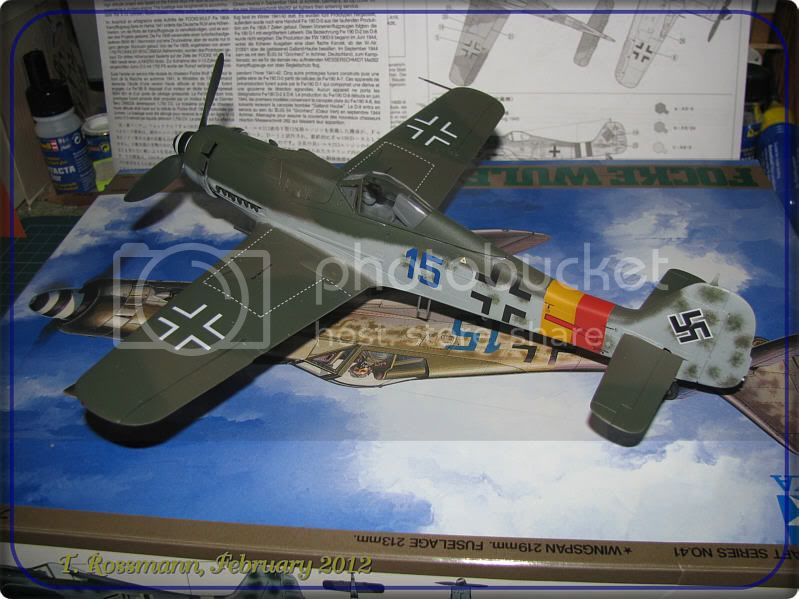
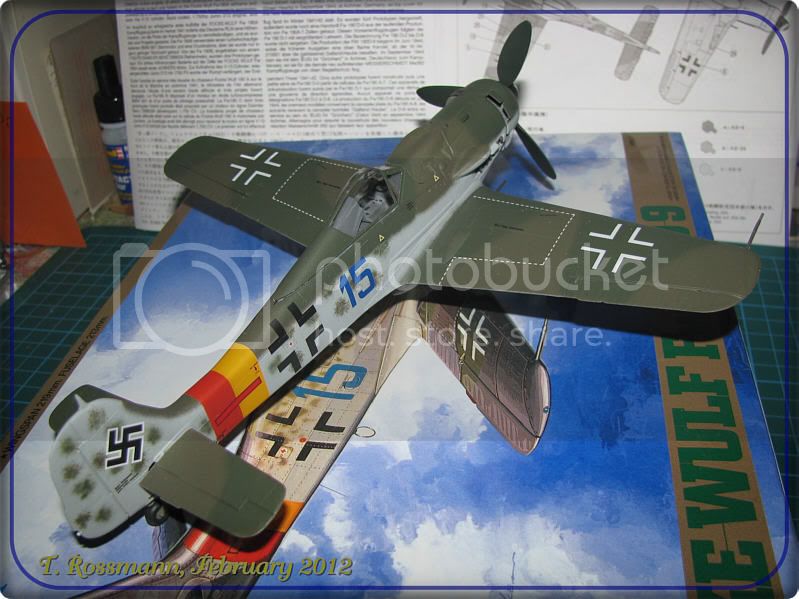

The F-8 also didn't give my any troubles with the build just painting the white camo took a few days. After all I think these stripes should be a bit wider, comparing it with the original photo. But I like it the way it is. Here no paint probemls at all, everything is painted with Agama, the white camo comes from Gunze. For armament I've chosen the Panzerblitz anti tank rockets with all those T-34 crawling around ....


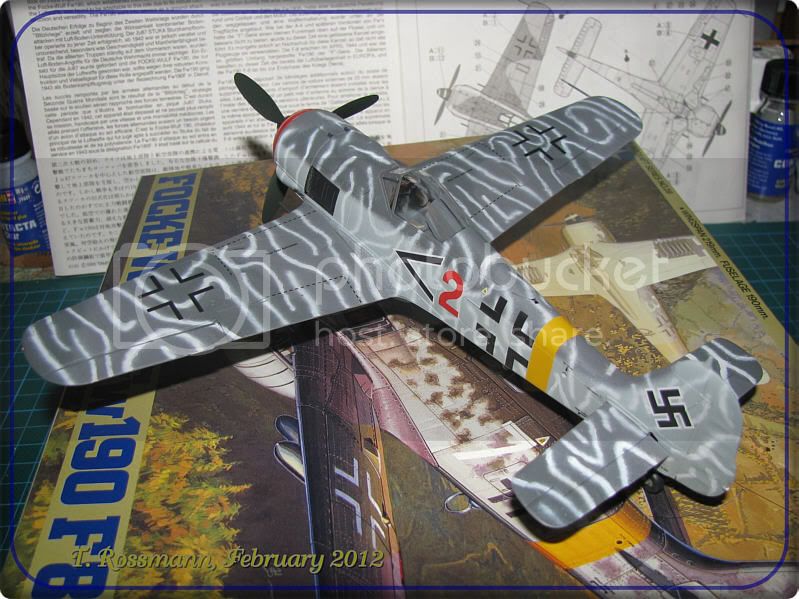

Here are both newbies together. I try to make some better pics in the next 2 weeks and put some of them in the Campaign Gallery.

I have another "Friedrich" in my stash and that one will get an MTO paint sheme of RLM 78/79 when I build it ....
Happy modelling!
Torsten
Anyway, I call my dual combo clear for Take-Off.
Both kits were started on 1. January 2012 and finished on 31. January 2012. I think that's a new speed record for me, but not in purpose. These beauties gave me no problems building them but the paint job was another story .... First the problems with Testors RLM 76, which came off again with the tape and afterwards my always faithfull Agama paints made a mess when RLM 81 left a grey dust on the surface So everything had to be repainted with Gunze. This time everything went fine. Finally after completing the D-9 and carrying away from the workbench to the shelf I banged my ellbow on a stool and the "Dora" fell about 1,50 meters down on its landing gear. I was shocked for a minute or so but fortunatly nothing serious happened. Only the Morane antenna broke off and one main wheel got loose. Repairs took 5 minutes and now here she is, my "Diva Dora" .... The F-8 also didn't give my any troubles with the build just painting the white camo took a few days. After all I think these stripes should be a bit wider, comparing it with the original photo. But I like it the way it is. Here no paint probemls at all, everything is painted with Agama, the white camo comes from Gunze. For armament I've chosen the Panzerblitz anti tank rockets with all those T-34 crawling around ....
Here are both newbies together. I try to make some better pics in the next 2 weeks and put some of them in the Campaign Gallery.
I have another "Friedrich" in my stash and that one will get an MTO paint sheme of RLM 78/79 when I build it ....
Happy modelling!
Torsten

greif8
Joined: January 17, 2006
KitMaker: 673 posts
AeroScale: 492 posts
Posted: Wednesday, February 01, 2012 - 09:38 PM UTC
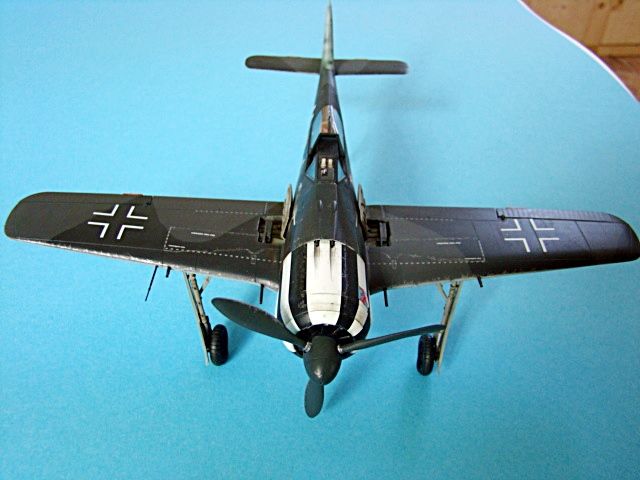
The great builds continue; lots of eye candy to oogle! I have finished general painting, the gloss coat and decaling of my build. Enjoy the photos.


dbmdyxl
Joined: May 20, 2011
KitMaker: 30 posts
AeroScale: 28 posts

Posted: Thursday, February 02, 2012 - 11:31 AM UTC
Hi Ernest, what colors did you use for the camouflage?
Quoted Text
The great builds continue; lots of eye candy to oogle! I have finished general painting, the gloss coat and decaling of my build. Enjoy the photos.

Siderius
Joined: September 20, 2005
KitMaker: 1,747 posts
AeroScale: 1,673 posts
Posted: Thursday, February 02, 2012 - 03:04 PM UTC
Torsten, fantastic builds there. Kurt Tank's beautiful design seems timeless to me.
Ernest, looking good too. Really like the nose of your FW. Looking forward to seeing it finished. Russell
Ernest, looking good too. Really like the nose of your FW. Looking forward to seeing it finished. Russell

greif8
Joined: January 17, 2006
KitMaker: 673 posts
AeroScale: 492 posts
Posted: Thursday, February 02, 2012 - 07:46 PM UTC
Hi Jiang, I used the Vallejo Model Air paint equivilents for RLM 74, 75 and 76 for the camo job. The paint job looks a bit dark right now, future has a way of doing that, but it will lighten up when I fade and weather the paint job.
Ernest
Ernest
Quoted Text
Hi Ernest, what colors did you use for the camouflage?Quoted TextThe great builds continue; lots of eye candy to oogle! I have finished general painting, the gloss coat and decaling of my build. Enjoy the photos.
mpatman
Joined: March 09, 2006
KitMaker: 248 posts
AeroScale: 160 posts
Posted: Saturday, February 04, 2012 - 07:36 AM UTC
Torsten, great effort with both your builds, they look great, love the F-8 in particular, very cool paint scheme!
Ernest, that paintwork is very slick, the black and white nose stripes are very eye-catching!
I have not had much time to do any modelling of late myself but plan on getting some done today, I'll post some pics if I make any prgress with my builds.
Happy modelling all!
Ernest, that paintwork is very slick, the black and white nose stripes are very eye-catching!
I have not had much time to do any modelling of late myself but plan on getting some done today, I'll post some pics if I make any prgress with my builds.
Happy modelling all!

611_sqd

Joined: January 24, 2011
KitMaker: 470 posts
AeroScale: 99 posts
Posted: Saturday, February 04, 2012 - 01:54 PM UTC
Here is my finished kit. Dropped once by me and attacked by my 2 year old. Looks good for me. Hasegawa 1/72 190D
Pic posted to the gallery

Pic posted to the gallery


c4willy
#305

Joined: February 01, 2006
KitMaker: 1,673 posts
AeroScale: 1,517 posts

Posted: Saturday, February 04, 2012 - 08:20 PM UTC
Time for a few in progress shots eh? We've all heard that the 1/24 Airfix kit has fit issues, the engine, the forward panels and the wing to fuselage to mention a few. I've even heard it said the kit is nearly unbuildable. However after studying what was available on the web and the drastic measures taken to make it all fit. I was determined to use the kit parts and not resort to drastic surgery if I could at all help it.
The cockpit tub was one of the first problems I tackled, it became apparent very quickly that it was not shaped to easily fit into the fuselage. To help with this I taped the fuselage halves together and filed the cockpit tub till it fit more or less perfectly and the instrument shroud actually met! It took a couple of hours of filing and sanding but the end result was more than worth it. I glued the bottom portion of the fuselage (the parts visible in the inboard canon bays) on first and let it dry overnight and then I glued the halves and the cockpit tub together held in place by Tamiya masking tape till it had dried overnight.
I spent some time working out how best to approach the second hurdle that of the engine cooling fan sitting 6mm to far forward and decided to sand every flush fitting surface. I also took the step of sanding the engine mounting ring and recessing the engine mounts by about 2mm. This necessitated the filing of the engine mount attachments so that they would fit into the recessed holes. It didn't take all that long and I'll be the first to admit that it was all guess work, however it turned out pretty much on the money so to speak! I've included a few to pics to illustrate what I mean.
To sort out the front panel problem I glued on the lower wing and used spring clamps to hold it and the parts of the cowl moulded to the fuselage together. I glued the oil ring to the front cowl and then the top three panels to that and left it all to dry overnight. Then I fitted it to the lower parts of the cowl. The fit was not that great but to get it all to conform I used some styrene shims to pack out the gaps and then I used electricians insulation tape, the glory of this tape is that you can stretch it and it'll pull all the panels together nicely! The kit is pretty much together now and I've a few sink holes to fill, some detail to rescribe and some rivet detail to replace but this kit went together well and looks pretty darn good! This is going to be one very big birdie!

AussieReg

#007
Joined: June 09, 2009
KitMaker: 8,156 posts
AeroScale: 3,756 posts
Posted: Saturday, February 04, 2012 - 09:19 PM UTC
Nice work Chris, I'll bookmark this thread for when I get started on the one my 9yo boy Josh picked up from a swap meet. Looks like it will be a fun father-and-son build !
Cheers, D
Cheers, D

greif8
Joined: January 17, 2006
KitMaker: 673 posts
AeroScale: 492 posts
Posted: Saturday, February 04, 2012 - 09:23 PM UTC
Aaron, nice little build there. It looks in good shape, I can't see any damage.
Chris, you builds looks like it is progessing nicely.
I have finished my build. The Fw 190 kits have a rep for being somewhat difficult to build and this one certainly fit that bill. Nothing relaxing about this build at all! It turn out ok. I am planning on showing it as the centerpiece of a diorama representing the zeroing of the weapons. That is a project for the future as I just recieved a commission to build Revell's 1/32 scale Arado AR 196.
Enjoy the photos,
Ernest


Chris, you builds looks like it is progessing nicely.
I have finished my build. The Fw 190 kits have a rep for being somewhat difficult to build and this one certainly fit that bill. Nothing relaxing about this build at all!
It turn out ok. I am planning on showing it as the centerpiece of a diorama representing the zeroing of the weapons. That is a project for the future as I just recieved a commission to build Revell's 1/32 scale Arado AR 196.Enjoy the photos,
Ernest
c4willy
#305
Joined: February 01, 2006
KitMaker: 1,673 posts
AeroScale: 1,517 posts
Posted: Saturday, February 04, 2012 - 11:47 PM UTC
@Damian: Thanks Damian I've started a build log so I could lay out what I've done with a little more detail. Look in the World War II forum it's titled Airfix 1/24 Fw190. If it seems a little disjointed let me know and I'll re-write it so that it's more understandable.
flyboy92187
Joined: March 30, 2011
KitMaker: 199 posts
AeroScale: 150 posts
Posted: Monday, February 06, 2012 - 05:54 AM UTC
Progress across the board is looking really good!!!
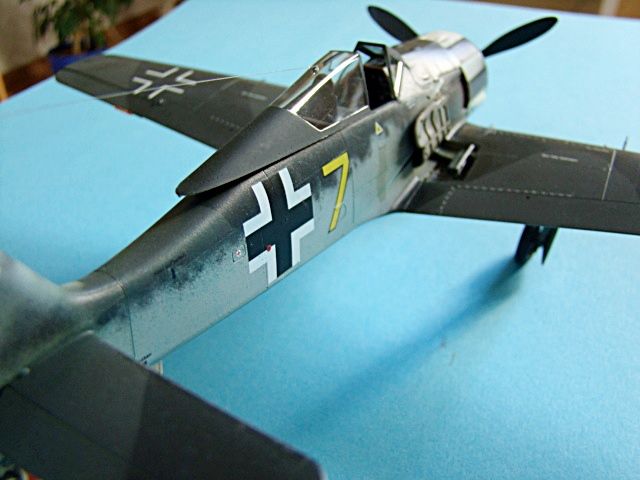
I was able to prime, preshade, paint, gloss, and begin the decals, so here are a few pictures.


I was able to prime, preshade, paint, gloss, and begin the decals, so here are a few pictures.

iflytb20

#501

Joined: August 25, 2009
KitMaker: 292 posts
AeroScale: 194 posts

Posted: Monday, February 06, 2012 - 10:47 PM UTC


Torchy
#047

Joined: September 13, 2005
KitMaker: 2,016 posts
AeroScale: 475 posts

Posted: Tuesday, February 07, 2012 - 01:01 AM UTC
Hi guys
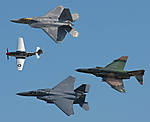
found this in the stash
will start it soon
Andy
found this in the stash
will start it soon
Andy

bdanie6
Joined: November 09, 2008
KitMaker: 615 posts
AeroScale: 459 posts
Posted: Tuesday, February 07, 2012 - 01:28 AM UTC
Hi everyone, opinion and info needed here. Received my Tamyia A-3 in the mail yesterday (from Scalehobbyist). Problem is I don't have any A-3 markings. My decals from JG-54 start at A-4, which are all white. Boring (I've done one already). When I was researching on the Internet, it looked to me that physically, at least, the A-3 to A-6 where the same except for the radio antenna mount on top of the rudder. So...
1 is that correct and 2 would it make a difference here if I made the change to an A-4 or A-6 since those are the ones I have markings for?
Later
1 is that correct and 2 would it make a difference here if I made the change to an A-4 or A-6 since those are the ones I have markings for?
Later
SGTJKJ
#041

Joined: July 20, 2006
KitMaker: 10,069 posts
AeroScale: 3,788 posts

Posted: Tuesday, February 07, 2012 - 02:54 AM UTC
Wow, a lot of great builds in this tread! This Wurger campaign is really popular.
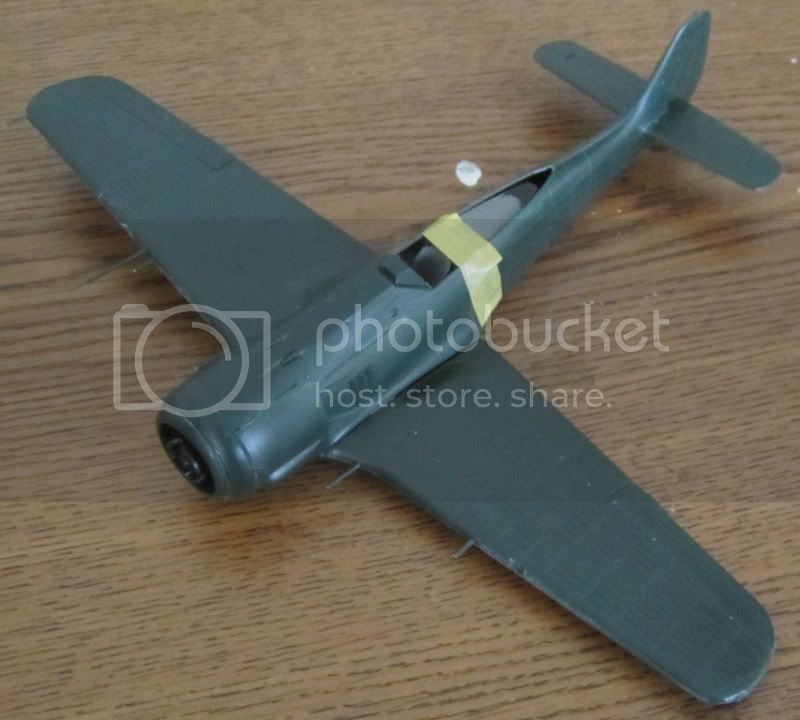
I have made a little progress on my old Monogram Wurger. It is beginning to look like a Wurger.
I have still not decided on a camouflage scheme or whether I am making a JaBo or standard fighter.
More to follow.
I have made a little progress on my old Monogram Wurger. It is beginning to look like a Wurger.
I have still not decided on a camouflage scheme or whether I am making a JaBo or standard fighter.
More to follow.


Jessie_C

Joined: September 03, 2009
KitMaker: 6,965 posts
AeroScale: 6,247 posts

Posted: Tuesday, February 07, 2012 - 03:44 AM UTC
Quoted Text
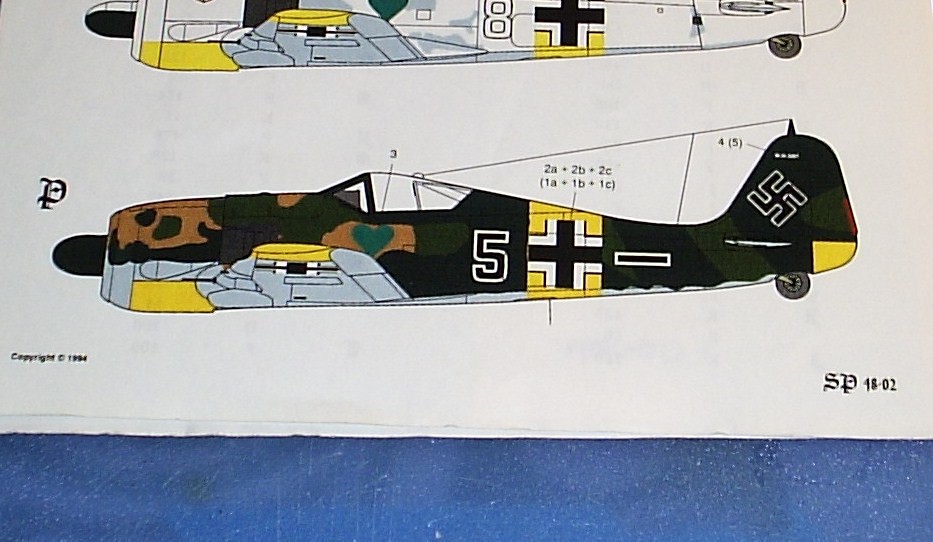
1 is that correct and 2 would it make a difference here if I made the change to an A-4 or A-6 since those are the ones I have markings for?
According to Eagle Editions, this is what you need to covert Tamiya's A-3 to an A-4.
Conversions themselves are well within the tolerances of the build rules, so have fun!
bdanie6
Joined: November 09, 2008
KitMaker: 615 posts
AeroScale: 459 posts
Posted: Tuesday, February 07, 2012 - 04:17 AM UTC
Jessie,
Thanks for the fast reply
The link shows the parts needed for the conversion as well as giving a short course on Wurger ID's. I won't need the conversion since the Eduard A-8 can donate them to the Tamyia A-3 to make the A-5 I am going to build
2 kool
Later (with pictures)
Thanks for the fast reply
The link shows the parts needed for the conversion as well as giving a short course on Wurger ID's. I won't need the conversion since the Eduard A-8 can donate them to the Tamyia A-3 to make the A-5 I am going to build
2 kool
Later (with pictures)
bdanie6
Joined: November 09, 2008
KitMaker: 615 posts
AeroScale: 459 posts
Posted: Tuesday, February 07, 2012 - 09:26 AM UTC
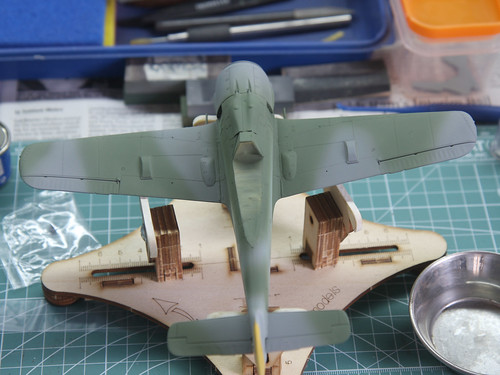
So...this was the cockpit I had finished for the Eduard Weekend kit, just plastic as the Weekender does not have the photo-etch included in it.

This photo shows how far I got before giving it up as a bad job and decided to go a different route.

I thought to go with the Tamyia kit because it is still relatively inexpensive and readily available.
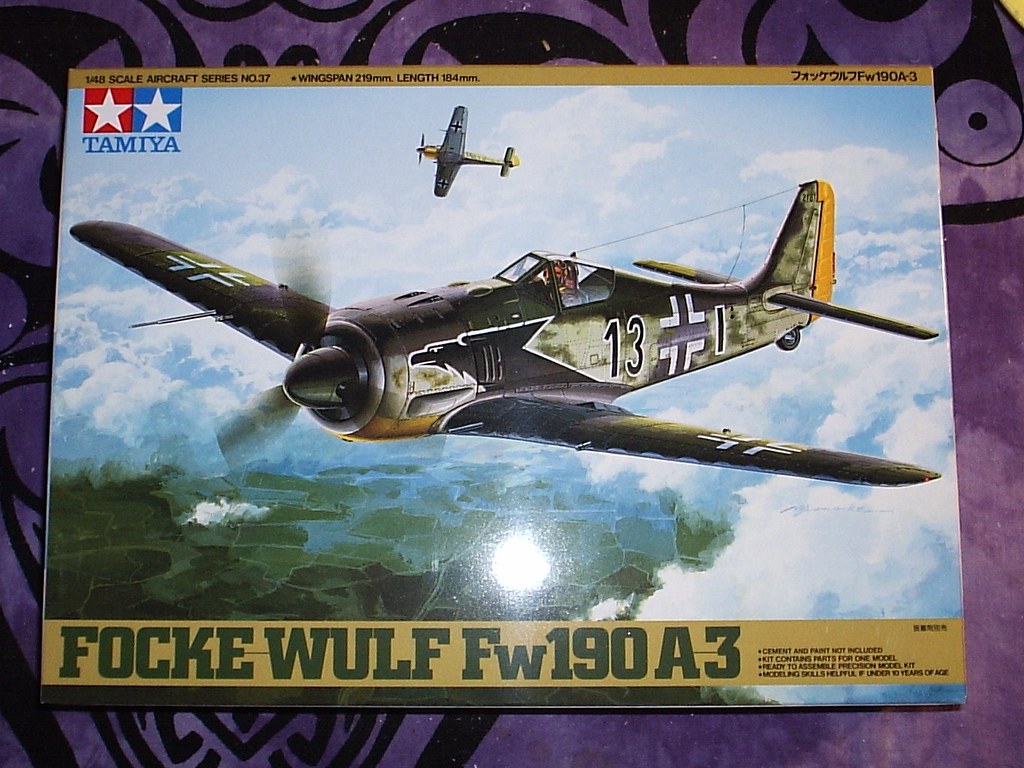
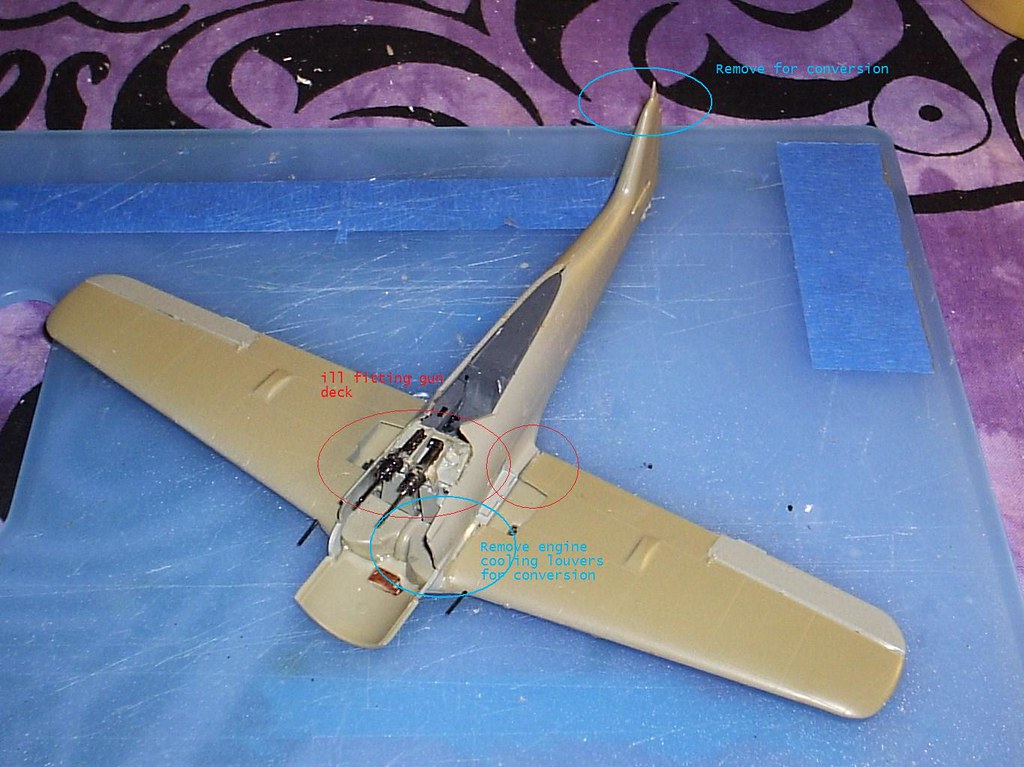
The only problem now is the markings I want to do are for Staffelkapitan Max Stotz who flew with 5/JG54 in 1943. His a/c was an A-5.
The plane looks to be mostly black over RLM 79, but is actually RLM 71/RLM 70 over RLM 79/RLM 80 with RLM 76 undersides.
I am going to use the Eduard A-8 as a donor for the pieces I'll need to update the Tamyia A-3 to an A-5. These will include the rudder, the radio antenna mount, and the engine cooling louvers.
well, looks like the fun is about to begin...again
Later
This photo shows how far I got before giving it up as a bad job and decided to go a different route.
I thought to go with the Tamyia kit because it is still relatively inexpensive and readily available.
The only problem now is the markings I want to do are for Staffelkapitan Max Stotz who flew with 5/JG54 in 1943. His a/c was an A-5.
The plane looks to be mostly black over RLM 79, but is actually RLM 71/RLM 70 over RLM 79/RLM 80 with RLM 76 undersides.
I am going to use the Eduard A-8 as a donor for the pieces I'll need to update the Tamyia A-3 to an A-5. These will include the rudder, the radio antenna mount, and the engine cooling louvers.
well, looks like the fun is about to begin...again
Later
 |

WEB HOSTING BY


Copyright ©2021 AeroScale and Kitmaker Network, a subsidiary of Silver Star Enterprises
All Rights Reserved. Please read our Conditions of Use and Privacy Policy.
All Rights Reserved. Please read our Conditions of Use and Privacy Policy.