OFFICIAL: FW190 'Wurger' Campaign

#305
Christchurch, New Zealand
Joined: February 01, 2006
KitMaker: 1,673 posts
AeroScale: 1,517 posts
Posted: Friday, March 02, 2012 - 08:01 AM UTC
Oregon, United States
Joined: February 07, 2004
KitMaker: 869 posts
AeroScale: 862 posts
Posted: Friday, March 02, 2012 - 11:22 AM UTC
Chris, are you sure you need to change your mottling? I have seen many photographs of Fw 190s and the mottling size varied greatly, it depends on which factory produced the aircraft.
Matrixone
Tennessee, United States
Joined: September 20, 2005
KitMaker: 1,747 posts
AeroScale: 1,673 posts
Posted: Friday, March 02, 2012 - 11:28 AM UTC
I agree with Maxitrone Chris! FW's came with different size mottling, sometimes with almost none at all. It's up to you and easy to change, but just thought I would add my two cents. Russell

To Thine Own Self Be True
Siderius
A.K.A., RTA
Oregon, United States
Joined: February 07, 2004
KitMaker: 869 posts
AeroScale: 862 posts
Posted: Friday, March 02, 2012 - 11:29 AM UTC
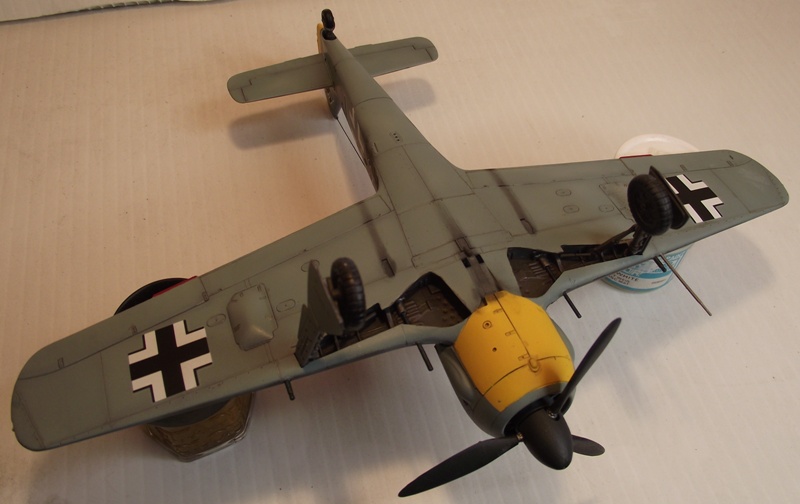
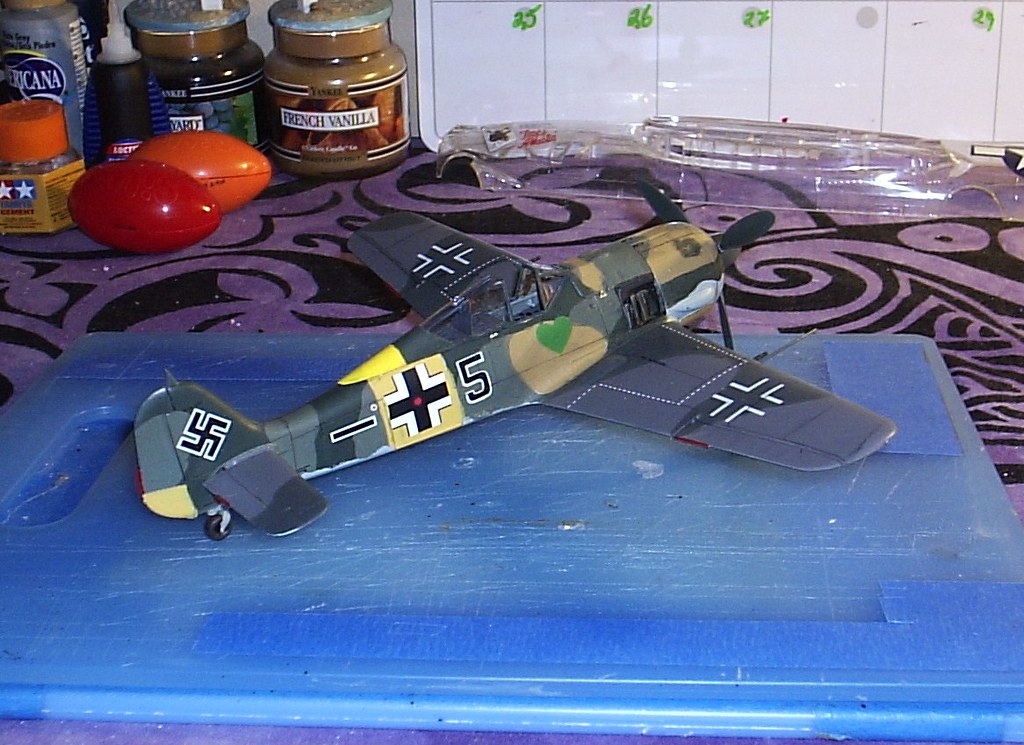
Here are a couple pics of my build, since these pics were taken I have since added all the decals and am waiting for them to dry so I can start airbrushing on the weathering.


Matrixone
#305
Christchurch, New Zealand
Joined: February 01, 2006
KitMaker: 1,673 posts
AeroScale: 1,517 posts
Posted: Friday, March 02, 2012 - 04:44 PM UTC
Hi Les my mottling job just didn't look "right" to me I've seen pictures of the Fw190 in black and white and I agree the mottling could go from being a few spots to being almost a solid colour. The more I looked at it the more I was certain I needed to modify it and diffuse it somewhat. Which I've done and it looks better I'm much happier with it now.
Hey Russell your two cents is always appreciated! It is after all what every modeller needs sometimes a different perspective from a fresh set of eyes. I appreciate the input guys as I sometimes get tunnel vision and lose sight of the greater picture.
It looks stark now but I've got to paint the markings and weather the beastie all of which will mute the camouflage.
Tennessee, United States
Joined: September 20, 2005
KitMaker: 1,747 posts
AeroScale: 1,673 posts
Posted: Friday, March 02, 2012 - 04:47 PM UTC
Sounds good Chris. I look forward to seeing your finished product. It looks good so far that's for sure! Russell
To Thine Own Self Be True
Siderius
A.K.A., RTA
Oregon, United States
Joined: February 07, 2004
KitMaker: 869 posts
AeroScale: 862 posts
Posted: Saturday, March 03, 2012 - 08:54 AM UTC
Chris,
I build a lot of Luftwaffe stuff and judging if the mottles are correct is difficult to do because after the markings are on the model will look very different. If at all possible look at photographs of the aircraft you are building.
Matrixone
#305
Christchurch, New Zealand
Joined: February 01, 2006
KitMaker: 1,673 posts
AeroScale: 1,517 posts
Posted: Saturday, March 03, 2012 - 11:16 AM UTC
#330
Queensland, Australia
Joined: July 15, 2011
KitMaker: 175 posts
AeroScale: 103 posts
Posted: Saturday, March 03, 2012 - 06:37 PM UTC
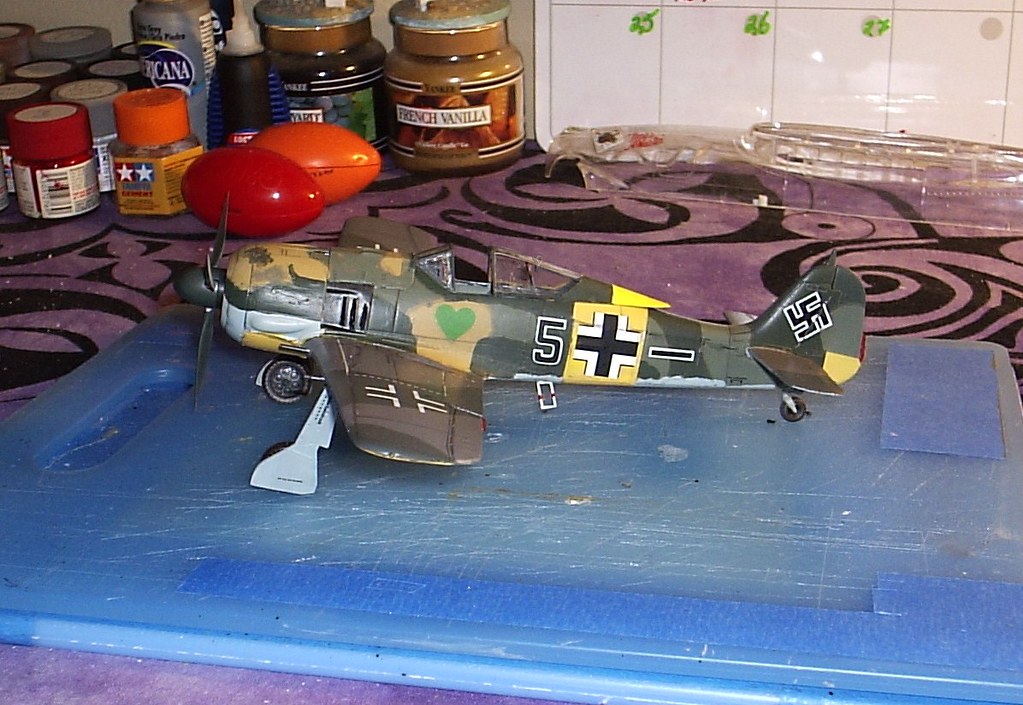
Have put the camo on my A3. The egg shell blue has not come up well in the photo, need to fix up my lighting.


Oregon, United States
Joined: February 07, 2004
KitMaker: 869 posts
AeroScale: 862 posts
Posted: Sunday, March 04, 2012 - 09:19 AM UTC
Nice paint job John.
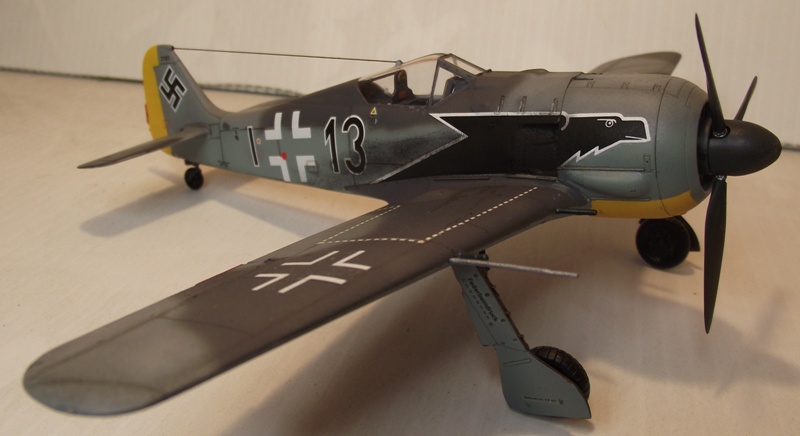
Here are two pics of my entry after the weathering has started. So far all this is just some dry brushing and some paint chipping done with a small paint brush.


The next steps in weathering will be done with the airbrush, first with enamel paints and then oil paints.
Matrixone
Oregon, United States
Joined: February 07, 2004
KitMaker: 869 posts
AeroScale: 862 posts
Posted: Sunday, March 04, 2012 - 01:14 PM UTC
I did some airbrushing just a short time ago to lighten the paint and also to blend in the dry brushing I did early in the day.

Next I will add the exhaust staining before doing anymore weathering.
Matrixone
Tennessee, United States
Joined: September 20, 2005
KitMaker: 1,747 posts
AeroScale: 1,673 posts
Posted: Sunday, March 04, 2012 - 01:54 PM UTC
Shorty, hey, neat camoflauge job there. What colors are you using? Les, great job, I'm always afraid of weathering, I tend to build my birds as if they've just come out of the factory. Good job, looks like war worn aircraft. Russell

To Thine Own Self Be True
Siderius
A.K.A., RTA
Oregon, United States
Joined: February 07, 2004
KitMaker: 869 posts
AeroScale: 862 posts
Posted: Sunday, March 04, 2012 - 03:00 PM UTC
Thanks Russell,
This model is going to be much different than my other models I usually make, this one is being built as a Focke-Wulf that has been sitting out in the open for an extended period of time and has a badly sun faded paint job. Even the tires on my model will be flat.
Matrixone
New Hampshire, United States
Joined: November 09, 2008
KitMaker: 615 posts
AeroScale: 459 posts
Posted: Monday, March 05, 2012 - 05:37 AM UTC
@Les, I am with Russ on this one. I hate weathering, mainly because I do it so infrequently, I think I suck at it.

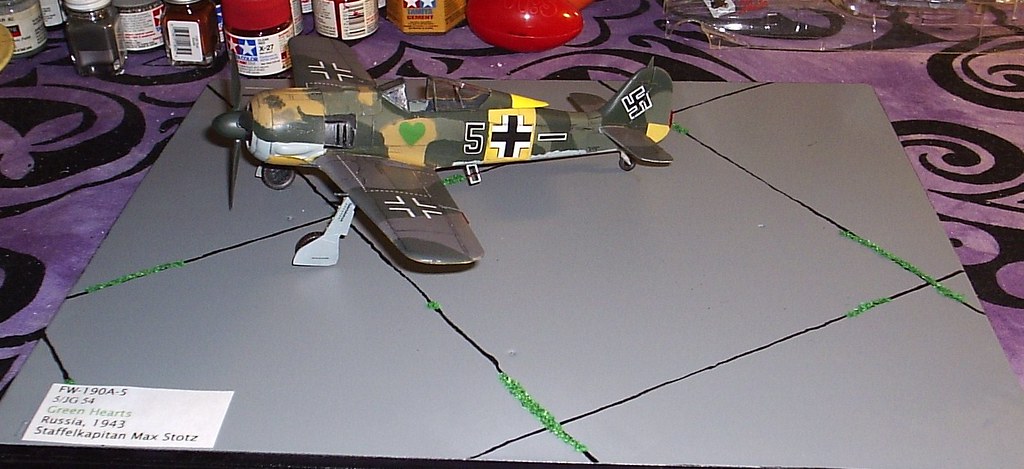
So, I am calling this one done and will post some pictures into the gallery.

And on it's display base. It's off to one side a bit to make way for some figures and a German Staff car.
Later
P-61 Black Widows, the Group Build
Veni, Vidi, Velcro; I came, I saw, I stuck around
Tennessee, United States
Joined: September 20, 2005
KitMaker: 1,747 posts
AeroScale: 1,673 posts
Posted: Monday, March 05, 2012 - 06:17 AM UTC
I guess part of my reasoning with weathering, is that many of the combatant aircraft didn't last as long as it would take for extensive weathering to occur the airframe? Just a thought. I admire those who can pull off the effect however, very well. Russell

To Thine Own Self Be True
Siderius
A.K.A., RTA
Oregon, United States
Joined: February 07, 2004
KitMaker: 869 posts
AeroScale: 862 posts
Posted: Monday, March 05, 2012 - 08:32 AM UTC
Very nice Bruce, looks great!
Russell,
Yes most late war German aircraft did not have a chance to weather too much before they were destroyed but even if they were only flown a few times they would at least get some exhaust stains and the wheels would fling some dirt or mud on the undersides of the wings and part of the fuselage so for these reasons I always add some light weathering but NOTHING like what I am doing to this model.lol
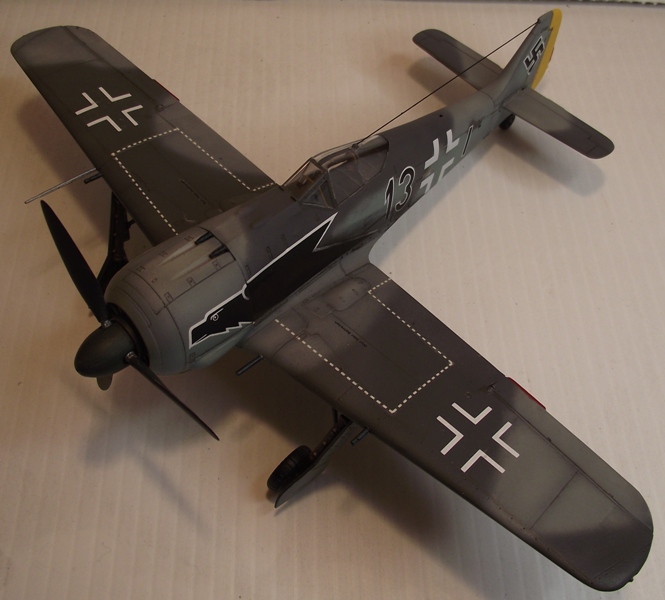
Here are two more pics of my entry, since these pics were taken I restored the national markings on the fuselage and tail by using a paint brush to add some dark gray paint to them, they now look a little closer to looking like the paint is flaking away and faded.


Matrixone
United States
Joined: October 22, 2011
KitMaker: 15 posts
AeroScale: 15 posts
Posted: Monday, March 05, 2012 - 01:13 PM UTC
I'm in!

Don't get the paper so here's my desktop ha.

Stockholm, Sweden
Joined: May 02, 2006
KitMaker: 1,953 posts
AeroScale: 1,902 posts
Posted: Wednesday, March 07, 2012 - 07:51 AM UTC
Another quick update!
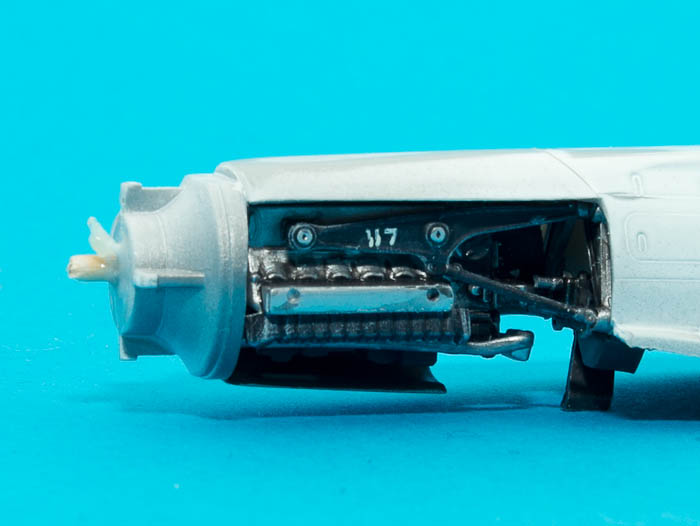
Engine in place...
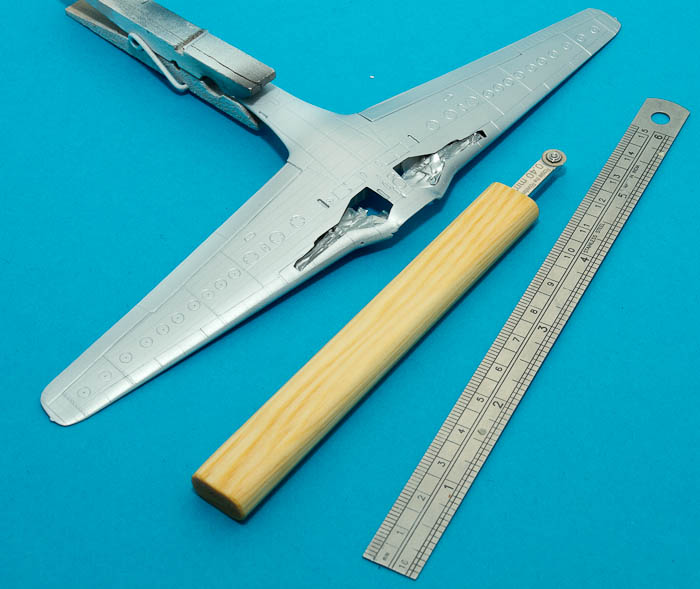
...and I'll try riveting for the first time ever!
Build blog is
here!
Magnus
Press banner to the right to follow my trail to the new forums!
Oregon, United States
Joined: February 07, 2004
KitMaker: 869 posts
AeroScale: 862 posts
Posted: Wednesday, March 07, 2012 - 09:34 AM UTC
Here are some new in-progress pics of my entry.


Matrixone
#330
Queensland, Australia
Joined: July 15, 2011
KitMaker: 175 posts
AeroScale: 103 posts
Posted: Saturday, March 10, 2012 - 04:58 PM UTC
Oregon, United States
Joined: February 07, 2004
KitMaker: 869 posts
AeroScale: 862 posts
Posted: Sunday, March 11, 2012 - 06:49 AM UTC
Nice job on your entry John!
Below are two more pics of my Otaki Fw 190, its very close to being finished now.


Matrixone
Tennessee, United States
Joined: September 20, 2005
KitMaker: 1,747 posts
AeroScale: 1,673 posts
Posted: Sunday, March 11, 2012 - 07:37 AM UTC
John, your model looks superb! I built the same one, markings wise, in 72 scale. I have to do something about the lighting I photograph under, your model doesn't look washed out like mine does in the photographs. Take care, again great job. Russell
To Thine Own Self Be True
Siderius
A.K.A., RTA
Ontario, Canada
Joined: March 29, 2010
KitMaker: 1,151 posts
AeroScale: 985 posts
Posted: Sunday, March 11, 2012 - 09:40 AM UTC
Les, what method do you use to get that sun-faded effect?
Oregon, United States
Joined: February 07, 2004
KitMaker: 869 posts
AeroScale: 862 posts
Posted: Sunday, March 11, 2012 - 10:50 AM UTC
Richard,
I used a couple methods to fade the paint on the model, the first step was dry brushing lighter shades of the camouflage colors on the uppersurfaces followed by lightly airbrushing different shades of tan and gray on top of the places where I did the dry brushing.
I did all of the above after the decals were put on the model so the markings will look as distressed and faded as the rest of the model. Looking at photographs of aircraft graveyards post war was a big help in giving me ideas on how far I wanted to take the weathering on this model.
Matrixone
#330
Queensland, Australia
Joined: July 15, 2011
KitMaker: 175 posts
AeroScale: 103 posts
Posted: Sunday, March 11, 2012 - 09:09 PM UTC
Quoted Text
John, your model looks superb! I built the same one, markings wise, in 72 scale. I have to do something about the lighting I photograph under, your model doesn't look washed out like mine does in the photographs. Take care, again great job. Russell
Thanks Russell. I cant help much with the photos, mine are very hit and miss. I've got a home made spray booth, some white cardboard and two light sources. I move the lights around and take lots of photos, a very small amount of which turn out!