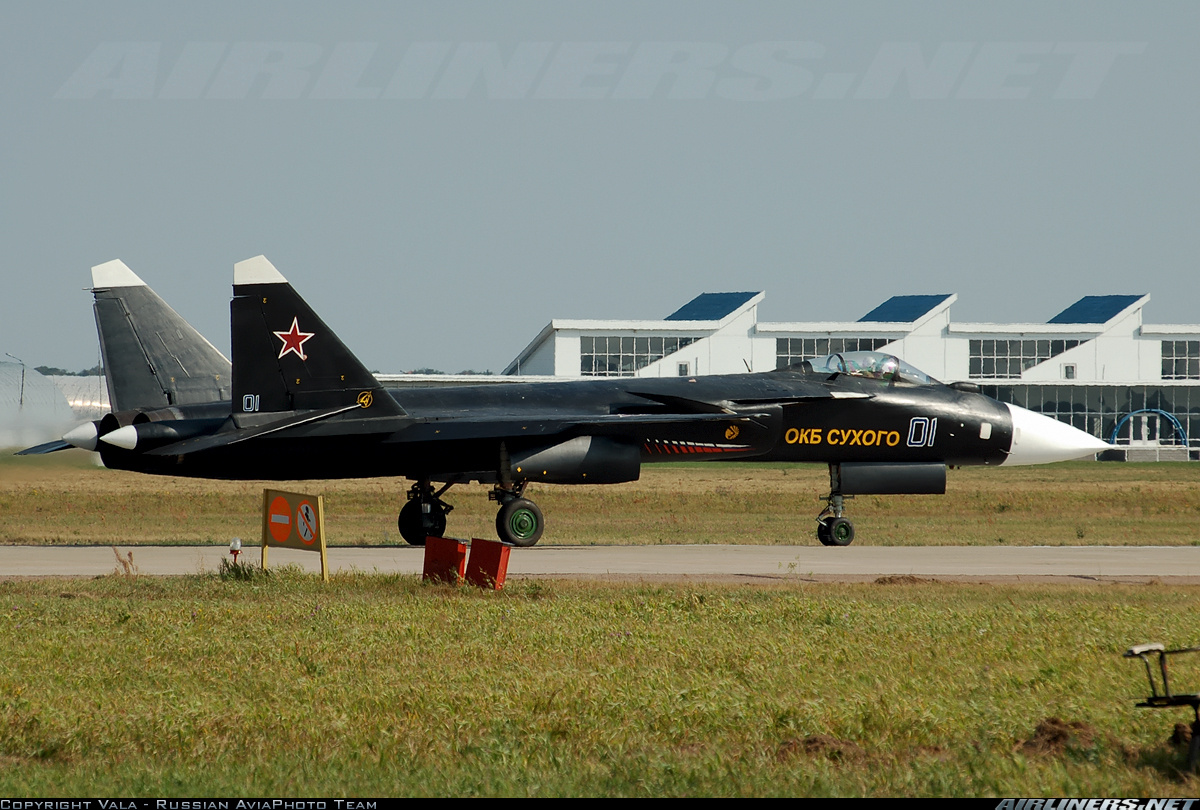
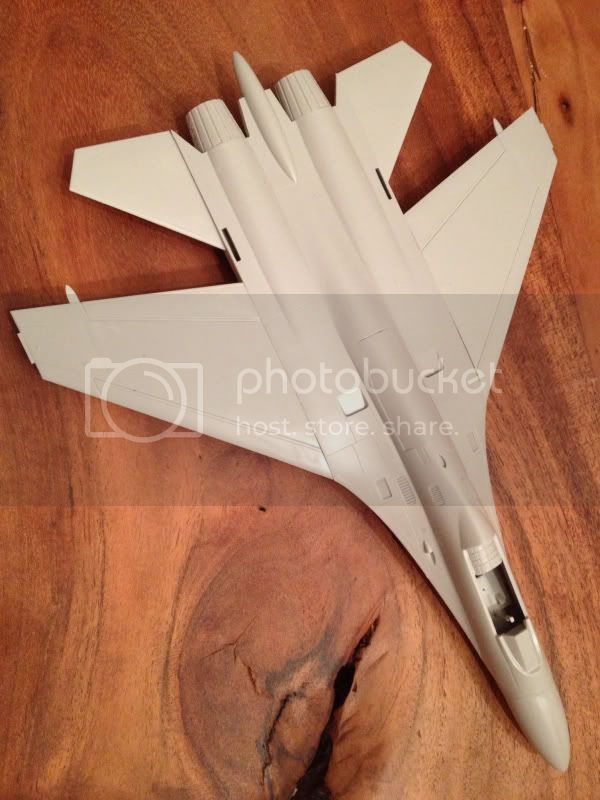
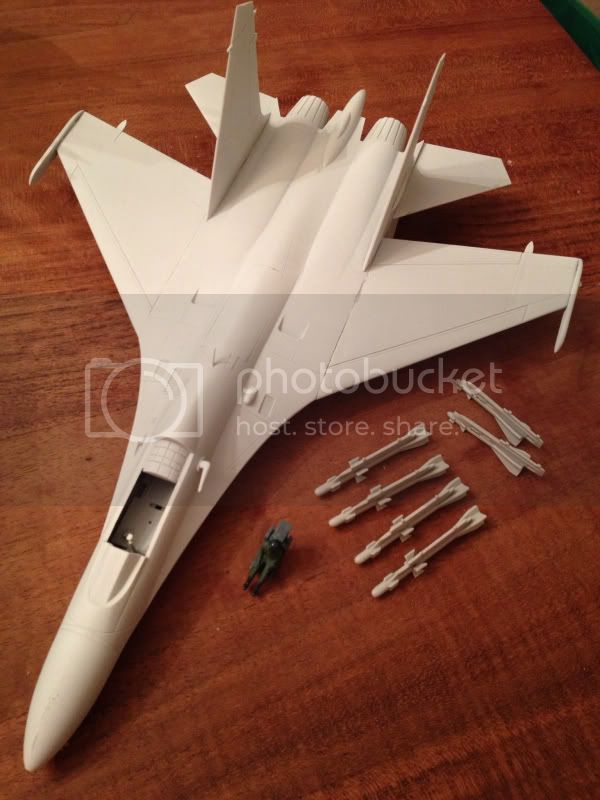
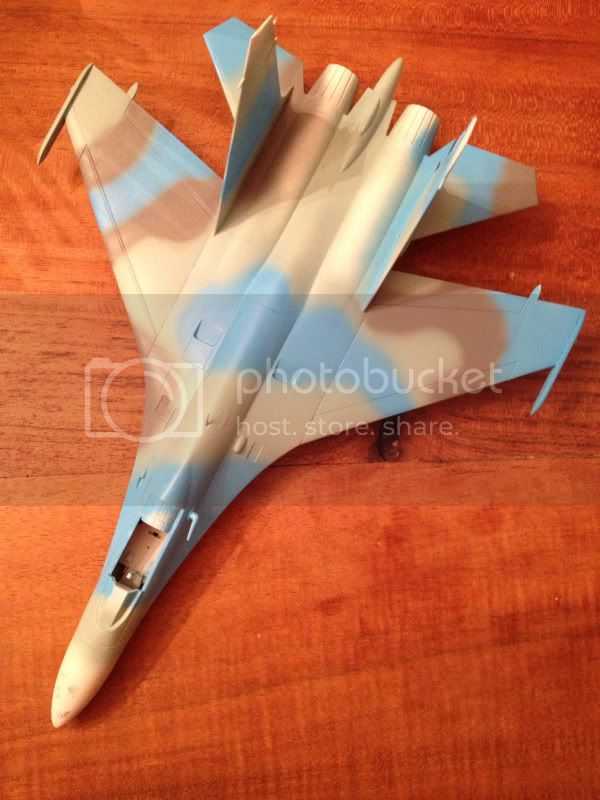
Great Berkut, John. Looking forward to see it finished.
Grenadier, very nice camouflage. I like the Vallejo colors as well. They work very well.
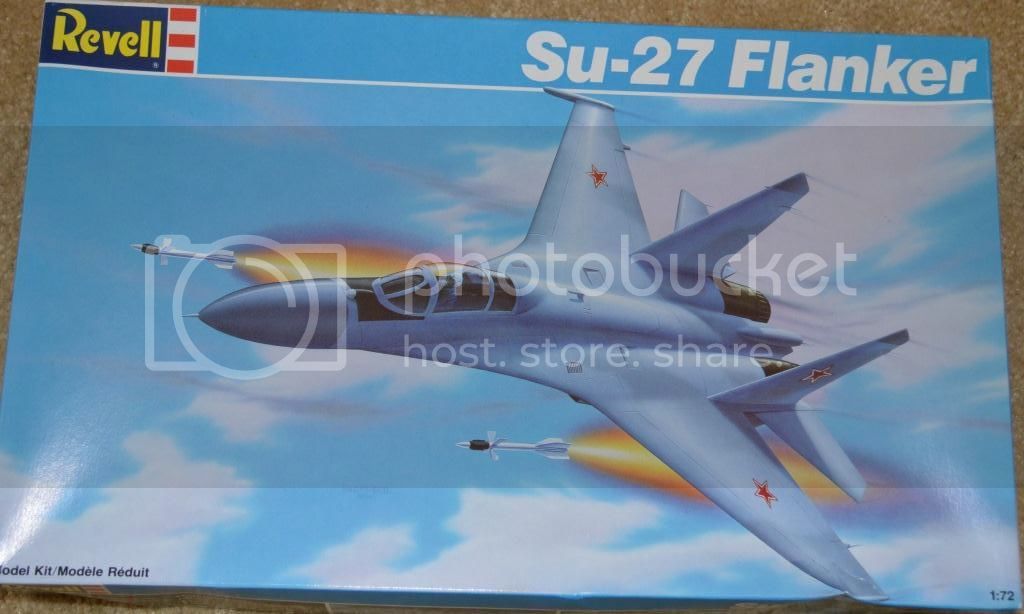
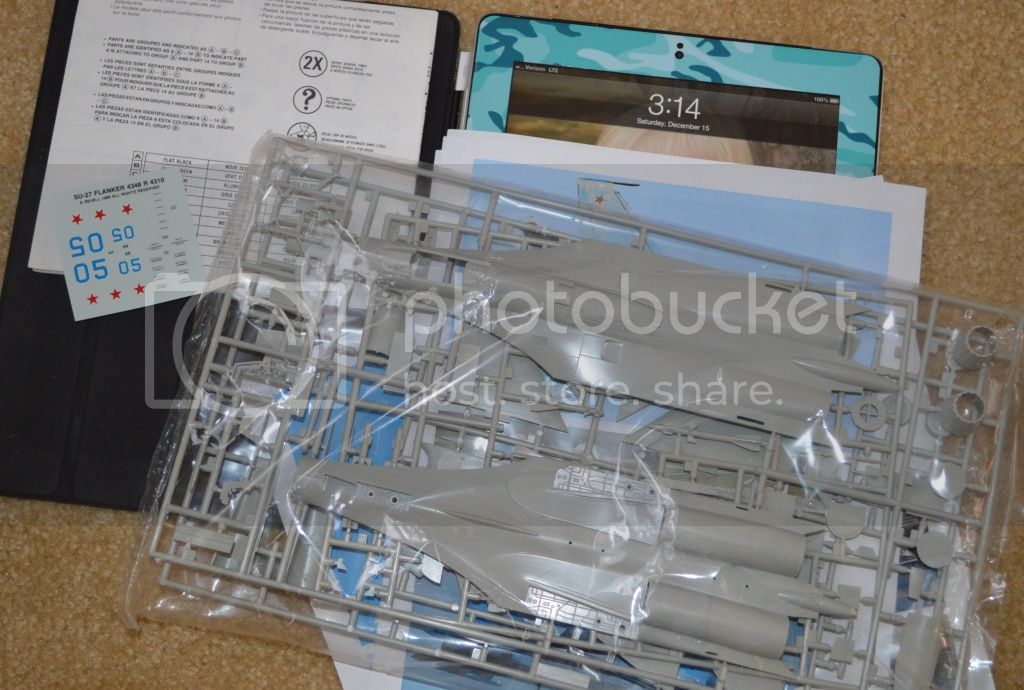
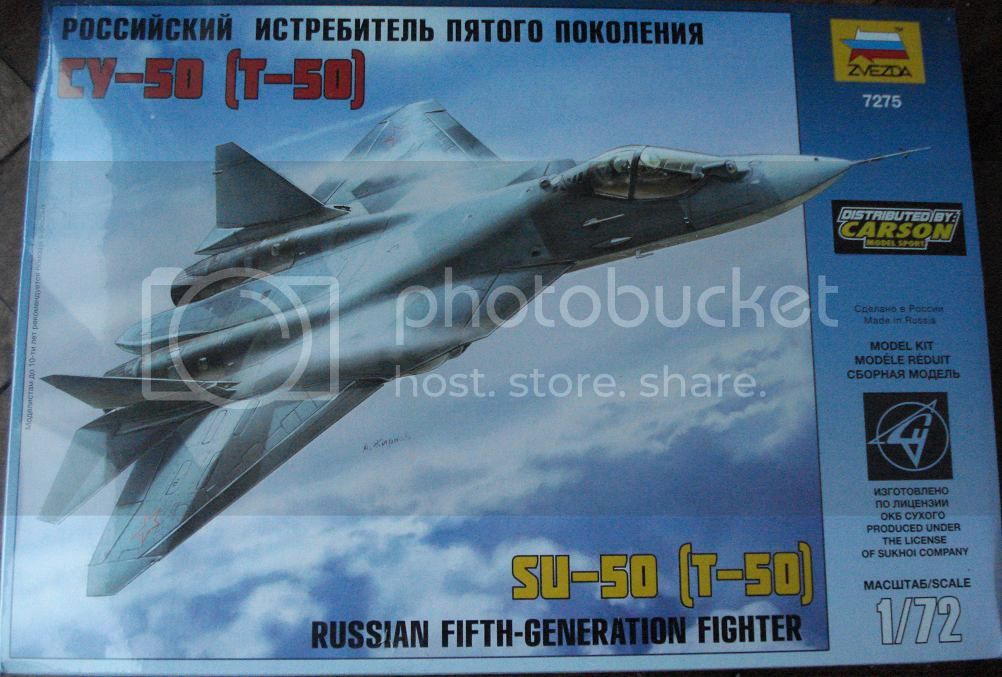
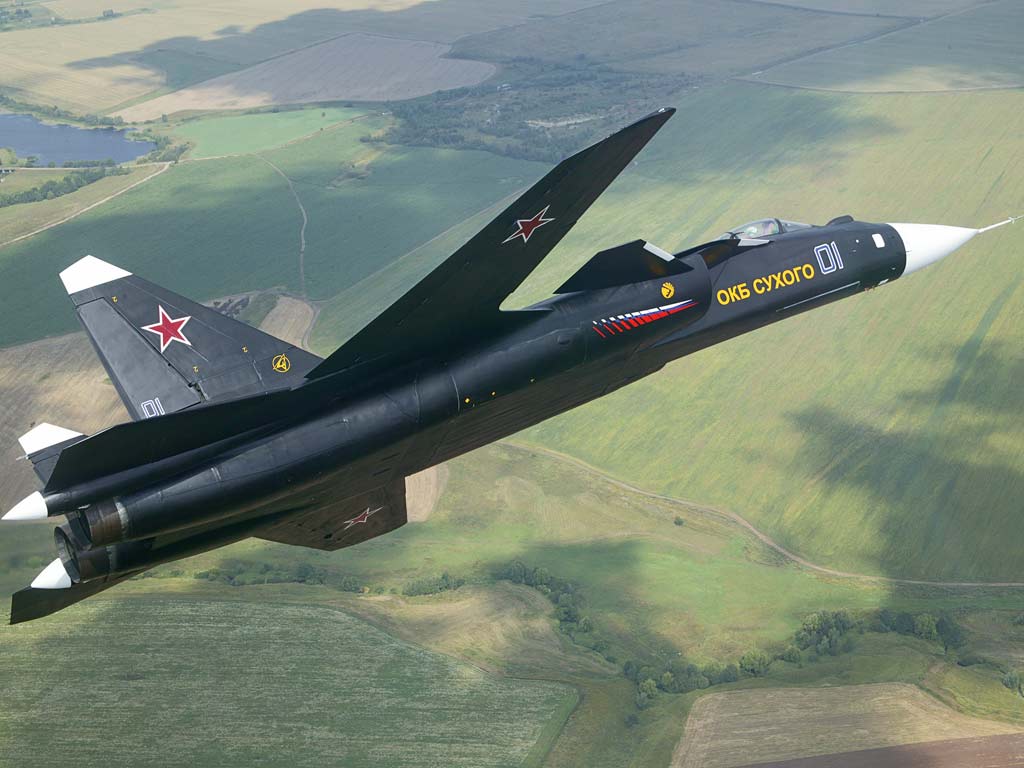
Here is what I will build for this campaign.It is a Revell reboxing, but I have no idea what the kit brand really is? Something from Eastern Europe maybe? Any insights welcome.
More to follow
Air Campaigns
Want to start or join a group build? This is where to start.
Hosted by Frederick Boucher, Michael Satin
OFFICIAL: Super Sukhois Campaign
Posted: Saturday, December 15, 2012 - 04:12 PM UTC
gconterio
Florida, United States
Joined: June 24, 2010
KitMaker: 66 posts
AeroScale: 39 posts
Joined: June 24, 2010
KitMaker: 66 posts
AeroScale: 39 posts
Posted: Saturday, December 15, 2012 - 07:17 PM UTC
And then there was one...
Tragedy has struck. Well, if tragedy is careless foolishness that is.
I had sealed-up the fuselage of the Su-11, and was preparing to add the wings when I noticed the fuselage had a slight by very discernible bend. Drat! Getting the fuselage together had been a bit of a battle, as the two halves were pretty warped to begin with, and I had wound up gluing and clamping in stages. The bend was noticeable enough that I determined I had to fix it before going on. I decided to do the hot water immersion technique, which I have used successfully before to straighten-out warped parts and assemblies. I boiled some water in a large enough pot to immerse the fuselage, turned-off the heat to let the temp come down a little, and plunged in the fuselage.
You can see where this is going, I'm sure!
Well I discovered that not only is the plastic Amodel uses very soft, it also apparently has a distinctly lower melting point. The fuselage melted in seconds. Badly.
The Su-11 is no more, although I did salvage the painted resign seat for another project.
On the bright side, the Su-9 is just about ready for priming and painting, which I hope to get started on tomorrow.
And the lesson for today is, be very, VERY careful when working with the soft plastic from Amodel! It does not hold up nearly so well as the harder plastic from other major manufacturers!
Posted: Sunday, December 16, 2012 - 07:45 AM UTC
Wow, tough luck, Greg! Do you have any pictures to share of the disaster?
Better luck with the next one and nice to know about the A model plastic.
didgeboy
Washington, United States
Joined: September 21, 2010
KitMaker: 1,846 posts
AeroScale: 103 posts
Joined: September 21, 2010
KitMaker: 1,846 posts
AeroScale: 103 posts
Posted: Tuesday, December 18, 2012 - 10:44 AM UTC
Just received my mask stuff from Micro mark and am hoping to make some masks for the camo on the fullback soon. Been trying to get my other deadline met for the Get Er Done campaign on Armorama and this has taken a back seat. That one is done at the end of the year so this will become the new priority. Will post some pics soon. Cheers.
Nito74
Lisboa, Portugal
Joined: March 04, 2008
KitMaker: 5,386 posts
AeroScale: 635 posts
Joined: March 04, 2008
KitMaker: 5,386 posts
AeroScale: 635 posts
Posted: Tuesday, December 18, 2012 - 11:56 AM UTC
Thanks Jesper !
It's been a challenge, it's my first aircraft in years, but it's been fun, relearning experience
It might be a Zvezda based kit. not sure.
Nice work on your Gepard !
@Greg
That's too bad..
Well that's an excuse to get another Su-11 next year Greg..
Don't let the plastic win
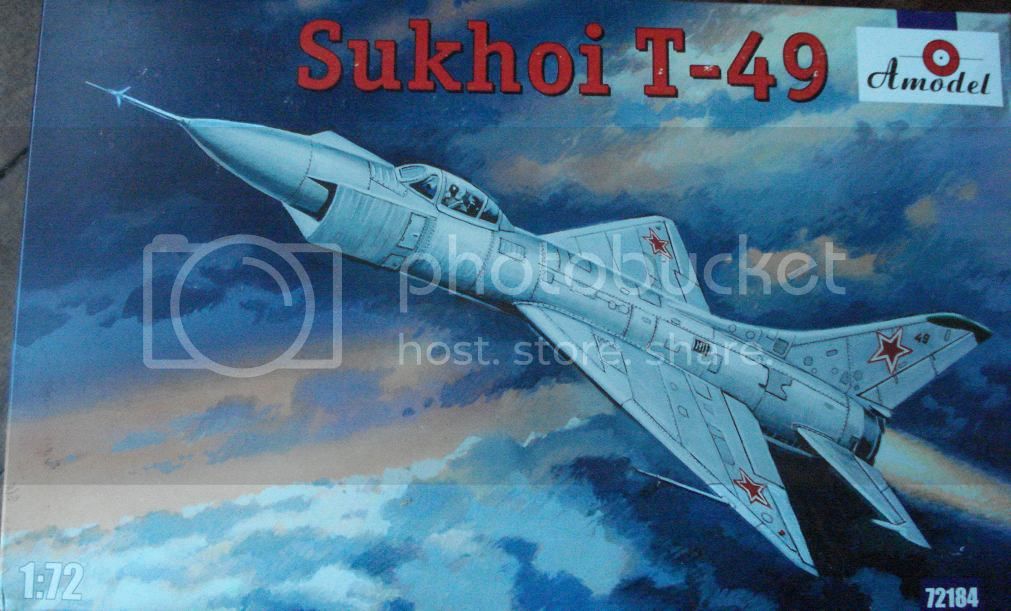
I got these today...
I'm very happy, my Sukhoi collection is finally complete..
Posted: Friday, December 21, 2012 - 08:38 AM UTC
Thanks for the comment, John. The quality feels a little like a Zvezda kit, so maybe you are right.
Nito74
Lisboa, Portugal
Joined: March 04, 2008
KitMaker: 5,386 posts
AeroScale: 635 posts
Joined: March 04, 2008
KitMaker: 5,386 posts
AeroScale: 635 posts
Posted: Wednesday, December 26, 2012 - 05:30 AM UTC
Quoted Text
Thanks for the comment, John. The quality feels a little like a Zvezda kit, so maybe you are right.
The newest Sukhoi, the T-50/Su-50 kit was released by Revell and Zvezda... I'm guessing the same moulds..
mykroft
Ontario, Canada
Joined: November 14, 2009
KitMaker: 270 posts
AeroScale: 264 posts
Joined: November 14, 2009
KitMaker: 270 posts
AeroScale: 264 posts
Posted: Wednesday, December 26, 2012 - 06:11 AM UTC
Quoted Text
Quoted TextThanks for the comment, John. The quality feels a little like a Zvezda kit, so maybe you are right.
The newest Sukhoi, the T-50/Su-50 kit was released by Revell and Zvezda... I'm guessing the same moulds..
Yes, the T-50 kit from Revell is a Zvezda rebox (the HobbyBoss T-50 is their own mold though), as is the Italieri Su-47/S-37. I'm building the Zvezda boxing of the Su-47 and the only visible difference is the colour of the plastic.
Nito74
Lisboa, Portugal
Joined: March 04, 2008
KitMaker: 5,386 posts
AeroScale: 635 posts
Joined: March 04, 2008
KitMaker: 5,386 posts
AeroScale: 635 posts
Posted: Thursday, December 27, 2012 - 06:11 AM UTC
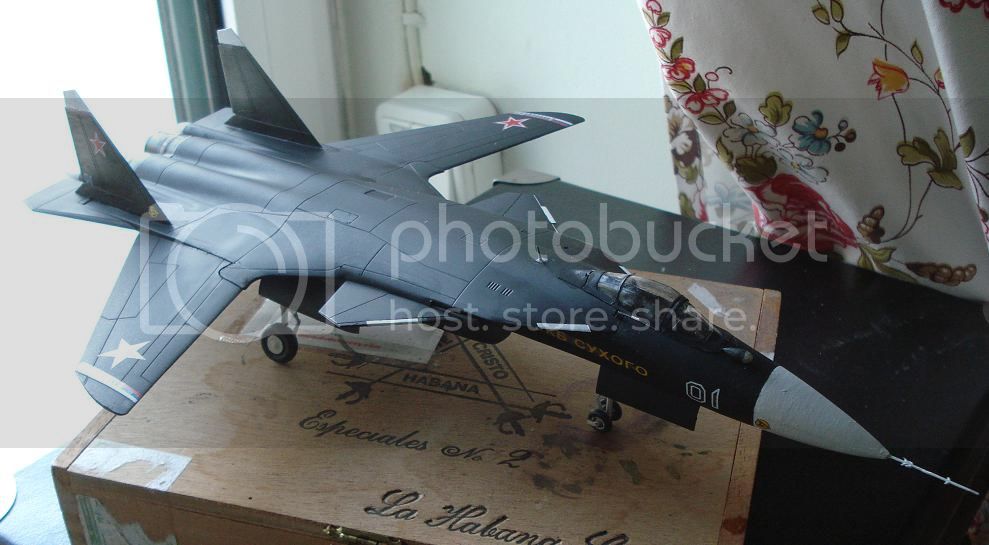
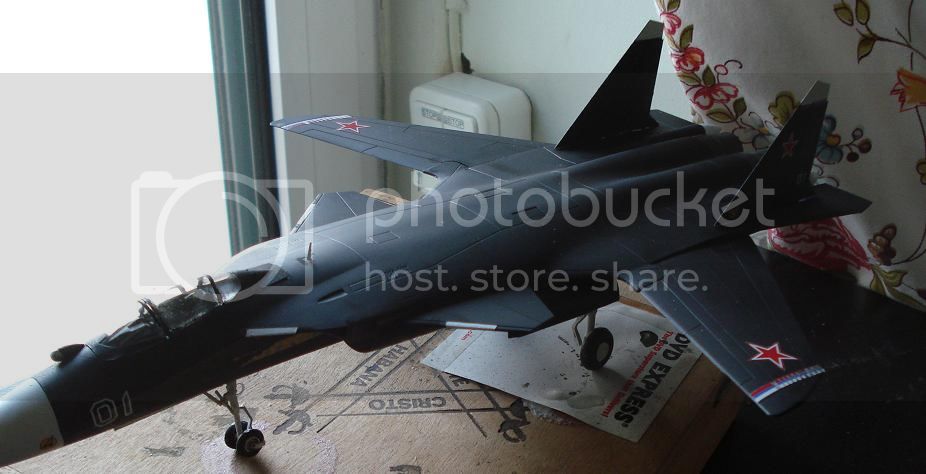
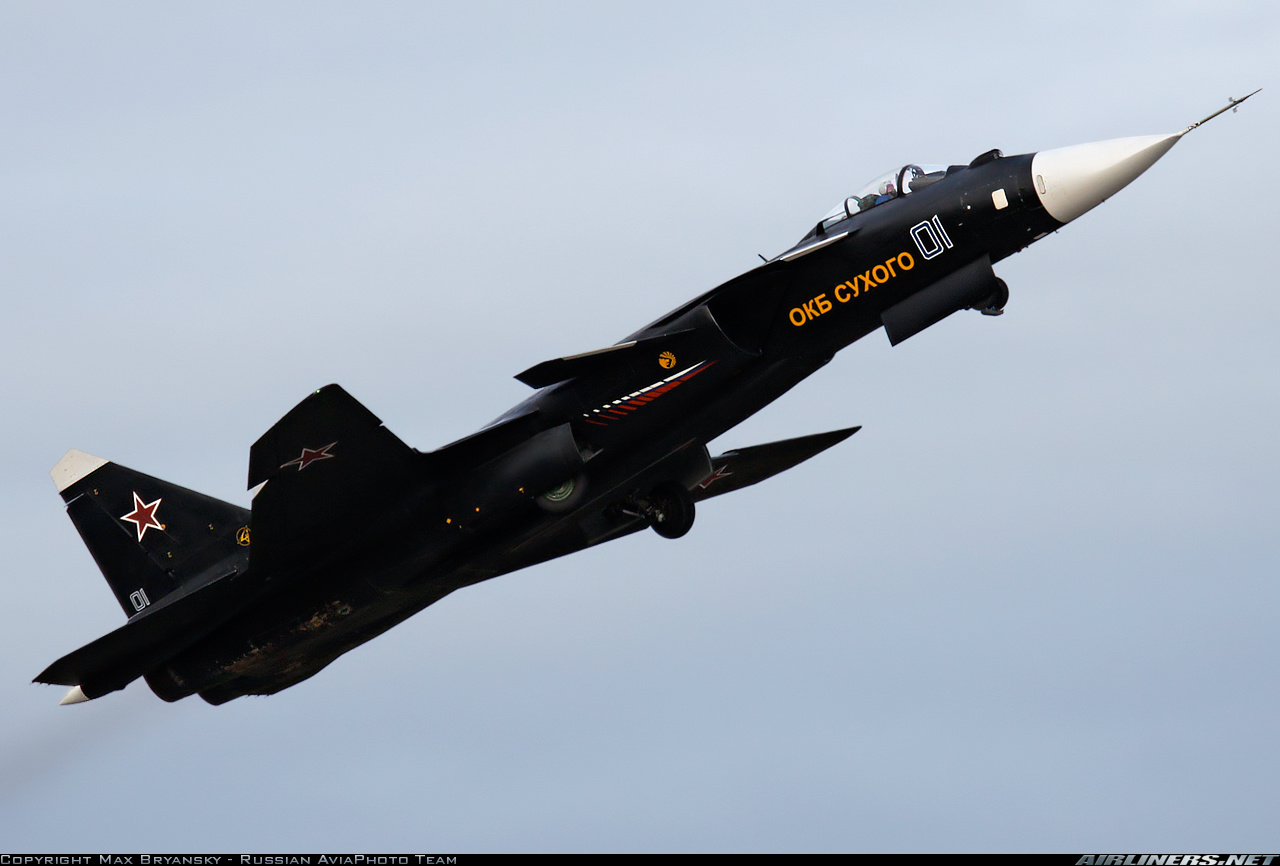
That's it, the final photos:
The only problem was that the masking tape took a part of the decal...here, just below the cockpit:
I only noticed when it was too late, so apart from this and the small antenna missing, I call it done !
I really liked this Campaign, I restarted my aircraft builds, I hope to keep building and learning !
Grenadier37
Texas, United States
Joined: June 02, 2008
KitMaker: 232 posts
AeroScale: 155 posts
Joined: June 02, 2008
KitMaker: 232 posts
AeroScale: 155 posts
Posted: Thursday, December 27, 2012 - 09:15 AM UTC
John that thing is crazy cool! Nice job indeed.
Can you just imagine all the "what if" possibilies?
Nito74
Lisboa, Portugal
Joined: March 04, 2008
KitMaker: 5,386 posts
AeroScale: 635 posts
Joined: March 04, 2008
KitMaker: 5,386 posts
AeroScale: 635 posts
Posted: Thursday, December 27, 2012 - 11:25 AM UTC
Quoted Text
John that thing is crazy cool! Nice job indeed.
Can you just imagine all the "what if" possibilies?
Thanks Grenadier37 !!
Cool What If's... jungle/artic camo schemes ..
Or
But they only made 4 prototypes I think (unsure)..
But they took some nice pics of them
Siderius
Tennessee, United States
Joined: September 20, 2005
KitMaker: 1,747 posts
AeroScale: 1,673 posts
Joined: September 20, 2005
KitMaker: 1,747 posts
AeroScale: 1,673 posts
Posted: Thursday, December 27, 2012 - 11:34 AM UTC
Excellent work John.. Neat Sukhoi! Russell
SaxonTheShiba
United States
Joined: February 01, 2009
KitMaker: 1,233 posts
AeroScale: 663 posts
Joined: February 01, 2009
KitMaker: 1,233 posts
AeroScale: 663 posts
Posted: Friday, December 28, 2012 - 03:38 AM UTC
John, nicely done.!!
Regards, Ian
Regards, Ian
Nito74
Lisboa, Portugal
Joined: March 04, 2008
KitMaker: 5,386 posts
AeroScale: 635 posts
Joined: March 04, 2008
KitMaker: 5,386 posts
AeroScale: 635 posts
Posted: Friday, December 28, 2012 - 08:22 AM UTC
Thanks Russell & Ian !!!
I really enjoyed this Campaign and getting a bird on the bench again !!!
Posted: Sunday, December 30, 2012 - 09:45 AM UTC
Great build, John.
Speaking of what if options. I have actually build this bird previously in a fictious scheme. Used a lot of masking tape Great fun and decent kit.
Posted: Monday, December 31, 2012 - 01:42 AM UTC
Work is coming along slowly on my Revell/Zvezda kit, but expect to kick it into gear in January and still make the deadline.
More to follow
More to follow
Grenadier37
Texas, United States
Joined: June 02, 2008
KitMaker: 232 posts
AeroScale: 155 posts
Joined: June 02, 2008
KitMaker: 232 posts
AeroScale: 155 posts
Posted: Wednesday, January 02, 2013 - 05:22 AM UTC
Quoted Text
Great build, John.
Speaking of what if options. I have actually build this bird previously in a fictious scheme. Used a lot of masking tape Great fun and decent kit.
VERY COOL!
One of these days I'll get back to the Don't-Fitter. I've been wrapping up a 1/72 Heller C.714 and a 1/48 Otaki HellKitty (great kit!), and plugging away at a 1/48 Kinetic F-16C (horrible, overly complicated, over engineered kit ).
SaxonTheShiba
United States
Joined: February 01, 2009
KitMaker: 1,233 posts
AeroScale: 663 posts
Joined: February 01, 2009
KitMaker: 1,233 posts
AeroScale: 663 posts
Posted: Wednesday, January 02, 2013 - 09:59 AM UTC
Jesper----looks like your SU-27 is coming along well.
I made some progress on the 1/48th scale Monogram SU-25 and the fuselage is together. All-in-all, a trouble free build so far.
Regards, Ian
I made some progress on the 1/48th scale Monogram SU-25 and the fuselage is together. All-in-all, a trouble free build so far.
Regards, Ian
Posted: Saturday, January 05, 2013 - 04:18 PM UTC
Nice progress, Ian. Keep us updated. I have that build in my stash, so nice to know if there are any issues to look out for.
I have finished the main assemblies for the SU-27. Next is the overall camouflage. I have researched pictures on the web and the paint colors look very different depending on whether it is a new coat or heavily weathered. It also looks like there are several nuances of the same camouflage color.
Anyway, I will make something that looks good - hopefully
didgeboy
Washington, United States
Joined: September 21, 2010
KitMaker: 1,846 posts
AeroScale: 103 posts
Joined: September 21, 2010
KitMaker: 1,846 posts
AeroScale: 103 posts
Posted: Monday, January 07, 2013 - 12:39 PM UTC
Going to start begging now for an extension, as things have been too busy for me the past two months. Cheers.
Posted: Monday, January 07, 2013 - 03:25 PM UTC
A little more progress on my SU-27. The main camouflage is on. Colors not exactly as I want them, but they will have to do.
More to follow
More to follow
Siderius
Tennessee, United States
Joined: September 20, 2005
KitMaker: 1,747 posts
AeroScale: 1,673 posts
Joined: September 20, 2005
KitMaker: 1,747 posts
AeroScale: 1,673 posts
Posted: Monday, January 07, 2013 - 03:40 PM UTC
Wow Jesper, great work. What colors did you use? Russell
gconterio
Florida, United States
Joined: June 24, 2010
KitMaker: 66 posts
AeroScale: 39 posts
Joined: June 24, 2010
KitMaker: 66 posts
AeroScale: 39 posts
Posted: Monday, January 07, 2013 - 03:54 PM UTC
Well it's been awhile since I checked-in since boiling my Su-11, but I have made some progress, despite a lack of photos. A second setback involved my Aztek airbrush going kaput on me. I know it says never to open them up, but I can never resist, so I took it apart. The good news is, reassembling them is not all that big a deal, despite warnings to the contrary. Bad news is, it's broken-broken. As in, not coming back. One of the internal linkages is broken. Made of plastic. Hard to believe more of them don't fail. I ordered a replacement, and in the mean time, I managed to resurrect an old Badger 150 that had inexplicably stopped working some time ago. (I'm a hopeless air brush-a-holic! Don't ask me about the others!) After completely breaking-down the Badger, I discovered the Teflon bushing the needle slides through had become dislodged, so the air brush was unable to create any vacuum. Once re-seated, it worked like new again, and allowed me to continue with one of the several layers of Alclad. It's a pain in the rear to clean though!
I'll try to get some progress pics tomorrow, but we're into the home stretch. Should look like a "Dr. Evil & Mini-Me" arrangement when posed with my Zvezda MiG-21!
Removed by original poster on 01/08/13 - 04:46:08 (GMT).
gconterio
Florida, United States
Joined: June 24, 2010
KitMaker: 66 posts
AeroScale: 39 posts
Joined: June 24, 2010
KitMaker: 66 posts
AeroScale: 39 posts
Posted: Monday, January 07, 2013 - 04:50 PM UTC
OK, so I couldn't wait. Here are some progress photos, so you know I'm not just stringing you all along!
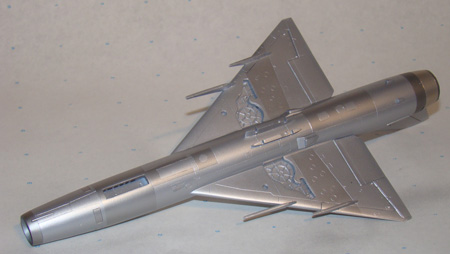
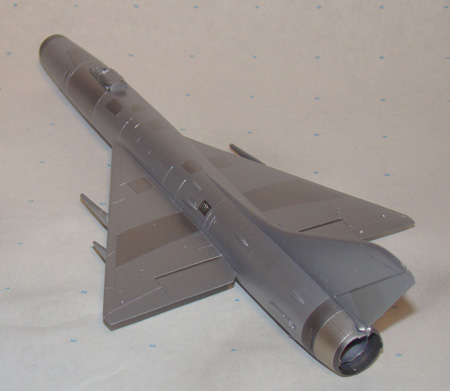
The Su-9 with paint:
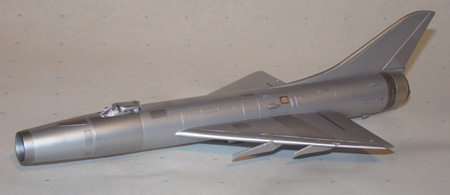
A ways yet to go, but like I said, into the home stretch. Still have to paint and attach the landing gear, which I cleaned-up tonight. I've already created a replacement pitot boom, which awaits attachment as one of the final steps. I removed those funky "spikes" which characteristically adorn the tip of each missile pylon, and will be replacing them with metal. One problem I've come up against is the missiles, which I consider unusable. I checked my old ICM modern Russian weapons set, and the AA-2 missiles in there are even worse. I will have to check around and see if I can find some decent after-market ones.
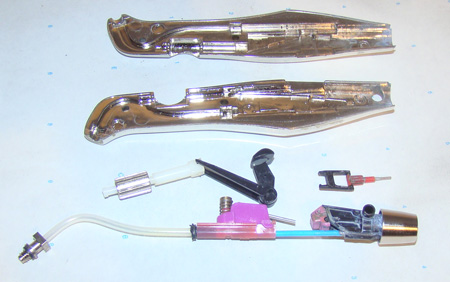
Now, for anyone who has ever wondered what's inside your Aztek air brush, here you are:
And here is the cause of my current despair:
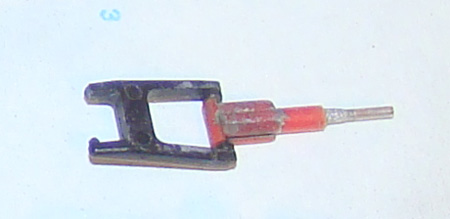
This little trapeze shaped linkage connects the trigger to the metal piston rod which keeps the needle pressed forward. Slide the trigger back, and it pulls-back the spring-tensioned piston, and allows the needle to open-up and let paint flow through. the little nub on the upper-left is broken-off, which prevents the entire linkage from working, so no paint flow. And, since Badger does not consider the internals to be user-serviceable, you cannot, to the best of my knowledge, order a replacement. I toyed with the idea of manufacturing a replacement part from rigid steel wire, but decided my time was worth more than the cost of just ordering a replacement. Actually a pretty lame design, if you ask me. It really is a wonder more of these things don't break, weak as the internal plastic parts are.
The Su-9 with paint:
A ways yet to go, but like I said, into the home stretch. Still have to paint and attach the landing gear, which I cleaned-up tonight. I've already created a replacement pitot boom, which awaits attachment as one of the final steps. I removed those funky "spikes" which characteristically adorn the tip of each missile pylon, and will be replacing them with metal. One problem I've come up against is the missiles, which I consider unusable. I checked my old ICM modern Russian weapons set, and the AA-2 missiles in there are even worse. I will have to check around and see if I can find some decent after-market ones.
Now, for anyone who has ever wondered what's inside your Aztek air brush, here you are:
And here is the cause of my current despair:
This little trapeze shaped linkage connects the trigger to the metal piston rod which keeps the needle pressed forward. Slide the trigger back, and it pulls-back the spring-tensioned piston, and allows the needle to open-up and let paint flow through. the little nub on the upper-left is broken-off, which prevents the entire linkage from working, so no paint flow. And, since Badger does not consider the internals to be user-serviceable, you cannot, to the best of my knowledge, order a replacement. I toyed with the idea of manufacturing a replacement part from rigid steel wire, but decided my time was worth more than the cost of just ordering a replacement. Actually a pretty lame design, if you ask me. It really is a wonder more of these things don't break, weak as the internal plastic parts are.