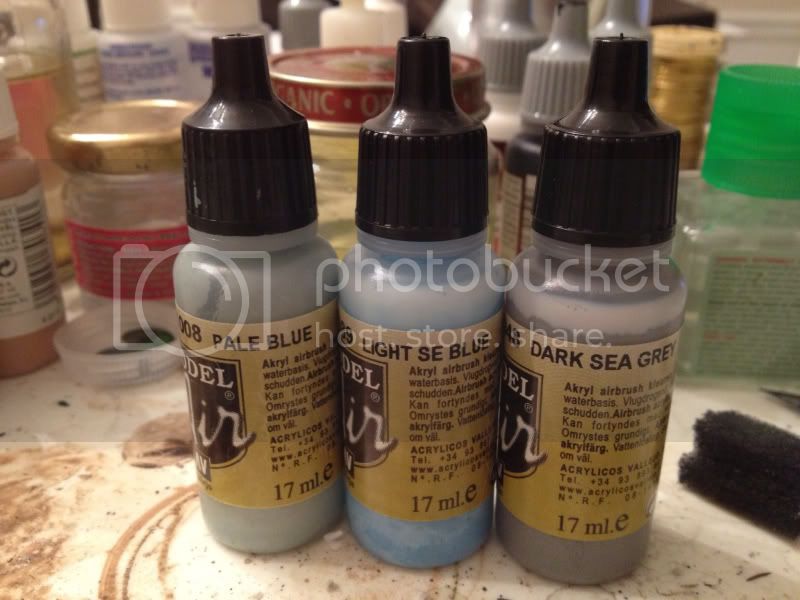
Thanks for the comment, Russell. I use Vallejo acrylics, but cannot remember the actual colors right now. I will upload a picture later.
Greg, very nice NMF on the Su-9. The use of different 'shades" of metallic looks great.
More to follow on my SU-27 soon.
Air Campaigns
Want to start or join a group build? This is where to start.
Want to start or join a group build? This is where to start.
Hosted by Frederick Boucher, Michael Satin
OFFICIAL: Super Sukhois Campaign
Posted: Wednesday, January 09, 2013 - 07:46 AM UTC
Posted: Thursday, January 10, 2013 - 03:53 AM UTC
Russell, as promised here are the paints used for the SU-27. In no way spot on shades, but then again there are so many different shades on these aircraft in Russian service.

Gremlin56
Joined: October 30, 2005
KitMaker: 3,897 posts
AeroScale: 564 posts
KitMaker: 3,897 posts
AeroScale: 564 posts

Posted: Thursday, January 10, 2013 - 05:17 AM UTC
Quoted Text
OK, so I couldn't wait. Here are some progress photos, so you know I'm not just stringing you all along!
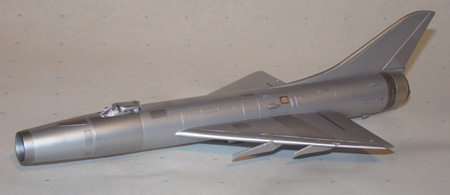
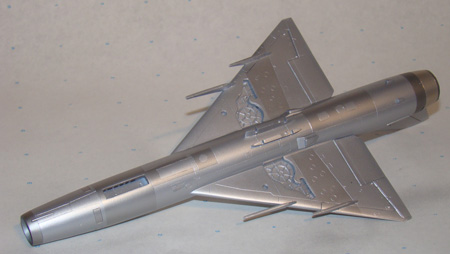
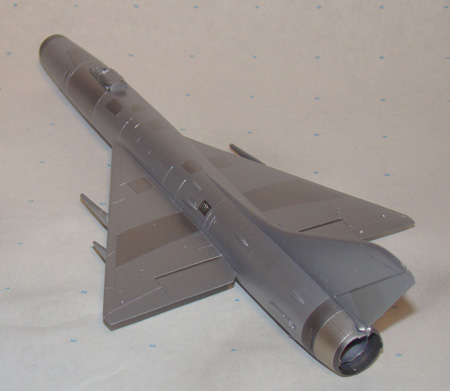
The Su-9 with paint:
A ways yet to go, but like I said, into the home stretch. Still have to paint and attach the landing gear, which I cleaned-up tonight. I've already created a replacement pitot boom, which awaits attachment as one of the final steps. I removed those funky "spikes" which characteristically adorn the tip of each missile pylon, and will be replacing them with metal. One problem I've come up against is the missiles, which I consider unusable. I checked my old ICM modern Russian weapons set, and the AA-2 missiles in there are even worse. I will have to check around and see if I can find some decent after-market ones.
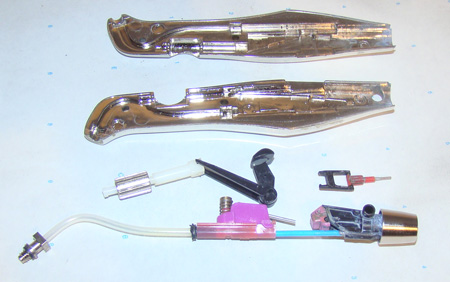
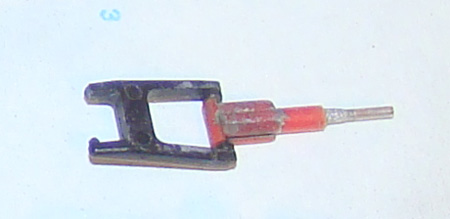
Now, for anyone who has ever wondered what's inside your Aztek air brush, here you are:
And here is the cause of my current despair:
This little trapeze shaped linkage connects the trigger to the metal piston rod which keeps the needle pressed forward. Slide the trigger back, and it pulls-back the spring-tensioned piston, and allows the needle to open-up and let paint flow through. the little nub on the upper-left is broken-off, which prevents the entire linkage from working, so no paint flow. And, since Badger does not consider the internals to be user-serviceable, you cannot, to the best of my knowledge, order a replacement. I toyed with the idea of manufacturing a replacement part from rigid steel wire, but decided my time was worth more than the cost of just ordering a replacement. Actually a pretty lame design, if you ask me. It really is a wonder more of these things don't break, weak as the internal plastic parts are.
Badger in future?.......................
Gremlin56
Joined: October 30, 2005
KitMaker: 3,897 posts
AeroScale: 564 posts
KitMaker: 3,897 posts
AeroScale: 564 posts

Posted: Thursday, January 10, 2013 - 05:19 AM UTC
Beautiful camo and great choice of colours Jesper,
cheers,
Julian
cheers,
Julian
gconterio

Joined: June 24, 2010
KitMaker: 66 posts
AeroScale: 39 posts

Posted: Thursday, January 10, 2013 - 07:56 AM UTC
Thanks, Jesper! I'm quite obsessed lately with natural metal finishes.
Gremlin - I meant to say "Aztek" doesn't consider any of the internal parts to be user-serviceable.
I did manage to resurrect my Badger 150 to continue work, but my replacement Aztek arrived today, and I will doubtless go back to using that. The Aztek is the easiest to clean of any airbrush I've used, and I HATE cleaning them! I may continue to use the Badger for just Alclad, as it's not too bad to clean-up and it works well with the laquer-based paint.

didgeboy

Joined: September 21, 2010
KitMaker: 1,846 posts
AeroScale: 103 posts

Posted: Thursday, January 10, 2013 - 04:38 PM UTC
Ok quick new aircraft builder question. I a, getting ready to paint the su34 and a bit freaked out about doing he camo. I have sprayed on the master colour and have begun masking of some small portions. I have two colors to lay down, a slightly darker shade then a more darker shade. My fear is that the way that I am masking off, just covering up the base colors, is going to be an issue when I start laying on the third color. Any help please?
Gremlin56
Joined: October 30, 2005
KitMaker: 3,897 posts
AeroScale: 564 posts
KitMaker: 3,897 posts
AeroScale: 564 posts

Posted: Thursday, January 10, 2013 - 07:18 PM UTC
Once you go Krome you never go back 
Julian

Julian
gconterio

Joined: June 24, 2010
KitMaker: 66 posts
AeroScale: 39 posts

Posted: Friday, January 11, 2013 - 02:13 AM UTC
Quoted Text
Ok quick new aircraft builder question. I a, getting ready to paint the su34 and a bit freaked out about doing he camo. I have sprayed on the master colour and have begun masking of some small portions. I have two colors to lay down, a slightly darker shade then a more darker shade. My fear is that the way that I am masking off, just covering up the base colors, is going to be an issue when I start laying on the third color. Any help please?
Hi Damon,
Whenever I do a three (or more!) color cammo scheme, I mask in progressive stages, lightest to darkest. Since underside colors are almost invariably the lightest, I start there, then mask off the bottom. Lightest topside color is next, after which I mask those areas which will remain that color. I then just repeat this process for each color, naturally leaving the masking for all the previous colors in place as I go along. This approach should work fine for your Su-34.
For me, what becomes really challenging is a three or more color topside cammo scheme with soft-edge demarcation between colors. Being extremely anal by nature, I am completely intolerant of overspray, so I never do this freehand, instead using paper masks cut to the shape of the patch of cammo I want to reproduce, and attaching it to the model with Blue Tac. You can see where this gets really complicated once you go beyond two colors!

didgeboy

Joined: September 21, 2010
KitMaker: 1,846 posts
AeroScale: 103 posts

Posted: Friday, January 11, 2013 - 03:35 AM UTC
Greg;
Sounds like I am on the right track. Gess I am just afraid of building up a layer that is too thick and either obscuring the detail or altering the top most colour. Any suggestions?
Sounds like I am on the right track. Gess I am just afraid of building up a layer that is too thick and either obscuring the detail or altering the top most colour. Any suggestions?
gconterio

Joined: June 24, 2010
KitMaker: 66 posts
AeroScale: 39 posts

Posted: Friday, January 11, 2013 - 07:53 AM UTC
Well one thing I always have to keep my eye on is my tendency to not thin my paint enough. If you're like me, and tend to error toward leaving it a bit thick, then you might conceivably get too thick a coat, but if you thin it properly, you should be able to put down several layers without obscuring detail of having it look a little funky. Also you should be able to lay down several light coats in order to overcome the darker base-color showing through.
Posted: Friday, January 11, 2013 - 09:47 AM UTC
Thanks for the comment, Julian.
Damon, as already pointed out the trick is really to get the right consistency of the paint. Airbrush in genral does not cover up details unless you really add a lot of coats.
Damon, as already pointed out the trick is really to get the right consistency of the paint. Airbrush in genral does not cover up details unless you really add a lot of coats.

didgeboy

Joined: September 21, 2010
KitMaker: 1,846 posts
AeroScale: 103 posts

Posted: Friday, January 11, 2013 - 06:38 PM UTC
Thanks guys. First time I am always a bit nervous and tend to over analyze (notice that word begins with "anal" for a reason). Will make sure to thin the stuff well but not too much.
Posted: Sunday, January 13, 2013 - 01:05 AM UTC
A little more progress on my SU-27. Main painting is done. Next is the decals and then light weathering.
More to follow
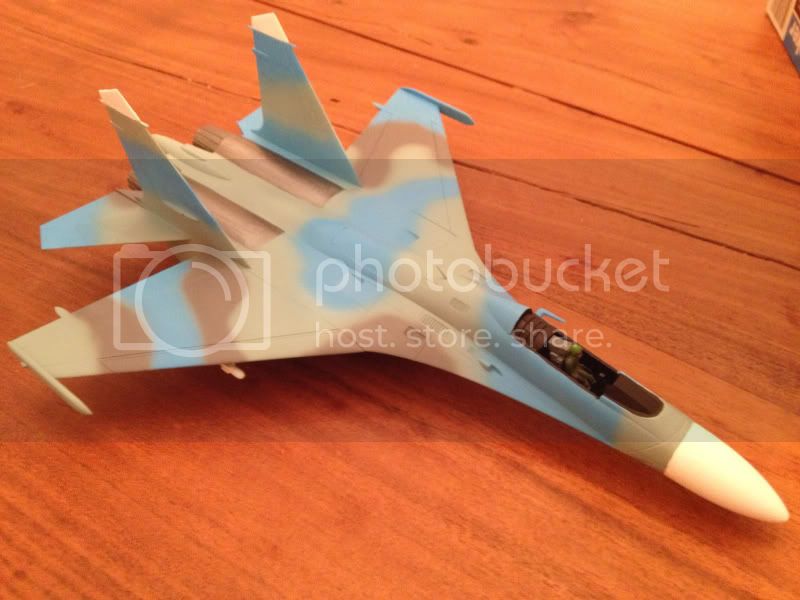
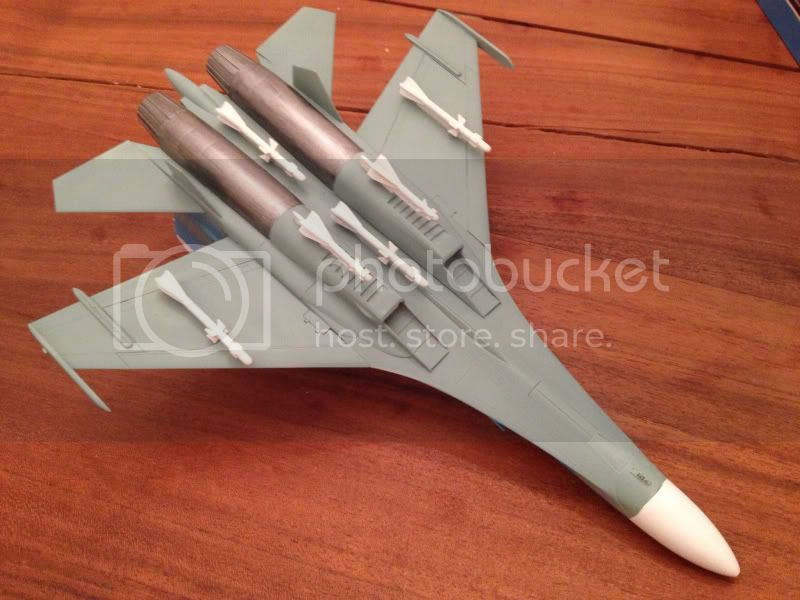
More to follow


gconterio

Joined: June 24, 2010
KitMaker: 66 posts
AeroScale: 39 posts

Posted: Sunday, January 13, 2013 - 01:52 AM UTC
That looks REALLY nice, Jesper!

Siderius

Joined: September 20, 2005
KitMaker: 1,747 posts
AeroScale: 1,673 posts

Posted: Sunday, January 13, 2013 - 05:17 AM UTC
I agree, great looking Sukhoi Jesper. Russell

didgeboy

Joined: September 21, 2010
KitMaker: 1,846 posts
AeroScale: 103 posts

Posted: Monday, January 14, 2013 - 02:07 PM UTC
Any word yet on an extension for this? My garage is too cold to work in right now and I still have one more main colour to lay down for the camo then onto the rest of it. Let me know. Cheers.

Siderius

Joined: September 20, 2005
KitMaker: 1,747 posts
AeroScale: 1,673 posts

Posted: Monday, January 14, 2013 - 02:10 PM UTC
As far as I am concerned, a month extension should be just fine. I guess I have some say in this since I am heading this campaign. I haven't headed a campaign before so I think I am within the realm of possiblity.  Russell
P.S. I still need to break open the Su-15!! School starts in a week. LOL
 Russell
P.S. I still need to break open the Su-15!! School starts in a week. LOL

SaxonTheShiba

Joined: February 01, 2009
KitMaker: 1,233 posts
AeroScale: 663 posts

Posted: Monday, January 14, 2013 - 02:41 PM UTC
I would also be interested in a slight extension to the campaign, if feasible. Should be close to the deadline, maybe just a tad longer.
Best wishes, Ian
Best wishes, Ian
Posted: Wednesday, January 16, 2013 - 08:39 AM UTC
Quoted Text
unfortunately with the number of campaigns currently running and starting we won't officially extend any campaigns at the moment so the campaign will close on its set date. As far as I am concerned, a month extension should be just fine. I guess I have some say in this since I am heading this campaign. I haven't headed a campaign before so I think I am within the realm of possiblity.Russell
P.S. I still need to break open the Su-15!! School starts in a week. LOL
However Russell will have the ability to award the ribbons long after the campaign closes so keep posting here as technically you can have an unofficial extension

Siderius

Joined: September 20, 2005
KitMaker: 1,747 posts
AeroScale: 1,673 posts

Posted: Wednesday, January 16, 2013 - 10:00 AM UTC
Sounds good to me folks! Russell

SaxonTheShiba

Joined: February 01, 2009
KitMaker: 1,233 posts
AeroScale: 663 posts

Posted: Wednesday, January 16, 2013 - 10:46 AM UTC
Good deal.....thanks for the info Allen. I think I can make it on time anyway.
Best wishes, Ian
Best wishes, Ian
Posted: Thursday, January 17, 2013 - 03:12 PM UTC
Thanks for the comments on my Sukhoi, guys. Appreciate it.
More progress has been made. The cockpit glass is way over scale, but I have no alternative. The decals are after market and add some nice color to break up the camouflage scheme.
Just a little light weathering and it is done.
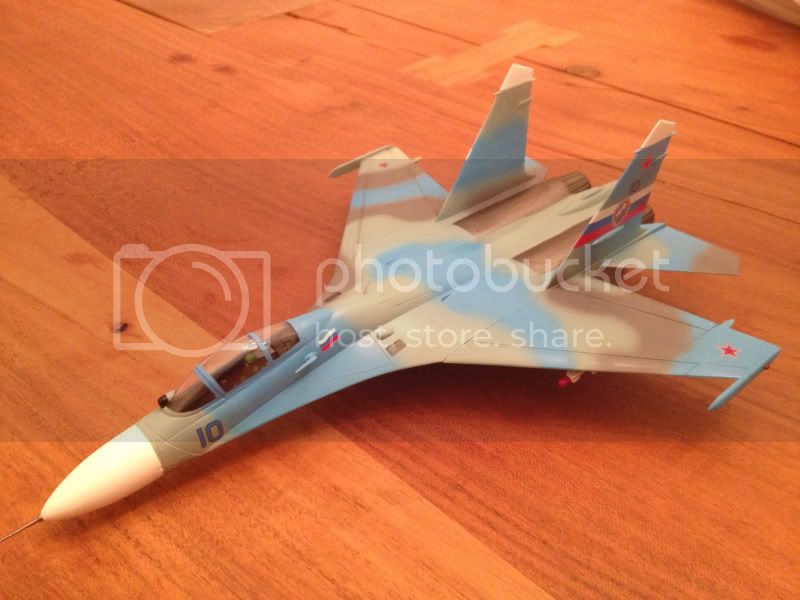
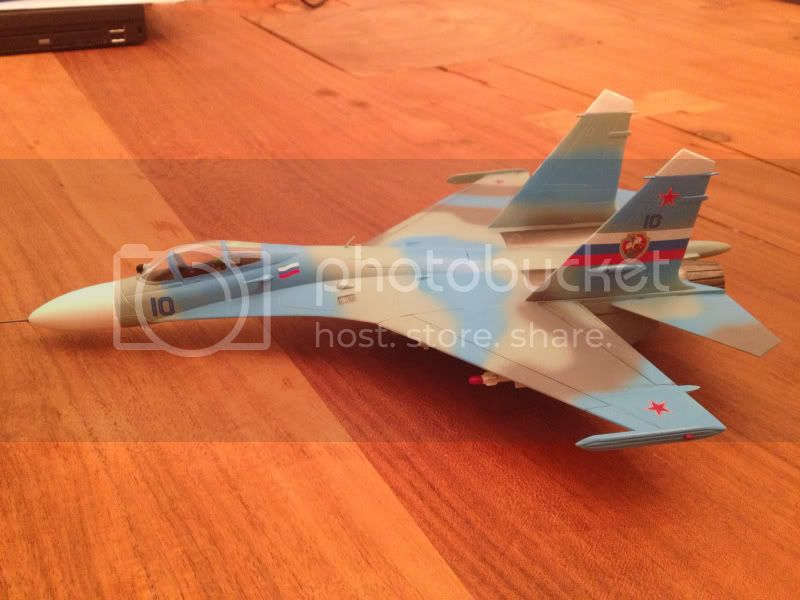
More progress has been made. The cockpit glass is way over scale, but I have no alternative. The decals are after market and add some nice color to break up the camouflage scheme.
Just a little light weathering and it is done.


Nito74

Joined: March 04, 2008
KitMaker: 5,386 posts
AeroScale: 635 posts

Posted: Friday, January 18, 2013 - 03:01 AM UTC
Yup ! That's a beauty Jesper !! smuk sukhoi !
Congrats !!!
Congrats !!!

Posted: Saturday, January 19, 2013 - 09:20 AM UTC
Thanks, John! Appreciate it. 


Siderius

Joined: September 20, 2005
KitMaker: 1,747 posts
AeroScale: 1,673 posts

Posted: Saturday, January 19, 2013 - 09:23 AM UTC
I must agree, a very fine looking Sukhoi! Good work Jesper. Russell 

 |


