Air Campaigns
Want to start or join a group build? This is where to start.
OFFICIAL: Hangar Queen III Campaign
Mcleod
_VISITCOMMUNITY
Alberta, Canada
Joined: April 07, 2010
KitMaker: 1,028 posts
AeroScale: 939 posts
Posted: Sunday, August 04, 2013 - 05:49 PM UTC

Quoted Text

Totally oob. The interior is scant at best, the decals are rhinoceros hide, I messed up the wash some. And I tried a different type of masking tape on the canopy. Which was a mistake.


I wouldn't be getting to down and hard on yourself, Richard. That's a fine looking 110 you have there.
vdejarnette
_VISITCOMMUNITY
Maryland, United States
Joined: February 25, 2013
KitMaker: 209 posts
AeroScale: 138 posts
Posted: Sunday, August 04, 2013 - 11:15 PM UTC
Richard, it is 1/72 scale. That is a beautiful 110 you have there.
RolandZ
_VISITCOMMUNITY
Gelderland, Netherlands
Joined: August 04, 2013
KitMaker: 4 posts
AeroScale: 1 posts
Posted: Tuesday, August 06, 2013 - 03:50 AM UTC
Well, here's my entry. A Monogram 1/48 RF-101 Voodoo. Major parts are loose, and a quick check for fit was done today. Need to get some paint on the internal parts and cockpit, so that will be step 1. Fit is not as bad as i read somewhere, with the wingroot quite acceptable. Definitely not a grand canyon

Please bear in mind that flying stuff is not what i usually build, and accuracy is nice, but not a requirement. I build for pleasure, if it looks good it's OK with me.

Anyway, here is where she is at right now:


And some loose parts:


Oh yeah, the mig-15 is the back is my 4 year old son's playthingie. A quick afternoon airfix project that he helped put together and has been playing with for almost 2 months now. Seemingly indestructable kit for a few euros
Bigrip74
_VISITCOMMUNITY
Texas, United States
Joined: February 22, 2008
KitMaker: 5,026 posts
AeroScale: 2,811 posts
Posted: Tuesday, August 06, 2013 - 08:19 AM UTC
Roland, welcome to HQIII and I love that Monogram 105. How has that Mig 15 remained in one piece, at that age I would have no wings by now.

Bob
GhostHawk
_VISITCOMMUNITY
Cordoba, Argentina
Joined: January 27, 2011
KitMaker: 268 posts
AeroScale: 264 posts
Posted: Tuesday, August 13, 2013 - 04:53 AM UTC
Hello:

I'm back again...!!! Traing to finish my model on "Hangar Queen"...

This is my Fiat CR-42CN, in 1/48...

First, my vacu-box, with the small master made from aluminium in my Dremel... and the tiny pieces done...


Then, the oil radiator intakes; made by hand... And the exhaust from the vacuformed pieces....


And the last, all the oil radiator system intake and exhaust; forgotten by Classic Airframes... Rare, Don't you think...?


Thanks You Very Much...

Diego
vdejarnette
_VISITCOMMUNITY
Maryland, United States
Joined: February 25, 2013
KitMaker: 209 posts
AeroScale: 138 posts
Posted: Wednesday, August 14, 2013 - 01:16 AM UTC
Splinter Camo is done on the ME P-1111. It is a combination of Tamiya RLM 81 (Braunviolet) and Vallejo RLM 82 (Dunkelgrun?). Not sure if the camo pattern is accurate for a late war interceptor (I saw something on finescale that reference 76/81/82 for late war fighters), but it's a 1946 what-if plane and I used RLM 84 in lieu of RLM 76 anyway.


Luckily that obvious white spot on the canopy seems to be where paint peeled off of the tape only, so it should be gone when I unmask the cockpit.
rochaped
_VISITCOMMUNITY
Lisboa, Portugal
Joined: August 27, 2010
KitMaker: 679 posts
AeroScale: 669 posts
Posted: Wednesday, August 14, 2013 - 04:15 AM UTC
Van,

That's a fine looking what-if you got there very well painted camo in my opinion.
Regarding the colours, the braunviolet looks more like RLM 75 or so it seems in the photo. RLM 81 is a bit more brownish to be fair.

Anyway the camo is spurious right? and it is really eye catching as it is.
Keep it up

Cheers
Pedro
vdejarnette
_VISITCOMMUNITY
Maryland, United States
Joined: February 25, 2013
KitMaker: 209 posts
AeroScale: 138 posts
Posted: Wednesday, August 14, 2013 - 06:47 AM UTC
Pedro,

I agree after looking at some other paint company's RLM 81 that the Tamiya AS Braunviolet is a lot more violet than brown. A review of the research posted on finescale on the subject tells me there are a small handful of variants of the RLM 81 mixture so who knows if it's actually incorrect for all instances of RLM 81.
rochaped
_VISITCOMMUNITY
Lisboa, Portugal
Joined: August 27, 2010
KitMaker: 679 posts
AeroScale: 669 posts
Posted: Wednesday, August 14, 2013 - 07:49 AM UTC
Hi all,

@Van, yes i agree. who knows how different german paint stocks would be like during the final year of WWI? surely there were variations of all late war RLM shades.
Please do not see my comment as depreciative, like i said the paint job looks real good whatever the shade used

Now, managed to call the Junkers done.
still 2 or 3 minor things to conclude but i'll leave those to the gallery photo.

Here it is, hope you enjoy. i know i did.


and this will be my second hangar queen apply. Tamiya's 109 has been inside the box like this for 3 years now, so i feel i need to ended him fast.


Right now I'll be 2 weeks without models or net, just plain fun vacations.

Cheers
Pedro
vdejarnette
_VISITCOMMUNITY
Maryland, United States
Joined: February 25, 2013
KitMaker: 209 posts
AeroScale: 138 posts
Posted: Wednesday, August 14, 2013 - 08:07 AM UTC
Pedro, I knew you weren't be deprecative, I appreciate the comments!

That is an excellent Junkers Nightfighter you have there. What variant is it? There are so many, I am used to looking at the ones with the radar sticking out from the nose like an old TV antennae but this one seems to be housed in a radome? I am guessing 1/48 correct?
rochaped
_VISITCOMMUNITY
Lisboa, Portugal
Joined: August 27, 2010
KitMaker: 679 posts
AeroScale: 669 posts
Posted: Wednesday, August 14, 2013 - 09:03 AM UTC
Van,

The model is old Dragon's quarter scale, with a morgenstern radar dome. I think it was the last effort made by germany in terms of airborne radar warfare, so I also assume it was the last sub version of the Ju 88 G model.

The nose is resin aftermarket by the way.

Cheers
Pedro
SuperSandaas
_VISITCOMMUNITY
Sør-Trøndelag, Norway
Joined: October 23, 2012
KitMaker: 189 posts
AeroScale: 142 posts
Posted: Wednesday, August 14, 2013 - 10:32 AM UTC
I have a Airfix Bf110 which I have only unboxed and started painting interior and some parts on. It has been put back in the box twice since I started it in late May when other projects was more tempting. I think it would be appropriate to get it finished now. If not it will just end up back in the box again...

Will post a picture tomorrow when my camera is recharged.
Bigrip74
_VISITCOMMUNITY
Texas, United States
Joined: February 22, 2008
KitMaker: 5,026 posts
AeroScale: 2,811 posts
Posted: Wednesday, August 14, 2013 - 11:50 AM UTC
@ Diego: I am very interested in your vacumn box, I am trying to build one myself and need a little help or some sort of diagram.

@ Eirik: Welcome to HQ III and will wait to see the photos, how long have you been putting the kit back into the box? I have several that are over 10 years old that have been in a constant in/out motion .

@ Pedro: nice job on the Junkers the view into the canopy is realistic. Now what is in store with the 109?

@ Van: it looks good to me.

Bob
rochaped
_VISITCOMMUNITY
Lisboa, Portugal
Joined: August 27, 2010
KitMaker: 679 posts
AeroScale: 669 posts
Posted: Wednesday, August 14, 2013 - 09:07 PM UTC
Hi Bob,

The 109 will dress one of 7.JG/26 Muncheberg's wingman during the staffel famous sejour in Sicily. E-7 version using some Kagero decals (altough I have several sheets of this publisher it will be the first time I actually use one of them).

See you in September


Cheers
Pedro
GhostHawk
_VISITCOMMUNITY
Cordoba, Argentina
Joined: January 27, 2011
KitMaker: 268 posts
AeroScale: 264 posts
Posted: Friday, August 16, 2013 - 06:05 AM UTC
Hello Boys...!!

At your request, totally out of the topic...

A little history of my Vacumn Box...

A take the materals from the favorite Artistic Warehause Shop of my wife... The box are used for bricolage, with decorative purposes; and at this latitudes we call MDF, some recycled wood...


After that I made the holes...


O.K. It was a lot of holes...

After that, the box was fixed to the white base suport with screws... And I glue the top suface (the suction surface)...


After that, You can fix the vacumn tube of the machine, and put the plastic sheet in between the removable top with the bolts (butterflybolts)


And... Bualaahh... You got all the thing...


I likes to fix the box to the workbench, that is way you can see the red metalic accesory... We call "Sargentos"...


Two considerations:

If you have a Electic Oven, Talk with your wife first... But, everybody says it works far better than the pistol...

And, May be necesary use some type of handgrip, and some "guide" to help a better aim in the moment when you drop the heated device against the suction surface...

I hope my English do not ruined all the explanation...

If you needs something else, Please, Ask again...
Thanks You Very Much

Diego
Bigrip74
_VISITCOMMUNITY
Texas, United States
Joined: February 22, 2008
KitMaker: 5,026 posts
AeroScale: 2,811 posts
Posted: Friday, August 16, 2013 - 08:32 AM UTC
Diego, I just purchased my materials yesterday before I saw your post. It is great and maybe you should do a write up for everyone. Again thanks for taking the time to lend a hand and your english is just fine the description and photos were what explained the vac box to me.

Bob
SuperSandaas
_VISITCOMMUNITY
Sør-Trøndelag, Norway
Joined: October 23, 2012
KitMaker: 189 posts
AeroScale: 142 posts
Posted: Friday, August 16, 2013 - 11:02 AM UTC
Well, it's not years and years. (I'm a speed-builder usually). I bought the kit in January as part of a big delivery, planning to built it right away as part of my "Battle of Britain" themed collection.

But then it was put into the stash. Several times during the spring I put it on the workbench, but never got it started. Then I though I'd built it during the summer, and started it in June but got a new parcel of kits and reboxed it agian when I wanted to build something in all natural metal. Then I picked it up again in July, but with only one week before 4 weeks of travelling I made a quick build of a Spitfire instead... And now I have a lot of kits I wanna start up after the holidays, so I better finish the poor thing before I rebox it again. The current status:
Bigrip74
_VISITCOMMUNITY
Texas, United States
Joined: February 22, 2008
KitMaker: 5,026 posts
AeroScale: 2,811 posts
Posted: Friday, August 16, 2013 - 11:25 AM UTC
Eirik, you are what I classify a clean builder my work bench is a mess. Maybe your build will cause me to clean up my work area, so I will be watching with interest.

Bob
vdejarnette
_VISITCOMMUNITY
Maryland, United States
Joined: February 25, 2013
KitMaker: 209 posts
AeroScale: 138 posts
Posted: Friday, August 16, 2013 - 11:35 AM UTC
I managed to cobble together a what-if JG 400 (2nd Group) livery from a combination of kit decals and a sheet from the Academy ME 163 Komet. The Academy decals were not nearly as bad as I have heard, but nonetheless I will now have to get an aftermarket sheet for that kit.

Jessie_C
_VISITCOMMUNITY
British Columbia, Canada
Joined: September 03, 2009
KitMaker: 6,965 posts
AeroScale: 6,247 posts
Posted: Thursday, August 22, 2013 - 08:58 AM UTC
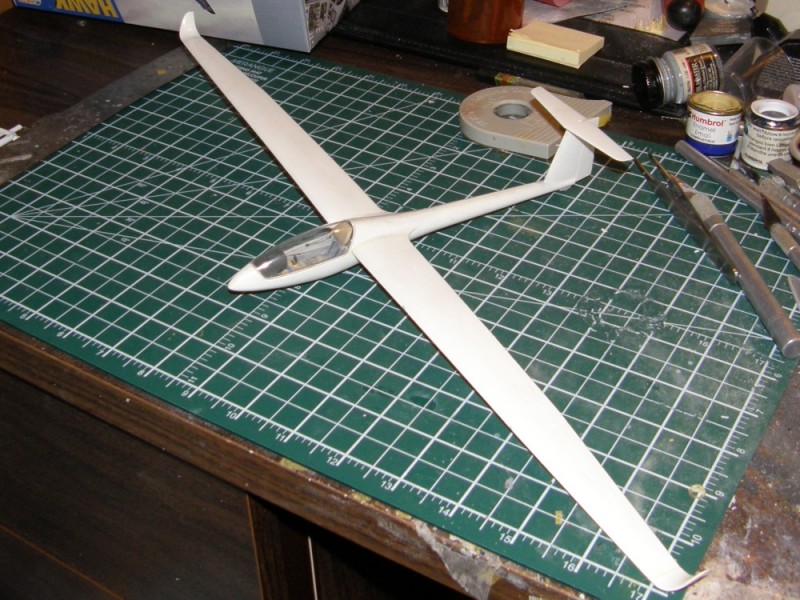
From the embarrassment of riches that is my WIP pile, I select the Revell 1/32 LS-8 for the Hangar Queen treatment. This one got almost finished before it fell into obscurity.

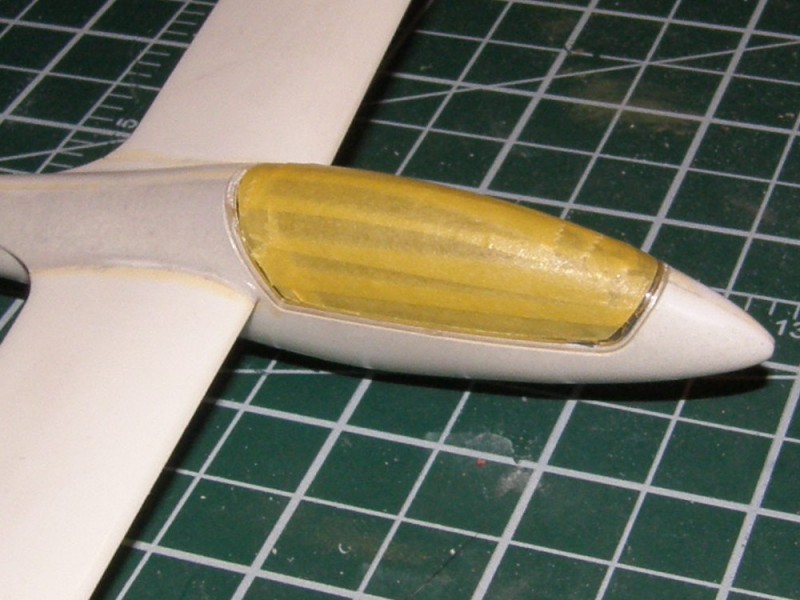
Picking up from where I left off, the first thing to do is to mask that lovely canopy.

I've sealed in the masking with a coat of Future. Once it dries I'll get a coat of primer on and see what needs doing.
Bigrip74
_VISITCOMMUNITY
Texas, United States
Joined: February 22, 2008
KitMaker: 5,026 posts
AeroScale: 2,811 posts
Posted: Thursday, August 22, 2013 - 12:49 PM UTC
@ Jessica: hello and what a great project to finish can you realize yourself just riding the thermals in that beautiful sail plane? Glad to have you on board.

@ Van: the paint is making her come alive.

Bob
Jessie_C
_VISITCOMMUNITY
British Columbia, Canada
Joined: September 03, 2009
KitMaker: 6,965 posts
AeroScale: 6,247 posts
Posted: Sunday, August 25, 2013 - 06:36 AM UTC
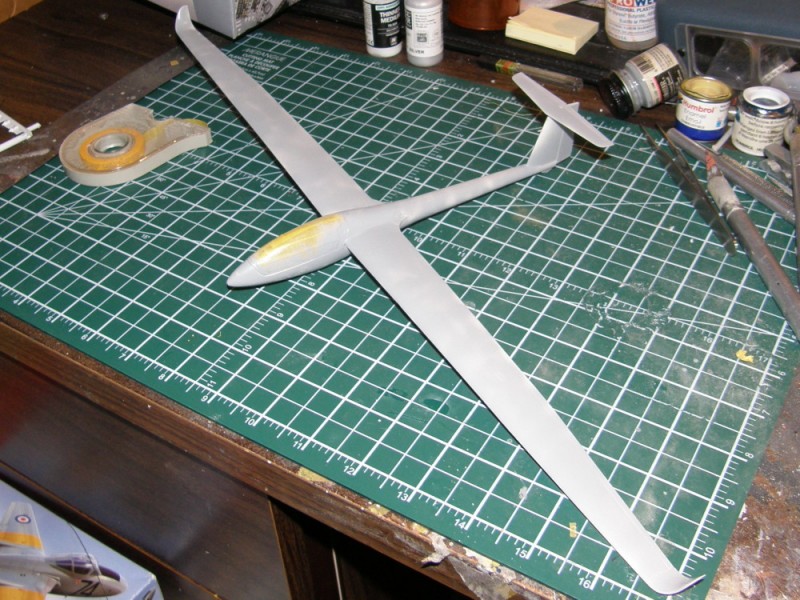
The primer reveals that I have some cleaning up to do.
tinbanger
_VISITCOMMUNITY
Ontario, Canada
Joined: February 04, 2008
KitMaker: 2,507 posts
AeroScale: 1,814 posts
Posted: Sunday, August 25, 2013 - 10:23 AM UTC
Hi Jessica.
Good idea sealing tape with Future I must try that!
Dragon164
#226
_VISITCOMMUNITY
British Columbia, Canada
Joined: February 20, 2012
KitMaker: 1,909 posts
AeroScale: 508 posts
Posted: Sunday, August 25, 2013 - 11:21 AM UTC

Quoted Text

Hi Jessica.
Good idea sealing tape with Future I must try that!


It works great!, you could also use the color that you are masking over to seal the tape.

Cheers Rob.
Jessie_C
_VISITCOMMUNITY
British Columbia, Canada
Joined: September 03, 2009
KitMaker: 6,965 posts
AeroScale: 6,247 posts
Posted: Sunday, August 25, 2013 - 12:06 PM UTC

Quoted Text

It works great!, you could also use the color that you are masking over to seal the tape.


Which is not the most terriffic idea in the world when you're masking a canopy...

But it does work wonders when you're doing a fuselage.