OFFICIAL: Hangar Queen III Campaign

#439
Washington, United States
Joined: November 05, 2005
KitMaker: 4,950 posts
AeroScale: 3,192 posts
Posted: Thursday, November 14, 2013 - 06:57 PM UTC
Hanger Queens in Waiting:
Monogram 1/72 F8F-1
Corsair the Sky Pirate - 1/72 Ace A-7D
Century Series - Airfix 1/72 F-105G
Anti Shipping - Academy 1/72 PBJ-1D
Academy 1/72 F-84E
Texas, United States
Joined: February 22, 2008
KitMaker: 5,026 posts
AeroScale: 2,811 posts
Posted: Friday, November 15, 2013 - 04:15 AM UTC
If it aint broke dont fix it.

#439
Washington, United States
Joined: November 05, 2005
KitMaker: 4,950 posts
AeroScale: 3,192 posts
Posted: Wednesday, November 20, 2013 - 08:14 AM UTC
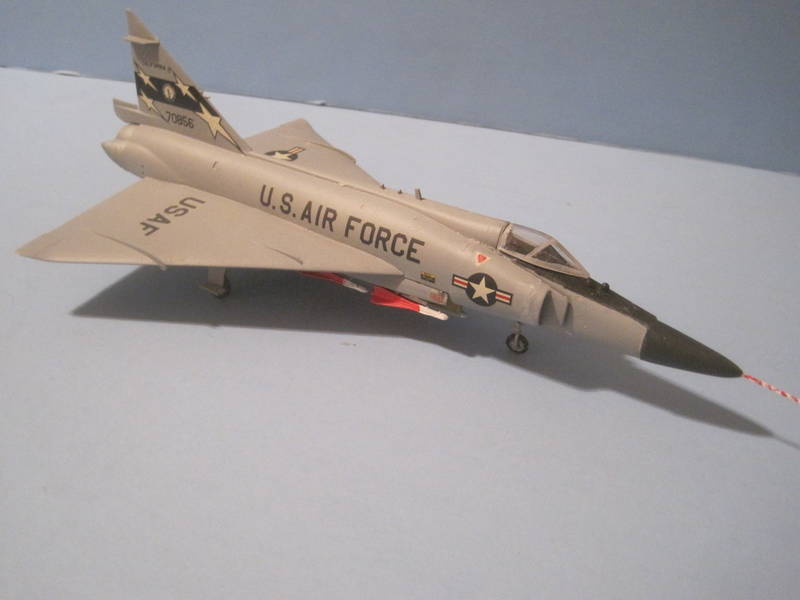
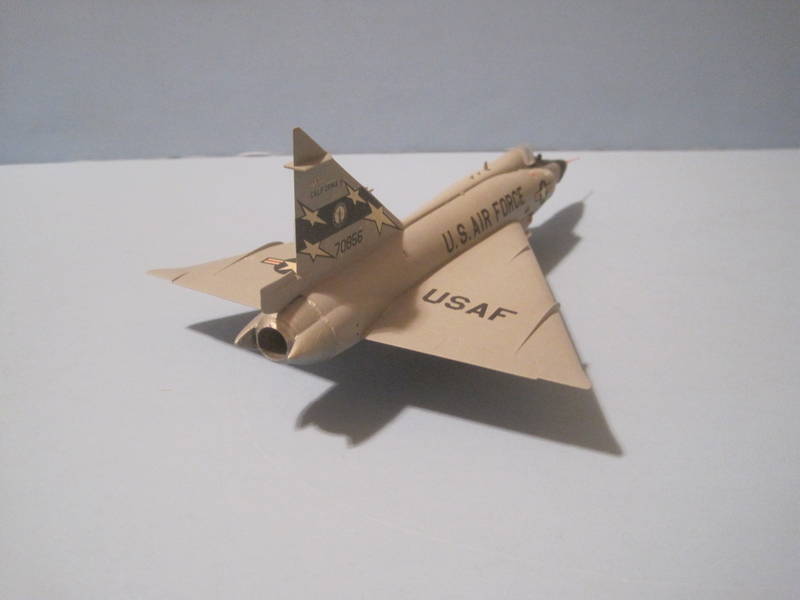
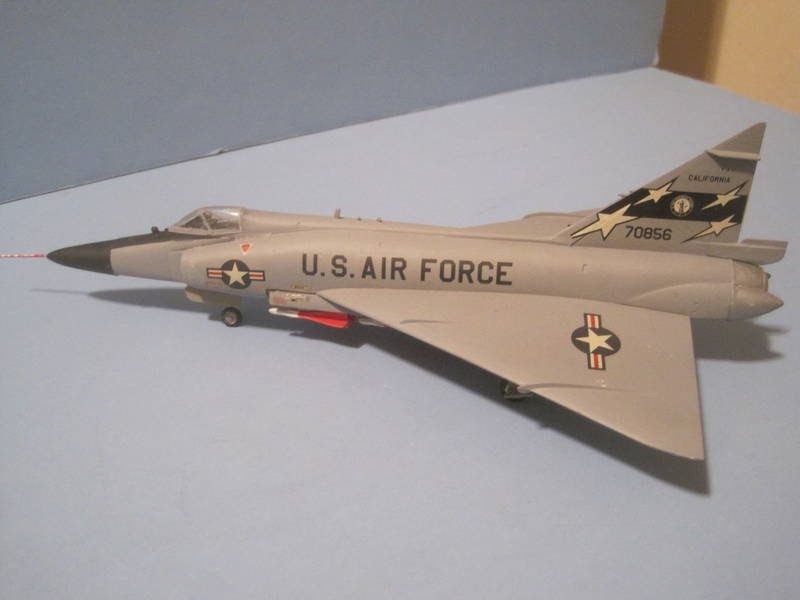
Well, I went to OHMS last night to show of an actual finished model, and managed to break the plastic pitot tube off as I took it out of the box to return it to the shelf.

So it now has a metal pitot tube....

Hanger Queens in Waiting:
Monogram 1/72 F8F-1
Corsair the Sky Pirate - 1/72 Ace A-7D
Century Series - Airfix 1/72 F-105G
Anti Shipping - Academy 1/72 PBJ-1D
Academy 1/72 F-84E
Texas, United States
Joined: February 22, 2008
KitMaker: 5,026 posts
AeroScale: 2,811 posts
Posted: Wednesday, November 20, 2013 - 10:57 AM UTC
Mark, I know your pain and smart moove with the metal part replacement.
Bob
If it aint broke dont fix it.

#439
Washington, United States
Joined: November 05, 2005
KitMaker: 4,950 posts
AeroScale: 3,192 posts
Posted: Wednesday, November 20, 2013 - 11:59 AM UTC
Jim Schubert always reminds me that modeling is problem solving. If I could just solve more problems than I make...
After I broke the pitot tube off, I carefully measured the part, scrounged thru my tube and wire collection and found something that was close. Found the right size drill and very carefully drilled a hole, off center and angled off of the CL.

So I used a larger drill, worked it at an angle to the original hole and wallered (that's a Texas term) the hole out. Applied CA liberally to the new pitot tube and held it in place till the CA cured...

Hanger Queens in Waiting:
Monogram 1/72 F8F-1
Corsair the Sky Pirate - 1/72 Ace A-7D
Century Series - Airfix 1/72 F-105G
Anti Shipping - Academy 1/72 PBJ-1D
Academy 1/72 F-84E
Tennessee, United States
Joined: September 20, 2005
KitMaker: 1,747 posts
AeroScale: 1,673 posts
Posted: Wednesday, November 20, 2013 - 01:48 PM UTC
Good work Mark, I just realized looking at your 102 and going back to the instructions for mine, that the red stripe I put on the intake lip shouldn't be where it is. Soooo....I removed those two red line decals on my kit and painted over the area. Whew! Easy mistake to make I guess. LOL

May post some new photos here. Russell
To Thine Own Self Be True
Siderius
A.K.A., RTA
Tennessee, United States
Joined: September 20, 2005
KitMaker: 1,747 posts
AeroScale: 1,673 posts
Posted: Wednesday, November 20, 2013 - 02:02 PM UTC
To Thine Own Self Be True
Siderius
A.K.A., RTA

#439
Washington, United States
Joined: November 05, 2005
KitMaker: 4,950 posts
AeroScale: 3,192 posts
Posted: Friday, November 22, 2013 - 10:44 AM UTC
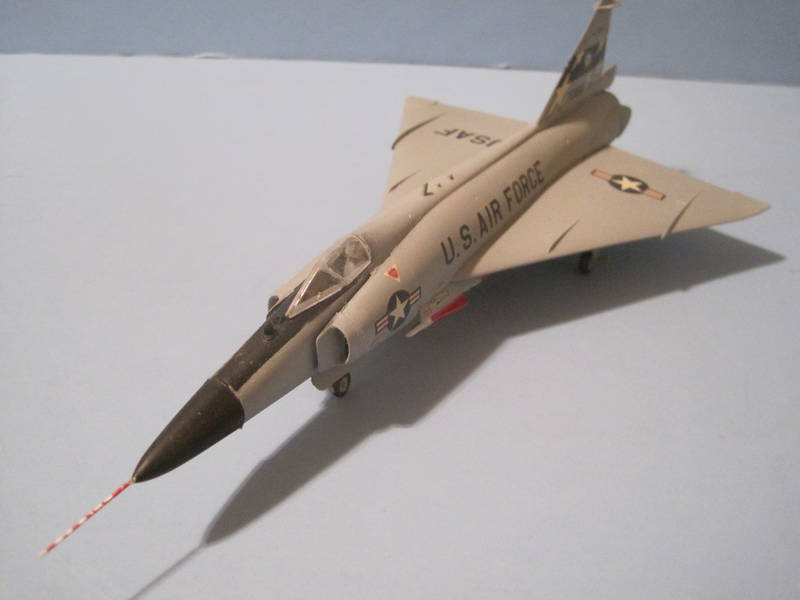
Here's one from the 317 FIS, shows the splitter flash pretty good.
F-102 There are several other flavors of this, including a CA ANG with black over silver..
FWIW, I destroyed the lighting bolt on the drop tank trying to get the two pieces to snug down. So they got left off...
Just noticed that the plane in the background is the one I did, don't think I got the SN in the right place 8^(
Hanger Queens in Waiting:
Monogram 1/72 F8F-1
Corsair the Sky Pirate - 1/72 Ace A-7D
Century Series - Airfix 1/72 F-105G
Anti Shipping - Academy 1/72 PBJ-1D
Academy 1/72 F-84E

#392
Hessen, Germany
Joined: January 09, 2013
KitMaker: 696 posts
AeroScale: 608 posts
Posted: Sunday, November 24, 2013 - 05:15 AM UTC
Hello, late but not too late for me to join your campaign!
My Dassault Mercure Airliner was a gift by my mother-in-law about fifteen years ago. I don't remember even when I first started that kit. It has been lying around at least five or more years. Now I realised there are only 3(!) parts left plus painting and decals. So I'm in


On the bench:
EE(BAC) Lightning F.2A (Airfix 1:72)
Texas, United States
Joined: February 22, 2008
KitMaker: 5,026 posts
AeroScale: 2,811 posts
Posted: Sunday, November 24, 2013 - 11:08 AM UTC
Hello Peter,
Welcome aboard you still have over 30 days to complete that airliner.
Bob
If it aint broke dont fix it.
England - East Midlands, United Kingdom
Joined: February 07, 2004
KitMaker: 911 posts
AeroScale: 415 posts
Posted: Tuesday, December 10, 2013 - 06:18 AM UTC
This is my RF-4E left over from the 55 years of Phabulous Phantoms campaign - pretty bad as I was running it!

Here is how it was at the end of the campaign, soooo close to being finished...
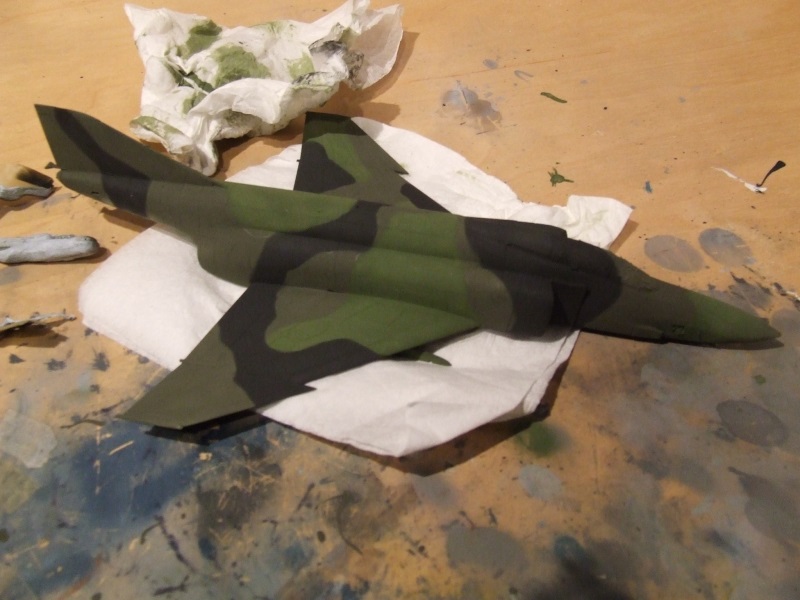
Decals were from Icarus. I've had them maybe 10 years, this is one of those projects that I've wanted to get done for a long time.
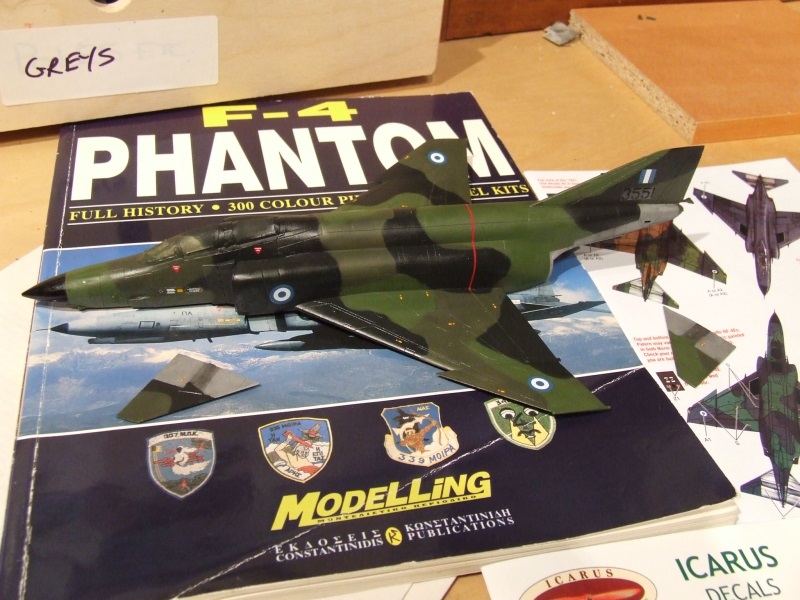
Washes and filters (those Phantoms the Greeks got given by the Germans got pretty tatty) and finishing touches...et voila!
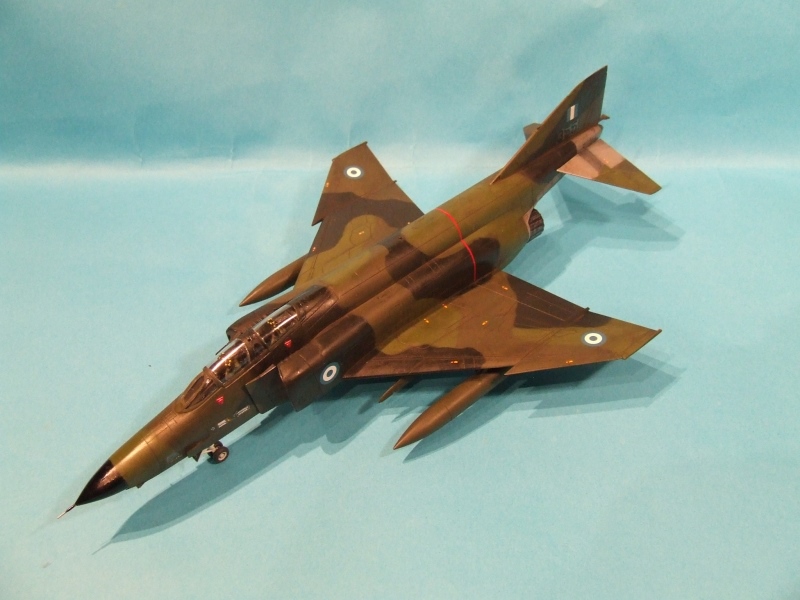
The kit is the Revell 1/72 RF-4E which for my money is the best Phantom in 1/72 (its not as fiddly and over-engineered as the Hasegawa F-4s, but has just as much detail and fits just as well).
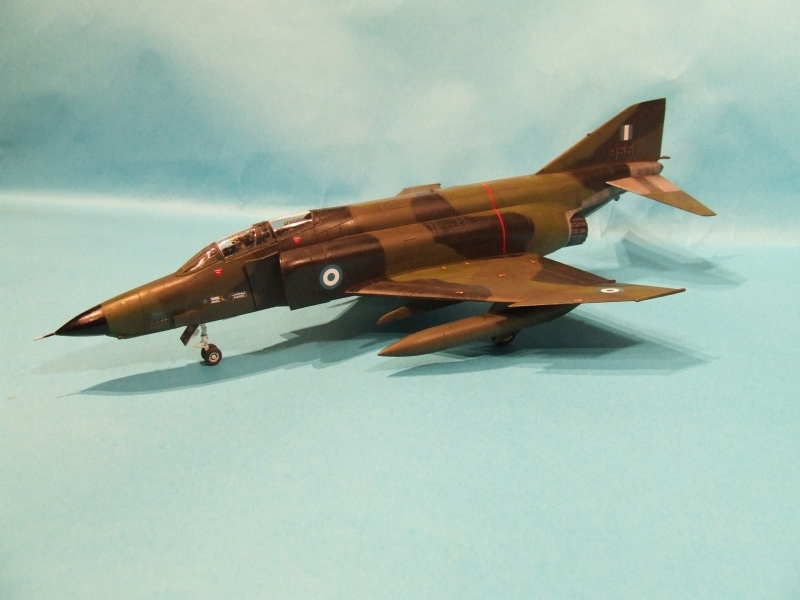
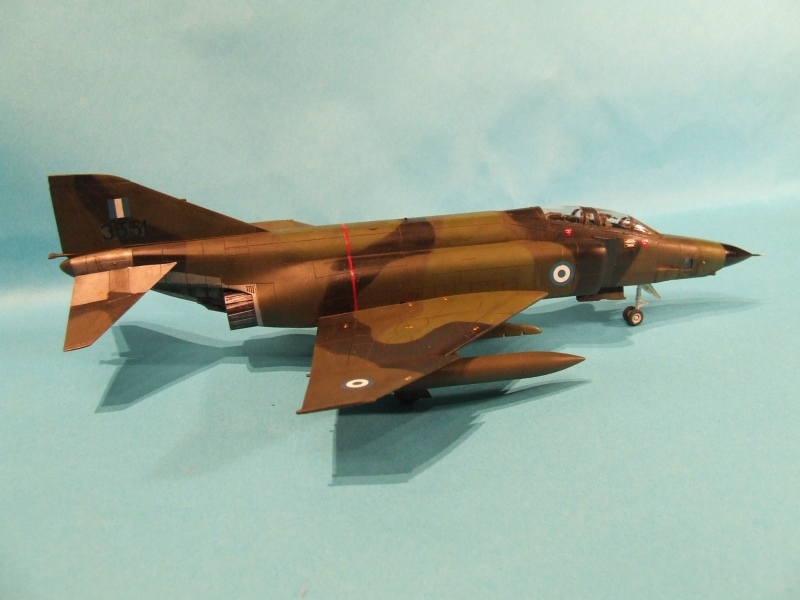
"Nelson be damned.......Lets get the hell out of here!"
Texas, United States
Joined: February 22, 2008
KitMaker: 5,026 posts
AeroScale: 2,811 posts
Posted: Wednesday, December 11, 2013 - 02:07 PM UTC
Well the time is ticking we only have 20 more days for Hanger Queen II.
Bob
If it aint broke dont fix it.
Ontario, Canada
Joined: March 23, 2008
KitMaker: 2,847 posts
AeroScale: 144 posts
Posted: Thursday, December 12, 2013 - 05:26 AM UTC
Greetings all!

I have dropped in from time to time to follow this campaign but mostly unforeseen life events have limited my participation. I would be remiss if I didn't acknowledge the beautiful work many of you have achieved on your no-longer Hangar Queens.

I have on more than a dozen occasions contemplated "premeditated destruction" of my entry and/or resigning from this campaign. The Super Cobra has proved to be a nightmare. I have lost count of how many times the skids have broken and needed repair (very brittle plastic?) let alone the volume of time needed to clean up bad seams on parts (the mould must have been improperly aligned?).
Anyway, I managed to get the remaining delicate parts on and decided to spray the main base colour (Light Gunship Grey). Considering that there is almost as much putty as plastic I think it didn't turn out too bad.


As might be expected, the "Curse of the Cobra" decided to visit again and the gun turret fell off while painting. To add insult to injury, the forward part of the port skid decided to break AGAIN! And, I still can't find the decals despite litterally hours of searching!

I've even contacted numerous members of the local IPMS club to see if anyone has spare low visibility Marine decals in 1/72 but so far no luck.

So, it looks like this beast is going back into the repair revetment.
Cheers,
Jan


Ontario, Canada
Joined: March 23, 2008
KitMaker: 2,847 posts
AeroScale: 144 posts
Posted: Friday, December 13, 2013 - 08:00 AM UTC
Hmm, maybe Friday the Thirteenth isn't that unlucky like some say! The chopper had the skid repaired (AGAIN), the last antennae and a scratch-built tail skid are attached. After fixing a few cosmetic blemishes the bird received a final coat of the base grey. In between all this, my SWMBO and I searched from almost top to bottom looking for the decals. In the process we found my loooong missing mini Mag-Lite, my cameras recently missing lens cap and...wait for it....THE DECALS!!!!!

Now the not quite rosy part, we had a minor flood over late summer in the basement work shop and the decals became a casualty. However, on a chance I cut out the name from the decal sheet and decided to see what would happen on a piece of scrap plastic. Here you see the result of the experiment.

The condition of the decals.

The Super Cobra at this point.

Next up is touch up the cockpit paint, paint the main rotor, canopy, stores and then the camo. Fingers crossed that the main skids remain attached.

Fingers crossed, period!!!!
Cheers,
Jan


British Columbia, Canada
Joined: September 03, 2009
KitMaker: 6,965 posts
AeroScale: 6,247 posts
Posted: Friday, December 13, 2013 - 08:18 AM UTC
They'll probably take a lot of soaking to get them off the paper. Just in case the water damaged the decals' glue, try putting them down on a coat of wet Future. That'll also seal them down nicely and prevent silvering at the same time.
When once you have tasted flight you will walk the Earth with your eyes turned skyward.
For there you have been, and there you will always long to return.
-Leonardo Da Vinci
Cordoba, Argentina
Joined: January 27, 2011
KitMaker: 268 posts
AeroScale: 264 posts
Posted: Friday, December 13, 2013 - 09:58 AM UTC
Hello:
May be necesary a "Hangar Queen IV" for this boy, but here we are...

A few corrections needed to the landing gear...


And more work on the legs...

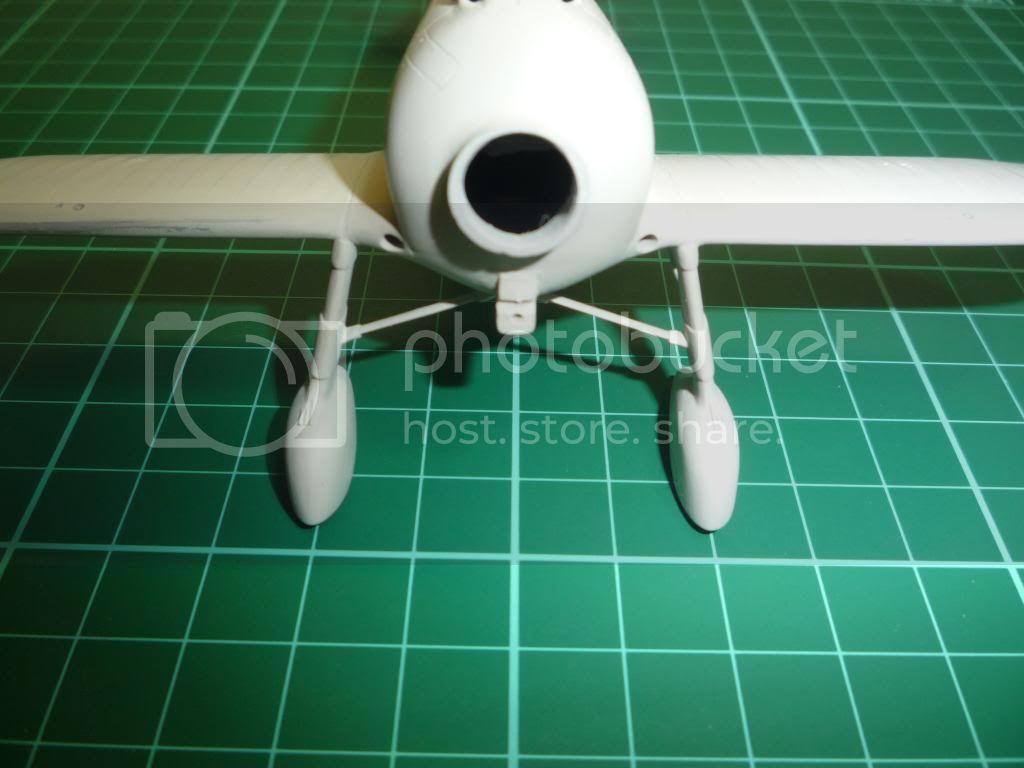
To finally have something like this...

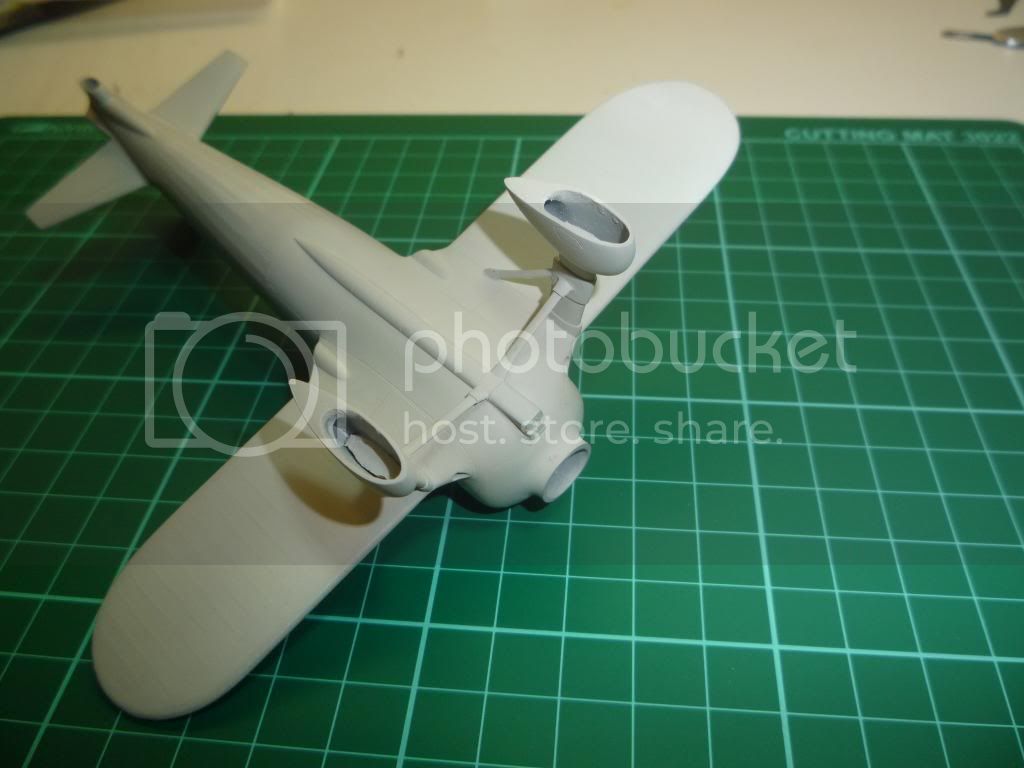
Not too much, but I was a hell of a fight...
I can not imagine what will be needed for the top wing...!

See You Soon... (I hope...)
Diego

Lisboa, Portugal
Joined: August 27, 2010
KitMaker: 679 posts
AeroScale: 669 posts
Posted: Friday, December 13, 2013 - 11:45 AM UTC
Hi everyone,
Here's my 2nd finished hangar beauty for this campaign…


Just needs a final varnish coat on the upper wings and the aerial, which I have tried 2 times to complete without success

Cheers
Pedro
Cordoba, Argentina
Joined: January 27, 2011
KitMaker: 268 posts
AeroScale: 264 posts
Posted: Friday, December 13, 2013 - 11:52 AM UTC
WOW...!!!
Very nice Pedro...!!!

Really enjoyable bird...

Diego

Lisboa, Portugal
Joined: August 27, 2010
KitMaker: 679 posts
AeroScale: 669 posts
Posted: Friday, December 13, 2013 - 11:57 AM UTC
Ah Ah! just noticed I've posted Emil #13 at a friday 13th

Lisboa, Portugal
Joined: August 27, 2010
KitMaker: 679 posts
AeroScale: 669 posts
Posted: Friday, December 13, 2013 - 12:02 PM UTC
Thanks Diego.
Hope you can tackle that Falco before the campaign ends, that's a great plane to model for sure

Ontario, Canada
Joined: March 23, 2008
KitMaker: 2,847 posts
AeroScale: 144 posts
Posted: Friday, December 13, 2013 - 12:50 PM UTC
@Jessie,Thanks for the tip and I'll keep it in mind but I'm out of Future at the moment (hmmm, part of the curse of the cobra?). I'll get some at my next market trip. The "experiment" worked out well to this point and I used Tamiya clear for that. I'll have to see if the decals that have overlapped will separate.
@Diego,I feel you pain when doing a bad kit.

If mine isn't done with this campaign, it will see a sorry end.
@Pedro,Beautiful '109 and congratulations on completing a 2nd one!

Cheers,
Jan


England - East Midlands, United Kingdom
Joined: February 07, 2004
KitMaker: 911 posts
AeroScale: 415 posts
Posted: Saturday, December 14, 2013 - 06:44 AM UTC
Pedro, that is a stunning model!

"Nelson be damned.......Lets get the hell out of here!"
Texas, United States
Joined: February 22, 2008
KitMaker: 5,026 posts
AeroScale: 2,811 posts
Posted: Saturday, December 14, 2013 - 08:31 AM UTC
@ Jan: just put it in the spares box or if you really are annoyed Zippo lighter fluid does wonderfully

@ Pedro: Stunning 109 and l agree with everyone here.
@ Neil: l may not have read correctlly, is she finished and ready to post to the gallery.
Bob
If it aint broke dont fix it.
Ontario, Canada
Joined: March 23, 2008
KitMaker: 2,847 posts
AeroScale: 144 posts
Posted: Saturday, December 14, 2013 - 09:38 AM UTC
Quoted Text
@ Jan: just put it in the spares box or if you really are annoyed Zippo lighter fluid does wonderfully 
Bob,
How ever could you even suggest surrendering to this forever irritating hunk of plastic!

This poor thing has managed to frustrate me through two previous HQ campaigns and I am not quite ready to give up the fight. Call it insanity or masochism but...
Cheers,
Jan


Texas, United States
Joined: February 22, 2008
KitMaker: 5,026 posts
AeroScale: 2,811 posts
Posted: Saturday, December 14, 2013 - 11:15 AM UTC
Jan, you are a better man than I

not to give up. I will not finish any of the three that I had planned

but such are the hiccups of life, so untill HQ III.
Bob
If it aint broke dont fix it.


 So it now has a metal pitot tube....


 May post some new photos here. Russell




 I've even contacted numerous members of the local IPMS club to see if anyone has spare low visibility Marine decals in 1/72 but so far no luck.


 Now the not quite rosy part, we had a minor flood over late summer in the basement work shop and the decals became a casualty. However, on a chance I cut out the name from the decal sheet and decided to see what would happen on a piece of scrap plastic. Here you see the result of the experiment.


 Fingers crossed, period!!!!


 If mine isn't done with this campaign, it will see a sorry end.


 This poor thing has managed to frustrate me through two previous HQ campaigns and I am not quite ready to give up the fight. Call it insanity or masochism but...


 not to give up. I will not finish any of the three that I had planned
  but such are the hiccups of life, so untill HQ III.