Air Campaigns
Want to start or join a group build? This is where to start.
Want to start or join a group build? This is where to start.
Hosted by Frederick Boucher, Michael Satin
OFFICIAL: Anything Goes Campaign
usethermite

Joined: February 14, 2012
KitMaker: 252 posts
AeroScale: 209 posts

Posted: Monday, April 29, 2013 - 07:05 AM UTC
Nice one, Dave. Did the canopy give you any trouble? JT
Posted: Monday, April 29, 2013 - 08:39 AM UTC
@ JT
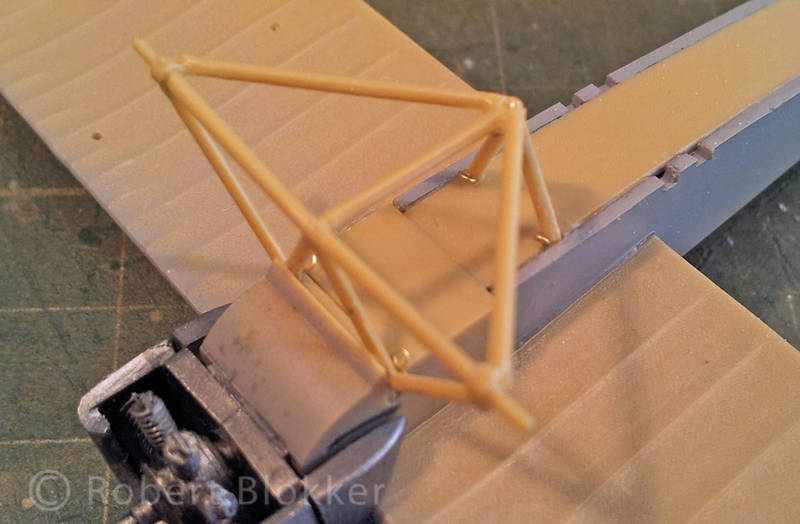
Thanks for the kind words. The rings are simply made of copperwire twisted around a needle, Cut through, closed and flattened with a tweezer which I then glued on keypoints on the landinggear. Below this text is a pic where you can see 4 of the rings in place. The other 2 are at the bottom side currently out of view. Also I used only 2 pieces of wire for all the rigging that runs through the wings. One for the front and one for the backrigging. Again the rings are making the work really easy as you only have to loop it through and pull it to the next hole.
@ Jesper
Thanks for the compliments.
Thanks for the kind words. The rings are simply made of copperwire twisted around a needle, Cut through, closed and flattened with a tweezer which I then glued on keypoints on the landinggear. Below this text is a pic where you can see 4 of the rings in place. The other 2 are at the bottom side currently out of view. Also I used only 2 pieces of wire for all the rigging that runs through the wings. One for the front and one for the backrigging. Again the rings are making the work really easy as you only have to loop it through and pull it to the next hole.

@ Jesper
Thanks for the compliments.
Posted: Monday, April 29, 2013 - 10:54 AM UTC
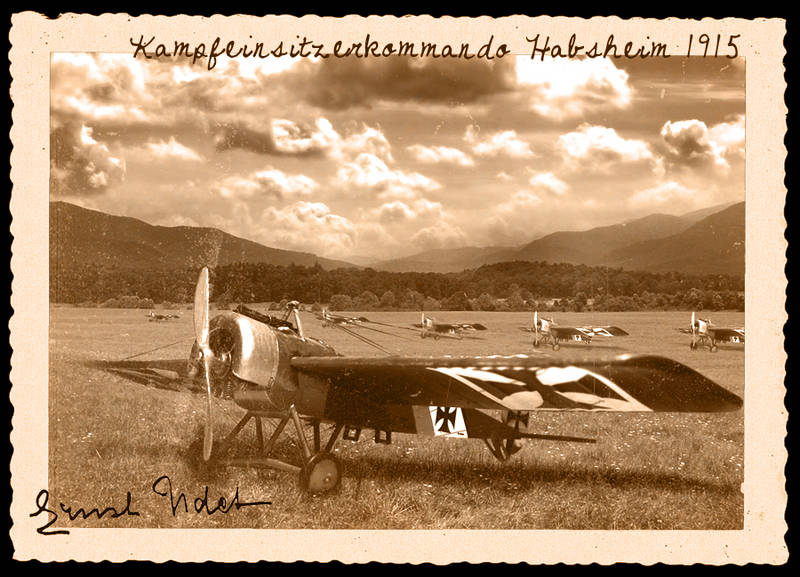
This is the last time I annoy you with my Fokker. One of my other hobbies/passtimes is creating artworks with photoshop. And I actually made one of the pictures from the last series with such a project in mind. and this evening after fiddling around a bit with Photoshop this was the result.


North4003

Joined: August 01, 2012
KitMaker: 960 posts
AeroScale: 391 posts

Posted: Monday, April 29, 2013 - 02:02 PM UTC
Quoted Text
Cool builds so far. Lee I like the lightning. Curious about that day-glo on the tail? Are they wargames markings?
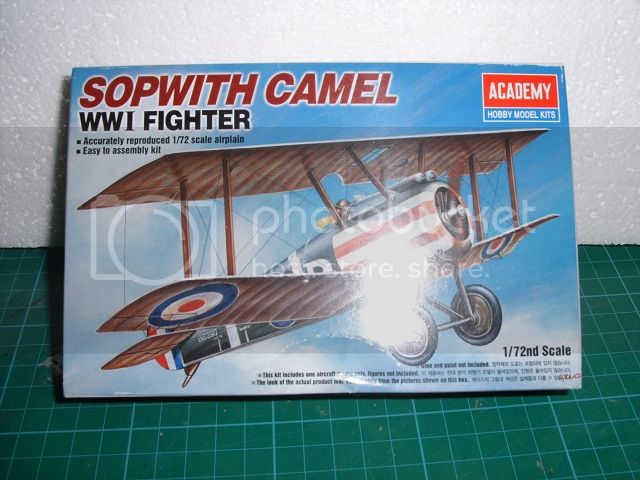
I've decided to change my build, with a lot of other commitments at the minute I feel I can't do that Xtrakit Canberra justice in the time that's left. I've decided instead to build Acdemy's 1/72 Sopwith Camel. Simple and quick it will be strictly OOB. Now I know that there are much better Camel's on the market, but this cost me the princely sum of 99p in evilbay and I need something inexpensive to try out rigging. I'd sooner make a bad job and learn from this than ruin something I invested more time, effort and money into.
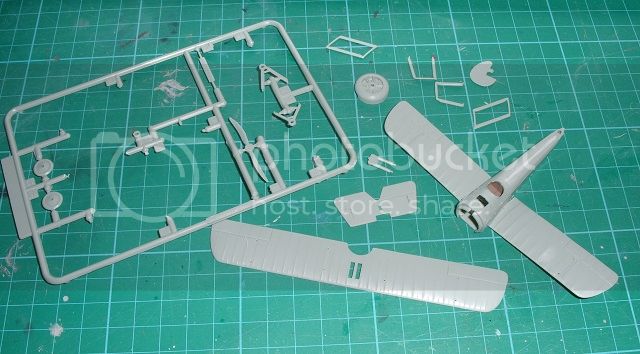
Saying it is quick is an understatement. Especially if you use superglue. This is the result of 5 hrs work since getting in from work. Most of that waiting for glue and filler to harden. The fit of the fuselage and lower wing is surprisingly good. A little filler was needed to get rid of an ejector pin mark on the wing and a little more on the top and bottom of the fuselage. Interior was painted brown and there's nothing but a bench inside. I've also started cleaning up the struts and other bits.
Comments welcome
Nice to see this kit built. I've seen it a Hobby Lobby and wondered about the assembly.
Posted: Tuesday, April 30, 2013 - 07:26 AM UTC
Thanks. You don't see it done very often, but as I said its been bettered. I'm finding it quick and relatively easy to build but devoid of any decent detail. The engine and guns are very simple affairs.
Robert, the wire loops are good trick. I haven't been able to make any small enough for this build. I might have to see if I can pick up some wire thats finer than what I have in my supplies. So for this I've gone with the 'pull elastic thread through holes in the wings' method. Seems to work for a lot of people. I will however make wire loops when it comes to rigging the rather large Supermarine Stranraer I recently picked up. I think they would look better on a larger aircraft and its also a much more complex rig.
Most of the assembly is now done. I glued the struts to the fuselage and lower wings and let them rest in the upper wings slots till they dried straight and true. I didn't use a rig, just eyeballed it. That might come back to haunt me.
 [/URL]
I'm also looking up some different colour schemes as I have had little luck with Academy decals in the past and prefer not to use them if I can.
Robert, the wire loops are good trick. I haven't been able to make any small enough for this build. I might have to see if I can pick up some wire thats finer than what I have in my supplies. So for this I've gone with the 'pull elastic thread through holes in the wings' method. Seems to work for a lot of people. I will however make wire loops when it comes to rigging the rather large Supermarine Stranraer I recently picked up. I think they would look better on a larger aircraft and its also a much more complex rig.
Most of the assembly is now done. I glued the struts to the fuselage and lower wings and let them rest in the upper wings slots till they dried straight and true. I didn't use a rig, just eyeballed it. That might come back to haunt me.
 [/URL]
I'm also looking up some different colour schemes as I have had little luck with Academy decals in the past and prefer not to use them if I can.
Posted: Tuesday, April 30, 2013 - 08:11 AM UTC
Quoted Text
This is the last time I annoy you with my Fokker. One of my other hobbies/passtimes is creating artworks with photoshop. And I actually made one of the pictures from the last series with such a project in mind. and this evening after fiddling around a bit with Photoshop this was the result.

Robert that is very beautiful, thanks for sharing. Something model builders are confronted with is the question of 'what do you do with your finished models', or 'why build models?'
You have developed really nice way to use built models there.
Posted: Tuesday, April 30, 2013 - 10:35 AM UTC

SaxonTheShiba

Joined: February 01, 2009
KitMaker: 1,233 posts
AeroScale: 663 posts

Posted: Tuesday, April 30, 2013 - 11:15 AM UTC
Robert-----Your photo presentation is absolutely beautiful. A perfect setting for that aircraft!
Murdo----Great pick. A Tornado is awesome in ANY scale!!!! Can't wait to see the finished product.
Regards, Ian
Murdo----Great pick. A Tornado is awesome in ANY scale!!!! Can't wait to see the finished product.
Regards, Ian
emroglan

Joined: December 16, 2004
KitMaker: 1,163 posts
AeroScale: 255 posts

Posted: Tuesday, April 30, 2013 - 06:37 PM UTC
Hello everyone,
It's been a while since I posted, because I blew my project. Seems like my F-105 has several parts missing as well as cracked canopy parts, so it goes into the waste bin.
As a result, I decided to try my hand on another build. Hasegawa's Bf109F-4 kit with Ultracast resin items.

I will only be changing the plain seat in the cockpit with the resin item.
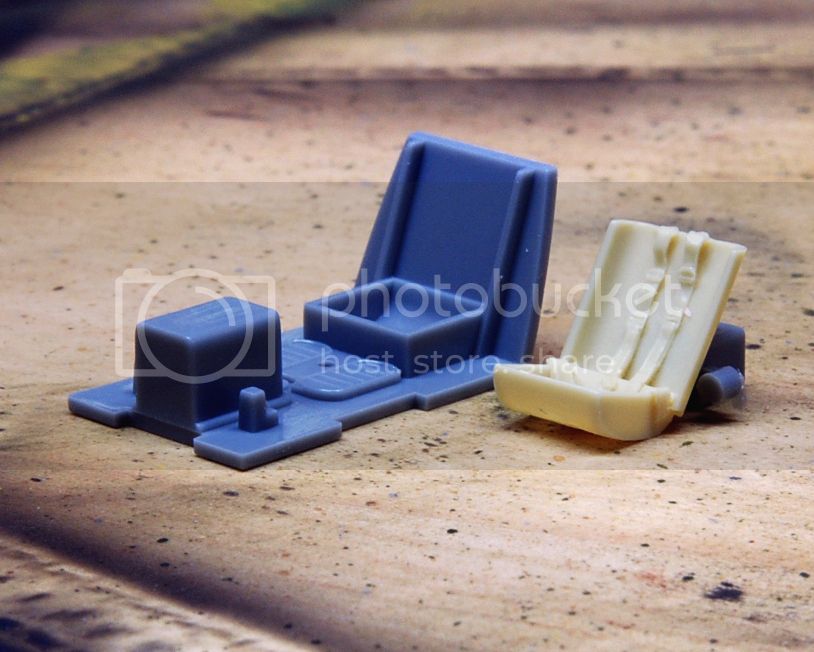
Progress is very slow, since it's spring time here and I just upgraded my bike. Wohooo! (and no time for model building)

Took me nearly a month to get some primer on my model.


The cannon detail on the propeller hub was half gone, so I cleaned it up and decided to replace it with a syringe needle. Let's see how that turns out, I'm not sure if I'll be able to cut the needle properly.

It's been a while since I posted, because I blew my project. Seems like my F-105 has several parts missing as well as cracked canopy parts, so it goes into the waste bin.
As a result, I decided to try my hand on another build. Hasegawa's Bf109F-4 kit with Ultracast resin items.

I will only be changing the plain seat in the cockpit with the resin item.

Progress is very slow, since it's spring time here and I just upgraded my bike. Wohooo! (and no time for model building)

Took me nearly a month to get some primer on my model.


The cannon detail on the propeller hub was half gone, so I cleaned it up and decided to replace it with a syringe needle. Let's see how that turns out, I'm not sure if I'll be able to cut the needle properly.

Posted: Wednesday, May 01, 2013 - 05:11 AM UTC
Hi all
@ JT the canopy was fine i had no bother with it at all the only thing was a few small gaps that were easy to fill ..
@ Jesper yes the A6 now has its ordnance in fact i should be finishing the build tonight so ill be posting the final pics later
@ Emre .. sorry to hear about the Thunderchief i hope the 109 turns out ok for you
PS nice bike !!
@ JT the canopy was fine i had no bother with it at all the only thing was a few small gaps that were easy to fill ..
@ Jesper yes the A6 now has its ordnance in fact i should be finishing the build tonight so ill be posting the final pics later

@ Emre .. sorry to hear about the Thunderchief i hope the 109 turns out ok for you

PS nice bike !!

Posted: Wednesday, May 01, 2013 - 06:14 AM UTC
@ Stephen
Yeah you definately need very thin wire for it but from my limited experiences in rigging so far I think this is one of the easiest ways to do it. It makes tying supereasy.
Great work on the camel by the way. Really looking forward to seeing it in it's paintcoat.
@ Jonathan
Thanks for the compliments. Glad you like it. Oddly enough even though these models lend themselves pretty well for this kind of work I haven't put much of my models in digital artworks. But I'm planning to do more of it. Totally off topic but this is a link to a folder from my portfolio with some digital artworks in it. Funny detail the dark transilvania artwork is made from a photograph I took of a huge train diorama in an amusementpark here in the Netherlands.
Digital Artworks by Robert Blokker
@ Ian
Thanks a lot for the compliments. Glad you like it.
@ Emre
That messerschmidt looks really good. That seat is definately an improvement over the kit part.
Looking forward how you are going to paint it.
@ Murdo
Better built that with the windows closed otherwise it will be blown off the bench


mojo72

Joined: September 05, 2010
KitMaker: 160 posts
AeroScale: 15 posts

Posted: Wednesday, May 01, 2013 - 07:51 AM UTC
Hi guys
Nice work with all the builds so far. I for one, am having a few issues with my Seminar UH-1B. For a 1/35th, I find it a bit undersized compare to other manufacturers. Hence, only minimal usage of the Eduard kit
The seats are from Academy's UH-1C with Eduard PE, and the crew seats are made from sprue and kitchen foil

I kept the instrument panel simple as it is going to be hidden from view


The figures are Dragon's UH-1D crew with some modofocations


Will keep you guys posted with the progress soon
Nice work with all the builds so far. I for one, am having a few issues with my Seminar UH-1B. For a 1/35th, I find it a bit undersized compare to other manufacturers. Hence, only minimal usage of the Eduard kit
The seats are from Academy's UH-1C with Eduard PE, and the crew seats are made from sprue and kitchen foil

I kept the instrument panel simple as it is going to be hidden from view


The figures are Dragon's UH-1D crew with some modofocations


Will keep you guys posted with the progress soon

Posted: Wednesday, May 01, 2013 - 08:23 AM UTC
wow, Muhammad, you do amazing detail painting! 

Posted: Wednesday, May 01, 2013 - 09:33 AM UTC
There are some fantastic models appearing here!
An update to the Tornado:
The bits:


The canopy is one piece and being a complete masochist I want it open so, out with the scalpel and:

Also did some work on the Bang Seats:

And where I am now:


Now, I know the detail looks very chunky and clunky but believe me, them things really ain't very big:

Excellent fun though!
An update to the Tornado:
The bits:


The canopy is one piece and being a complete masochist I want it open so, out with the scalpel and:

Also did some work on the Bang Seats:

And where I am now:


Now, I know the detail looks very chunky and clunky but believe me, them things really ain't very big:

Excellent fun though!

SaxonTheShiba

Joined: February 01, 2009
KitMaker: 1,233 posts
AeroScale: 663 posts

Posted: Wednesday, May 01, 2013 - 10:46 AM UTC
Muhammad, your helicopter interior is beautiful. Also, the work on your crew figures is outstanding. Very realistic how you decorated the visor covers on the helmets.
Murdo---Great work on the bang seats.!!!
Best wishes, Ian
Murdo---Great work on the bang seats.!!!
Best wishes, Ian
Posted: Wednesday, May 01, 2013 - 10:46 AM UTC
@ Muhammad . thos figures are very nice i like the flags on the helmets 
@ murdo . great work on the seats im looking forward to seeing this one PS dont sneeze !!
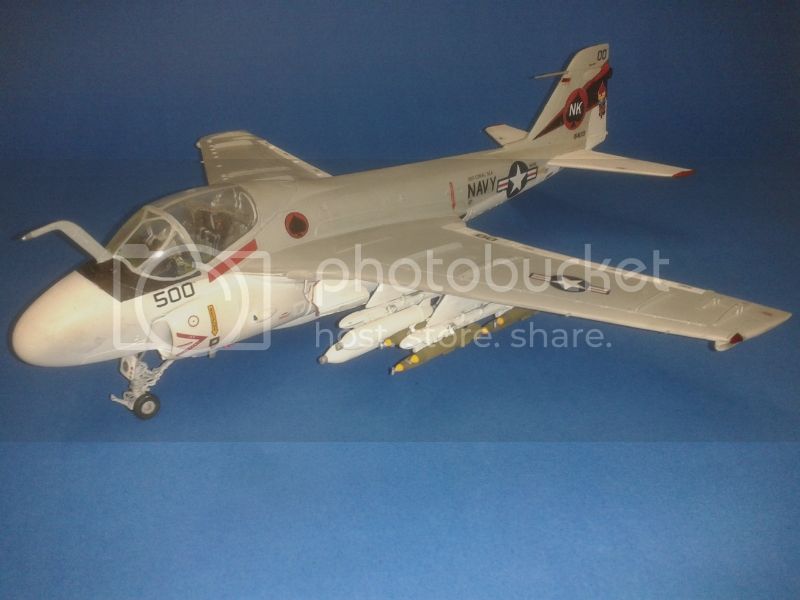
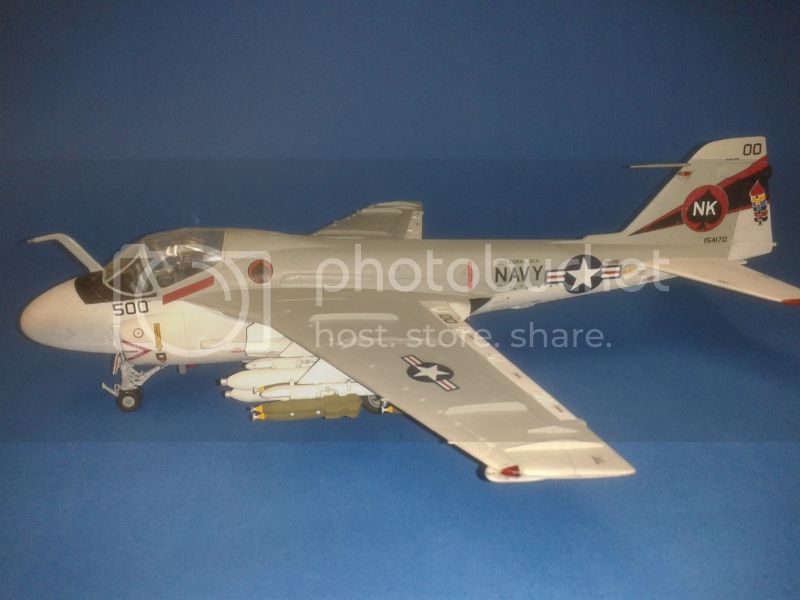
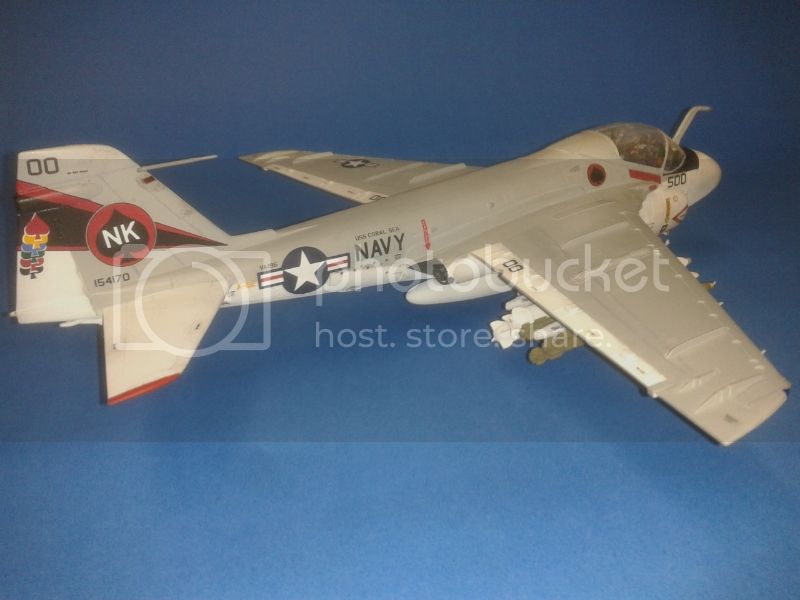
Well iv finished the Intruder Overall this was a nice build for an older kit and im pleased with how its turnd out . There were a few tricky bits like gluing the bombs to the rails and redoing the hoses and break lines and the PE cockpit set needed a bit of trimming as it was ment for the Kentic kit but apart from that it all went together well with minimal filling required .. the only scratch building i did was for the nav and landing lights which were made from epoxy glue and the break lines made from fuse wire ..
keep up the good work everyone



@ murdo . great work on the seats im looking forward to seeing this one PS dont sneeze !!

Well iv finished the Intruder
 Overall this was a nice build for an older kit and im pleased with how its turnd out . There were a few tricky bits like gluing the bombs to the rails and redoing the hoses and break lines and the PE cockpit set needed a bit of trimming as it was ment for the Kentic kit but apart from that it all went together well with minimal filling required .. the only scratch building i did was for the nav and landing lights which were made from epoxy glue and the break lines made from fuse wire ..
 keep up the good work everyone


SaxonTheShiba

Joined: February 01, 2009
KitMaker: 1,233 posts
AeroScale: 663 posts

Posted: Wednesday, May 01, 2013 - 11:23 AM UTC
Dave-----Good looking A-6. Go VA-196!!!!!!!!!!!!!!

Jessie_C


Joined: September 03, 2009
KitMaker: 6,965 posts
AeroScale: 6,247 posts

Posted: Wednesday, May 01, 2013 - 11:49 AM UTC
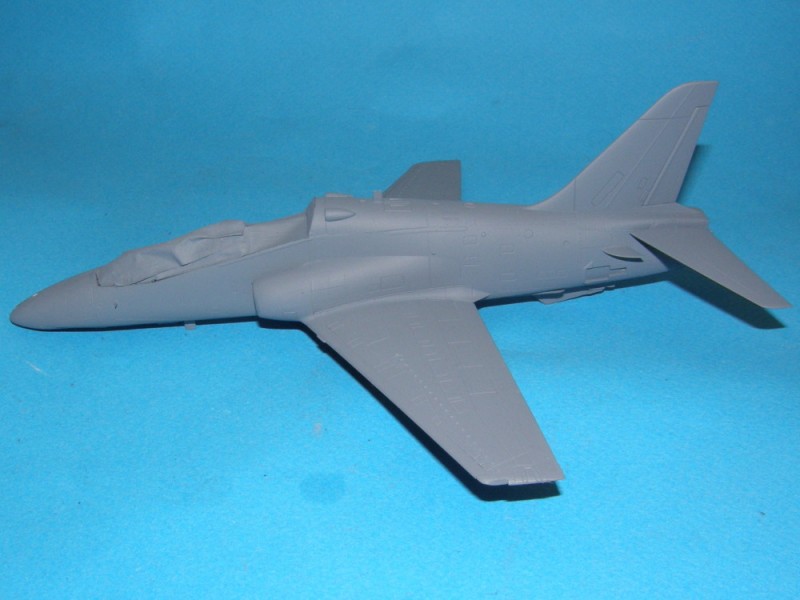
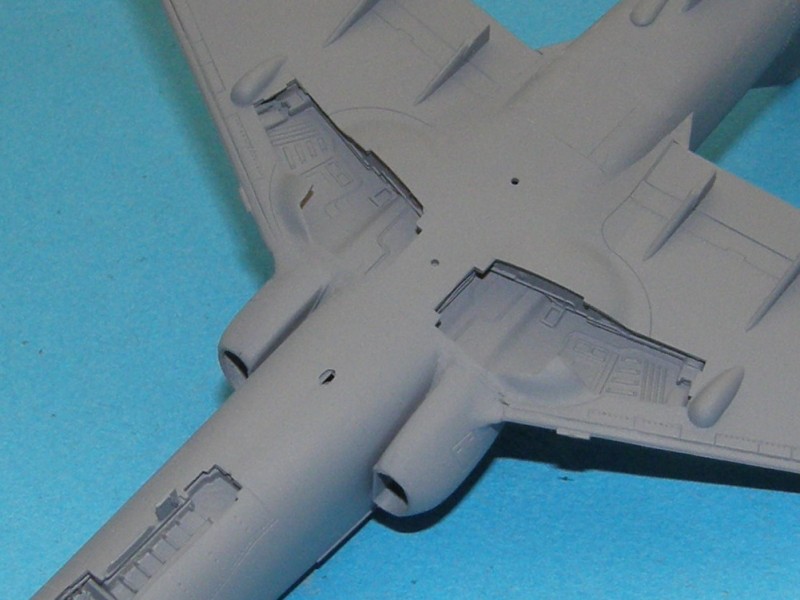
More progress on the Goshawk. The upper portions of the intakes look much better after the filling and sanding.
But I still need to do more work on the bottom
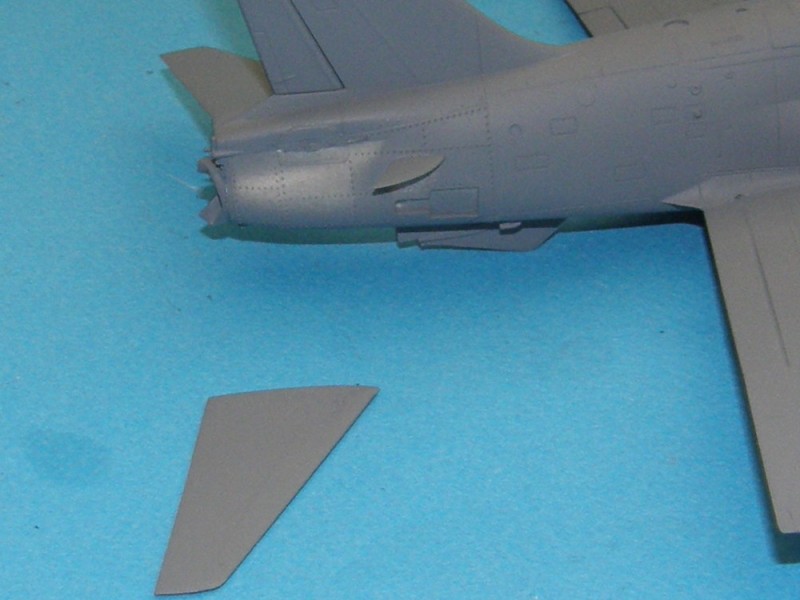
All the reviews I have read warn that the tailplane attachment tabs are too fragile. I found that out for myself
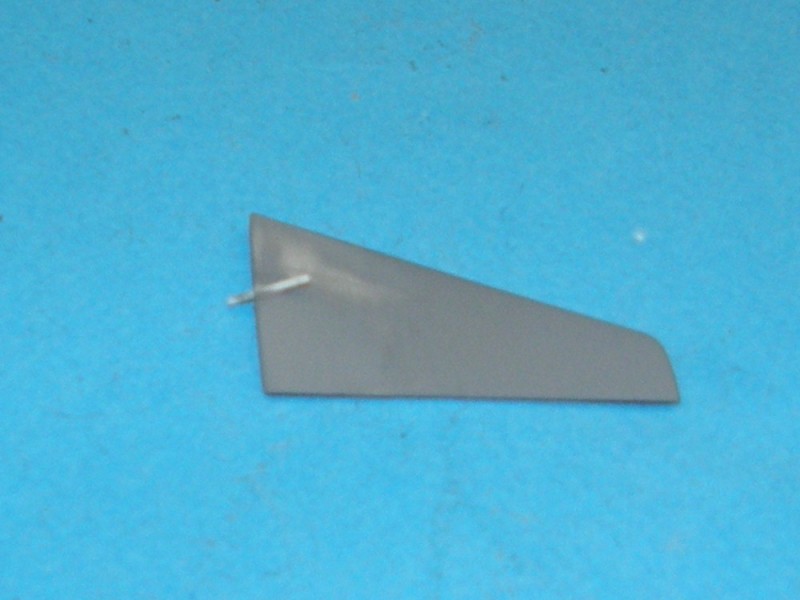
What's a girl to do when confronted with the task of gluing a very thin part on by the edge? Get out the micro-drills of course. Drill a hole right through the root of the stabiliser at the correct angle and glue in a piece of styrene rod
Drill another hole in the fuselage for the rod to fit. Make sure you drill it in the right place or you'll have to drill again. Ask me how I found this out.
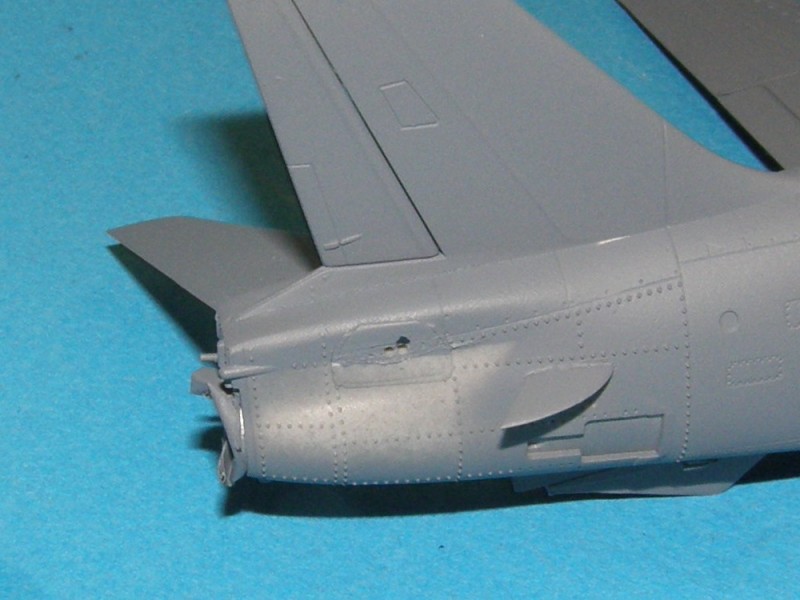
Test fit
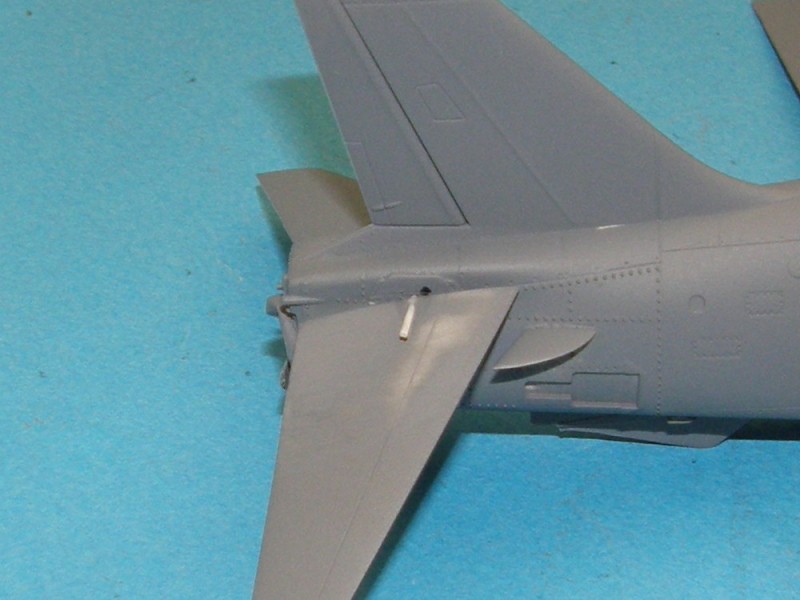
And glue in place securely. Once the glue is dry, trim off the excess rod and sand everything smooth.

But I still need to do more work on the bottom

All the reviews I have read warn that the tailplane attachment tabs are too fragile. I found that out for myself

What's a girl to do when confronted with the task of gluing a very thin part on by the edge? Get out the micro-drills of course. Drill a hole right through the root of the stabiliser at the correct angle and glue in a piece of styrene rod

Drill another hole in the fuselage for the rod to fit. Make sure you drill it in the right place or you'll have to drill again. Ask me how I found this out.

Test fit

And glue in place securely. Once the glue is dry, trim off the excess rod and sand everything smooth.
Posted: Thursday, May 02, 2013 - 09:35 AM UTC
Got a few hours in last night and tonight by finishing work on my contracted time which is an absolute novelty for me.
Here's an update. This kit goes together beautifully with absolute minimum filler around where the wing joins the air intake. You can just see the white filler.
Cockpit in:

Fuselage and wings in place:

The white bar is to make the stabilisers stay equal and turn equally.

Canopy masked and in place for painting:

And started on the wheels adding brake cables from very small wire. No, I don't care if they look wrong, my eyes are dying here!

More pics to follow soon I hope!
Here's an update. This kit goes together beautifully with absolute minimum filler around where the wing joins the air intake. You can just see the white filler.
Cockpit in:

Fuselage and wings in place:

The white bar is to make the stabilisers stay equal and turn equally.

Canopy masked and in place for painting:

And started on the wheels adding brake cables from very small wire. No, I don't care if they look wrong, my eyes are dying here!

More pics to follow soon I hope!
Posted: Friday, May 03, 2013 - 08:46 AM UTC
@ Ian ... Thanks for the comment mate 

@ Murdo ... Great looking little Tornado


@ Murdo ... Great looking little Tornado


SaxonTheShiba

Joined: February 01, 2009
KitMaker: 1,233 posts
AeroScale: 663 posts

Posted: Friday, May 03, 2013 - 10:48 AM UTC

Middle_Franconian

Joined: January 02, 2011
KitMaker: 279 posts
AeroScale: 239 posts

Posted: Friday, May 03, 2013 - 09:27 PM UTC
Hi all  ,
,
sorry, not time for update as my job keeps me busy at the moment. But great progress in this campaign so far!
@ Ian: Great looking A-4! I like the painted walkways. Easy to do but with great effect!
@ Murdo: Nice Tornado. Great progress on that little thing. The bang seats are amazing!
@ Dave: Congratulations to your completed Intruder! Looks great!
@ Muhammad: Your figures are looking amazing. I really like them and they are blending perfectly into the cockpit. Great!
@ Robert: Your Eindecker comes our perfect! And it was finished in such a short time! Thanks for sharing!
@ Stephen: Cool to see another WWI veteran!
@ Emre: Cool looking bike btw! I have built the Hasegawa 109 F a few years ago (Marseille issue), it is a very nice kit and fits together very well.
Regards,
Sebastian
 ,
,sorry, not time for update as my job keeps me busy at the moment. But great progress in this campaign so far!
@ Ian: Great looking A-4! I like the painted walkways. Easy to do but with great effect!
@ Murdo: Nice Tornado. Great progress on that little thing. The bang seats are amazing!
@ Dave: Congratulations to your completed Intruder! Looks great!
@ Muhammad: Your figures are looking amazing. I really like them and they are blending perfectly into the cockpit. Great!
@ Robert: Your Eindecker comes our perfect! And it was finished in such a short time! Thanks for sharing!
@ Stephen: Cool to see another WWI veteran!
@ Emre: Cool looking bike btw! I have built the Hasegawa 109 F a few years ago (Marseille issue), it is a very nice kit and fits together very well.
Regards,
Sebastian

Posted: Saturday, May 04, 2013 - 02:26 AM UTC
Ola People
Some really neat work shown here.
@ Muhammad
Great work on the helo. That is a nice interior and the figures bring it to life. Nice detail painting.
@ Murdo
Those coins really give a good idea of the size (or rather lack of) on that kit. Nice details you added to the seats and the kit has surprisingly good details for that small a scale.
@ Dave
That Intruder came out really nice. Good job on the landinggear and that massive amount of decals look very good.
@ Jessica
Your work on the airintakes really paid off. They look much better. And also a good save on the tailfins.
@ Ian
Great finish on the paint of your A4. Very nice those subtle differences and your wash really looks ace.
@ Sebastian
Thanks for the compliments on my E.III it was a fun and simple built. So that attributed to my built speed. Plus I had some spare time available to pull it off. Pretty happy with the result myself.
Some really neat work shown here.
@ Muhammad
Great work on the helo. That is a nice interior and the figures bring it to life. Nice detail painting.
@ Murdo
Those coins really give a good idea of the size (or rather lack of) on that kit. Nice details you added to the seats and the kit has surprisingly good details for that small a scale.
@ Dave
That Intruder came out really nice. Good job on the landinggear and that massive amount of decals look very good.
@ Jessica
Your work on the airintakes really paid off. They look much better. And also a good save on the tailfins.
@ Ian
Great finish on the paint of your A4. Very nice those subtle differences and your wash really looks ace.
@ Sebastian
Thanks for the compliments on my E.III it was a fun and simple built. So that attributed to my built speed. Plus I had some spare time available to pull it off.
 Pretty happy with the result myself.
Jessie_C


Joined: September 03, 2009
KitMaker: 6,965 posts
AeroScale: 6,247 posts

Posted: Saturday, May 04, 2013 - 09:38 AM UTC
A little more progress
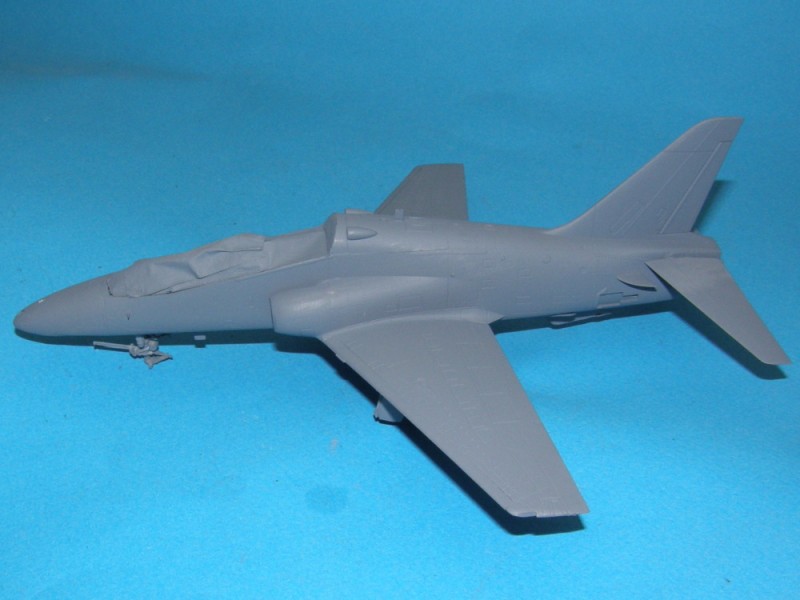
Intakes looking like one piece now
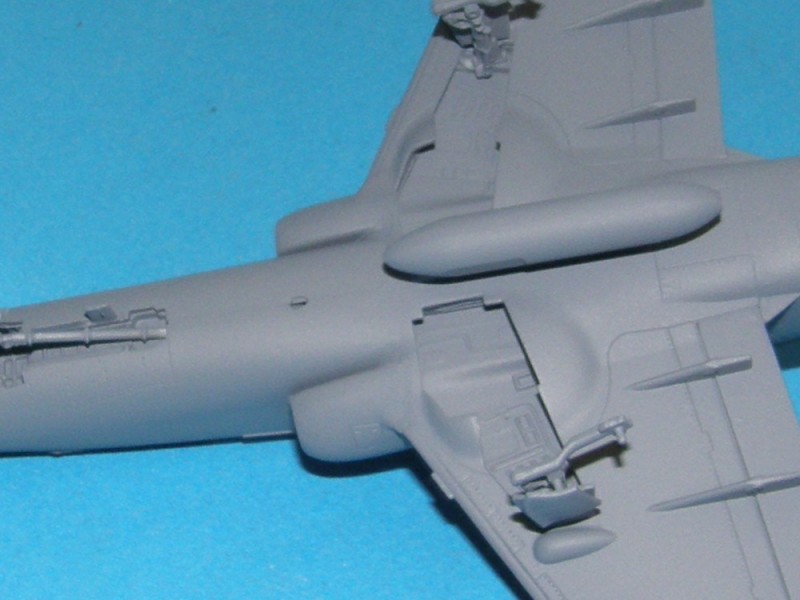
What broken tailplane?
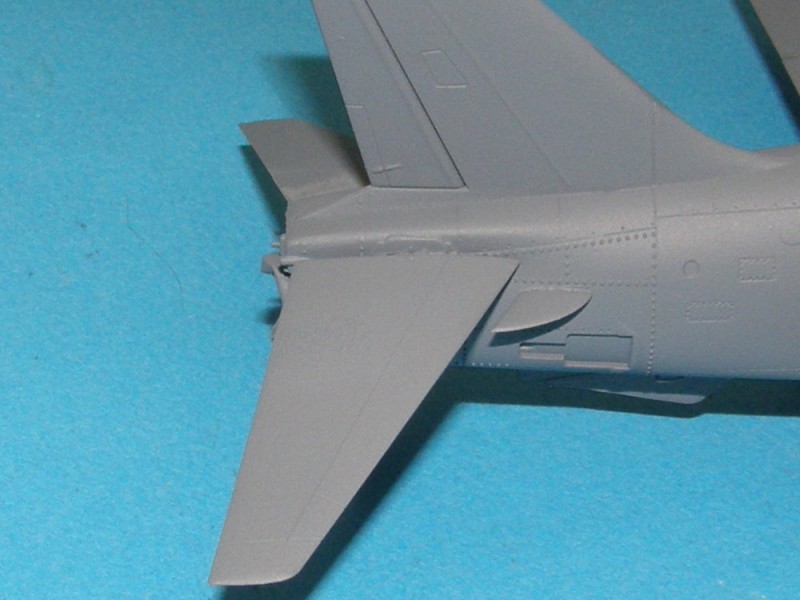
And I've discovered that sometime just recently I've broken off my scratchbuilt antenna. Time to do another one...
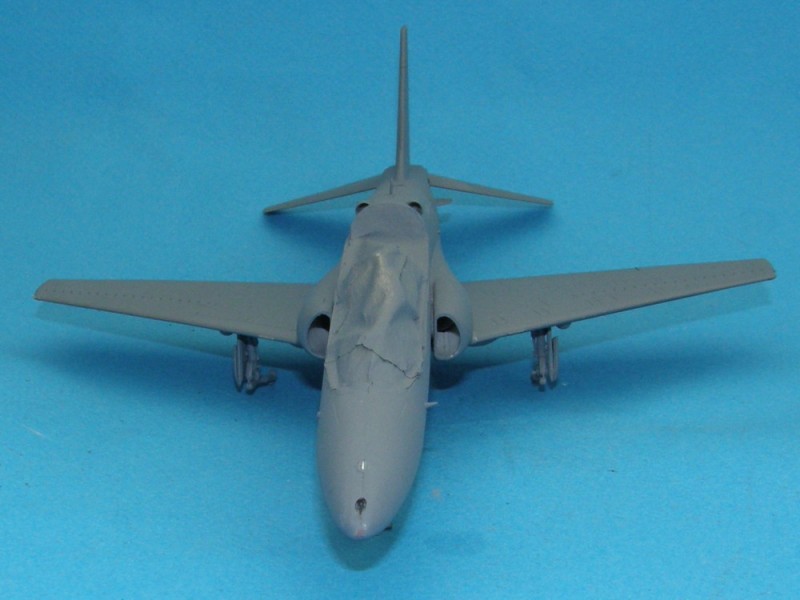

Intakes looking like one piece now

What broken tailplane?

And I've discovered that sometime just recently I've broken off my scratchbuilt antenna. Time to do another one...

Posted: Sunday, May 05, 2013 - 09:05 AM UTC
@ Jessica
That is looking sharp. Looking forward to the paint.
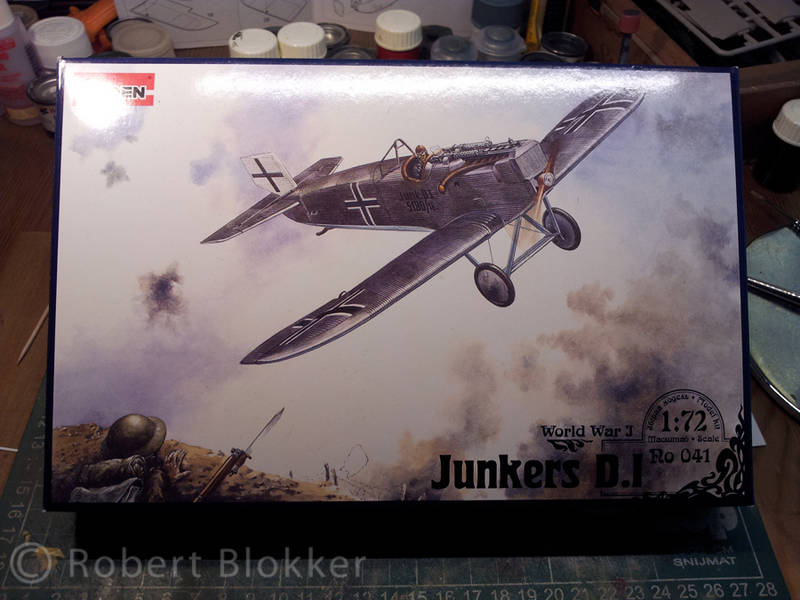
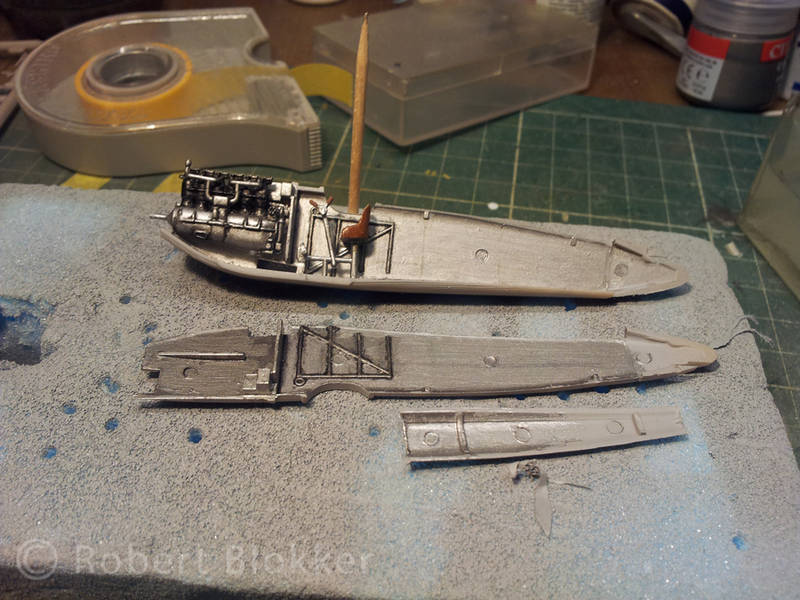
I found out that building aircraft is contagious. Directly after finishing the Fokker E.III Eindecker I cracked open another Roden box that I purchased a few weeks back together with the Fokker D.VII. A pretty good kit detail wise. And took photographs along the way.
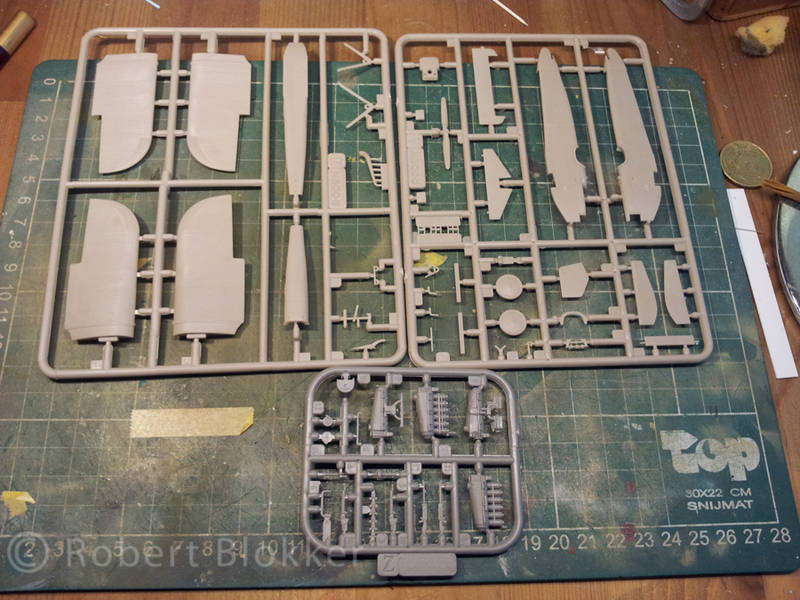
A view on the cockpit and engine before the interior gets closed off.
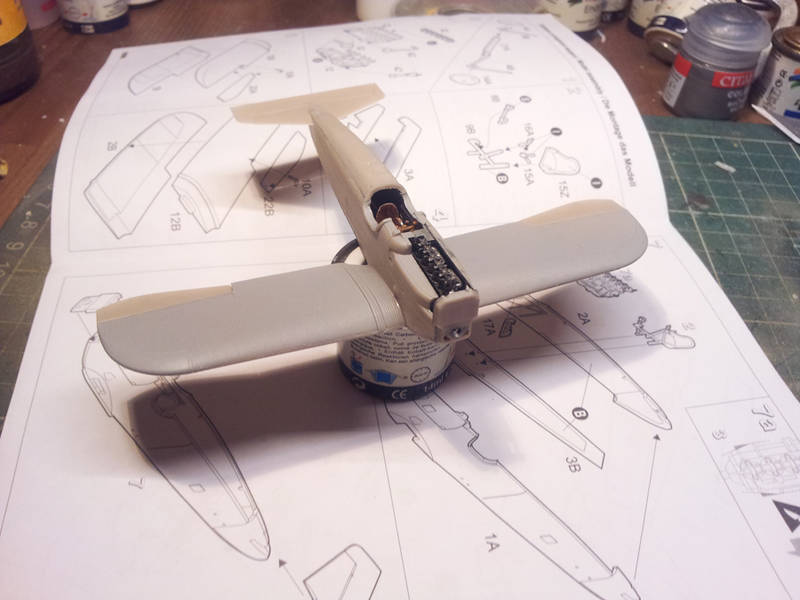
Halfway through the build
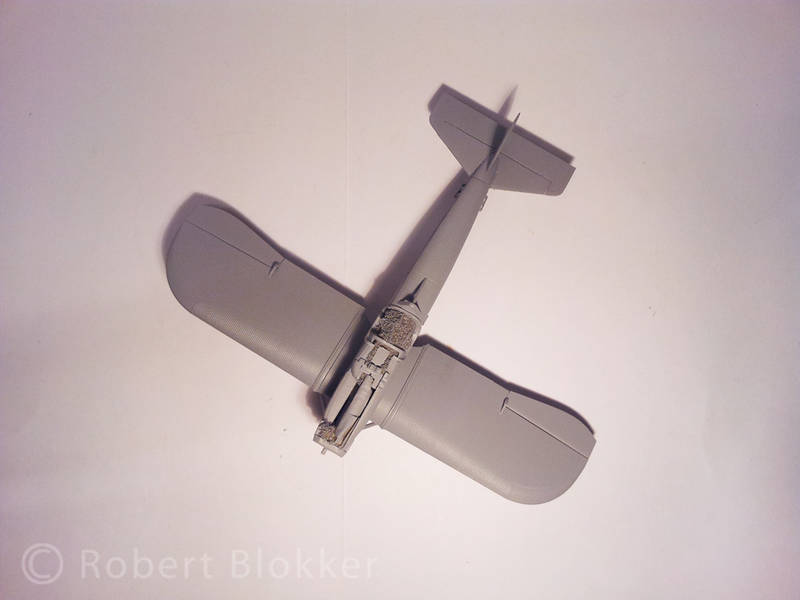
Primer shots of the warpigeon
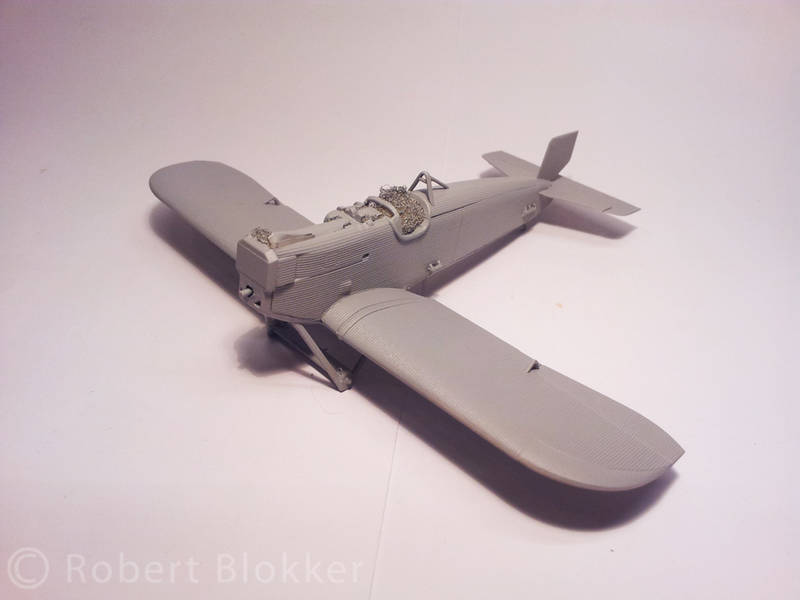
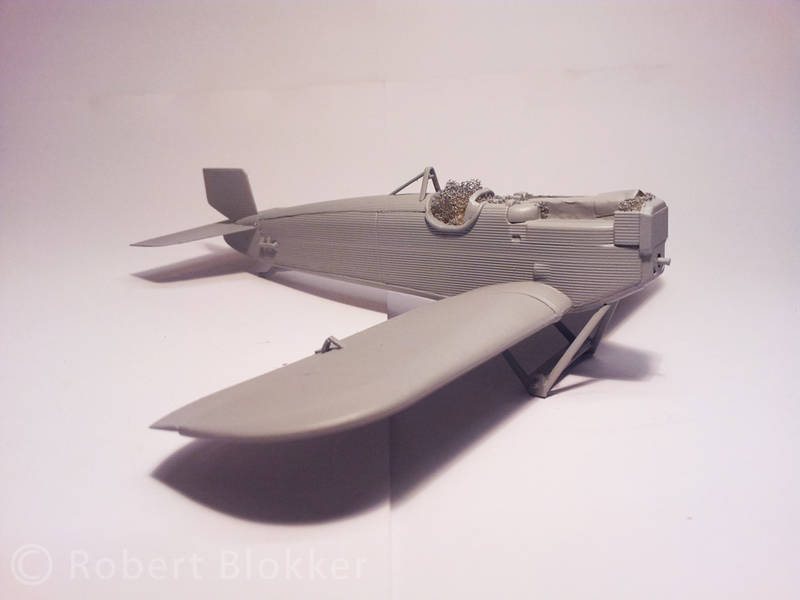
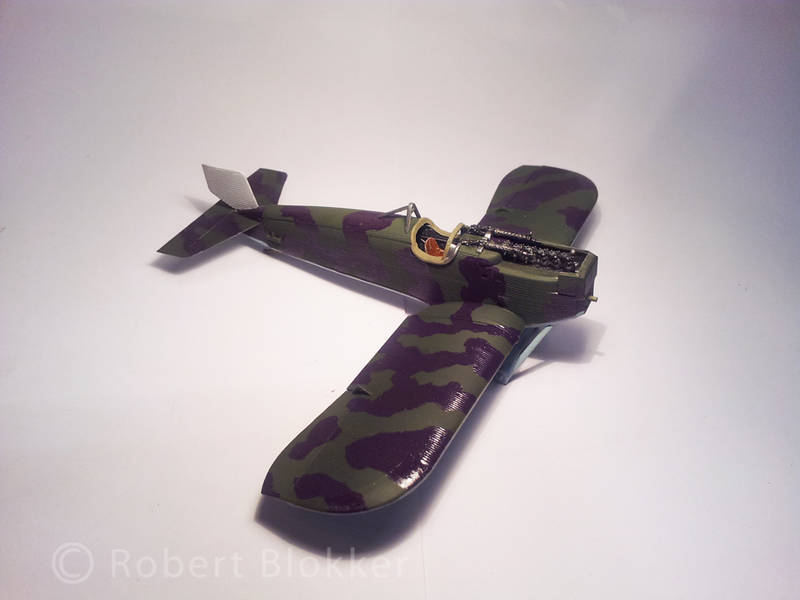
Time for color. Olive green basecoat with a yellowish lighter green as highlight. The bottom was painted with Humbrol 65 Matt Light blue. The purple is also handpainted with Humbrol.
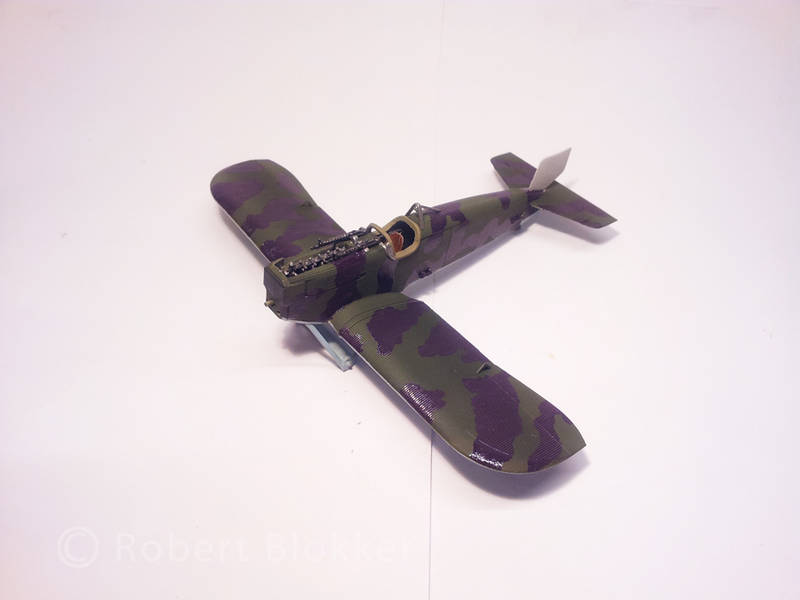
And then it was decal time. The corrugated metal structure all over the aircraft made this really hard. Something I could have foreseen but somehow didn't. I did my best on it. I'm not really satisfied with it but I leave it at this since the decals don't seem to improve no matter how much Microsol I throw against it. And they were very fragile and I had several rip while applying them. Maybe I buy this kit again in the future to try my hand at it again.
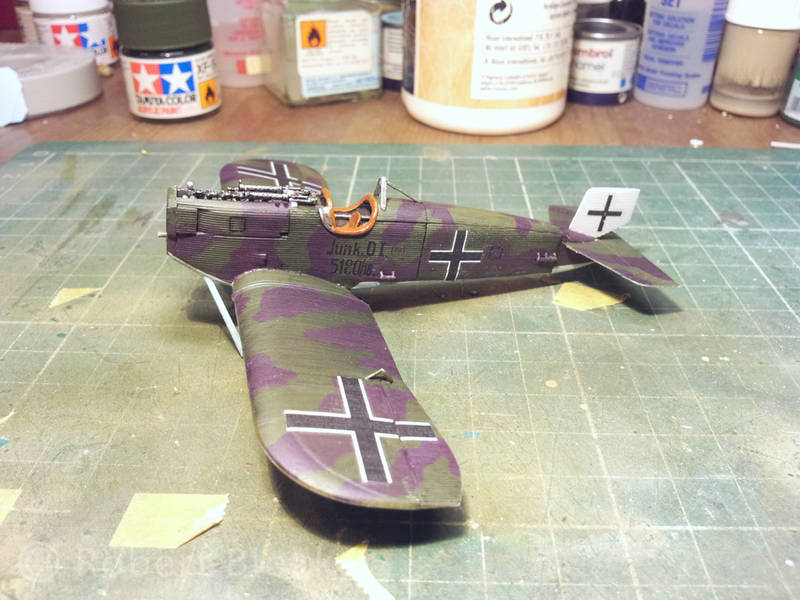
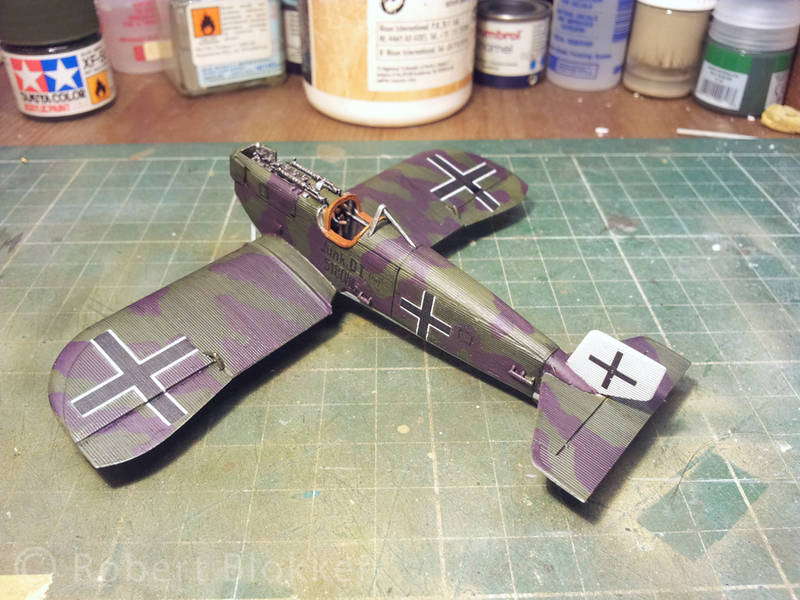
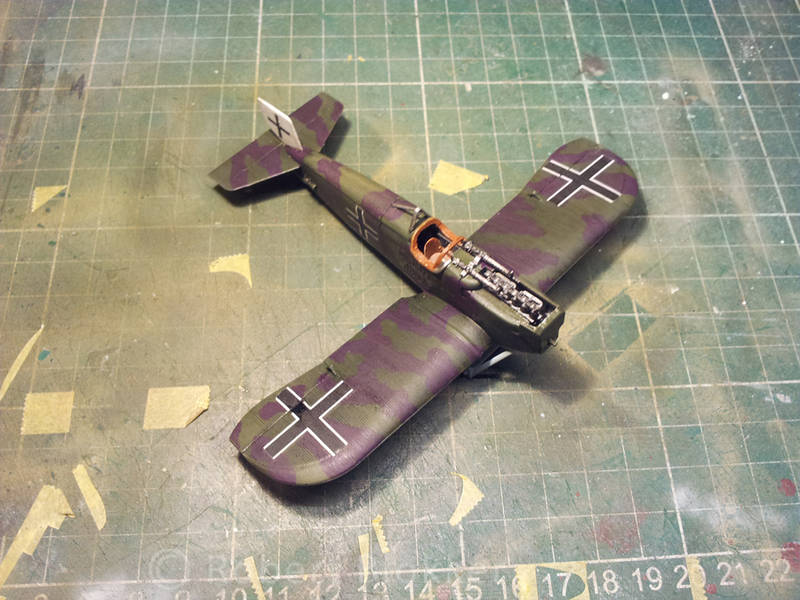
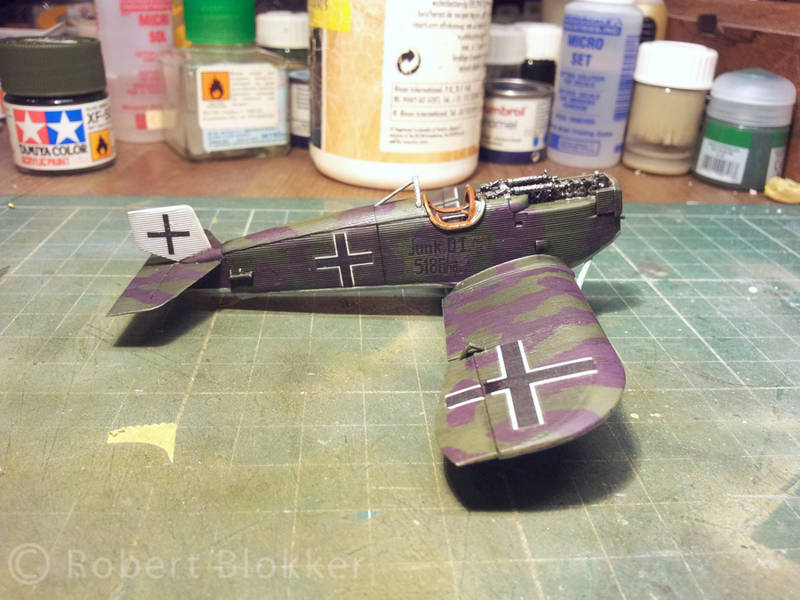
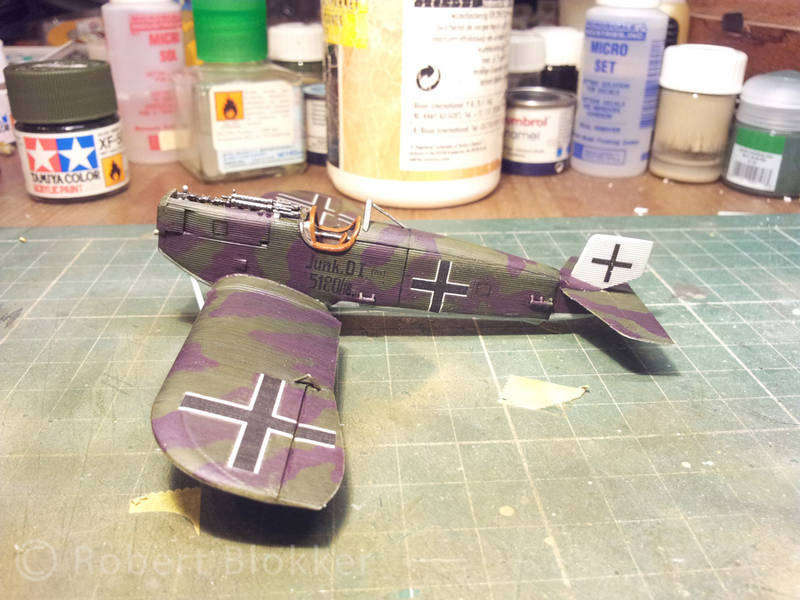
Some small details like the prop, exhaust and the bullet guards over the engine and the wheels need to be added and then I call it finished.
Big fun these Roden kits. There are already 4 new kits from them on the way to me. And I bought a book about Richthofens Flying Circus.
That is looking sharp. Looking forward to the paint.
I found out that building aircraft is contagious. Directly after finishing the Fokker E.III Eindecker I cracked open another Roden box that I purchased a few weeks back together with the Fokker D.VII. A pretty good kit detail wise. And took photographs along the way.


A view on the cockpit and engine before the interior gets closed off.

Halfway through the build

Primer shots of the warpigeon


Time for color. Olive green basecoat with a yellowish lighter green as highlight. The bottom was painted with Humbrol 65 Matt Light blue. The purple is also handpainted with Humbrol.


And then it was decal time. The corrugated metal structure all over the aircraft made this really hard. Something I could have foreseen but somehow didn't. I did my best on it. I'm not really satisfied with it but I leave it at this since the decals don't seem to improve no matter how much Microsol I throw against it. And they were very fragile and I had several rip while applying them. Maybe I buy this kit again in the future to try my hand at it again.


Some small details like the prop, exhaust and the bullet guards over the engine and the wheels need to be added and then I call it finished.
Big fun these Roden kits. There are already 4 new kits from them on the way to me. And I bought a book about Richthofens Flying Circus.
 |


