World War II
Discuss WWII and the era directly before and after the war from 1935-1949.
Hosted by Rowan Baylis
1/48 B-17F Build - 303rd BGs Luscious Lady
Joel_W
Staff MemberAssociate Editor
AUTOMODELER
_VISITCOMMUNITY
New York, United States
Joined: December 04, 2010
KitMaker: 11,666 posts
AeroScale: 7,410 posts
Posted: Tuesday, April 07, 2015 - 06:50 PM UTC

Quoted Text

Simply amazing, Brian- cheers! Best bomb bay I've seen yet- you've raised that bar!


Hey Chuck,
Any thoughts on when you'll start another one of your incrediable modeling adventures?
Joel
chukw1
_VISITCOMMUNITY
California, United States
Joined: November 28, 2007
KitMaker: 817 posts
AeroScale: 729 posts
Posted: Tuesday, April 07, 2015 - 08:32 PM UTC
Not to hijack this thread, but you can see my latest over on Armorama- http://armorama.kitmaker.net/forums/167483&ord=&page=3


Cheers!
Redhand
#522
_VISITCOMMUNITY
New Jersey, United States
Joined: January 20, 2013
KitMaker: 1,460 posts
AeroScale: 1,443 posts
Posted: Wednesday, April 08, 2015 - 04:25 AM UTC
I cruised over to look at this Chuck. Fantastic as usual. Many thanks for the kind words about the bomb bay.

Redhand
#522
_VISITCOMMUNITY
New Jersey, United States
Joined: January 20, 2013
KitMaker: 1,460 posts
AeroScale: 1,443 posts
Posted: Wednesday, April 08, 2015 - 04:59 AM UTC
BEFORE I FORGET!

There's one detail I need to add before gluing the port bulkheads in and winding up like this:


Lookit this last progress shot and tell me what you think it is:


Here are a couple of hints:


Yeah, the ropes above the catwalk. And no, I'm not interested in trying that after the port bulkhead is fully installed.

I plan to tackle it with some "boat model" products I've ordered from "Cornwall Model Boats." http://www.cornwallmodelboats.co.uk/index.html

That would be flat eyelets like this:


and some twine of the same diameter like this:


They are en-route now from "across the pond."

I'll continue mucking about with other details while waiting, and start on the inner bomb racks that fit against the catwalk.

Let me add that the Eduard Brassin engines came in today. Fabulous set, but rather than engage in a mini review, let me just say that they should allow me to replicate this kind of engine detail in this build.


This is from a Stateside training F model, and the pilot is the late, great David Shelhamer of the 303rd Bomb Group. He made his 25 missions, though not without some crew losses, and he did it the hard way, flying both Schweinfurt missions in August and October 1943, among many other really tough ones. He was an extraordinary pilot, and man.
Joel_W
Staff MemberAssociate Editor
AUTOMODELER
_VISITCOMMUNITY
New York, United States
Joined: December 04, 2010
KitMaker: 11,666 posts
AeroScale: 7,410 posts
Posted: Wednesday, April 08, 2015 - 09:49 PM UTC
Brian,
Looking forward to seeing you work your magic with those engines. Should be really something special.

Your scale replicas of those ropes should be rather interesting to say the least. Looking forward to seeing how you handle them.

Joel
Redhand
#522
_VISITCOMMUNITY
New Jersey, United States
Joined: January 20, 2013
KitMaker: 1,460 posts
AeroScale: 1,443 posts
Posted: Wednesday, April 08, 2015 - 10:21 PM UTC

Quoted Text


Your scale replicas of those ropes should be rather interesting to say the least. Looking forward to seeing how you handle them.

Joel


Me too! I don't know what I am dealing with until I actually get the parts. I did place a premium on getting FLAT eyelets for the ropes, due to tight space issues, and wanting them to fit up against the door jams, etc. We'll see.

Working cable runs in the ceiling and bomb racks right now, but slowly.
Redhand
#522
_VISITCOMMUNITY
New Jersey, United States
Joined: January 20, 2013
KitMaker: 1,460 posts
AeroScale: 1,443 posts
Posted: Saturday, April 11, 2015 - 06:23 AM UTC
MAYBE NOT WORTH POSTING

But the below pic does show the method I'm using on the ceiling cables. The lower part of the picture, where the tape is, is actually where the ceiling is supposed to be.


If I am lucky, I'll be successful in cutting the wire ends and trimming down the strips so I can lay them on the outer edge of the ceiling without bending the wires and having to start over.


Joel_W
Staff MemberAssociate Editor
AUTOMODELER
_VISITCOMMUNITY
New York, United States
Joined: December 04, 2010
KitMaker: 11,666 posts
AeroScale: 7,410 posts
Posted: Sunday, April 12, 2015 - 02:19 AM UTC
Brian,
So far, those cables do look good.
Joel
Redhand
#522
_VISITCOMMUNITY
New Jersey, United States
Joined: January 20, 2013
KitMaker: 1,460 posts
AeroScale: 1,443 posts
Posted: Sunday, April 12, 2015 - 05:32 PM UTC
ANOTHER SHORT UPDATE

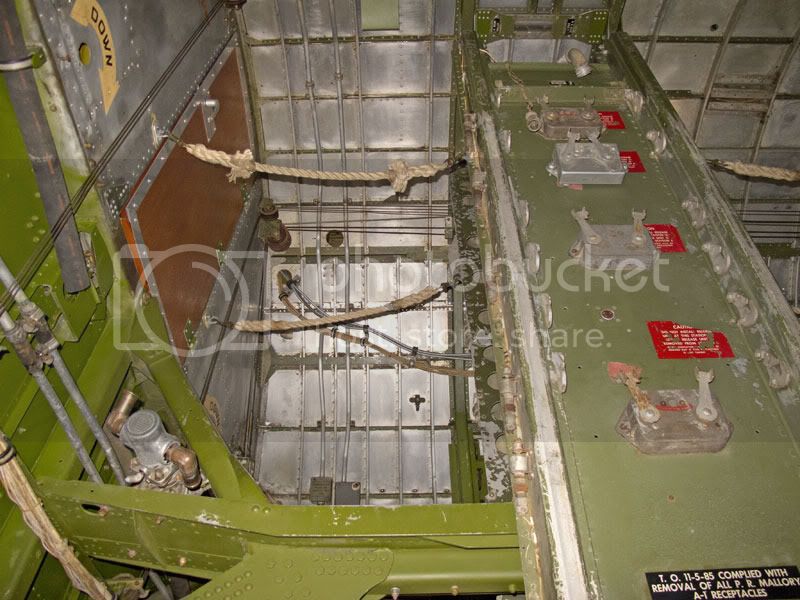
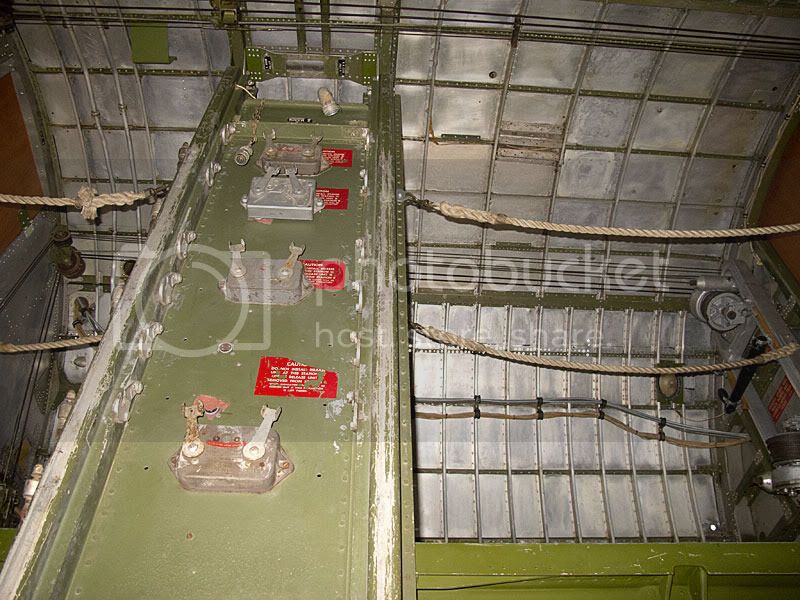
After a number of "tears of rage/frustration" attempts, I finally got the thinner-diameter control cables installed in both sides of the bomb bay ceiling. See below.


It only happened after I ripped out the old ones installed on the stbd ceiling and settled on a method that created a tighter, bundled look on both sides. I simply cut four uniform lengths of wire and glued them together using crazy-clue to create four bars sitting side-by-side, then glued that into each side of the ceiling.

This approach created the proper, tighter "look" for the cable runs and also, not incidentally, is necessary to create better clearance for installation of the tall, inner bomb racks in the ceiling.

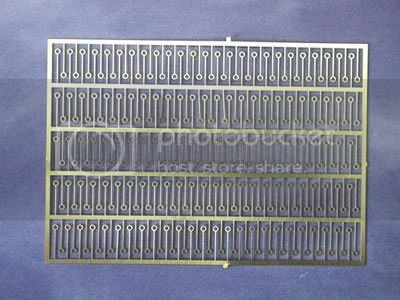
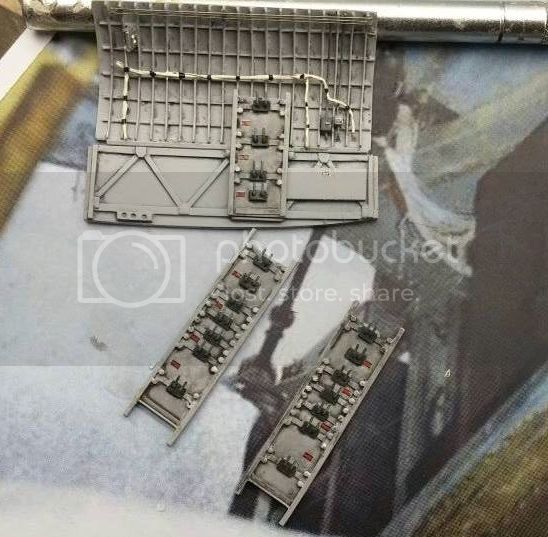
Some work on those can be seen below.


No, the holes aren't parallel in all cases, but that will even out with the installation of the brackets, which aren't uniformly positioned either. See below.


Am I tired of the bomb bay, and posting pictures of it? As one of my old, first year/"Paper Chase" type law professors said when a student asked an obvious-answer question: "What do you think?"

At least there is an "end is in sight" aspect to this part of the build. I'm already looking at the radio room and thinking about what's going to be necessary for realistic bulkheads, whether to add extra seats on the right side, etc.

Will I EVER get the fuselage together? Who knows? Perhaps when I turn into a
Joel_W
Staff MemberAssociate Editor
AUTOMODELER
_VISITCOMMUNITY
New York, United States
Joined: December 04, 2010
KitMaker: 11,666 posts
AeroScale: 7,410 posts
Posted: Sunday, April 12, 2015 - 06:36 PM UTC
Hey Pumpkin
That's making steady progress, even if it's one little step at a time. Your patience with this build is amazing. I would have gone stark raving mad, or looked for ways to finish it before I was "finished".

The few times I've tried to glue strands together using CA glue, I always ended up gluing them to the ceramic tile I was working on. I used extra thin, as I thought that gel just wouldn't look right. I eventually figured it out that if I hang the strands over the edge, then glued them, they only got glued to each other.

And yeah, I'm starting to really wonder if the fuselage halves will fit and ever get glued together. Then you can start to detail those 4 big radials.

Joel
KPHB17FE
_VISITCOMMUNITY
Illinois, United States
Joined: January 12, 2015
KitMaker: 292 posts
AeroScale: 292 posts
Posted: Monday, April 13, 2015 - 03:58 PM UTC
While visiting the AFM Restoration facility last week, I acquired some information on B-17 mods. I have not had time to go through it thoroughly yet, but this is pertinent to your build:

 photo Stage I Header_zpswanfrx27.jpg

Note Item 14:

 photo Some Stage I items_zpswhg3amg5.jpg

There is some more interesting stuff here but trying to find legible versions has been a bit of a challenge!
Redhand
#522
_VISITCOMMUNITY
New Jersey, United States
Joined: January 20, 2013
KitMaker: 1,460 posts
AeroScale: 1,443 posts
Posted: Monday, April 13, 2015 - 06:10 PM UTC
This is most interesting! Since Luscious Lady arrived in the UK in Dec 42 I can "get away" with the navigator seat still being there and the closed "basement doors" in the cockpit, but this definitely answers the question about the extra seats in the radio room (no) and explains why so many 17s appear without de-icer boots. I'm still debating whether to include at least some of them in this build, but "probably not." It will depend on further study of same-vintage 303rd B-17 pics I have in my own records.

Again, thanks for the tips! I'll be asking later about the configuration of the one radio room seat, and its armor plate. I am REALLY looking forward to moving on from the bomb bay.

Brian
Redhand
#522
_VISITCOMMUNITY
New Jersey, United States
Joined: January 20, 2013
KitMaker: 1,460 posts
AeroScale: 1,443 posts
Posted: Monday, April 13, 2015 - 07:46 PM UTC
Here's a crash shot of a 303rd B-17F in January 1943 sans deicer boots.


That pretty much settles the question for me: "No."

Joel_W
Staff MemberAssociate Editor
AUTOMODELER
_VISITCOMMUNITY
New York, United States
Joined: December 04, 2010
KitMaker: 11,666 posts
AeroScale: 7,410 posts
Posted: Monday, April 13, 2015 - 08:55 PM UTC
Brian,
Your research photo library is amazing.

BTW, I just noticed that on 4/22/15 your build will have entered its 2nd year. Now that's dedication.
Joel
AbramJ
_VISITCOMMUNITY
Arizona, United States
Joined: February 07, 2015
KitMaker: 45 posts
AeroScale: 44 posts
Posted: Monday, April 13, 2015 - 09:48 PM UTC
Brian, your build is looking amazing as usual.

Karl, that document is very interesting and very useful in my builds of aircraft for the 303rd. I'm guessing this only applied to the -F and changed when the -G was being fielded?
KPHB17FE
_VISITCOMMUNITY
Illinois, United States
Joined: January 12, 2015
KitMaker: 292 posts
AeroScale: 292 posts
Posted: Tuesday, April 14, 2015 - 06:13 AM UTC
I believe there is a later one but I haven't gotten through all of the documents yet. It is incredibly mind numbing...

There are a few more pages to the document I posted and there are some revised versions as well. I am still learning
KPHB17FE
_VISITCOMMUNITY
Illinois, United States
Joined: January 12, 2015
KitMaker: 292 posts
AeroScale: 292 posts
Posted: Tuesday, April 14, 2015 - 06:46 AM UTC
More information on the RO seat that you would ever actually need:

RO seat photo RO seat dims_zpsifbmf4ok.jpg

RO seat Assy photo Seat  Assy RO_zpsfs3dl4ad.jpg

RO seat inst photo RO seat Inst_zpsl2nnznwj.jpg
KPHB17FE
_VISITCOMMUNITY
Illinois, United States
Joined: January 12, 2015
KitMaker: 292 posts
AeroScale: 292 posts
Posted: Wednesday, April 15, 2015 - 12:52 AM UTC
Here is the seat armor:

RO Seat Back O photo RO Seat Back armor_zpshb2qx2lj.jpg

And in the F models they apparently felt the Radio Operators family jewels were important as they also included this bit under the seat!

 photo RO Seat Bottom Armor_zpsjnxr8a8h.jpg
Redhand
#522
_VISITCOMMUNITY
New Jersey, United States
Joined: January 20, 2013
KitMaker: 1,460 posts
AeroScale: 1,443 posts
Posted: Wednesday, April 15, 2015 - 03:02 AM UTC
Thanks for the seat armor derails Karl. I knew the seat had it because of my interview with MOH recipient Forrest Voslar, who on the day for which he was awarded the medal, told me that after he was wounded the first time, left his radio room gun and went to the seat, where he sat down and "hid" behind the armor for a few moments, until he realized, "This is stupid" and went back to his weapon.

I think I can modify another of the TD pilot's seats by making it shorter than the pilots' seats, and cut the armor myself this time. The seat pedestal should be easy to make.

BTW, here are a couple of radio room seat pics taken from a site online documenting a project by Ohio HS students to make a replica seat using original Boeing plans.


Cool!

Finally, my catwalk rope parts came today, and for once they are exactly what I hoped they would be. Pretty much "spot on" in dimension.

KPHB17FE
_VISITCOMMUNITY
Illinois, United States
Joined: January 12, 2015
KitMaker: 292 posts
AeroScale: 292 posts
Posted: Wednesday, April 15, 2015 - 05:12 PM UTC
That is a neat project, any idea what inspired them to do such a thing? Also, I was interested to note the difference in the seat back angle compared to the pilots seats. I always "assumed" they were the same unit. And one more little note: the pilots seats were painted, but the RO's was not. No idea as to why.

Redhand
#522
_VISITCOMMUNITY
New Jersey, United States
Joined: January 20, 2013
KitMaker: 1,460 posts
AeroScale: 1,443 posts
Posted: Wednesday, April 15, 2015 - 08:08 PM UTC

Quoted Text

That is a neat project, any idea what inspired them to do such a thing?


The WWII manufacturer was an Ohio Company near their School, so I expect it was a tribute to this small part of Ohio's contribution to the war effort.
Redhand
#522
_VISITCOMMUNITY
New Jersey, United States
Joined: January 20, 2013
KitMaker: 1,460 posts
AeroScale: 1,443 posts
Posted: Sunday, April 19, 2015 - 07:48 AM UTC
BOMB RACK CONSTRUCTION

The last three are basically done:


All they need is a few bits of touch-up, a coat of light black wash, and some some placard decals. Then they will be ready to fit into the bomb bay, and I can measure the tall center ones for attachment points for the catwalk ropes.

Joel_W
Staff MemberAssociate Editor
AUTOMODELER
_VISITCOMMUNITY
New York, United States
Joined: December 04, 2010
KitMaker: 11,666 posts
AeroScale: 7,410 posts
Posted: Sunday, April 19, 2015 - 05:02 PM UTC
Brian,
Very nicely done. they look great.
Joel
Redhand
#522
_VISITCOMMUNITY
New Jersey, United States
Joined: January 20, 2013
KitMaker: 1,460 posts
AeroScale: 1,443 posts
Posted: Wednesday, April 22, 2015 - 07:31 AM UTC
BOMB RACKS COMPLETED -- FIRST ANNIVERSARY OF THIS BUILD BLOG!

Here they are, with the port outer rack positioned against the port bulkheads I have been working on.


There is one control cable run to be added to the top of the port lower bulkhead (it runs behind the bomb rack) and then I will start fitting the inner racks in place and measuring for the catwalk ropes.

It IS nearing completion, though I have a couple of small surprises still in this space before I move to the radio room.

I will also add that the only way I can keep my sanity in this build is by looking at each piece, almost, as a "little kit." At my current pace I expect to be at least another year on this.

Today is actually the first anniversary of my starting this build blog, though I was working on the build about three months before that, I believe.

I appreciate all the feedback you folks have given, and the continuing interest you have shown. Karl's expertise (there, I used that word again) has been invaluable, and all your comments have been an inspiration. You all have definitely pushed me to make the build better. Thank you.
Joel_W
Staff MemberAssociate Editor
AUTOMODELER
_VISITCOMMUNITY
New York, United States
Joined: December 04, 2010
KitMaker: 11,666 posts
AeroScale: 7,410 posts
Posted: Wednesday, April 22, 2015 - 08:47 PM UTC
Brian,
Can't believe it's already been one year. Makes me feel like a real groupie. An old one, an very old one, but one none the less.

Those bomb racks looks sensational. The level of detail you've maintained is really quite extraordinary. Although at the rate you're going towards completion, you could actually finish this build right as you qualify for Social Security.

Joel