

Nice work Shorty, looks great.
Cheers, D
Air Campaigns
Want to start or join a group build? This is where to start.
Want to start or join a group build? This is where to start.
Hosted by Frederick Boucher, Michael Satin
OFFICIAL: Schwalbe - Me 262 Campaign

AussieReg

#007

Joined: June 09, 2009
KitMaker: 8,156 posts
AeroScale: 3,756 posts
Posted: Thursday, August 13, 2015 - 05:21 PM UTC


MLD

Joined: July 21, 2002
KitMaker: 3,569 posts
AeroScale: 419 posts
Posted: Thursday, August 13, 2015 - 06:33 PM UTC
Nice camp Shorty. Are you going to mottle the fuselage sides?

shorty53

#330
Joined: July 15, 2011
KitMaker: 175 posts
AeroScale: 103 posts

Posted: Friday, August 14, 2015 - 03:41 AM UTC
Quoted Text
Nice camp Shorty. Are you going to mottle the fuselage sides?
Yes Mike, I did try to mottle / blend the colour on the fuselage side, thats why the photo is from above so you cant see what a horrible job I did! Hopefully it will look better once Ive done some weathering.

goodn8

Joined: October 12, 2008
KitMaker: 709 posts
AeroScale: 651 posts
Posted: Friday, August 14, 2015 - 08:01 PM UTC
Joe: Great Job on your cmpaign entry. Awesome modeling an paint work. You did very well on fading this beautiful camo and it`s showing a decent weathering at all. And the open canopy is always an eye-catcher. 
Damian: Nice little tutorial about "how to do a putty".
And good work on the nacelles. When comes the bird?
John: I like that splinter camo Very clean and smooth painting and already a decent fading. As for the mottle I agree that this is hard to apply and needs full mental concentration. One thing: all the cockpit interior should be RLM66, will you go for it later? And is the gap at the right rear wing/nacelle connection a typical kit issue?
Thomas
Damian: Nice little tutorial about "how to do a putty".
And good work on the nacelles. When comes the bird?
John: I like that splinter camo
Very clean and smooth painting and already a decent fading. As for the mottle I agree that this is hard to apply and needs full mental concentration. One thing: all the cockpit interior should be RLM66, will you go for it later? And is the gap at the right rear wing/nacelle connection a typical kit issue?Thomas

goodn8
Joined: October 12, 2008
KitMaker: 709 posts
AeroScale: 651 posts
Posted: Friday, August 14, 2015 - 08:18 PM UTC
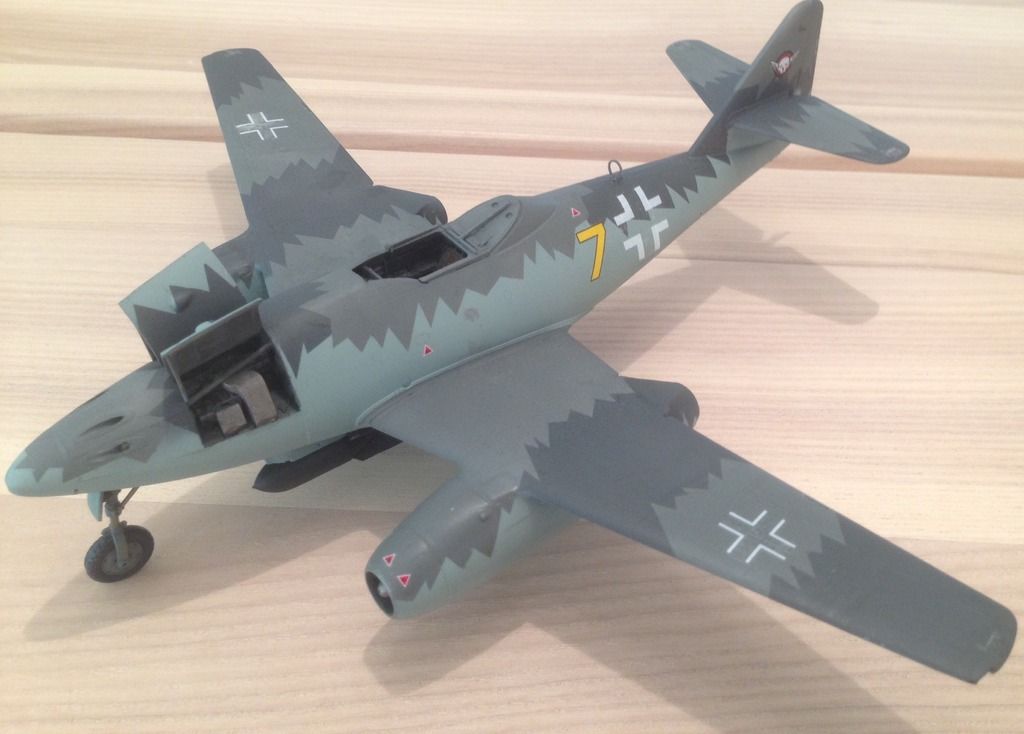
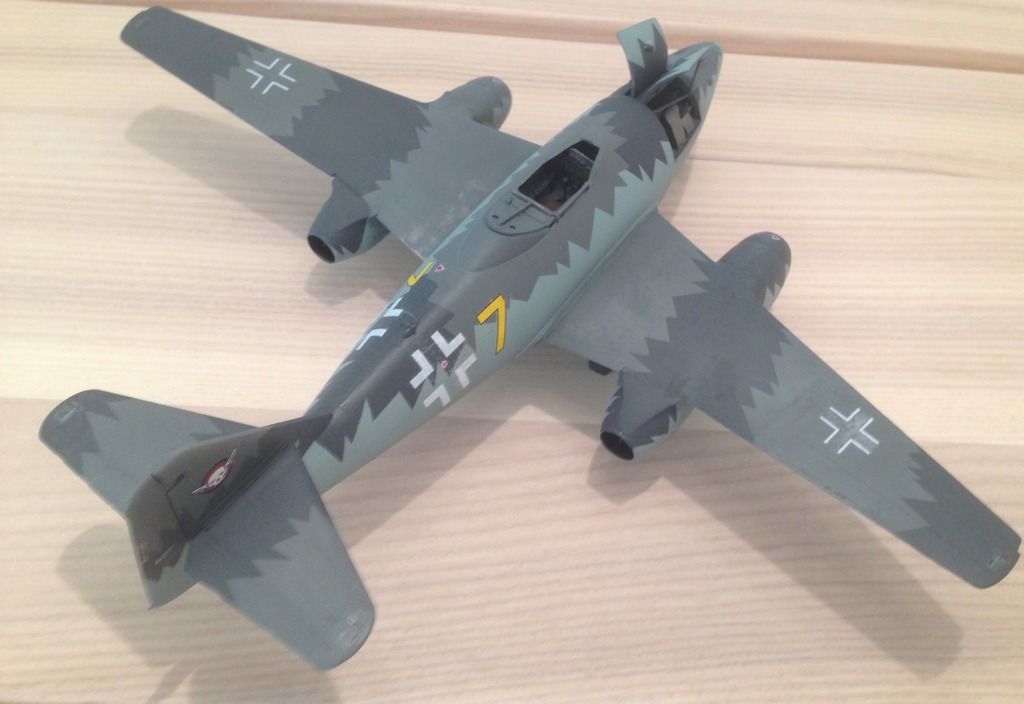
O.K. folks, next progress and stage:
This is the first time ever I tried a mottling effect by airbrush and done it free hand. Last time I "mottled" was a Revell 262 1/32 in the late '70s with a brush...
I'm not yet achieved the aim that I wanted but I can live with. This should be my (second) best I can do (the best will always be the next one.. )
Have to blend and fade the whole camo but next will be decaling.


Thanks for looking, Thomas
This is the first time ever I tried a mottling effect by airbrush and done it free hand. Last time I "mottled" was a Revell 262 1/32 in the late '70s with a brush...
I'm not yet achieved the aim that I wanted but I can live with. This should be my (second) best I can do (the best will always be the next one..
)Have to blend and fade the whole camo but next will be decaling.
Thanks for looking, Thomas

Antilles
Joined: March 22, 2015
KitMaker: 671 posts
AeroScale: 614 posts
Posted: Friday, August 14, 2015 - 09:17 PM UTC
John and Thomas: Niceley done camo!
Thomas: I like Your mottling already very much! But I am irritated about the sequence of painting the sides of your model. Is this correct: First black green, than grey and subsequently the mottling?
Oliver
Thomas: I like Your mottling already very much! But I am irritated about the sequence of painting the sides of your model. Is this correct: First black green, than grey and subsequently the mottling?
Oliver
goodn8
Joined: October 12, 2008
KitMaker: 709 posts
AeroScale: 651 posts
Posted: Friday, August 14, 2015 - 10:09 PM UTC
Quoted Text
John and Thomas: Niceley done camo!
Thomas: I like Your mottling already very much! But I am irritated about the sequence of painting the sides of your model. Is this correct: First black green, than grey and subsequently the mottling?
Oliver
Thank you Oliver!
As I said it's my first time trying a mottle effect.
Well, let's call it "reverse mottling". Since the fotos of the unit I'd like to go for looks like it was "refurbished" and was primary painted black-green (RLM81) all over and was later re-painted at the sides and tail ("Black 4" found in Czech Republic). It also received a new nose, that's while the tape is still on. So I just did RLM78 over RLM81.
Thomas
SGTJKJ
#041

Joined: July 20, 2006
KitMaker: 10,069 posts
AeroScale: 3,788 posts

Posted: Saturday, August 15, 2015 - 04:18 PM UTC
Thomas, very nice mottling. I think the end result is great and probably fits well with the reverse mottling on the real subject.
In any case very nice effect - especially on such a small kit.
Looking forward to see more
In any case very nice effect - especially on such a small kit.
Looking forward to see more

MLD
Joined: July 21, 2002
KitMaker: 3,569 posts
AeroScale: 419 posts
Posted: Saturday, August 15, 2015 - 08:01 PM UTC
Thomas, those sides look great!
light over dark, dark over light.. either way you cannot help but be happy with those results.
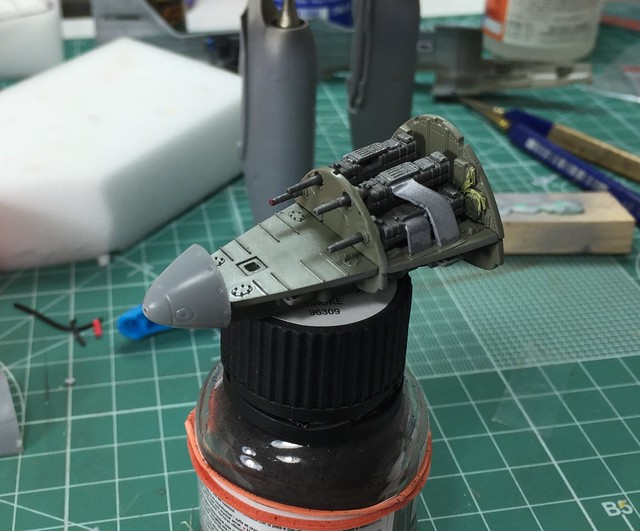
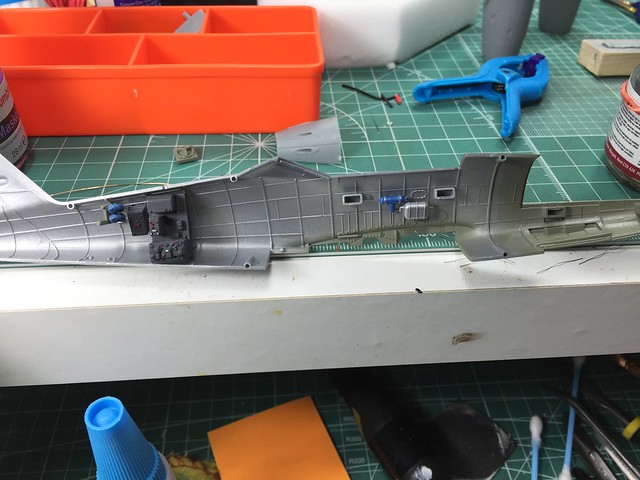
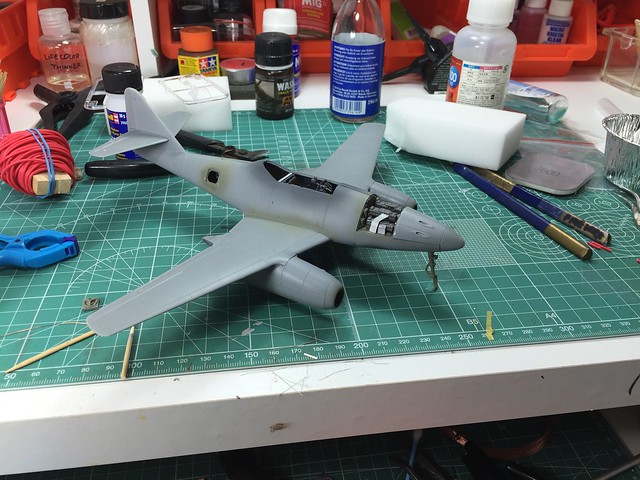
Was playing with the Hobby Boss 1/72 He 162 for the bare metal and putty effects. Mine is not quite as nice as the 1/32 one in the Weathering magazine, but I like this effect as well. A little more weathering on the metal to take the shine off and I'm using this on my U4 build.

light over dark, dark over light.. either way you cannot help but be happy with those results.
Was playing with the Hobby Boss 1/72 He 162 for the bare metal and putty effects. Mine is not quite as nice as the 1/32 one in the Weathering magazine, but I like this effect as well. A little more weathering on the metal to take the shine off and I'm using this on my U4 build.

goodn8
Joined: October 12, 2008
KitMaker: 709 posts
AeroScale: 651 posts
Posted: Sunday, August 16, 2015 - 11:24 PM UTC
Jesper and Mike: Thank you very much guys for your kindly judgement! I really appreciate it very much 
Mike, it would look nice if you go with that metal effect on your U4. When you check my previous posts you can see that I tried it also on mine at the underside (also first time doing that).
Btw, I forgot to show the actual underside - still lot of of things to do...

Go on with your good work
Thomas
Mike, it would look nice if you go with that metal effect on your U4. When you check my previous posts you can see that I tried it also on mine at the underside (also first time doing that).
Btw, I forgot to show the actual underside - still lot of of things to do...
Go on with your good work
Thomas

woltersk
Joined: May 27, 2003
KitMaker: 1,026 posts
AeroScale: 215 posts
Posted: Monday, August 17, 2015 - 08:14 AM UTC
Quoted Text
Keith, nice work on the interior paint so far. Don't worry too much, I've never been known as a stickler for strict finish dates. I'd much rather see a build finished and on display than half-baked in a box and buried in the stash. Just get it done in your own good time and keep posting here as you go (I will be here keeping you company with my own build!)
Cheers, D
Damian,
Appreciate that, however, this build might take me 'til Christmas...of 2016.

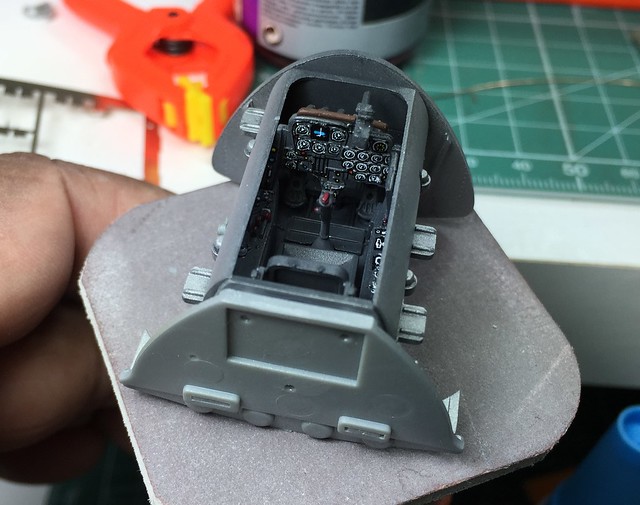
I tried my hand at wiring the control panel and fuselage. The yellow should be toned down with a wash and the instruments will be touched up. It may not be accurate, but its better than nothing (I think). And it was kinda fun and challenging to do.

Model on everyone!!
Keith


bomber14
Joined: February 02, 2015
KitMaker: 330 posts
AeroScale: 286 posts
Posted: Tuesday, August 18, 2015 - 11:04 AM UTC
Quoted Text
Quoted TextQuoted TextFantastic finish Joe. The fading looks great to my eye.
Which Gunze and Model Masterpaint numbers did you use for the topside colors, and did you mix colors to get those shades?
Did you fade them with oils?
The reason I ask is that my results with that scheme usually ends up looking too stark.
mike i used gunze rlm 81 brown violet acrylic and MM rlm 82 green enamel. i added 3-4 drops of white when thinning them down and after shooting each color i added a few more drops of white to fade the colors and sprayed a light coat in the middle of all the patches. then glosscoat and decals followed by the flory wash. the flory wash is water based and real easy to use. finally a dullcoat to seal and dull the finish. i also used tamiya weathering powders set with the soot in it to add some powder marks to the gun ports and ejectors and a few hatches. the underside was first sprayed with tamiya light blue from the can then after panel hilighting another coat of MM rlm 76. unfortunatly it covered up all the panel lines so i used the flory wash which turned out pretty good.
joe
Joe,
Thanks for the detailed description.
My Gunze 81 (acrylic) is much darker, I will have to try your lightening ratio. The MM (acrylic) 84 I have is nowhere close to that color. I am not much of an enamel airbrusher.
I certainly cannot argue with your results. They are fantastic.
Mike
to tell you the truth mike I think I like enamel better in the airbrush. it seems to lay down smoother. granted the only acrylic I have used so far is Tamiya and gunze and I have used denatured alcohol to thin instead of the brand thinner. I recently bought a bunch of lifecolor paints and their thinner. I plan on using them on my next build,a p47 razorback for the fighter/bomber campaign if I ever get around to starting it.
joe.
bomber14
Joined: February 02, 2015
KitMaker: 330 posts
AeroScale: 286 posts
Posted: Tuesday, August 18, 2015 - 11:28 AM UTC
Quoted Text
Joe: Great Job on your cmpaign entry. Awesome modeling an paint work. You did very well on fading this beautiful camo and it`s showing a decent weathering at all. And the open canopy is always an eye-catcher.
Damian: Nice little tutorial about "how to do a putty".
And good work on the nacelles. When comes the bird?
John: I like that splinter camo
Thomas
thanks Thomas I am happy with the results. can't wait to do another. btw the tether on the canopy is a strand of the wife's hair

I think I can answer your question to john about that gap. if that is the hobbyboss kit then yes it is a kit issue. I like the kit but the wing to fuselage fit and the wing to engine nacelle is not the best. my build also does not have the right upward angle as my Tamiya build either.
joe.
SGTJKJ
#041
Joined: July 20, 2006
KitMaker: 10,069 posts
AeroScale: 3,788 posts
Posted: Tuesday, August 18, 2015 - 11:51 AM UTC
That is impressive detail, Keith. Looks beautiful.
I have made a little more progress on my build. Most details are painted and decals are on. Next is some light weathering and obviously the cockpit canopy.
I have made a little more progress on my build. Most details are painted and decals are on. Next is some light weathering and obviously the cockpit canopy.


Mascharius
Joined: March 05, 2015
KitMaker: 28 posts
AeroScale: 28 posts
Posted: Tuesday, August 18, 2015 - 05:46 PM UTC
So I started. With the Revell-Kit few days ago. Didn´t have the time to post it till now.
I hope you can see the date on the picture.
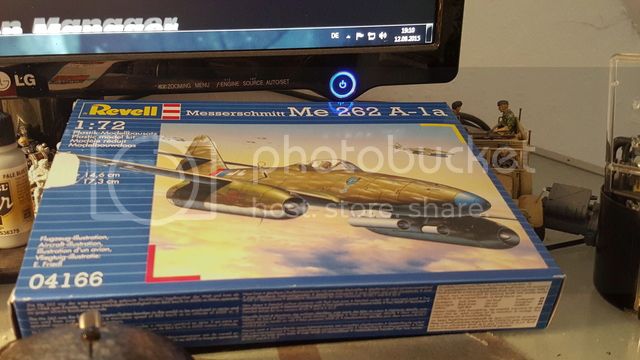
I Think i will manage to finish it in time.
I hope you can see the date on the picture.
I Think i will manage to finish it in time.

eMan
#298

Joined: August 08, 2002
KitMaker: 1,182 posts
AeroScale: 351 posts

Posted: Thursday, August 20, 2015 - 08:23 AM UTC
Some update pics.


Mascharius
Joined: March 05, 2015
KitMaker: 28 posts
AeroScale: 28 posts
Posted: Thursday, August 20, 2015 - 12:04 PM UTC
And i´ve made some progress as well.
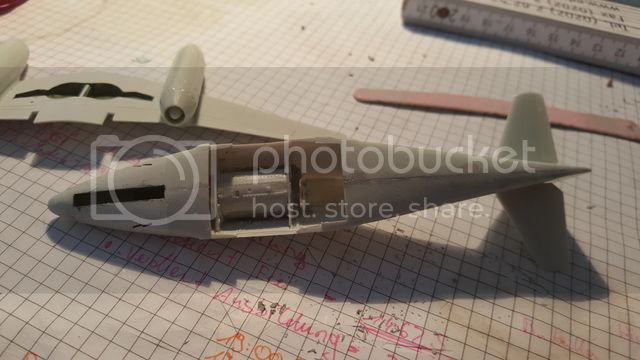
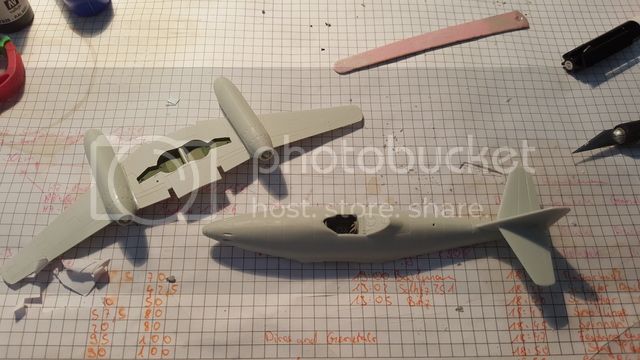
I hope to get some colour on it today.
I hope to get some colour on it today.
SGTJKJ
#041
Joined: July 20, 2006
KitMaker: 10,069 posts
AeroScale: 3,788 posts
Posted: Thursday, August 20, 2015 - 01:52 PM UTC
Nice progress, Lap Man and Jan.
I plan to finish mine within a week so to make the official deadline despite Damian kindly extending it.
I plan to finish mine within a week so to make the official deadline despite Damian kindly extending it.
AussieReg
#007
Joined: June 09, 2009
KitMaker: 8,156 posts
AeroScale: 3,756 posts
Posted: Friday, August 21, 2015 - 02:46 AM UTC
Some great progress as we enter the final couple of weeks of the official Campaign period!
Jan, welcome aboard and thanks for joining us. Fast progress as well, I'm looking forward to the next update.
Lap Man, beautiful interior work.
Jesper, neat decaling my friend, your build is looking really sharp!
Keith, that wiring looks great. It really stands out and adds a lot to the interior.
Thomas, great work on the colours, coming up beautifully.
I am planning on a couple of hours tonight at my build, I should be able to get the interior finished and start on the major assembly.
Cheers, D

iflytb20

#501

Joined: August 25, 2009
KitMaker: 292 posts
AeroScale: 194 posts

Posted: Friday, August 21, 2015 - 04:27 PM UTC
This is where I stand in my build.
Finished the cockpit tub and the gun racks. I managed to convince the fuselage halves to stick together but guess I wasn't convincing enough. I see lot's of puttying and sanding in my future
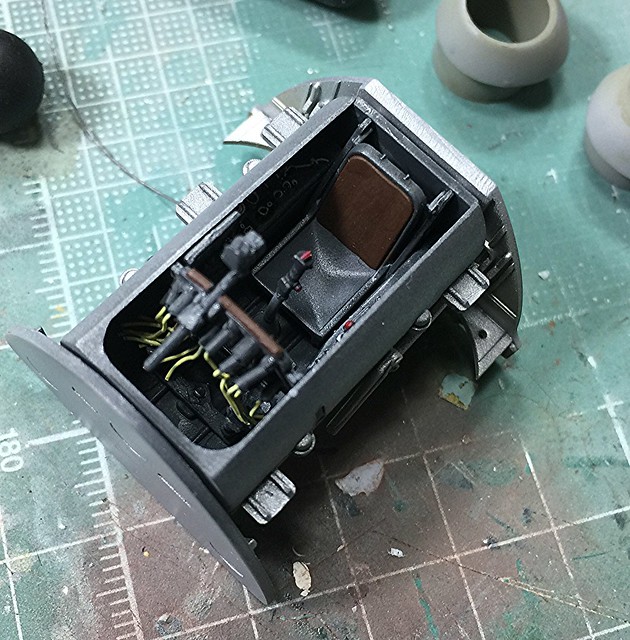
Hope I can finish it before the deadline. And speaking of which - did I read about an extension ?

Finished the cockpit tub and the gun racks. I managed to convince the fuselage halves to stick together but guess I wasn't convincing enough. I see lot's of puttying and sanding in my future
Hope I can finish it before the deadline. And speaking of which - did I read about an extension ?

SGTJKJ
#041
Joined: July 20, 2006
KitMaker: 10,069 posts
AeroScale: 3,788 posts
Posted: Friday, August 21, 2015 - 05:37 PM UTC
Raj, stunningly beautiful details in the cockpit. Really awesome stuff!
AussieReg
#007
Joined: June 09, 2009
KitMaker: 8,156 posts
AeroScale: 3,756 posts
Posted: Friday, August 21, 2015 - 08:12 PM UTC
Raj, awesome work, amazing detail! And yes, don't rush your build to hit the deadline, we will run a few extra weeks to see some more builds completed.
I managed a couple of hours tonight and got the PE belts fitted and seats installed in the office, then gave the fuselage halves and cockpit a wash with heavily thinned flat black enamel. Once again, poor quality pics, but you get the idea.


Cheers, D
I managed a couple of hours tonight and got the PE belts fitted and seats installed in the office, then gave the fuselage halves and cockpit a wash with heavily thinned flat black enamel. Once again, poor quality pics, but you get the idea.


Cheers, D
goodn8
Joined: October 12, 2008
KitMaker: 709 posts
AeroScale: 651 posts
Posted: Saturday, August 22, 2015 - 11:25 AM UTC
Raj: Great job and detailing at the weaponary, cockpit and recon stuff!
Jan: Same kit as mine and a quick progress too. Move on, I'm curious how yours will turn out
Jesper:Every next stage you show up it looks better and better, very nice!
Damian: Thanks! Good to see your build moving onwards and a neat job on the office But think again about the fuselage inside as they were never be painted in any RLM. Same as the cockpit underside they were normally left in bare metal/alu.
Thomas
Jan: Same kit as mine and a quick progress too. Move on, I'm curious how yours will turn out
Jesper:Every next stage you show up it looks better and better, very nice!
Damian: Thanks! Good to see your build moving onwards and a neat job on the office
But think again about the fuselage inside as they were never be painted in any RLM. Same as the cockpit underside they were normally left in bare metal/alu.Thomas
Antilles
Joined: March 22, 2015
KitMaker: 671 posts
AeroScale: 614 posts
Posted: Saturday, August 22, 2015 - 01:12 PM UTC
Keith: Great work with the wiring! I have seen some pictures of the original, where it looks just like "spaghetti" running from point A to B! You hit the original very well!
Jesper: Camo and decals on Your swallow look awesome!
Jan: As Thomas said, it is very useful to look at his pics of the revell swallow! He pointed out the flaws and their correction very well. Nice build so far!
Raj: Hi Raj, i like Your swallow of the first fighter campaign very much and I am curious about Your next Me 262! Nice details and wiring!
LapMan: Good to see a further build!
Damian: Nice working place details in Your swallow.
There is lots of activity in this campaign. Great!
Oliver
SGTJKJ
#041
Joined: July 20, 2006
KitMaker: 10,069 posts
AeroScale: 3,788 posts
Posted: Saturday, August 22, 2015 - 07:47 PM UTC
Thanks for the comments, Oliver, Thomas, and Damian. Appreciate it.
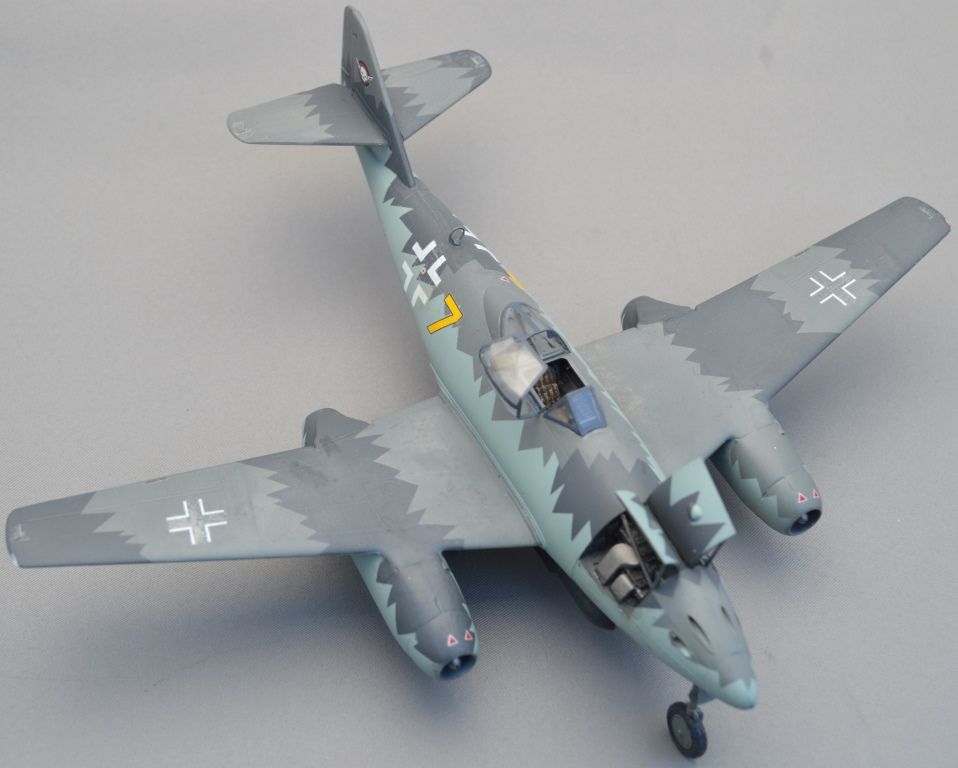
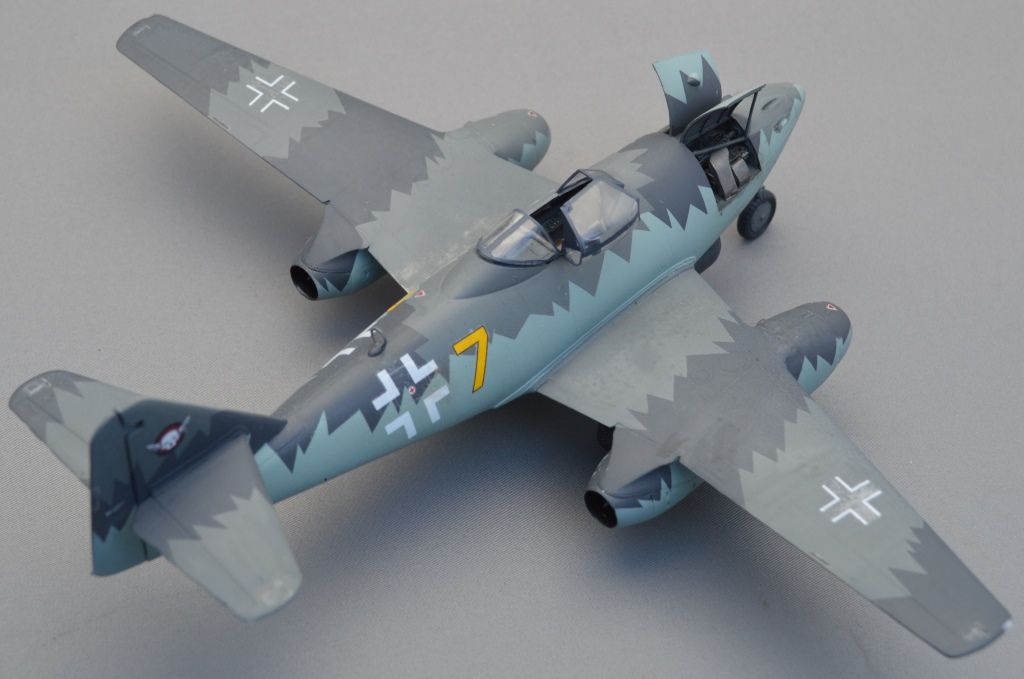
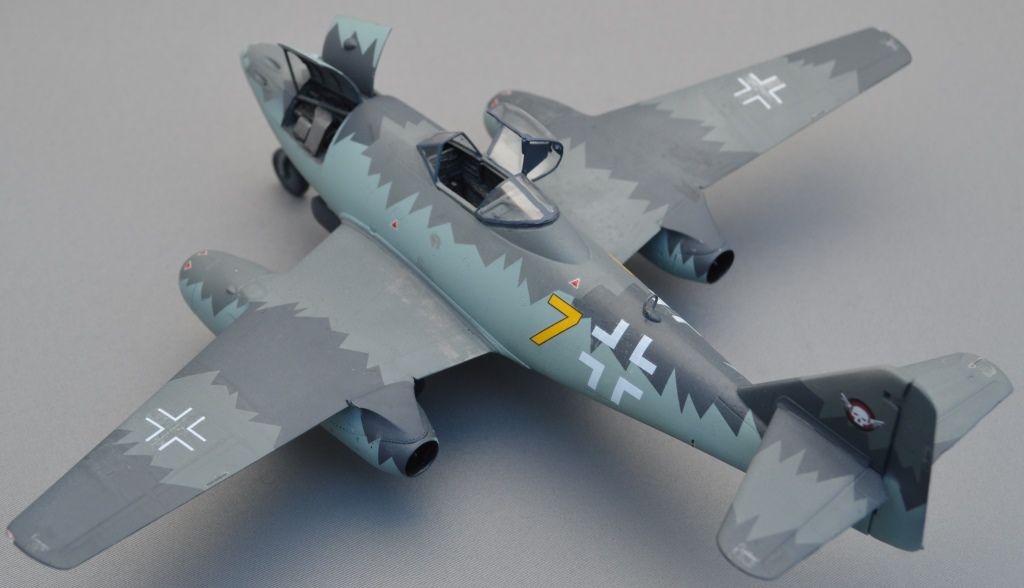
I have now finished my Me 262. I am pretty satisfied although one of the wing decals silvered up on me. I am still debating with myself if I want to weather it some more, but so far I will keep it as is.
Comments welcome
Looking forward to see all the other great builds in this campaign.
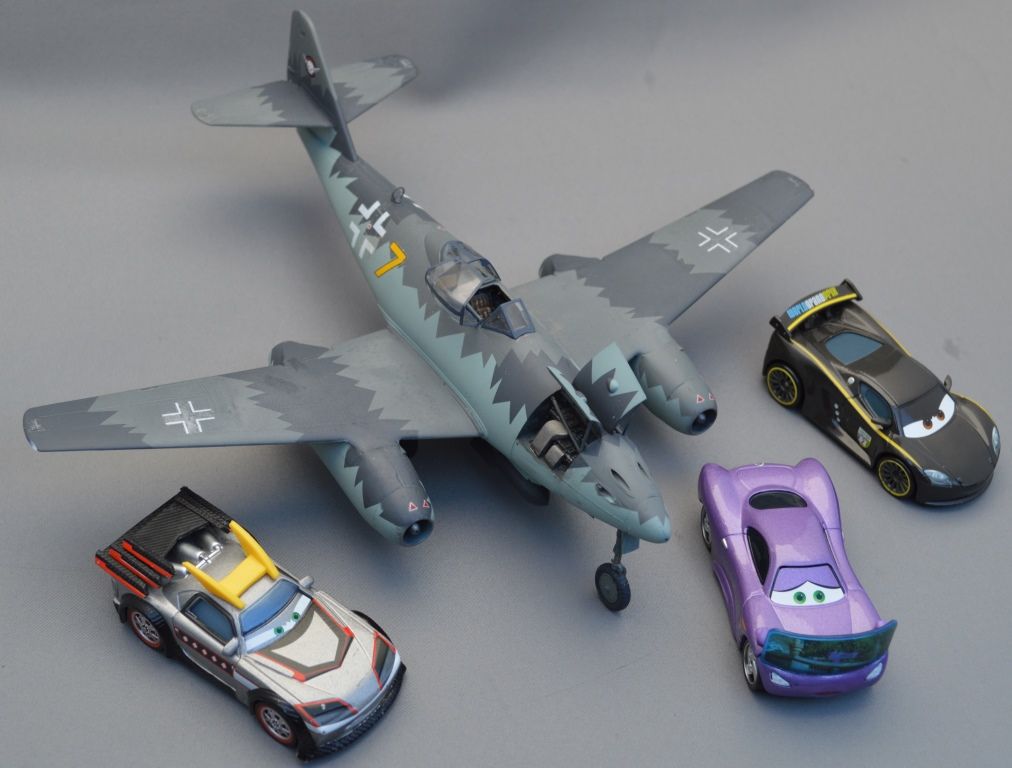
PS. The last picture is from the kids that insisted their cars to be in the picture!
I have now finished my Me 262. I am pretty satisfied although one of the wing decals silvered up on me. I am still debating with myself if I want to weather it some more, but so far I will keep it as is.
Comments welcome
Looking forward to see all the other great builds in this campaign.
PS. The last picture is from the kids that insisted their cars to be in the picture!


 |

WEB HOSTING BY


Copyright ©2021 AeroScale and Kitmaker Network, a subsidiary of Silver Star Enterprises
All Rights Reserved. Please read our Conditions of Use and Privacy Policy.
All Rights Reserved. Please read our Conditions of Use and Privacy Policy.