OFFICIAL: Schwalbe - Me 262 Campaign
Nordrhein-Westfalen, Germany
Joined: March 22, 2015
KitMaker: 671 posts
AeroScale: 614 posts
Posted: Monday, March 30, 2015 - 08:31 PM UTC
Hallo Keith,
good idea to break the silence. Here are some pics of the finished cockpit tub of my swallow.


Greetings, Oliver
On the desk: Probably a Panzer III.
California, United States
Joined: October 08, 2013
KitMaker: 111 posts
AeroScale: 28 posts
Posted: Friday, April 03, 2015 - 09:56 AM UTC
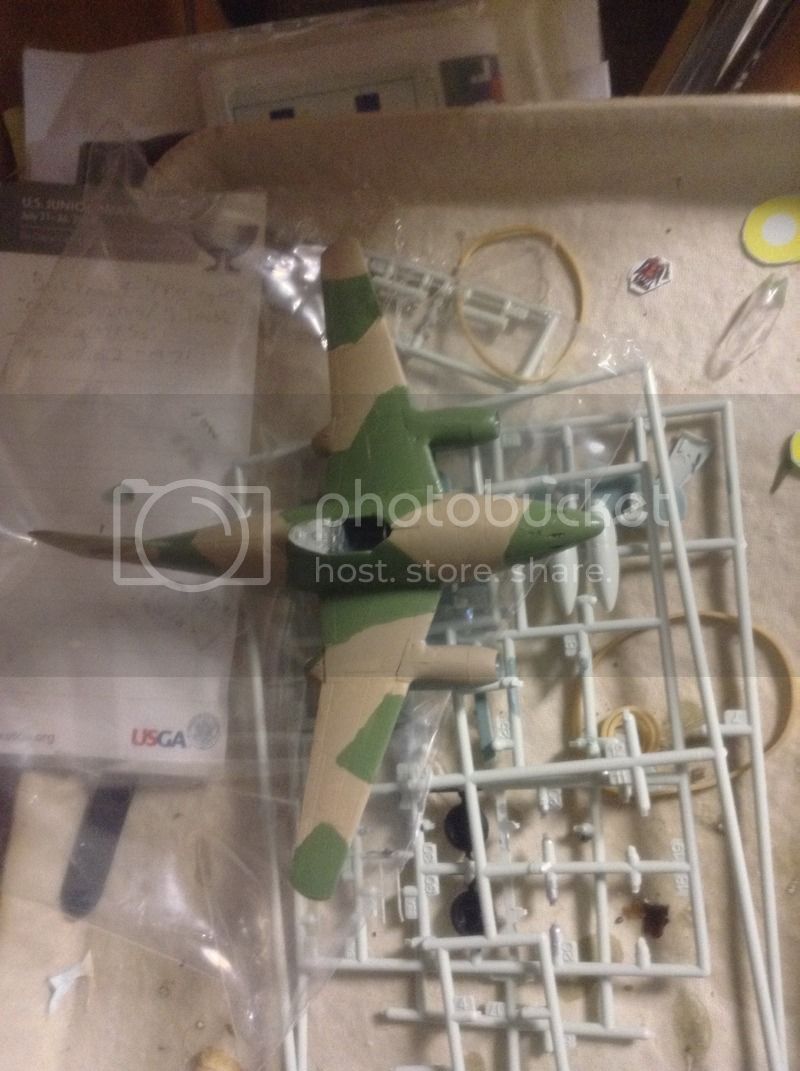
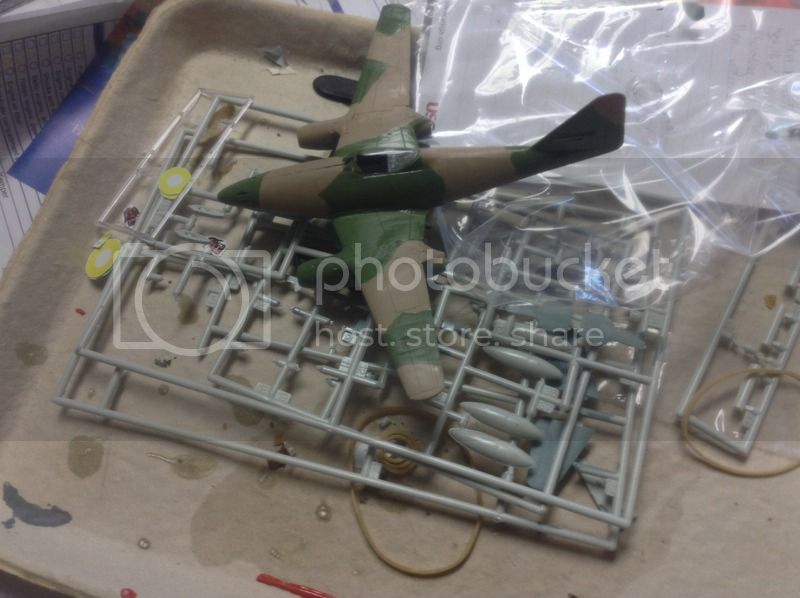
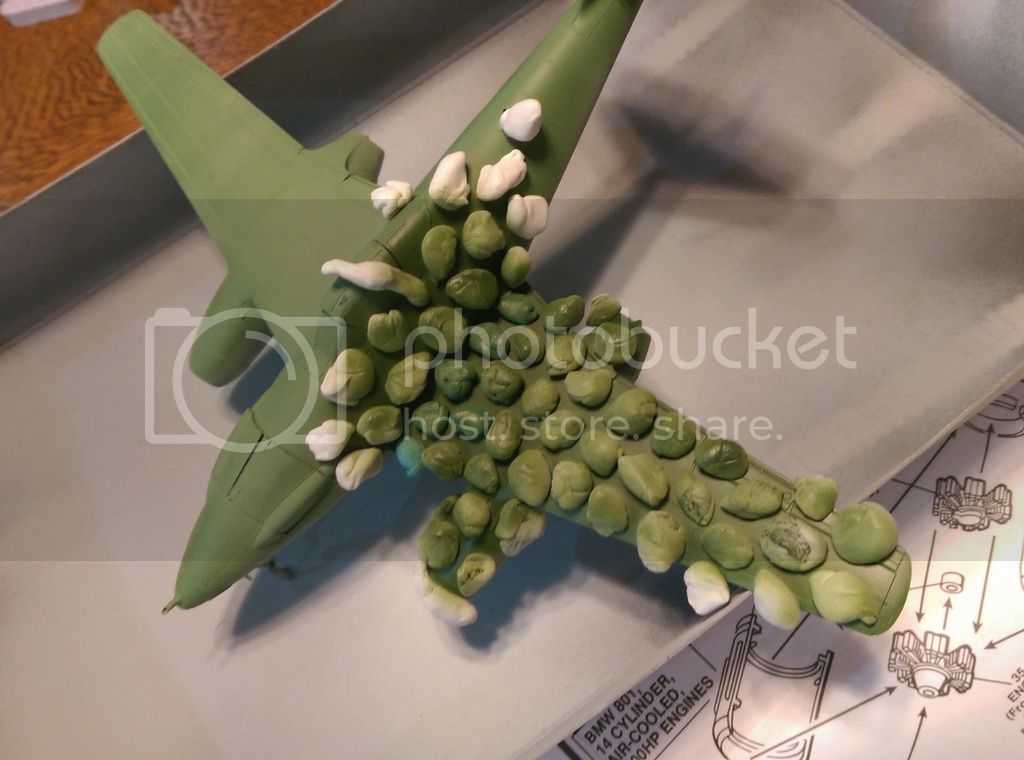
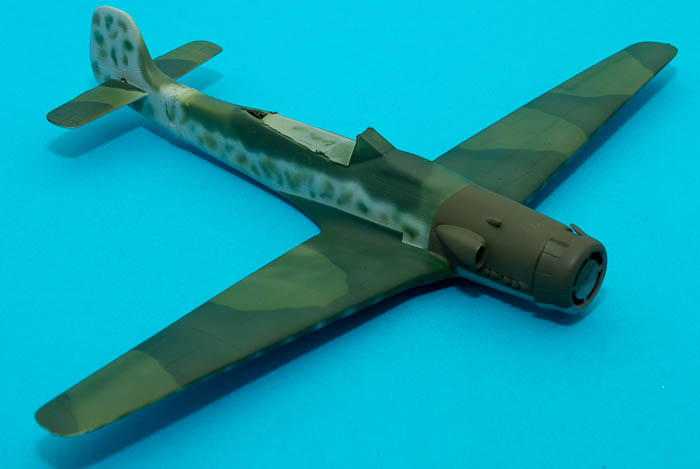
Here's an update on my U3 recon bird.... camo on. Finishing up canopy and then on to detailing and decals.
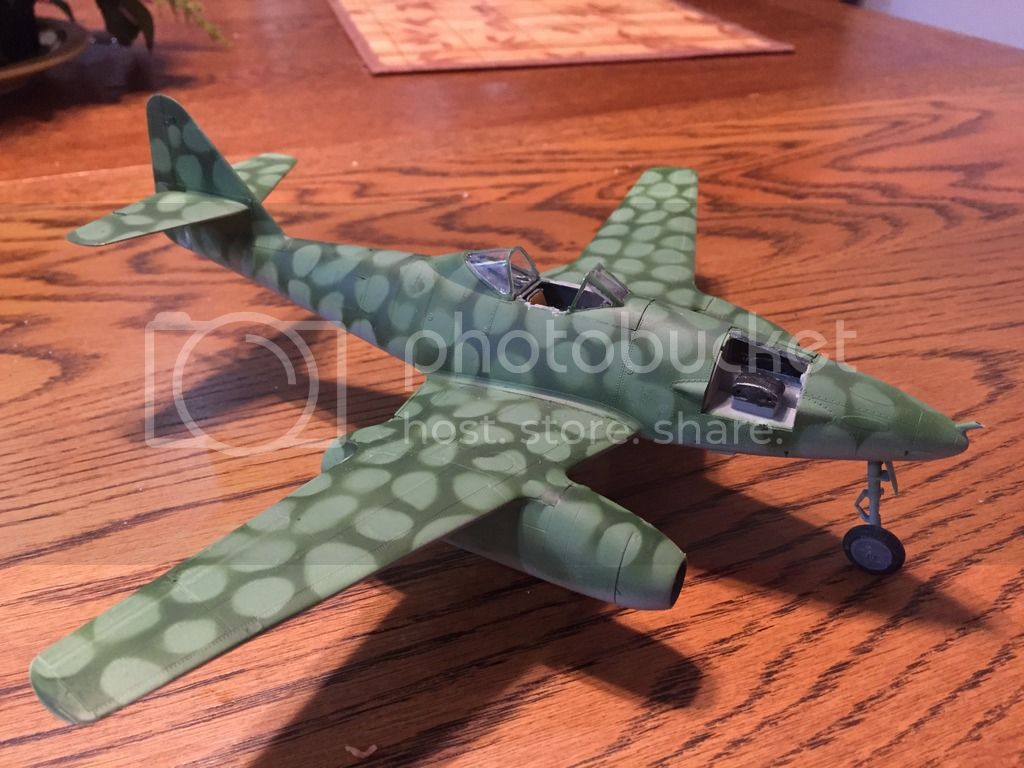
Painted the camo over little blobs of blu tack.
Joe Osborne
Regards,
Joe Osborne
On the bench:
1/35 Tamiya Tiger I early Production
1/35 Tamiya Mid Production Tiger I
AussieReg
 Associate Editor
#007
Victoria, Australia
Joined: June 09, 2009
KitMaker: 8,156 posts
AeroScale: 3,756 posts
Posted: Friday, April 03, 2015 - 05:31 PM UTC
Great updates guys, I wish I could get some benchtime to keep up with everybody else's progress!
Joe, neat work on the camo. The Blu-Tac mask is a neat trick. I'm looking forward to seeing it with decals on.
Oliver, very nice detail work on the cockpit. Looking good so far!
Keith, glad to see that you are enjoying the HB kit, the detail in those sub assemblies is great.
C4, setting the pace there my friend! Great job on the camo, I really like the splinter/mottled schemes.
Carry on good folks, keep the updates coming!
Cheers, D
ON the bench
Revell 1/24 '53 Corvette (building as '54)
Revell 1/24 BMW 507 Coupe and Cabrio
Italeri 1/48 Me262 B-1a/U1 Nightfighter
Monogram 1/24 '57 Chevy Nomad
Dragon 1/350 USS Frank Knox DD-742
Oregon, United States
Joined: January 13, 2014
KitMaker: 107 posts
AeroScale: 105 posts
Posted: Tuesday, April 07, 2015 - 09:17 AM UTC
I'll see what I can do about repainting the red portion of the Eire roundel, though I've tested the decals and found they tend to flake. Not sure if that is due to their age, quality or both. Additionally I don't have a unit insignia to match/resemble the example I'd found. It's a work in process.
On the other hand I can offer up a Central/Latin American, Manchukuo, Dutch, Imperial German, Croatian or even Vatican Schwalbe with other assorted markings I have.
On the WIF Workbench: 1/72 IL-2 Sturmovik (Cuban Air Force)
"I shall either find a way or I shall make one." - supposedly, Hannibal Barca
Vermont, United States
Joined: July 21, 2002
KitMaker: 3,569 posts
AeroScale: 419 posts
Posted: Tuesday, April 07, 2015 - 05:03 PM UTC
Quoted Text
I'll see what I can do about repainting the red portion of the Eire roundel, though I've tested the decals and found they tend to flake. Not sure if that is due to their age, quality or both. Additionally I don't have a unit insignia to match/resemble the example I'd found. It's a work in process.
On the other hand I can offer up a Central/Latin American, Manchukuo, Dutch, Imperial German, Croatian or even Vatican Schwalbe with other assorted markings I have.
Vatican???
That would be hilarious and awesome.
Please do the Vatican AF version.
If you can keep your head when all about you are losing theirs,
perhaps you've misunderstood the situation.
#041
Kobenhavn, Denmark
Joined: July 20, 2006
KitMaker: 10,069 posts
AeroScale: 3,788 posts
Posted: Wednesday, April 08, 2015 - 12:20 PM UTC
Nice camouflage, Joe. What is that pipe on the tip of the fuselage?
Looking forward to see more.

Campaign'oholic - 252+ campaigns completed
New Jersey, United States
Joined: February 02, 2015
KitMaker: 330 posts
AeroScale: 286 posts
Posted: Wednesday, April 08, 2015 - 01:18 PM UTC
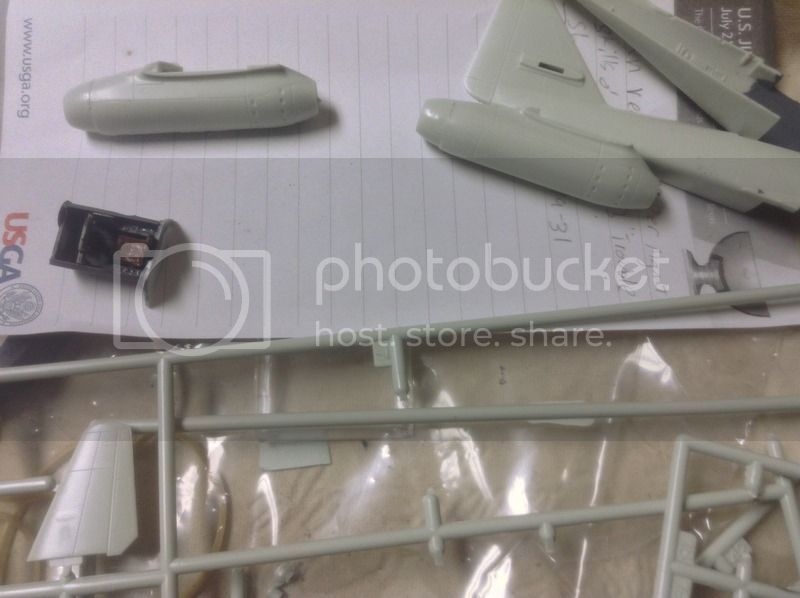
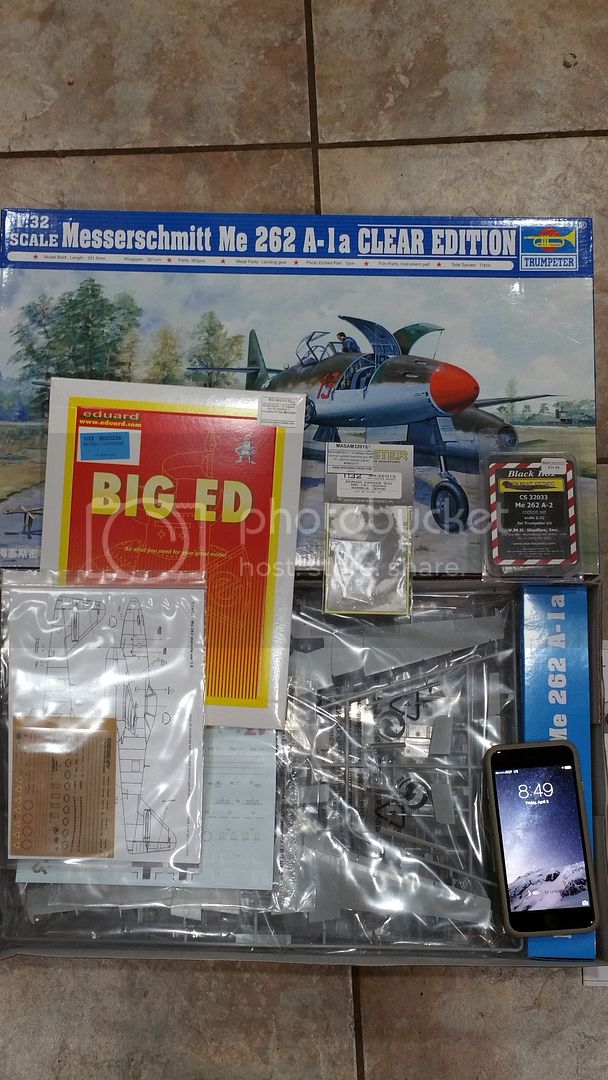
hi everyone, I'm new here. when I seen this campaign I had to jump right in since this is one of my favorite aircraft of WWII. I am a little behind most everyone else, and there are some nice builds so far. but here is what I am building-
[img]http://gallery3.kitmaker.net/data/29826/thumbs/GEDC2168.JPG
I have started it and will post more when I am further along. nice kit so far but just like the Tamiya kit, no wing slats. I was thinking about making my own but I want to keep it simple- anyone have some suggestions? I don't want to grind out the wings so I was thinking of using very thin sheet and gluing them in the down position. I had seen someone here that had a resin slat kit but so far I can't find one.
thanks for having me- joe
p.s. why did the photo not show from the gallery? I followed the steps in tutorial
anyway it's the hobby boss 262 a-1a
New Jersey, United States
Joined: February 02, 2015
KitMaker: 330 posts
AeroScale: 286 posts
Posted: Wednesday, April 08, 2015 - 01:25 PM UTC
i'll try again-

Nope- ?
Nordrhein-Westfalen, Germany
Joined: March 22, 2015
KitMaker: 671 posts
AeroScale: 614 posts
Posted: Wednesday, April 08, 2015 - 02:47 PM UTC
Hallo Joe,
I had the same problem, when I started. Probably, you forgot the Image End Tag. So just put [/img] after the ending jpg.
Hopefully this will work.
Kind Regards
Oliver
On the desk: Probably a Panzer III.
#041
Kobenhavn, Denmark
Joined: July 20, 2006
KitMaker: 10,069 posts
AeroScale: 3,788 posts
Posted: Wednesday, April 08, 2015 - 05:36 PM UTC
Joe, welcome onboard. One of my favorite aircraft as well.
You are definitely not late to the party. A lot fo people will enter later - myself included. I will probably make a Luft '48 Me 262.
As pointed out by Oliver you just needed the [/img] at the end. below is your photo.

Campaign'oholic - 252+ campaigns completed
#363
Pennsylvania, United States
Joined: January 08, 2014
KitMaker: 425 posts
AeroScale: 401 posts
Posted: Wednesday, April 08, 2015 - 05:46 PM UTC
If you remove the /thumbs portion it will display the full sized-image. I had this issue myself before Mal got me straightened out. Welcome aboard!
On the Bench:
The Big Three: Eduard 1:48 Bf 109G-2 Trop
Radial Fighters: Hasegawa 1:48 Ki84 Frank
The Mighty Eighth: Eduard 1:48 P-51D-10
New Jersey, United States
Joined: February 02, 2015
KitMaker: 330 posts
AeroScale: 286 posts
Posted: Wednesday, April 08, 2015 - 10:30 PM UTC
thanks for the help guys. i thought it had the img at the end. what i did was click the img tab below, copied the photo then pasted it in between the img's. i tried without removing the type and removing it so all i had was the img's. i am going to try it again even though it is posted already- thanks for that jesper
paul, what do you mean by the thumbs portion?
New Jersey, United States
Joined: February 02, 2015
KitMaker: 330 posts
AeroScale: 286 posts
Posted: Wednesday, April 08, 2015 - 10:35 PM UTC
let's try it again

no, now it's not letting me paste.
New Jersey, United States
Joined: February 02, 2015
KitMaker: 330 posts
AeroScale: 286 posts
Posted: Wednesday, April 08, 2015 - 10:38 PM UTC
Berlin, Germany
Joined: October 12, 2008
KitMaker: 709 posts
AeroScale: 651 posts
Posted: Wednesday, April 08, 2015 - 10:50 PM UTC
Hi Joe!
Don't worry, you are not the only one with pic's problems.
Copy your file direction:
http://gallery3.kitmaker.net/data/29826/GEDC2168.JPGand paste inside as Jessica explains in the next reply

Try again, and welcome to "Schwalbe-campaign"
Thomas

Sometimes you need to distance yourself to see things clearly - Lao Tzu -
... in scale and in real life -T.
British Columbia, Canada
Joined: September 03, 2009
KitMaker: 6,965 posts
AeroScale: 6,247 posts
Posted: Wednesday, April 08, 2015 - 10:53 PM UTC
It may be easier for you to type the IMG tags yourself when you write your posts. Paste your picture's URL into the posting window, then type "img" (don't forget to put the square brackets in place of the quotation marks) in front of the URL and "/img" behind it (again, square brackets). Don't leave spaces.
When once you have tasted flight you will walk the Earth with your eyes turned skyward.
For there you have been, and there you will always long to return.
-Leonardo Da Vinci
Berlin, Germany
Joined: October 12, 2008
KitMaker: 709 posts
AeroScale: 651 posts
Posted: Wednesday, April 08, 2015 - 11:46 PM UTC
As for my Revell-Schwalbe there is not much progress.Only little time for the bench where I staring sharp at the plastic parts

Some putty, sanding, glueing and a try to give that awful canopy a look-alike. Don't want to spend money for a spare canopy and mainly use kits as they are and try what I can do.
Don't know if this is better nor if it works when painting.The fit is still a mess!


Keith and Joe: nice work so far!Camo with blu tack looks funny.
Thomas
Sometimes you need to distance yourself to see things clearly - Lao Tzu -
... in scale and in real life -T.
Nordrhein-Westfalen, Germany
Joined: March 22, 2015
KitMaker: 671 posts
AeroScale: 614 posts
Posted: Thursday, April 09, 2015 - 12:29 AM UTC
Hallo Thomas,
Great work with that nasty canopy! As I am using the same kit, I have trouble here, too. Did You use aluminium foil for the frame! Additionally, please be aware with the lower part of the nose. If you don't glue well, there will be a lot of filling and sanding! Hence, this evening is filled with sanding for me

On the desk: Probably a Panzer III.
Berlin, Germany
Joined: October 12, 2008
KitMaker: 709 posts
AeroScale: 651 posts
Posted: Thursday, April 09, 2015 - 12:38 AM UTC
hi Oliver!
Thank's for the comment. It is what I was just editing in my last post - the fit
And yes, I use a thin self adhesive aluminum foil, riveted a little and cut in seperate pieces. Fiddling work and could be better.
Good luck with your evening progress! You did very well on your cockpit, nice wiring behind the dials.
Thomas
Sometimes you need to distance yourself to see things clearly - Lao Tzu -
... in scale and in real life -T.
California, United States
Joined: October 08, 2013
KitMaker: 111 posts
AeroScale: 28 posts
Posted: Thursday, April 09, 2015 - 07:24 PM UTC
Quoted Text
Nice camouflage, Joe. What is that pipe on the tip of the fuselage?
Looking forward to see more.
I have to really laugh at myself on this one... usually I research the heck out of what I'm building. This build I just grabbed an Me-262 off the LHS shelf and just built it... wondering what the heck the pipe is off the nos, but not bothering to find out. Just wanted a quick build.
So now I research it and it has to be the Mk 108 cannon installed on some of the U3's ... LOL!!! When I looked at reference pics the cannon when installed is actually off center to the right of the nose, and although there is a bevel at the end of the barrel .. the barrel is STRAIGHT!!!

So I just clipped off the barrel and will use some brass tube to try and fix this puppy.
The whole reason for building this 48th scalle Swallow was as a test bed to get familiar with the aircraft so I can do a better job building this:
But now that I know about the tube I can't let that stand... have to get that fixed!
Gotta love our hobby!
Regards,
Joe Osborne
On the bench:
1/35 Tamiya Tiger I early Production
1/35 Tamiya Mid Production Tiger I
Nordrhein-Westfalen, Germany
Joined: March 22, 2015
KitMaker: 671 posts
AeroScale: 614 posts
Posted: Sunday, April 19, 2015 - 08:46 PM UTC
So, this weekend I wanted to make a good canopy out of a bad one and tried to vac-form it, but...I entirely ruined it. As I am waiting now for a new one to arive, I did some priming and pre-shading with the partly assembled body of the swallow

Additionally, I finished the work at the landing gear and tires, so I will be very happy this week, when the new canopy will be delivered.

So wait and see

On the desk: Probably a Panzer III.
Oregon, United States
Joined: January 13, 2014
KitMaker: 107 posts
AeroScale: 105 posts
Posted: Tuesday, April 21, 2015 - 09:10 PM UTC
On the WIF Workbench: 1/72 IL-2 Sturmovik (Cuban Air Force)
"I shall either find a way or I shall make one." - supposedly, Hannibal Barca
Vermont, United States
Joined: July 21, 2002
KitMaker: 3,569 posts
AeroScale: 419 posts
Posted: Thursday, April 23, 2015 - 11:00 PM UTC
I havent forgotten the campaign, and after finishing up the last minute work for the Can/AM Con show tomorrow, I'm off and running.
I have been trying to finish the Su-34 with full Begemot stenciling...

I have not been 262-idle..I've collected 3 Me262's, a Galland vanilla vers, a two nightfighters, and the U4 resin nose (thanks Markus!) plus some aftermarket decals.
Looking in the latest Weathering Magazine and seeing the bare metal with grey paint seam sealant on the He 162, I am sure at least one of these will have that scheme.
Mike
If you can keep your head when all about you are losing theirs,
perhaps you've misunderstood the situation.
Nordrhein-Westfalen, Germany
Joined: March 22, 2015
KitMaker: 671 posts
AeroScale: 614 posts
Posted: Friday, April 24, 2015 - 01:58 AM UTC
Hallo everybody,
I am just looking for the right color of my swallow. Probably the upper side was RLM 83. I found on the reference Chart of ipms Stockholm, that the equivalent tamiya color should be XF-26. But it seems a bit too dark. Is this correct?

Oliver
On the desk: Probably a Panzer III.
Stockholm, Sweden
Joined: May 02, 2006
KitMaker: 1,953 posts
AeroScale: 1,902 posts
Posted: Saturday, April 25, 2015 - 02:43 AM UTC
Finally I'm 100% devoted to the 262-project!
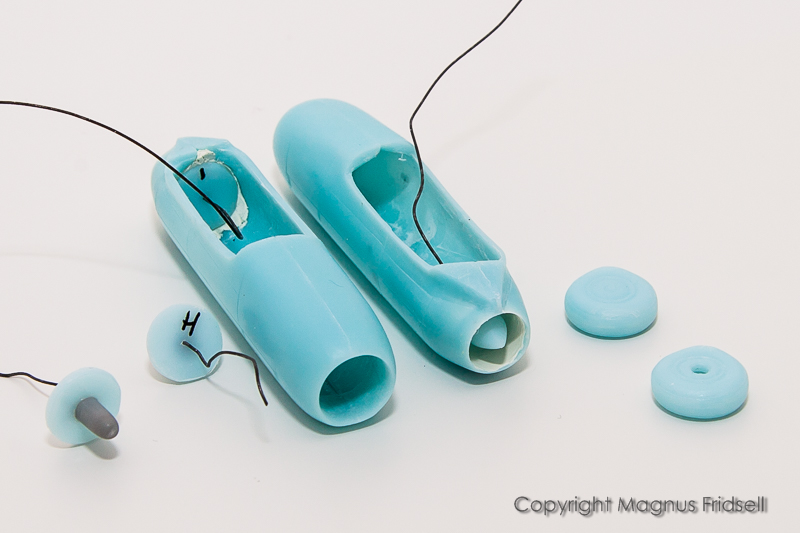
A bit of work on the nacelles, described more in detail in my
build thread!
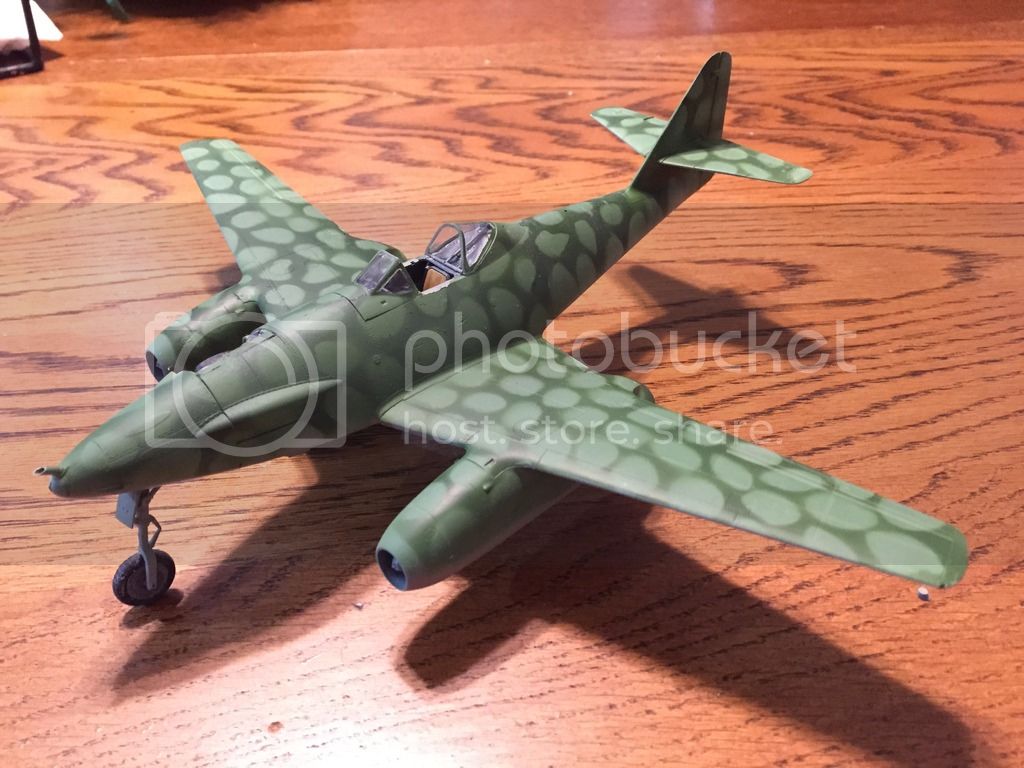
Oliver! I'm sorry but I can't help you with the Tamiya-question but I can give you my recipes for the two late-war Luftwaffe greens in the Gunze range. I realise that if you don't have access to the Gunze range of paints this will be pretty useless but I'll post it anyway...
The lighter of the two greens (RLM 83 in my world but there has been more than a little debate regarding the numbering...) is a mix of 35% H6 and 65% H58. The darker one (RLM 82) is mainly Gunze H6 with a few drops of H58 added to lighten it a bit.
You should end up with something that looks like the wings on this one!
Magnus
Press banner to the right to follow my trail to the new forums!