Air Campaigns
Want to start or join a group build? This is where to start.
OFFICIAL: Schwalbe - Me 262 Campaign
AussieReg
Staff MemberAssociate Editor
AUTOMODELER
#007
_VISITCOMMUNITY
Victoria, Australia
Joined: June 09, 2009
KitMaker: 8,156 posts
AeroScale: 3,756 posts
Posted: Thursday, July 09, 2015 - 08:18 PM UTC
Proof of LIFE !!!


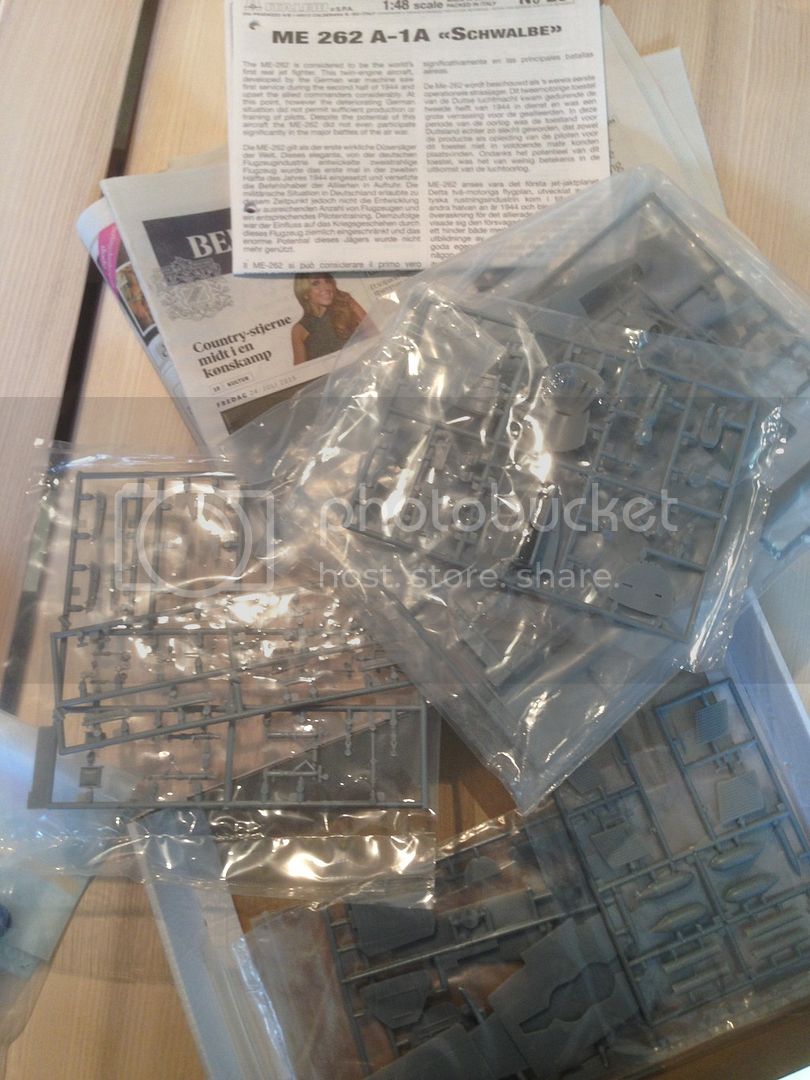
Early work on basic sub-assemblies at this stage. No fit issues to speak of, very satisfying so far.

You guys have been progressing beautifully without my interference, work and home life have been crazy these past few months but now hopefully I can make a last-minute run at getting this built. I suppose I could appeal to the Campaign Leader for extra time if I fail miserably !

Mike D, very nice work on the mottling. Subtle, looks great. Thanks for posting the pics as well.

I have updated the Roll Call/Build Status post back on page 1, please take a look and let me know if I've got anything wrong.

Carry on. Cheers, D

bomber14
_VISITCOMMUNITY
New Jersey, United States
Joined: February 02, 2015
KitMaker: 330 posts
AeroScale: 286 posts
Posted: Thursday, July 09, 2015 - 08:19 PM UTC
again one photo dropped. I hate this system

bomber14
_VISITCOMMUNITY
New Jersey, United States
Joined: February 02, 2015
KitMaker: 330 posts
AeroScale: 286 posts
Posted: Thursday, July 09, 2015 - 08:30 PM UTC

Quoted Text


Quoted Text

mike that is a great job!!! I like the camo. could you show how you did it? the subtle effect between the mottle and base color is perfect. please show your process of the weathering and filters too if you could I am always looking to improve my limited technic.

what scale is your build and kit? I want to build a two seater next.

joe

btw I agree w/u- photobucket is a pain. too many adds slow it to a crawl and I hate the video adds they run while your trying to upload photos.


Joe,
I've got an old Tamiya SG superfine double action airbrush, sort of on on its last legs, but it is hanging in there.
The base coat is Vallejo Air RML 74 (blue grey, I think its called) the mottling is tamiya xf 22 (RML 02 clone) thinned waayyyy down. almost 50/50 paint to rubbing alc. I did not use the darker grey called out in the instructions.

The pressure is very low, 20psi and the needle is tightened way down for very little paint flow.
As for the mottles, it's really just scribbled on there, short zig zag lines running up and down and then back overtop going left right.
I kept the airbrush moving pretty quickly and just light taps on the trigger to get paint. I am pretty pleased with the light, almost transparent, blotches of cammo.

I had tried to get mottles at the edges of other German late war a/c cammo, but in retrospect I was just using the paint I had been filling in cammo with and really needed to thin the paint much much more for the mottles

It's really a different way to paint than I am used to for 1/35th armor, when I am looking for base coat coverage or to fill in cammo patterns.

Hope this helps
Mike


thanks mike. I cut my air down to about 15-18lbs at trigger pull. can't say exactly what the paint/thinner percentage was since I added thinner to the paint in the mixing cup. I had a translucent look to the paint on the side of the cup as it sloshed around. maybe I needed to add more thinner.
mike is that a 1/48th kit? hard to tell.
joe
MLD
_VISITCOMMUNITY
Vermont, United States
Joined: July 21, 2002
KitMaker: 3,569 posts
AeroScale: 419 posts
Posted: Thursday, July 09, 2015 - 08:54 PM UTC
Joe, nope it is the Hasegawa 1/72 night fighter / trainer version.
I have another vanilla Hasegawa kit and Markus sent me a -U4 nose conversion. This was supposed to be the warm up build, but time is passing and I am not finished yet.
bomber14
_VISITCOMMUNITY
New Jersey, United States
Joined: February 02, 2015
KitMaker: 330 posts
AeroScale: 286 posts
Posted: Friday, July 10, 2015 - 12:30 AM UTC

Quoted Text

Joe, nope it is the Hasegawa 1/72 night fighter / trainer version.
I have another vanilla Hasegawa kit and Markus sent me a -U4 nose conversion. This was supposed to be the warm up build, but time is passing and I am not finished yet.


the camo is even more impressive then at 1/72 scale. I was going to buy the hobbyboss 1/48 2 seater trainer but I don't know if it comes with a night fighter option. I thought I read somewhere the radar antenna for the nose are included but I don't want to buy it if i'm not sure
joe
bomber14
_VISITCOMMUNITY
New Jersey, United States
Joined: February 02, 2015
KitMaker: 330 posts
AeroScale: 286 posts
Posted: Friday, July 10, 2015 - 12:39 AM UTC

Quoted Text

Proof of LIFE !!!


Early work on basic sub-assemblies at this stage. No fit issues to speak of, very satisfying so far.

You guys have been progressing beautifully without my interference, work and home life have been crazy these past few months but now hopefully I can make a last-minute run at getting this built. I suppose I could appeal to the Campaign Leader for extra time if I fail miserably !

Mike D, very nice work on the mottling. Subtle, looks great. Thanks for posting the pics as well.

I have updated the Roll Call/Build Status post back on page 1, please take a look and let me know if I've got anything wrong.

Carry on. Cheers, D


looks like a nice kit. been thinking of giving that one a try. be interesting following ur build.
I wouldn't worry about the time frame, i'm sure the campaign manager would grant you some more time-lol
c4willy
#305
_VISITCOMMUNITY
Christchurch, New Zealand
Joined: February 01, 2006
KitMaker: 1,673 posts
AeroScale: 1,517 posts
Posted: Friday, July 10, 2015 - 01:23 PM UTC
Hi guys I'm a little further along I've got the kit decaled now I just need to weather it a little and finish off the landing gear doors et, then I'll be done ... er ..... maybe!


As can be seen in the first pic and third pics the decals are really rather old and were brittle and prone to breaking up I'll have a few touch ups to do on them later.

shorty53
#330
_VISITCOMMUNITY
Queensland, Australia
Joined: July 15, 2011
KitMaker: 175 posts
AeroScale: 103 posts
Posted: Saturday, July 11, 2015 - 04:44 PM UTC
Finally got some undercoat on my 262.

bomber14
_VISITCOMMUNITY
New Jersey, United States
Joined: February 02, 2015
KitMaker: 330 posts
AeroScale: 286 posts
Posted: Monday, July 20, 2015 - 01:43 AM UTC

Quoted Text

Hi guys I'm a little further along I've got the kit decaled now I just need to weather it a little and finish off the landing gear doors et, then I'll be done ... er ..... maybe!


As can be seen in the first pic and third pics the decals are really rather old and were brittle and prone to breaking up I'll have a few touch ups to do on them later.


nice job with the difficult decals chris. looking forward to seeing it complete. did you use three different colors for the top camo? looks like the inboard patch on the right wing is a brown/violet and the rest grey/violet and lt green or is it just the lighting?

Speaking of completing, I am just about finished with my hobbyboss 262. just need to add a few last minute details and get it photographed. that I am going to have a photography professor at the college I work at to shoot it for me, hopefully some time this week.

joe.
bomber14
_VISITCOMMUNITY
New Jersey, United States
Joined: February 02, 2015
KitMaker: 330 posts
AeroScale: 286 posts
Posted: Monday, July 20, 2015 - 10:24 PM UTC

Quoted Text

Finally got some undercoat on my 262.


looking good john, what scale is it? nice smooth primer coat- Tamiya primer?
shorty53
#330
_VISITCOMMUNITY
Queensland, Australia
Joined: July 15, 2011
KitMaker: 175 posts
AeroScale: 103 posts
Posted: Tuesday, July 21, 2015 - 01:34 PM UTC
Joe

Quoted Text

Quoted Text

Finally got some undercoat on my 262.


looking good john, what scale is it? nice smooth primer coat- Tamiya primer?


It's 1/48 and Tamiya primer from spray can.
AussieReg
Staff MemberAssociate Editor
AUTOMODELER
#007
_VISITCOMMUNITY
Victoria, Australia
Joined: June 09, 2009
KitMaker: 8,156 posts
AeroScale: 3,756 posts
Posted: Tuesday, July 21, 2015 - 06:11 PM UTC
More updates, great to see!

Joe, nice job on the paintwork, very interesting scheme. Good to see markings going on as well.

Chris, it looks like those decals put up quite a bit of a struggle mate. Looking forward to seeing how you weather this one, very close to the finishing line now.

Shorty, very clean build, no fit issues showing up now the primer coat is on.

Cheers, D
MLD
_VISITCOMMUNITY
Vermont, United States
Joined: July 21, 2002
KitMaker: 3,569 posts
AeroScale: 419 posts
Posted: Thursday, July 23, 2015 - 08:34 AM UTC
There is an article on painting and weathering a 262 in the latest 'Styles' issue of The Weathering Magazine.
I haven't had a chance to digest the article yet, but looking forward to applying some of the stuff from there.

Mike
SGTJKJ
#041
_VISITCOMMUNITY
Kobenhavn, Denmark
Joined: July 20, 2006
KitMaker: 10,069 posts
AeroScale: 3,788 posts
Posted: Thursday, July 23, 2015 - 03:10 PM UTC
I am in with a late entry. I am building the Italeri (Gunze?) Me 262. I am building it straight from the box but with an imaginary afrikakorps 1946 camouflage scheme. Just want to see a Me 262 in sand and green

More to follow


Antilles
_VISITCOMMUNITY
Nordrhein-Westfalen, Germany
Joined: March 22, 2015
KitMaker: 671 posts
AeroScale: 614 posts
Posted: Thursday, July 23, 2015 - 04:37 PM UTC
Hallo Jesper,

a swallow in desert outfit. Sounds very interesting! IŽll stay tuned!

Oliver
AussieReg
Staff MemberAssociate Editor
AUTOMODELER
#007
_VISITCOMMUNITY
Victoria, Australia
Joined: June 09, 2009
KitMaker: 8,156 posts
AeroScale: 3,756 posts
Posted: Thursday, July 23, 2015 - 07:41 PM UTC
Looking forward to this one Jesper, great to have you on board.

Cheers, D
SGTJKJ
#041
_VISITCOMMUNITY
Kobenhavn, Denmark
Joined: July 20, 2006
KitMaker: 10,069 posts
AeroScale: 3,788 posts
Posted: Friday, July 24, 2015 - 02:51 AM UTC
Thanks for the comments, Oliver and Damian. Great to be in this campaign. The Me 262 is one of my favorite aircraft of WWII.

A little progress today. Nothing painted yet, but the main fuselage is closed up and the wings are on. So far really impressed with the details and fit. I am planning to leave the nice little gun bay open.

More to follow


goodn8
_VISITCOMMUNITY
Berlin, Germany
Joined: October 12, 2008
KitMaker: 709 posts
AeroScale: 651 posts
Posted: Friday, July 24, 2015 - 08:19 PM UTC
Nice progress in building and painting, Guys!
Even great to see a new entry with Jesper with a quick start. Damien: going any further with your build?
As I can see I'm yet not that far away from the shown stages.
Hope I can go foreward this wekend...
Thomas
goodn8
_VISITCOMMUNITY
Berlin, Germany
Joined: October 12, 2008
KitMaker: 709 posts
AeroScale: 651 posts
Posted: Friday, July 24, 2015 - 09:21 PM UTC
Something from last week...
Did I already metioned the poor canopy and bad fit
Meanwhile the putty is sanded down


... and did some anti-corrosion primer for some panel edges followed by a bit of weathering before applying a thin layer of RLM 76 on some parts.

Thomas
Antilles
_VISITCOMMUNITY
Nordrhein-Westfalen, Germany
Joined: March 22, 2015
KitMaker: 671 posts
AeroScale: 614 posts
Posted: Friday, July 24, 2015 - 10:20 PM UTC
Thomas: I like Your anti-corrosion primed areas very much. Looks like a massive masking session! Have You sprayed RLM 76 over several plates? I cannot see it exactly from the picture. But, it looks great!

Oliver
goodn8
_VISITCOMMUNITY
Berlin, Germany
Joined: October 12, 2008
KitMaker: 709 posts
AeroScale: 651 posts
Posted: Friday, July 24, 2015 - 10:45 PM UTC
Thanks Oliver!
RLM 76 is not yet applied, it's still the silver base. And I will leave most of the underside plain metall exept a few plates and the flaps and the rear section of the fuselage. The panels are prime-painted only inside where the rivets are and it's free hand painted - no masking.
Thomas
Antilles
_VISITCOMMUNITY
Nordrhein-Westfalen, Germany
Joined: March 22, 2015
KitMaker: 671 posts
AeroScale: 614 posts
Posted: Friday, July 24, 2015 - 11:04 PM UTC

Quoted Text

Thanks Oliver!
RLM 76 is not yet applied, it's still the silver base. And I will leave most of the underside plain metall exept a few plates and the flaps and the rear section of the fuselage. The panels are prime-painted only inside where the rivets are and it's free hand painted - no masking.
Thomas


Free hand - Wow!!! What do You do for such a steady hand! No coffee probably!?!

Oliver
SGTJKJ
#041
_VISITCOMMUNITY
Kobenhavn, Denmark
Joined: July 20, 2006
KitMaker: 10,069 posts
AeroScale: 3,788 posts
Posted: Friday, July 24, 2015 - 11:30 PM UTC

Quoted Text

The panels are prime-painted only inside where the rivets are and it's free hand painted - no masking.
Thomas


Looks great. No masking is probably the way to go as the real work would probably also be done without masking and in a hurry.

Looking forward to see more
SGTJKJ
#041
_VISITCOMMUNITY
Kobenhavn, Denmark
Joined: July 20, 2006
KitMaker: 10,069 posts
AeroScale: 3,788 posts
Posted: Monday, July 27, 2015 - 12:46 AM UTC
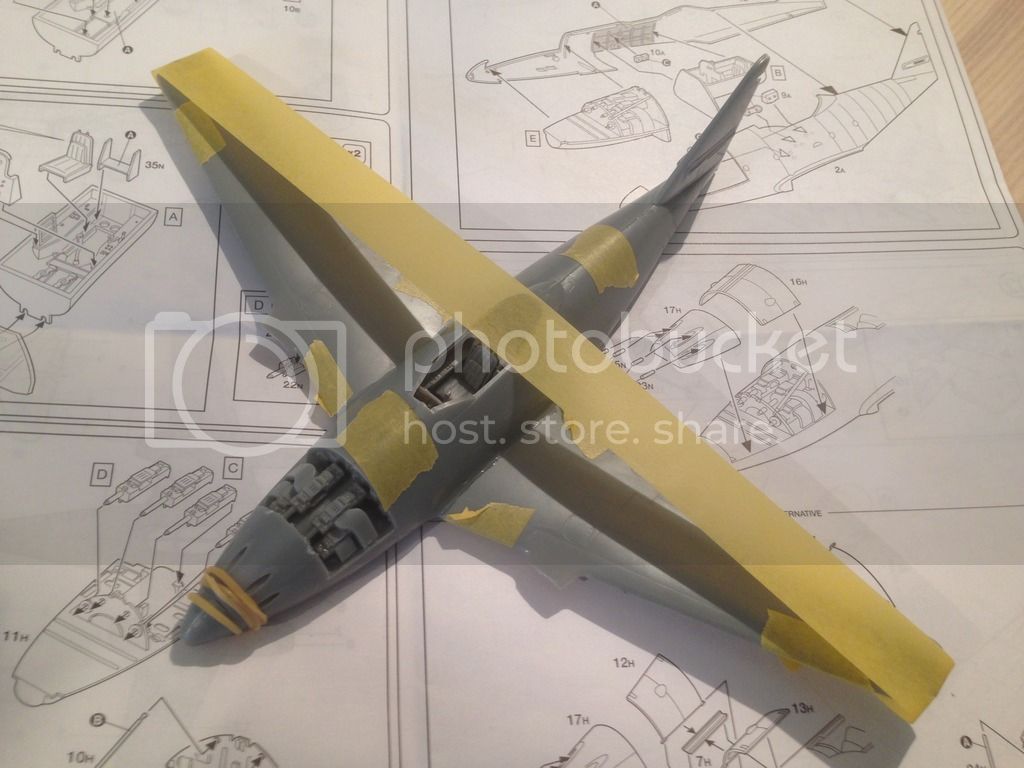
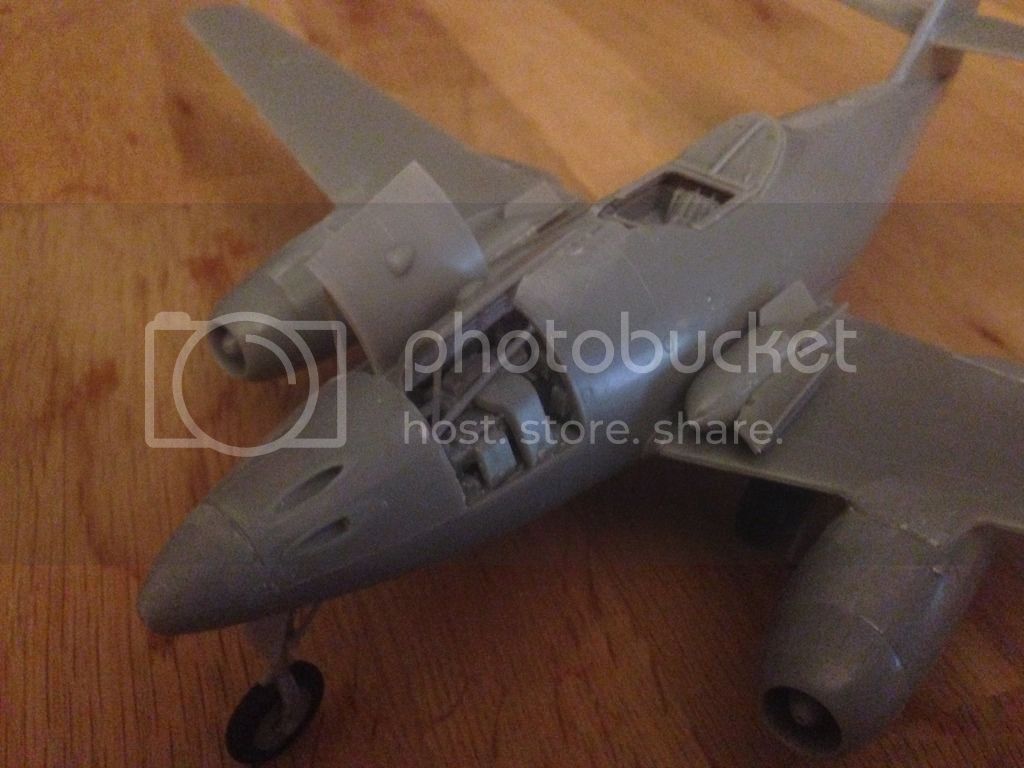
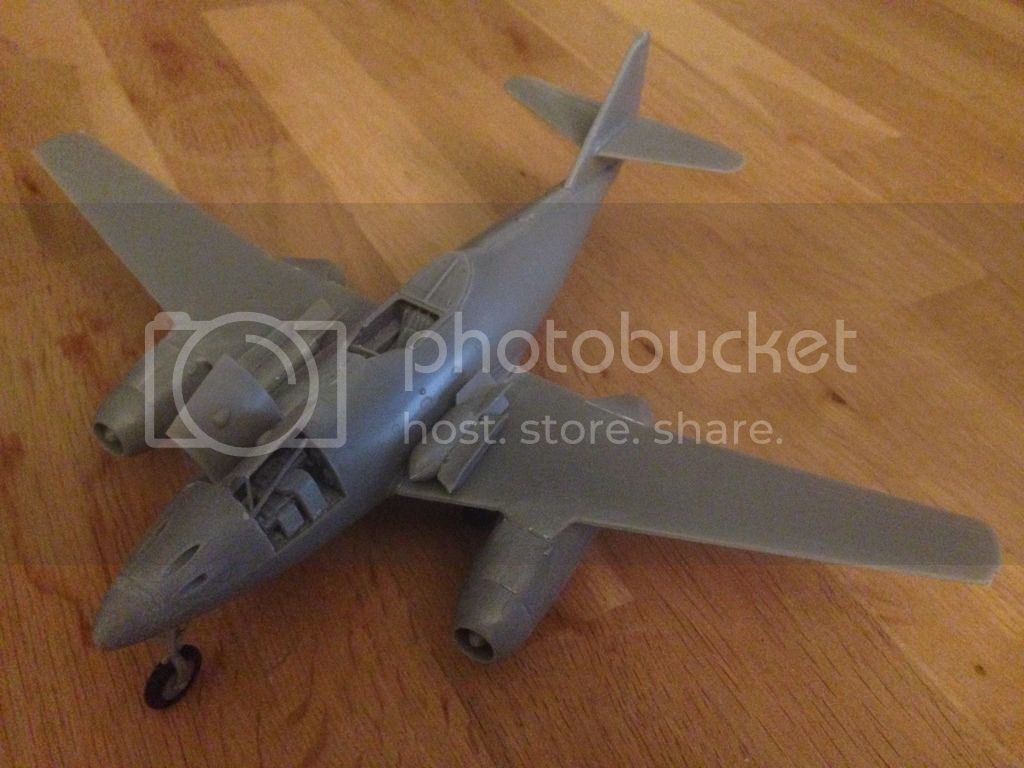
More progress. The main construction is done. Next is a base coat and then some more sanding and some putty in a few places.
I really like the gun bay as it is straight OOB. I decided to leave it open.

Notice that I placed the bombs on the wings. These will of course be placed under the nose later. The bombs are placed there to avoid a tail sitter. After long complex mathematical calculations I put exactly the right amount of weight in the nose to avoid a tail sitter when the bombs are fitted. Without the bombs tail will be heaviest. This is the accuracy of my calculations In other words I have been very lucky when stuffing lead weights and white glue into the nose at random

More to follow soon


AussieReg
Staff MemberAssociate Editor
AUTOMODELER
#007
_VISITCOMMUNITY
Victoria, Australia
Joined: June 09, 2009
KitMaker: 8,156 posts
AeroScale: 3,756 posts
Posted: Monday, July 27, 2015 - 06:30 PM UTC
Jesper, the absolute engineer in you is showing my friend. How you balance such precision with such a neat speed-build I will never know !!

Thomas, really nice work on the underside paint, very interesting effect and a steady hand for sure !

I am determined to get this one finished, but I will surely need some extra time past the deadline, so for anybody else that is struggling to get completed we will have an extra few weeks to play with.

Some minor work for me, parts cleanup and sub-assemblies, no paint yet. I dragged out a photo-etch tool that I purchased back in October 2009 (the invoice was still in the box) but have NEVER used! Just shows how my modelling time has suffered at the hands of that inconsiderate beast called real life !

In between the styrene work I had a play with the wheel well PE parts, a very enjoyable little diversion indeed.


Apologies for the poor quality photos, I really need to invest in a decent camera one day soon.

Keep up the great work folks.

Cheers, D