OFFICIAL: China-Burma-India Campaign
MichaelSatin
 Campaigns Administrator
Colorado, United States
Joined: January 19, 2008
KitMaker: 3,909 posts
AeroScale: 2,904 posts
Posted: Sunday, January 15, 2017 - 01:38 AM UTC
Quoted Text
Gotta see those stripes on that 1/32 monster. 
Ask and you shall receive:
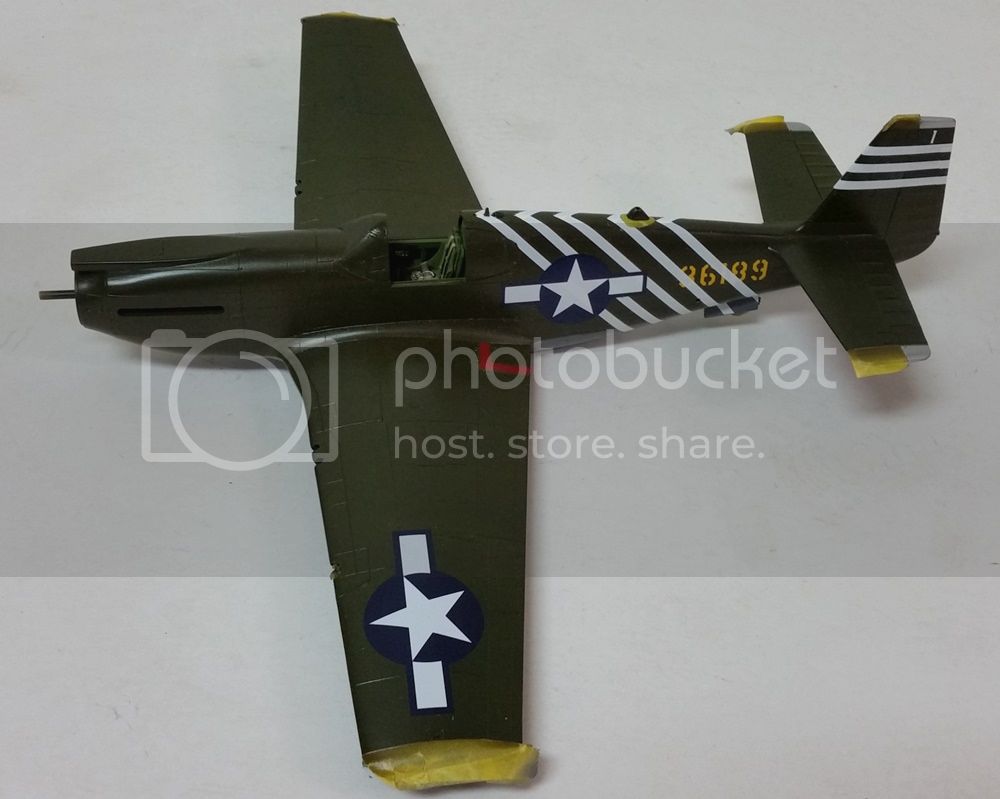
The spacing didn't turn out as consistent as I would have liked, but then I doubt it was on the real thing either. All in all, I can live with it. But the kit stars-and-bars were no go's, separate roundels and bars that didn't look right together and weren't opaque. I managed to find some of the right size in the decal stash, so I used them.
Michael

On the bench:
Sorta depends on your definition of "on the bench"...
Texas, United States
Joined: February 22, 2008
KitMaker: 5,026 posts
AeroScale: 2,811 posts
Posted: Sunday, January 15, 2017 - 02:50 AM UTC
Looks good, I watched a couple of videos on Cochran and The First Air Commando and you could see the lines were not all lined up neatly.
Kinda like when I thought the D Day stripes had to be nice and neat, little did I know (at 14) those stripes were slapped on as fast as possible without tape.
Bob
If it aint broke dont fix it.
Nordrhein-Westfalen, Germany
Joined: March 22, 2015
KitMaker: 671 posts
AeroScale: 614 posts
Posted: Sunday, January 15, 2017 - 08:49 PM UTC
Richard: Thank´s for watching! By the way, Your built of the Oskar looks excellent. Just love the details You pay attention. Fascinating!
Michael:
The P-51 looks very cool painted and with stripes on!
Thomas:
Excellent work on the paint job. Did You just wipe of the acrylic paint with alcohol or did You use some kind chipping stuff like hairspray?
Bob:
Nice start on Your Oscar!
Oliver

On the desk: Probably a Panzer III.

#123
New Mexico, United States
Joined: November 17, 2008
KitMaker: 1,202 posts
AeroScale: 292 posts
Posted: Sunday, January 15, 2017 - 09:23 PM UTC
Michael,
I love watching your build-very cool. Can't wait to see more, nice job on the stripes.
Take care,
Don "Lakota"
Working on Campaigns:
1/72 Hasegawa Ki-84 Frank
1/144 Dragon Armor
MichaelSatin
 Campaigns Administrator
Colorado, United States
Joined: January 19, 2008
KitMaker: 3,909 posts
AeroScale: 2,904 posts
Posted: Monday, January 16, 2017 - 03:48 AM UTC
And here we go! The Hobbycraft 1/32 P-51A in the colors of Col. Philip Cochran of the 1st Air Commandos in Feb.-March, 1944:
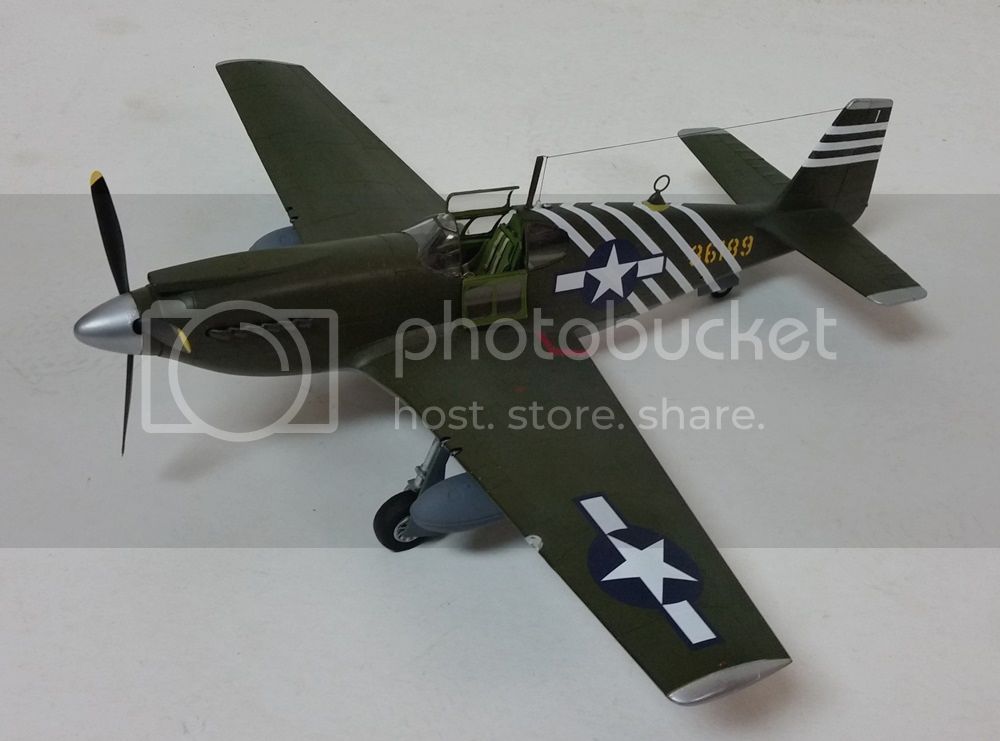
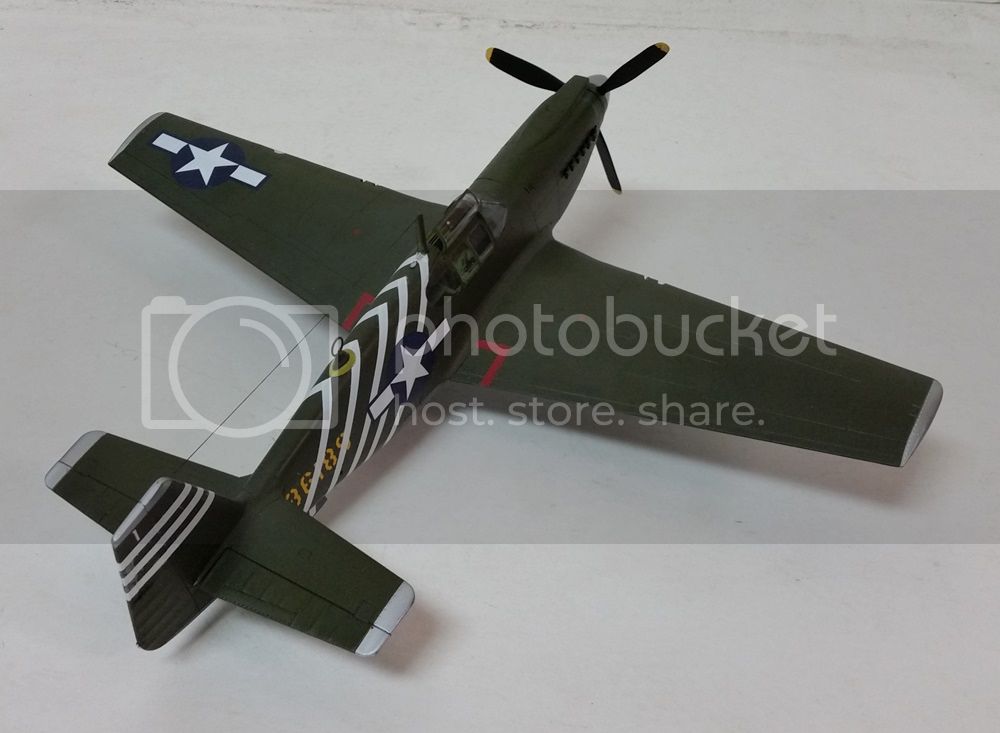
I quite enjoyed this one, a nice (if somewhat basic) kit of an Alison powered Mustang.
Looking forward to seeing how the rest of the great looking projects underway turn out!
Michael
On the bench:
Sorta depends on your definition of "on the bench"...
Texas, United States
Joined: February 22, 2008
KitMaker: 5,026 posts
AeroScale: 2,811 posts
Posted: Monday, January 16, 2017 - 04:05 AM UTC
THAT WAS FAST

and I am slow with 1/48.
Nice looking Mustang.
If it aint broke dont fix it.
MichaelSatin
 Campaigns Administrator
Colorado, United States
Joined: January 19, 2008
KitMaker: 3,909 posts
AeroScale: 2,904 posts
Posted: Monday, January 16, 2017 - 05:23 AM UTC
Quoted Text
THAT WAS FAST  and I am slow with 1/48.
Nice looking Mustang.
Thanks Bob! I had some time off and I went for it. I've learned to be happy with (mostly) out of the box and clean builds, so that helps.
Michael

On the bench:
Sorta depends on your definition of "on the bench"...
AussieReg
 Associate Editor
#007
Victoria, Australia
Joined: June 09, 2009
KitMaker: 8,156 posts
AeroScale: 3,756 posts
Posted: Monday, January 16, 2017 - 08:30 AM UTC
Nice looking "razorback" P-51 Michael, I like it a lot. Blasting through an OOB build on a basic kit can be a really enjoyable time. I'm always on the lookout for the old Monogram P-47 kits at swap meets for exactly this type of diversion from the increasingly complex kits.
Cheers, D
ON the bench
Revell 1/24 '53 Corvette (building as '54)
Revell 1/24 BMW 507 Coupe and Cabrio
Italeri 1/48 Me262 B-1a/U1 Nightfighter
Monogram 1/24 '57 Chevy Nomad
Dragon 1/350 USS Frank Knox DD-742
Pennsylvania, United States
Joined: June 17, 2009
KitMaker: 566 posts
AeroScale: 507 posts
Posted: Monday, January 16, 2017 - 09:03 AM UTC
Thomas, your p-36 is looking good Im looking foward to reading about the unit details
Bob, Awesome choice! Im really liking this Burst of Hayabusas here on aeroscale, they deserve the attention!
Michael, Great job finishing your Mustang. The Allison engined planes are my favorite of the line.
I've got a bit more done on my Hayabusa having closed up the fuselage and glued the wings and stabilizers on. Im now a couple rounds deep into the filling and sanding, especially the rear lower wing and flap area and the separate wing tips. Next will be to address the inboard leading edge of the wings and start on the landing gear
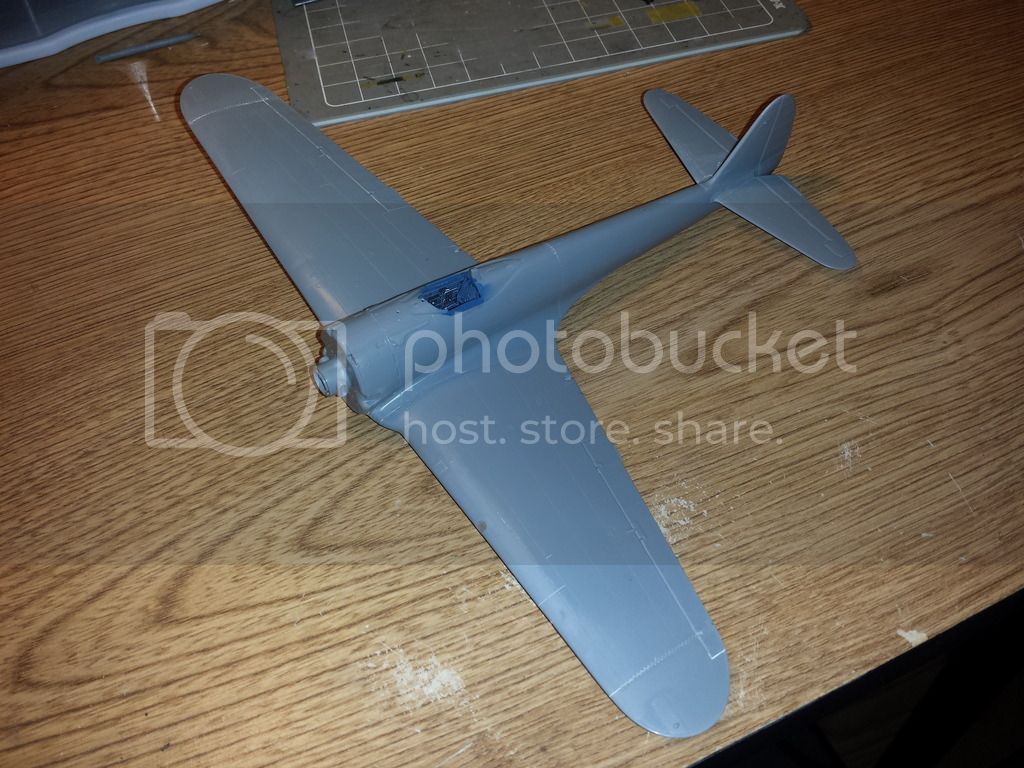
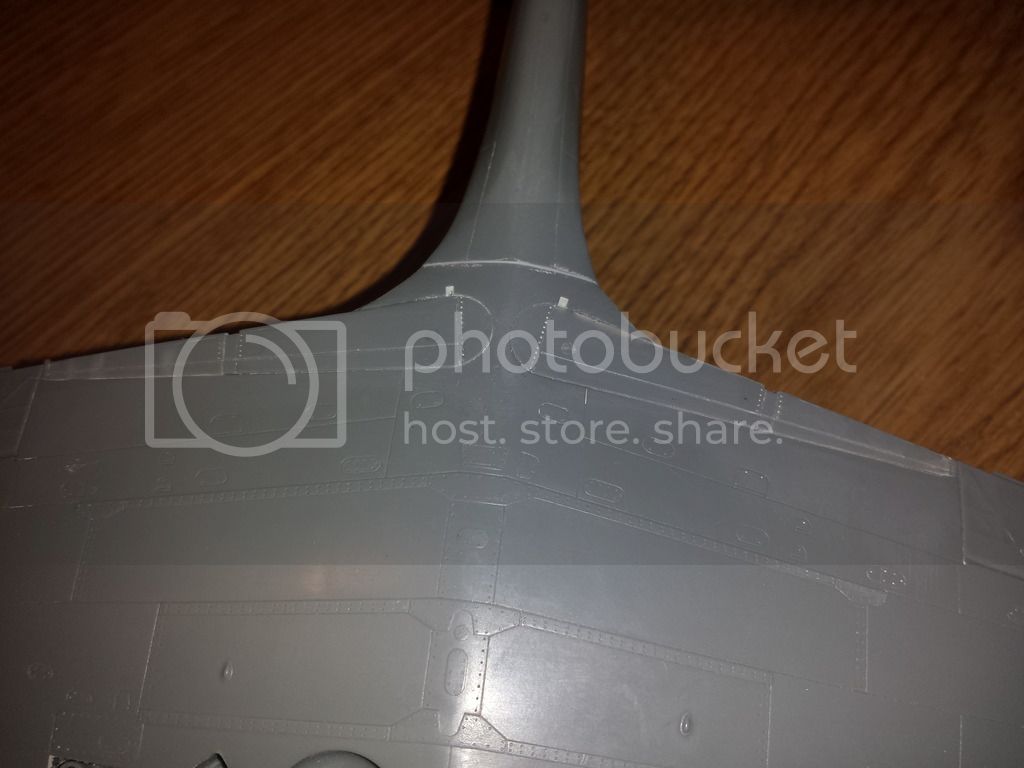
Hasegawa designed the combat flaps to be built extended so I ended up sanding them down to almost nothing and using CA to attach them. A gap at the underside wing to fuselage joint required a bit of styrene to fill.
"...Fat, drunk, and stupid is no way to go through life son"
Texas, United States
Joined: February 22, 2008
KitMaker: 5,026 posts
AeroScale: 2,811 posts
Posted: Monday, January 16, 2017 - 09:43 AM UTC
Mike, what are you using as a gap filler and what is your process? It looks clean with no destroyed detail
If it aint broke dont fix it.
Bangkok, Thailand / ไทย
Joined: September 17, 2013
KitMaker: 1,617 posts
AeroScale: 212 posts
Posted: Monday, January 16, 2017 - 10:44 AM UTC
Hi all. Nice progress shown and even a first finish. Well mine is going strong, the Ki 84 is ready for painting. Only thing that frustrates me is the pictures which I can't get to the right size.
I therefore will delete the ones already shown and replace them after I figured out how to present some decent photos. Used to be no problem in the past.
Regards,
Robert Jan
Texas, United States
Joined: February 22, 2008
KitMaker: 5,026 posts
AeroScale: 2,811 posts
Posted: Monday, January 16, 2017 - 01:17 PM UTC
Robert, do you have Microsoft paint on your computer? If so you can use that to resize the photos.
Bob
If it aint broke dont fix it.
Indre-et-Loire, France
Joined: May 23, 2011
KitMaker: 651 posts
AeroScale: 181 posts
Posted: Monday, January 16, 2017 - 01:29 PM UTC
Hi all,
very good works around there !
@ Michael: i really like your Air Commando P51 !

Mine is not as close to the end line, my principal effort is on my T-6 finish, but when it was drying i did the interior which is not far away from the closing process

....i'm just asking myself if i scratchbhild the seat belts (as usual) or if i take the time to lokk for another solution.....:


cheers
nico
Pennsylvania, United States
Joined: June 17, 2009
KitMaker: 566 posts
AeroScale: 507 posts
Posted: Tuesday, January 17, 2017 - 03:01 AM UTC
Quoted Text
Mike, what are you using as a gap filler and what is your process? It looks clean with no destroyed detail
Appearances must be deceiving because I have definitely wrecked some detail

I use CA for my gap filling though Ive taken to jamming whatever bits of plastic will fit into a gap begore I start with the CA.
"...Fat, drunk, and stupid is no way to go through life son"
New Jersey, United States
Joined: February 06, 2015
KitMaker: 1,098 posts
AeroScale: 900 posts
Posted: Tuesday, January 17, 2017 - 07:44 AM UTC
Mike -
Oscar looks good - nice job on the flaps !
Richard
Nordrhein-Westfalen, Germany
Joined: March 22, 2015
KitMaker: 671 posts
AeroScale: 614 posts
Posted: Wednesday, January 18, 2017 - 02:17 AM UTC
Michael:
Your finished Mustang looks really great. I agree with Mike. Those Allison Mustangs are cool.
Mike:
Nice progess on Your Hayabusa.
Nicolas:
The airfix cockpit seems very nice. Have You improved the side walls or are they "as delivered"?
On my Mohawk, I added some styrene to reduce the amount of putty and give it a first shape.
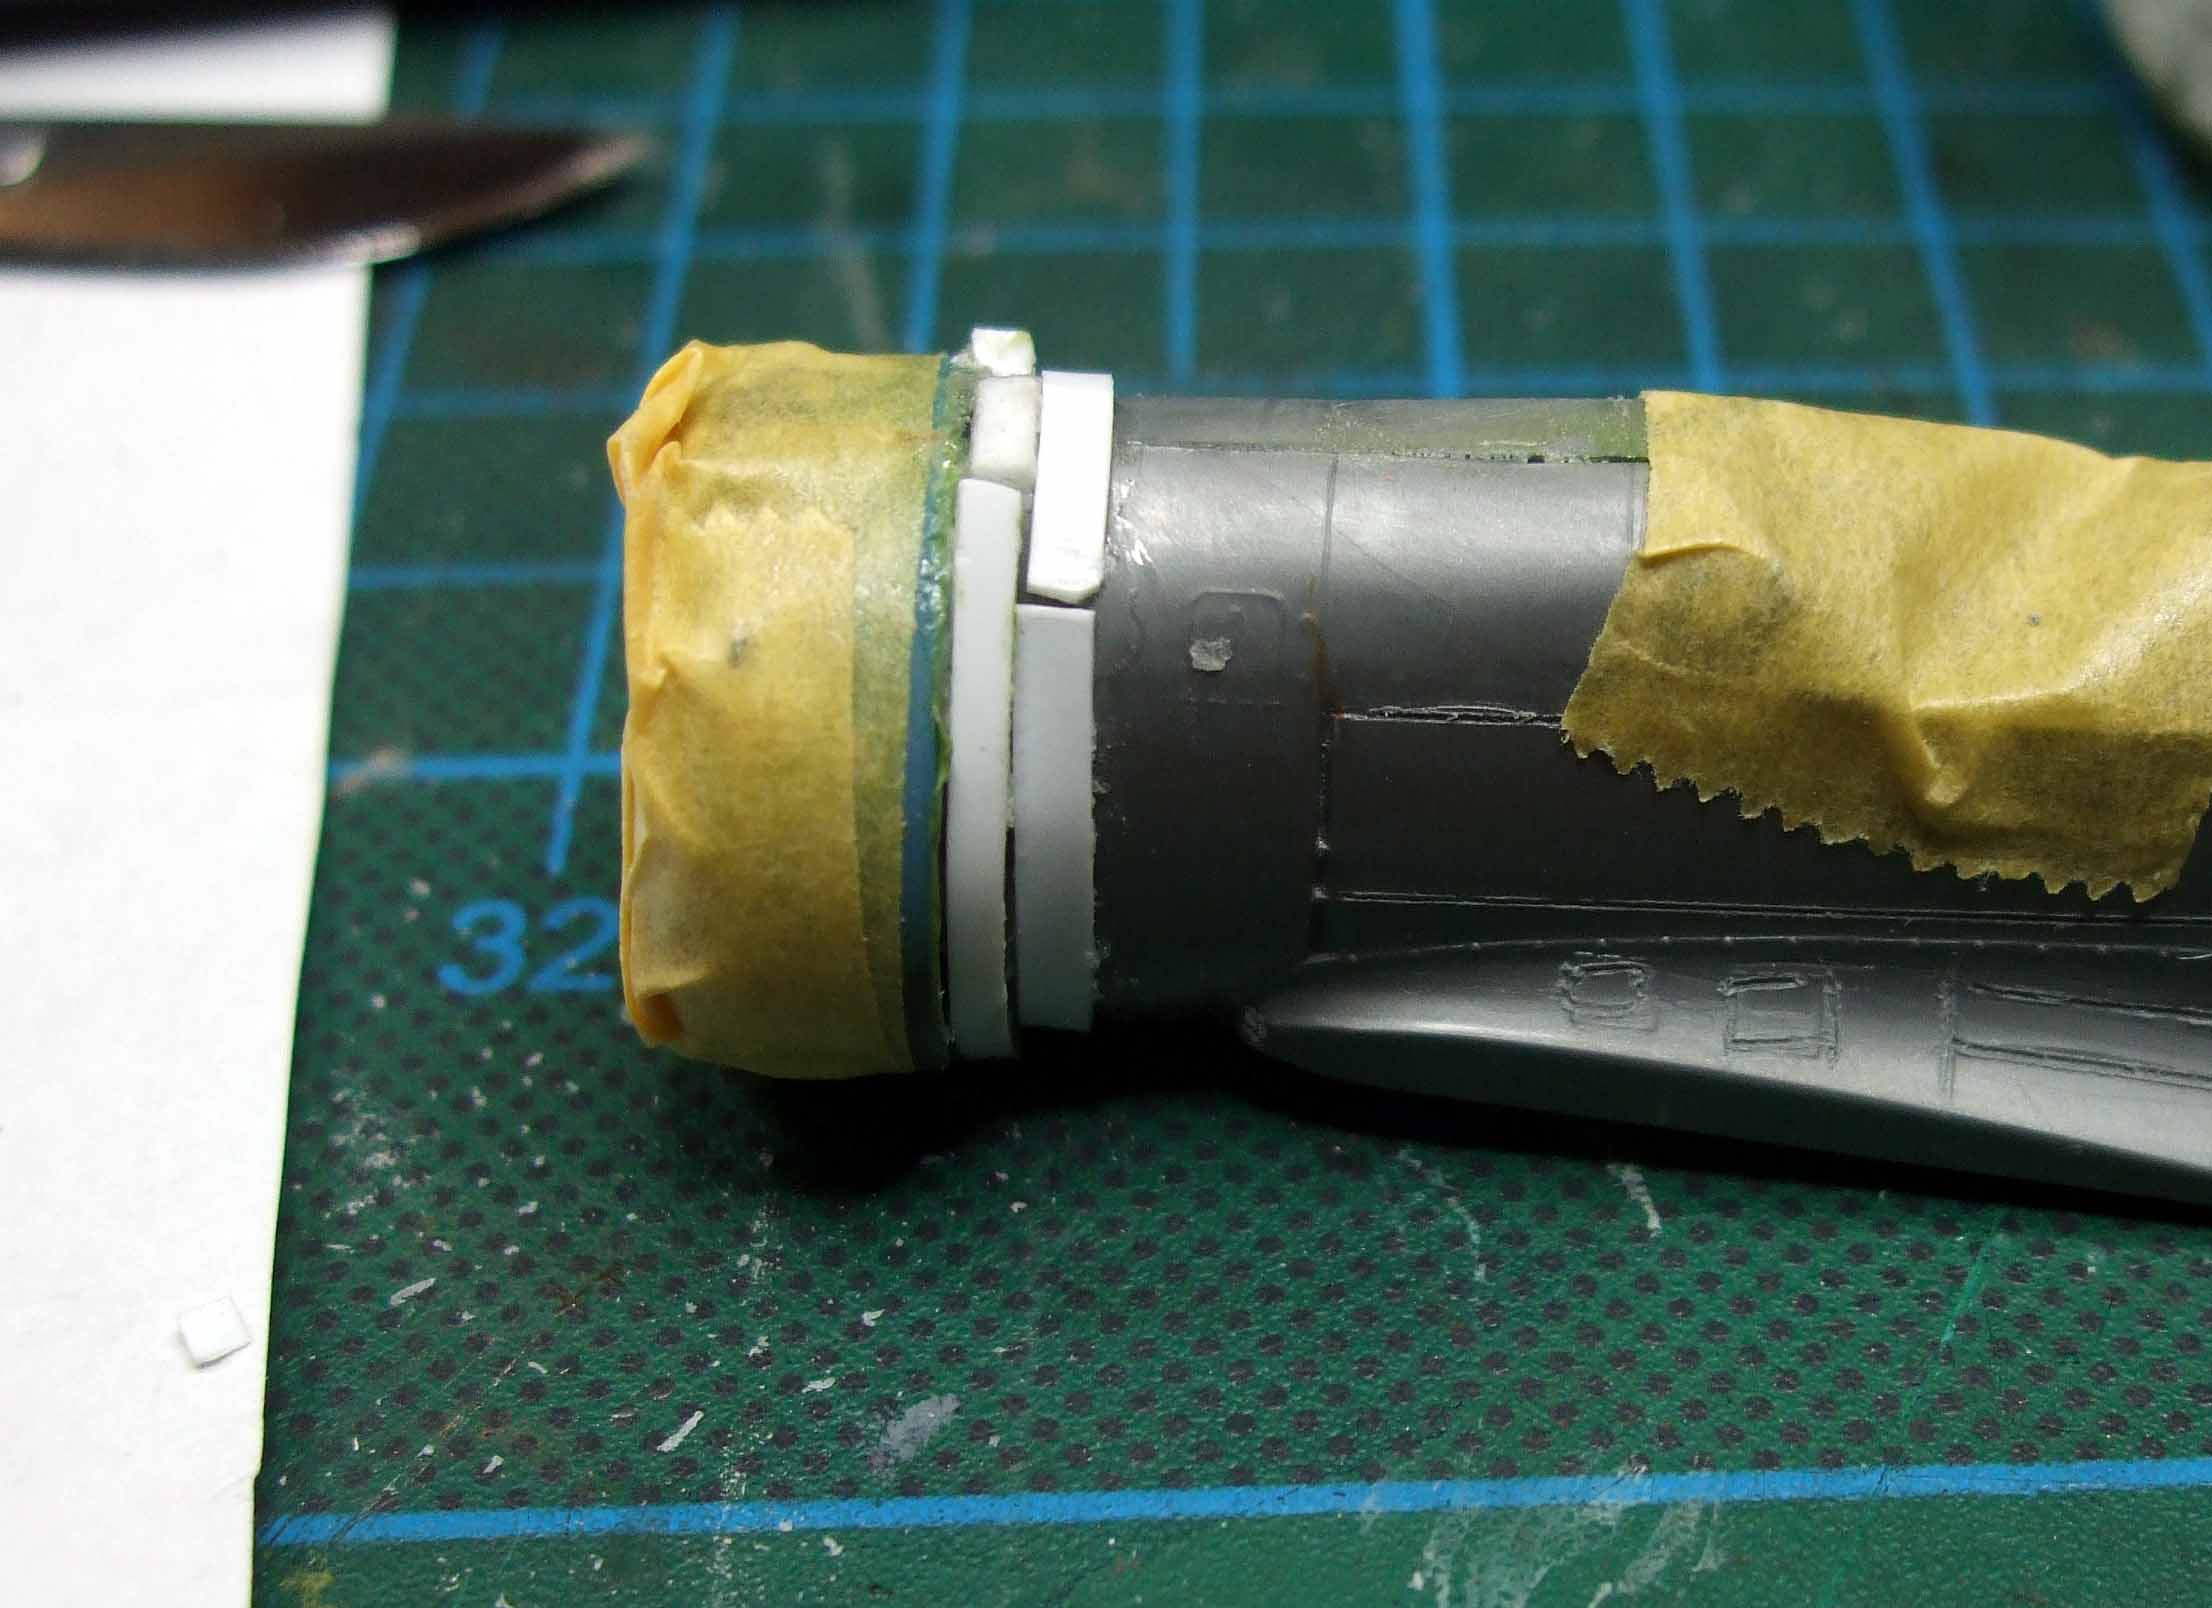
Subsquently, the putty was applied.I used the old Revell Putty, that is rather annoying. Probably I will try some Tamiya Putty next time.
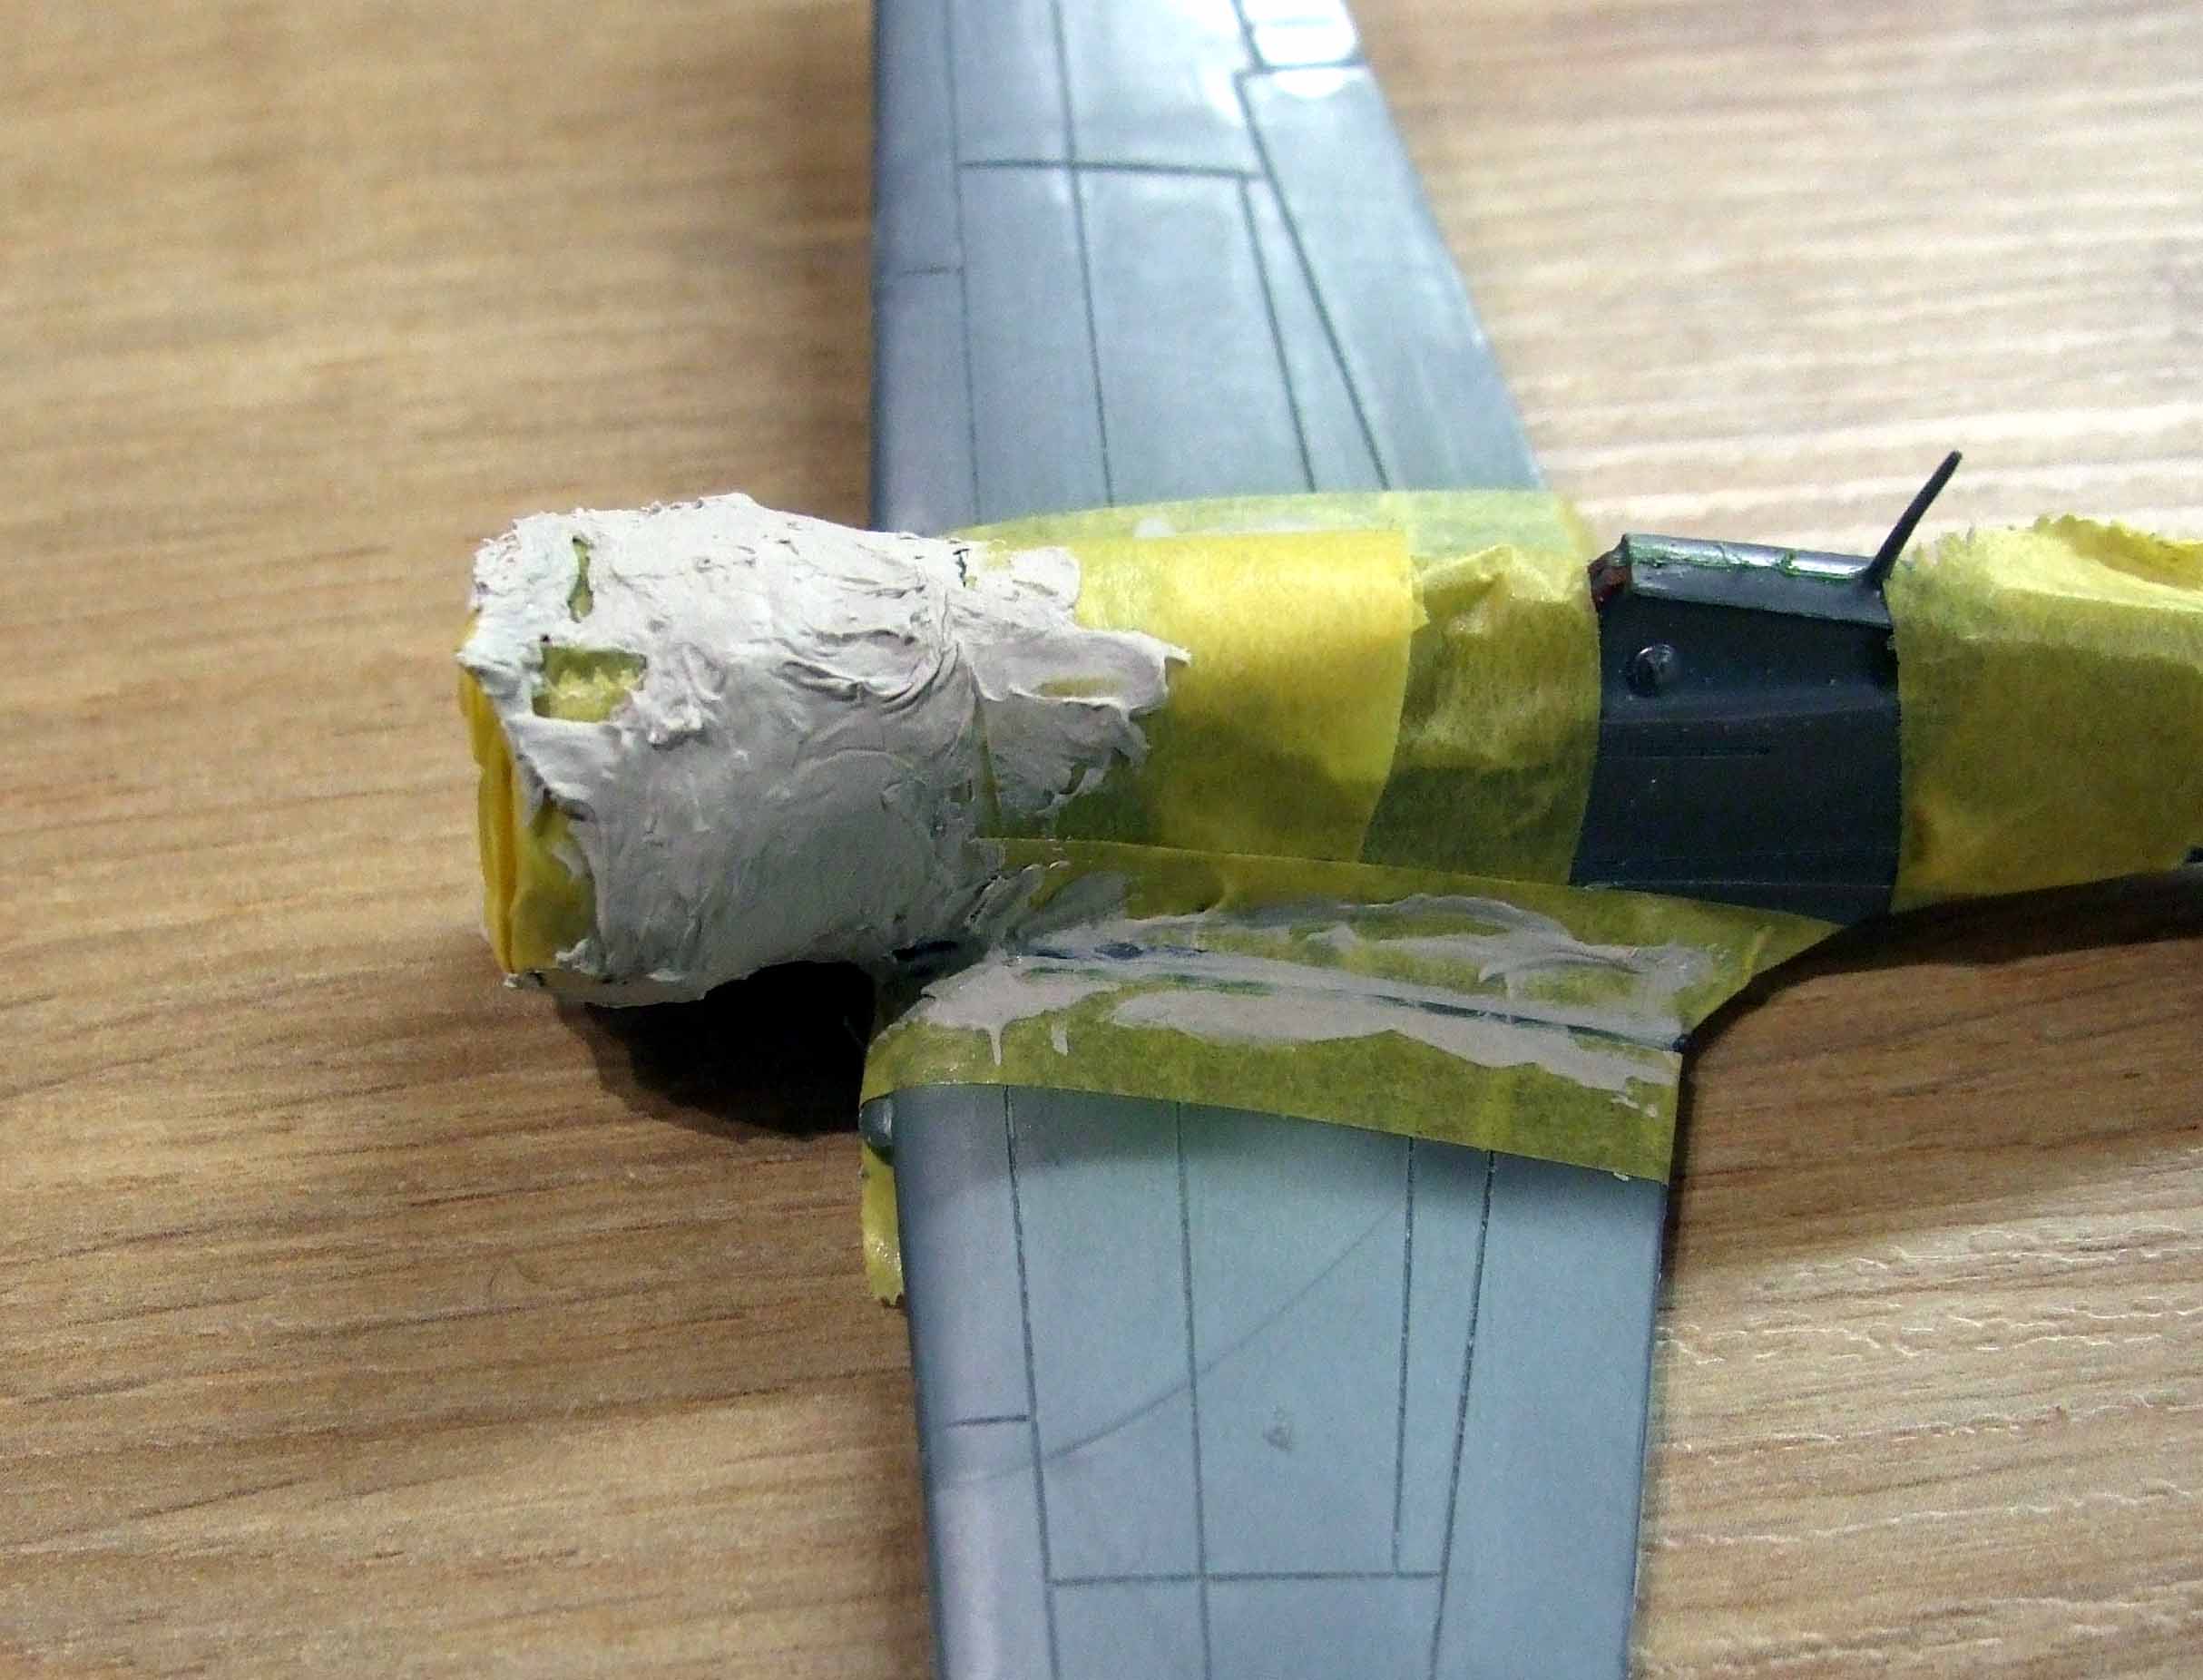
After a major sanding work, the shape of the mohawk comes to life.
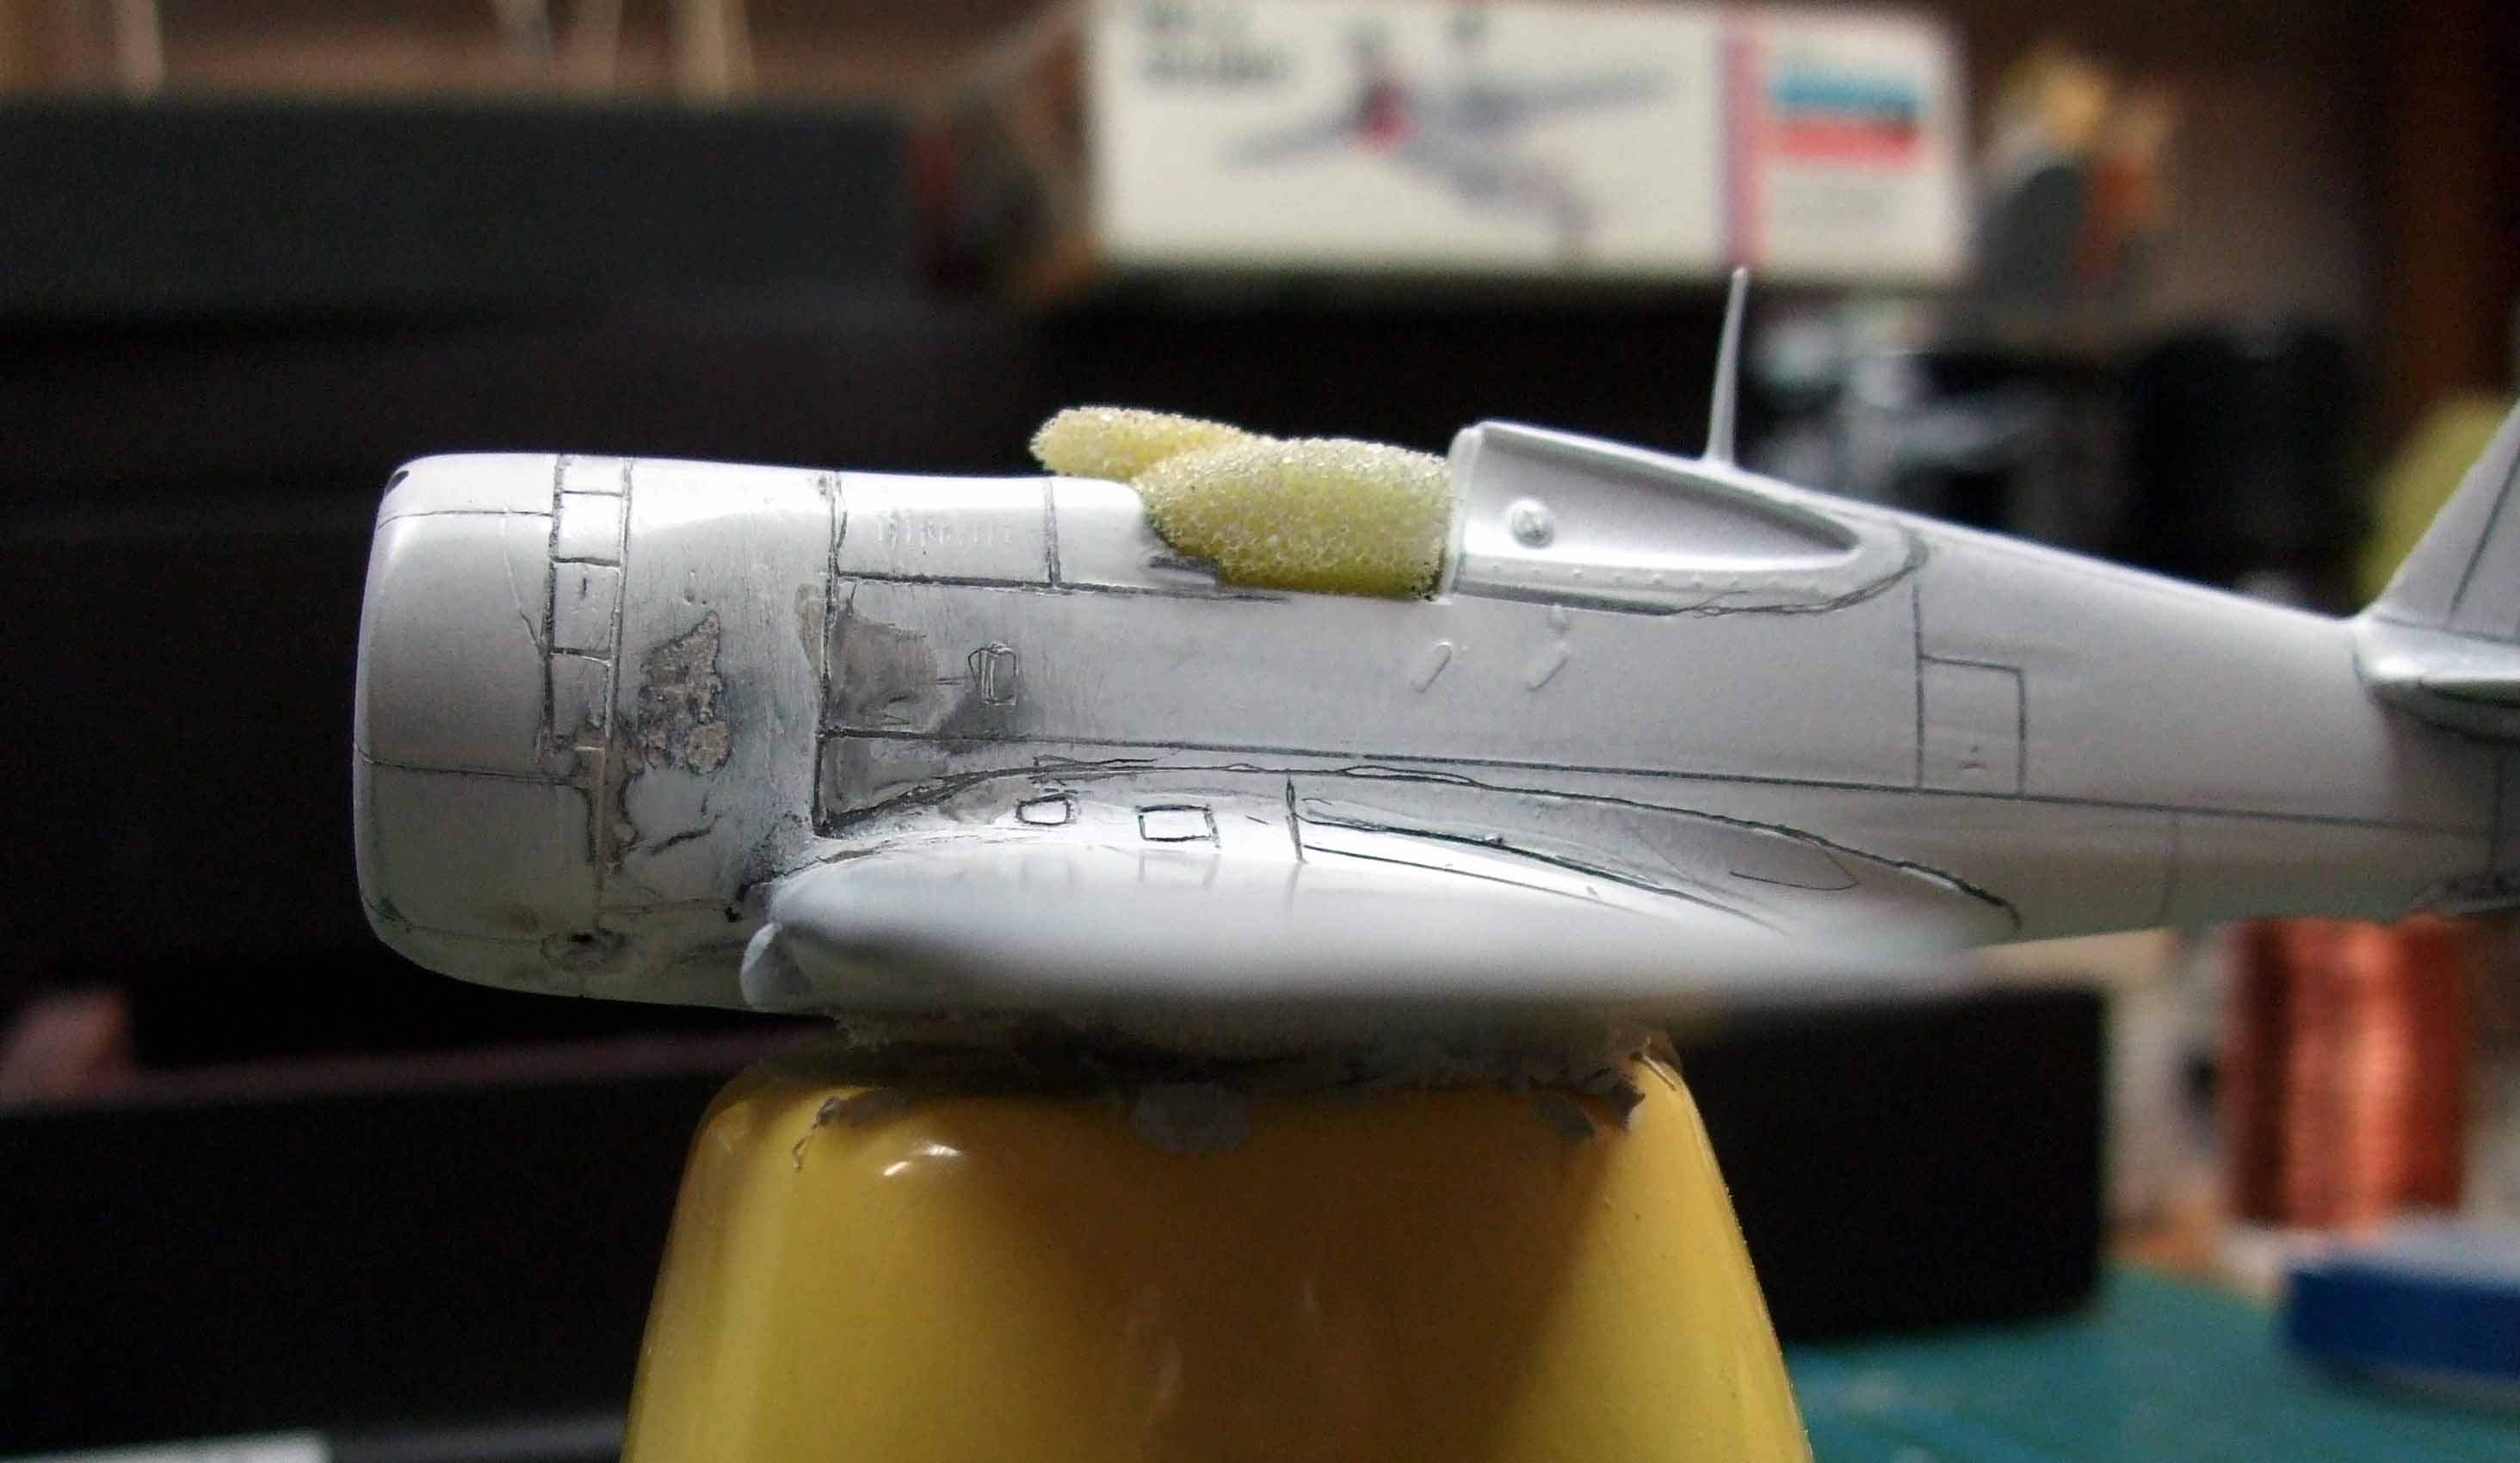
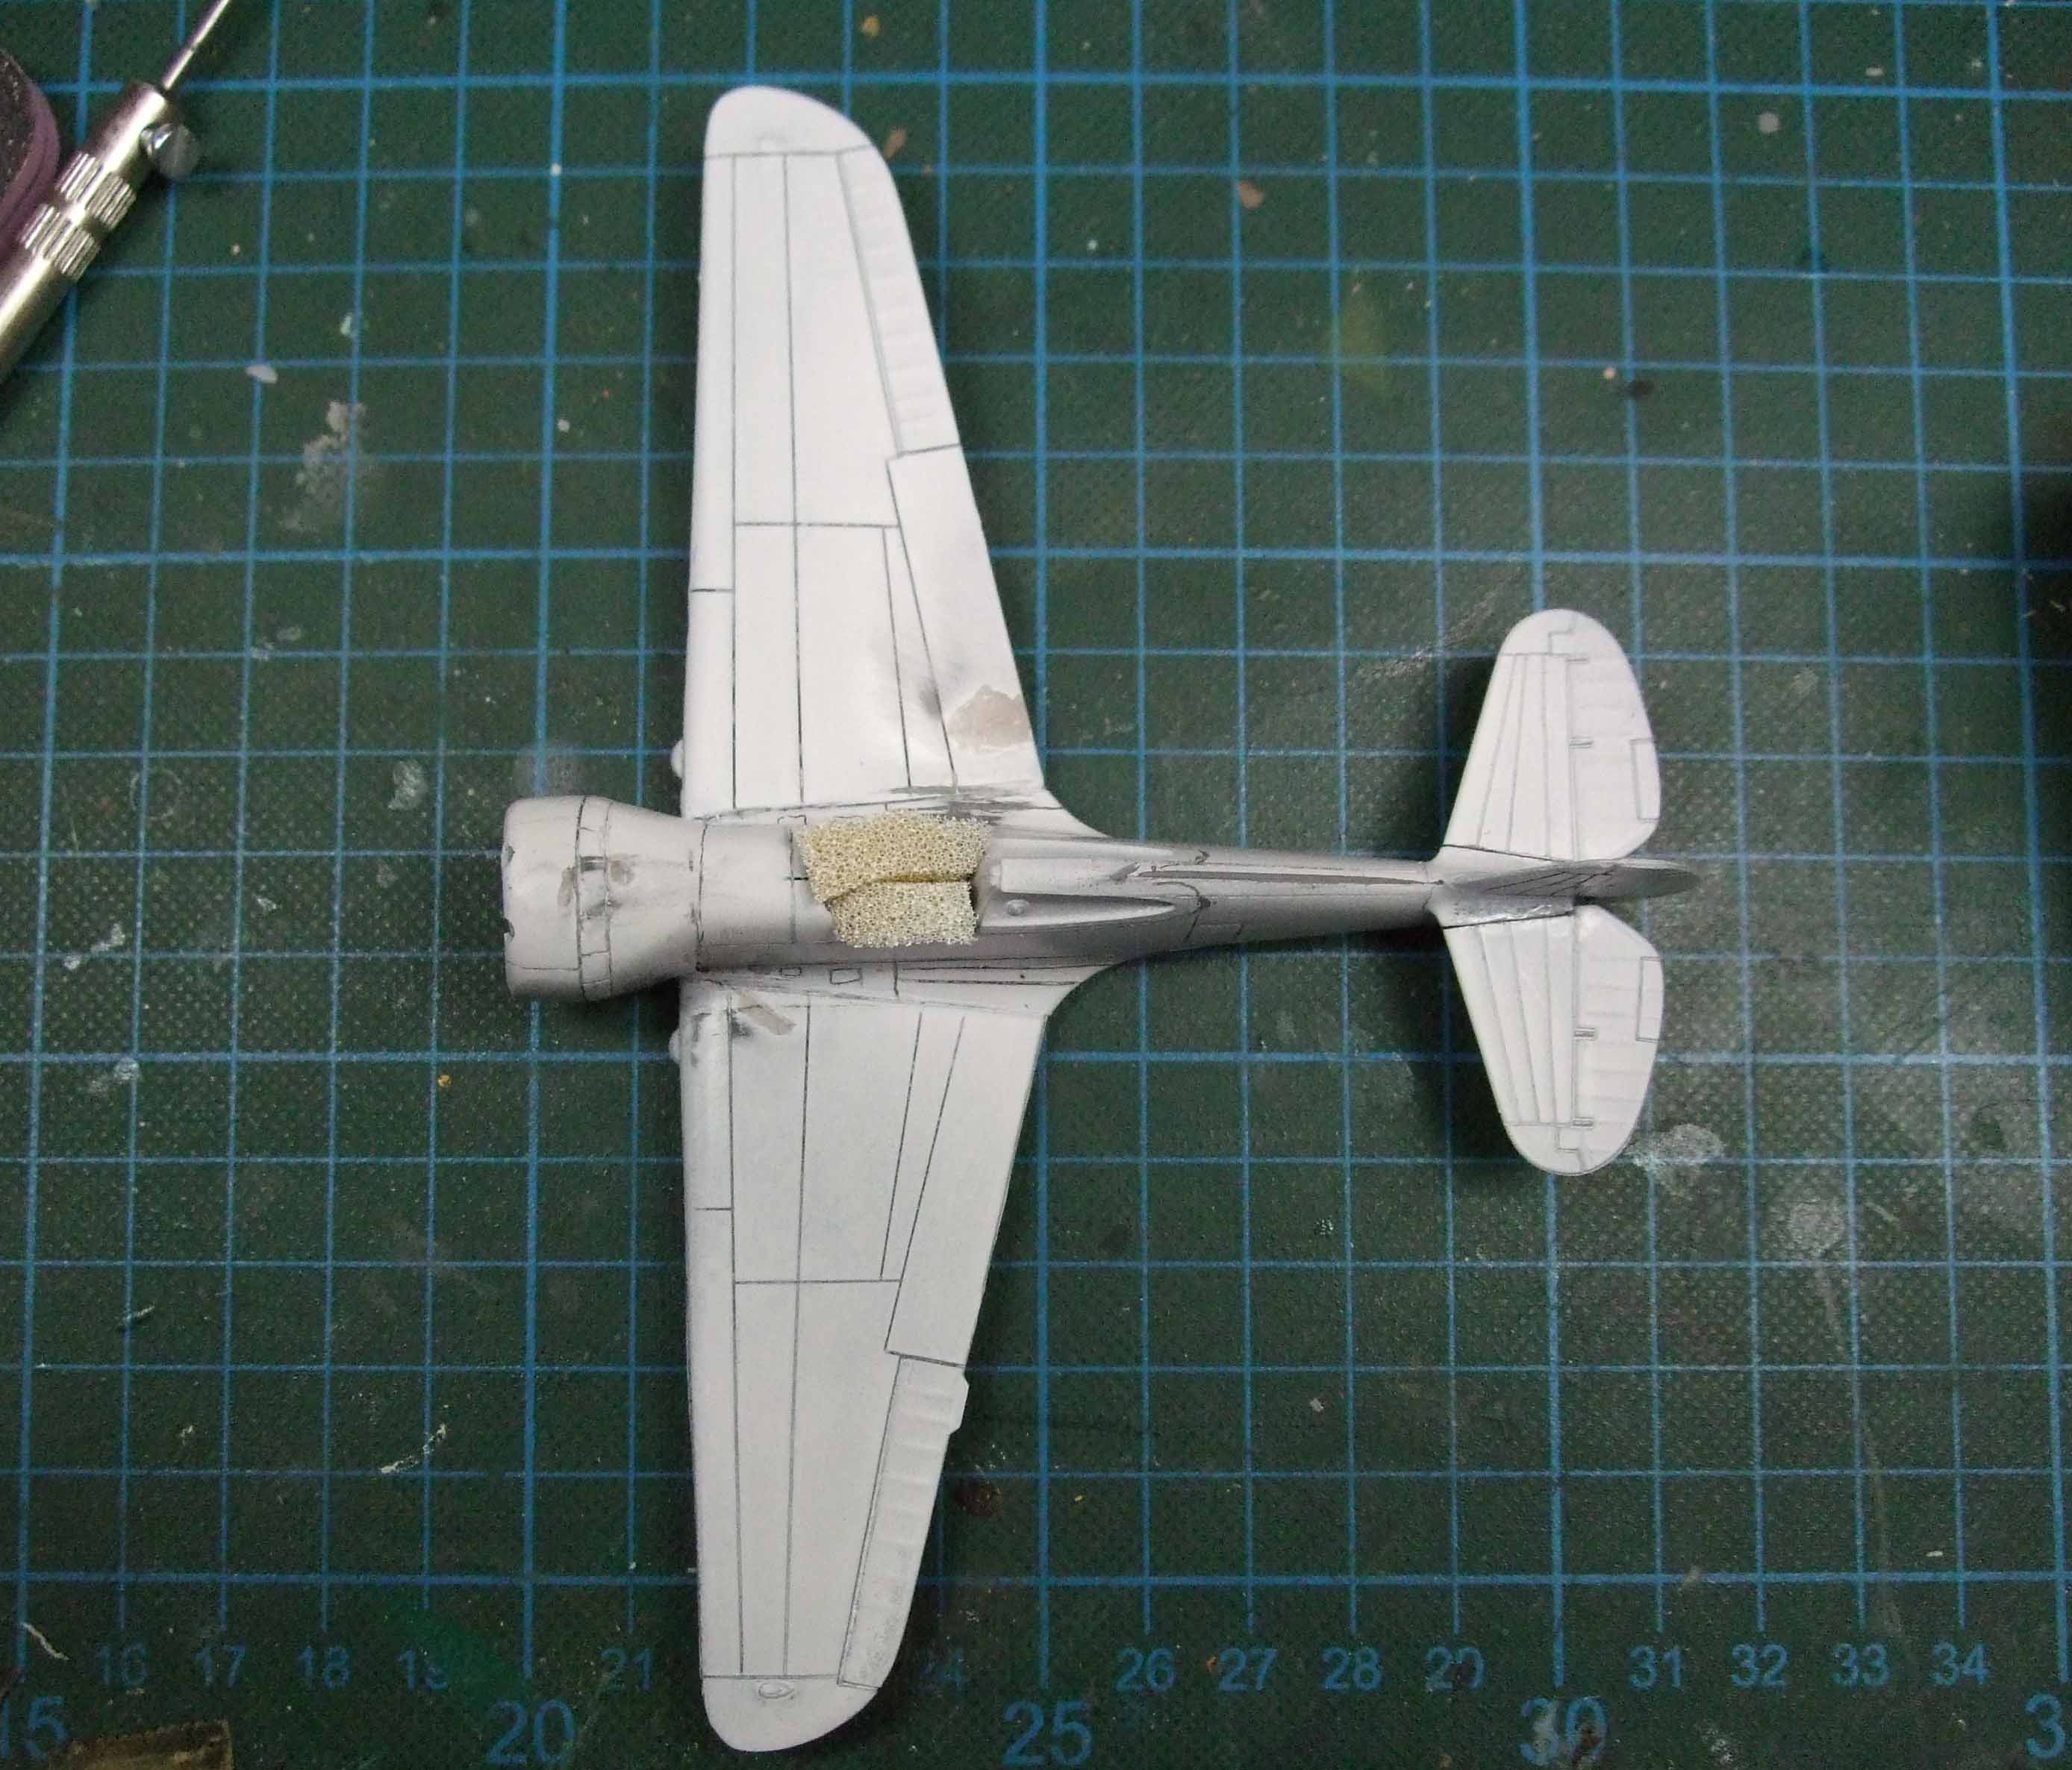
More to come.
Oliver

On the desk: Probably a Panzer III.
Texas, United States
Joined: February 22, 2008
KitMaker: 5,026 posts
AeroScale: 2,811 posts
Posted: Wednesday, January 18, 2017 - 07:10 AM UTC
Oliver, all I can say is WOW! what you've done with that airplane. Nice tip on the fill in technique.
The canopy is taped, LG attached and all primed waiting for some dry weather here to do some painting.


If it aint broke dont fix it.
New Jersey, United States
Joined: February 06, 2015
KitMaker: 1,098 posts
AeroScale: 900 posts
Posted: Wednesday, January 18, 2017 - 07:49 AM UTC
Oliver -
It seems you like to modify fuselages as well - very nice work !
Cheers - Richard
New Jersey, United States
Joined: February 06, 2015
KitMaker: 1,098 posts
AeroScale: 900 posts
Posted: Wednesday, January 18, 2017 - 07:52 AM UTC
Bob -
Great progress ! It seems you are enjoying your return to building and I ,for one , am glad of it . Can't wait to see it in paint.
Cheers - Richard
Indre-et-Loire, France
Joined: May 23, 2011
KitMaker: 651 posts
AeroScale: 181 posts
Posted: Wednesday, January 18, 2017 - 01:29 PM UTC
Quoted Text
Nicolas:
The airfix cockpit seems very nice. Have You improved the side walls or are they "as delivered"?
On my Mohawk, I added some styrene to reduce the amount of putty and give it a first shape.
Hi Oliver, what an improving task ! Very good job !
For my P-40, i did not improve anything, all details are from the original kit, i did not expect that and was glad to see them ! The only thing which is missing are the seat belts...i think i'm going to add them "homemade" as usual ...
Cheers
nico
Berlin, Germany
Joined: October 12, 2008
KitMaker: 709 posts
AeroScale: 651 posts
Posted: Wednesday, January 18, 2017 - 08:01 PM UTC
Michael: Very nice quick and neat build! Absolutely nicely done! Congrats for finishing first (never expected that

), thought I'll be faster as I'm very close do "done".
Thanks for comments, guys!
Oliver: Great work on that cowling! Sure this will turn out nicely when painted. Did you managed the "oval" shape?
About my Hawk 75 (as Bob asking too)it's just basically airbrushed with enamel matte aluminum (no base as it was dark blue styrene)then first covered randomly with very thinned acrylic olive-drab (like a wash) and wiped partially and carefully away with water&isopropyl. After that, fixed with a gloss acrylic coat, decals and a second coat. Blue/white stripes on tail were airbrushed (noticed too late a little mistake, sic!). No chipping-stuff/hairspray.
Bob: Very well, looking foreward to see color on your bird!
Mike and Nicholas: Very good progress on the Hayabusa shape and the T-6 interior.
some own progress follows, Thomas

Sometimes you need to distance yourself to see things clearly - Lao Tzu -
... in scale and in real life -T.
Texas, United States
Joined: February 22, 2008
KitMaker: 5,026 posts
AeroScale: 2,811 posts
Posted: Friday, January 20, 2017 - 02:58 AM UTC
Question for Richard: I will spray the Ki43 with Tamiya rattle can AS-12 silver since I don't have the facilities to airbrush a lacquer. will this be OK?
Bob
If it aint broke dont fix it.
New Jersey, United States
Joined: February 06, 2015
KitMaker: 1,098 posts
AeroScale: 900 posts
Posted: Friday, January 20, 2017 - 03:59 AM UTC
Quoted Text
Question for Richard: I will spray the Ki43 with Tamiya rattle can AS-12 silver since I don't have the facilities to airbrush a lacquer. will this be OK?
Bob
Bob -
I'm not certain if you are asking about the appropriateness of the color or a technical question regarding this paint. I am not familiar with Tamiya rattle can paint as I have never used them.
If you are going over it with another color then you need to be certain that the over coat is compatible with the base color . Do a test on a piece of plastic or an old kit you may have. Trouble generally starts when lacquers are put on over non- laquer finishes. If the Tamiya AS 12 is the finish color than you should be OK.
If you can tell me your paint scheme ( Is it from the Life Like sheet we discussed?)
and type of paint ( acrylic, enamel, Laquer) and application method for each coat (rattle can, brush, airbrush ) I may be able to help you further if you like.
Also feel free to contact me by private message if you wish.
Love the Oscar ! Richard
Texas, United States
Joined: February 22, 2008
KitMaker: 5,026 posts
AeroScale: 2,811 posts
Posted: Friday, January 20, 2017 - 04:05 AM UTC
Richard, sorry for the confusion. The question was mainly an appropriate color for NMF, the rattle can is a lacquer I think but the green to be used would be acrylic.
Bob
If it aint broke dont fix it.

#305
Christchurch, New Zealand
Joined: February 01, 2006
KitMaker: 1,673 posts
AeroScale: 1,517 posts
Posted: Friday, January 20, 2017 - 03:29 PM UTC


