

I guess that you have to scratch build those, I can't find them as kits anywhere.....


 .....still 'on' about the Catalina are we my wee laddie?......
  :-)
:-) 

Hey Jan....I'm gettin' the dreded red 'X's' instead of your pics......think you could repost'em?
tia
Tread.
 red X's.....oh well. :-)
Quoted Text
Hey Jan....I'm gettin' the dreded red 'X's' instead of your pics......think you could repost'em?
tia
Tread.
Shock------horror!
I'll try again Gordon.....
Nope still the same dreded X's.....here's the links instead.
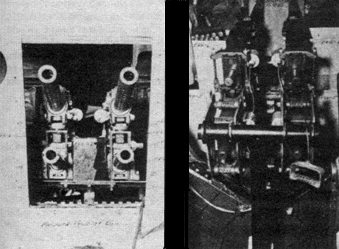
Karaya Browning .50's
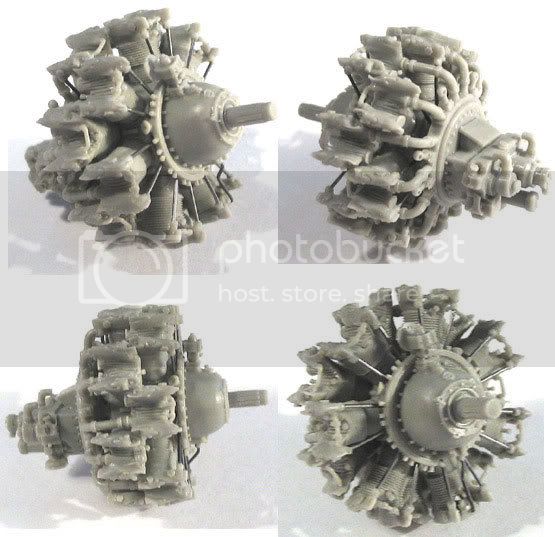
Buffies Best Pratt & Whitney R-1830 1-48
Don't know why I get those

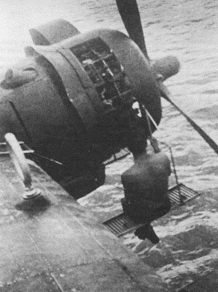
You bet Gordon! Having hanging in of those gantry cranes or what you call them, and one still on the machine waiting to be replaced.....
What did you think about the Karaya .50's then??
Have the gantry {which was probably on wheels} straddling the nose of the Catalina, just in front of the leading edge of the wing. Have one of those superbly made AM engines from Buffies Best suspended from the crossbeam by a chain and cumalong either going in or coming out of the engine nacelle {say, the starboard side}. Then heavily weather the outside of the port side engine cowling with dark soot suggesting that both of these engines are beginning to blow oil from so many hours 'on duty' and on patrol. Surround the perimeter of the aircraft with a couple of those very neat, tubular steel maintenance platforms {with at least one positioned right next to the nose of the aircraft to facilitate proper access for the mechanic removing/replacing the engine which is hanging by the chain}, toss a smattering of tools, lunch, ammo crates, etc around the place and Voila!...........but then, I'm just getting overly creative with your spare time afterall.......aren't I? Quoted TextYou bet Gordon! Having hanging in of those gantry cranes or what you call them, and one still on the machine waiting to be replaced.....
What did you think about the Karaya .50's then??
Very much along the lines I was thinking there Jan
Tread.


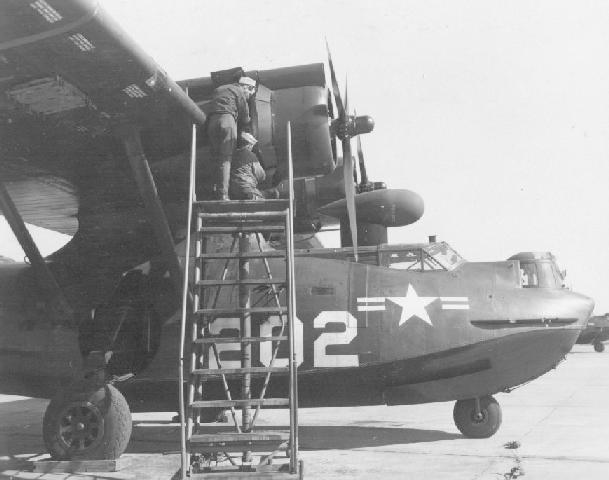


 Thx for posting pics for us all to see, they are very helpful and show just what can be done with this massive beastie.

 |


