Air Campaigns
Want to start or join a group build? This is where to start.
The great checker board Campaign
Bigrip74
_VISITCOMMUNITY
Texas, United States
Joined: February 22, 2008
KitMaker: 5,026 posts
AeroScale: 2,811 posts
Posted: Saturday, May 22, 2010 - 12:47 PM UTC
JP, just one word. I veiwed your post while painting the checkerboard, and in 1/72. You are mad I can not even see the completed build when I did work in that scale. Great job JP

Bob
Ruffus
_VISITCOMMUNITY
Guatemala
Joined: April 12, 2005
KitMaker: 343 posts
AeroScale: 111 posts
Posted: Monday, May 24, 2010 - 07:10 AM UTC
It seems that I´m not going to make it, can´t do anything on the weekend. Darn, I want that chequered ribbon. well, maybe next time.

Regards

Byron
Phantom2
_VISITCOMMUNITY
Östergötland, Sweden
Joined: April 18, 2006
KitMaker: 708 posts
AeroScale: 678 posts
Posted: Monday, May 24, 2010 - 09:06 AM UTC
P-47D Thunderbolt
Tamiya 1/48
Pt. 1


Hi all!

Late as usual, but I have done more then you’ll think!

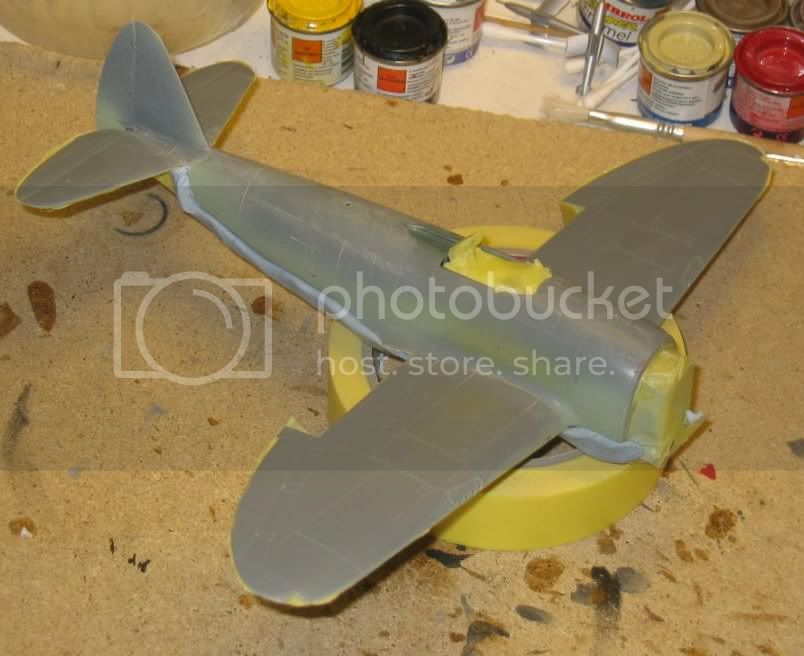
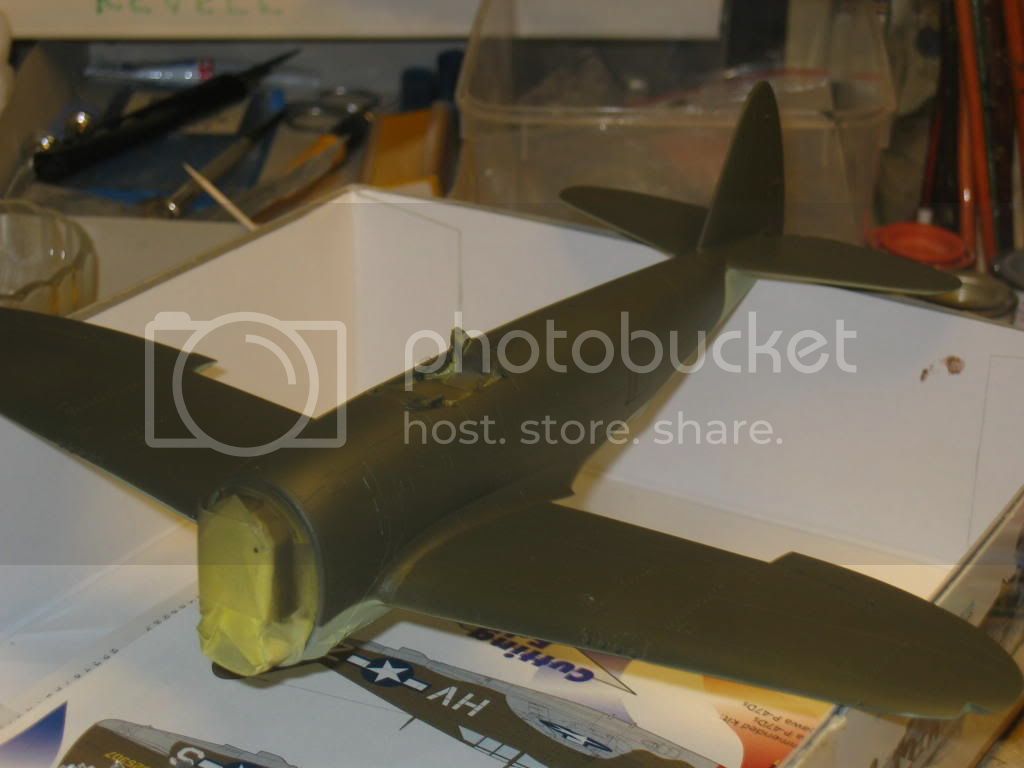
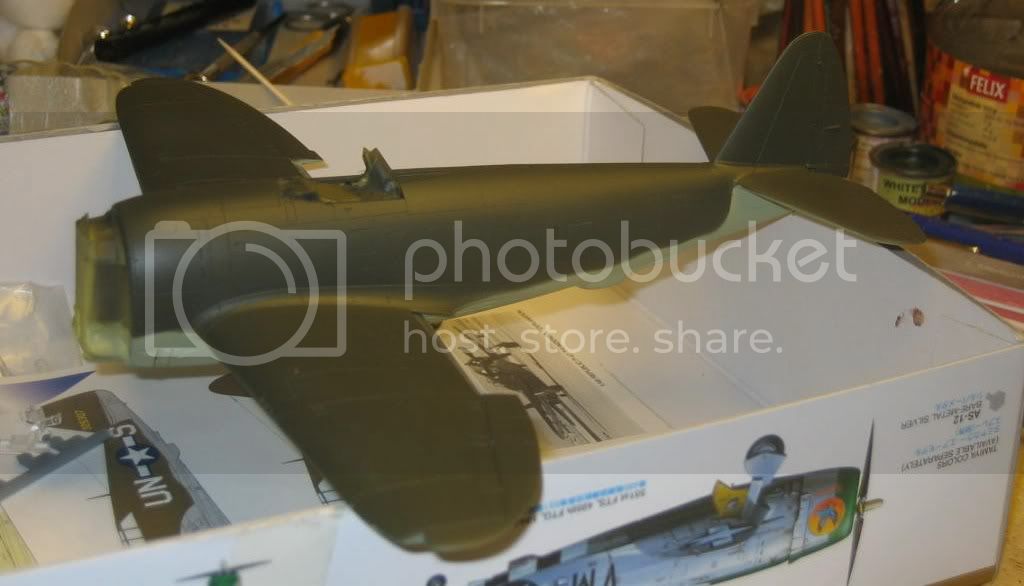
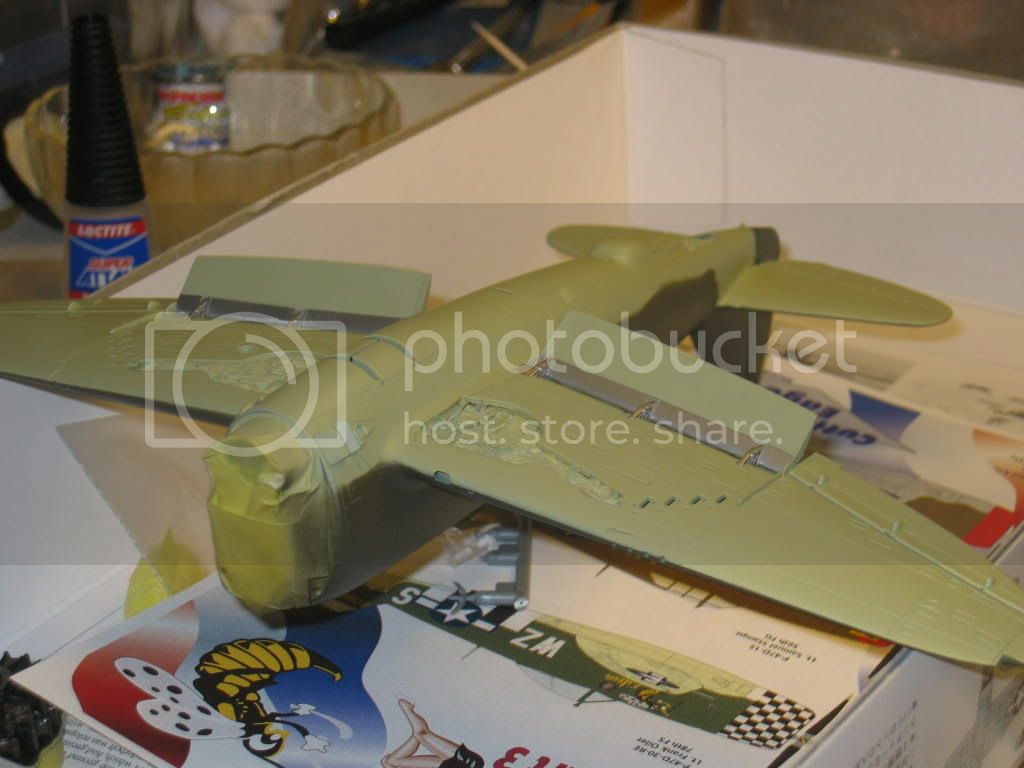
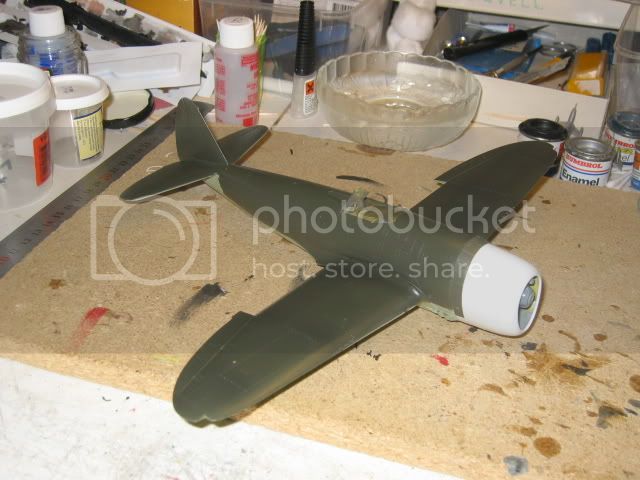
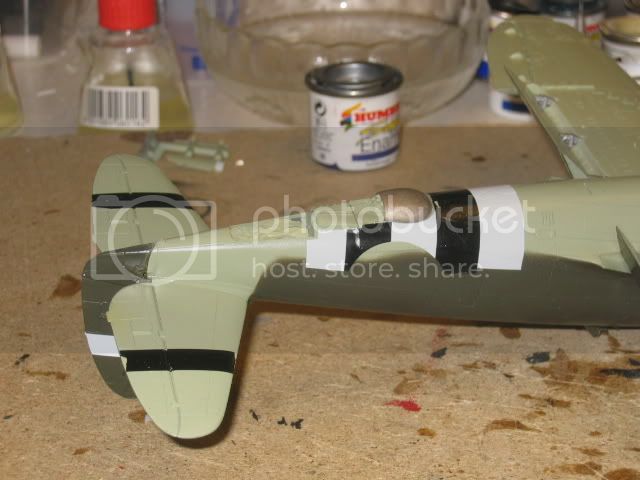
My Thunderbolt is almost fully assembled and is in the paint booth at the moment!

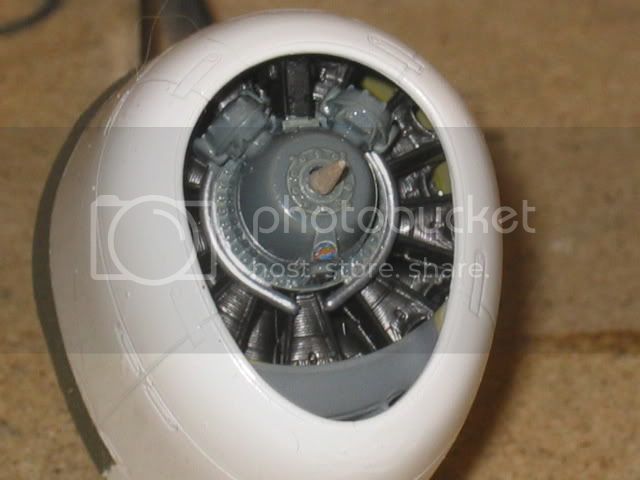
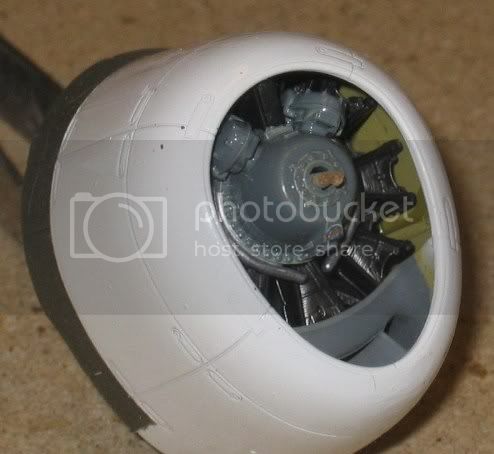
I started with all those small sub-assemblies, and after a few hours of gluing, I had quite a pile of small stuff as bombs, tanks, props, wheels, landing gear, spars and other stuff.


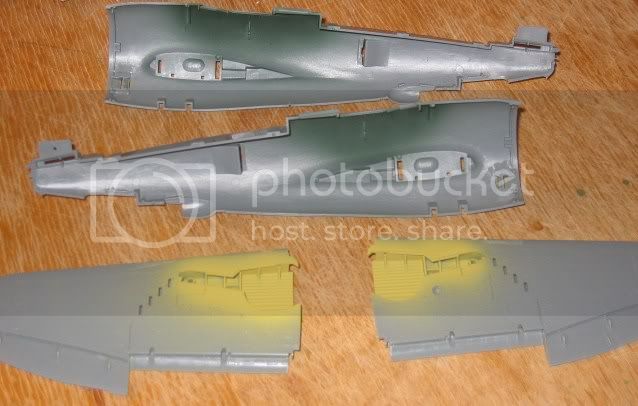
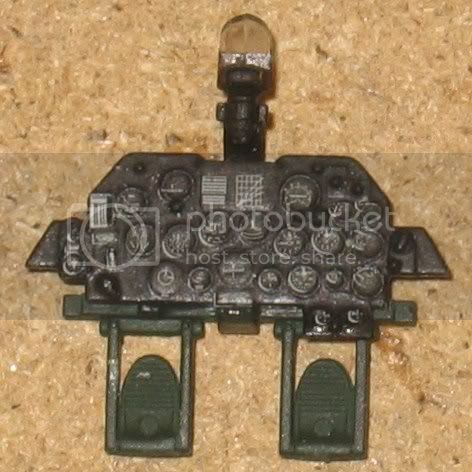
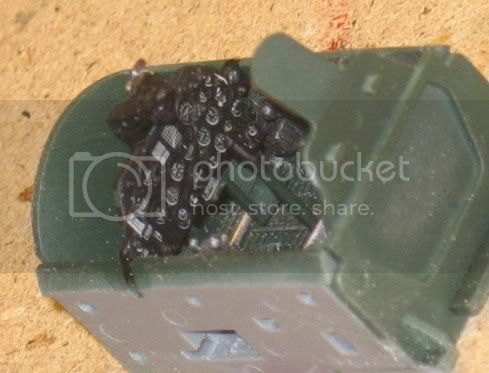
I painted the cockpit Bronze Green and the inside surfaces Zinc Chromate Yellow.


I used the kit decals on the instrument panel, looks really good!


Cockpit parts all assembled and painted up.


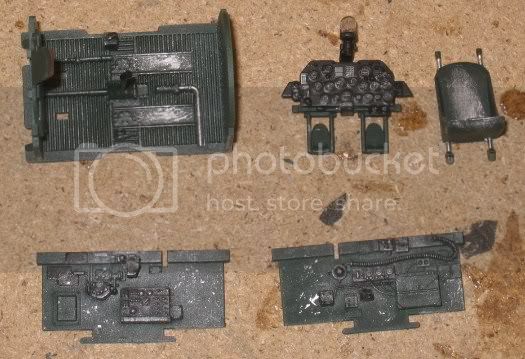
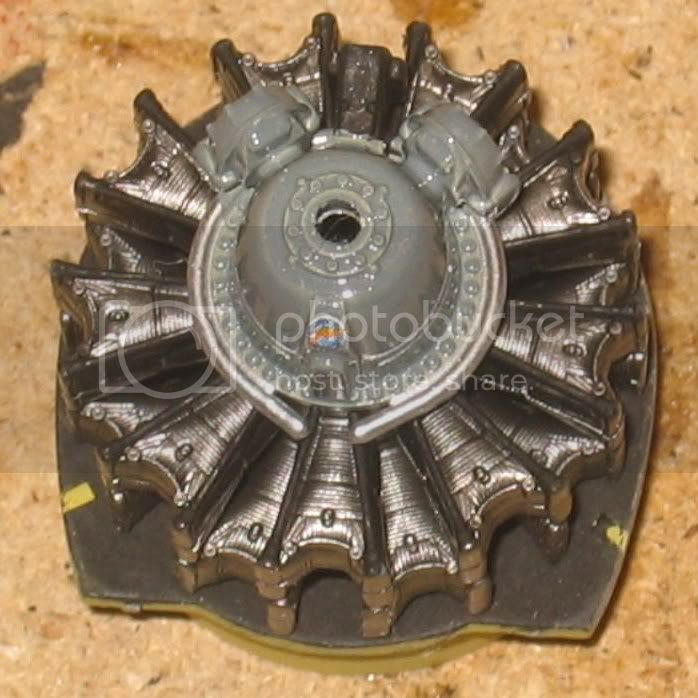
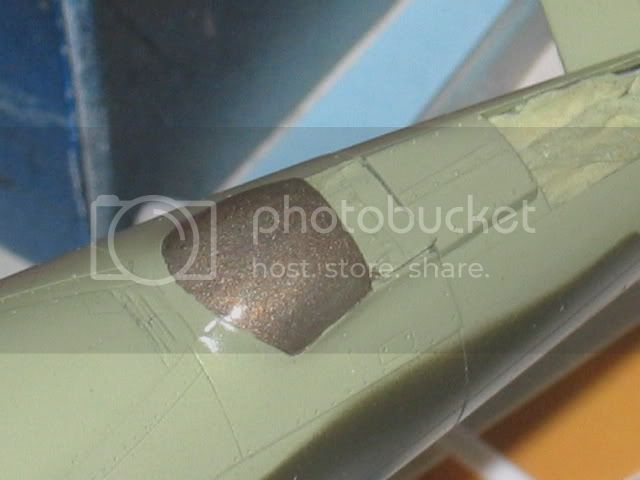
Engine firewall painted.


Firewall and spars assembled, but I did not glue the wing spars.


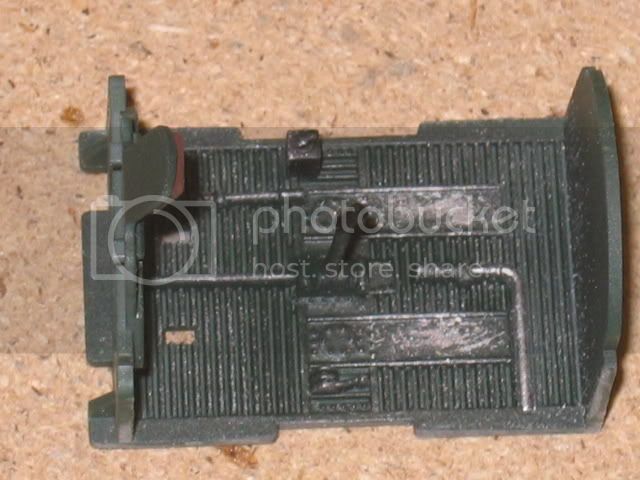
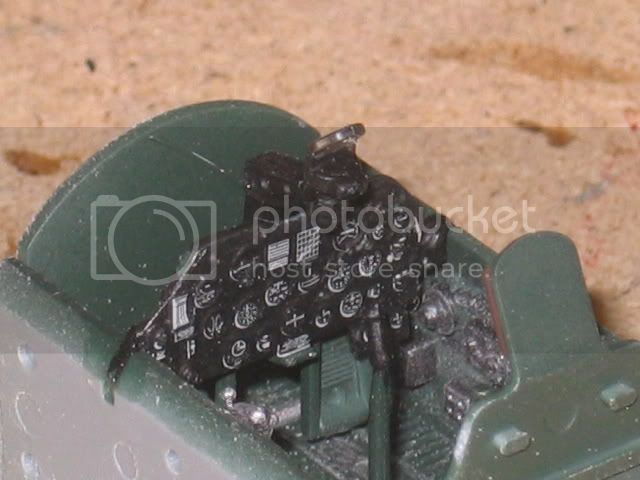
Some pics of the assembled, painted, dry brushed, washed and weathered cockpit, competed!


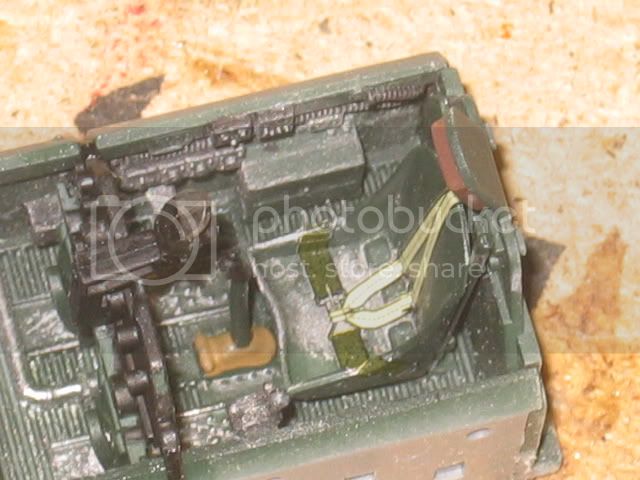
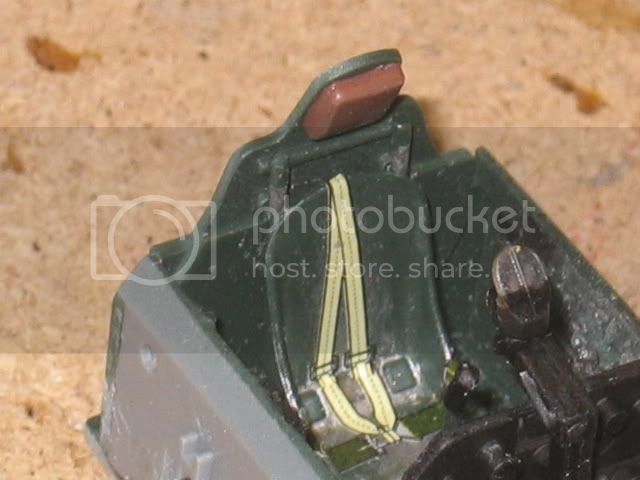
I used the seatbelts supplied as decals, but I’ll do this with the canopy closed, so It won’t be so obvious (didn’t have the time to order an etched set from Hannants).

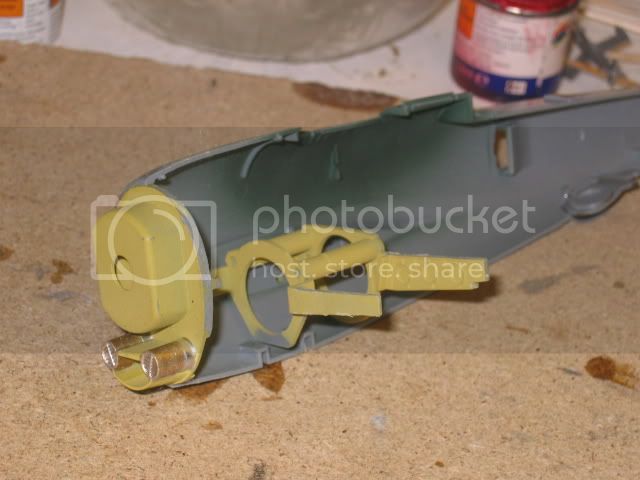
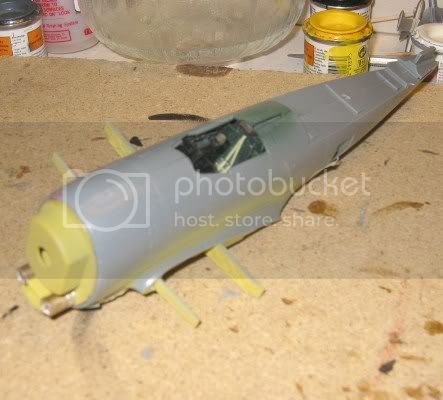
I glued the cockpit in place and closed the fuselage.
This series of kits are the top-of-the line from Tamiya, perfect fit and well detailed, and very fun and easy to build!


Well, how about a few days extension, I think I´ll need it?

More to come soon!

Cheers!


Stefan E
RedwingNev
_VISITCOMMUNITY
England - East Midlands, United Kingdom
Joined: February 07, 2004
KitMaker: 911 posts
AeroScale: 415 posts
Posted: Monday, May 24, 2010 - 10:06 PM UTC
Well, I'm frustrated here. I've picked up my F-15J again after it languished for a few months, but I'm having real problems with it cracking apart. For some reason my glue (Revell liquid glue) and Hasegawa plastic don't seem to like each other.

Each time I fix, fill and sand a broken join, somewhere else cracks apart again So I'm basically running to stand still at the moment. I would ask for an extension, but I go on holiday next week so it looks like I am not going to get it done in time, which frustrates me.
thegirl
_VISITCOMMUNITY
Alberta, Canada
Joined: January 19, 2008
KitMaker: 6,743 posts
AeroScale: 6,151 posts
Posted: Tuesday, May 25, 2010 - 05:06 AM UTC
Wow Jaypee ! I really like the Camel , an excellent scheme and one I will have to do in the future with Rodens kit . Thanks for joinning in and being a part of the team
ps , nice job on the rigging
thegirl
_VISITCOMMUNITY
Alberta, Canada
Joined: January 19, 2008
KitMaker: 6,743 posts
AeroScale: 6,151 posts
Posted: Tuesday, May 25, 2010 - 05:13 AM UTC
Byron and Stefan , Hi Guy's ! So you need more time hey . I will let Chuck know that this campaign has been extended two weeks . June 15 is the dead line . I would like to give you guy's more time , but there are other campaigns starting this summer and I have a few which I leading . So the slate does need to be cleared . Hope that gives you enough time and any one else looking to finish .
Phantom2
_VISITCOMMUNITY
Östergötland, Sweden
Joined: April 18, 2006
KitMaker: 708 posts
AeroScale: 678 posts
Posted: Tuesday, May 25, 2010 - 05:49 AM UTC
Hi Terri!

Thanks, this will give me enough time to complete the Jug!

I know, I´m tangeld up in just every campaign here!

I´m an campaign-addict now, and I love it!

Even tough I hardly can keep up with all the builds!

Cheers!

Stefan E
litespeed
Staff MemberNews Reporter
AEROSCALE
_VISITCOMMUNITY
England - North West, United Kingdom
Joined: October 15, 2009
KitMaker: 1,976 posts
AeroScale: 1,789 posts
Posted: Tuesday, May 25, 2010 - 11:37 AM UTC
Hi Terri
I am almost there with my Hawker Hunter, should be able to finish it in the next couple of evenings. I am having the usual problems with Academy decals! Then I can make a start on the Me 109 campaign.
tim
Photobucket
jaypee
_VISITCOMMUNITY
Scotland, United Kingdom
Joined: February 07, 2008
KitMaker: 1,699 posts
AeroScale: 1,384 posts
Posted: Tuesday, May 25, 2010 - 12:21 PM UTC
Nice Hunter, their kits are really nice for the price but the decals seem so hard to work with.

The tail decals drying. Much better than drawn on.
tail decals drying some details
To trim them tomorrow. Some up close shots with the Canon.
No lighting, no tripod, no flash, indoors, amazing!


tail decals drying some details

tail decals drying some details

Just noticed there are more codes for the tailplane.
Since there is an extension I'll put those in.


PS Terri if you ever do this with Roden (please do I'd be stoked to see it) just ping me and I'll send you the image files for the codes. They are a start if not exact.
litespeed
Staff MemberNews Reporter
AEROSCALE
_VISITCOMMUNITY
England - North West, United Kingdom
Joined: October 15, 2009
KitMaker: 1,976 posts
AeroScale: 1,789 posts
Posted: Tuesday, May 25, 2010 - 12:33 PM UTC
Hi Jaypee
Thanks, I love this kit even though the ejector seat supplied with the kit is 1/72 when it should be 1/48. Definetly do another one, but I would buy some alternative decals.
tim
litespeed
Staff MemberNews Reporter
AEROSCALE
_VISITCOMMUNITY
England - North West, United Kingdom
Joined: October 15, 2009
KitMaker: 1,976 posts
AeroScale: 1,789 posts
Posted: Wednesday, May 26, 2010 - 04:15 AM UTC
Hi Terri
A wet afternoon here has meant I have been able to finish my Academy 1/48 Hawker Hunter F6 for this campaign. Great kit, but the decals were stinkers!! Posted pics on the gallery. Thanks for a great campaign.
tim

Photobucket
Photobucket
AussieReg
Staff MemberAssociate Editor
AUTOMODELER
#007
_VISITCOMMUNITY
Victoria, Australia
Joined: June 09, 2009
KitMaker: 8,156 posts
AeroScale: 3,756 posts
Posted: Wednesday, May 26, 2010 - 10:49 AM UTC
Very nice job on the Hunter Tim, and JP, now I can see where the madness stems from, that's a great job on a "fiddly" scheme mate !!
warreni
_VISITCOMMUNITY
South Australia, Australia
Joined: August 14, 2007
KitMaker: 5,926 posts
AeroScale: 2,201 posts
Posted: Wednesday, May 26, 2010 - 12:53 PM UTC
OMG... * shivers * This one fought me all the way and will be banished to the back of the model cabinet in a short time.

Everything went wrong that could go wrong, except for maybe the weathering of the paint which didn't come out too badly.

I wanted to have the wings spread, but after I ot to the point where I was going to do it Mr Trumpeter had decided it was not possible. I suppose I should look on the bright side and think it won't take up too much room in said cabinet.

And you may not see the other side of the model as when I was removing the Tamiya masking tape from the wings part of it had gone over the decal on the underside of the other wing, and even though it had been futured, Micro-soled and clear coated it pulled a large part of the white part of the decal off. That was the final straw for me.

Congrats to all who completed the campaign.

Please not the lovely, tidy modelling bench..

Ruffus
_VISITCOMMUNITY
Guatemala
Joined: April 12, 2005
KitMaker: 343 posts
AeroScale: 111 posts
Posted: Wednesday, May 26, 2010 - 01:51 PM UTC
Hi Terri, thanks for the extra air, will do my best to finish on time

Hey!! Stefan
"I´m an campaign-addict now, and I love it!
Even tough I hardly can keep up with all the builds!".
Same here

Byron
SGTJKJ
#041
_VISITCOMMUNITY
Kobenhavn, Denmark
Joined: July 20, 2006
KitMaker: 10,069 posts
AeroScale: 3,788 posts
Posted: Wednesday, May 26, 2010 - 10:27 PM UTC
Great finish on the Hunter, Tim. I looks very good. The Academy decals are really really bad. A real heavy solution are necessary unless it is some of the newer kits with Cartograf decals.

Not bad at all, Warren. I think it looks good, but maybe the horrows you are refering to are to visible in the picture. Just remember to have the right side out in the display cabinet.

I have now finished my Bf 109G-10 for this campaign. The aerial will be added after I have moved to our new house in two weeks

It is the Revell 1/48 reboxing - a great little kit. The only real problem is the cockpit which was exchanged for a squadron vac formed cockpit canopy.

After having finished the kit and removed the cockpit canopy masking I noticed that the cockpit has "sucked" up some fine dust from inside the kit. Probably some very low static electricity? Has anybody come across this before? Is this a normal issue with vacformed canopies?

Comments welcome


thegirl
_VISITCOMMUNITY
Alberta, Canada
Joined: January 19, 2008
KitMaker: 6,743 posts
AeroScale: 6,151 posts
Posted: Thursday, May 27, 2010 - 03:46 AM UTC
Tim , great job on the Academy kit . I haven't had the pleasure yet of trying their decals out , but from what every one keeps saying about them . After market sounds the best way to go .


Warren , love the corsair ! I have had that happen before with masking tape , can be very frustrating . Guy;s are right , just show the left side and no one will ever know


Jesper , another excellent build rolls off your bench !
I never tried a vac canopy before , but I think you could be right about how it worked it's way there and way .
SGTJKJ
#041
_VISITCOMMUNITY
Kobenhavn, Denmark
Joined: July 20, 2006
KitMaker: 10,069 posts
AeroScale: 3,788 posts
Posted: Thursday, May 27, 2010 - 09:30 PM UTC
Thanks, Terri. Appreciate it. I am also quite satisfied and I learned something new about vacformed canopies
warreni
_VISITCOMMUNITY
South Australia, Australia
Joined: August 14, 2007
KitMaker: 5,926 posts
AeroScale: 2,201 posts
Posted: Thursday, May 27, 2010 - 10:22 PM UTC
Thanks for that Terri. I am getting better slowly but surely..
litespeed
Staff MemberNews Reporter
AEROSCALE
_VISITCOMMUNITY
England - North West, United Kingdom
Joined: October 15, 2009
KitMaker: 1,976 posts
AeroScale: 1,789 posts
Posted: Friday, May 28, 2010 - 01:56 AM UTC
Thanks boss
tim
thegirl
_VISITCOMMUNITY
Alberta, Canada
Joined: January 19, 2008
KitMaker: 6,743 posts
AeroScale: 6,151 posts
Posted: Tuesday, June 01, 2010 - 06:03 AM UTC
No worries guy's . I have let Chuck now , but haven't heard back from him yet .
Phantom2
_VISITCOMMUNITY
Östergötland, Sweden
Joined: April 18, 2006
KitMaker: 708 posts
AeroScale: 678 posts
Posted: Tuesday, June 01, 2010 - 09:09 AM UTC
Hi all!


OK, so now my little fledgling got her wings!

Off we went to get some paint!

Firstly, a nice coat of Sky on the belly!


Then I used the tape & Blue Tac combo to mask the top side.


Then off to the paint booth again, now for the British Dark Green.

Here’s how she looks with the masking removed.


Flaps attached;


Engine done, some washes left to do.


Cowling painted white;


Forgot all about the engine washes and mounted the engine, Doh!


A coat of clear before decaling;


Decaling underway;


More to come soon!

Cheers!


Stefan E
warreni
_VISITCOMMUNITY
South Australia, Australia
Joined: August 14, 2007
KitMaker: 5,926 posts
AeroScale: 2,201 posts
Posted: Tuesday, June 01, 2010 - 09:41 AM UTC
Nice work so far Stefan.

I have actually worked on aircraft with radial engines and I can assure you that even though they can get dirty and oily at times they are not normally left in that condition.

Even in WW2 one of the main problems would have been keeping the troops busy so they did not think about their lot at that time, and one of the best ways to do that is to get them to wash aircraft. This keeps everyone amused for hours and engines come up looking great.

SO what I am suggesting is that it is not necessary to always make your engines look filthy dirty as often they are not, so don't sweat the lack of a wash.

Cheers
Warren
Phantom2
_VISITCOMMUNITY
Östergötland, Sweden
Joined: April 18, 2006
KitMaker: 708 posts
AeroScale: 678 posts
Posted: Wednesday, June 02, 2010 - 09:01 AM UTC
Hi!

Thanks, Warren!

"Newly washed and almost clean", hmm..... I´ll try that!

Cheers!

Stefan E
Keeperofsouls2099
_VISITCOMMUNITY
Florida, United States
Joined: January 14, 2009
KitMaker: 2,798 posts
AeroScale: 2,443 posts
Posted: Wednesday, June 02, 2010 - 09:26 AM UTC
Think it looks great
thegirl
_VISITCOMMUNITY
Alberta, Canada
Joined: January 19, 2008
KitMaker: 6,743 posts
AeroScale: 6,151 posts
Posted: Wednesday, June 02, 2010 - 11:01 AM UTC
Nothing worng with your buils so far , your doing a super job ! If you feel more comfortable just do a light wash to make the details pop .