

Cheers Terri, that's a good idea, chopsticks. I'm not so worried about the setbacks I've gotta learn.
I'm going to finish off my sc.1 before I tackle the camel again. But it will be better for it
Great stuff on big doll, thats a sneaky one of them leaving off some white on the decal!
Air Campaigns
Want to start or join a group build? This is where to start.
Want to start or join a group build? This is where to start.
Hosted by Frederick Boucher, Michael Satin
The great checker board Campaign

jaypee

Joined: February 07, 2008
KitMaker: 1,699 posts
AeroScale: 1,384 posts

Posted: Tuesday, February 02, 2010 - 12:50 AM UTC


lespauljames

Joined: January 06, 2007
KitMaker: 3,661 posts
AeroScale: 369 posts

Posted: Tuesday, February 02, 2010 - 01:36 AM UTC
just joined this one, i started A camel, edu8056 and will be doing it in msrkingd og capt R.Sykes from 201 squadron france oct 1918 it has a chessboard finish tail upper surface. this will be my first ww1 1/48, and my second to thhird attemt at getting into aircraft
pics when the nicer weather comes. so far i have primered and glossed the engine for alclad dull alu, and done some oilwork on the spars
pics when the nicer weather comes. so far i have primered and glossed the engine for alclad dull alu, and done some oilwork on the spars


thegirl

Joined: January 19, 2008
KitMaker: 6,743 posts
AeroScale: 6,151 posts
Posted: Tuesday, February 02, 2010 - 02:21 AM UTC
What I really like about using chopsticks is you can make your struts to any size which is needed and gloss wood stains work the best ! ( no painting different layers ) Looking forward to your progress when you are back on the project 
Hey James ! Nice choice for a third attempt with aircraft . Glad to have you on !
Hey James ! Nice choice for a third attempt with aircraft . Glad to have you on !
lespauljames
Joined: January 06, 2007
KitMaker: 3,661 posts
AeroScale: 369 posts
Posted: Wednesday, February 03, 2010 - 01:02 AM UTC
Thanks Terri, i just keep loosing steamXD
well were are some wip shots, the wings have been pre highlighted, i dont know if it will work, but my ab doesnt do fine so i thought, why not.
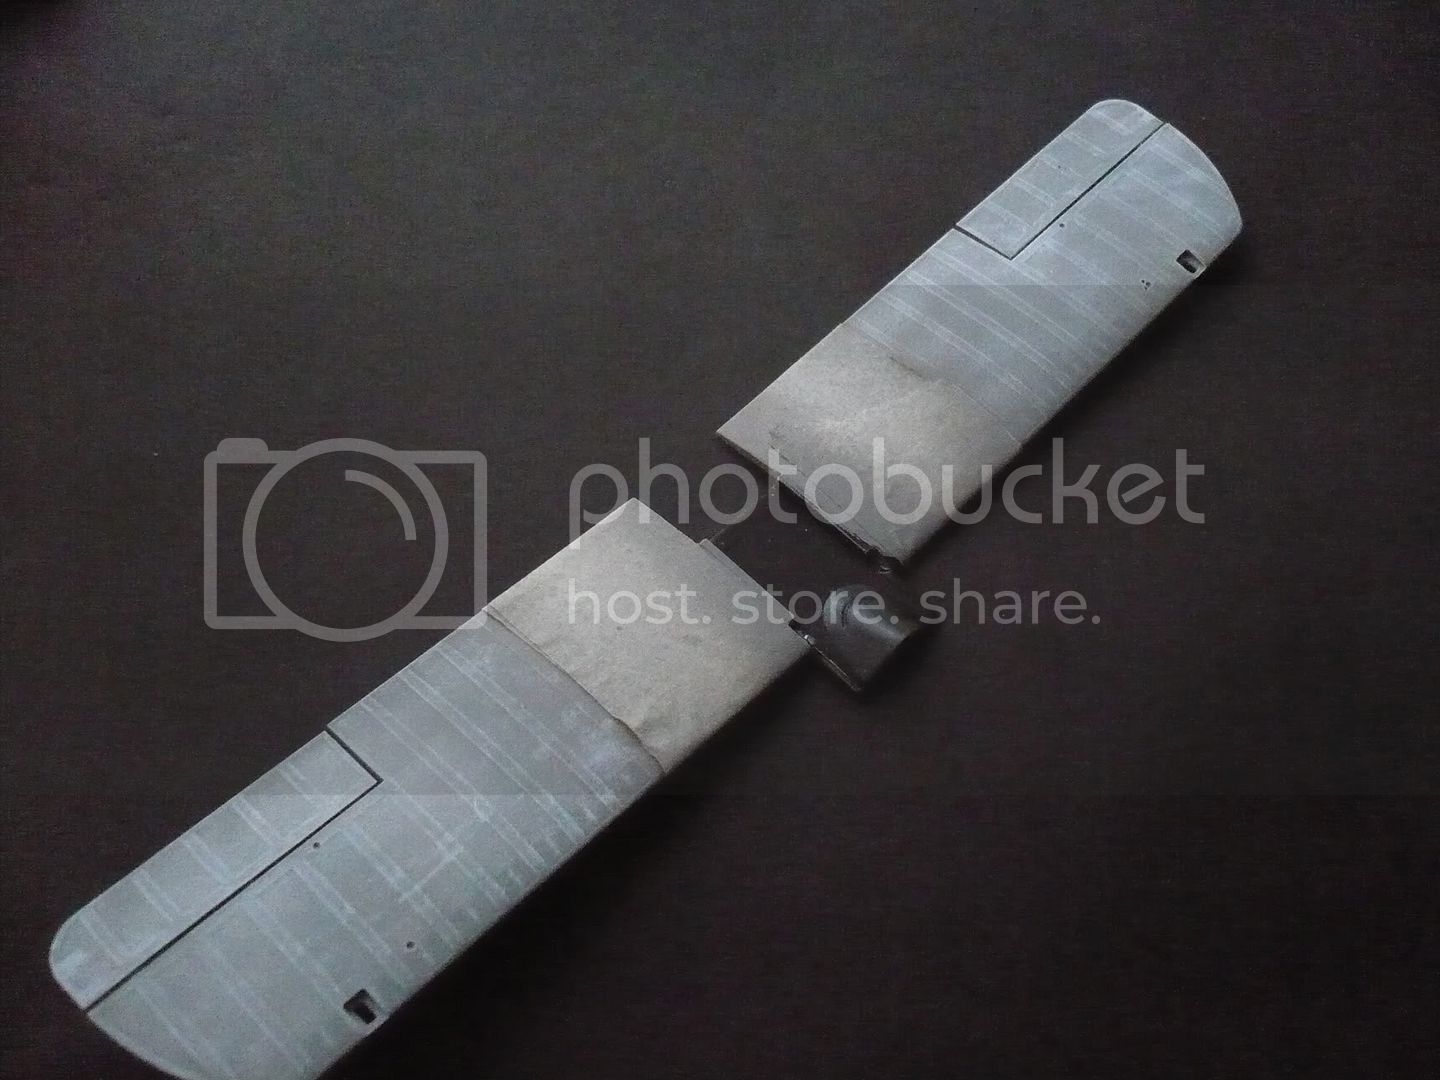
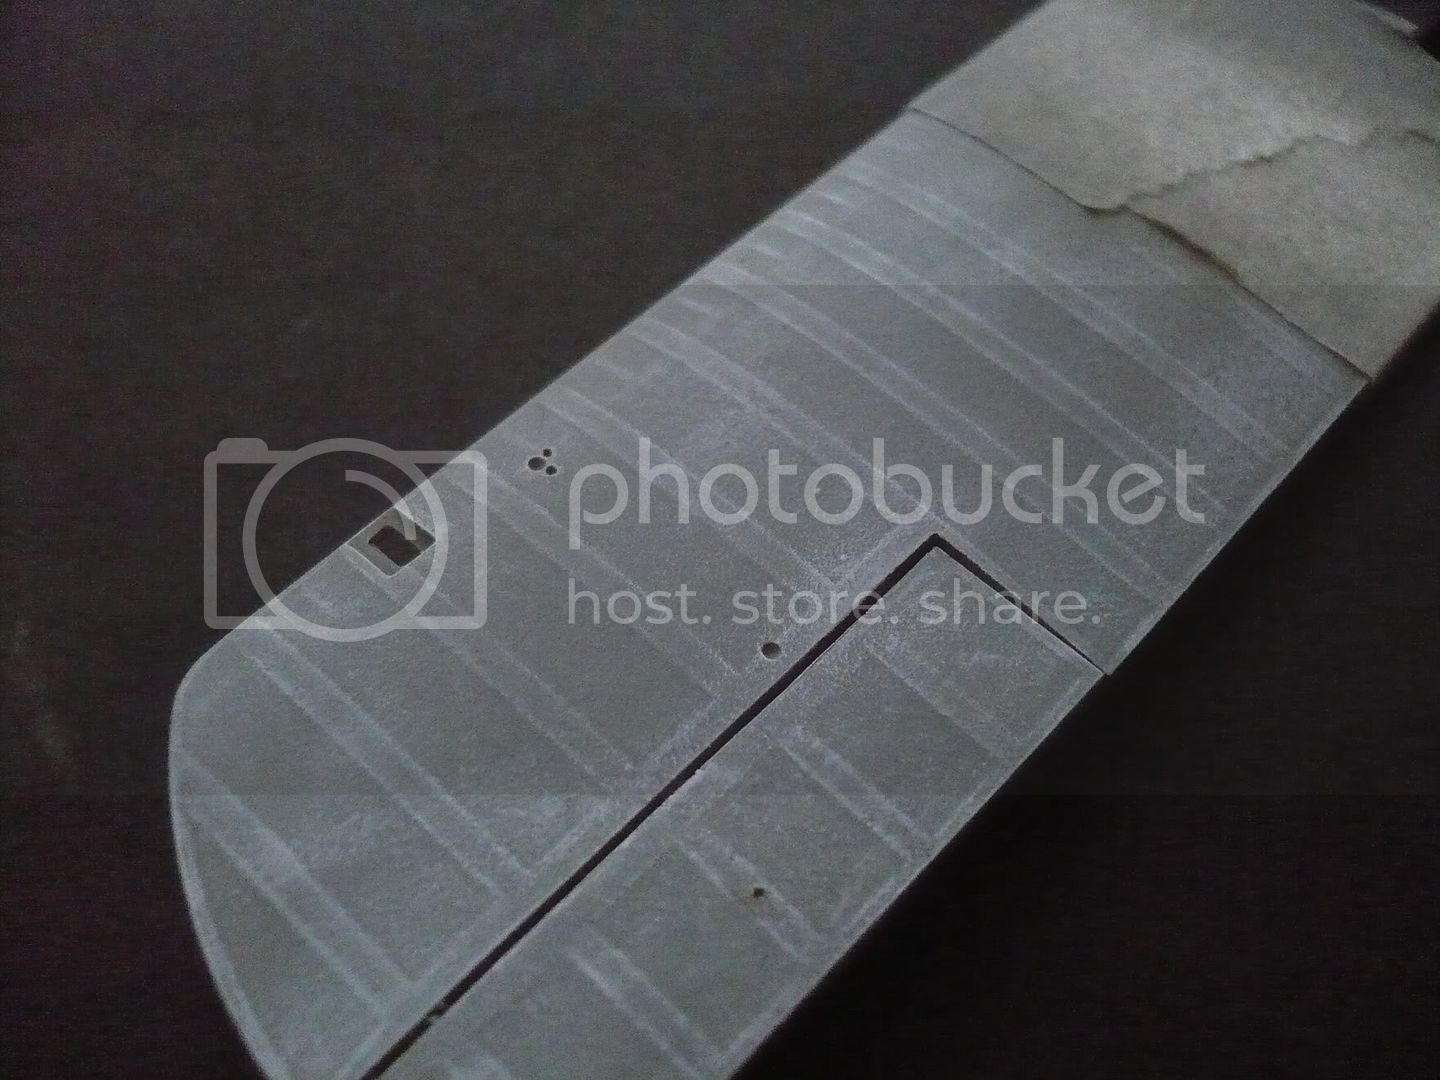
surfaces being prepared for alclad
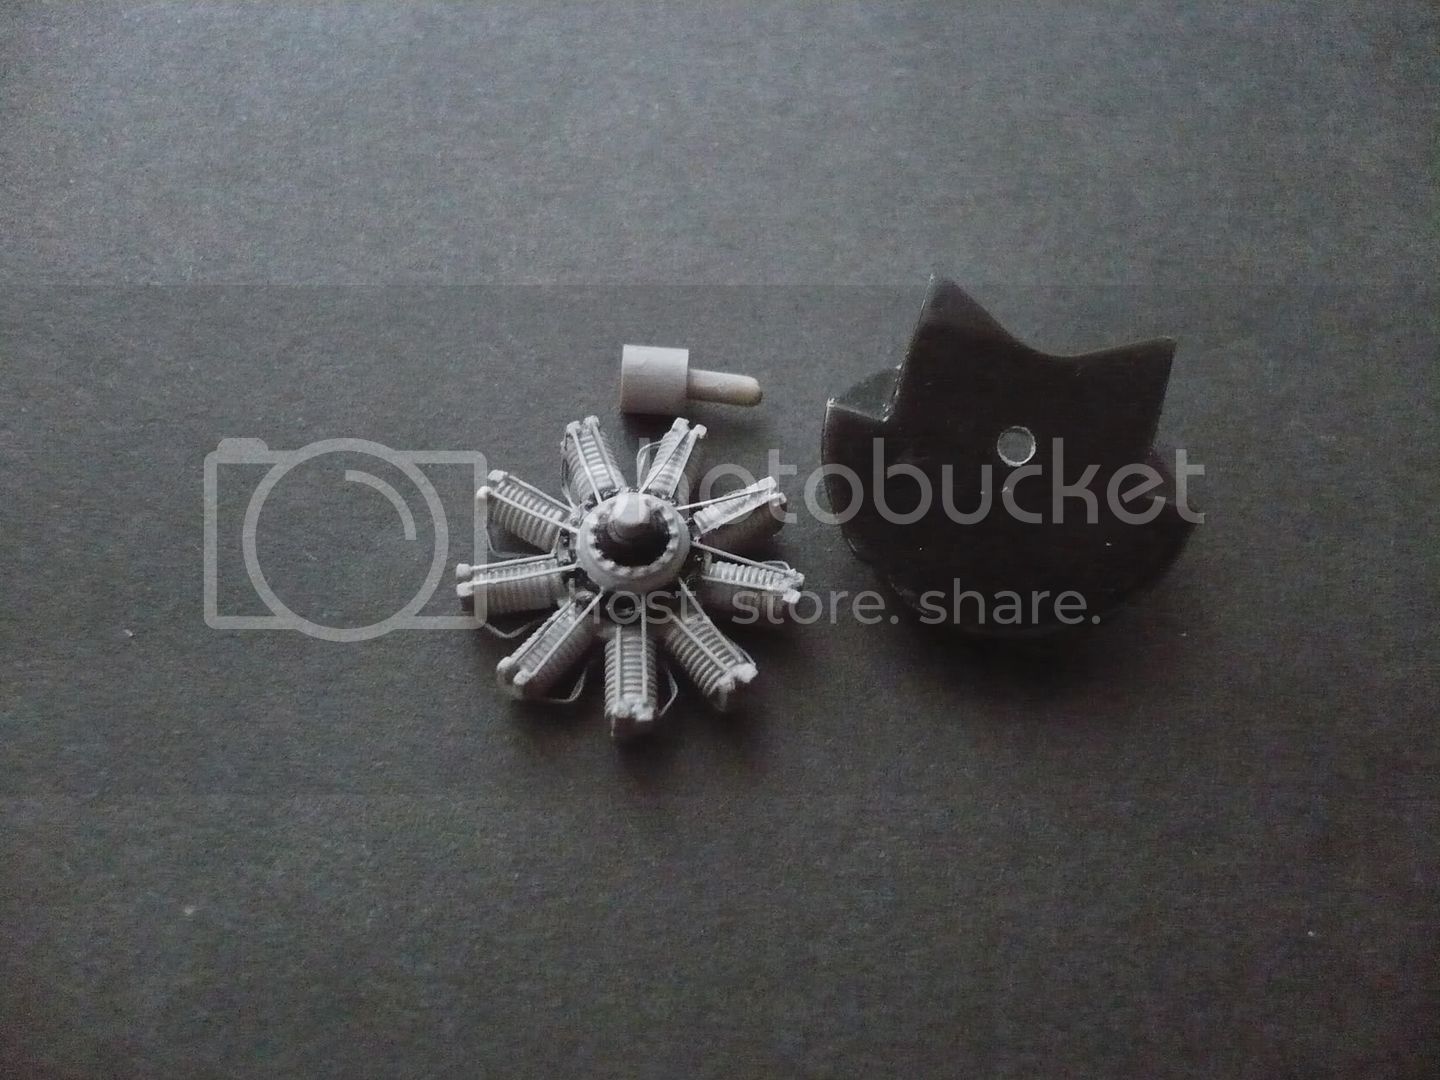
and a random shhot of the engine housing thing

*ED* cowling! thats the one
well were are some wip shots, the wings have been pre highlighted, i dont know if it will work, but my ab doesnt do fine so i thought, why not.
surfaces being prepared for alclad
and a random shhot of the engine housing thing
*ED* cowling! thats the one
thegirl
Joined: January 19, 2008
KitMaker: 6,743 posts
AeroScale: 6,151 posts
Posted: Wednesday, February 03, 2010 - 02:28 AM UTC
Engine housing thingy ....good one James ! Nice effect with the per-shading James .
Decaling is finished on the mustang and started with the final detail painting , pic's up later tonight .
Decaling is finished on the mustang and started with the final detail painting , pic's up later tonight .
thegirl
Joined: January 19, 2008
KitMaker: 6,743 posts
AeroScale: 6,151 posts
Posted: Wednesday, February 03, 2010 - 04:54 PM UTC
Here are those pic's ......hope you guy's like it so far .


AussieReg

#007

Joined: June 09, 2009
KitMaker: 8,156 posts
AeroScale: 3,756 posts
Posted: Wednesday, February 03, 2010 - 08:42 PM UTC
Looking great Terri, super finish with the Alclad ! Was it Polished Aluminium?
Cheers, D
Cheers, D

thegirl
Joined: January 19, 2008
KitMaker: 6,743 posts
AeroScale: 6,151 posts
Posted: Thursday, February 04, 2010 - 01:24 AM UTC
Quoted Text
Looking great Terri, super finish with the Alclad ! Was it Polished Aluminium?
Cheers, D
Thanks D ! I didn't usee the Polished Aluminium -I used Duraluminium for the finish .
lespauljames
Joined: January 06, 2007
KitMaker: 3,661 posts
AeroScale: 369 posts
Posted: Thursday, February 04, 2010 - 06:03 AM UTC
looks great Terri!, im ordering alclad for the first time to use on the camel and the spcial hobby heinkel . a small textual update, im not going to rig the camel, for my first 48th ww1 plane i will be happy enough with a clean build and nice finish.
vanize

Joined: January 30, 2006
KitMaker: 1,954 posts
AeroScale: 1,163 posts
Posted: Thursday, February 04, 2010 - 10:07 AM UTC
Quoted Text
Here are those pic's ......hope you guy's like it so far .
Looks fantastic, terri!
thegirl
Joined: January 19, 2008
KitMaker: 6,743 posts
AeroScale: 6,151 posts
Posted: Friday, February 05, 2010 - 12:57 AM UTC
Thanks James and Vance for the nice comments
No sweat with the rigging James , would like to see you try it with a kit with doesn't have much one of these days . When you feel up to it that is !
You will like the Alclads , just make sure your black primer coat is smooth as glass . Looking forward to your progress .....
No sweat with the rigging James , would like to see you try it with a kit with doesn't have much one of these days . When you feel up to it that is !
You will like the Alclads , just make sure your black primer coat is smooth as glass . Looking forward to your progress .....
lespauljames
Joined: January 06, 2007
KitMaker: 3,661 posts
AeroScale: 369 posts
Posted: Friday, February 05, 2010 - 01:34 AM UTC
i orderd a fokker E.V so i think ill try it on that one, and the surface i prepared was brush painted, but i think its pretty smooth, i have been sanding glossing and buffing in prep. now im stuck as im waiting for paints + more kits to arrive in the mail.
lespauljames
Joined: January 06, 2007
KitMaker: 3,661 posts
AeroScale: 369 posts
Posted: Friday, February 05, 2010 - 11:09 PM UTC
hey all, got some painting done,

AussieReg
#007
Joined: June 09, 2009
KitMaker: 8,156 posts
AeroScale: 3,756 posts
Posted: Friday, February 05, 2010 - 11:51 PM UTC
G'day James, the build is coming along great. Now that wouldn't happen to be a Cry-Baby that you've go it resting on?
Cheers, D
Cheers, D
lespauljames
Joined: January 06, 2007
KitMaker: 3,661 posts
AeroScale: 369 posts
Posted: Saturday, February 06, 2010 - 06:45 AM UTC
sure is Damian, i think its a model from the early ninties
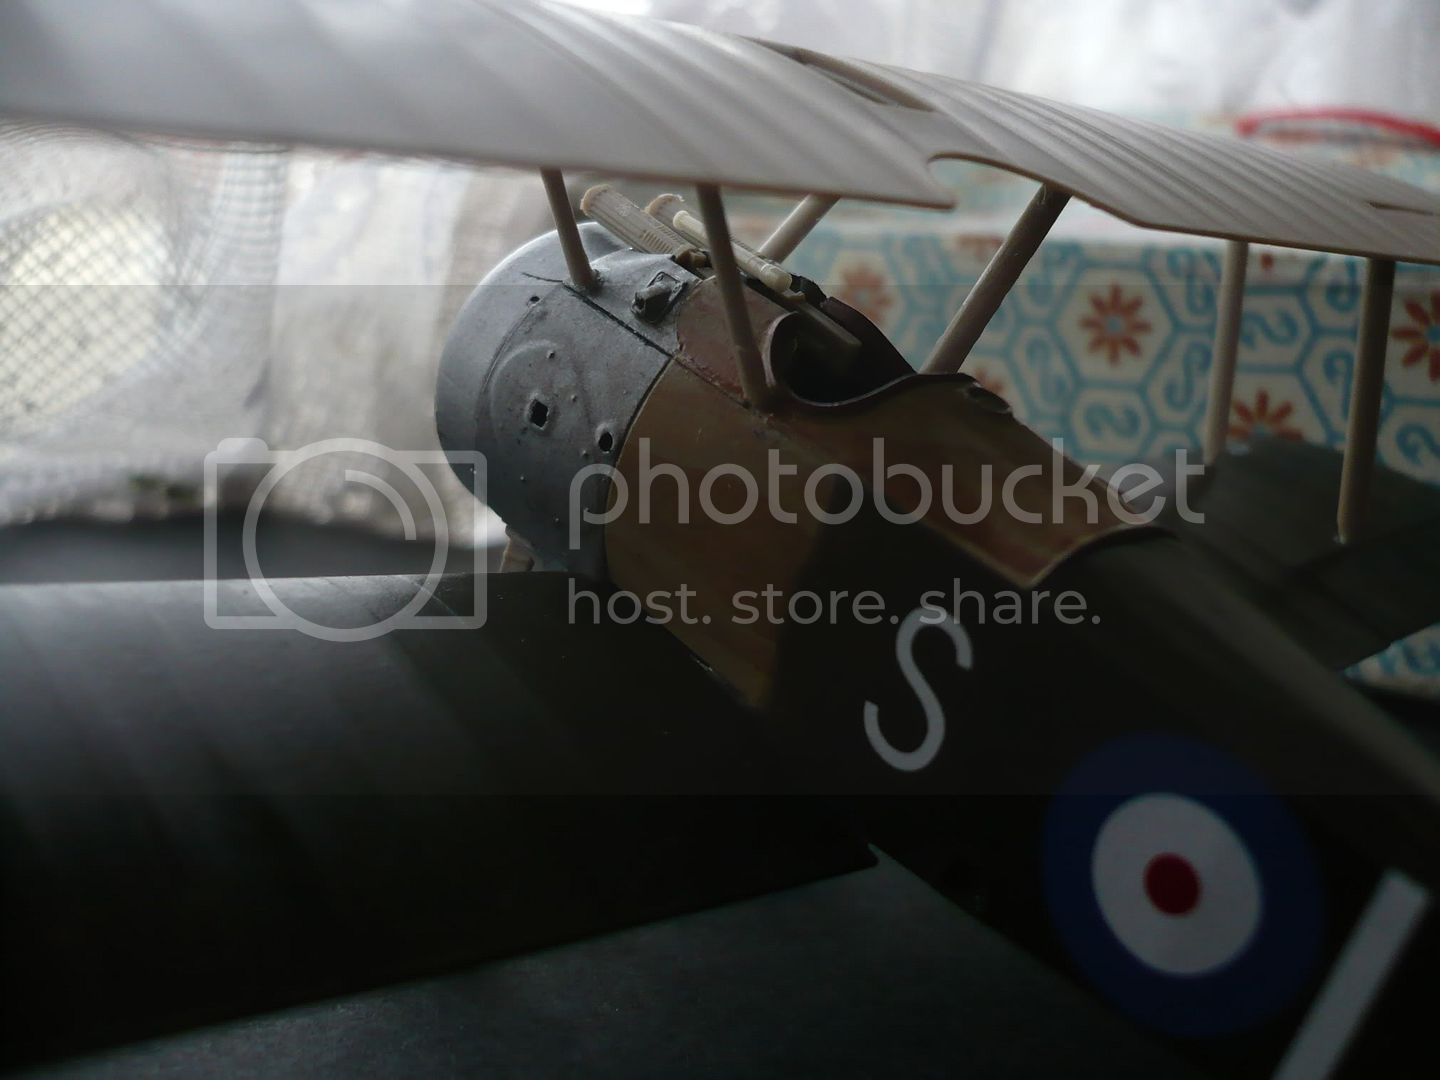
small update, the alclad i used was dull aluminium, now, i thought it was a little shinier, so its pretty dull, but the engone looks brilliant, and it is too think in places, but im happy, ill pop some weatheing on it whn the kits done, so the kits coming along nicely, i have been able to close it up.
small update, the alclad i used was dull aluminium, now, i thought it was a little shinier, so its pretty dull, but the engone looks brilliant, and it is too think in places, but im happy, ill pop some weatheing on it whn the kits done, so the kits coming along nicely, i have been able to close it up.
lespauljames
Joined: January 06, 2007
KitMaker: 3,661 posts
AeroScale: 369 posts
Posted: Monday, February 08, 2010 - 01:40 AM UTC
sorry for double post!
i have plenty of progress.
here we go. looks naked without rigging, im going to rig my second camel fo sho
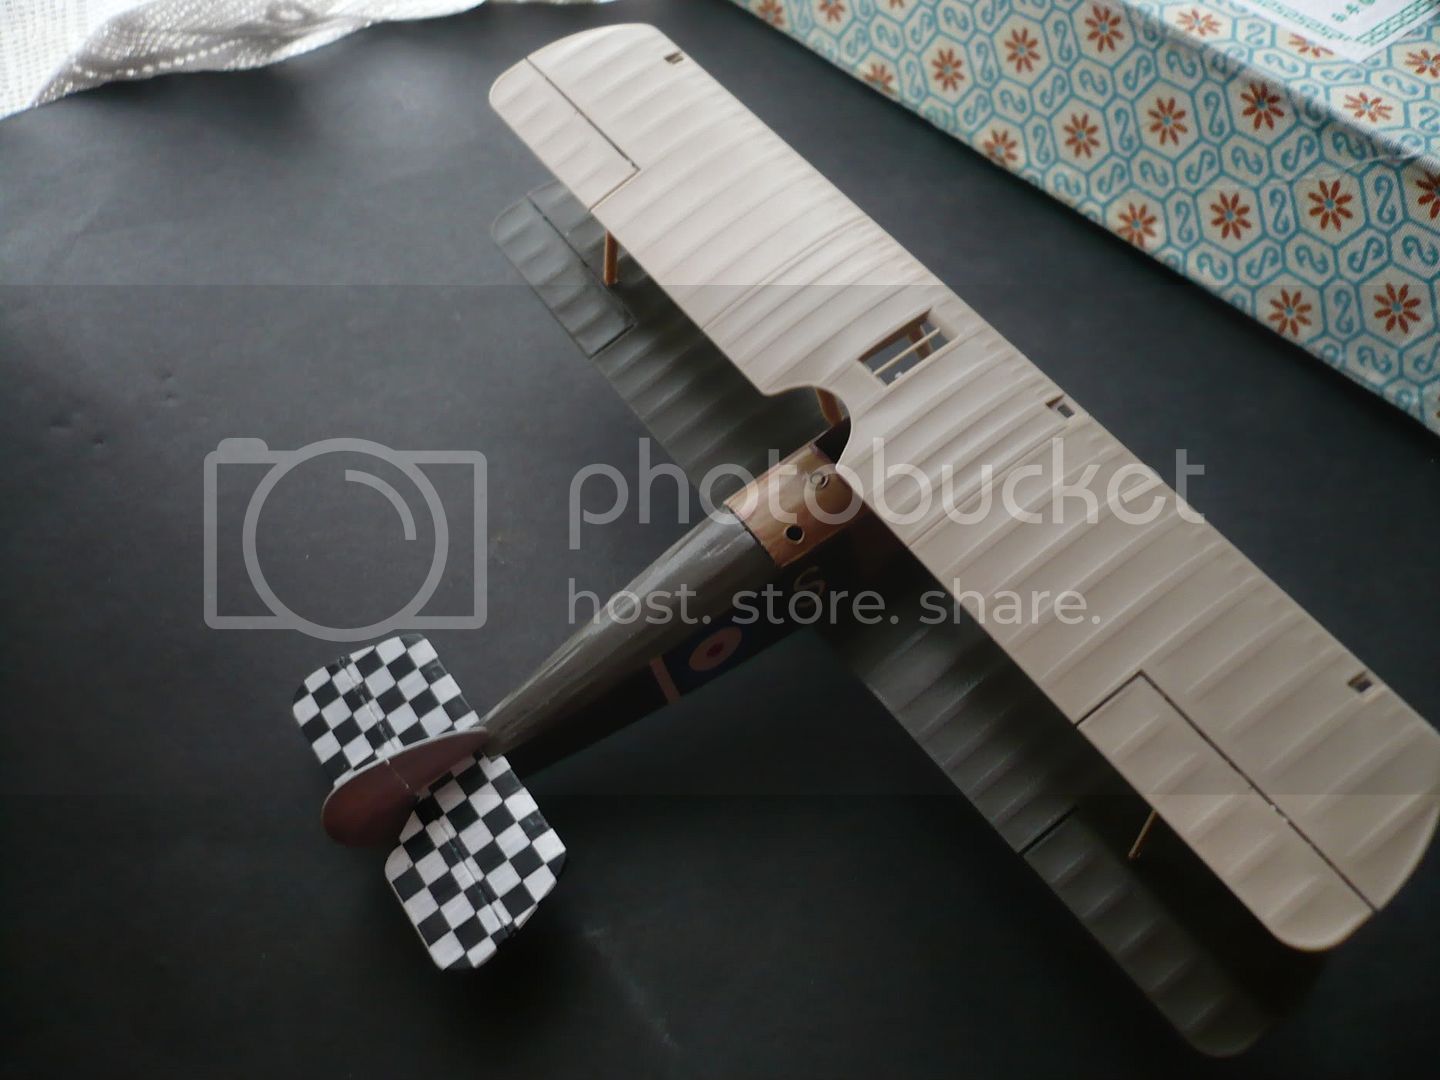


one thing is that i really strugled with placing the top wing. used way too much glue, and in the end resorted to CA, there are some bits of glue still to clean.
i have plenty of progress.
here we go. looks naked without rigging, im going to rig my second camel fo sho
one thing is that i really strugled with placing the top wing. used way too much glue, and in the end resorted to CA, there are some bits of glue still to clean.
jaypee
Joined: February 07, 2008
KitMaker: 1,699 posts
AeroScale: 1,384 posts
Posted: Monday, February 08, 2010 - 10:20 AM UTC
Very cool James.
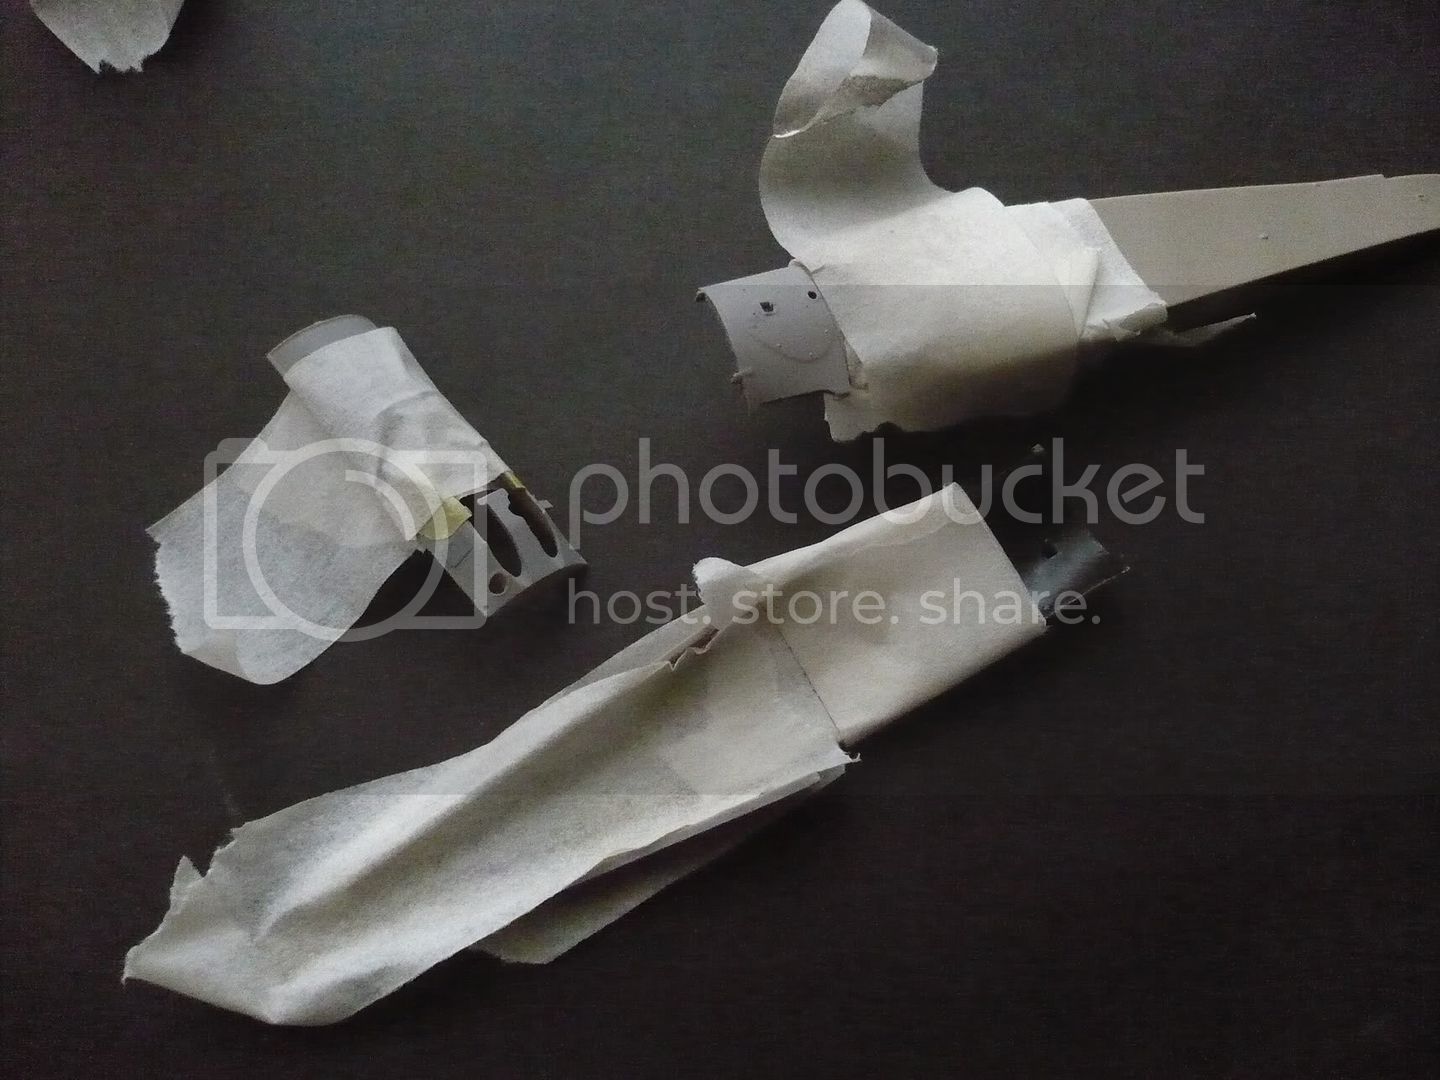
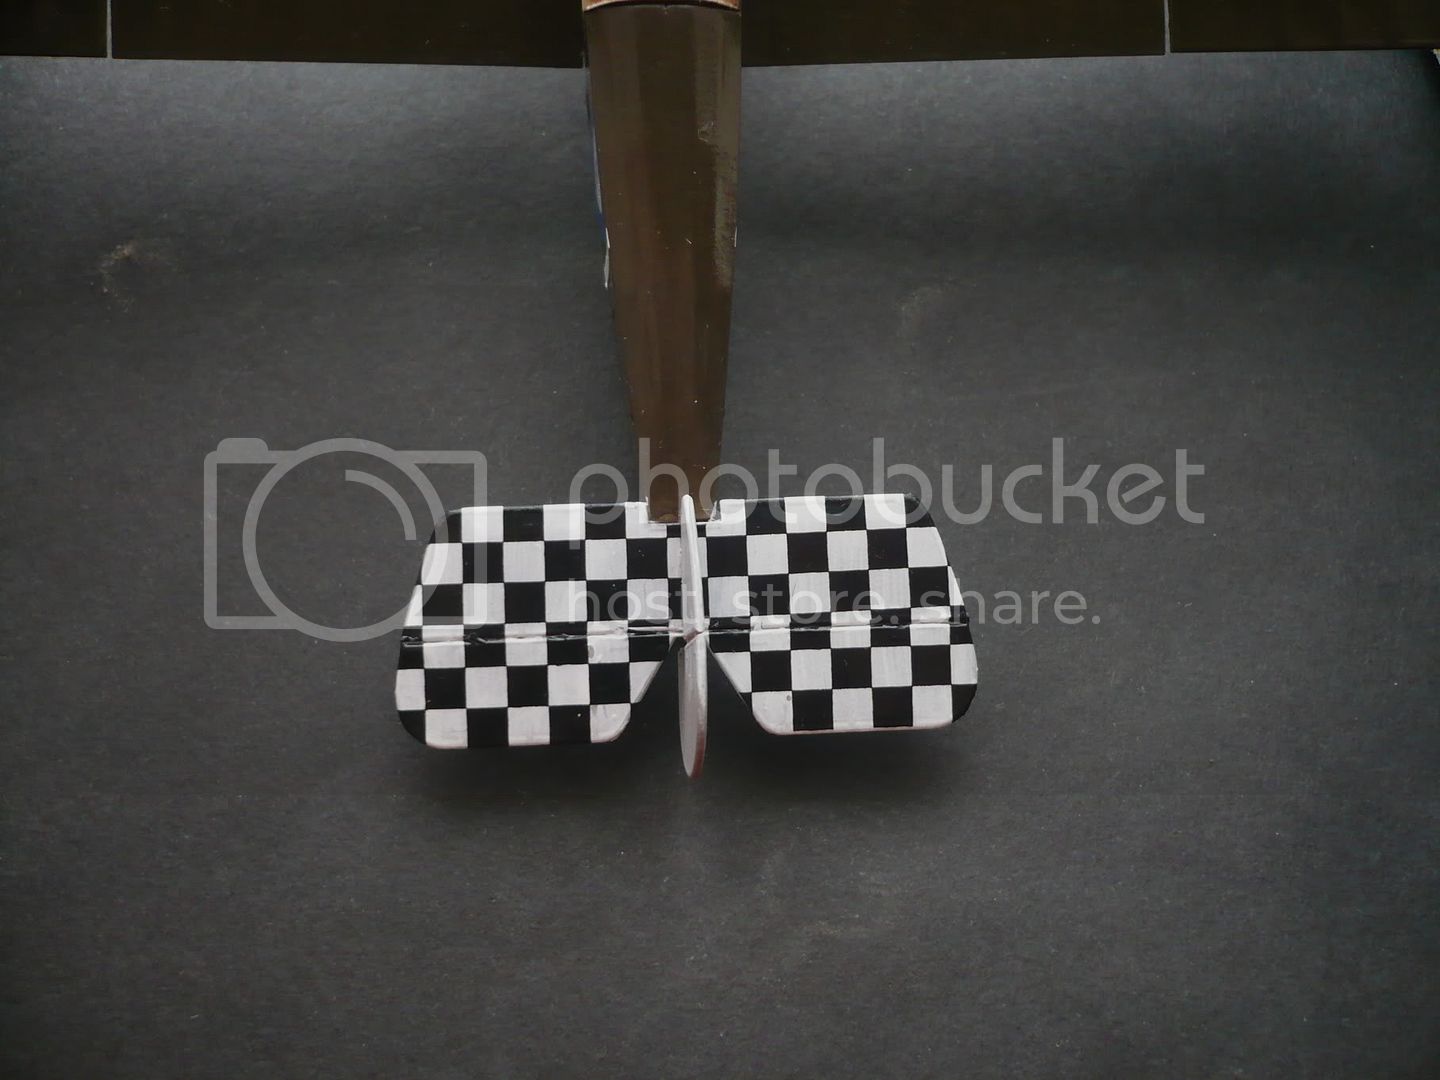
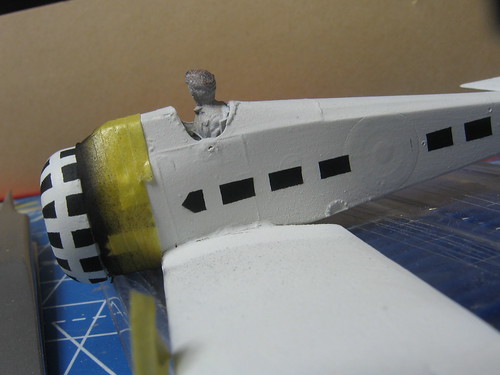
Here is my camel.
Removed all the struts and rigging sanded back the paint job.
Since I'm now got a desk to work at, I thought I'll do the checks proper.
This will be a two stage process. Outer checks first then remask for the inner ones.
1.5 mm strips of tape.
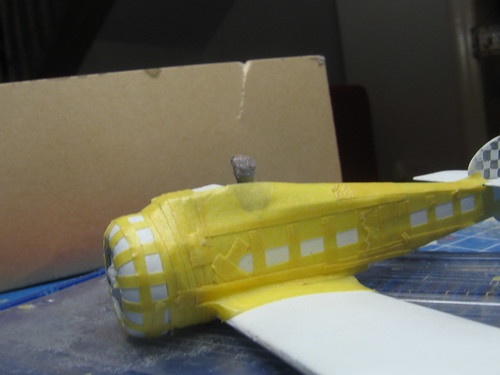
Took about an hour to mask up one side and the cowl.
And about five minutes to paint it. Easy!
Here is my camel.
Removed all the struts and rigging sanded back the paint job.
Since I'm now got a desk to work at, I thought I'll do the checks proper.
This will be a two stage process. Outer checks first then remask for the inner ones.
1.5 mm strips of tape.
Took about an hour to mask up one side and the cowl.
And about five minutes to paint it. Easy!
thegirl
Joined: January 19, 2008
KitMaker: 6,743 posts
AeroScale: 6,151 posts
Posted: Monday, February 08, 2010 - 04:08 PM UTC
I like It James ! You are doing a fine job on this build .
Jaypee , great to see back on this one and congrat's on finally have a desk to work by .
Looking forward to seeing more progress ................
I have painted the last of the details and weathering and she is a drying ...will have pic's up of the finished project tomorrow .
Jaypee , great to see back on this one and congrat's on finally have a desk to work by .
Looking forward to seeing more progress ................
I have painted the last of the details and weathering and she is a drying ...will have pic's up of the finished project tomorrow .
jaypee
Joined: February 07, 2008
KitMaker: 1,699 posts
AeroScale: 1,384 posts
Posted: Monday, February 08, 2010 - 09:30 PM UTC
It makes such a difference to have a decent work area, as opposed to my knee.
Since looking at the hi res pic I've sanded the decals off. Boy is digital
photography critical!
Also got an optivisor and helping hands from a local electronics firm this morning.
Probably essential for 1/72 subjects. I think working with the optivisor will
take a bit of getting used to though.
Can't wait to see that Tamiya p51 finished. Are you going to touch up the front
section of the checks?
lespauljames
Joined: January 06, 2007
KitMaker: 3,661 posts
AeroScale: 369 posts
Posted: Monday, February 08, 2010 - 11:21 PM UTC
thanks Guys, im hoping to decal the top wing in the next hour. woo.
Jaypee i thought the build was 48th by looking at all that masking. seeing it in 72nd is just fantastic.
so Terri the Stangs all finished now,? looking forward to pics!
Jaypee i thought the build was 48th by looking at all that masking. seeing it in 72nd is just fantastic.
so Terri the Stangs all finished now,? looking forward to pics!
thegirl
Joined: January 19, 2008
KitMaker: 6,743 posts
AeroScale: 6,151 posts
Posted: Tuesday, February 09, 2010 - 02:38 PM UTC
Well guy's here are a few pic's before the batteries died 
Not yet Jaypee , but they will get done just not right now .
Looking forward to your progress James on the Camel ...
Any way here are the pic's


For got to paint the front canopy frame !

Not yet Jaypee , but they will get done just not right now .
Looking forward to your progress James on the Camel ...
Any way here are the pic's
For got to paint the front canopy frame !
lespauljames
Joined: January 06, 2007
KitMaker: 3,661 posts
AeroScale: 369 posts
Posted: Thursday, February 11, 2010 - 11:55 PM UTC
nice one Terri, did you apply a wash to that ? if so, looks good, if not, looks good anyway!
jaypee
Joined: February 07, 2008
KitMaker: 1,699 posts
AeroScale: 1,384 posts
Posted: Friday, February 12, 2010 - 11:19 AM UTC
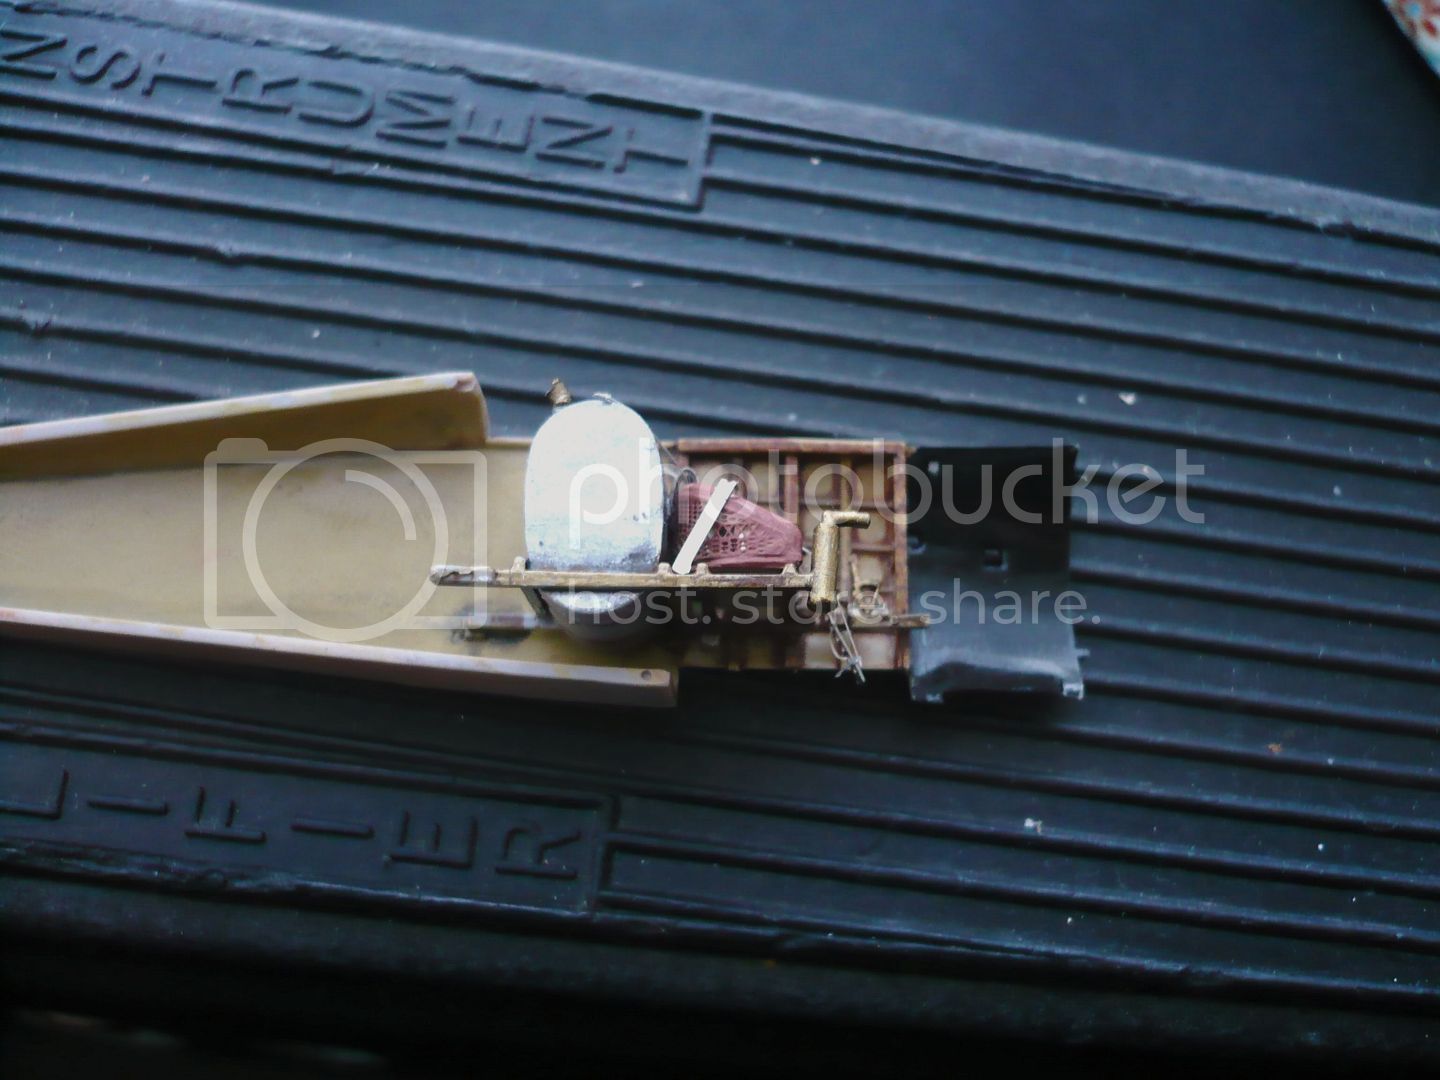
Used this opportunity (see that is management speak for a cock up)
to practice the eyelet and loop rigging technique as demonstrated somewhere
here by our lovely Terri.
Stretching the qtip was really easy, I've done this before for exhaust pipe
but I was surprised how this you can draw it and it still remain a tube. Amazing stuff.
Next made the eyelets with copper wire from standard household flew (strand core) held with
locking tweezers and twisted with .5mm brass rod.
Drilling the holes, making 20 eyelets and fixing them took two hours. But it is pretty
mind numbing so you can watch a movie while doing or Heroes and Mad Men in my case.
Here is the result it's no the neatest but I am restricted as to where I can actually drill holes
after 4 attempts at rigging. It is overscale but it'll look neat and I've got
to make the mistakes to practice this technique.
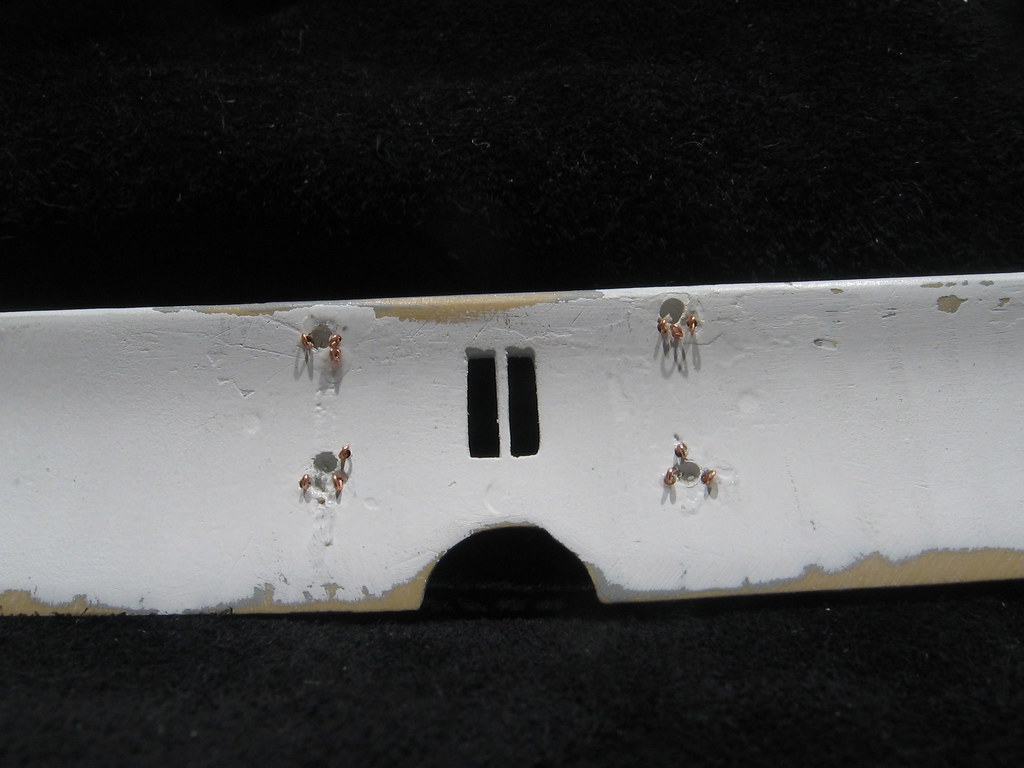
Actually the holes for the struts aren't aligned correctly so I've fixed it, and sanded down some of that rough paint but it is late here and I'm too tired to take another photo. Next time I see y'all here I have the bottom wing done the same and time to paint the wings up. Till then, slan agat.
JP
to practice the eyelet and loop rigging technique as demonstrated somewhere
here by our lovely Terri.
Stretching the qtip was really easy, I've done this before for exhaust pipe
but I was surprised how this you can draw it and it still remain a tube. Amazing stuff.
Next made the eyelets with copper wire from standard household flew (strand core) held with
locking tweezers and twisted with .5mm brass rod.
Drilling the holes, making 20 eyelets and fixing them took two hours. But it is pretty
mind numbing so you can watch a movie while doing or Heroes and Mad Men in my case.
Here is the result it's no the neatest but I am restricted as to where I can actually drill holes
after 4 attempts at rigging. It is overscale but it'll look neat and I've got
to make the mistakes to practice this technique.
Actually the holes for the struts aren't aligned correctly so I've fixed it, and sanded down some of that rough paint but it is late here and I'm too tired to take another photo. Next time I see y'all here I have the bottom wing done the same and time to paint the wings up. Till then, slan agat.
JP
thegirl
Joined: January 19, 2008
KitMaker: 6,743 posts
AeroScale: 6,151 posts
Posted: Sunday, February 14, 2010 - 12:19 AM UTC
Yes James I did apply a wash to it . I used a pin wash method just enought to high-light the panel lines and rivet detail with out going over board with it . Editional weathering was done with oil pastels for the chalk ones won't adhere to the Alclad .
Jaypee , the method does get easier with practice . My first few attempts turned out not to bad , but after you have done it a few times it is a easy method . For finer wire you can use the wire from a set of headphones from a walkman ...etc ..etc .. I do like yours they look great .
Jaypee , the method does get easier with practice . My first few attempts turned out not to bad , but after you have done it a few times it is a easy method . For finer wire you can use the wire from a set of headphones from a walkman ...etc ..etc .. I do like yours they look great .
jaypee
Joined: February 07, 2008
KitMaker: 1,699 posts
AeroScale: 1,384 posts
Posted: Sunday, February 14, 2010 - 09:06 PM UTC
Cool yes I think that should be even finer. In fact I'll bet in work (electronics) they have some REALLY thin wire for prototyping as it needs to be less than the size of a pin on a chip. I'll check the stores this morning. I'll see what I can find and report back.
 |

WEB HOSTING BY


Copyright ©2021 AeroScale and Kitmaker Network, a subsidiary of Silver Star Enterprises
All Rights Reserved. Please read our Conditions of Use and Privacy Policy.
All Rights Reserved. Please read our Conditions of Use and Privacy Policy.