Beautiful job Martin, the paint and weathering are spot on !!
Well done, D
Air Campaigns
Want to start or join a group build? This is where to start.
Want to start or join a group build? This is where to start.
Hosted by Frederick Boucher, Michael Satin
Official BF 109 Campaign
Posted: Monday, July 26, 2010 - 03:17 AM UTC

Siderius

Joined: September 20, 2005
KitMaker: 1,747 posts
AeroScale: 1,673 posts

Posted: Monday, July 26, 2010 - 01:50 PM UTC
Martin, just wanted to add that's a great looking 109! Good job on the build. Russell
thegirl

Joined: January 19, 2008
KitMaker: 6,743 posts
AeroScale: 6,151 posts

Posted: Tuesday, July 27, 2010 - 03:36 AM UTC
I'm back guy's !
Big thanks to D for his aid in helping out , hope you guy's went easy on him .
Very nice so far Hermann , love the camo !
Martin , wow ; super job done on your build ! Very nice and clean paint work .
I really like how the cowl is up on the one side showing of the engine .
Thanks for joinning the GB and sharing your work with the rest of us

Posted: Tuesday, July 27, 2010 - 03:46 AM UTC
Always a pleasure to help out Terri (not that I had to do much).
Great to see you back online.
Cheers, D
Great to see you back online.
Cheers, D
AIRGUNNER

Joined: September 27, 2006
KitMaker: 246 posts
AeroScale: 234 posts

Posted: Tuesday, July 27, 2010 - 04:46 AM UTC
Well, I finally have some time to devote to this campaign. There are already some lovely builds here, and a really high standard set. I hope I can do as good a job.
Right, on to the kit. Its Airfix old 1/24th 109. I.m still not sure which option I will go for, I will decide nearer paint time.
A bit of progress, cockpit is nearly done, a couple of details still to do, seat belts are Eduard, all paints are Xtracrilics.

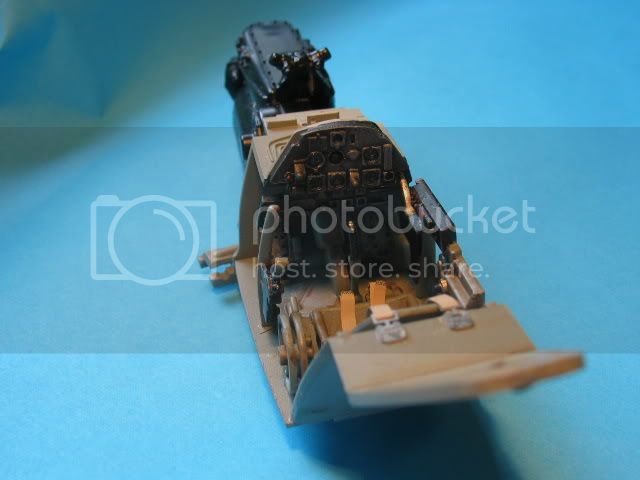
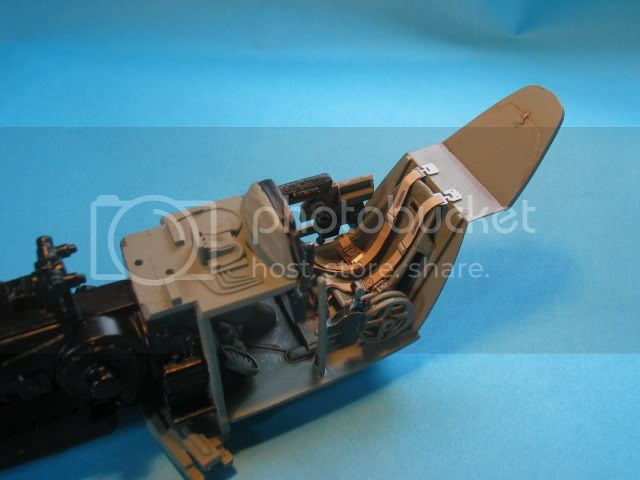
Engine will not be detailled, just given a coat of black so the prop aligns correctly. Engine covers will all be modelled shut, as this build will go to a friends son when its done.
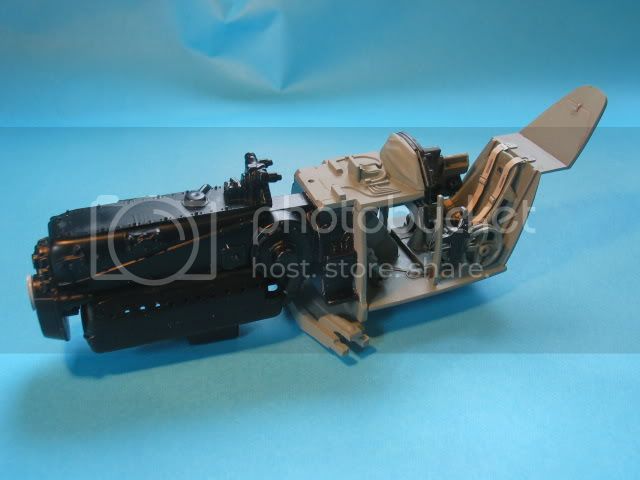
More come soon, any critique more than welcome.
Steve
Right, on to the kit. Its Airfix old 1/24th 109. I.m still not sure which option I will go for, I will decide nearer paint time.
A bit of progress, cockpit is nearly done, a couple of details still to do, seat belts are Eduard, all paints are Xtracrilics.


Engine will not be detailled, just given a coat of black so the prop aligns correctly. Engine covers will all be modelled shut, as this build will go to a friends son when its done.

More come soon, any critique more than welcome.
Steve
hkopper

Joined: March 01, 2008
KitMaker: 529 posts
AeroScale: 340 posts

Posted: Tuesday, July 27, 2010 - 05:39 AM UTC
Great finish Martin!
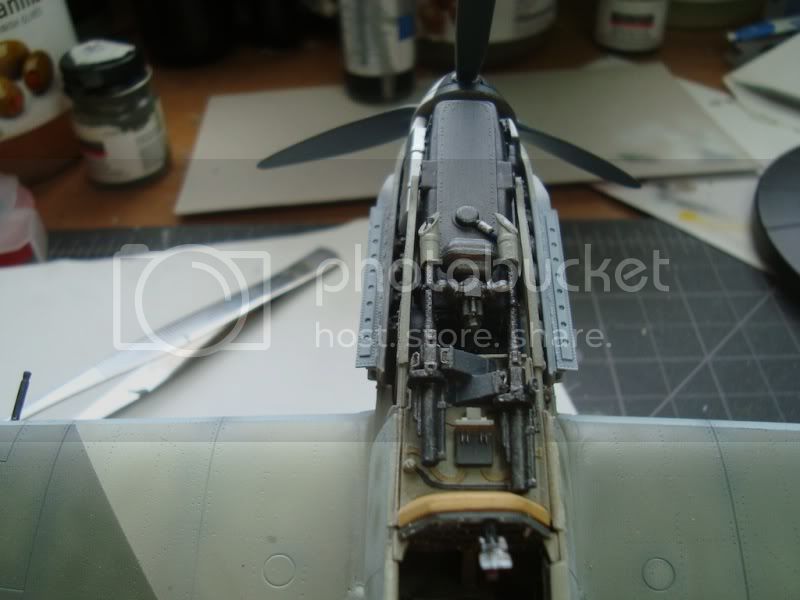
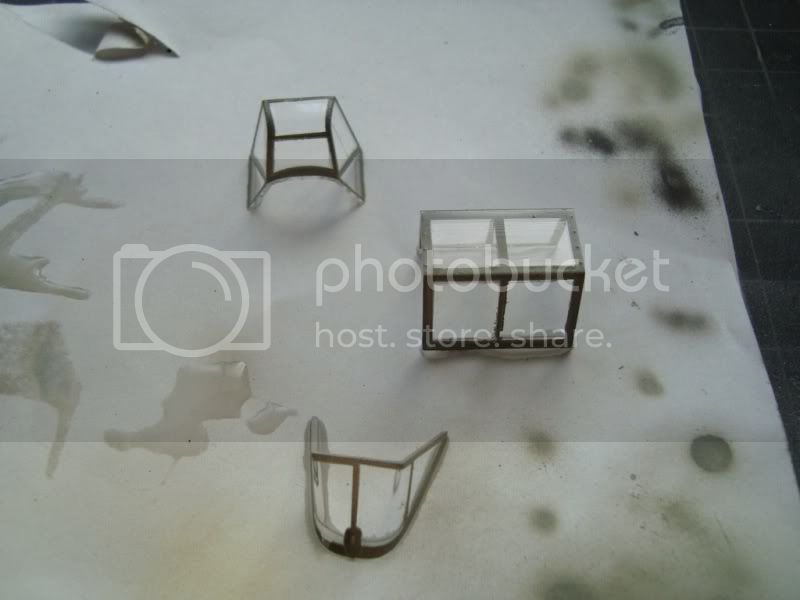
I've painted most to the small parts and the canopy. I will now add a coat of Future in anticipation of the decals and weathering. Here are some pix of my progress:
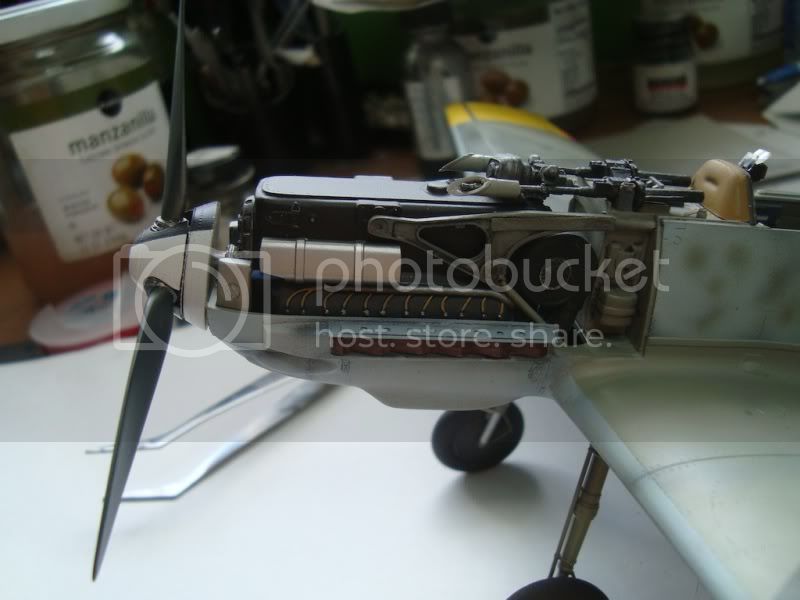
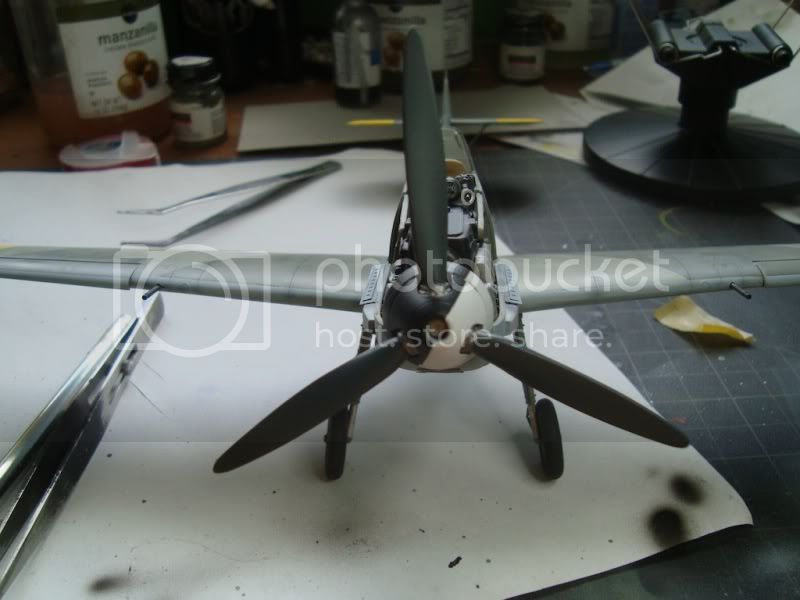
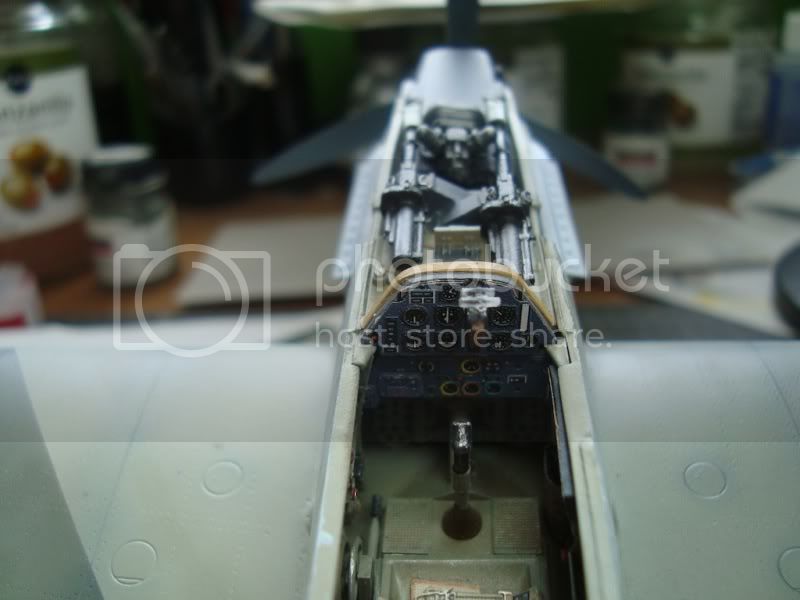
Thanks for watching,
Hermann.
I've painted most to the small parts and the canopy. I will now add a coat of Future in anticipation of the decals and weathering. Here are some pix of my progress:


Thanks for watching,
Hermann.

Emeritus

Joined: March 30, 2004
KitMaker: 2,845 posts
AeroScale: 1,564 posts

Posted: Tuesday, July 27, 2010 - 07:10 AM UTC
Too long time, no see.
Well, the weathers have been quite too hot for working at the bench, so at least I got an excuse...
But anyway, here's some progess on my entry:
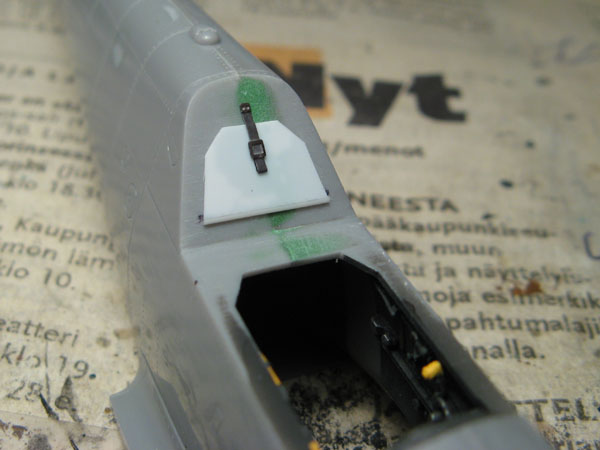
As the back shelf of the cockpit was absent of any details, I added the storage locker door made from styrene sheet, with stretched sprue for the hinge, as well as a strap from some left-over PE part.
After painting the cockpit opening, I glued in the cockpit module from underneath.
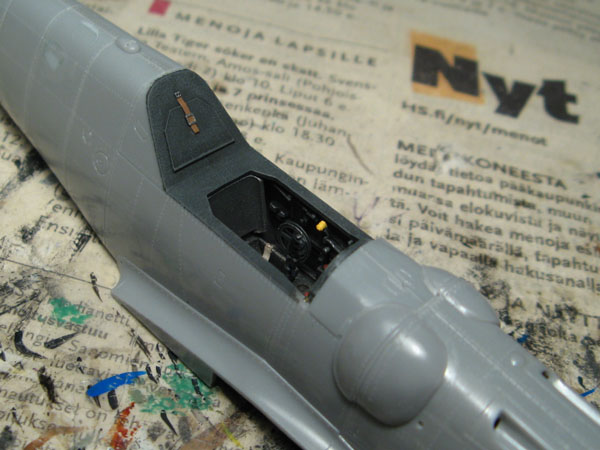
Although the Aires cockpit set comes with a Galland panzer made up from two PE parts, I decided to use the kit, as the PE contraption looked quite flimsy and equally tricky to assemble neatly enough.
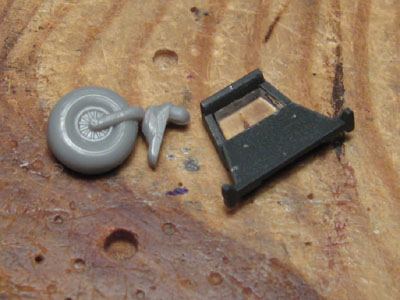
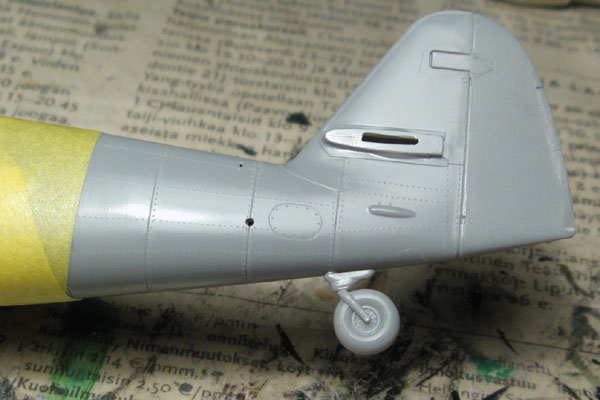
The tail wheel problem was solved by cutting off the wheel marred by the sink mark and replacing it with the larger of the two left-over tail wheels provided in the kit. Not exactly the same, but looks the part.
Wanting to use a supercharger intake filter (those Finnish backwoods airfields were dusty), I dug out the left-overs of a PART PE set from which I hadn't used the filter.
The construction looked overly tricky though:
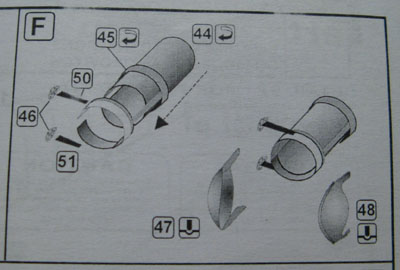
Now rolling one part into a tube I can manage, but gluing a second part over the first and keeping the whole thing intact AND attaching all the other gizmos, no way...
After a quick pondering, I took a bit of a shortcut:
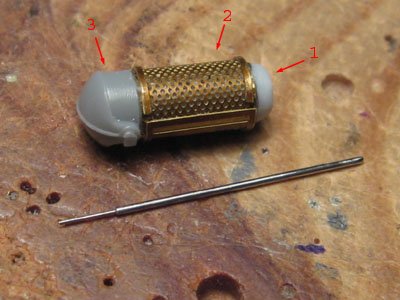
1) A length of sprue to make a ridig core for the filter screen as well as a mount to the intake pipe
2) the PE filter screen and frame
3) the front of the kit part.
A slight bummer is that the filter screen is of the early type (it's from a G-2 set), while the late type would probably be more appropriate for this, but I think I'll have to make do with this one.
I took while and browsed Eduard's website and some of their older PE sets seem to include both early and late types of filter screens, but those sets are out production (not that I'd rush out to buy a set just for the filter screen), and the newer ones don't seem to include even one type.
Below the filter is a new pitot tube made from steel wire and a hypodermic needle.
Next stop: attaching the wings and stabilizers. It'll be starting to look like an airplane....

Well, the weathers have been quite too hot for working at the bench, so at least I got an excuse...

But anyway, here's some progess on my entry:
As the back shelf of the cockpit was absent of any details, I added the storage locker door made from styrene sheet, with stretched sprue for the hinge, as well as a strap from some left-over PE part.

After painting the cockpit opening, I glued in the cockpit module from underneath.

Although the Aires cockpit set comes with a Galland panzer made up from two PE parts, I decided to use the kit, as the PE contraption looked quite flimsy and equally tricky to assemble neatly enough.

The tail wheel problem was solved by cutting off the wheel marred by the sink mark and replacing it with the larger of the two left-over tail wheels provided in the kit. Not exactly the same, but looks the part.

Wanting to use a supercharger intake filter (those Finnish backwoods airfields were dusty), I dug out the left-overs of a PART PE set from which I hadn't used the filter.
The construction looked overly tricky though:

Now rolling one part into a tube I can manage, but gluing a second part over the first and keeping the whole thing intact AND attaching all the other gizmos, no way...
After a quick pondering, I took a bit of a shortcut:

1) A length of sprue to make a ridig core for the filter screen as well as a mount to the intake pipe
2) the PE filter screen and frame
3) the front of the kit part.
A slight bummer is that the filter screen is of the early type (it's from a G-2 set), while the late type would probably be more appropriate for this, but I think I'll have to make do with this one.
I took while and browsed Eduard's website and some of their older PE sets seem to include both early and late types of filter screens, but those sets are out production (not that I'd rush out to buy a set just for the filter screen), and the newer ones don't seem to include even one type.
Below the filter is a new pitot tube made from steel wire and a hypodermic needle.
Next stop: attaching the wings and stabilizers. It'll be starting to look like an airplane....


AIRGUNNER

Joined: September 27, 2006
KitMaker: 246 posts
AeroScale: 234 posts

Posted: Wednesday, July 28, 2010 - 03:43 AM UTC
Very small update with mine..
Fuselage is closed, but covered in clamps and tape so no pictures, hopefully tomorrow if the glue sets up nicely,
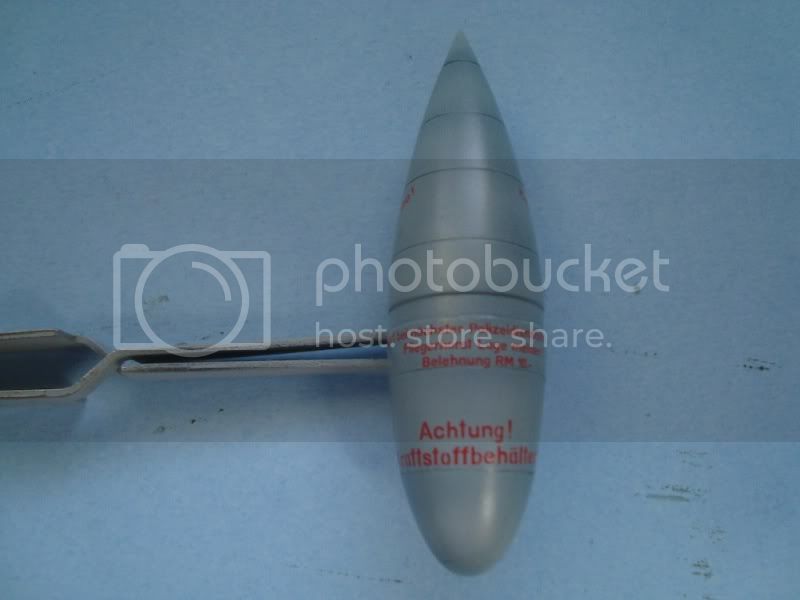
Prop is done though!
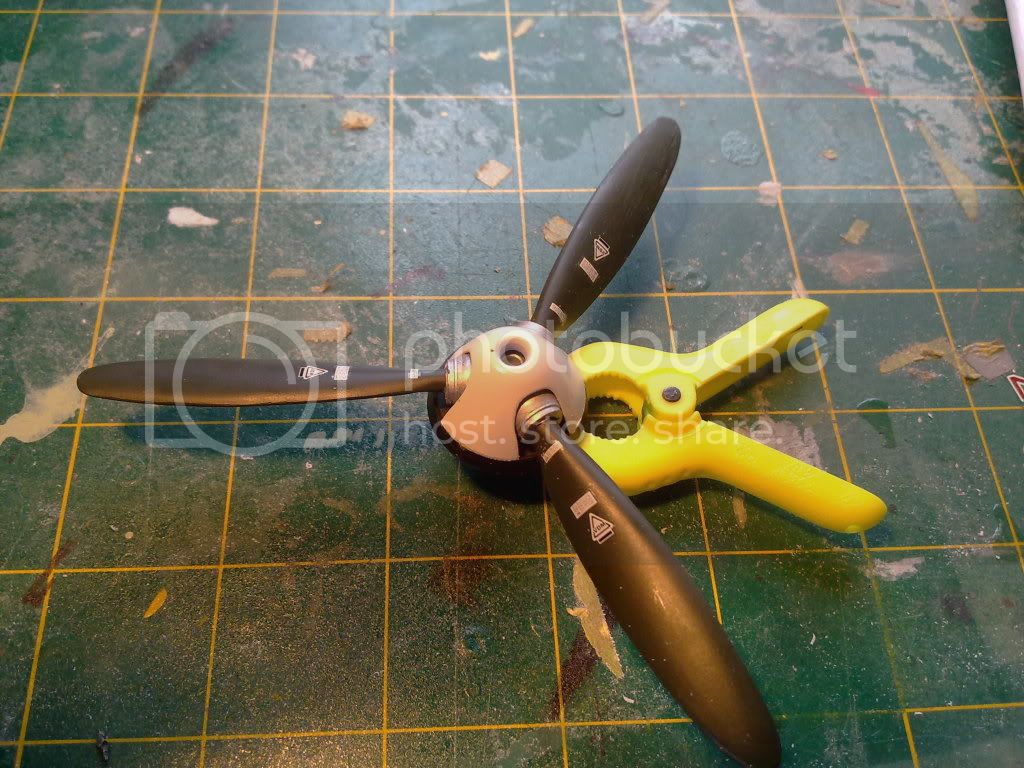
I've decided to do it as Yellow 1 of Oblt. Pips Priller of 6./JG51 as these decals are in the box, and I haven't time to wait for more to be delivered.
Steve
Fuselage is closed, but covered in clamps and tape so no pictures, hopefully tomorrow if the glue sets up nicely,
Prop is done though!

I've decided to do it as Yellow 1 of Oblt. Pips Priller of 6./JG51 as these decals are in the box, and I haven't time to wait for more to be delivered.
Steve
hkopper

Joined: March 01, 2008
KitMaker: 529 posts
AeroScale: 340 posts

Posted: Thursday, July 29, 2010 - 12:49 AM UTC
I'm inching closer to the finish line (this is going to be another close one)! The next step on my agenda will be weathering.
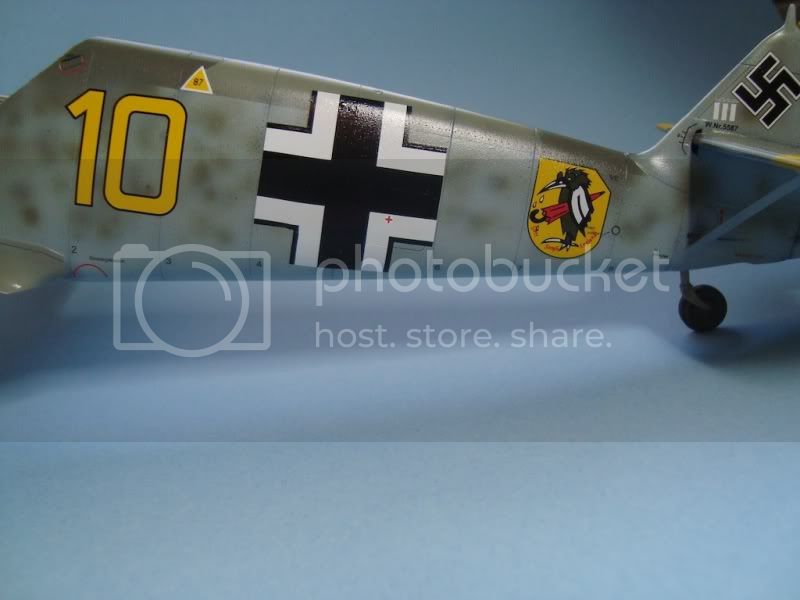
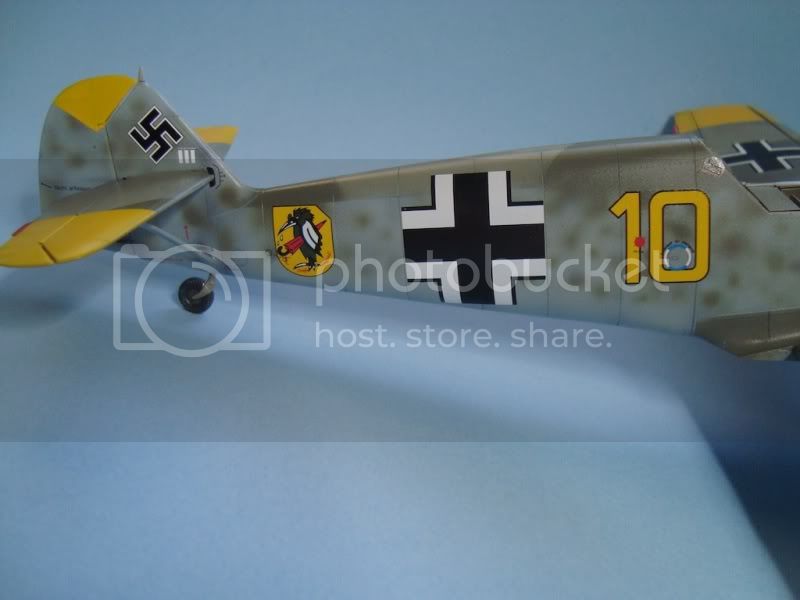
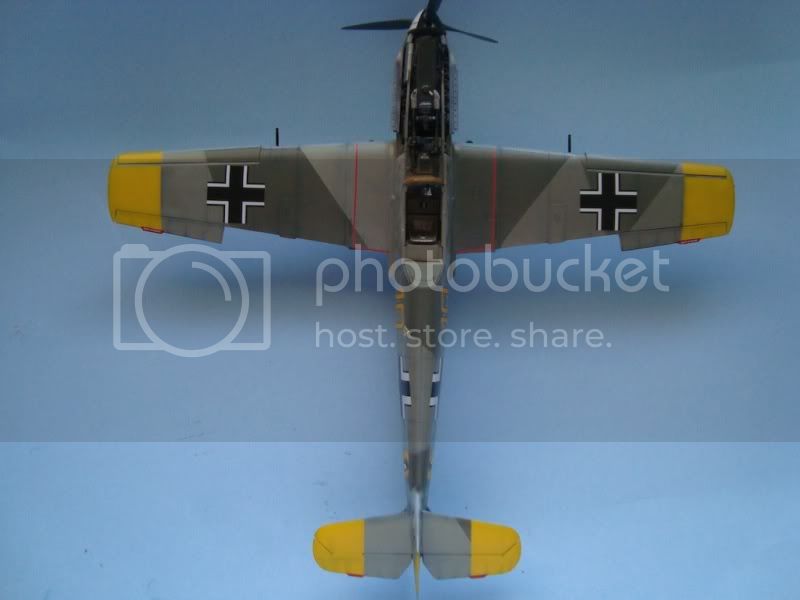
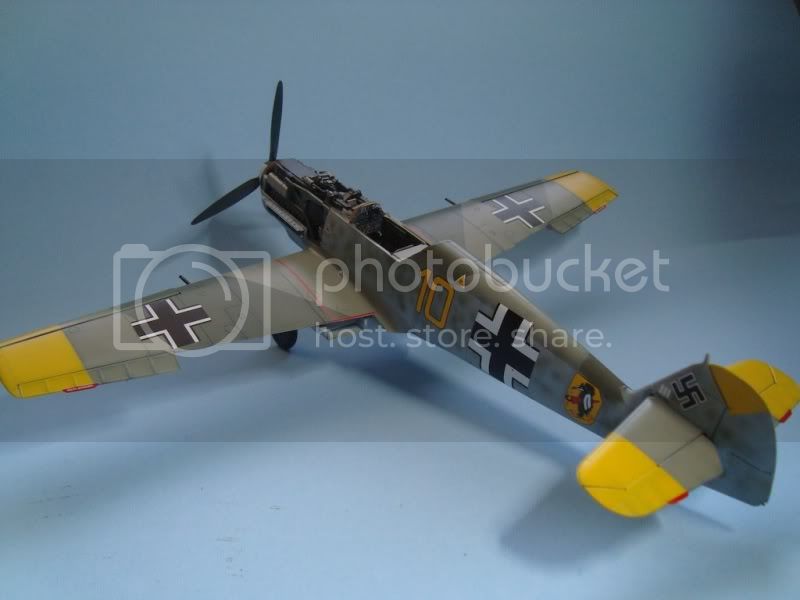
Thanks for watching,
Hermann.


Thanks for watching,
Hermann.
thegirl

Joined: January 19, 2008
KitMaker: 6,743 posts
AeroScale: 6,151 posts

Posted: Thursday, July 29, 2010 - 01:58 AM UTC
As always Eetu excellent attention to the details . Glad you were able to work out the tail wheel issue , looking forward to your next up-date 
Prop looks good Steve
Hermann , Awesome ! Really looking forward to the weathering you have rrally put your heart into this build , your best one to date !

Prop looks good Steve

Hermann , Awesome ! Really looking forward to the weathering you have rrally put your heart into this build , your best one to date !

hkopper

Joined: March 01, 2008
KitMaker: 529 posts
AeroScale: 340 posts

Posted: Friday, July 30, 2010 - 04:40 AM UTC
Thanks Terri for those kind words!
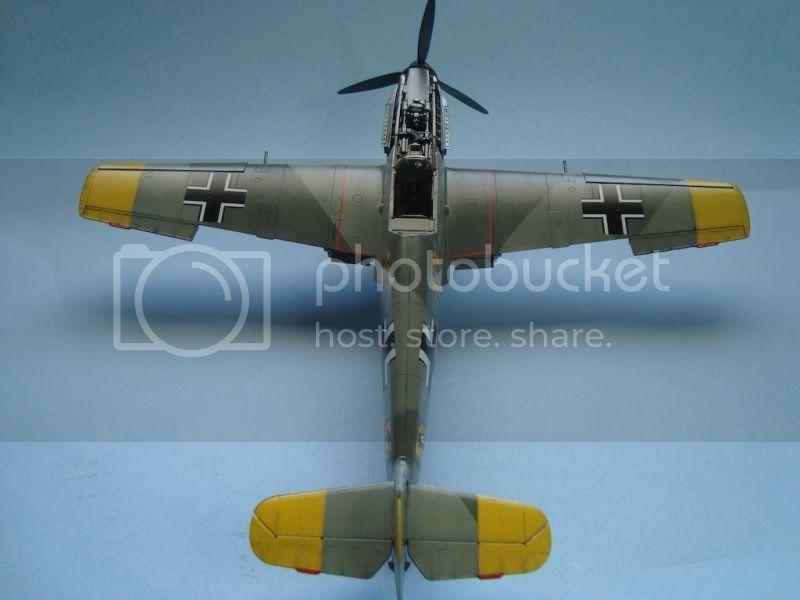
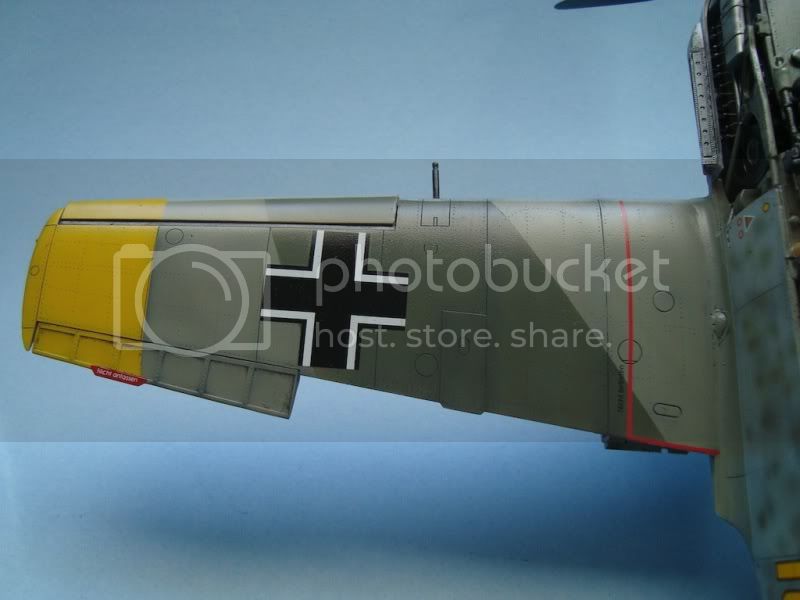
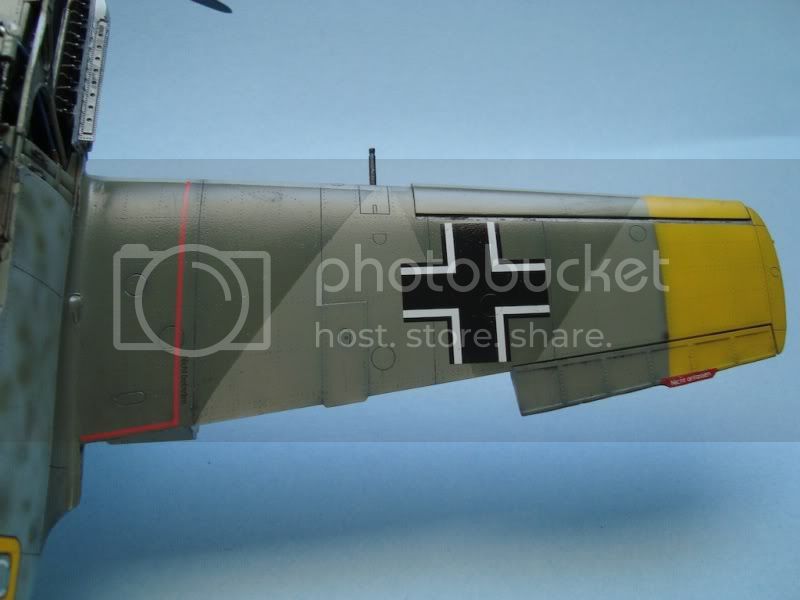
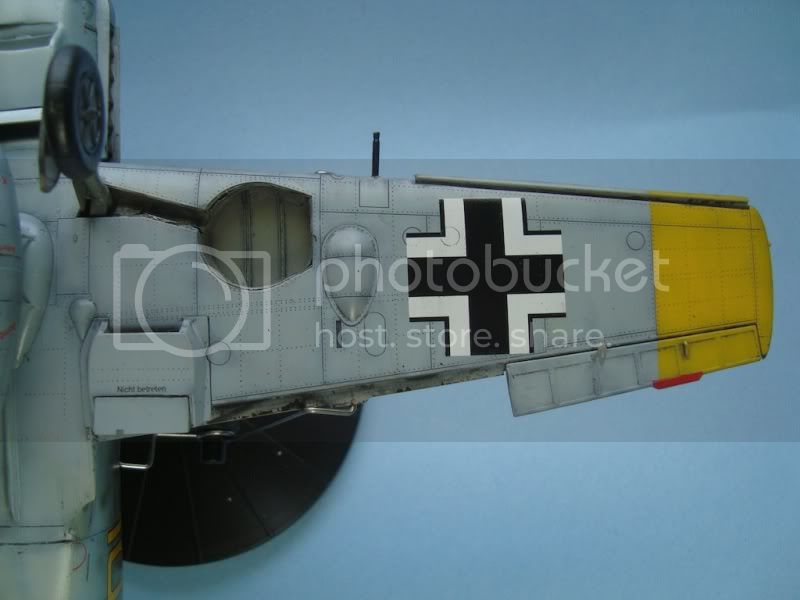
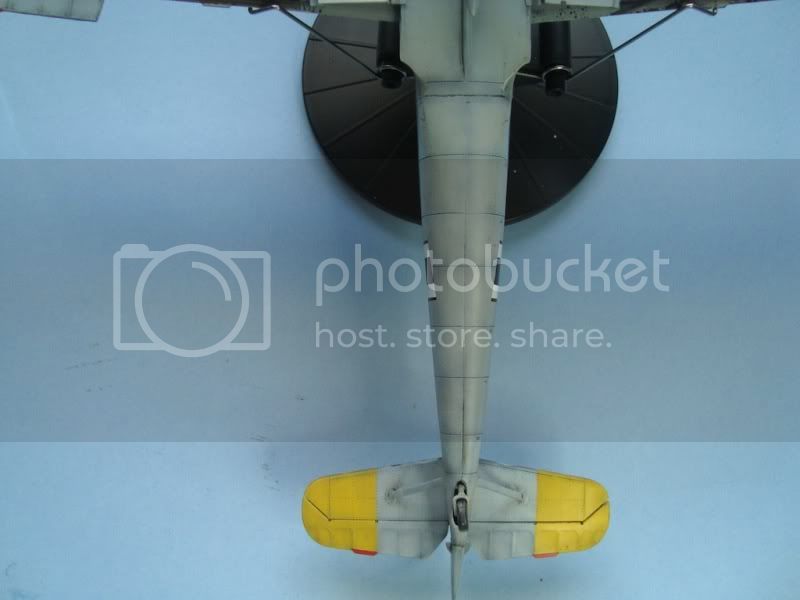
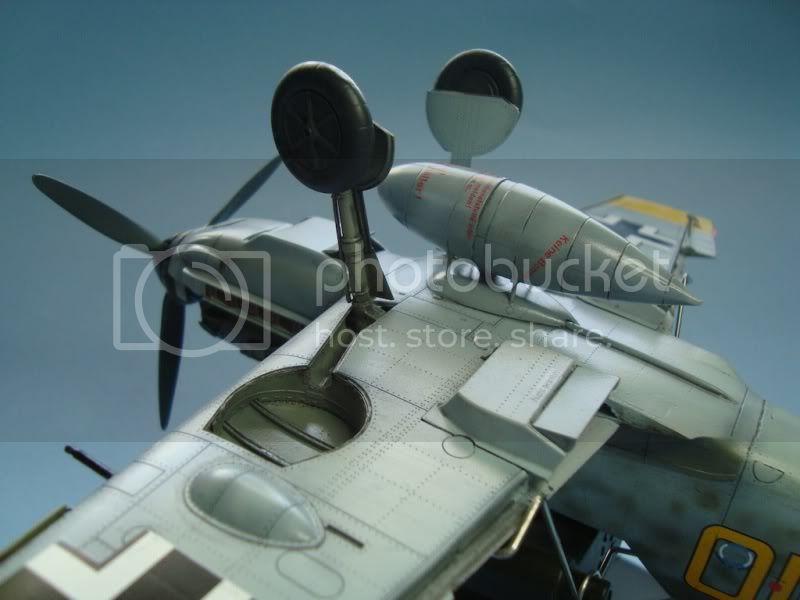
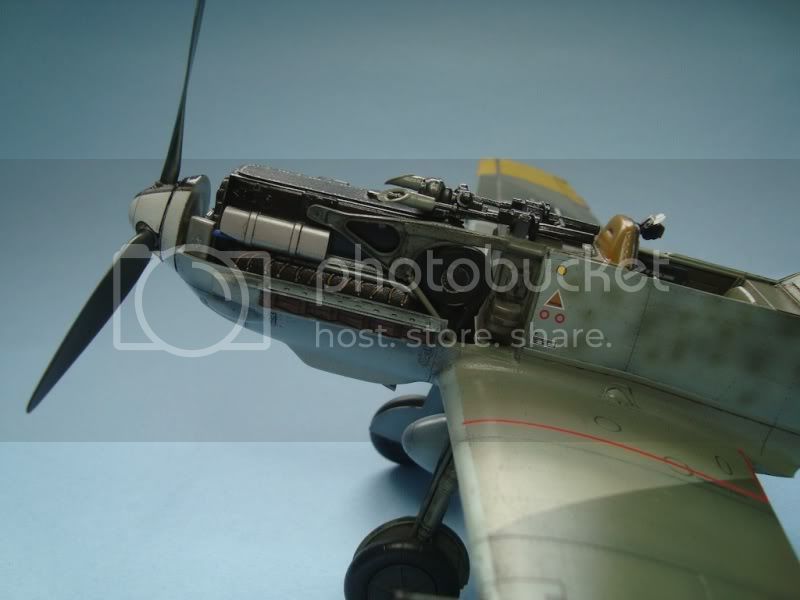
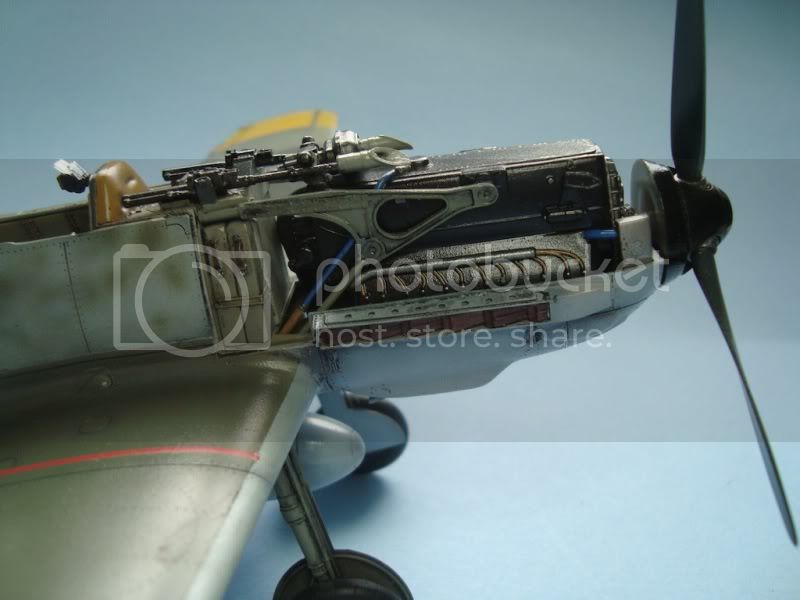
Here are some more pix illustrating my progress through the weathering process. Here I'm using both oil washes and Promodeller's clay wash (dark dirt and black):
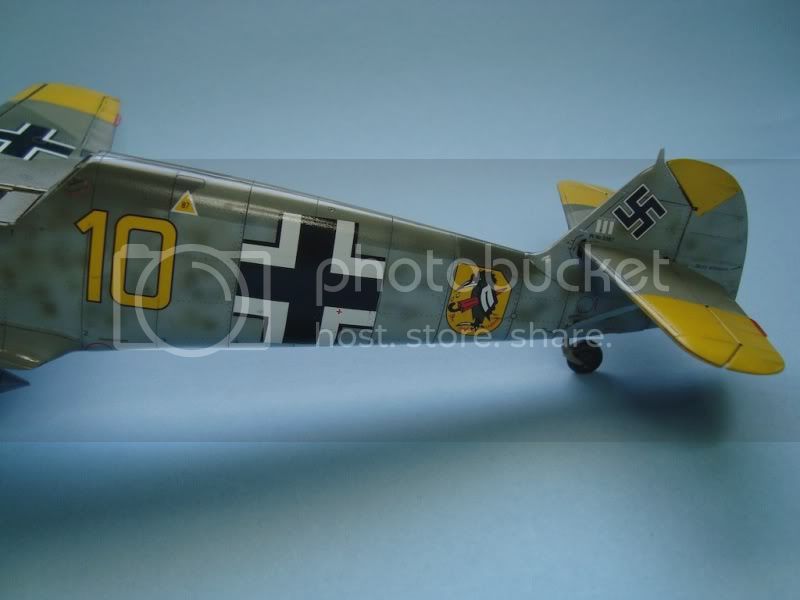
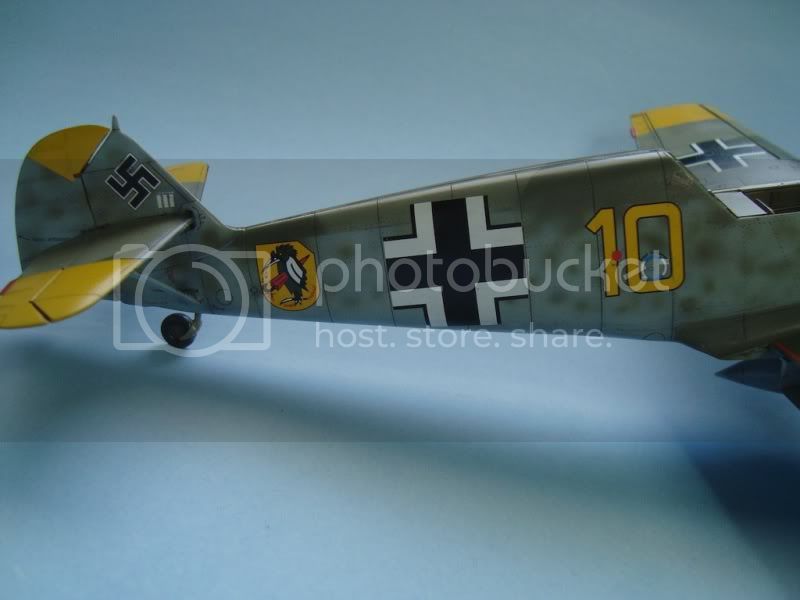
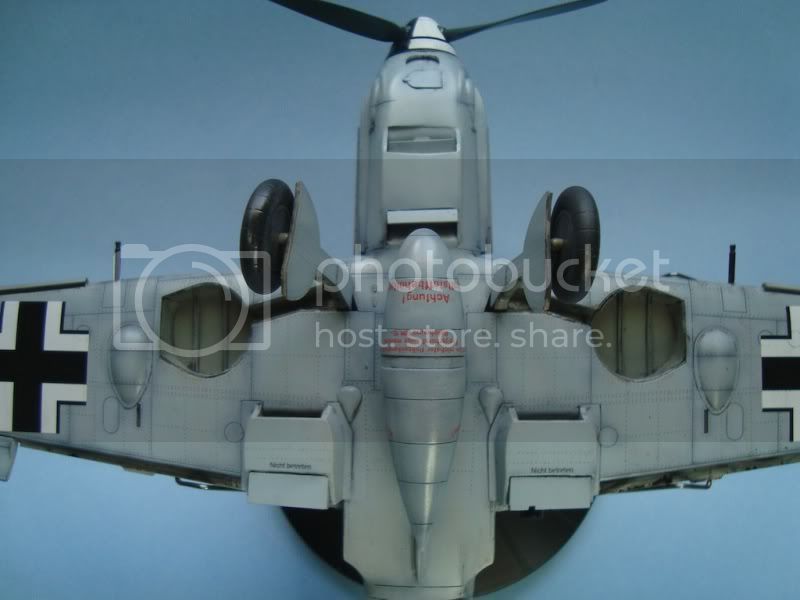
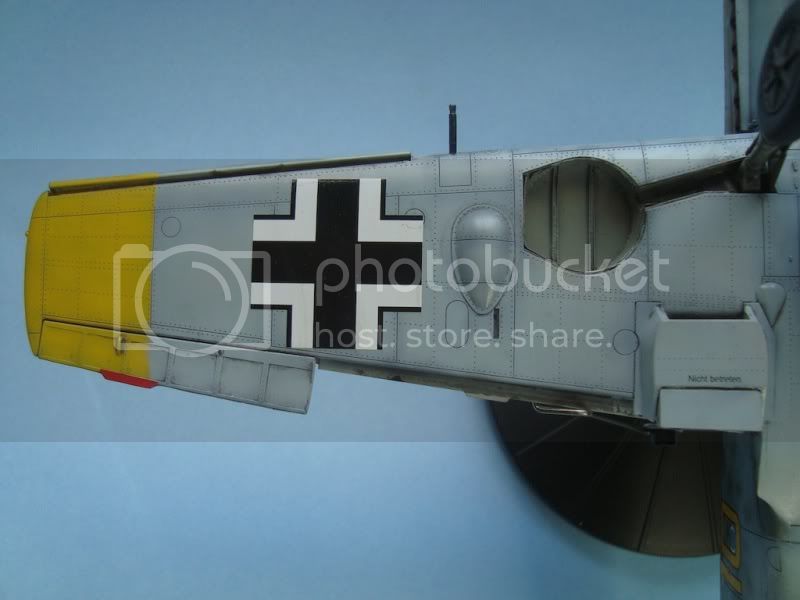
Thanks for watching,
Hermann.
Here are some more pix illustrating my progress through the weathering process. Here I'm using both oil washes and Promodeller's clay wash (dark dirt and black):


Thanks for watching,
Hermann.

Emeritus

Joined: March 30, 2004
KitMaker: 2,845 posts
AeroScale: 1,564 posts

Posted: Friday, July 30, 2010 - 09:55 AM UTC
@ Hermann: Very nice job on the weathering, keep up the good work. The details stand out nicely without being too heavily accented. 
Thanks Terri! Glad you like it.
Well, here's some more progress:
Today I got to to point where I think I got all the riveting done. Not by any means perfect, with some wonkiness here and there, spacing inconsistencies, etc. But I think I could have done worse for a first time.
It's looking like an airplane and there's not too much still left to be done before I can prime the thing and get going on the exterior.
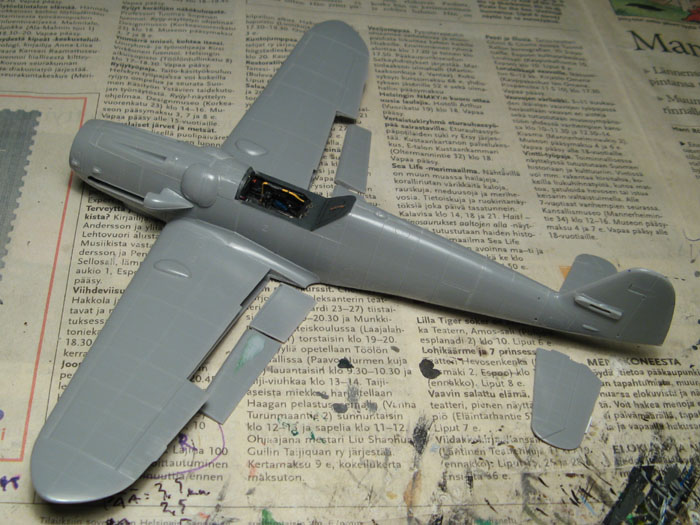
Not much difference between last update and now though, mostly little things, apart from gluing the wing in place.
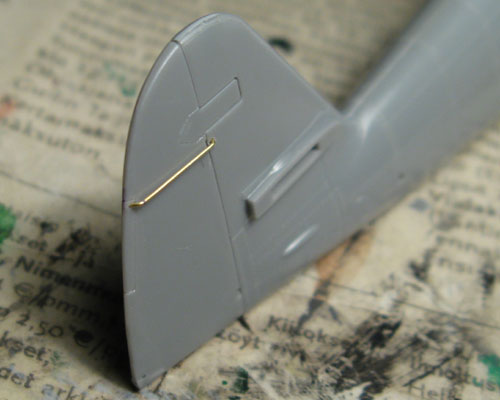
A new rudder trim tab actuator made from brass wire replaced solid moulded-in detail:
I didn't do the riveting on the bottom of the fuselage near the wing-to-fuselage seam until having attached the wing and smoothed out the seam as that's one of the few joints in the kit that do not fall on natural seam lines. Also the only (in addition to that sink mark on the left landing flap) area that required any real filling (and that's still very minor). One smear of putty followed by sanding, Mr. Surfacer, and sanding once more took care of it.
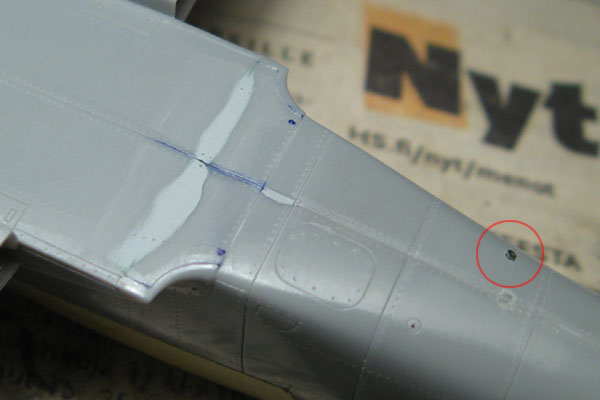
While I was at it, looking at my references, I ended up adding a fuel vent pipe made from a hypodermic needle, flattened with a hammer and glued in place where the kit only had a small recessed line oval shape.
Being that far in the madness, I reasoned I was too far to not go further and added two more pipes to front, near the wing roots.
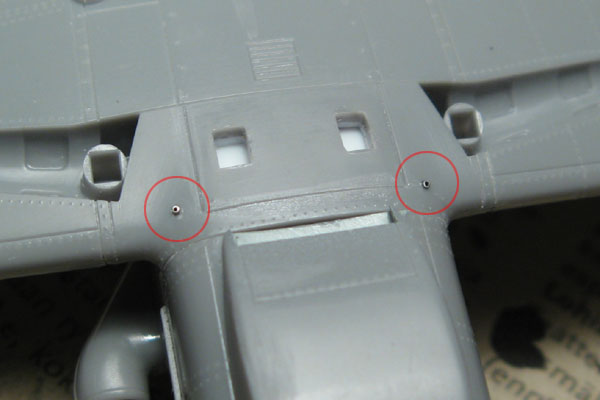
Btw, does anyone know what these are for? They look like some sort of vent pipes to me... The Aero Detail I have don't mention them in the photo caption texts (or at least in the English translations).


Thanks Terri! Glad you like it.
Well, here's some more progress:
Today I got to to point where I think I got all the riveting done. Not by any means perfect, with some wonkiness here and there, spacing inconsistencies, etc. But I think I could have done worse for a first time.

It's looking like an airplane and there's not too much still left to be done before I can prime the thing and get going on the exterior.

Not much difference between last update and now though, mostly little things, apart from gluing the wing in place.
A new rudder trim tab actuator made from brass wire replaced solid moulded-in detail:

I didn't do the riveting on the bottom of the fuselage near the wing-to-fuselage seam until having attached the wing and smoothed out the seam as that's one of the few joints in the kit that do not fall on natural seam lines. Also the only (in addition to that sink mark on the left landing flap) area that required any real filling (and that's still very minor). One smear of putty followed by sanding, Mr. Surfacer, and sanding once more took care of it.

While I was at it, looking at my references, I ended up adding a fuel vent pipe made from a hypodermic needle, flattened with a hammer and glued in place where the kit only had a small recessed line oval shape.
Being that far in the madness, I reasoned I was too far to not go further and added two more pipes to front, near the wing roots.

Btw, does anyone know what these are for? They look like some sort of vent pipes to me... The Aero Detail I have don't mention them in the photo caption texts (or at least in the English translations).

mpatman

Joined: March 09, 2006
KitMaker: 248 posts
AeroScale: 160 posts

Posted: Friday, July 30, 2010 - 05:42 PM UTC
Hi all,
I started my build 2 weeks ago and have just got around to putting up some pics:


Cheers,
Mark
I started my build 2 weeks ago and have just got around to putting up some pics:


Cheers,
Mark
Posted: Saturday, July 31, 2010 - 12:02 PM UTC
Hermann, Eetu, Mark, WOW guys, superb builds going on everywhere here. Hermann's awesome paint and weathering, Eetu's scary detailing, Mark's beautiful clean build and superp paint so far . . . .  (speechless)
Terri, this Campaign promises to product some show-stoppers. What an awesome gallery to look forward to !!
Cheers, D
 (speechless)
Terri, this Campaign promises to product some show-stoppers. What an awesome gallery to look forward to !!
Cheers, D
Posted: Monday, August 02, 2010 - 11:06 PM UTC
Small Update :
Close the fuselage - must have used atleast a kilo of fillers
Hope to get the wings attached soon.

Cockpit seat Prior to installation. Tried to get a rough finish to "simulate" metal. Still need lots of practice
Close the fuselage - must have used atleast a kilo of fillers

Hope to get the wings attached soon.

Cockpit seat Prior to installation. Tried to get a rough finish to "simulate" metal. Still need lots of practice
hkopper

Joined: March 01, 2008
KitMaker: 529 posts
AeroScale: 340 posts

Posted: Wednesday, August 04, 2010 - 05:41 AM UTC
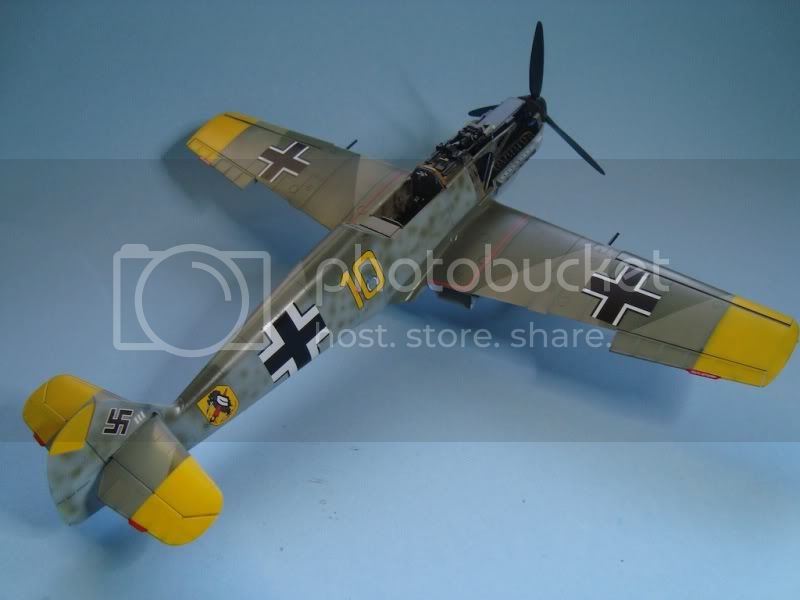
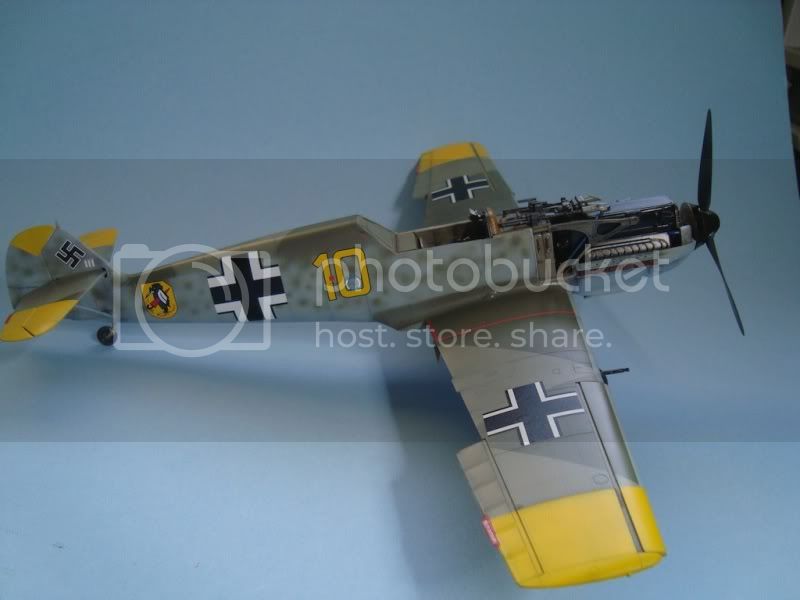
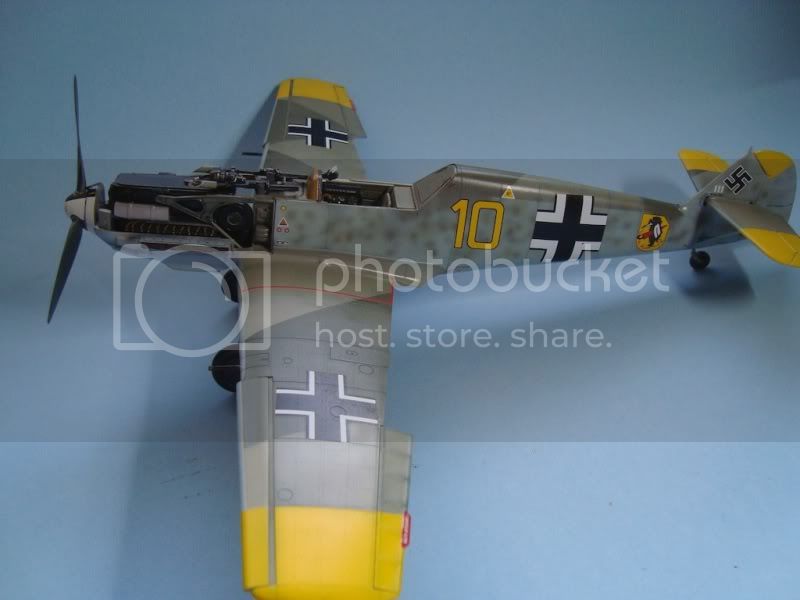
Here is my finished Emil!!
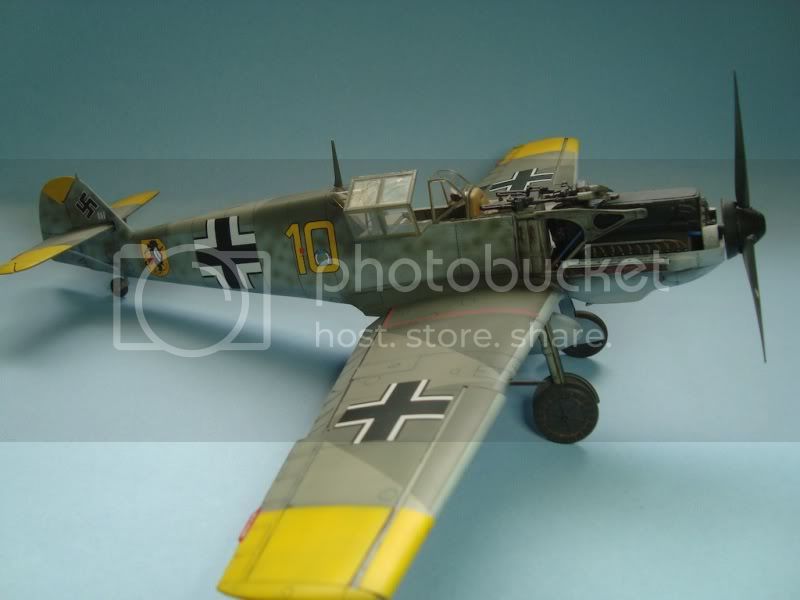
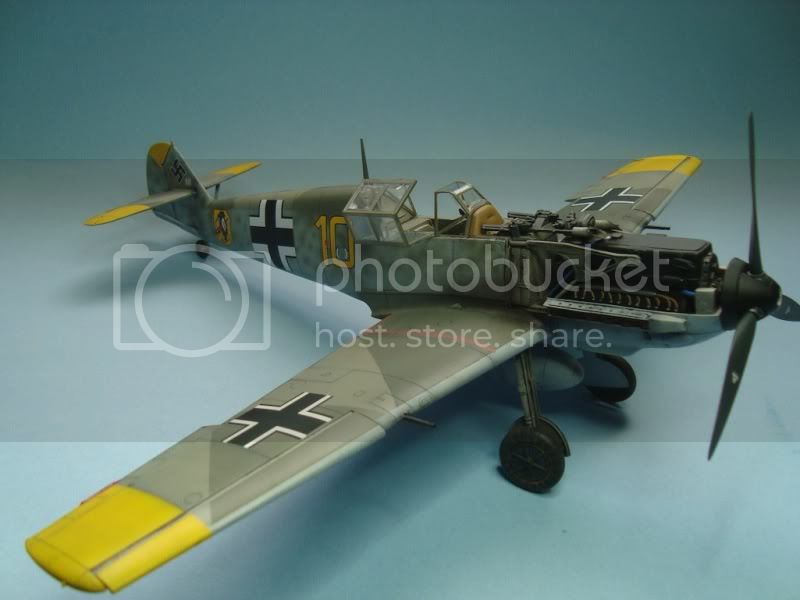
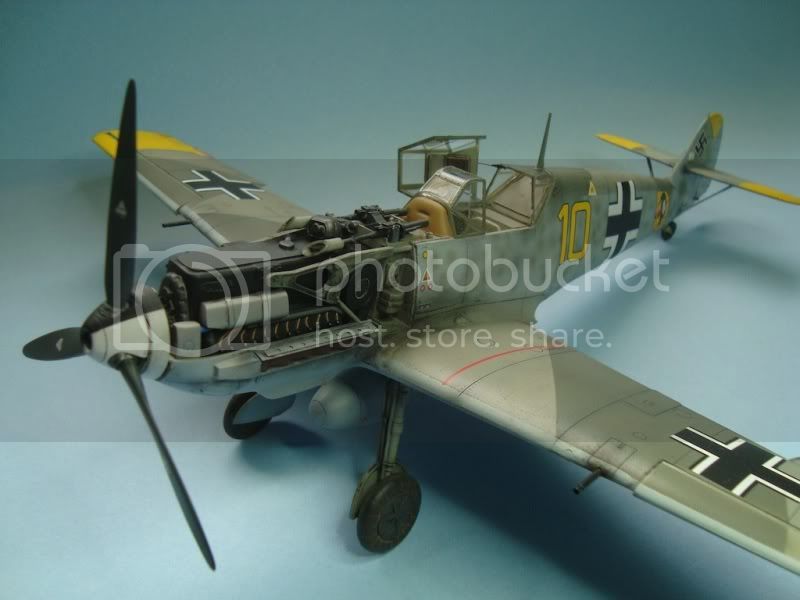
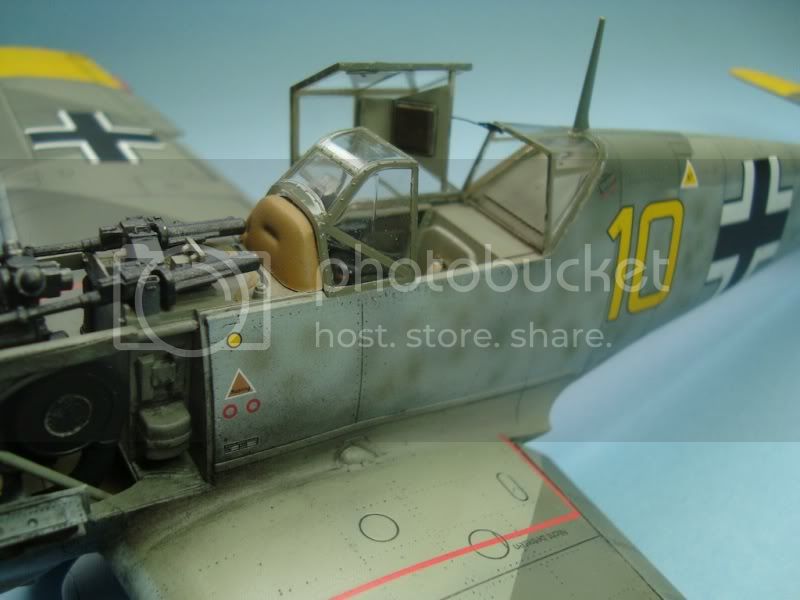
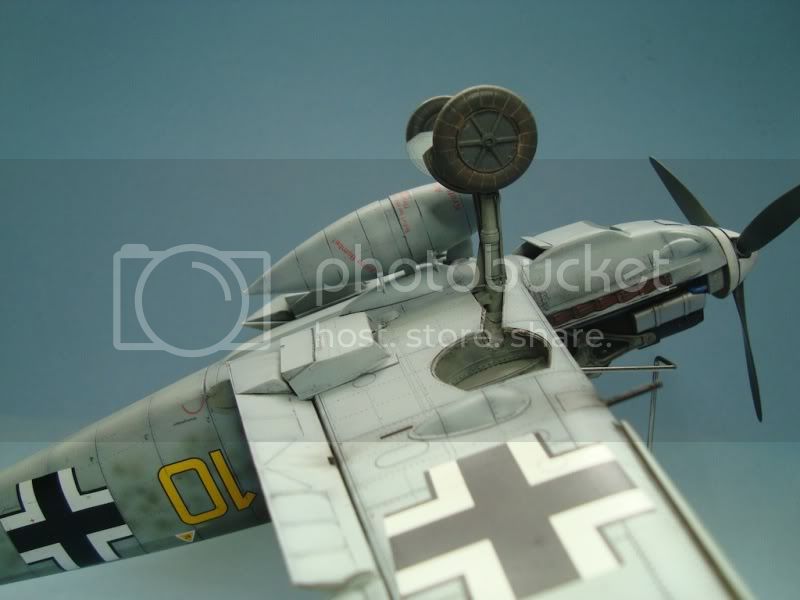
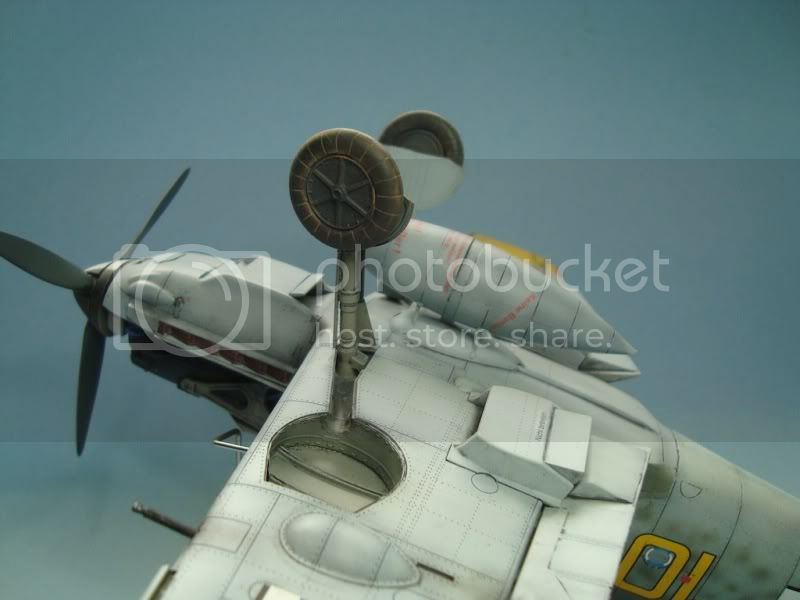
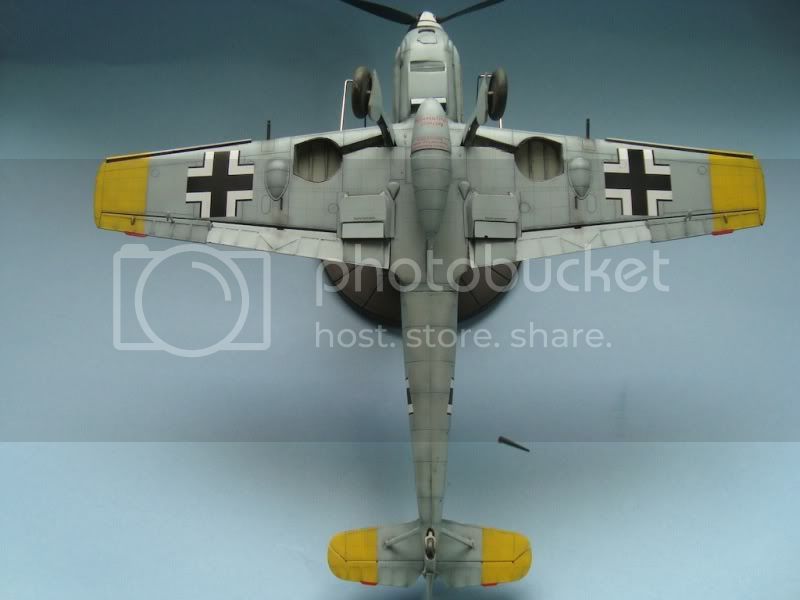
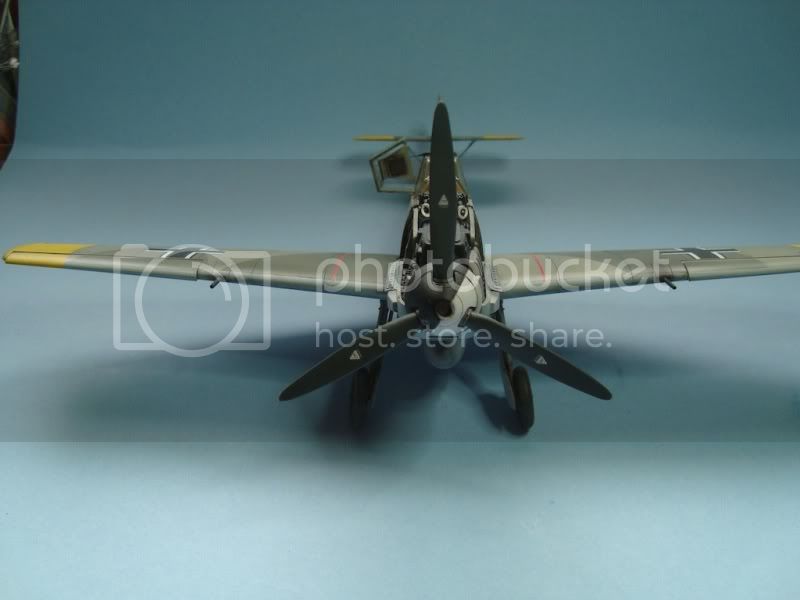
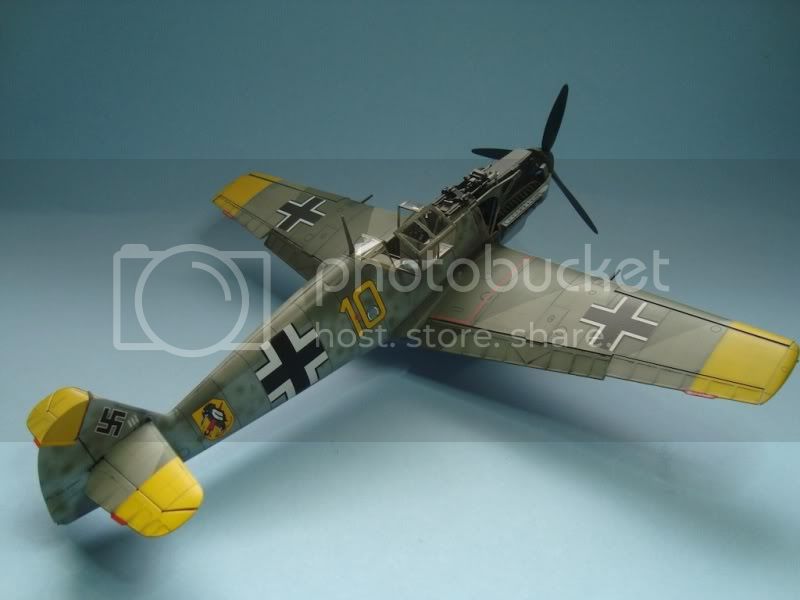
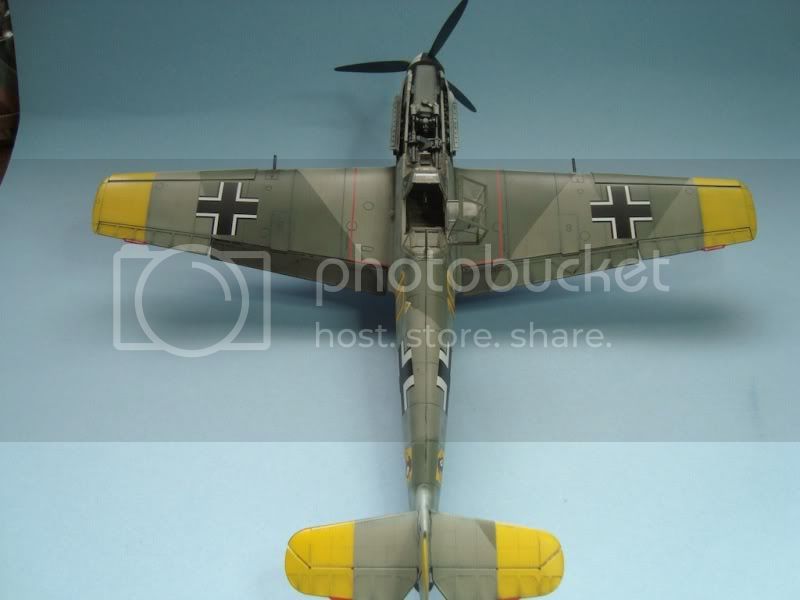
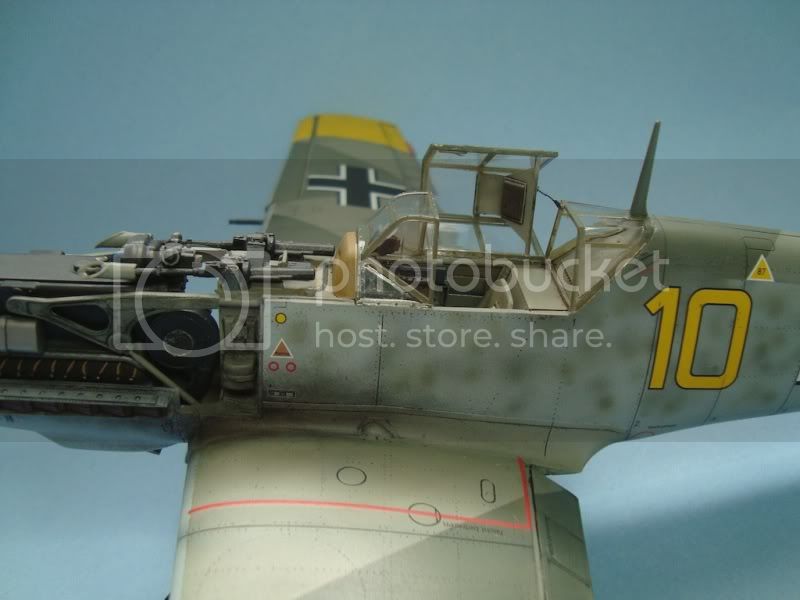
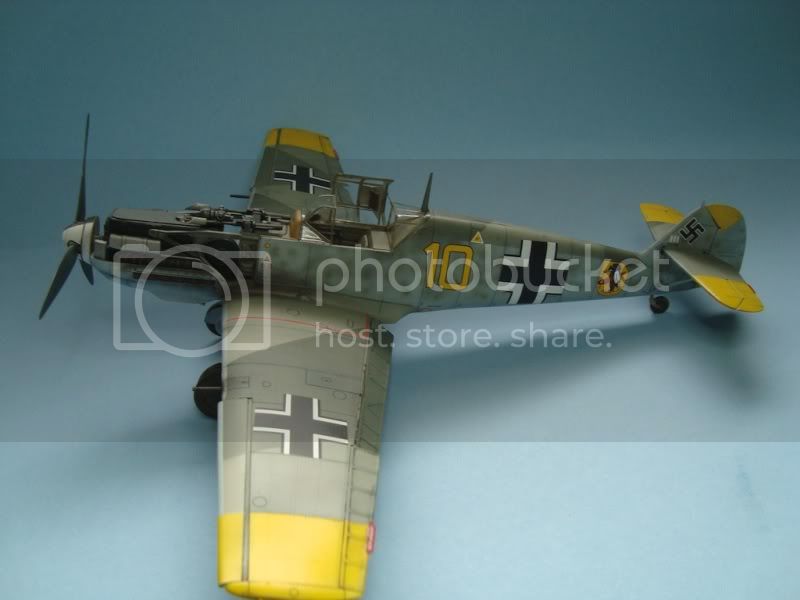
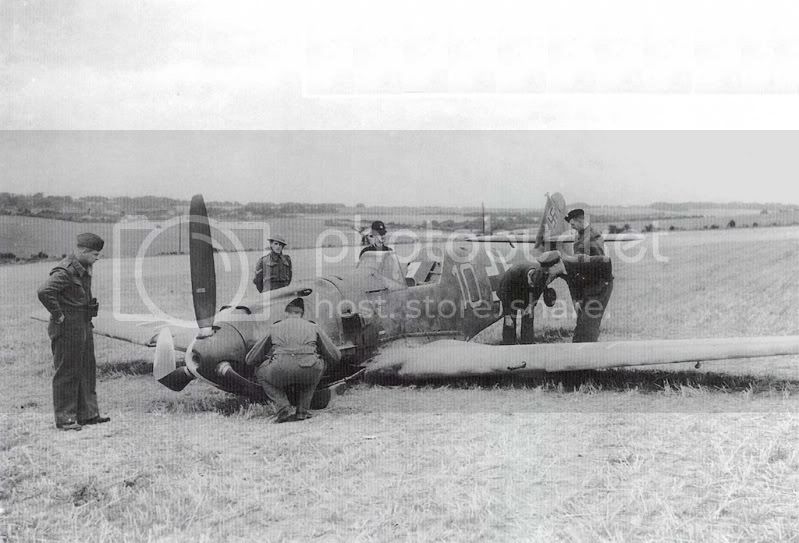
and a pic of the actual aircraft after it was downed:
Thanks for watching!
Hermann.


and a pic of the actual aircraft after it was downed:

Thanks for watching!
Hermann.
Posted: Wednesday, August 04, 2010 - 05:52 AM UTC
Guyz and Galz, Lots of great work here! I'm not a big fan of the 109, but there is some really neat detailing going on here. 

mpatman

Joined: March 09, 2006
KitMaker: 248 posts
AeroScale: 160 posts

Posted: Wednesday, August 04, 2010 - 07:08 PM UTC
Hermann,
Beautiful work there on "yellow 10"
Mark
Beautiful work there on "yellow 10"
Mark
Posted: Wednesday, August 04, 2010 - 07:33 PM UTC
Beautiful job Hermann, great result mate !!
Cheers, D
Cheers, D

FalkeEins

Joined: March 07, 2005
KitMaker: 868 posts
AeroScale: 690 posts

Posted: Thursday, August 05, 2010 - 01:46 AM UTC
very nice work as usual Hermann - excellent job on the weathering. Less is definitely more! I've tried these Promodeller washes but I'm not a big fan. They don't 'enough' for me and I usually revert back to oils..what's the secret...?

FalkeEins

Joined: March 07, 2005
KitMaker: 868 posts
AeroScale: 690 posts

Posted: Thursday, August 05, 2010 - 01:47 AM UTC
very nice work as usual Hermann - excellent job on the weathering. Less is definitely more! I've tried these Promodeller washes but I'm not a big fan. They don't do 'enough' for me and I usually revert back to oils..what's the secret...?
@ Jesper - great looking Airfix Friedrich - your 'problems' don't detract from the quality of the build and the paint job !
@ Damian - that's superb . your best yet on Aeroscale I reckon !
@Justin - wow, great JG 4 bird ! Don't often see JG 4 represented in model form. Nice choice and love the finish .... EageCals..?
thegirl

Joined: January 19, 2008
KitMaker: 6,743 posts
AeroScale: 6,151 posts

Posted: Thursday, August 05, 2010 - 02:33 AM UTC
Excellent job Hermann ! 
The weathering is spot on , just the right amount of flavor .
Thanks for taking part in the GB

The weathering is spot on , just the right amount of flavor .
Thanks for taking part in the GB

hkopper

Joined: March 01, 2008
KitMaker: 529 posts
AeroScale: 340 posts

Posted: Thursday, August 05, 2010 - 02:56 AM UTC
Thanks Terri, Mark, Damian and Neil for those kind words. It sure was a fun campaign with tons of great builds and good techniques to put in one's pocket for future kits.
@ Neil: I'm not a great big fan of the finish I get from Promodeller's wash. I tend to rely more heavily on oil washes instead. The Promodeller's wash was used mainly for the panel lines and at times I had to apply several coats to get the look that I desired. Promodeller's does require a smooth surface, otherwise it will be hard to remove the excess. For the smooth surface, I apply a generous coat of gloss to the finish (tend to prefer Future (Klear) but I'll try Vallejo's gloss finish in my next build.
Cheers,
Hermann.

Emeritus

Joined: March 30, 2004
KitMaker: 2,845 posts
AeroScale: 1,564 posts

Posted: Friday, August 06, 2010 - 02:37 AM UTC
Very nice work here. Great job with the Emil, Hermann!  That weathering and washes look good, the details stand out nicely without being too stark.
I've been trying out those Promodeler washes on a couple my last models as well. Though I've liked them, I have to agree with you on that sometimes they require a couple of applications to get enough of the pigment in the recesses.
I've made some more progress on my G-6. Now the airframe is all but ready for priming.
Attaching the radiator flaps turned out a bit tricky, as there was little to mount the flaps, just the ledges in the wings. And with the ledges on the inside, that alone wouldn't do.
For the upper flaps, I glued pieces of styrene strip to the sides of the fuselage and landing flaps to have something for the flaps to mount to.
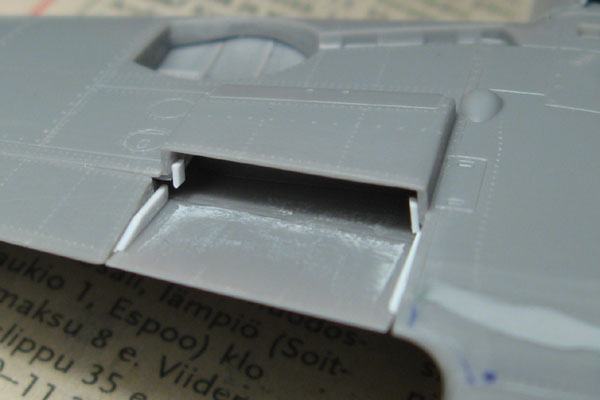
That white stuff is superglue fume residue form the CA I used to strenghten the joints from the inside. Here I've already glued styrene strip to the insides of the lower part of the radiator housing to help mounting the lower flaps.
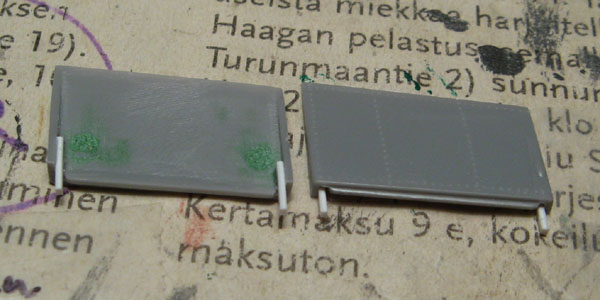
And here's the lower flaps. Those styrene strips glued to the sides will fit snuggly between the bottom of the radiator housing and the styrene strips shown in the previous photo.
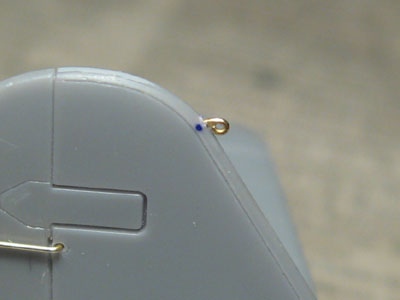
An antenna wire mount made from some scrap PE would have been more realistic, but trickier to mount, requiring careful splitting of the seam to securely attach it, so I opted for a brass wire loop glued in a hole drilled to the leading edge of the fin. Making a similar mount to the antenna mast would have been nice, but the kit part was so thin that drilling a hole in the top was out of the question. And as I wasn't in the mood for making a new mast from scratch, I settled for my usual groove cut and filed to the point of the mast.
To close this update, here's the shock-absorbing spring for the canopy fixing wire: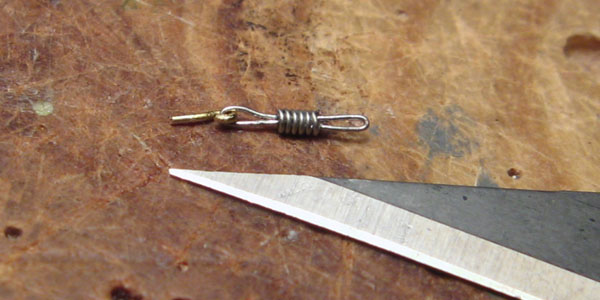
...And if you're wondering, no, it's not functional! And I'm not gonna try making those in 1:72, 1:48 is small enough for me!
 That weathering and washes look good, the details stand out nicely without being too stark.
 I've been trying out those Promodeler washes on a couple my last models as well. Though I've liked them, I have to agree with you on that sometimes they require a couple of applications to get enough of the pigment in the recesses.
I've made some more progress on my G-6. Now the airframe is all but ready for priming.
Attaching the radiator flaps turned out a bit tricky, as there was little to mount the flaps, just the ledges in the wings. And with the ledges on the inside, that alone wouldn't do.
For the upper flaps, I glued pieces of styrene strip to the sides of the fuselage and landing flaps to have something for the flaps to mount to.

That white stuff is superglue fume residue form the CA I used to strenghten the joints from the inside. Here I've already glued styrene strip to the insides of the lower part of the radiator housing to help mounting the lower flaps.

And here's the lower flaps. Those styrene strips glued to the sides will fit snuggly between the bottom of the radiator housing and the styrene strips shown in the previous photo.

An antenna wire mount made from some scrap PE would have been more realistic, but trickier to mount, requiring careful splitting of the seam to securely attach it, so I opted for a brass wire loop glued in a hole drilled to the leading edge of the fin. Making a similar mount to the antenna mast would have been nice, but the kit part was so thin that drilling a hole in the top was out of the question. And as I wasn't in the mood for making a new mast from scratch, I settled for my usual groove cut and filed to the point of the mast.
To close this update, here's the shock-absorbing spring for the canopy fixing wire:

...And if you're wondering, no, it's not functional!
 And I'm not gonna try making those in 1:72, 1:48 is small enough for me!

Emeritus

Joined: March 30, 2004
KitMaker: 2,845 posts
AeroScale: 1,564 posts

Posted: Friday, August 06, 2010 - 10:49 AM UTC
Quoted Text
Making a similar mount to the antenna mast would have been nice, but the kit part was so thin that drilling a hole in the top was out of the question. And as I wasn't in the mood for making a new mast from scratch, I settled for my usual groove cut and filed to the point of the mast.
Oh who am I kidding..?

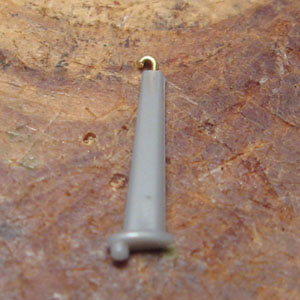
Turned out the mast was just thick enough for a 0,3mm drill bit.

 |


