Air Campaigns
Want to start or join a group build? This is where to start.
OFFICIAL: Civilian Planes Only Campaign
grayghost666
#021
Joined: August 02, 2007
KitMaker: 2,458 posts
AeroScale: 197 posts
Posted: Saturday, December 18, 2010 - 09:19 AM UTC

Quoted Text

I've come late to the party and have a Revell A330 that had the fuselage glued together and windows filled ages ago. Recently I glued the wings together. Will that be OK to enter?

Jens


Hello Jens,
I think that that model would be better off in the Hanger Queen Campaign then here. You must have a photo of the model not started posted for it to be allowed for this campaign.
The Hanger Queen campaign is for all the unfinished models that are sitting around. All you need to do is post a restart photo in the thread and get going.
Again I am sorry to say no,
Cheers,
Bruce
warreni
_VISITCOMMUNITY
South Australia, Australia
Joined: August 14, 2007
KitMaker: 5,926 posts
AeroScale: 2,201 posts
Posted: Saturday, December 18, 2010 - 10:18 AM UTC
Ok.. I rushed off and started but did not realise I had to take a photo of the unstarted kit.. Can I get a pass with the next photo that is dated 18Dec10?


This was taken about 30 minutes after starting the build.

I got everything together and dry and then proceeded to dry-fit the wing to the fuselage.. Hmmm.. There was a rather huge gap between the upper wing and the fuselage..

I have come to expect these 'issues' with Airfix kits from the last few years and came up with a method that 'appears' to have solved the problem. Yep, sprue cut to length from the kit and Tamiya Super Thin cement dribbled into the end joints. Seem to have done the trick. It still means some filling but only with Mr Surfacer, not auto filler...

And here is my cure for the gap problem.. No frills engineering..

The other issue at the moment is that the Matchbox trencher seems to have moved to Airfix and invlicted his trade on this kit. It is amazing how I never read anything about these trenches mentioned anywhere in any reviews I read, yet Trumpeter are regularly rubbished for surface finish that I consider far more realistic than the Matchbox/Airfix trencher.. Hopefully most of it will disappear under a coat or ten of gloss white paint.

Anyway, enough of the rant.. Next up will be the mating of the fuselage and the wings. I am sure that will be exciting!
jenshb
_VISITCOMMUNITY
England - South East, United Kingdom
Joined: December 18, 2010
KitMaker: 7 posts
AeroScale: 6 posts
Posted: Sunday, December 19, 2010 - 12:49 AM UTC
No problem Bruce.

Jens
bdanie6
_VISITCOMMUNITY
New Hampshire, United States
Joined: November 09, 2008
KitMaker: 615 posts
AeroScale: 459 posts
Posted: Monday, December 20, 2010 - 01:41 AM UTC
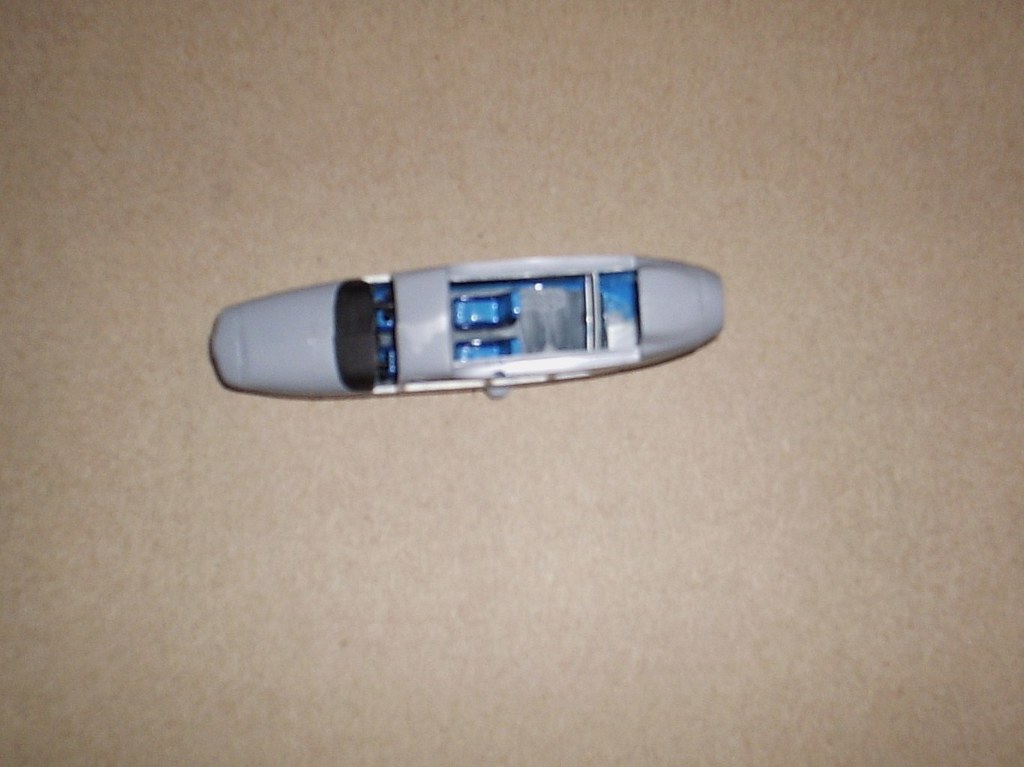
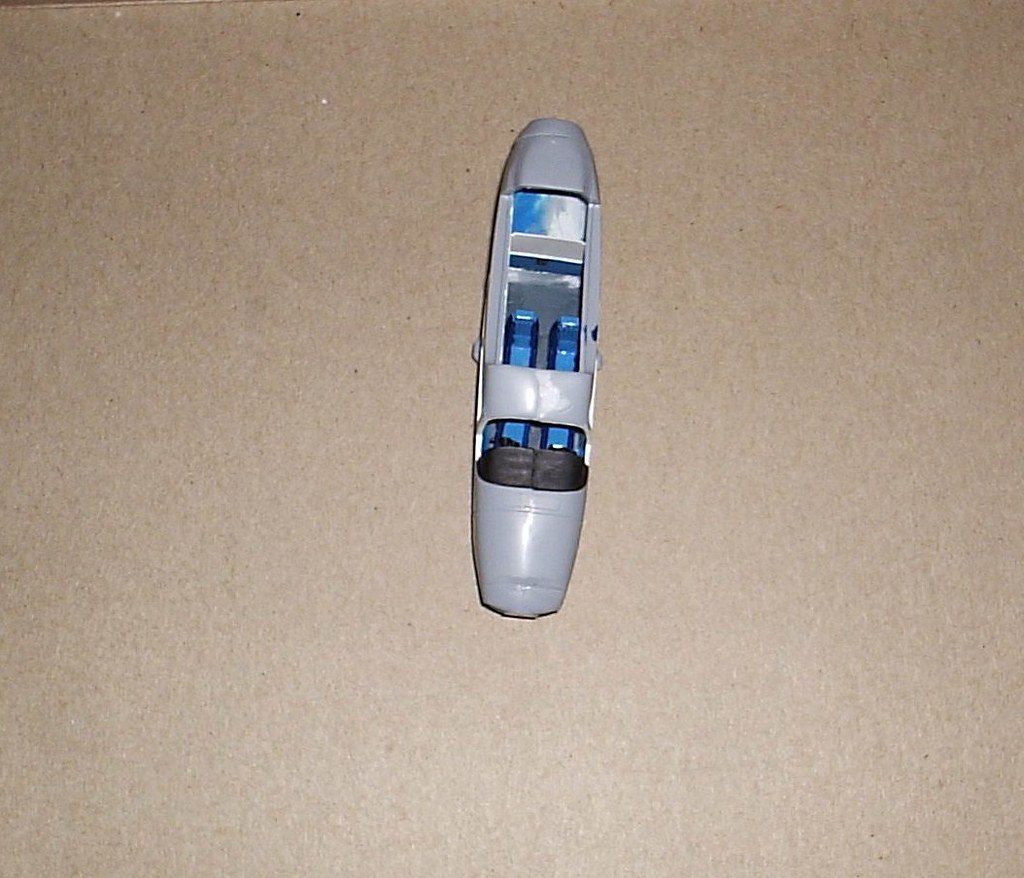
I fabricated a rear bulkhead, sort of and got the interior painted. I had to extend the floor to where the bulkhead goes since the floor actually ends short of the last window
This is a picture of the interior bits before assembly starts


More to come,later
iflytb20
#501
_VISITCOMMUNITY
Kerala, India / भारत
Joined: August 25, 2009
KitMaker: 292 posts
AeroScale: 194 posts
Posted: Monday, December 20, 2010 - 02:59 AM UTC
Er....my camera was in the shop when i started and i don't have a photograph of the kit before i started. Can i still stay
grayghost666
#021
Joined: August 02, 2007
KitMaker: 2,458 posts
AeroScale: 197 posts
Posted: Tuesday, December 21, 2010 - 11:11 AM UTC
Hello All,
If you did not get a photo of your build before you started it and will swear on your Junior Pilot Wings that it was a new kit and not started befored the start of the campaign, You may stay.
I would like to see some early photo's of your build, OK.
Cheers,
Bruce
warreni
_VISITCOMMUNITY
South Australia, Australia
Joined: August 14, 2007
KitMaker: 5,926 posts
AeroScale: 2,201 posts
Posted: Tuesday, December 21, 2010 - 12:18 PM UTC
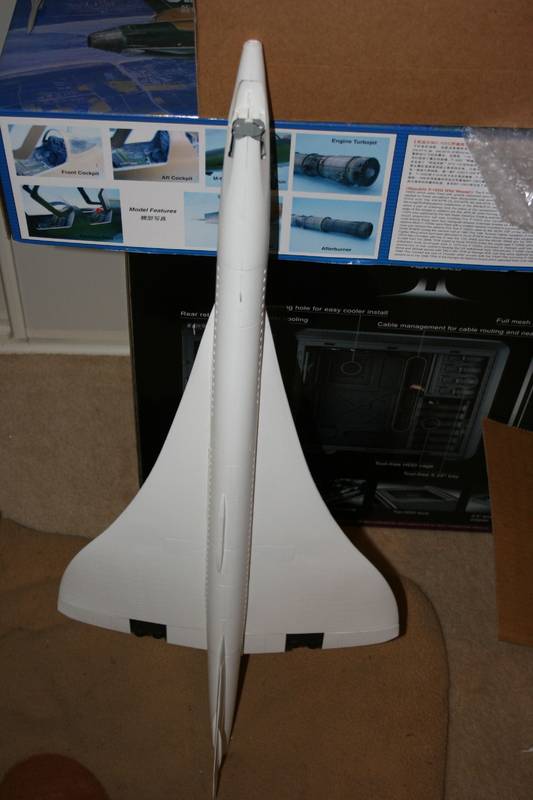
OK.. I do swear that my 1/72 Airfix BAC Aeri-whatever Concorde was still sitting unmolested in my stash when the build started. It has since been cut, snipped, sanded, scraped and glued.. Even the upper wing panels are now on... See...


Next comes the fun bit of trying to disguise the lovely seams.
Bigrip74
_VISITCOMMUNITY
Texas, United States
Joined: February 22, 2008
KitMaker: 5,026 posts
AeroScale: 2,811 posts
Posted: Tuesday, December 21, 2010 - 12:55 PM UTC
Warren, how big is that 1/72 Concorde?

Bob
warreni
_VISITCOMMUNITY
South Australia, Australia
Joined: August 14, 2007
KitMaker: 5,926 posts
AeroScale: 2,201 posts
Posted: Tuesday, December 21, 2010 - 01:05 PM UTC

Quoted Text

Warren, how big is that 1/72 Concorde?

Bob


That part in the picture is 453mm long.
Merlin
Staff MemberSenior Editor
AEROSCALE
#017
_VISITCOMMUNITY
United Kingdom
Joined: June 11, 2003
KitMaker: 17,582 posts
AeroScale: 12,795 posts
Posted: Saturday, December 25, 2010 - 05:10 AM UTC
Hi there

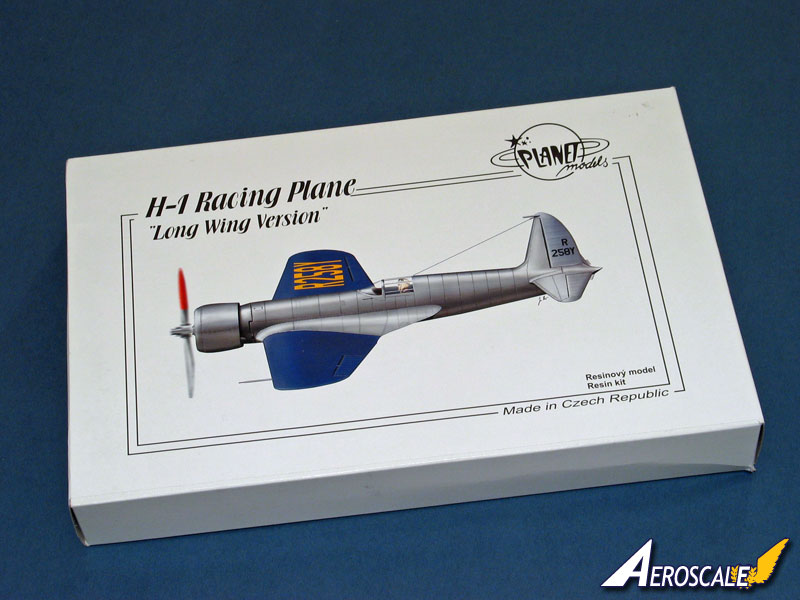
I've been mulling over what to build and finally plumped for Planet Models' Hughes Racer:


Hopefully I'll make a start before too long...

All the best

Rowan
Bigrip74
_VISITCOMMUNITY
Texas, United States
Joined: February 22, 2008
KitMaker: 5,026 posts
AeroScale: 2,811 posts
Posted: Saturday, December 25, 2010 - 05:37 AM UTC
Rowan, nice choice I would loved to have flown that a/c.

Bob
warreni
_VISITCOMMUNITY
South Australia, Australia
Joined: August 14, 2007
KitMaker: 5,926 posts
AeroScale: 2,201 posts
Posted: Saturday, December 25, 2010 - 08:46 AM UTC
Hi all!

Some more progress. Undercarriage is all built. Engines on..


It is fighting me tooth and nail but I am clamping it into submission..

Well, with the main pieces anyway. These are the doors over the anti-tail strike wheel assembly in the tail. Notice they in no way fit the aperture they are supposed to close off..


I am just going to putty it up then rescribe the lines.

More later (hopefully)
warreni
_VISITCOMMUNITY
South Australia, Australia
Joined: August 14, 2007
KitMaker: 5,926 posts
AeroScale: 2,201 posts
Posted: Saturday, December 25, 2010 - 07:29 PM UTC
Some more progress on the recalcitrant Concorde.. although the flaps and tracks fitted fairly well.. except if you pushed too hard on the rear locating lug it pushed straight through the top of the wing.. sigh..

Next ones I trimmed the locating lug to prevent this small problem.


If you ever think of building this big, beautiful model aircraft you need lots of clamps and putty. I am using Tamiya white putty seeing 95% of the aircraft is white. In fact, this would have been a good kit and for a beginner if ..
1. It wasn't quite so big, and
2. The fit was nor rubbish.
The plastic parts are moulded in the colours the items need to be painted and it would make it much easier for a beginner.

Cheers
Warren
bdanie6
_VISITCOMMUNITY
New Hampshire, United States
Joined: November 09, 2008
KitMaker: 615 posts
AeroScale: 459 posts
Posted: Sunday, December 26, 2010 - 02:00 AM UTC
Warren, even with all the problems you have encounted, the plane looks like it is coming along fine. A testament to your skill and patience

Now, on to my nightmare

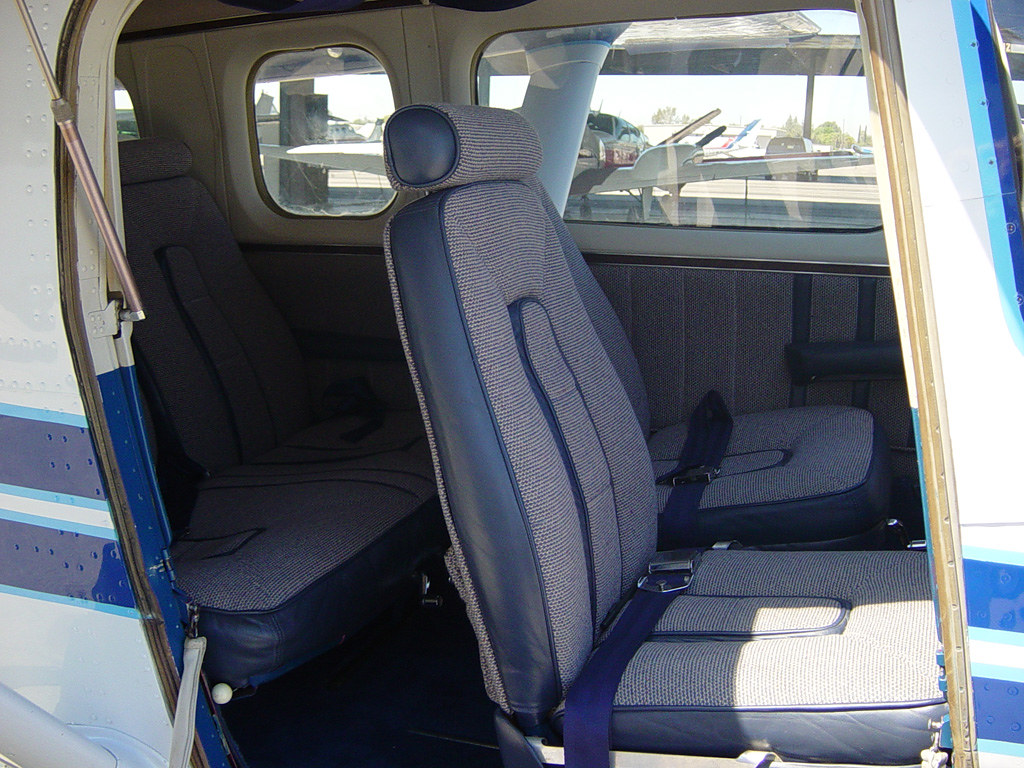
I finally had time to gat back to this thing and finished putting the interior together. First picture is my insperation


Next, my interior, bad as it is. I had to fabricate the rear bulkhead myself. I apologize for the fuzzy picture, I blame the operator


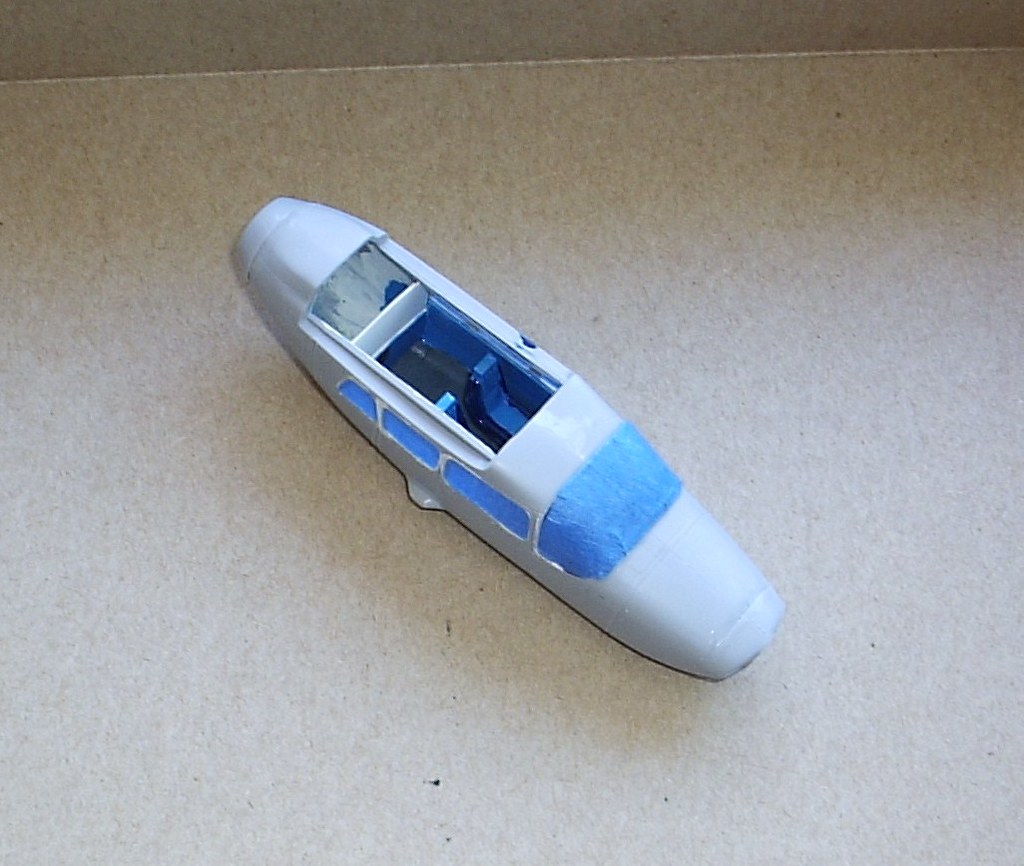
Next comes the glazing. Since the glass just fits into grooves from the outside, I'm going to try masking the window before I install them and see how that works.

Later
warreni
_VISITCOMMUNITY
South Australia, Australia
Joined: August 14, 2007
KitMaker: 5,926 posts
AeroScale: 2,201 posts
Posted: Sunday, December 26, 2010 - 07:32 AM UTC
Welcome to he nightmare club Bruce.. Just remember, all you have to do is wake up..

You have some nice sink marks there as well if I am not mistaken. There are so many ejector marks etc on my beast that if they are on the bottom of the plane they can stay there as I doubt it will ever get picked up once it is finished. It will be my dirty little secret.. Oh and the thousands who read this site..
VonCuda
_VISITCOMMUNITY
North Carolina, United States
Joined: November 28, 2005
KitMaker: 2,216 posts
AeroScale: 1,080 posts
Posted: Sunday, December 26, 2010 - 09:54 AM UTC
Looking good guys. Warren, just remember the camera will make up for lots of mistakes. I use that trick ALL the time.


Bruce, I built that bird last year for the twin boom campaign. Not much detail but a pretty fun build as I remember it.


Hermon
bdanie6
_VISITCOMMUNITY
New Hampshire, United States
Joined: November 09, 2008
KitMaker: 615 posts
AeroScale: 459 posts
Posted: Monday, December 27, 2010 - 01:01 AM UTC
Warren, yeah, some sink marks, but they are an easy fix, and all the ejector pin marks are internal, so that is one thing Testors did right. One thing they did wrong, that I jsut found is the top of the wing is short shot on both ends. The port side tip just needed some putty and shaping to fix, but the starboard tip needs to be compleatly rebuilt

@Hermon, I built one of these things years ago as the USAF FAC. I took the instructions advice and used the decals as templates to cut out the windows and used the supplied glass to make the extra observation ports. Not the best idea Wound up using a lot of canopy glue to fill the gaps
warreni
_VISITCOMMUNITY
South Australia, Australia
Joined: August 14, 2007
KitMaker: 5,926 posts
AeroScale: 2,201 posts
Posted: Monday, January 03, 2011 - 07:40 PM UTC
Hi Everyone.

The Concorde is close to paint now. Will have to stock up on lots of gloss white as it is a big plane!


Cheers
Warren
Removed by original poster on 01/04/11 - 22:27:47 (GMT).
Murdo
_VISITCOMMUNITY
Scotland, United Kingdom
Joined: May 25, 2005
KitMaker: 2,218 posts
AeroScale: 211 posts
Posted: Tuesday, January 04, 2011 - 10:30 AM UTC
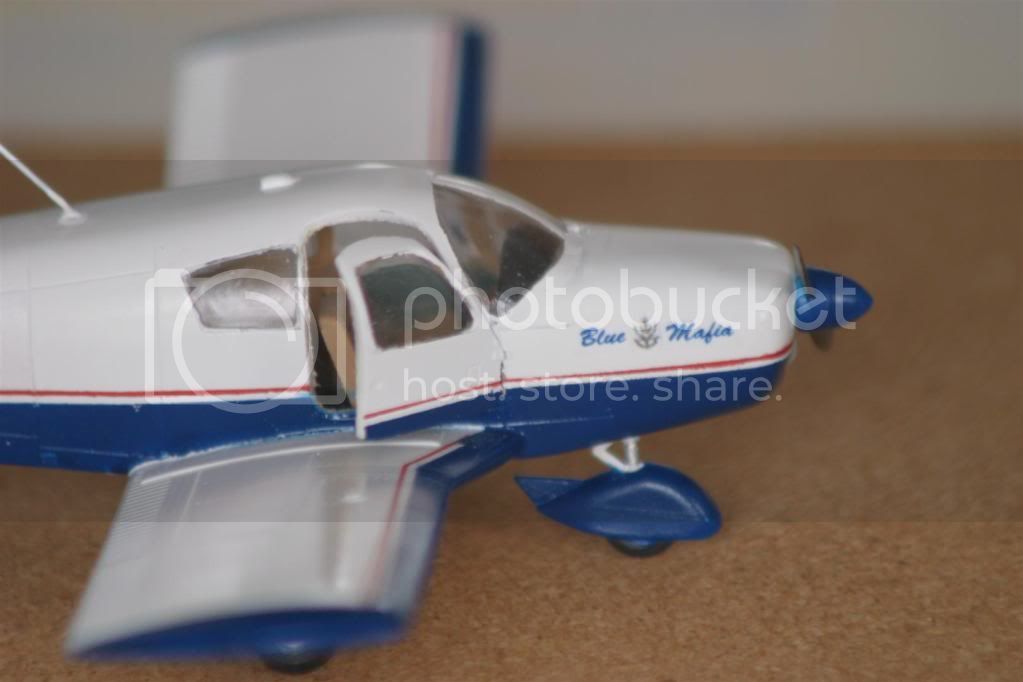
Finally finished my 1/48 Piper Cherokee. Lovely wee kit.

I cut open the driver's door and added my own paint scheme which was horrendous to do as the tail is very serrated. I normally build Armour so having to do a really pretty and fine paint job was a strange challenge and had a steep learning curve. Paints are Halfords Appliance White and Tamiya Arcrylics.

"G-MACK" and "Blue Mafia" are decals which were printed on my colour laser as I gave up on the Inkjet inks "running". I then used a product called "Decal It" which puts down a plasticy / resin cover on ordinary paper which you then soak in water and very gently rub the paper off which leaves the picture stuck to the plastic. It took a lot of tries but I'm happy with my first results.


Hope you like it!

Currently working on a Revell Cessna Citation 1


Is there a campaign gallery for posting finished pics in yet?


grayghost666
#021
Joined: August 02, 2007
KitMaker: 2,458 posts
AeroScale: 197 posts
Posted: Thursday, January 06, 2011 - 08:38 AM UTC
Hello All,
I have told Rowan (Merlin) that I am resigning as Campaign Leader for Civilian Planes Only Campaign for the following reasons:
On Monday the 10th of Jan. I will be having a Heart Valve Replacement Surgery done. I will be in Hospital for 7 to 21 days then I will be in a Rehab Hospital for 1 to 3 months. That adds up to about 4 months off line and it is not fair to you all for me to be gone that long so I decide to resign and let someone else be the Campaign Leader who will be here when you need them.
After I get out of Hospital I am going to take some down time to gain my strength back and slowly come back to modeling.
I will still be around till Sunday morning if you need any questions answered.
May all of You and Your Family Have a Peacefully and Safe Year,
Cheers,
Bruce
PS: The Gallery should be in the 2010 folder as the campaign started in that year. Click on Photos and Then on Aeroscale then look for galleries then look for the years you should see 2010 campaign galleries It should be there I think.
If not PM me and I will find it for you and send you a PM.
bdanie6
_VISITCOMMUNITY
New Hampshire, United States
Joined: November 09, 2008
KitMaker: 615 posts
AeroScale: 459 posts
Posted: Friday, January 07, 2011 - 04:53 AM UTC
Bruce,

I wish you good luck and a speedy recovery my friend. You will be missed here.
Take care of yourself and let us know how you are doing from time to time.

Regards
Bruce
bdanie6
_VISITCOMMUNITY
New Hampshire, United States
Joined: November 09, 2008
KitMaker: 615 posts
AeroScale: 459 posts
Posted: Friday, January 07, 2011 - 05:02 AM UTC
Work is slowly progressing. Now working 2 part time jobs 7 days a week is keeping me away from the table more than I like, but it is what it is.

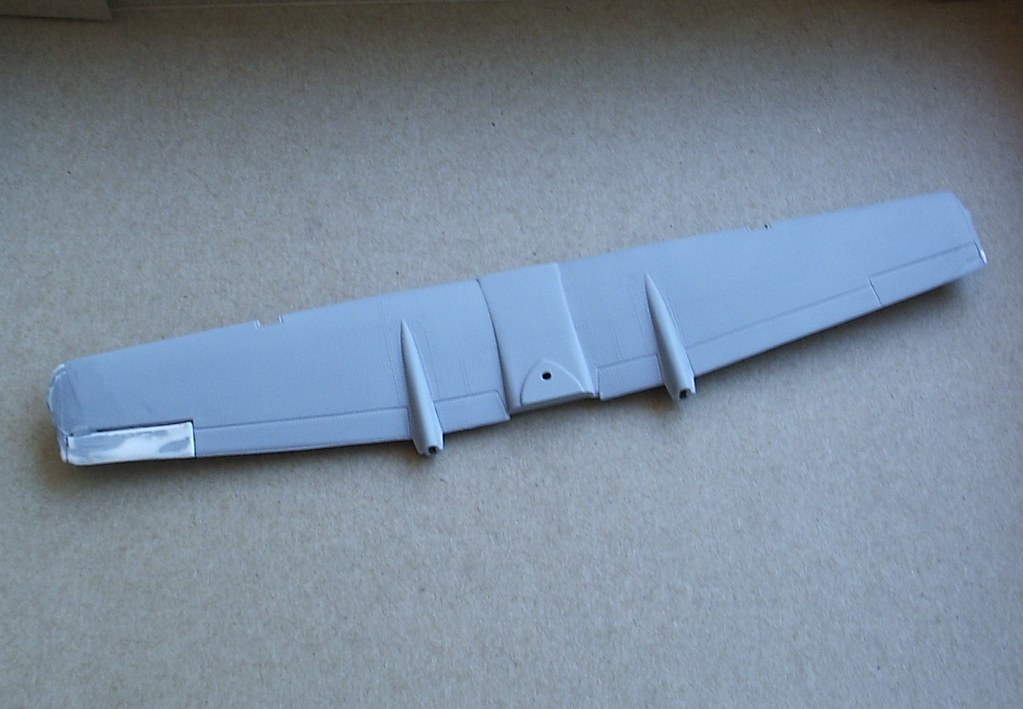
I have gotten the wing tips repaired as much as my limited scratch building skills and eye sight allow.


One thing I learned about Tamyia putty (and this maybe true for all putty) is that you can't put much lateral pressure on it, or it cracks and you have to start all over again. So after the second repair I coated the dry putty and surrounding plastic with super glue.

With that done, I went on to mask the glass and then attach it to the airframe.


and from the otherside...


And now onto the rest of the build

Later
Bigrip74
_VISITCOMMUNITY
Texas, United States
Joined: February 22, 2008
KitMaker: 5,026 posts
AeroScale: 2,811 posts
Posted: Friday, January 07, 2011 - 06:58 AM UTC
@ Bruce: nice progress on the build, you gave me an idea for my Piper J3. I will tape the windows inside and out before painting the inside ? what color I do not know yet, I am still trying remember the inside trim.

@ Warren: nice job on that 12 hour ahead project. I remember building the SST back in 1968, boy did I botch the kit, so this is what it is suppose to look like.

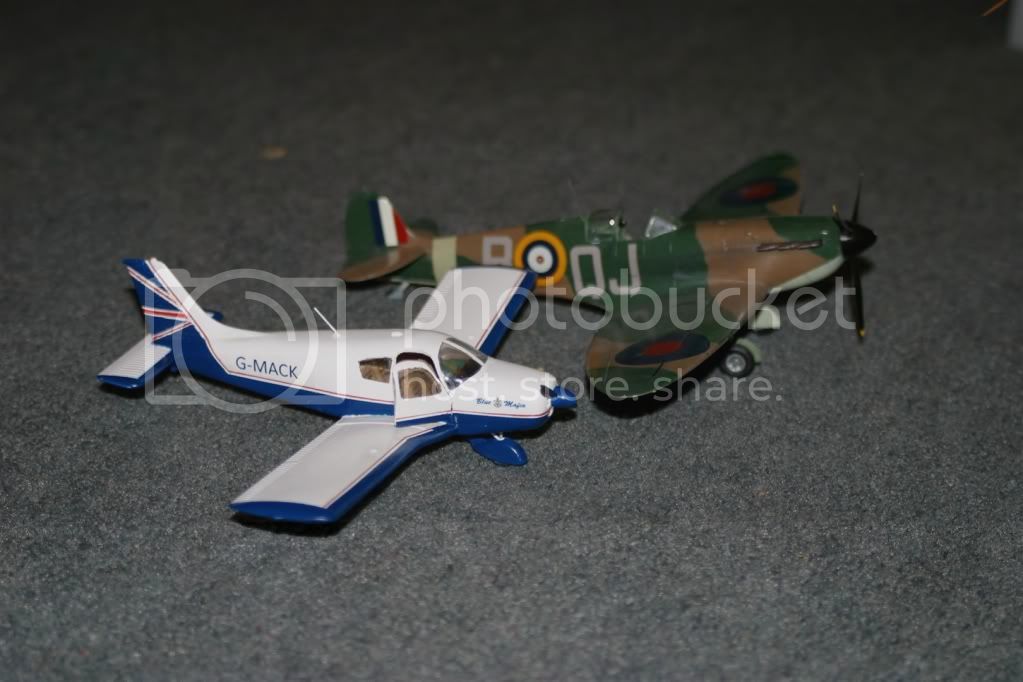
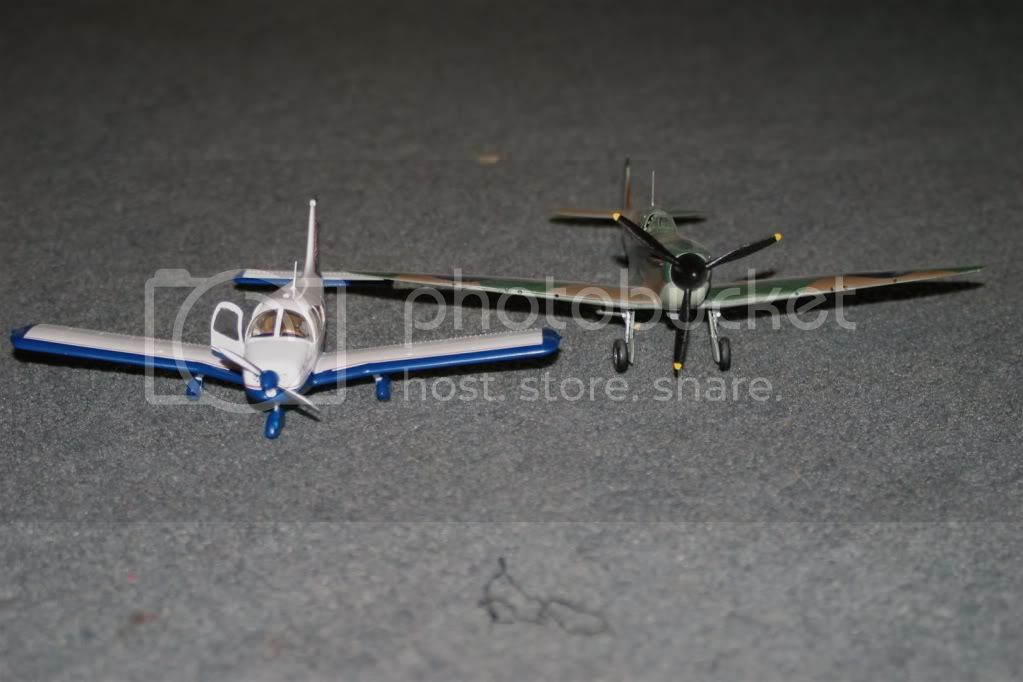
@ Murdo: love the color of your Cherokee, and it would be fun to get a photo with say a Spit, or P-47 for size comparison.

Bob
Murdo
_VISITCOMMUNITY
Scotland, United Kingdom
Joined: May 25, 2005
KitMaker: 2,218 posts
AeroScale: 211 posts
Posted: Friday, January 07, 2011 - 08:01 AM UTC
Bruce... Good luck mate and I hope it all goes very well for you!

Bob, I'll try and get pics with a Spit asap.

EDIT:

Okay, got pics with a Spitfire: