Official Aces High Two Campaign Thread.
AussieReg
 Associate Editor
#007
Victoria, Australia
Joined: June 09, 2009
KitMaker: 8,156 posts
AeroScale: 3,756 posts
Posted: Friday, March 26, 2010 - 03:15 AM UTC

folks. Just a little update on the Gladiator, got the Brown basecoat on.
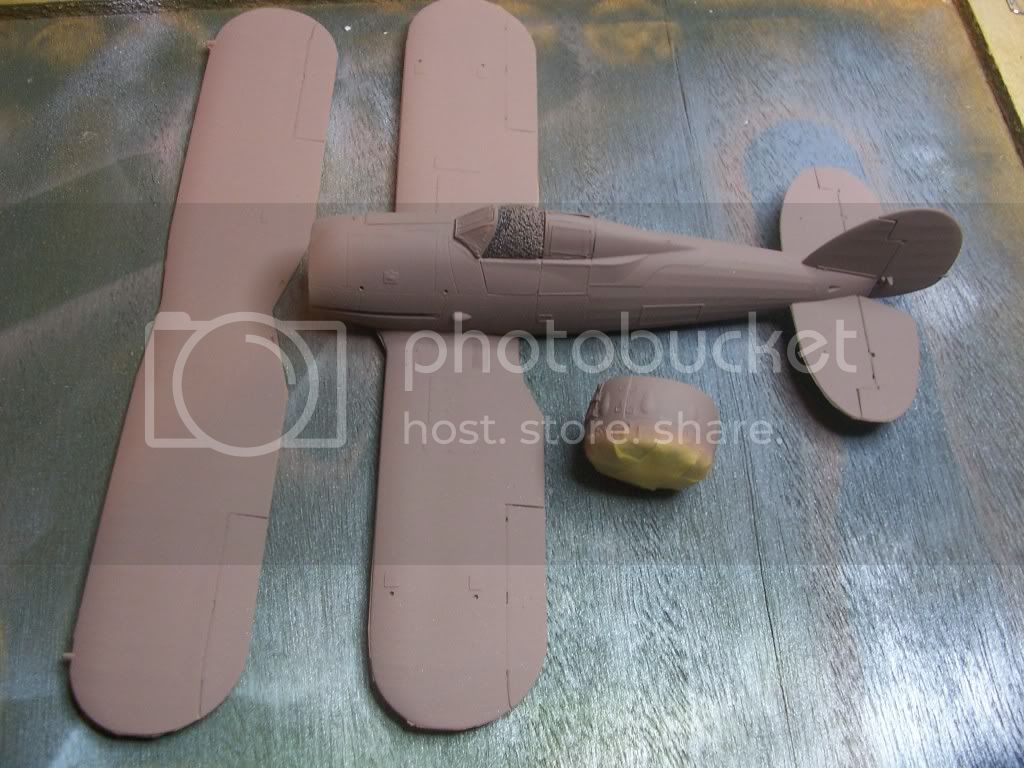
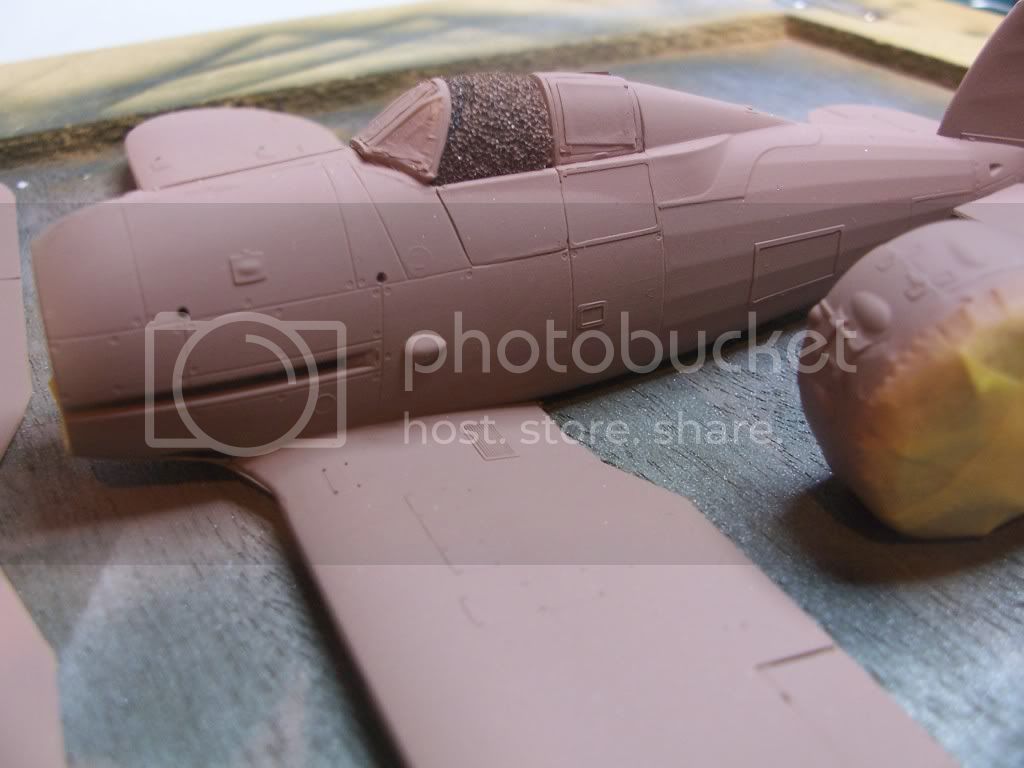
Hope to get the Green done tomorrow, but my 4yo son is insisting that we build his Thunderbolt, and he has told me of his plans for the colour scheme. Get out the welding goggles folks, this is gunna be WILD.
Cheers, D
ON the bench
Revell 1/24 '53 Corvette (building as '54)
Revell 1/24 BMW 507 Coupe and Cabrio
Italeri 1/48 Me262 B-1a/U1 Nightfighter
Monogram 1/24 '57 Chevy Nomad
Dragon 1/350 USS Frank Knox DD-742

#041
Kobenhavn, Denmark
Joined: July 20, 2006
KitMaker: 10,069 posts
AeroScale: 3,788 posts
Posted: Sunday, March 28, 2010 - 07:21 AM UTC
Campaign'oholic - 252+ campaigns completed
AussieReg
 Associate Editor
#007
Victoria, Australia
Joined: June 09, 2009
KitMaker: 8,156 posts
AeroScale: 3,756 posts
Posted: Friday, April 02, 2010 - 03:45 PM UTC
We have Green !!
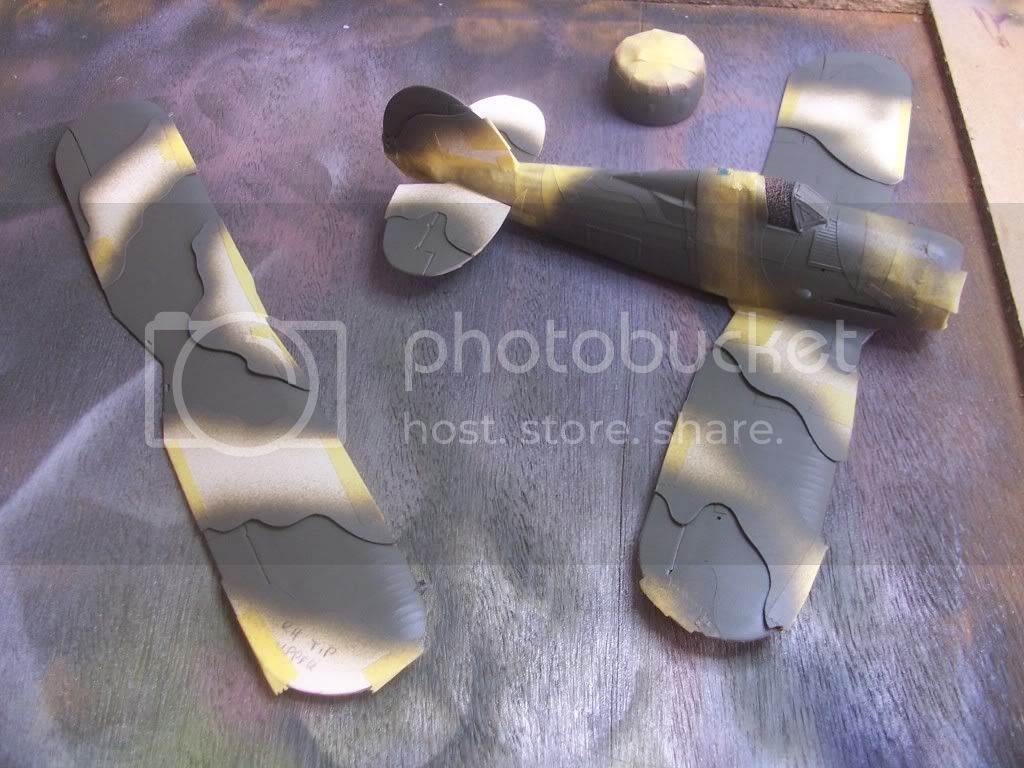
More pics later after the "unmasking", as long as it isn't a total disaster

On second thoughts, more pics even if it IS a total disaster

Cheers, D
ON the bench
Revell 1/24 '53 Corvette (building as '54)
Revell 1/24 BMW 507 Coupe and Cabrio
Italeri 1/48 Me262 B-1a/U1 Nightfighter
Monogram 1/24 '57 Chevy Nomad
Dragon 1/350 USS Frank Knox DD-742
AussieReg
 Associate Editor
#007
Victoria, Australia
Joined: June 09, 2009
KitMaker: 8,156 posts
AeroScale: 3,756 posts
Posted: Friday, April 02, 2010 - 07:53 PM UTC

WOOO HOOO, Another technique trialled and, well, not quite mastered but result acceptable. I cut masks from manila folders and raised them slightly with very fine "worms" of Blu-Tac in order to slightly feather the edges of the green camo. A bit hard to see in the pics, but I'm happy

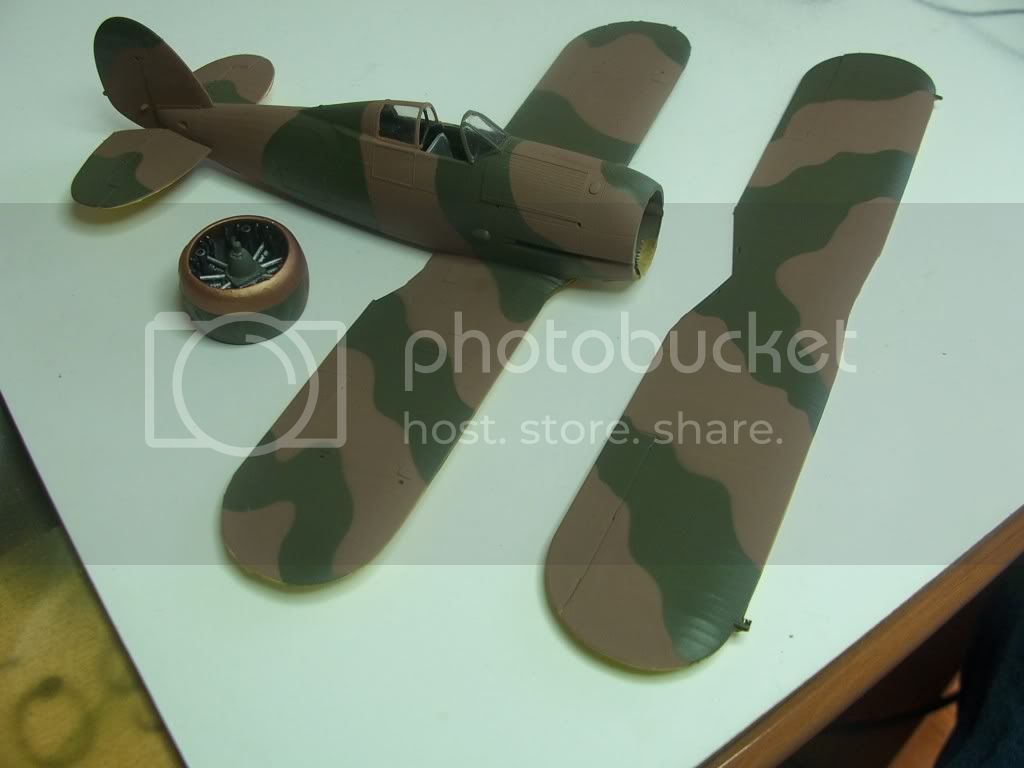
Some touch-ups, a clear coat, decals, a wash to blend and tone things down a bit, then final assembly. How's everybody else doing??
Cheers, D
ON the bench
Revell 1/24 '53 Corvette (building as '54)
Revell 1/24 BMW 507 Coupe and Cabrio
Italeri 1/48 Me262 B-1a/U1 Nightfighter
Monogram 1/24 '57 Chevy Nomad
Dragon 1/350 USS Frank Knox DD-742

#029
England - East Midlands, United Kingdom
Joined: December 23, 2005
KitMaker: 6,249 posts
AeroScale: 3,270 posts
Posted: Friday, April 02, 2010 - 08:48 PM UTC
So they finally dragged you away from the surf and sand long enough to get some modelling done eh Damian?

Looking very good, and the canopy masking was spot on!
I have a base coat of Alclad on the Hofer P-51. Once my P-47K is finished,(which it almost is), I can get moving again on it in amongst all the 56th FG activity thats been going on lately

Nige

It's not the same, better, but not the same...
AussieReg
 Associate Editor
#007
Victoria, Australia
Joined: June 09, 2009
KitMaker: 8,156 posts
AeroScale: 3,756 posts
Posted: Friday, April 02, 2010 - 09:05 PM UTC
Hehe yeah, back to the real world now. Thanks for the kudos. I think I said over on the Seaplanes thread that to me a good masking job on the glass can really make or break a build, so I take a lot of time and care with that part.
Now I don't think any of us will criticize you for the lack of progress on your builds with the brilliant work going on at the 56th website. Maybe I'll try to find markings for 56th aircraft for every P-47 SIG Campaign from here on in ???

Cheers, D
ON the bench
Revell 1/24 '53 Corvette (building as '54)
Revell 1/24 BMW 507 Coupe and Cabrio
Italeri 1/48 Me262 B-1a/U1 Nightfighter
Monogram 1/24 '57 Chevy Nomad
Dragon 1/350 USS Frank Knox DD-742
Texas, United States
Joined: February 22, 2010
KitMaker: 17 posts
AeroScale: 6 posts
Posted: Sunday, April 04, 2010 - 01:48 PM UTC
Will a color profile suffice if you can't find any photos of a particular aircraft. I am working on Heinz Bar's Bf109E-3 from the BoB time frame. There are several published profiles in Osprey books.
Thanks,
Satch

#029
England - East Midlands, United Kingdom
Joined: December 23, 2005
KitMaker: 6,249 posts
AeroScale: 3,270 posts
Posted: Monday, April 05, 2010 - 10:14 AM UTC
Quoted Text
Will a color profile suffice if you can't find any photos of a particular aircraft. I am working on Heinz Bar's Bf109E-3 from the BoB time frame. There are several published profiles in Osprey books.
Thanks,
Satch
Sorry Satch.
Photos only I'm afraid. I'm sure one of our resident Luftwaffe experts will be able to help.
All the best,
Nige
It's not the same, better, but not the same...
Scotland, United Kingdom
Joined: February 07, 2008
KitMaker: 1,699 posts
AeroScale: 1,384 posts
Posted: Monday, April 05, 2010 - 11:25 AM UTC
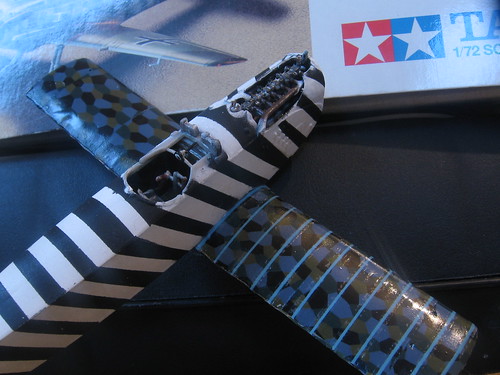
Well got the lozenge on (Almark) and put on rib tapes (Roden)for one wing. They silvered quite bad. Bit annoying that but this is my first crack at lozenge so I'll plough on with these rib tapes in the interest of getting something done.
England - South East, United Kingdom
Joined: March 07, 2005
KitMaker: 868 posts
AeroScale: 690 posts
Posted: Monday, April 05, 2010 - 12:28 PM UTC
Quoted Text
Sorry Satch.
Photos only I'm afraid.
I'm sure there are a few photos in the JG51 photo history by Stipdonk/Meyer - I'll see if I can dig it out...

#041
Kobenhavn, Denmark
Joined: July 20, 2006
KitMaker: 10,069 posts
AeroScale: 3,788 posts
Posted: Wednesday, April 07, 2010 - 10:04 PM UTC
Very nice progress, JP. The decals came on quite good looking at the picture. Looking forward to see how it ends.
Very nice job on the green for the Gladiator. Your technique worked out fine.
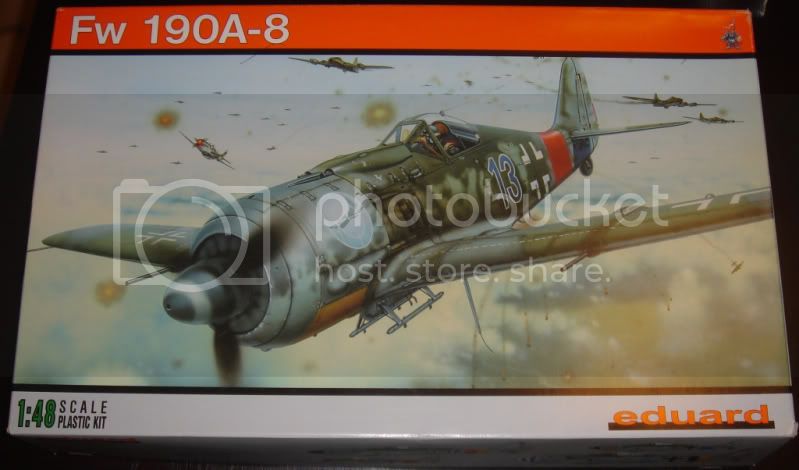
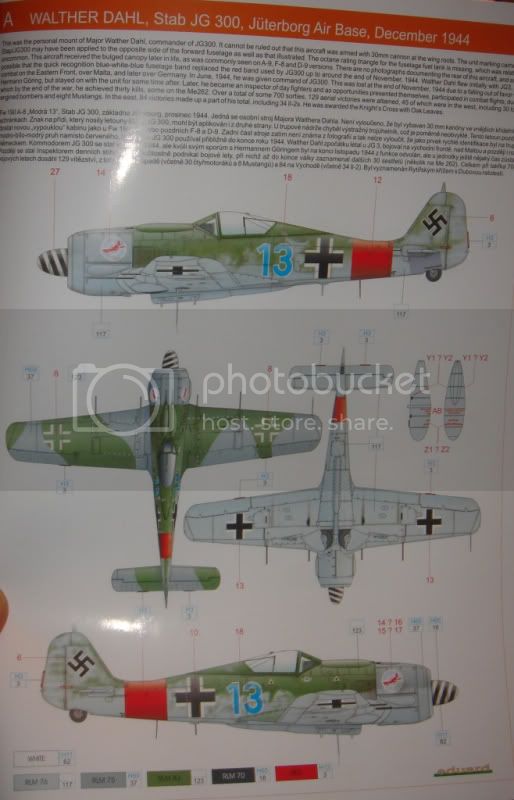
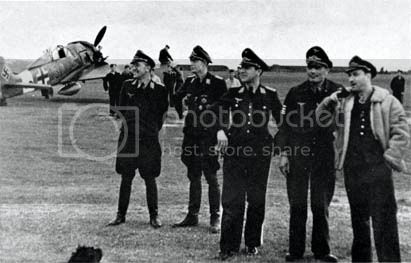
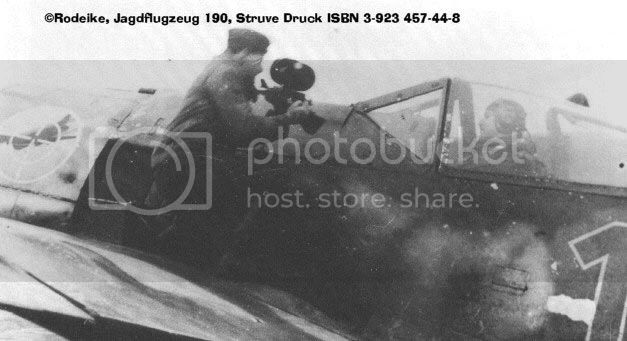
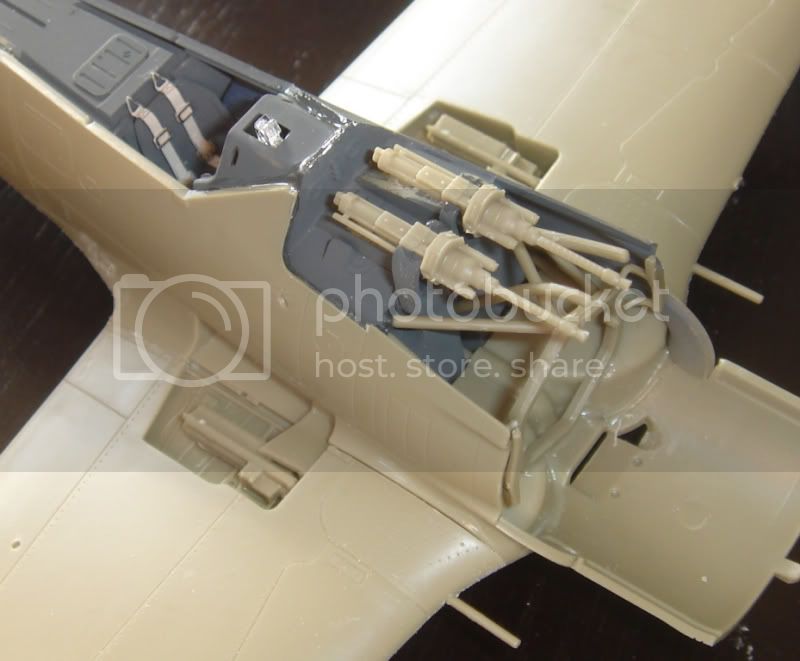
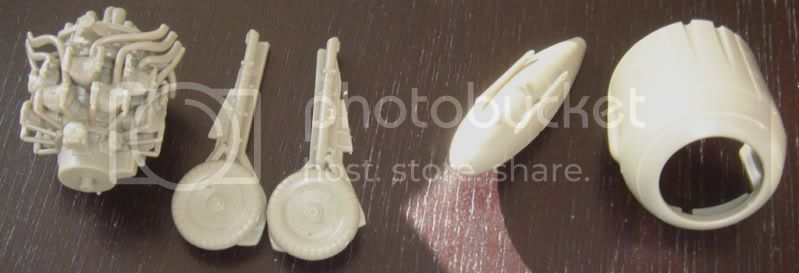
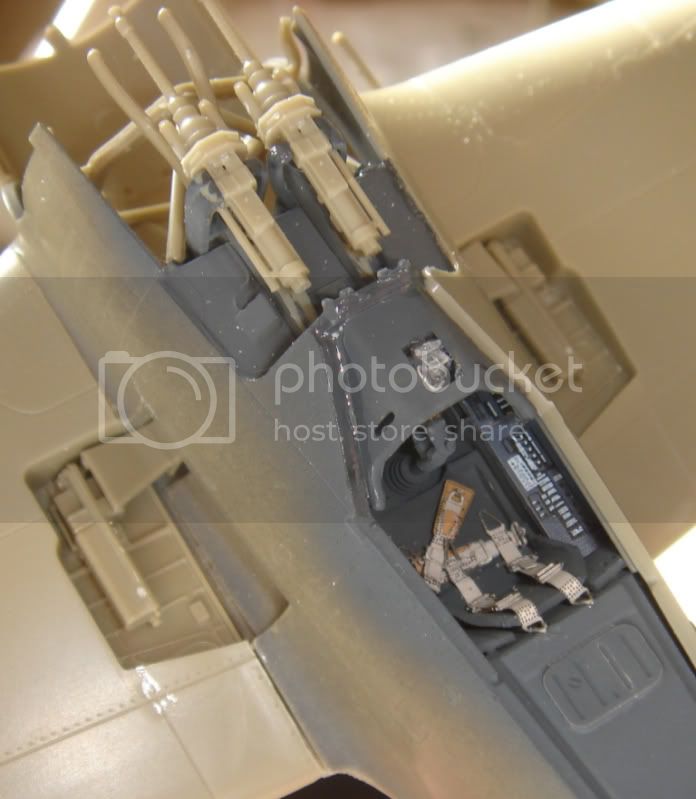
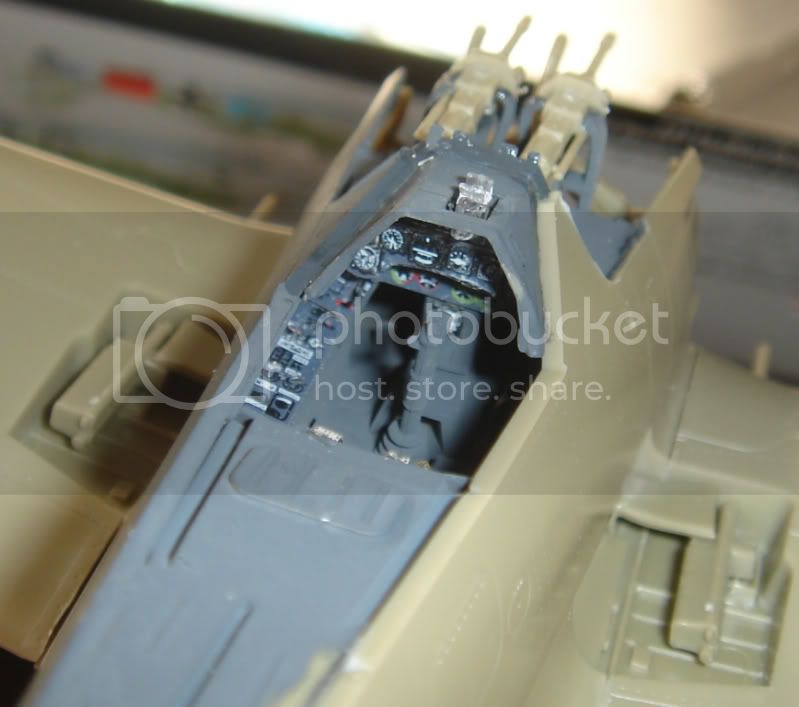
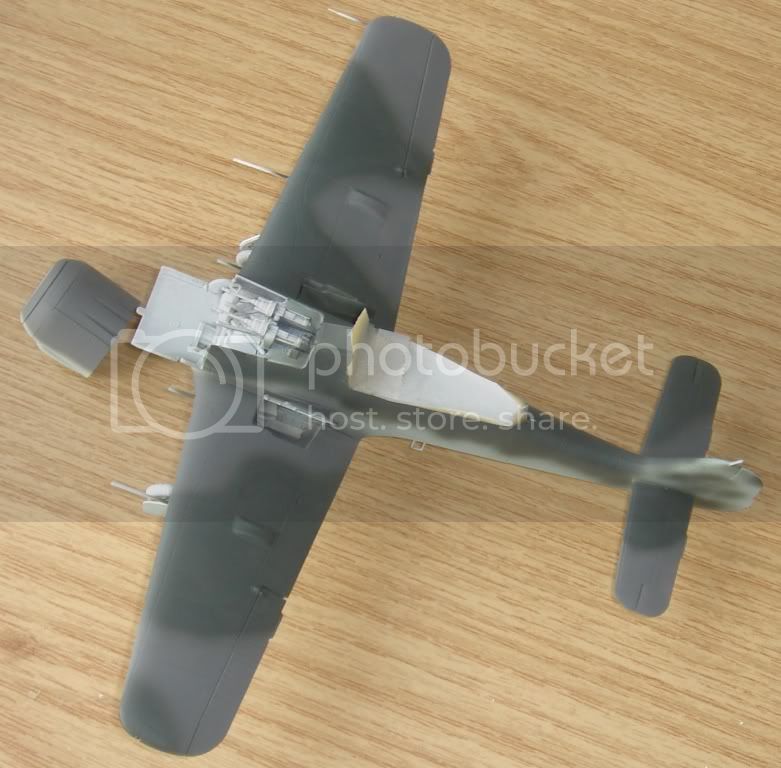
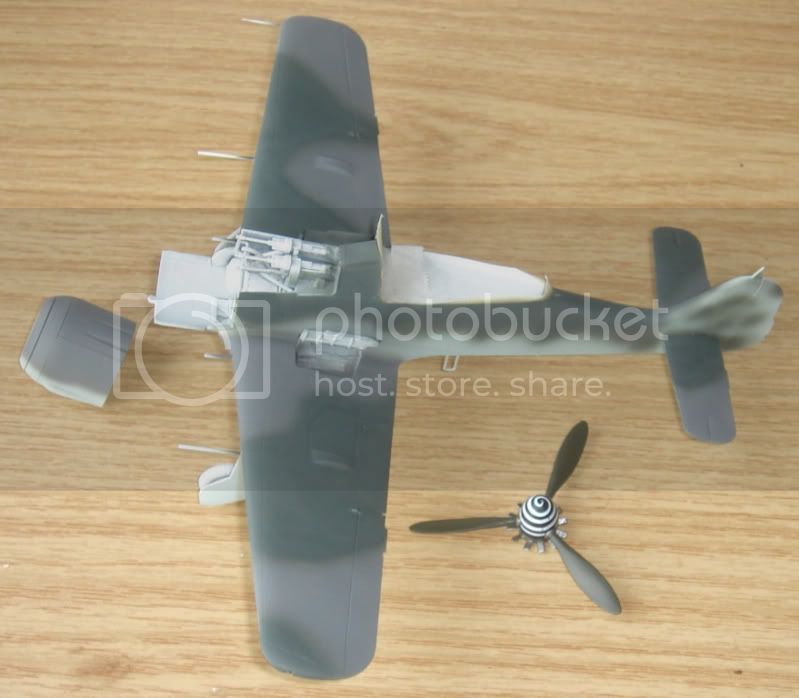
I have made some more progress on the Eduard FW 190A-8. A lot of good things has been said about this kit over the years since its release - and all of it seems true so far. Very nice details and I am surely going to have the MG cowling open and the MG hatches in the wings.
One thing that struck me as odd, is that Eduard has molded the side cowling to the engine shut and the plastic is very heavy. This means there is no good way of showing the beautiful engine.
Campaign'oholic - 252+ campaigns completed
AussieReg
 Associate Editor
#007
Victoria, Australia
Joined: June 09, 2009
KitMaker: 8,156 posts
AeroScale: 3,756 posts
Posted: Saturday, April 10, 2010 - 02:22 AM UTC
Jaypee, I dips me hat to ya for tackling that scheme. You're a braver lad than I, that's for sure. It's looking good from where I sit !
Jesper, very nice progress on the 190.
Well, I got the top wing on the Gladiator today, amongst some

and some

and some more

, and

for a while, but now it's

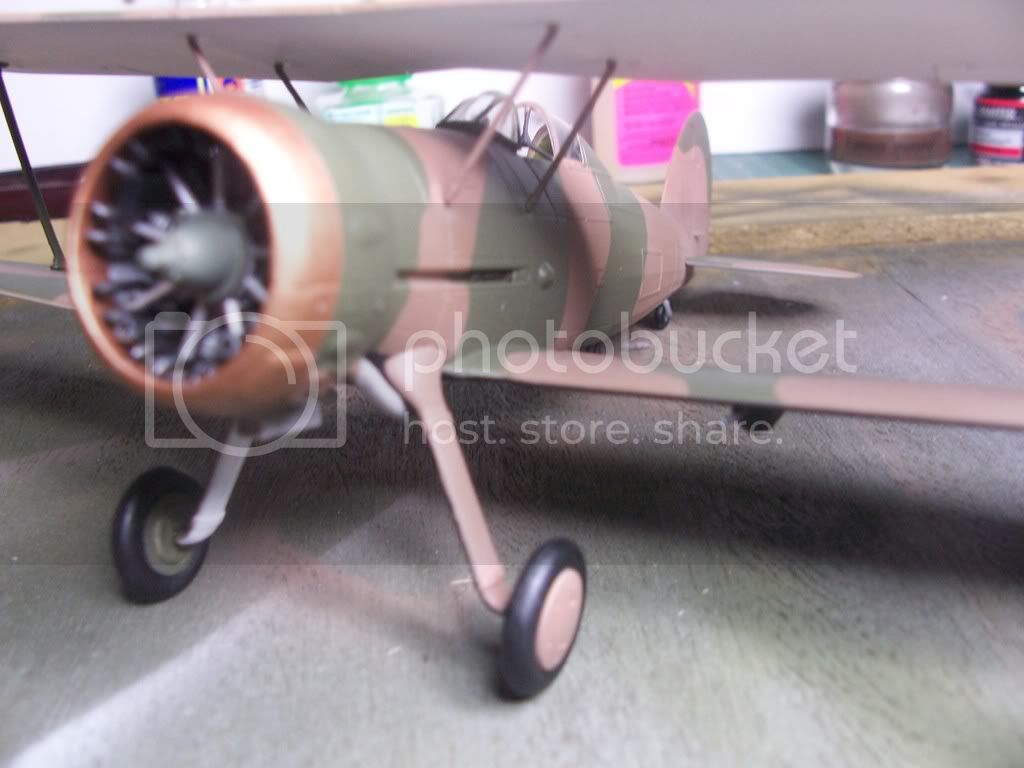
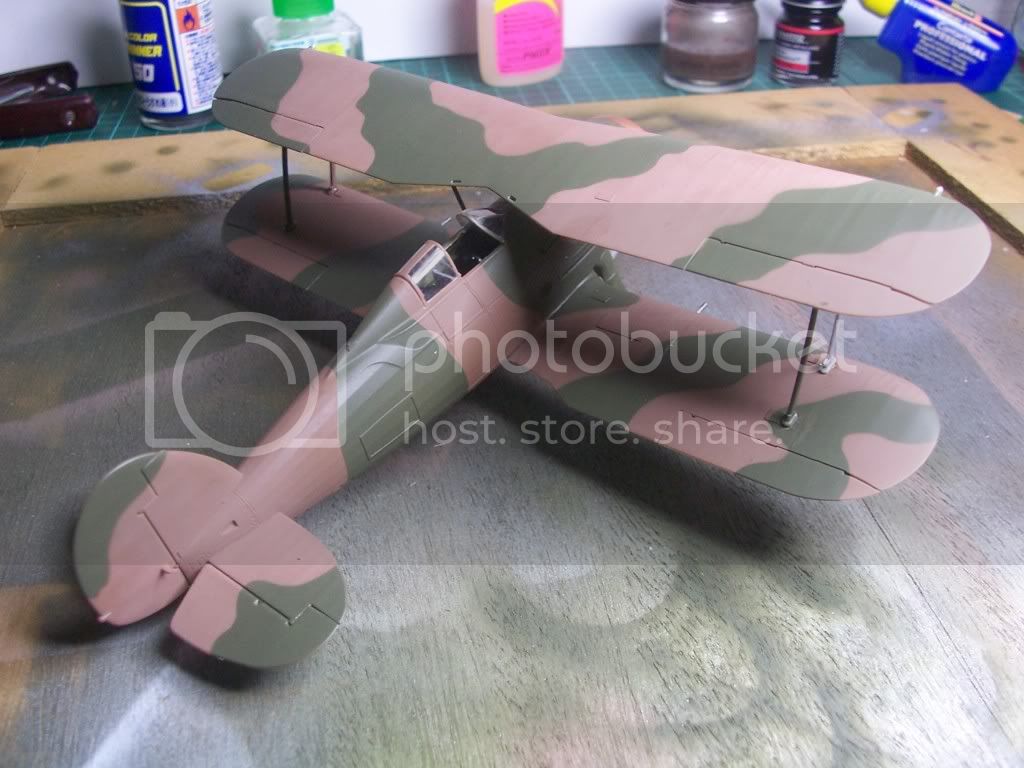
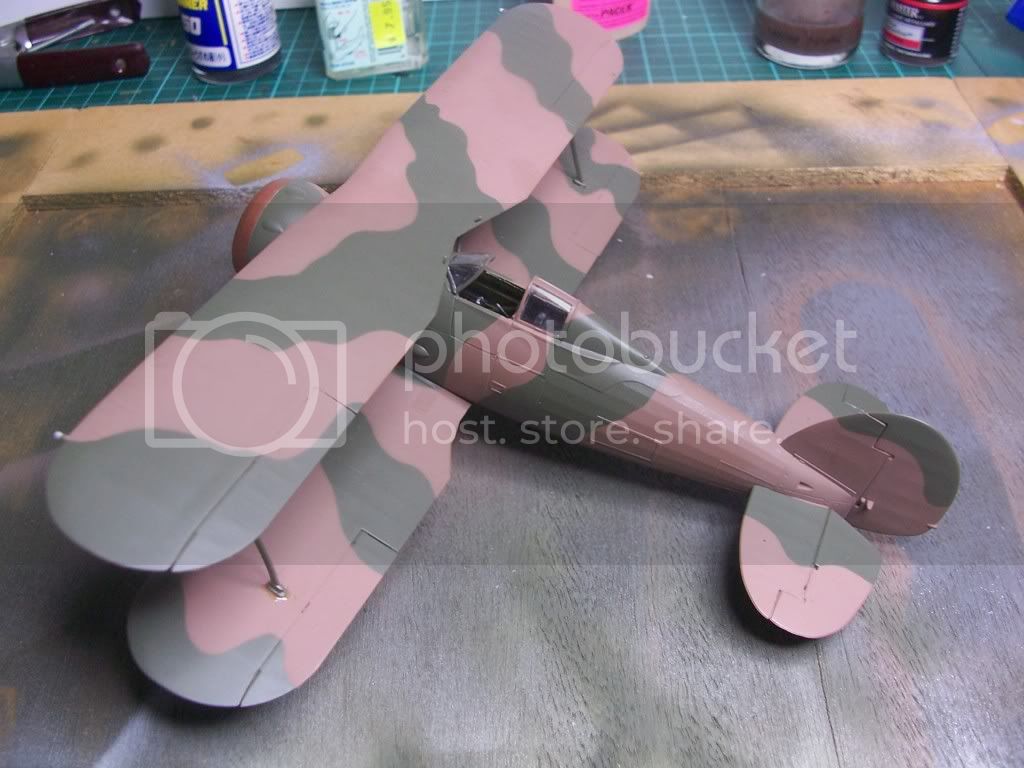
My first biplane, and even though I had some troubles, I'm enjoying it and I'm happy with the progress.
I've read that the rigging on this bird was aerofoil shaped, so I'm planning to use some Evergreen flat strip instead of thread. That will be fun

Cheers, D
ON the bench
Revell 1/24 '53 Corvette (building as '54)
Revell 1/24 BMW 507 Coupe and Cabrio
Italeri 1/48 Me262 B-1a/U1 Nightfighter
Monogram 1/24 '57 Chevy Nomad
Dragon 1/350 USS Frank Knox DD-742

#029
England - East Midlands, United Kingdom
Joined: December 23, 2005
KitMaker: 6,249 posts
AeroScale: 3,270 posts
Posted: Thursday, April 15, 2010 - 07:50 AM UTC
Looking good everyone

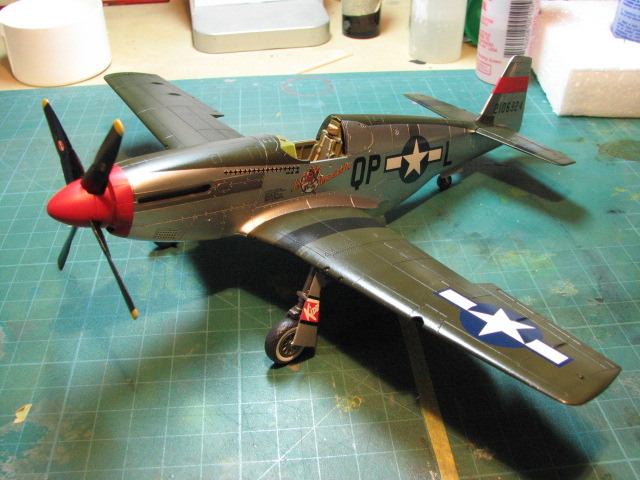
P-47K all done and dusted so I can now concentrate on getting Kidd Hofers P-51 finished.
Can't believe its been a month since I posted any progress!
Olive drab top surfaces on and faded now. Masking off and only a small amount of overspray to fix. Next job will be a couple of Klear coats, black theatre bands on the stabilisers and wings, red band on the rudder and nose. After that I can make a start on the decals, and I'm looking forward to seeing this one come to life

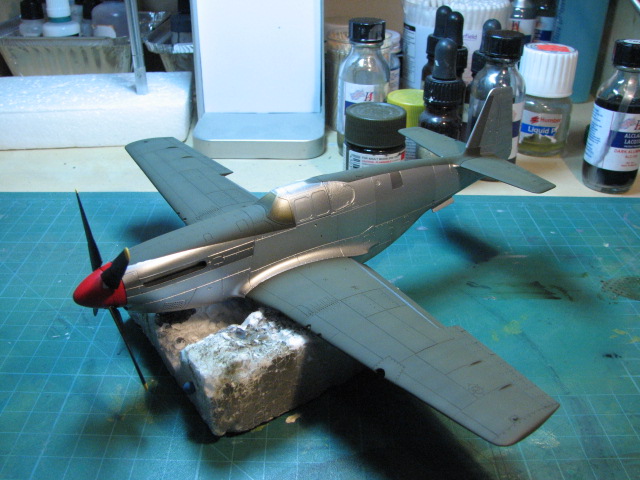
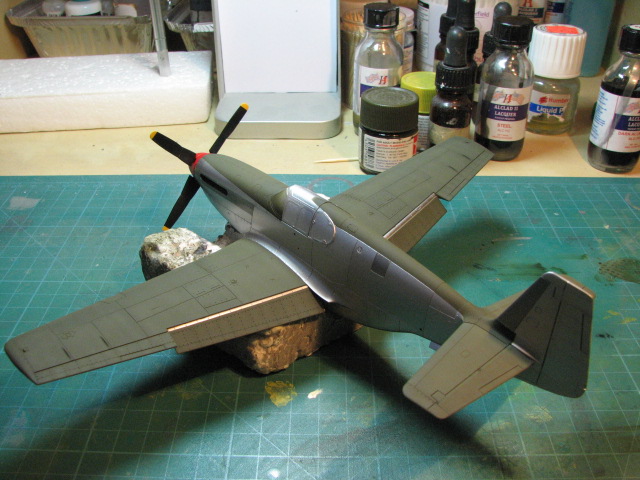
Nige

It's not the same, better, but not the same...
New Jersey, United States
Joined: October 18, 2007
KitMaker: 1,698 posts
AeroScale: 96 posts
Posted: Monday, April 19, 2010 - 04:10 AM UTC
Damian – nice job on the Gladiator. I think you did a great job with the soft edge AB, a success for sure. I have yet to try that technique, but seems you nailed that one.
Jesper – nice ref pics! Looks like a beautiful kit, great details. Doing a great job with the build.
JP – Very nice job so far; I think the decals came out alright as seen from here.
Nigel – Beautiful bird, look forward to the end product!
No progress at my end, I have to finish my P51 squadron before I tackle the P38s!
New South Wales, Australia
Joined: March 18, 2008
KitMaker: 347 posts
AeroScale: 223 posts
Posted: Monday, April 19, 2010 - 11:10 AM UTC
Assumption is the mother of all f*#k ups.
Florida, United States
Joined: January 14, 2009
KitMaker: 2,798 posts
AeroScale: 2,443 posts
Posted: Monday, April 19, 2010 - 01:15 PM UTC
Very nicely done Blue good weathering.
Build On,
Justin

"From time to time, the tree of liberty must be watered with the blood of
tyrants and patriots."
- Thomas Jefferson
IPMS#47611
Joined: December 23, 2007
KitMaker: 1,596 posts
AeroScale: 1,275 posts
Posted: Monday, April 19, 2010 - 08:06 PM UTC
Gosh, I almost forgot about this campaign....there are just two months left... thank God I have a proper kit in the stash, I just need the decals and maybe I'll manage somehow to build the model, of course without any major upgrades...
New Jersey, United States
Joined: October 18, 2007
KitMaker: 1,698 posts
AeroScale: 96 posts
Posted: Tuesday, April 20, 2010 - 07:37 AM UTC
Very nicely done Nick, congrats on the finish build

AussieReg
 Associate Editor
#007
Victoria, Australia
Joined: June 09, 2009
KitMaker: 8,156 posts
AeroScale: 3,756 posts
Posted: Friday, April 23, 2010 - 11:52 PM UTC
Very nice work on the Spitfire Nick, well done.
Pattle's Gladiator is moving along, clear then decals then clear all applied, I will give it a light wash to dirty it up a bit, then some more clear, then RIGGING OMG !!
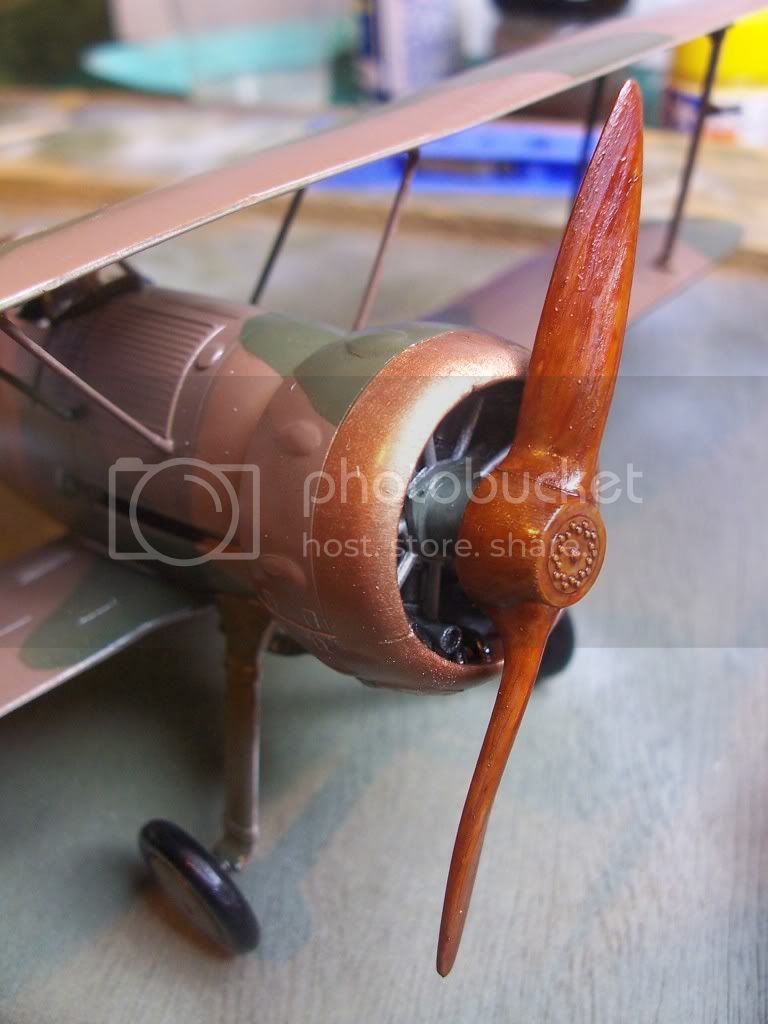
I had my first attempt at "woodgraining" on the prop. First I gave it a heavy swipe with a coarse sanding stick in the direction of the grain to give it some texture, then I gave it several light coats of artists watercolour (Jo Sonja's Dark Earth) which was quite thin, with a light wipe in the direction of the grain. Once that was dry I gave it a top coat of Tamiya acrylic Clear Orange (X-26). Not as good as the Early Aviation woodworking experts, but not bad for a hack like myself . . .
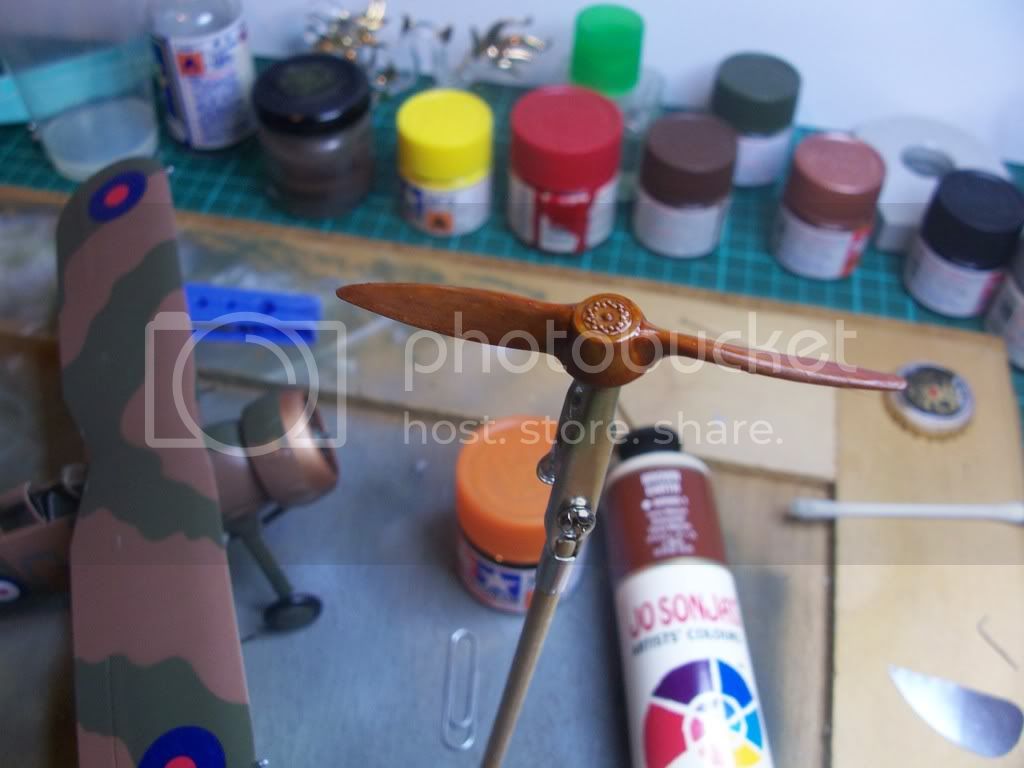
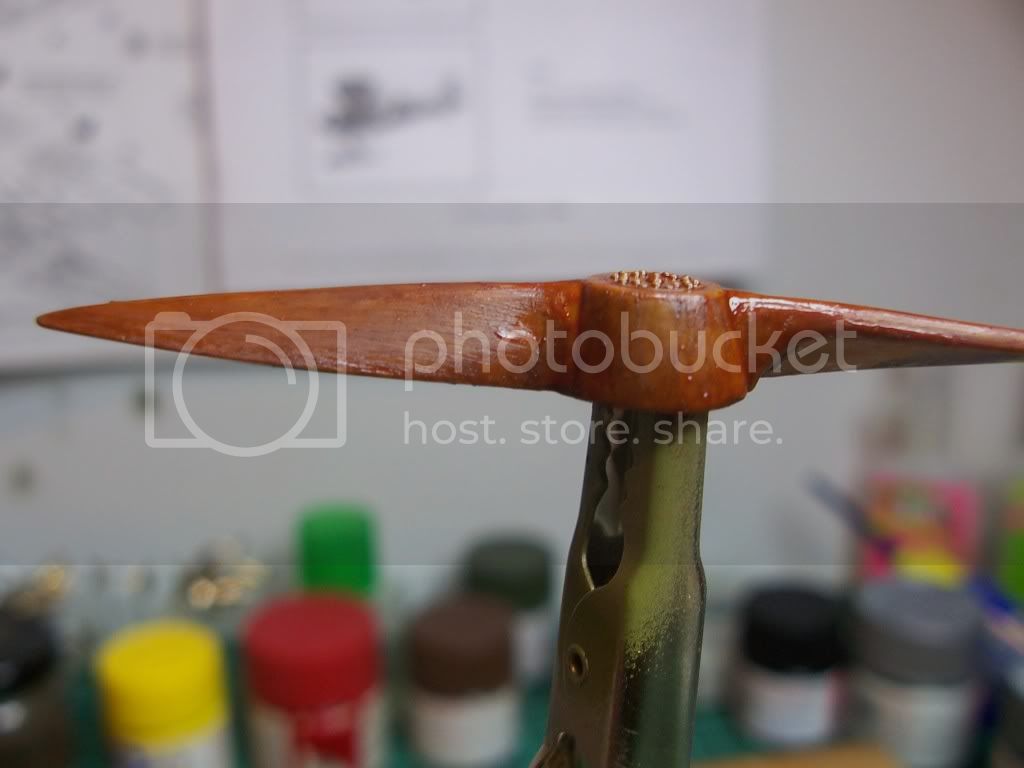
Any comments or suggestions gratefully accepted.
Cheers, D
ON the bench
Revell 1/24 '53 Corvette (building as '54)
Revell 1/24 BMW 507 Coupe and Cabrio
Italeri 1/48 Me262 B-1a/U1 Nightfighter
Monogram 1/24 '57 Chevy Nomad
Dragon 1/350 USS Frank Knox DD-742
AussieReg
 Associate Editor
#007
Victoria, Australia
Joined: June 09, 2009
KitMaker: 8,156 posts
AeroScale: 3,756 posts
Posted: Saturday, April 24, 2010 - 02:13 AM UTC
Actually I'm even happier now that the Clear Orange is dry and it's perched on the business end of the kite
Cheers, D


ON the bench
Revell 1/24 '53 Corvette (building as '54)
Revell 1/24 BMW 507 Coupe and Cabrio
Italeri 1/48 Me262 B-1a/U1 Nightfighter
Monogram 1/24 '57 Chevy Nomad
Dragon 1/350 USS Frank Knox DD-742
Saskatchewan, Canada
Joined: April 23, 2006
KitMaker: 140 posts
AeroScale: 89 posts
Posted: Saturday, April 24, 2010 - 06:28 AM UTC
Quoted Text
Actually I'm even happier now that the Clear Orange is dry and it's perched on the business end of the kite
Cheers, D 

That woodgrain looks good!


#029
England - East Midlands, United Kingdom
Joined: December 23, 2005
KitMaker: 6,249 posts
AeroScale: 3,270 posts
Posted: Saturday, April 24, 2010 - 10:35 AM UTC
Nice one Nick. Well done.
Don't forget, you need to upload a photo of your finished model along with a photo of the actual plane to qualify for your campaign ribbon.
Upload them into the
ACES HIGH 2 PHOTO GALLERY Nice job on that wooden prop D, its something I've never managed to get a good result with.
Ok, a bit more progress on my effort for the campaign.
This week I've managed to get the red bands around the nose and rudder painted on, and the black bands around the wings and horizontal stabilisers.
Next up will be a couple of coats of Klear and then decals.
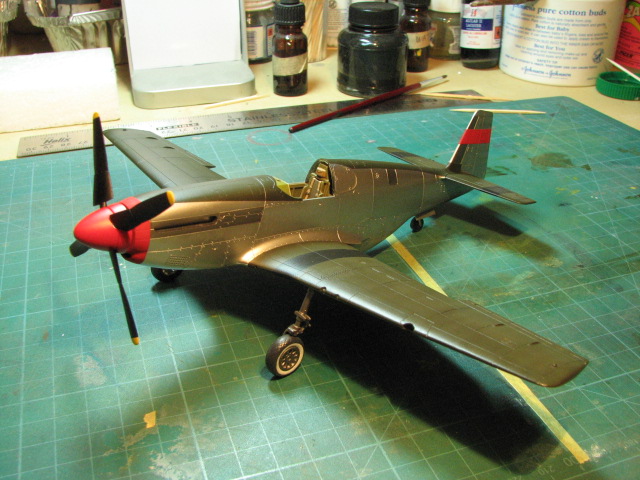
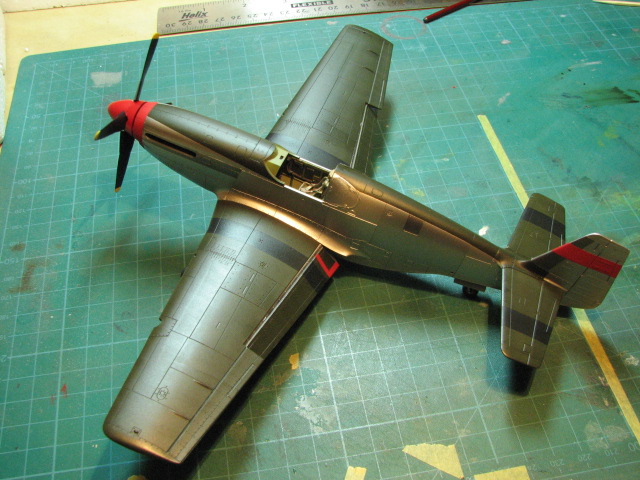
I couldn't resist dry fitting the undercarriage to see how it looks sitiing on those white wall tyres.
Nige

It's not the same, better, but not the same...
MichaelSatin
 Campaigns Administrator
Colorado, United States
Joined: January 19, 2008
KitMaker: 3,909 posts
AeroScale: 2,904 posts
Posted: Sunday, April 25, 2010 - 06:45 AM UTC
Hi everyone!
Does anyone know of any evidence, photo or otherwise (but preferably photo) for Hasegawa's rendering of Galland's Fw.190A-6?
This seems like the logical place to ask. Thanks!

Michael
On the bench:
Sorta depends on your definition of "on the bench"...

#041
Kobenhavn, Denmark
Joined: July 20, 2006
KitMaker: 10,069 posts
AeroScale: 3,788 posts
Posted: Sunday, April 25, 2010 - 10:10 PM UTC
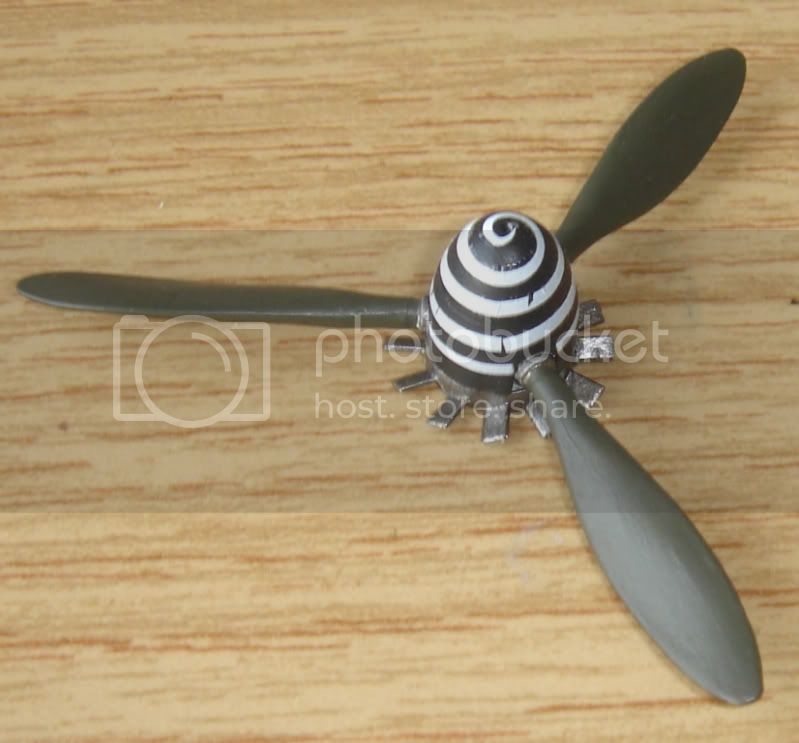
An update on my FW 190 build. The main camouflage is done, but still lots of details to paint before a gloss coat and the decals.
Also some progress on the spinner. Diffecult to get the spiral decal to settle, but I succeeded in the end. Now just a little bit touching up to do and a coat of varnish.
More to follow as the build progresses.
Campaign'oholic - 252+ campaigns completed

#029
England - East Midlands, United Kingdom
Joined: December 23, 2005
KitMaker: 6,249 posts
AeroScale: 3,270 posts
Posted: Thursday, April 29, 2010 - 08:23 AM UTC
Looking good Jesper!
Its always a nice point in a build when the main decals are on and the plane your working on gains its identity.
Nige

It's not the same, better, but not the same...
 folks. Just a little update on the Gladiator, got the Brown basecoat on.


